Leaderboard


Popular Content
Showing content with the highest reputation on 07/01/2018 in all areas
-
Just so you all know I actually have done something. I have pushed the source to both my github and to sourceforge, please commit to the experimental branch and I will merge it into the stable branch once it is safe. Also, nothing meaningful happens yet so don't get too excited. Only the Visual studio build works right now. I haven't set up the Xcode or Makefile builds yet, I'm trying to do them now. https://github.com/apianti/Clover https://sourceforge.net/p/cloverefiboot/Clover IA32/X64/ARM/ARM64 testing ISO (6/7/2018): Clover-3.0-experimental.iso6 points
-
Hey peoples, just an update that I'm working on parsing and rendering SVGs, they are super complicated, I'm far behind where I was hoping to be but I'm getting there. I am a little preoccupied with other stuff in my life as well. Donations are always appreciated, and thanks to everyone who has donated already (I've got a list of you kind natured people ). EDIT: I'm going to push what I have to sourceforge. Not sure how much more I can do on my own, maybe others can get some stuff done as well. I only ask that you follow the coding style that I have used and COMMENT everything.4 points
-
FSInject is used to block files from being loaded and also inject files from pre exit boot services for the kernel. It probably does not have much of a use since it was mainly for preventing the kernel cache from loading.3 points
-
I guess you missed these posts: Check this post and this post and you can have the transparency issue fixed along with the QuickLook issue. Here the link to the explain why it's happening.3 points
-
I was just curious thats why i asked2 points
-
Indeed. That would disable it all. But...since you asked for something to be done from config...that would be the only way I know. Of course that way would also be permanent. ) I don’t know of a temporary way to disable that..and also do it from config. And as you said, it would be recommended to use the UI instead of config, in case things go horribly wrong at some point, with the current config. But, just to clarify, are you looking for disabling specific kexts, from config? Cause now I’m a bit confused as to what the use case of such a feature would be.2 points
-
Maybe this would help?
 2 points
 -
In uefi ti manca un driver... Aggiungi AptioMemoryFix.efi 2.zip2 points
-
Inkscape is not working in macOS 10.11+. Pity. LibreOffice Draw works with SVG but buggy. Boxy SVG cost 10$ but looks good enough. Illustrator is good but expensive. It is in future. I want to go step by step.2 points
-
Because AptioMemoryFix is the same thing but automatically finds a slide, Aptio3 does not. Plus I think there are few extra fixes.2 points
-
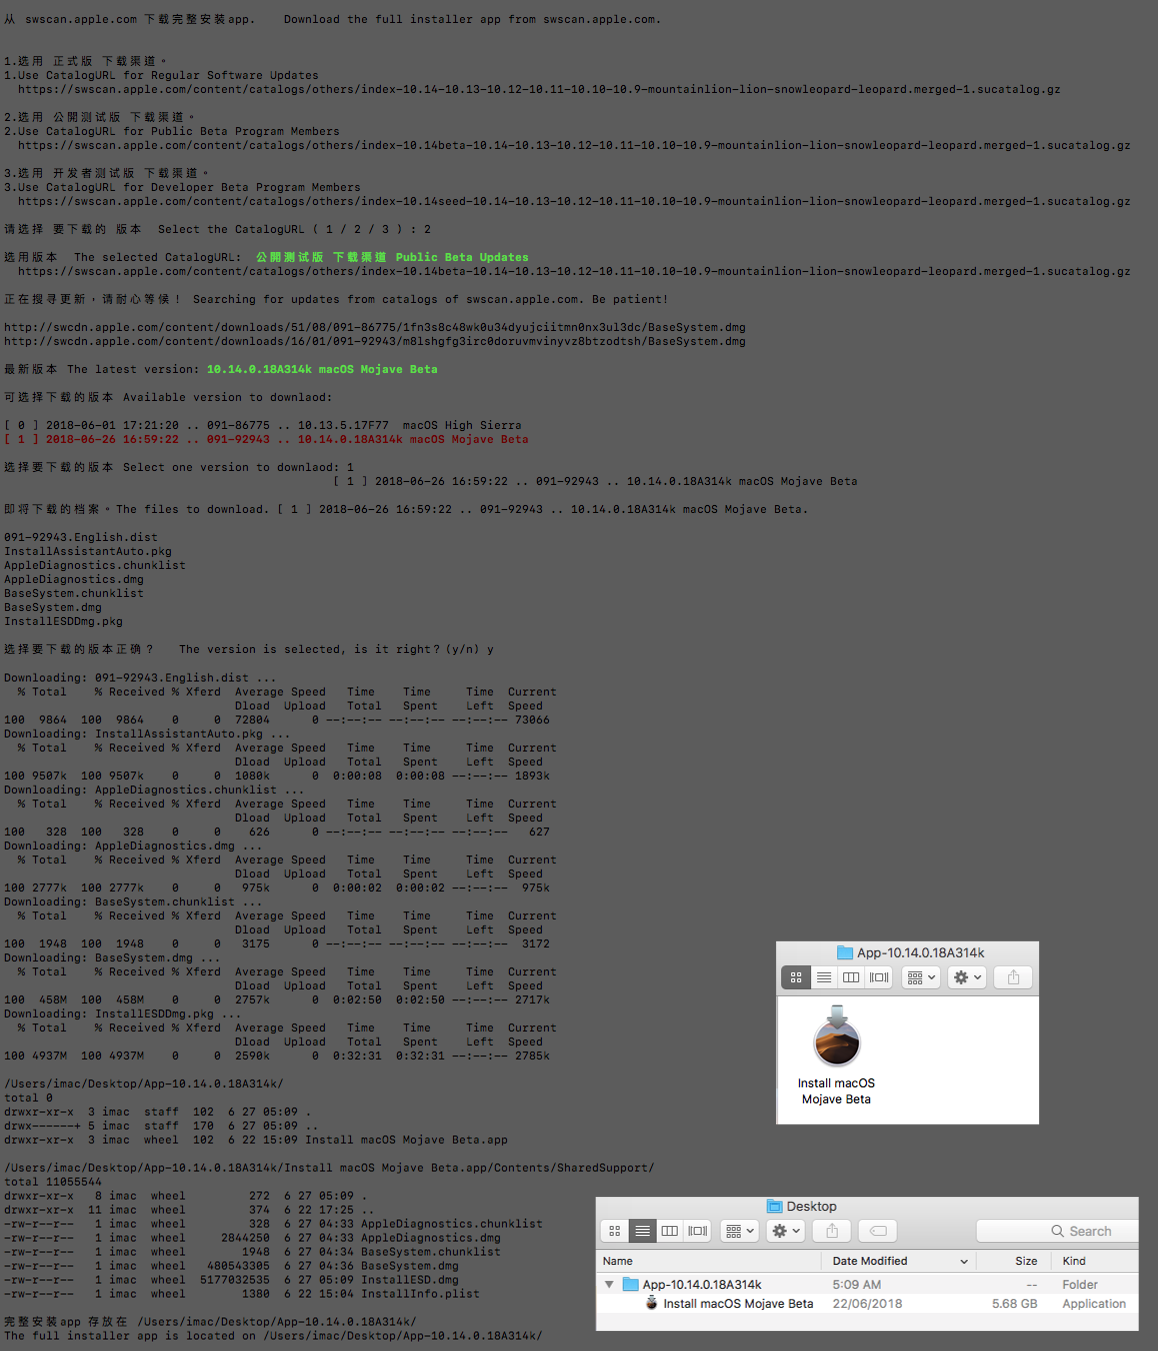
Remove or rename it and you should be able to download the full Mojave installer. But hey... if the script made your day and you're happy with then do not change anything.2 points
-
Section 1: How to make Clover default bootloader after Installing Windows on UEFI. If you installed windows on you Hackintosh and now you don’t have access to your macOS anymore this guide will help you to get back the clover as the main bootloader. The reason that this is happening is because when you install windows after installing macOS the UEFI bootloader will change from: \EFI\BOOT\BOOTX64.EFI (Clover bootloader) to \EF\Microsoft\Boot\bootmgfw.efi So, in order to make clover the default bootloader again you need to edit the UEFI boot entries and change the boot media file from “bootmgrfw.efi” to “BOOTX64.EFI” and here is how to do that. I personally use BOOTICEx64 which is for 64Bit version of windows and if you use 32Bit version of Windows you need to use the x86 version. Original Download Source Alternative download link. Here is what you need to do: 1. Open BOOTICE and from the tabs on the top select “UEFI” 2. Click “Edit Boot Entries” button 3. From UEFI boot entries select “Windows Boot Manager” 4. From “Boot entry configurations” change “Menu Title” from “Windows Boot Manager” to whatever name that you like, I changed mine to “macOS Sierra” because that’s the version of the macOS that I have and from “Media file” change “\EFI\Microsoft\Boot\bootmgfw.efi” to “\EFI\BOOT\BOOTX64.EFI” and finally select “Boot this entry next time” Now save the new entries by clicking “Save current boot entry” 5. By clicking the “Save current boot entry” you will see the confirmation window. Click ok and you’re done. 6. Now restart your computer and now you will see Clover’s boot menu and boot into macOS. "Thanks to Pauly for BOOTICE" Section 2: Here’s how to create a custom entry to rename the Boot Microsoft EFI Boot from EFI to "Windows 10" 1. Open clover configurator and select GUI 2. Click the + sign to add a new Boot entry. 3. From the Volume drop down menu select the EFI partition that has the “Microsoft” boot files. In my case it is the EFI (disk2) 4. Add your desired name for the new custom entry like “Windows 10” or whatever you like, Click the “Title / FullTitle” check box. Select the type of the Operating system that you are creating the custom entry for which again in this case it is Windows and then select the volume type which is an internal disk in this case. 5. Save you settings and reboot. If you have done exactly as instructed here then you will see the new entry in the clover’s boot menu. To easily hide unwanted partitions in clover's boot menu without having to create the custom entries using clover configurator see this post.1 point
-
Like I said above, I can't get your DSDT to save my edits. Here's what it looks like: Pre-edit: Post-edit: If you ever need to patch your DSDT, this edit will remove the errors so that it can be compiled and saved.

 1 point
 -
Solo corretto DSDT.aml.zip1 point
-
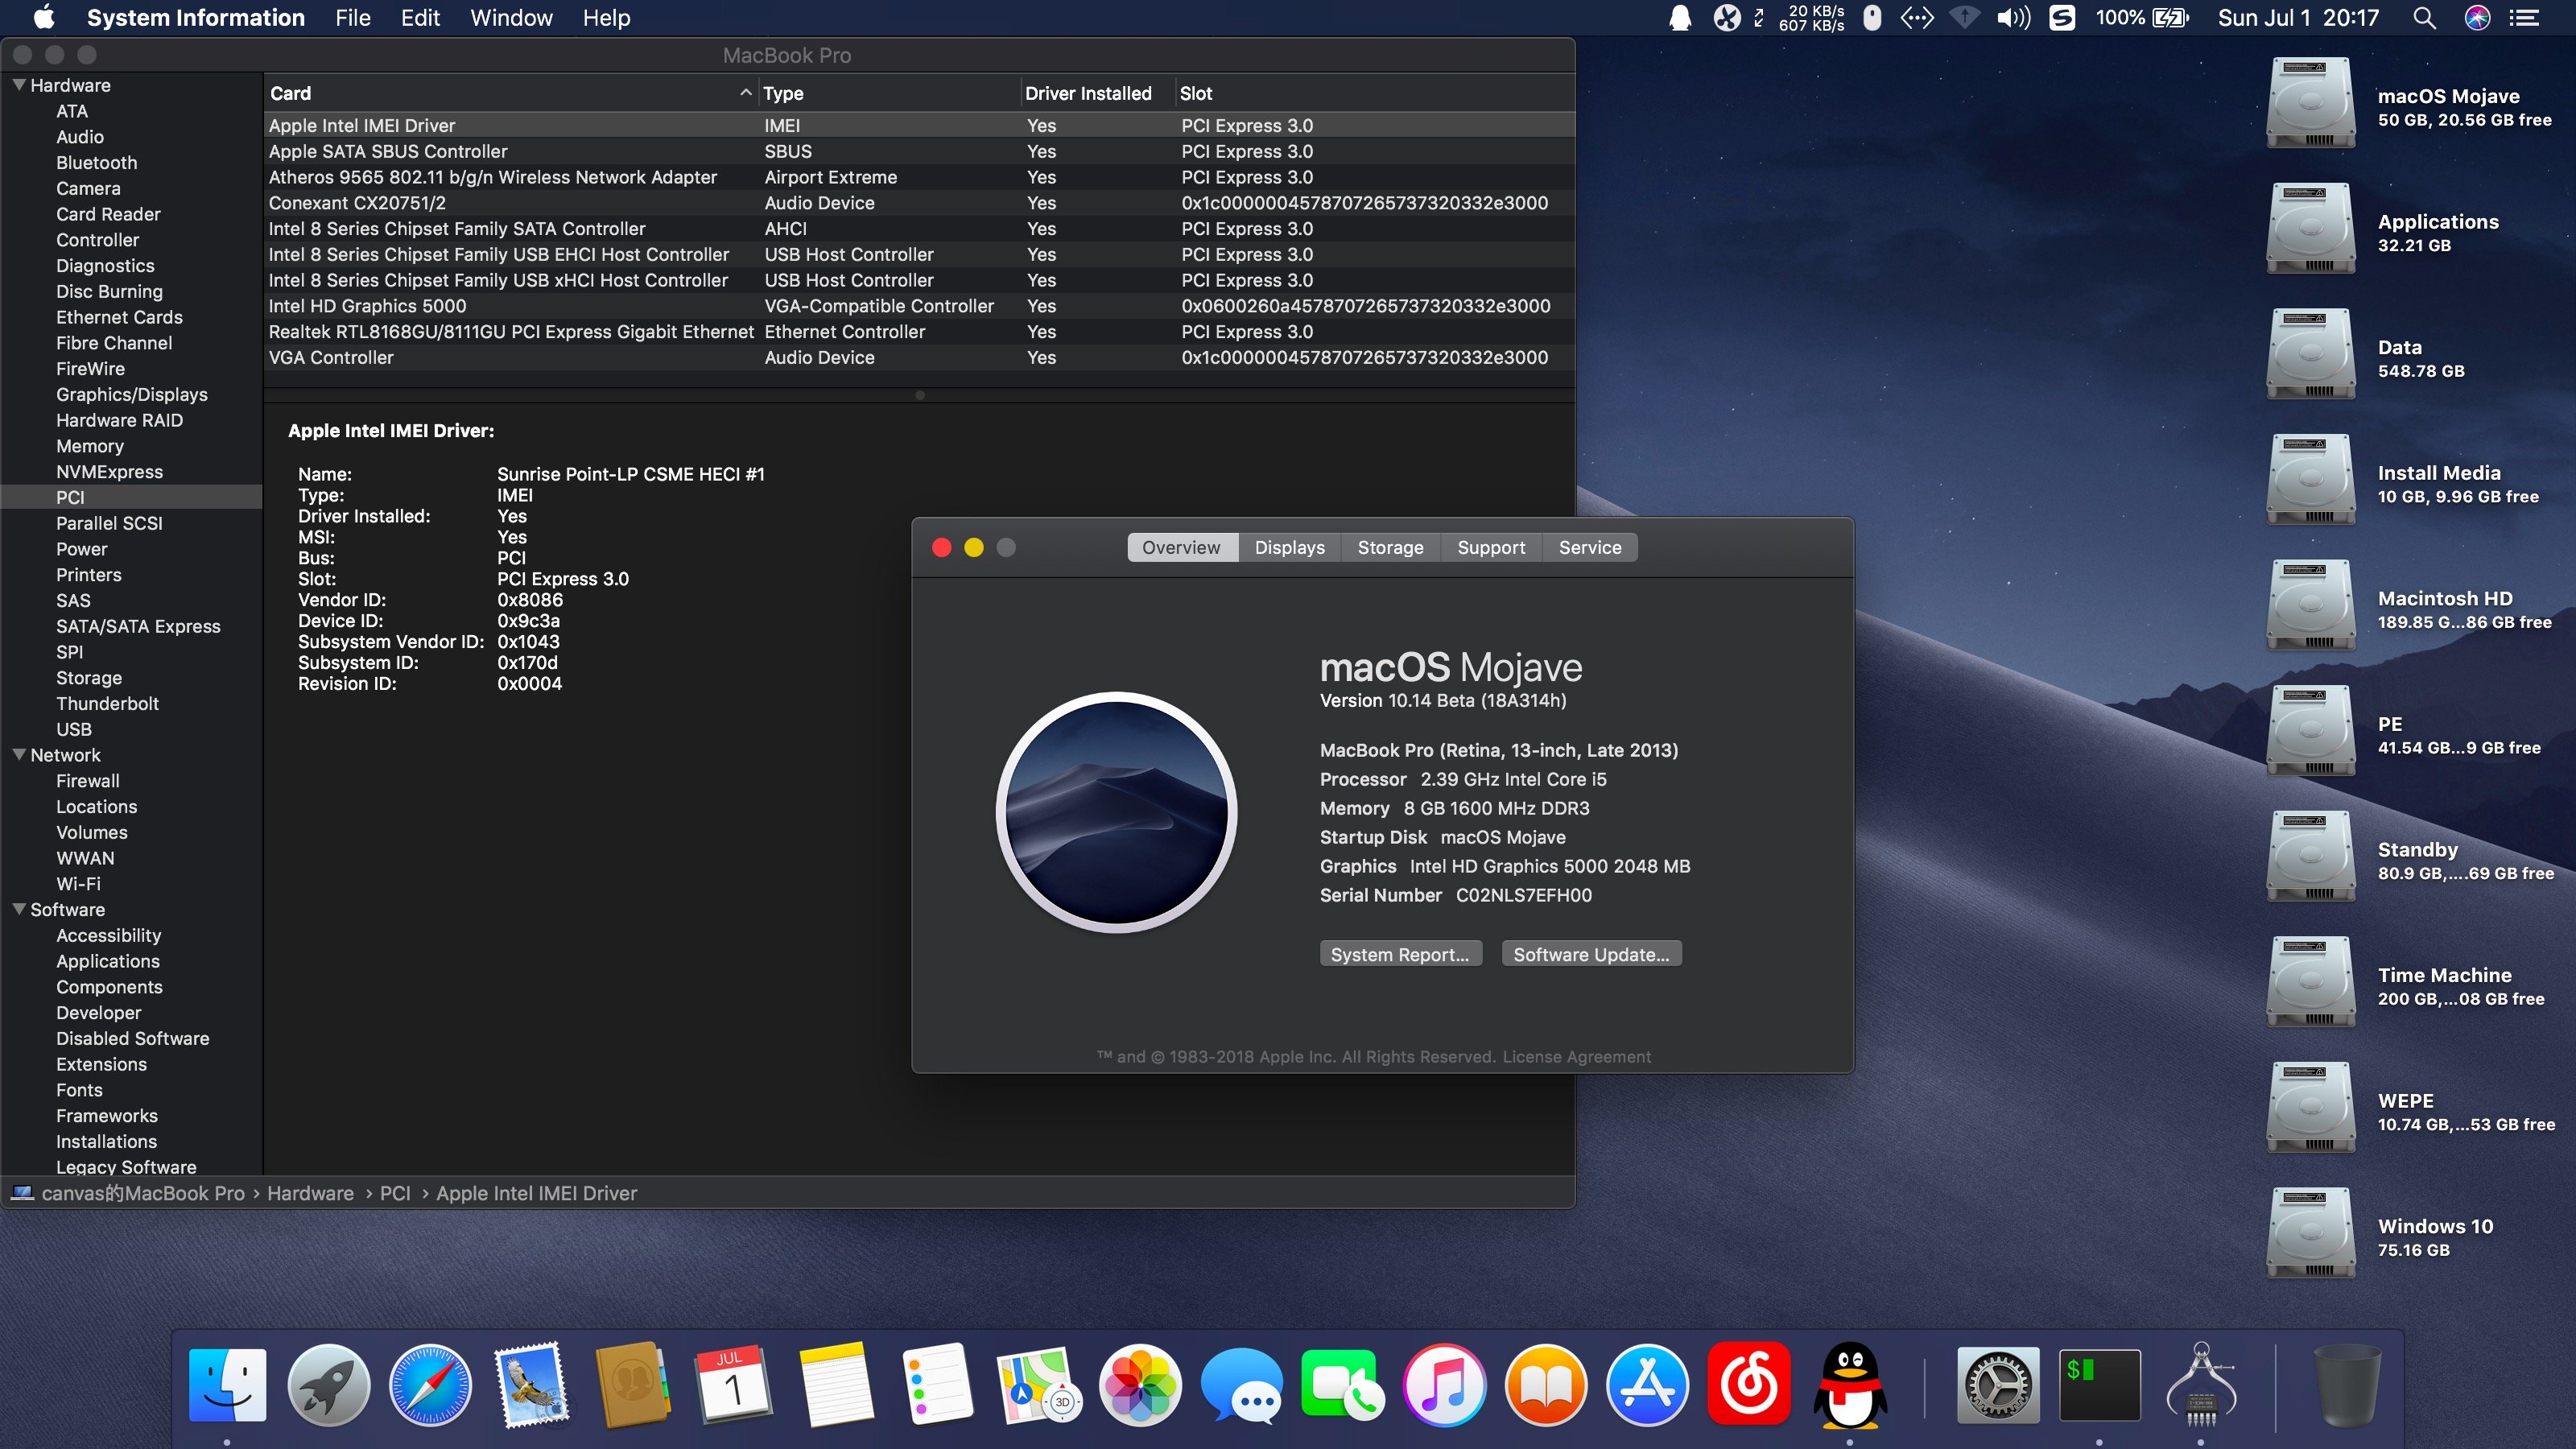
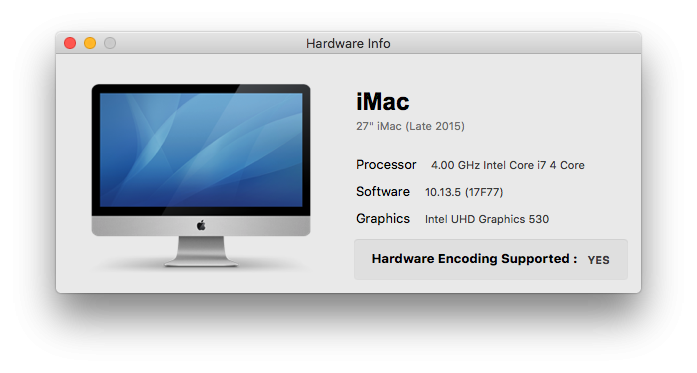
Oh well, so my "iMacPro" has no Hardware Encoding support..!!! #LoL
 1 point
 -
tel me what layout id u use before looks very good take a tests and let me know1 point
-
 check here, have a v1.9 http://olarila.com/forum/viewtopic.php?f=6&t=65161 point
 -
I can answer "Yes" and this is safe for you. All drivers can be considered as mandatory until you are know exactly what and for a what and may say that you have another way to go without this driver.1 point
-
1 point
-
REMOVE GENERICXHCI KEXT, U DONT NEED IT1 point
-
Ti sei dato la risposta da solo clover è sempre in evoluzione, o uno segue lo sviluppo oppure si annota tutti i file in drivers64UEFI e drivers64 Tra le altre cose, farsi una USB di emergenza ti fai anche il backup dei file di boot di windows, che se ti capita come a me su una macchina, si è inchiodato l'aggiornamento all 1803 sputtanandomi i file di boot, quindi windows non veniva manco visto, ma grazie al backup in 60sec ho ripristinato il tutto1 point
-
Formatti una pendrive in GPT e copi la EFI del disco nella EFI della USB e verifichi che ti faccia il boot... la vuoi più facile1 point
-
Hi everyone here, today i driver my ar9565 wireless adaptor in macOS Mojave successfully, and i has commit the pull requests, https://github.com/chunnann/ATH9KFixup/pull/6 and there are the drivers i am usingATH9K-10.14.zip You can install atherosairport40 to /system/library/extensions/io80211family.kext/contents/plugins,install lilu and ath9kfixup to clover, good luck for you
 1 point
 -
Non avertene a male se te lo dico, ma pare siamo sempre al primo giorno di scuola... avere una USB di emergenza permette poi di uscire da questi problemi in scioltezza invece di perdere un sacco di tempo con alchimie per avviare. Da windows puoi usare mini tool partition wizard per montare la EFI e poi la browsi con total commander o explorer++ avviato come admin. Poi posta la EFI senza la cartella apple che vediamo cosa si può fare PS: cosa si può fare vedo che ha già visto gengik1 point
-
So, is it or not?1 point
-
Quali driver64uefi hai nella EFI? controlla di avere sul config KernelPM1 point
-
quando si blocca lì forse manca qualcosa o hai file ridondanti in clover quando sei nell GUI di clover pigia la barra spaziatrice e seleziona -x -s hai la pendrive di emergenza? se si avvia con quella e fai un hack_info in modo da vedere come strutturata la EFI del disco1 point
-
So if I understood correctly you are only using the Intel Graphics there is no second GPU? Correct? Run this app and send me the results I will check again. RunMe.app.zip1 point
-
allegami tutta la origin1 point
-
OH..... I have a very good news that I have able to install 10.3 without any problem. I changed Initial display output - IGPU, and then the I have successfully boot into Mac OS. Now the situation is Mac OS currently used Intel graphics, so how can I used Nvidia graphics because in my 2nd hard disk I have install windows 10 and I played lots of game there.Now if the graphics card is disabled then can't play the games and one more question now If I get os update in App Store..can I install those update?..or it will crash everything?
 1 point
 -
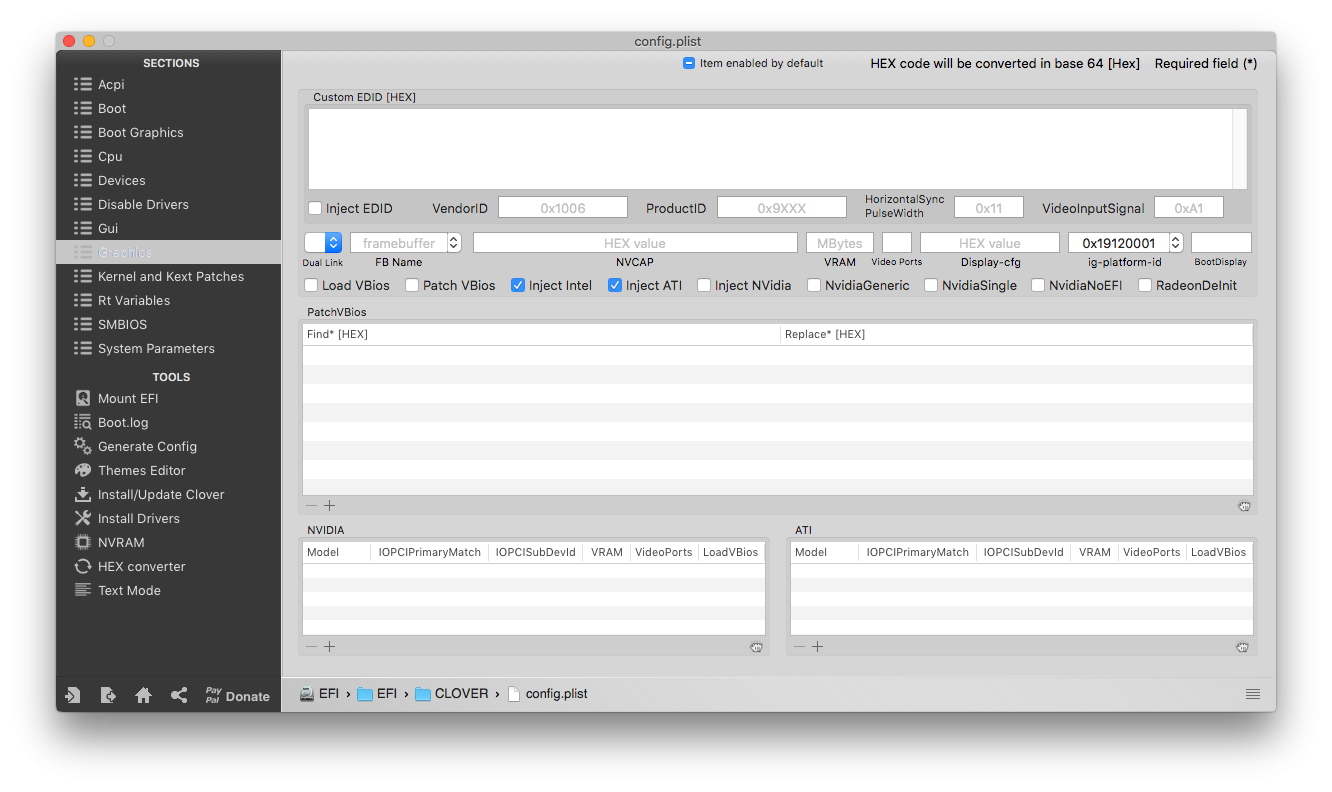
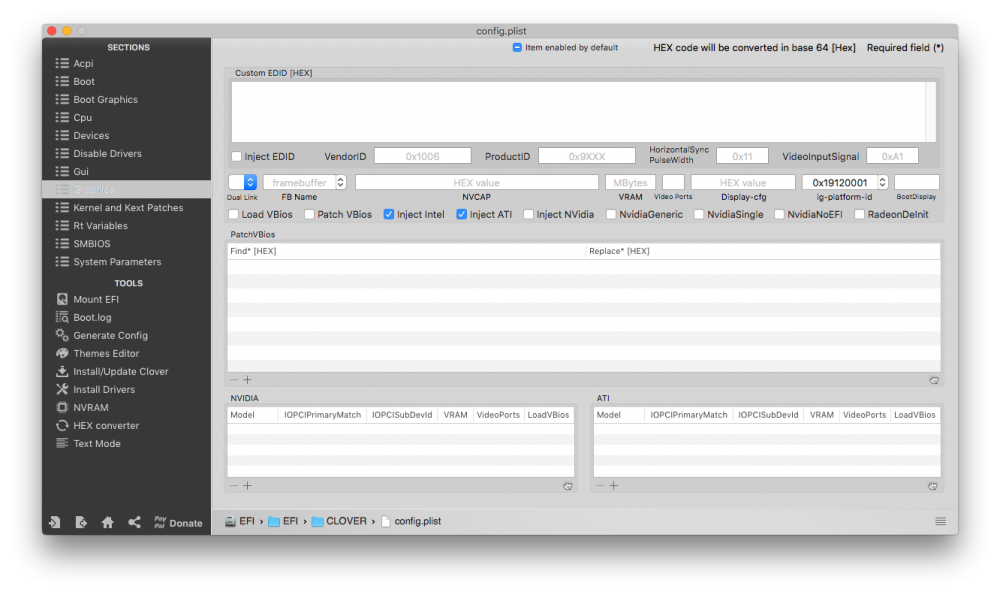
0x19120001 not work. it made the loop boot. I changed it to 0x19120000 and it works. below is the current config.plist config.plist1 point
-
BTW.. I forgot to mention... The CPU core numbering issues in iStat Menus should be resolved within the next upcoming iStatMenus distribution. Currently, there is still a bug in the program.. The Sensor kexts are working fine though..1 point
-
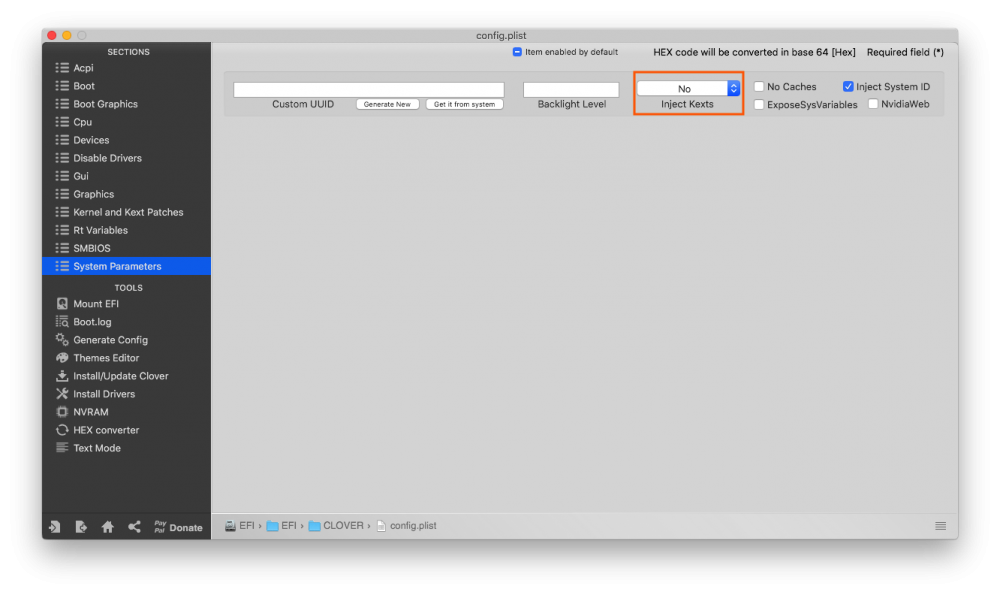
As far as the log said there's an issue is related to your graphics settings. Make sure you have configured the Graphics parameters correctly and double check the ig-platform-id injection on your intel graphics I use 0x19120001 as ig-platform-id for my Intel HD530 Check this picture and remember you don't need to use Inject ATI. From the System Parameters generate a new UUID as well and save the config.
 1 point
 -
I think I finally solved this issue. In BIOS I changed S.M.A.R.T. status check to disabled, and Launch CSM to disabled. Thanks!1 point
-
It's working for me in both directions but I have to have the air drop window open on my hack to receive a photo sent from my iPhone. Are you using the handoff patch in Clover kext patches?1 point
-
I'm finding that injecting AAPL,GfxYTile causes problems on 10.14 beta with KabyLake-R UHD 620 graphics (my hardware is a NUC7 Dawson Canyon). Since AAPL,GfxYTile is really a work around for much older versions of OS X, and can be easily applied if needed with config.plist/Devices/AddProperties, better to remove this code from Clover. My diffs: NUC6i7KYK:Clover rehabman$ git diff rEFIt_UEFI/Platform/gma.c diff --git a/rEFIt_UEFI/Platform/gma.c b/rEFIt_UEFI/Platform/gma.c index 962c2079..ff0794a7 100644 --- a/rEFIt_UEFI/Platform/gma.c +++ b/rEFIt_UEFI/Platform/gma.c @@ -2436,7 +2436,8 @@ BOOLEAN setup_gma_devprop(pci_dt_t *gma_dev) default: break; } - devprop_add_value(device, "AAPL,GfxYTile", skylake_hd_vals[1], 4); + //REVIEW_REHABMAN: not needed and problematic with UHD620 on 10.14 beta + //devprop_add_value(device, "AAPL,GfxYTile", skylake_hd_vals[1], 4); break; } break; @@ -2645,7 +2646,8 @@ BOOLEAN setup_gma_devprop(pci_dt_t *gma_dev) default: break; } - devprop_add_value(device, "AAPL,GfxYTile", kabylake_hd_vals[1], 4); + //REVIEW_REHABMAN: not needed and problematic with UHD620 on 10.14 beta + //devprop_add_value(device, "AAPL,GfxYTile", kabylake_hd_vals[1], 4); break; } break;1 point
-
CPU core ratio is set to "Per core", I didn't OC my CPU yet. I have nice temps and CPU is delidded, but I want to make sure everything's perfectly stable first. I'll check AVX offsets now. I've successfully patched 1401, all replaces were successful. I'll try to apply other methods (disable MSR LOCK, TSCAdjustReset.kext, etc.). I'll rename remaining cores now. Every check takes time, my system doesn't panic after a brief sleep.1 point
-
Of course, I do not complain about that script especially and talking about it, you just did a great job, thank you. But if I asked it is because I saw people do not even be trying with direct link, just saw other people using that script and then also reporting having trouble with the script as well. Not especially with Mojave (but it would not be long, I guess ) but I (and I'm sure you do as well) saw that with HS.1 point
-
Replace DSDT, reboot and send me new SEND_ME DSDT.aml.zip Use updated app for a full dump RunMe.app1 point
-
come vedi qui ci sono varie versioni di Maciasl , cambia fra loro la versione ACPI usata , che come immagini viene aggiornata .......... Se provi ad aprire lo stesso DSDT estratto con versione meno recente di Maciasl potresti avere meno errori o warning ......
 1 point
 -
di quale hardware stiamo parlando? stai usando iasl 6.2? se vuoi allega il dsdt, provo a compilarlo e ti dico1 point
-
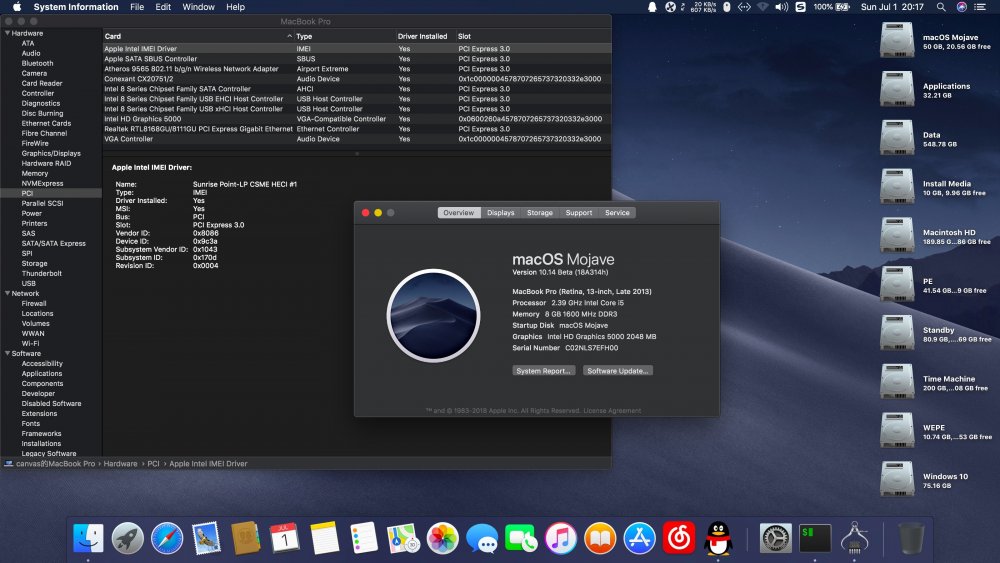
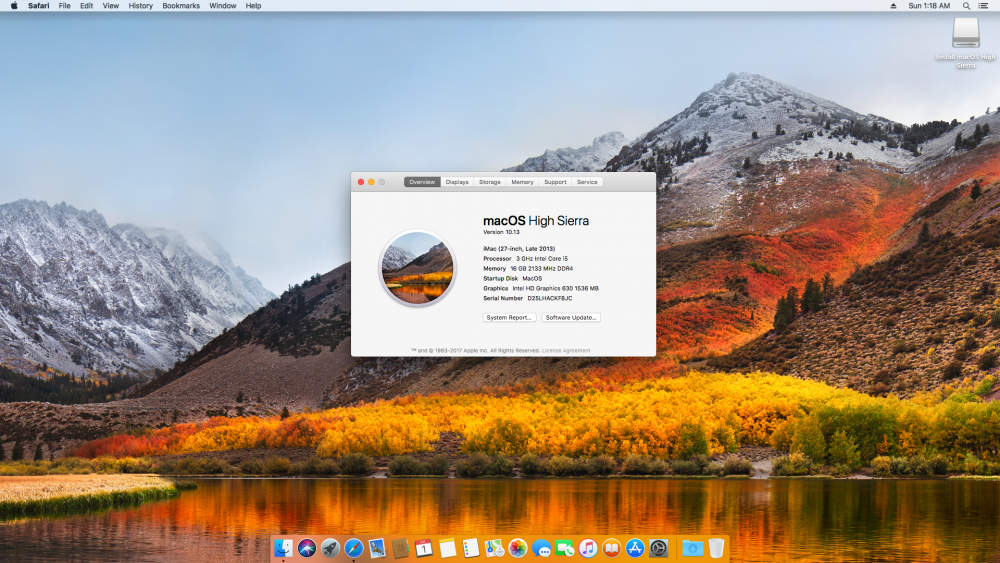
@arsradu and @erice Let me explain it this way: All the CPUs that come with the internal GPU (IGD/iGFX/iGPU) have a feature called Intel Quick Sync Video which was introduced with Sandy Bridge CPUs. Apple has been using this technology since Mountain Lion which being used with a variety of its softwares such as Safari, iTunes FaceTime QuickTime and so on and so forth, this feature is helps to improve the performance of video encoding and conversion and rendering (in video editing softwares such as iMovie, FinalCut, Motion and Compressor) in a sense of actuall video rendering (in video editing softwares such as iMovie, FinalCut, Motion and Compressor, etc..) and simply viewing what we see on our displays. This feature is enabled by default in any given Apple computer which has the internal graphics and/or a dedicated GPU such as 21.5" and 27" iMacs or for instance MacBook Pros with single or dual GPUs and they will use the Intel Quick Sync Video technology to improve the performance on video rendering (macOS itself and the Video Editing softwares) so macOS will take advantage of this technology automatically when the iGPU is active and initialized correctly by the OS which is the case in all of those computers. Now on our hacks when we enable this feature in BIOS/UEFI and config it correctly as the result we have a better performance on how the video performance of our systems behaves. When I first installed Mojave I wasn't even able to play videos in QuickTime let alone using QuickLooks properly so something was missing. After I made the changes to my config.plist it become clear that the missing pice was indeed the Intel Quick Sync which is responsible for handling the correct and a better performance. I know you might have used the same config in Sierra and High Sierra without any issues because most of the new discreet GPUs can handle the Quick Sync up to a point but with macOS Mojave and the major changes in the OS itself we now need to adapt to these changes accordingly and I believe that's another reason that macOS Mojave is not supporting many of the previous Apple computers and hacks because they aren't simply able to support these changes and processes properly. Please feel free to correct me if I'm wrong. These are two simple examples on Hardware Encoding Support when the iGPU is enabled or not: My IvyBridge rig without iGPU and a nVidia 1070 GPU with Latest Web Drives in High Sierra My SkyLake with iGPU and RX580 in High Sierra:

 1 point
 -
@Slice Cool..!!! But on my case, I lost svg image colors.. it becomes Black/White here. Using Sample.svg with no gradient for sure.. (Legacy Clover, current EFI, no-QEMU.. not sure bzoz of Legacy though). Sample.svg
 1 point
 -
Yep. But...that's exactly what I'm trying to say. I already tried latest AppleALC 1.2.8 (built from latest sources) with latest Lilu 1.2.4 (also built from latest sources). And...the initial results were not really good. :))) Anyway, I rebuilt both from fresh downloaded sources, no problems building. But..let's see how they perform. So, AppleALC 1.2.8v3 and Lilu 1.2.4. attached. Update: initial test results look good. Tested them with HS and Mojave Beta 2, ALC1150. Will test ALC892 tonight. Update2: so far so good on the ALC892, as well. Will continue testing and update this post if anything changes in the meantime. For anyone willing to try them out: MAKE A BACKUP of your current kexts and keep in mind these are EXPERIMENTAL/TEST builds. So they could have bugs. AppleALC1.2.8v3.kext.zip Lilu1.2.4.kext.zip1 point
-
Base on this way from swcdn.apple.com. We can download it, and automatically extract it as a full installer app as App Store. And as I check, the md5 of dmg is the same as downloaded full app from App Store. All right! I agree that, I'm too boring to make this installScipt. Mojave MBR HFS Firmware Check Patch/Q6-DownloadFullApp/installScript_1014fullapp
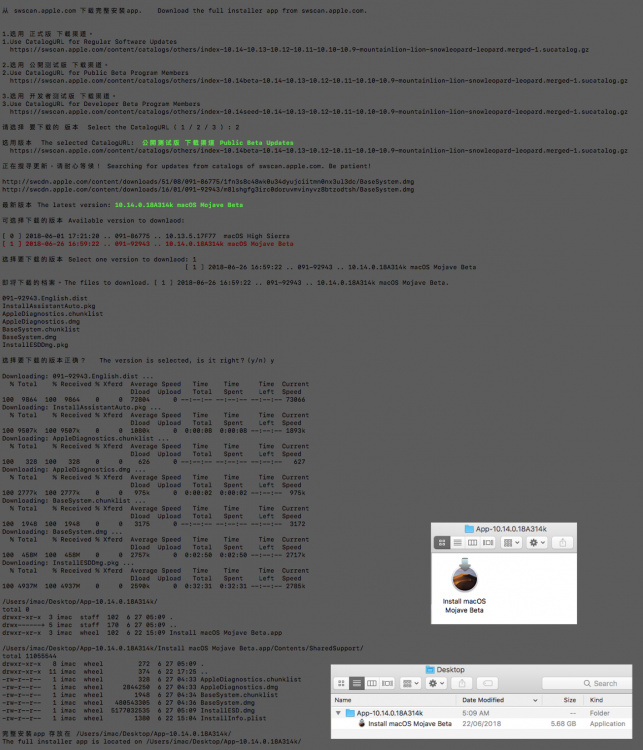 1 point
 -
Hi, Here it is (attached) for anyone who needs it for patching or restoring! Taken from macOS 10.14 Beta 1 18A293u Regards, Mohamed AppleHDA_282.5.kext.zip1 point
-

Version 2.0.8
732,721 downloads
Mac OS X Unlocker for VMware V2.0 Please ask questions in this thread http://www.insanelymac.com/forum/topic/303311-workstation-1112-player-712-fusion-78-and-esxi-6-mac-os-x-unlocker-2/ 1. Introduction Unlocker 2 is designed for Workstation 11, Player 7, ESXi 6 and Fusion 7. If you are using an earlier product please continue using Unlocker 1 Version 2 has been tested against: Workstation 11/12 on Windows and Linux Player 7 & Workstation Player 12 on Windows and Linux Fusion 7/8 on Mavericks and Yosemite ESXi 6.0 The patch code carries out the following modifications dependent on the product being patched: Fix vmware-vmx and derivatives to allow Mac OS X to boot Fix vmwarebase .dll or .so to allow Apple to be selected during VM creation Fix libvmkctl.so on ESXi 6 to allow use with vCenter Download a copy of the latest VMware Tools for OS X Note that not all products recognise the darwin.iso via install tools menu item. You will have to manually mount the darwin.iso for example on Workstation 11 and Player 7. The vmwarebase code does not need to be patched on OS X or ESXi so you will see a message on those systems telling you that it will not be patched. In all cases make sure VMware is not running, and any background guests have been shutdown. The code is now Python as it makes the Unlocker easier to run and maintain on ESXi. There are some challenges to write the code as ESXi has a subset of Python 2.7 which constrains some modules that can be used. 2. Prerequisites The code requires Python 2.7 to work. Most Linux distros, ESXi and OS X ship with a compatible Python interpreter and should work without requiring any additional software. Windows has a packaged version of the Python script using PyInstaller, and so does not require Python to be installed. 3. Limitations If you are using VMware Player or Workstation on Windows you may get a core dump. Latest Linux and ESXi products are OK and do not show this problem. IMPORTANT: If you create a new VM using version 11 hardware VMware will stop and create a core dump.There are two options to work around this issue: 1. Change the VM to be HW 10 - this does not affect performance. 2. Edit the VMX file and add: smc.version = "0" | 4. Windows On Windows you will need to either run cmd.exe as Administrator or using Explorer right click on the command file and select "Run as administrator". win-install.cmd - patches VMware win-uninstall.cmd - restores VMware win-update-tools.cmd - retrieves latest OS X guest tools 5. Linux On Linux you will need to be either root or use sudo to run the scripts. You may need to ensure the Linux scripts have execute permissions by running chmod +x against the 2 files. lnx-install.sh - patches VMware lnx-uninstall.sh - restores VMware lnx-update-tools.cmd - retrieves latest OS X guest tools 6. Mac OS X On Mac OS X you will need to be either root or use sudo to run the scripts. This is really only needed if you want to use client versions of Mac OS X. You may need to ensure the OS X scripts have execute permissions by running chmod +x against the 2 files. osx-install.sh - patches VMware osx-uninstall.sh - restores VMware 7. ESXi You will need to transfer the zip file to the ESXi host either using vSphere client or SCP. Once uploaded you will need to either use the ESXi support console or use SSH to run the commands. Use the unzip command to extract the files. <<< WARNING: use a datastore volume to run the scripts >>> Please note that you will need to reboot the host for the patches to become active. The patcher is embbedded in a shell script local.sh which is run at boot from /etc/rc.local.d. You may need to ensure the ESXi scripts have execute permissions by running chmod +x against the 2 files. esxi-install.sh - patches VMware esxi-uninstall.sh - restores VMware Note: 1. Any changes you have made to local.sh will be lost. If you have made changes to that file, you will need to merge them into the supplied local.sh file. 2. The unlocker runs at boot time to patch the relevant files and it now survives an upgrade or patch to ESXi as local.sh is part of the persisted local state. 8. Thanks Thanks to Zenith432 for originally building the C++ unlocker and Mac Son of Knife (MSoK) for all the testing and support. Thanks also to Sam B for finding the solution for ESXi 6 and helping me with debugging expertise. Sam also wrote the code for patching ESXi ELF files. History 12/12/14 2.0.0 First release 13/13/14 2.0.1 Removed need for Python for Windows 13/13/14 2.0.2 darwin.iso was missing from zip file 02/01/15 2.0.3 Added EFI firmware files to remove Server check Refactored Python code 07/01/15 2.0.4 Added View USB Service to Windows batch files Fixed broken GOS Table patching on Linux 18/06/15 2.0.5 ESXi 6 working Latest tools from Fusion 7.1.2 20/06/15 2.0.6 ESXi 6 patch for smcPresent vCenter compatibility 16/09/15 2.0.7 Workstation 12 on Linux fixes 14/11/15 2.0.8 Player 12 on Linux fixes Get latest VMware tools command Removed firmware files Moved to PyInstaller 3.0 © 2011-2015 Dave Parsons1 point -
How to easily hide unwanted partitions in clover's boot menu without having to create the custom entries: You can use clover configurator to easily hide the partitions that you don't what to see on your clover's boot menu. 1. Open your config.plist with clover configurator and select GUI. 2. On the top right corner you'll see a box called "Hide Volume", all you have to do is to click on the + sign to add a new entry. The entry you add must be exactly the same as the name of the partition that you want to hide. For example if you want to hide the recovery partition of your macOS you need to add "Recovery HD" and save the config. By adding this entry the "Recovery HD" will be hidden on clover's boot menu, remember if you have more than one version of macOS installed on you hackintosh all recovery partitions will be hidden. Cheers.1 point
.thumb.jpeg.7082d67b3394c9399e80144027a7b397.jpeg)