Leaderboard


Popular Content
Showing content with the highest reputation on 05/25/2019 in all areas
-
Well, I can assure you that we do test all our releases on Penryn legacy systems (e.g. Core 2 Quad). Some while ago I asked one of our members, RodionS, to post some instructions, and they are mentioned here and here. Currently we do not have (enough) people to maintain our own DuetPkg fork and/or MBR tools, which is slightly saddening, but since posted ones (thx to Clover team) already provide decent experience, you may well use the files from these links. It might be a good idea to have a slightly better list of fixing common mistakes specific to legacy systems (for instance, ACPI patching sure needs more work than usual), and I believe this is is a good chance for the community to step in. After all everything is available for public ^_^.3 points
-
for ICH7/8/9/10 and some other we need to patch AppleAHCIPort 40600200 to 00000000 or change SATA device-id to ICH6 8126 Helpful is reading about "the things you need", not using my EFI folder, because DSDT, SSDT, network , graphics and audio codec are completely different - if you do not use exactly the same configuration2 points
-
Can I propose a new subforum be created for the new OpenCorePkg OpenCore front end being created by vit9696 and others, it is a fantastic piece of work: https://github.com/acidanthera/OpenCorePkg Even at version 0.1 it runs my Mojave 10.14.4 setup very nearly flawlessly. It consists of a 10KB bootstrap BootX64.efi and a 200KB OpenCore.efi OS loader. All configuration is done using a very well documented config.plist1 point
-
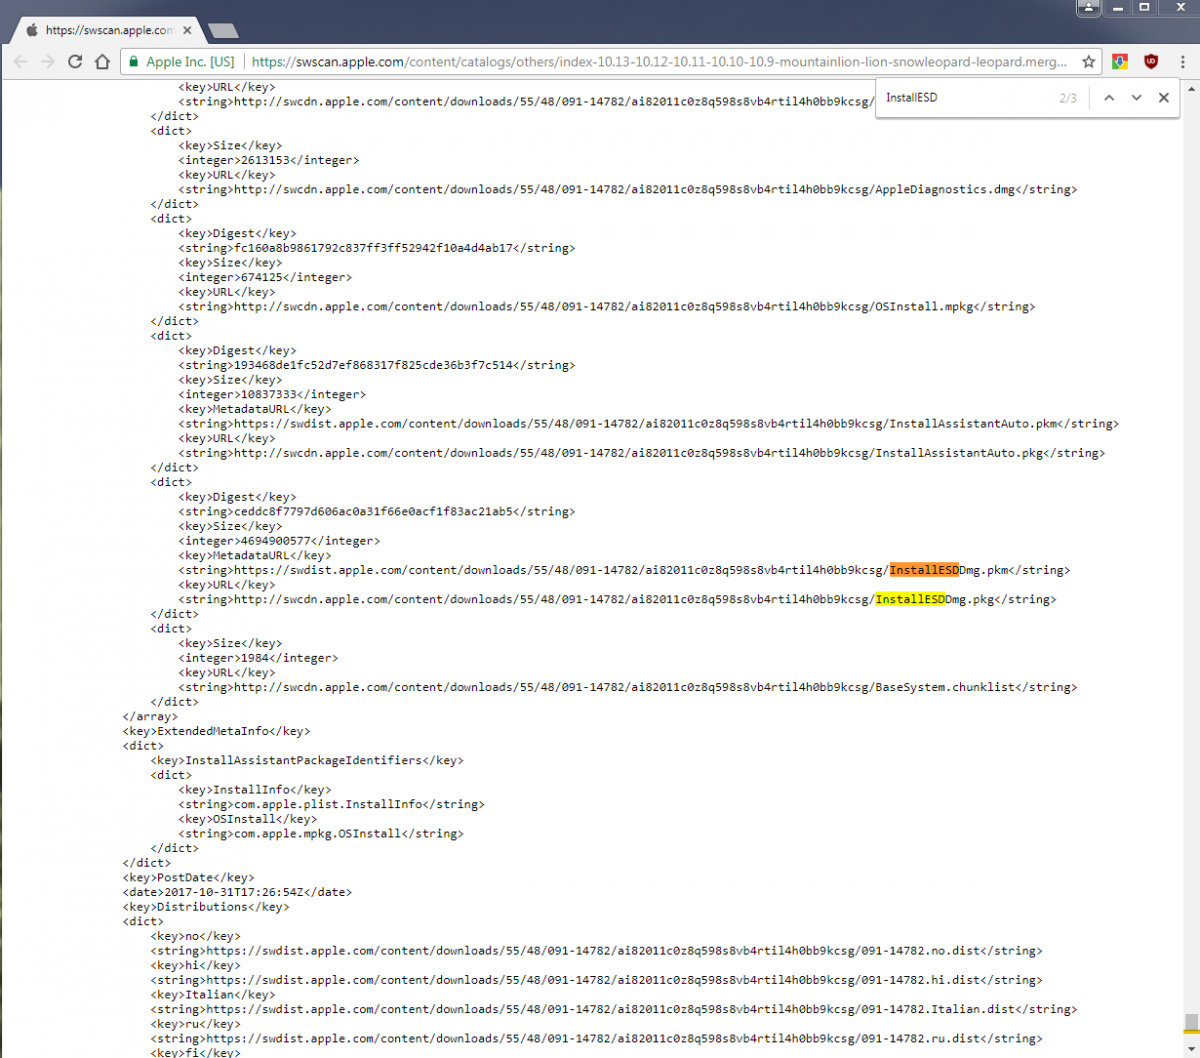
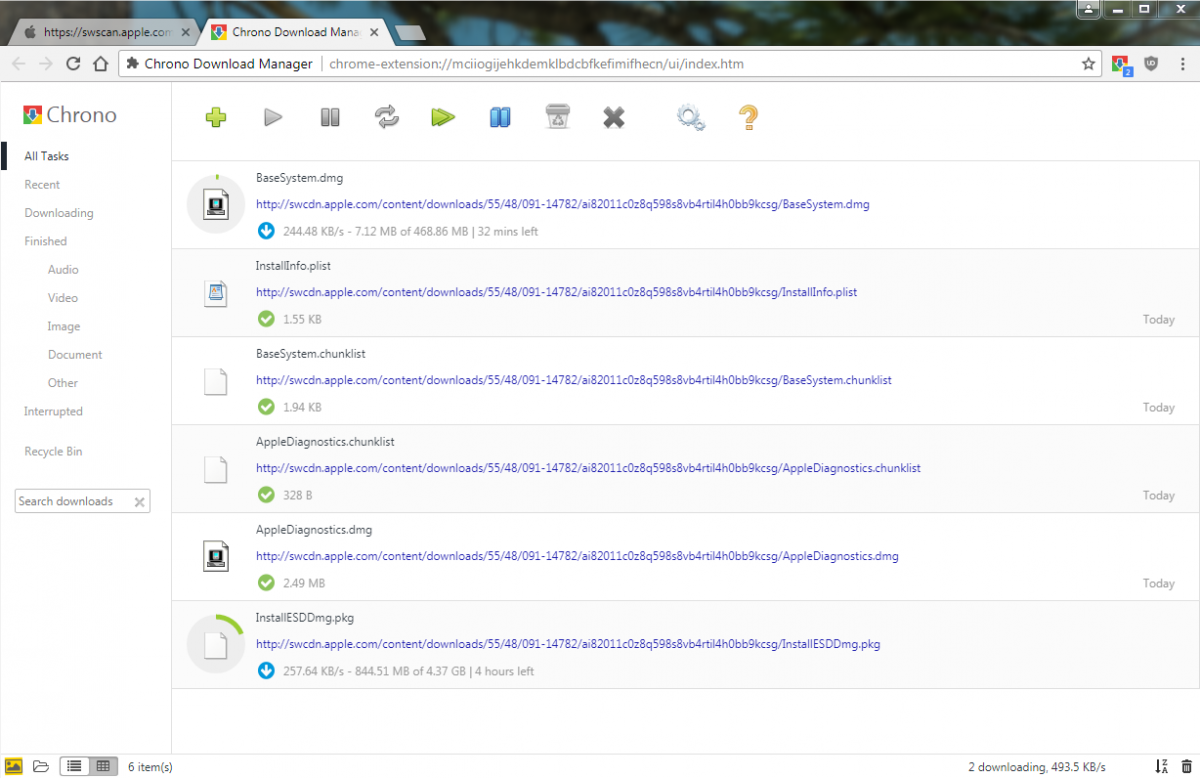
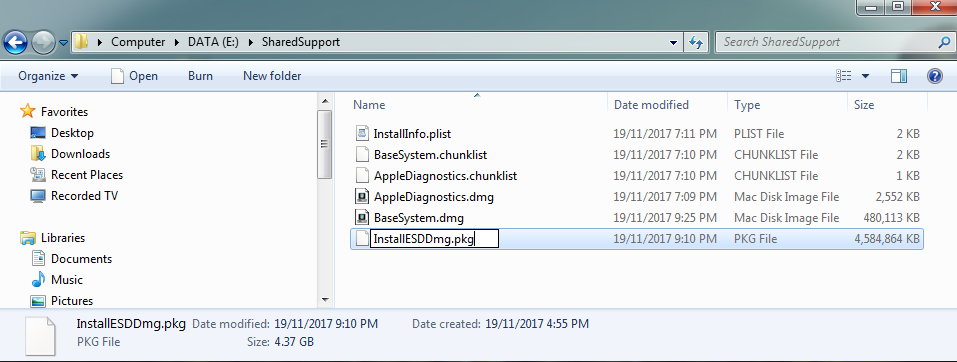
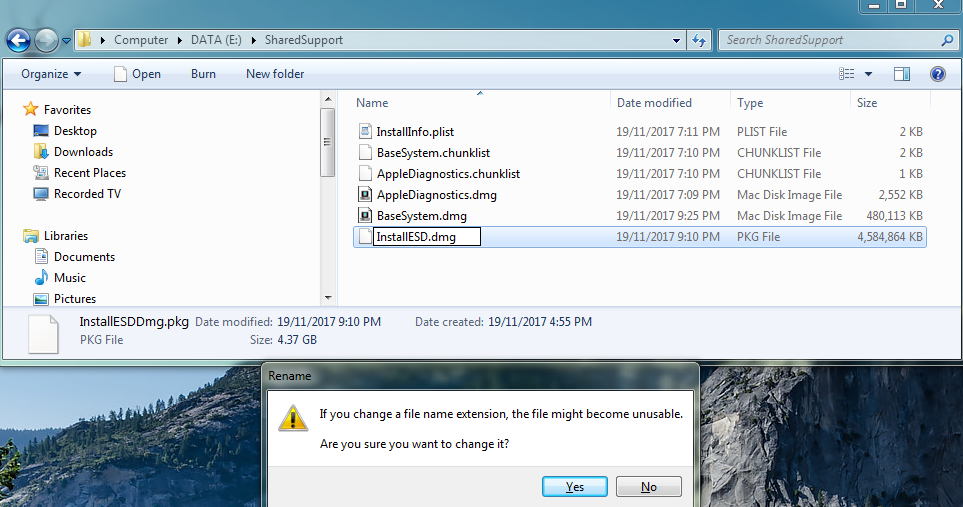
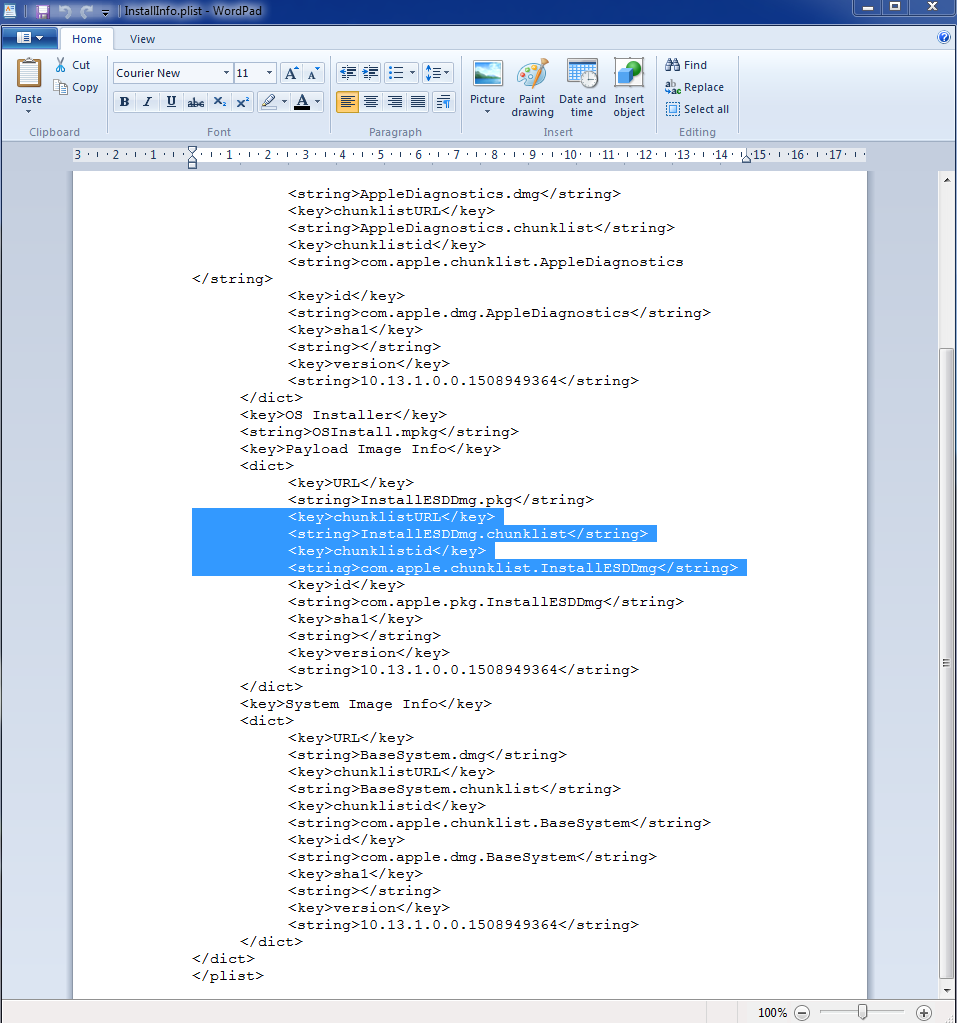
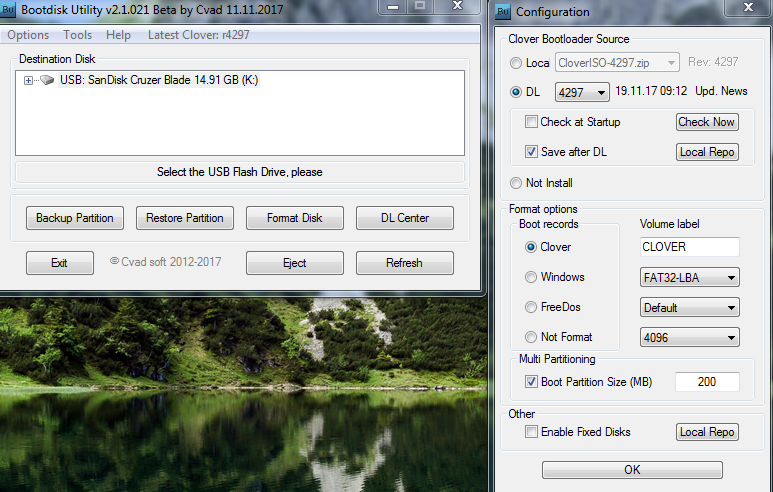
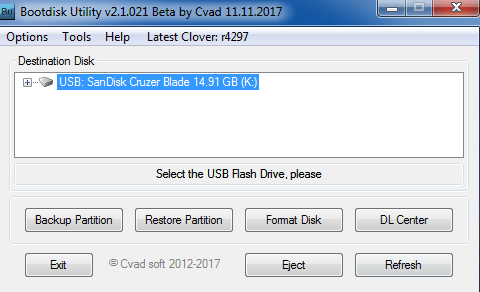
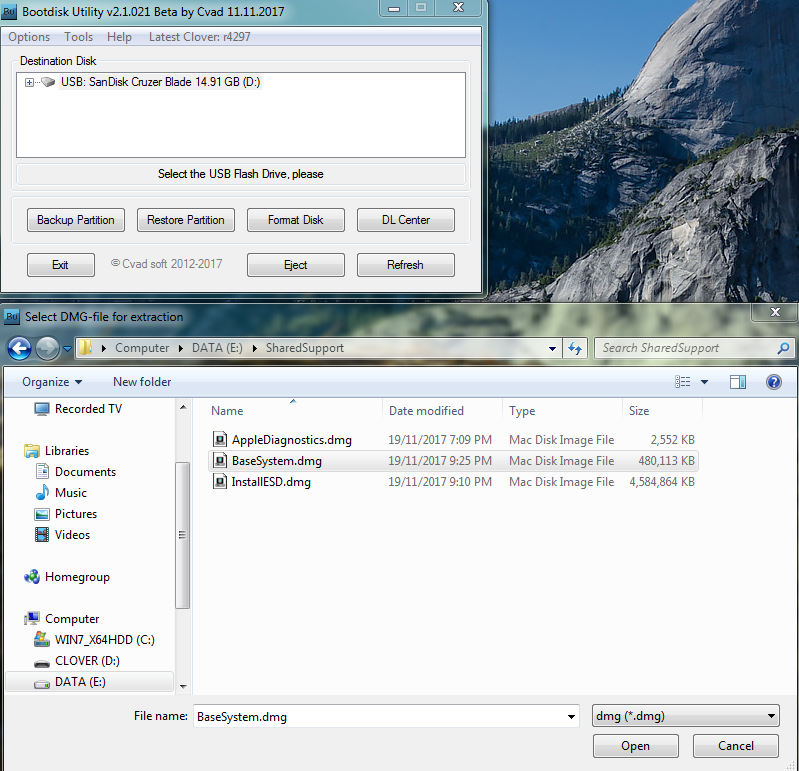
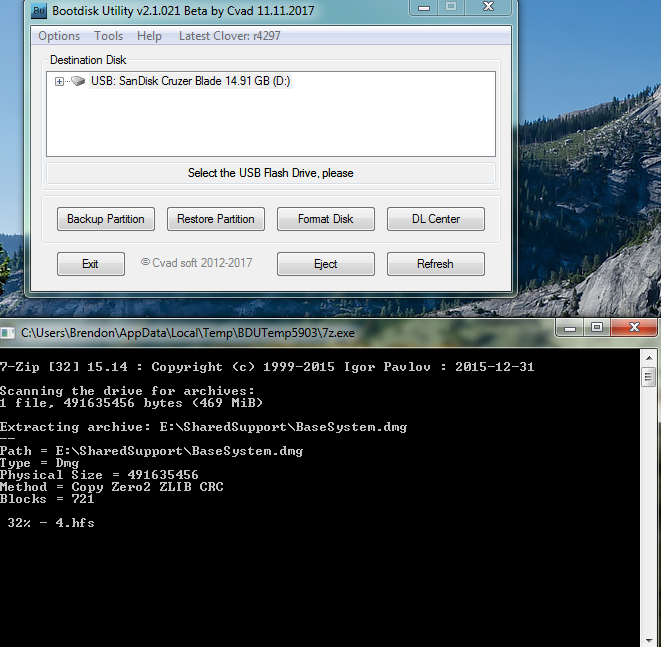
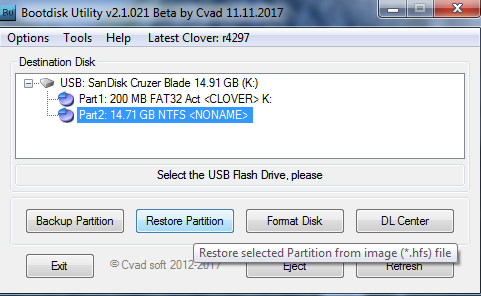
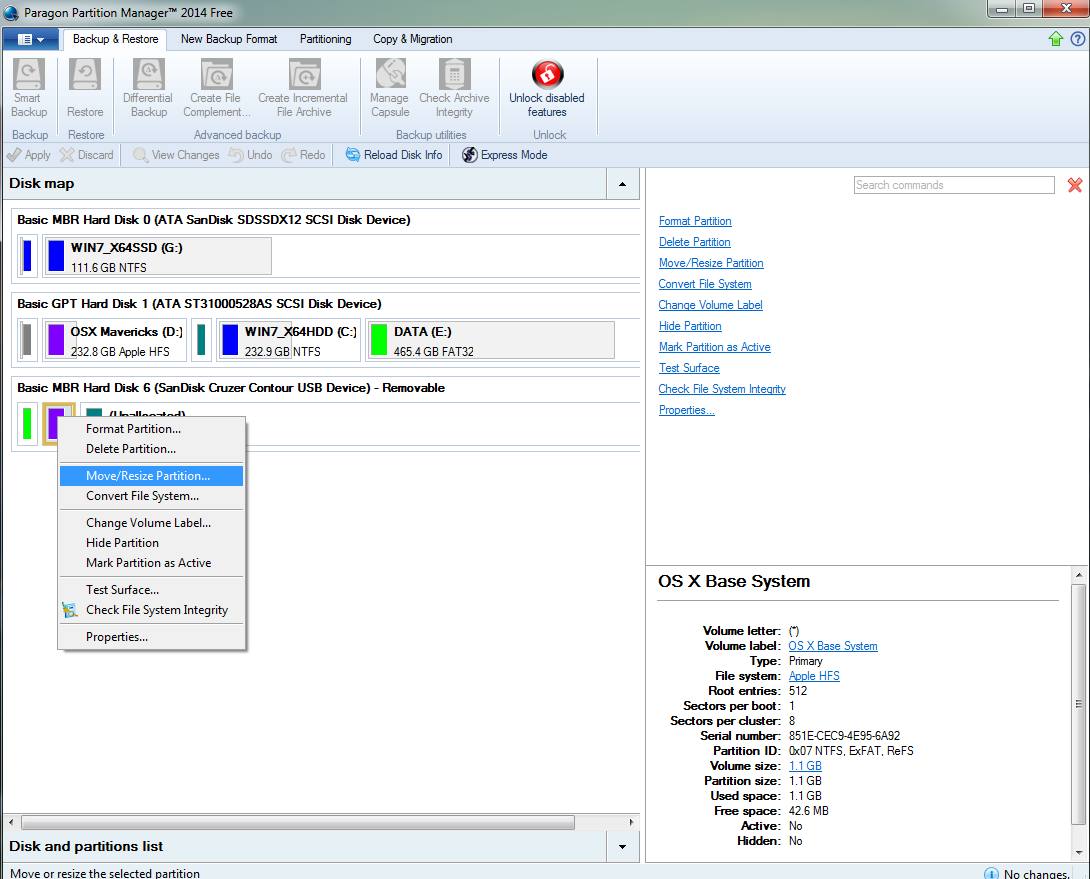
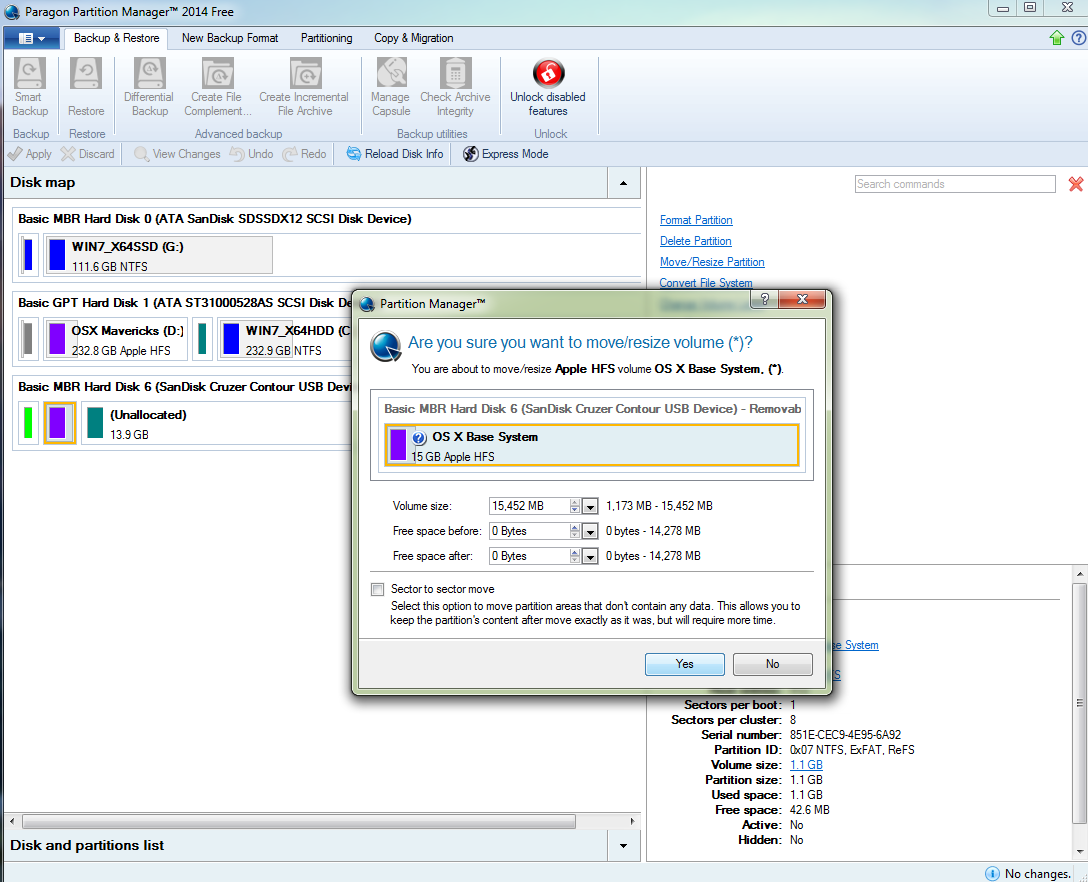
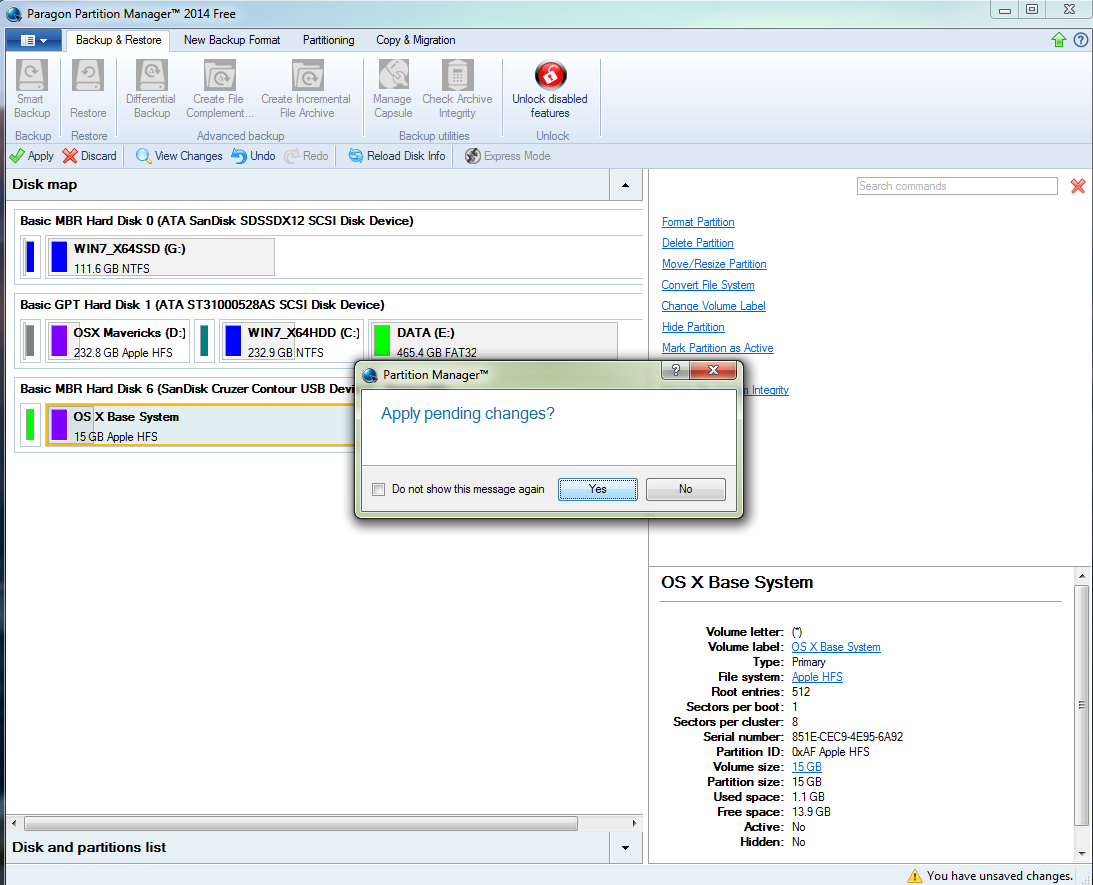
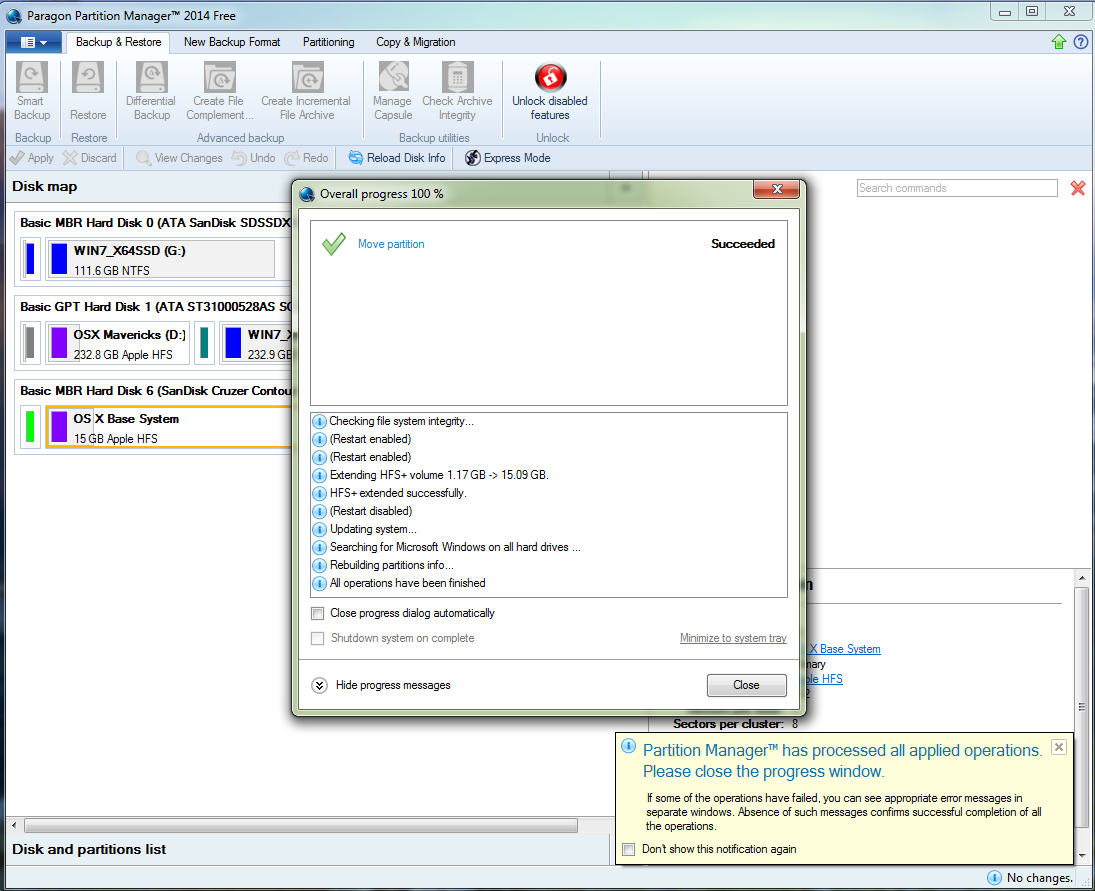
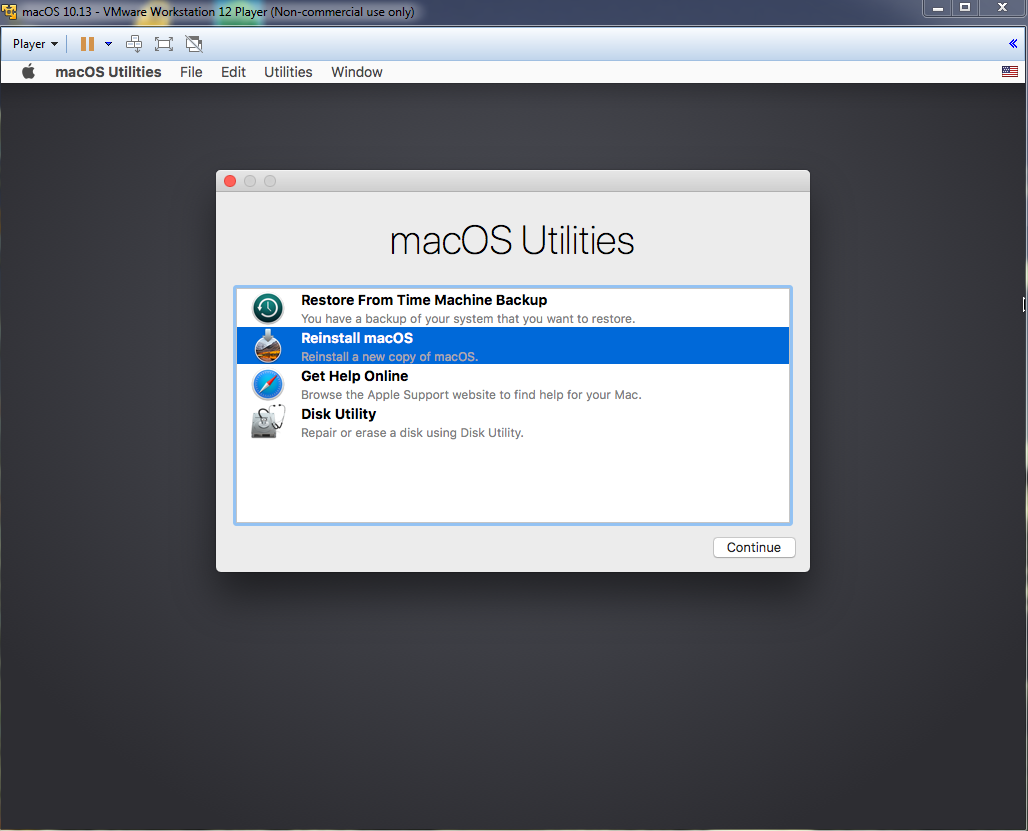
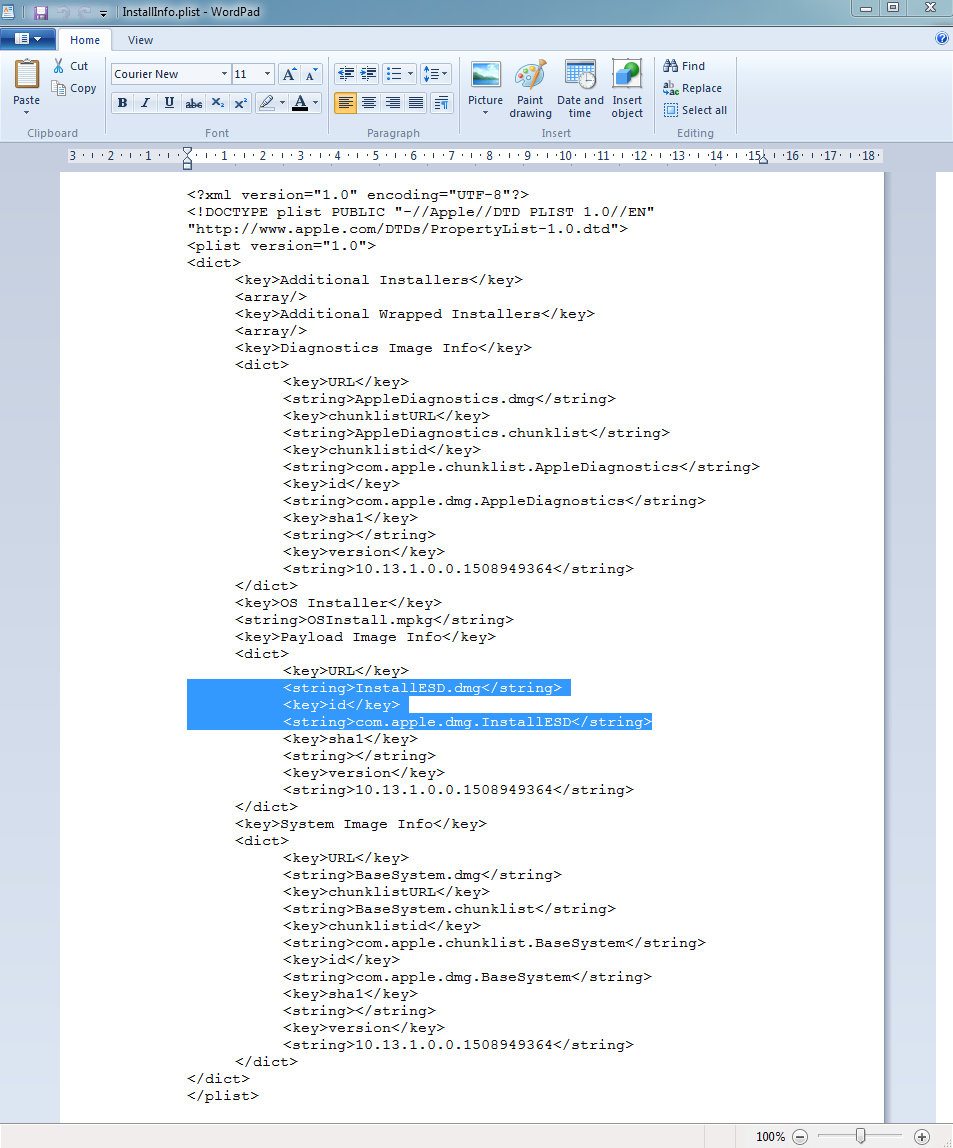
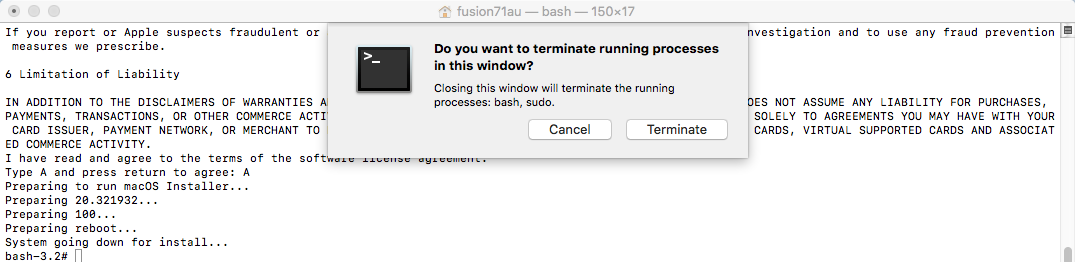
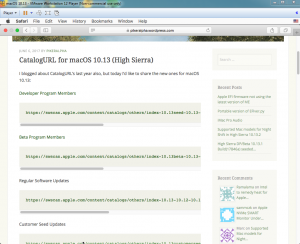
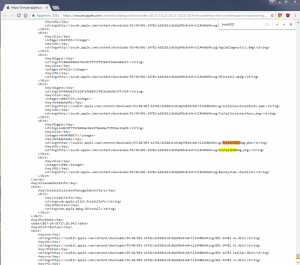
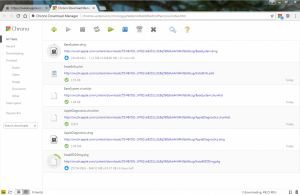
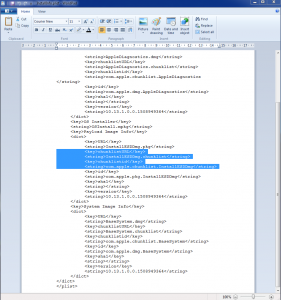
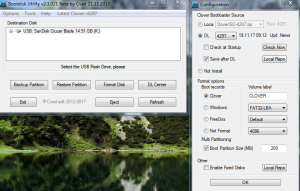
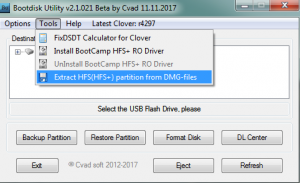
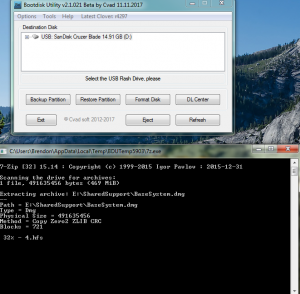
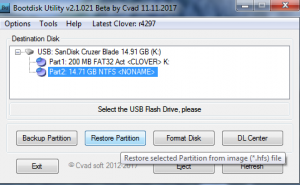
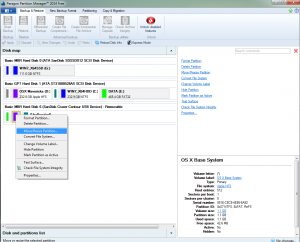
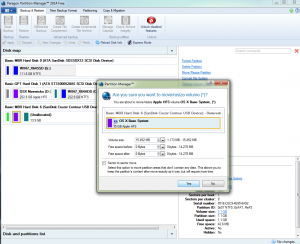
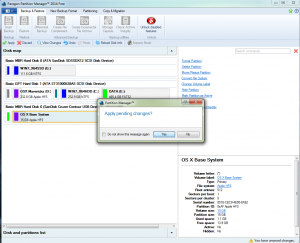
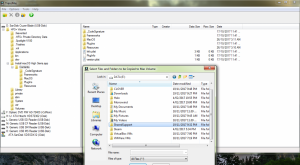
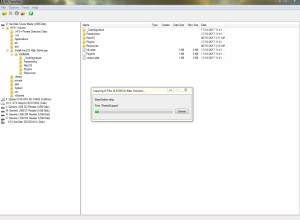
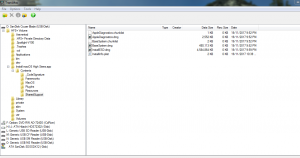
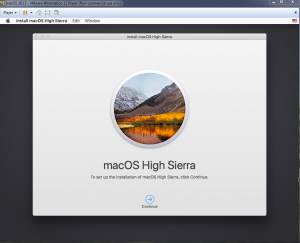
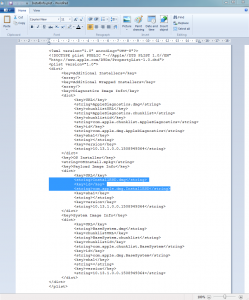
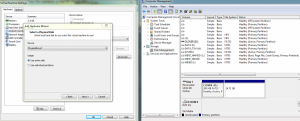
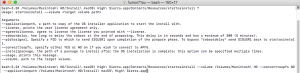
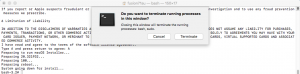
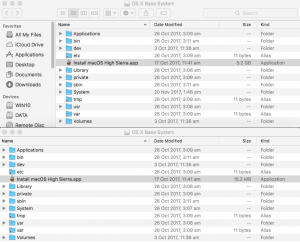
Making a High Sierra USB Installer Entirely From Scratch in Windows This is a proof of concept tutorial, to show it's possible to create a vanilla High Sierra installer, entirely from scratch, in Windows (even without App Store downloaded "Install macOS High Sierra.app" from a real Mac ). @PikeRAlpha's link to Apple's Software Catalog provides us with all the URLs necessary to download the needed files directly from Apple instead of some dubious source from the internet... Pre-Requisites 8GB or larger USB drive. Edit: Recommend 16GB or larger for macOS Catalina 10.16 Boot Disk Utility v2.1.2017rev021b from @CVAD TransMac (free 15 day trial) Paragon Hard Disk Manager Free Download Installer Files Directly from Apple 1) Browse Apple's Regular Software Catalog and find the URLs to download the following 6 installer files... BaseSystem.dmg BaseSystem.chunklist InstallInfo.plist InstallESDDmg.pkg AppleDiagnostics.dmg AppleDiagnostics.chunklist (Hint - search page for "InstallESD" to find its URL and others nearby) to a folder named "SharedSupport" on your Windows NTFS drive. A browser download manager (eg Chrono for Chrome, dTA for FireFox) is handy since InstallESD is >4GB ---> allows you to pause/resume interrupted download... 2) Rename InstallESDDmg.pkg to InstallESD.dmg 3) Edit InstallInfo.plist with WordPad/text editor to remove the chunklistURL and chunklistid keys for InstallESD, and renaming it from InstallESDDmg.pkg to InstallESD.dmg (example of edited file attached to this post)... Note: You can verify the SHA1 checksum of your InstallESD.dmg and BaseSystem.dmg with the correct ones at this website. Boot Disk Utility to format the Installer USB and Restore OS X Base System HFS partition 1. Format USB with BDU & latest Clover ---> creates boot files in CLOVER partition + second FAT partition 2. Extract 4.hfs from \SharedSupport\BaseSystem.dmg with BDU --> save to it's local folder 3. Restore 4.hfs to USB second partition with BDU ---> 2nd partition becomes bootable "OS X Base System" Paragon Hard Disk Manager to extend HFS Partition to its Full Extent Open Paragon Partition Manager Free and resize the second partition of the USB drive to the full size allowed. Don't forget to apply the changes at the end... Transmac to Copy "SharedSupport" folder to OS X Base System 1. Open the TransMac program and navigate to the HFS+ Volume/Install macOS High Sierra.app/Contents folder. Right click anywhere in the empty space on the RHS pane and select "Copy Here"... 2. In the next stage, select the "SharedSupport" folder we created above as the "Files and Folders to be copied to the Mac Volume"... Clover Settings Clover configuration is required now. The default config.plist (in the Clover FAT32 partition of the USB) maybe sufficient to boot your machine if you’re lucky. If not, the hackintosh-vanilla-desktop-guide has some good explanations on the various settings available and also offers sample configuration files based on CPU type. Also, look at the Clover Wiki, Clover Instructions and Clover Configuration Thread for pointers and edit /EFI/Clover/config.plist accordingly with Wordpad or Notepad. The location of the important configuration files for Clover are summarized below config.plist--->EFI/CLOVER folder DSDT.aml with or without SSDT.aml--->EFI/CLOVER/ACPI/patched (don't need one if your DSDT is auto patched by Clover in config.plist) Kexts eg FakeSMC, NullCPUPowerManagement --->EFI/CLOVER/kexts/<osx version> or /Other. NB BootDiskUtility by default already has FakeSMC.kext installed here. You may need to add VoodooPS2Controller for your laptop keyboard/trackpad to work. If UEFI booting, you will most likely need one of the OsxAptioFixDrv-64 drivers copied from /EFI/CLOVER/drivers-off/drivers64UEFI to /EFI/CLOVER/drivers64UEFI. If you want to use the installer to run High Sierra in Windows on VMware, you can follow my guide to set up the Virtual Machine and replace Clover's default config with EFI_Clover for VMware (which is compatible to run in VMware). In the screenshots below, I have attached the USB Installer (in this case PhysicalDrive7) to my macOS Virtual Machine. Reboot the system to the USB installer to install High Sierra ... What happens if we don't have access to TransMac or Paragon Hard Disk Manager? Not a problem, as long as we get "OS X Base System" bootable, we can launch terminal from the Utilities Menu to copy the SharedSupport folder over to the Installer app. In essence, we will build the full installer app = 5GB+ on the target HD eg "Macintosh HD", by copying both the "small" installer app = 15MB (on "OS X Base System") and the SharedSupport folder from the NTFS volume (mounted in this example on /Volumes/DATA)... -bash-3.2# cd / -bash-3.2# cp -R Install\ macOS\ High\ Sierra.app /Volumes/Macintosh\ HD/ -bash-3.2# cp -R /Volumes/DATA/SharedSupport /Volumes/Macintosh\ HD/Install\ macOS\ High\ Sierra.app/Contents/ ...then start installation with the startosinstall utility... -bash-3.2# /Volumes/Macintosh\ HD/Install\ macOS\ High\ Sierra.app/Contents/Resources/startosinstall --volume /Volumes/Macintosh\ HD --converttoapfs NO --applicationpath /Volumes/Macintosh\ HD/Install\ macOS\ High\ Sierra.app The above steps can be automated with the attached "startosinstall.command" script, which will assemble "Install macOS High Sierra.app" on "Macintosh HD" and launch the startosinstall utility targeting the "Macintosh HD" volume. Copy/download to "Macintosh HD", then run in terminal (after attaching DATA USB with /Shared Support folder)... cd "/Volumes/Macintosh HD" chmod +x startosinstall.command ./startosinstall.command Updated Download Links for macOS Mojave 10.14.6_18G103 Browse Apple's Regular Software Catalog and find the URLs to download the following 6 installer files... BaseSystem.dmg BaseSystem.chunklist InstallInfo.plist InstallESDDmg.pkg AppleDiagnostics.dmg AppleDiagnostics.chunklist Note: In Mojave, Apple has removed the --converttoapfs NO and --applicationpath arguments from the startosinstall utility.... eg to use startosinstall for the above section "What happens if we don't have access to TransMac or Paragon Hard Disk Manager?", the syntax is now -bash-3.2# /Volumes/Macintosh\ HD/Install\ macOS\ Mojave.app/Contents/Resources/startosinstall --volume /Volumes/Macintosh\ HD This basically means that for Mojave, the default installation will always convert the target volume to the apfs file system. Updated Download Links for macOS Catalina 10.15.6_19G73 Browse Apple's Regular Software Catalog and find the URLs to download the following 6 installer files... BaseSystem.dmg BaseSystem.chunklist InstallInfo.plist InstallESDDmg.pkg AppleDiagnostics.dmg AppleDiagnostics.chunklist startosinstall.command.zip InstallInfo.plist_edited_10.13.6.zip InstallInfo.plist_edited_10.14.6.zip InstallInfo.plist_edited_10.15.6.zip


 1 point
 -

Version r2877
196,275 downloads
Latest revision of Chameleon bootloader. High Sierra(10.13.x), Sierra(10.12.x) and El Capitan(10.11.x) boot supported. Yosemite boot support starting from Chameleon revision 2381 (June 2014) Please don't upload it on other servers and don't repack it, thank you. - Installer PKG - Binaries format (Manual install) Please don't upload it on other servers and don't repack it, thank you. Credits to Chameleon Team http://forum.voodooprojects.org Changelog: http://forge.voodoop...e/changes/HEAD/ Language Translation: For on-line Chameleon language package resource edit >> Pootle Pls translate/complete it. Link here on InsanelyMac: Chameleon 2.4svn Official PKG Installer Enjoy ErmaC1 point -
Introduction:So this build has been very challenging as the Z390 platform is fairly new. I struggled for some days trying to get USB, power management and onboard graphics working. You need to do a bit of work customising your own plist and SSDT but if you do, your rig will not disappoint.The guide below should work for any of the ASUS Z390 boards but may require some minor SSDT changes to configure your USB ports but it’s not that hard to do as long as you are willing to read the motherboard manual and do some very basic text file editing.Hardware: Motherboard: ASUS TUF Z390M-Pro Gaming CPU: Intel Coffeelake Core i9-9900k Cooling: Be Quite Dark Rock Pro 4 RAM: G.Skill Ripjaws V 32GB 2X16GB DDR4 3200MHz CL16 Disk: Samsung 970 EVO 2TB NVMe 1.3 M.2 (2280) Ethernet: Onboard Intel I219V Wifi/BT: Broadcom BCM943602CS + PCI-e adapter (Ebay Special) Audio: Onboard Realtek ALC S1200A Graphics: Onboard Intel UHD 630 USB: Onboard Intel Z390 Chipset Working: Onboard USB, audio, ethernet, graphics Wifi and BT via the PCI-e adapter Reboot, shutdown, hibernate, sleep/wake iCloud, iMessage, FaceTime, Time Machine GPU Hardware acceleration RAM XMP (3200MHz) Not Working: USB: I’ve disabled two of the rear USB ports to keep under the 15 port limit. I tried the USB port limit patch but had no luck getting it working. Also the general consensus is that using >15 USB ports is a bad idea and can cause unexpected crashes/data-corruption. iTunes Streaming (I have not investigated this as I don’t use iTunes). Clover auto boot from OS partition (this has me stumped at the moment). Onboard HDMI port during installation (used DP instead). Not Investigated (yet): USB 3.1 Gen 2 and USB-C (I don’t have any such devices) Overclocking or exceeding the 95W TDP of the i9900k Upgrade to Mojave 10.14.3 Install Procedure:This install guide should work with any version of 10.14 but I have only tried 10.14.2 since that was the current version at the time I started this process.BIOS settings (v2.20.1271): Advanced\System Agent (SA) Configuration\VT-d - Disabled Advanced\System Agent (SA) Configuration\Above 4G - Decoding Enabled Advanced\USB Configuration\Legacy USB Support - Disabled Advanced\USB Configuration\XHCI Hand-off - Disabled What you will need: 8GB USB drive (preferably USB 2.0, see below) ASUS Motherboard manual Clover v2.4 r4871 Clover Configurator v5.4.1.1 MaciASL IORegistryExplorer Kexts (all versions are the minimum required): AppleALC v1.3.5 (needed for the Realtek ALC S1200A) IntelMausiEthernet 2.5.0 USBInjectAll from RehabMan v0.7.1 (2018-1108) VirtualSMC v1.0.2 (replaces the older FakeSMC) Lilu 1.3.1 WhateverGreen 1.2.6 This Guide is based on the amazing /r/Hackintosh Vanilla Desktop Guide and follows it with some critical additions that will fix USB, sleep/reboot/hibernate and a few other issues. It is expected that you have a basic understanding of Mac OSX, Clover, Clover Configurator and command line tools such as text editors. If not, give the below a go, and just Google when you get stuckFollow the /r/Hackintosh Vanilla Desktop Guide to do the following; Gather all your kexts as listed above. They can be downloaded and placed in /EFI/CLOVER/kexts/other/ by hand or most can be installed automatically by Clover configurator via the Kexts Installer menu. Build your USB installer. Perform your Clover setup. Update your config.plist file to include all the Coffee Lake specific configuration. Here are some specific alterations to the vanilla build that were required; Acpi I added a few extra patches which were used for USB testing and are probably not required once setup. All of which can be installed from the List Of Patches pulldown. -> change EHC1 to EH01 -> change EHC2 to EH02 -> change _OSI to XOSI Boot You should be able to remove the verbose (-v) option as hopefully it will not be required. Added slide=0 to fix various boot issues. Unfortunately I don’t remember exactly what those errors were or which forum post helped me identify the issue. Added darkwake=10 to fix issues with power nap. Kernel and Kext Patches I disabled the USB port limit patches because the didn’t work and can cause stability issues if left enabled. See the USB section below for more details. SMBIOS Set the Product Name to Macmini8,1 I found that since the Macmini8,1 is based on Coffee Lake and uses the Intel UHD 630 onboard graphics seemed to work better than when set to iMac18,1 which caused random graphical glitches. You shouldn’t need to use macserial to generate the Serial Number or board number, just hit this Generate New button and let Clover Configurator sort it for you. You will still need to verify that the serial number is safe to use with Check Coverage button. USB:By now you should have a bootable USB drive with a near working configuration. The last remaining issue is getting USB working. This is the step that most people get stuck. There are a few issues with USB on Hackintosh that cause problems; You are limited to 15 USB ports. Now this might sound like lots but each physical port usesone port if it is USB 2.0 but if it supports USB 3.1 then it counts as two ports (both a USB 2.0 and USB 3.1 in the one physical port). There are various patches out there which remove this limit but even if you can get them to work, they will probably break when you upgrade and can cause system instability. OSX has a fixed size memory array to store this data and if you have more than 15 ports it can overwrite other critical memory. All 300 series motherboards (in our case the Z390) have way more than 15 USB ports. If you don’t bother fixing this issue then on the 300 series boards you will most likely enumerate 15 USB 2.0 ports before the system ever gets a chance to find the USB 3.1 ports. As such all your USB ports will be locked to USB 2.0. This means if you install off a USB 3.x drive, it will fail part way through the install when the ports get locked to USB 2.0 and the drive can no longer be seen. So in order to fix this problem you have to build your own SSDT file to tell the system which ports to enable, where they are on the XHC bus and what version of USB they support. I used the guide from RehabMan (Creating a Custom SSDT for USBInjectAll.kext) to build mine.Now the catch will be that you probably need to boot into OSX in order to be able to map the USB port locations to create the SSDT file. If you need to do this, you must install from a USB 2.0 drive as discussed above.The other option is just try and guess the location of each port. I mapped them all out and then realised that ASUS actually named each port sensibly so I could have just worked it out if I bothered to read the manual and look at the motherboard layout diagram.So for the ASSUS ASUS TUF Z390M-Pro Gaming the port layout looks like this; Intel® Z390 Chipset : 2 x USB 3.1 Gen 2 port(s) (1 at back panel, teal blue, Type-A, 1 at mid-board) Intel® Z390 Chipset : 7 x USB 3.1 Gen 1 port(s) (4 at back panel, blue, Type-A, 1 x Type-C, 2 at mid-board) Intel® Z390 Chipset : 4 x USB 2.0/1.1 port(s) (4 at mid-board) Location/Type BIOS & Motherboard Manual Description XHC High Speed Identifier XHC Super Speed Identifier Back Panel above HDMI upper port Blue Type-A U31G1_5 HS05 SS05 Back Panel above HDMI lower port Blue Type-A U31G1_6 HS06 SS06 Back Panel USB 3.1 Gen 2 Teal Type-A U31G2_1 HS01 SS01 Back Panel USB 3.1 Type-C U31G1_C2 HS02^ SS02^ Back Panel below ethernet upper port Blue Type-A U31G1_7 HS07 SS07 Back Panel below ethernet lower port Blue Type-A U31G1_8 HS08 SS08 Onboard Connector USB 2.0 Left Header USB11 & USB12 HS11 & HS12 N/A Onboard Connector USB 2.0 Right Header USB3 & USB4 HS03 & HS04 N/A Onboard Connector USB 3.1 Header U31G1_9 & U31G1_10 HS09 & HS10 SS09 & SS10 Onboard USB 3.1 Gen2 Header U31G2_C3 HS13^ SSxx^ ^Unable to confirm as do not have any device to test on these ports.The motherboard manual and BIOS names for each port map perfectly to the XHC name so if this holds true for other ASUS 300 series motherboards (which it appears from my research that they do) then you probably can just build the .dsl file by hand.Building your own custom SSDT file as per Creating a Custom SSDT for USBInjectAll.kext; Start by grabbing SSDT-UIAC-ALL.dsl from RehabMan’s OS-X-USB-Inject-All repository. Delete all sections of the XHC configuration that do not match your XHC device-id. In this case the Z390 chipset is “8086_a36d”. You can confirm this with IORegistryExplorer. Look for /Root/Macmini8,1/AppleACPIPlatformExpert/PCI0@0/AppleACPIPCI/XHC@14 then it should be listed as IOName. Now decide which ports you want to enable and which you want disabled remembering that you can only have a maximum of 15. In my case I disabled all the USB 2.0 internal ports except for one which is connected to the Broadcom BCM943602CS for BlueTooth. I also disabled a few of the USB 3.1 ports that I don’t need. Just comment out the ports you don’t need so that if in future you want to make changes it is easy. Check that the USB Connector values are correct. USB2=0, USB3=3, internal=255 Now compile the SSDT-UIAC-ALL.dsl to SSDT-UIAC.aml In MaciASLFile: Save As, format: ACPI Machine Language Binary and place it in /EFI/ACPI/patched. USBInjectAll.kext will now enable only the USB ports you have configured. My file looks like the following; // SSDT-UIAC.dsl // // This SSDT can be used as a template to build your own customization // for USBInjectAll.kext for the ASUS TUF Z390M-Pro Gaming motherboard. // It would be very easy to modify this file for any ASUS Z390 motherboard. // // Ports have comments on each to help identify their location. // You can disable ports by commenting out their configuration. // To avoid errors, this file is best edited in MaciASL. // // Note: UsbConnector: USB2 = 0, USB3 = 3, internal = 255 DefinitionBlock ("", "SSDT", 2, "hack", "_UIAC", 0) { Device(UIAC) { Name(_HID, "UIA00000") Name(RMCF, Package() { "8086_a36d", Package() { "port-count", Buffer() { 26, 0, 0, 0 }, "ports", Package() { // "HS01", Package() // U31G2_1 - Back Panel USB 3.1 Gen 2 Blue Type-A // { // "UsbConnector", 3, // "port", Buffer() { 1, 0, 0, 0 }, // }, // "HS02", Package() // U31G1_C2 - Back Panel USB 3.1 Type-C // { // "UsbConnector", 3, // "port", Buffer() { 2, 0, 0, 0 }, // }, // "HS03", Package() // USB3 - Onboard Connector USB 2.0 Right Header // { // "UsbConnector", 0, // "port", Buffer() { 3, 0, 0, 0 }, // }, "HS04", Package() // USB4 - Onboard Connector USB 2.0 Right Header { "UsbConnector", 0, "port", Buffer() { 4, 0, 0, 0 }, }, "HS05", Package() // U31G1_5 - Back Panel above HDMI upper port Blue Type-A { "UsbConnector", 3, "port", Buffer() { 5, 0, 0, 0 }, }, "HS06", Package() // U31G1_6 - Back Panel above HDMI lower port Blue Type-A { "UsbConnector", 3, "port", Buffer() { 6, 0, 0, 0 }, }, "HS07", Package() // U31G1_7 - Back Panel below ethernet upper port Blue Type-A { "UsbConnector", 3, "port", Buffer() { 7, 0, 0, 0 }, }, "HS08", Package() // U31G1_8 - Back Panel below ethernet lower port Blue Type-A { "UsbConnector", 3, "port", Buffer() { 8, 0, 0, 0 }, }, "HS09", Package() // U31G1_9 - Onboard Connector USB 3.1 Header { "UsbConnector", 3, "port", Buffer() { 9, 0, 0, 0 }, }, "HS10", Package() // U31G1_10 - Onboard Connector USB 3.1 Header { "UsbConnector", 3, "port", Buffer() { 10, 0, 0, 0 }, }, // "HS11", Package() // USB11 - Onboard Connector USB 2.0 Left Header // { // "UsbConnector", 0, // "port", Buffer() { 11, 0, 0, 0 }, // }, // "HS12", Package() // USB12 - Onboard Connector USB 2.0 Left Header // { // "UsbConnector", 0, // "port", Buffer() { 12, 0, 0, 0 }, // }, // "HS13", Package() // Unknown // { // "UsbConnector", 3, // "port", Buffer() { 13, 0, 0, 0 }, // }, // "HS14", Package() // Unknown // { // "UsbConnector", 3, // "port", Buffer() { 14, 0, 0, 0 }, // }, // "SS01", Package() // U31G2_1 - Back Panel USB 3.1 Gen 2 Teal Type-A // { // "UsbConnector", 3, // "port", Buffer() { 17, 0, 0, 0 }, // }, // "SS02", Package() // U31G1_C2 - Back Panel USB 3.1 Type-C // { // "UsbConnector", 3, // "port", Buffer() { 18, 0, 0, 0 }, // }, // "SS03", Package() // Unknown // { // "UsbConnector", 3, // "port", Buffer() { 19, 0, 0, 0 }, // }, // "SS04", Package() // Unknown // { // "UsbConnector", 3, // "port", Buffer() { 20, 0, 0, 0 }, // }, "SS05", Package() // U31G1_5 - Back Panel above HDMI upper port Blue Type-A { "UsbConnector", 3, "port", Buffer() { 21, 0, 0, 0 }, }, "SS06", Package() // U31G1_6 - Back Panel above HDMI lower port Blue Type-A { "UsbConnector", 3, "port", Buffer() { 22, 0, 0, 0 }, }, "SS07", Package() // U31G1_7 - Back Panel below ethernet upper port Blue Type-A { "UsbConnector", 3, "port", Buffer() { 23, 0, 0, 0 }, }, "SS08", Package() // U31G1_8 - Back Panel below ethernet lower port Blue Type-A { "UsbConnector", 3, "port", Buffer() { 24, 0, 0, 0 }, }, "SS09", Package() // U31G1_9 - Onboard Connector USB 3.1 Header { "UsbConnector", 3, "port", Buffer() { 25, 0, 0, 0 }, }, "SS10", Package() // U31G1_10 - Onboard Connector USB 3.1 Header { "UsbConnector", 3, "port", Buffer() { 26, 0, 0, 0 }, }, // "USR1", Package() // { // "UsbConnector", 255, // "port", Buffer() { 15, 0, 0, 0 }, // }, // "USR2", Package() // { // "UsbConnector", 255, // "port", Buffer() { 16, 0, 0, 0 }, // }, }, }, }) } } //EOF Now you should be able to perform a successful install of Mojave. Once you are up and running, copy the EFI folder from your USB to the EFI partition on your SSD/HDD and you should be good to go.iMessage, iCloud and FaceTime:If you get errors enabling these services, you can try this simple repair guide from Hackintosher to get up and running.Files:If it helps I have uploaded all my config files to Dropbox so you can see what I did.If you copy my config.plist file, be aware that I have removed the following keys; SerialNumer SmUUI BoardSerialNumber Memory You will need to generate these keys for yourself. Good Luck!1 point
-

Version r2922
131,493 downloads
Enoch Latest revision of my Chameleon bootloader branch. Not able to boot AFPS yet.... Please don't upload it on other servers and don't repack it, thank you. - Installer PKG - Binaries format (Manual install) Please don't upload it on other servers and don't repack it, thank you. Chameleon bootloader credits goes to Chameleon Team http://forum.voodooprojects.org Changelog: http://forge.voodoop...e/changes/HEAD/ This revision of Enoch contain the upcoming FileNVRAM revision 1.1.5 (RC8) Credits to Micky1979 Language Translation: For on-line Chameleon language package resource edit >> Pootle Pls translate/complete it. Link here on InsanelyMac (Italian only): Enoch Bootloader Enjoy ErmaC1 point -
Symlinks work on the OS level so there shouldn't be any need for me to do anything. Maybe you need to make a symlink for /Users/mnfesq/Downloads also? EDIT: I read your update. Glad you got it working1 point
-
It turns out that I had created symbolic links and not actual aliases. I tried deleting the link I had and creating a new link. After that, the kext updater worked fine. Not sure what that was about but thanks for the reply.1 point
-
The reason it auto selects MacPro4,1 is because it’s the first in the list, I don’t have the app checking against system SMBIOS that the app is being ran off of, but it’s not a bad idea.I will look into that, thanks for the report. You can always open a issue on github under the app repo.1 point
-
Sei il numero 1 Quando hai tempo... Tranquillo Hai già fatto tanto (per la seconda volta)1 point
-
Definitely sounds the better option then, will update guide. Will also test later that it does not interfere with MacOS installation. Cheers1 point
-
Then I won't use it either. Something I have discovered is I've got a load of rgb corsair bits and I have found that having erp enabled in the bios is much much better as when I power off the system it cuts the power to all USB devices properly enabling all my rgb {censored} to shut off and my USB audio device to shut down, however if i have it disabled then my keyboard and mouse's rgb lighting freak out after shutdown and my USB audio device stays on. Same thing in windows so I think erp enabled is defo the correct choice of the two buddy.1 point
-
I had installed, it feels good.1 point
-
No, the ports showing a device name indicate a device plugged into the port. The green means at some point it had a device plugged into the port. The green highlighting is to help you keep track of which ports are active and which ports are not active. Once you have identified all the active ports, delete the rest.1 point
-
Here is ... EFI 2.zip But it is not for uefi laptop, it is for old style bios desktop MB with Nvidia card and you may use samples from here https://github.com/acidanthera/OpenCorePkg/tree/master/Docs1 point
-
ola... ok tambem com rx580 c.frio
 1 point
 -
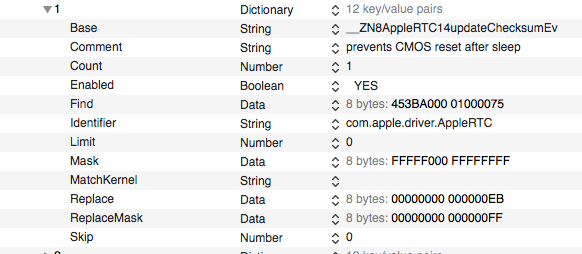
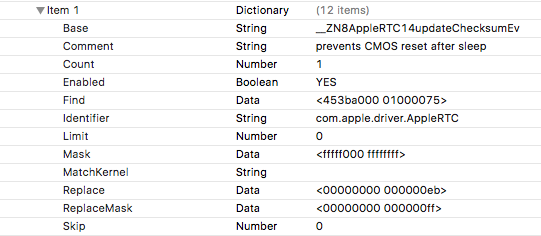
the most important ACPI patches for my hardware 1) HPET must be turned ON (_STA=0x0F), for example Device (HPET) { Name (_HID, EisaId ("PNP0103") /* HPET System Timer */) // _HID: Hardware ID Name (_STA, 0x0F) // _STA: Status Name (_CRS, ResourceTemplate () // _CRS: Current Resource Settings { IRQNoFlags () {0,8,11,12} Memory32Fixed (ReadOnly, 0xFED00000, // Address Base 0x00000400, // Address Length ) }) } 2) method _PTS does nothing if Arg=05 (Shutdown) Method (_PTS, 1, NotSerialized) // _PTS: Prepare To Sleep { If ((Arg0 != 0x05)) { //all the OEM _PTS code here: PTS (Arg0) WAKP [Zero] = Zero WAKP [One] = Zero WSSB = ASSB /* \ASSB */ WOTB = AOTB /* \AOTB */ WAXB = AAXB /* \AAXB */ ASSB = Arg0 AOTB = Zero AAXB = Zero } } 3 block AppleRTC writes to bytes 0x58, 0x59 (CMOS checksum) by patch or kext https://github.com/acidanthera/RTCMemoryFixup
 1 point
 -
bought this motherboard based on your guide and successfully have my first Hackintosh - thank you!!1 point
-
I'm completely new on OC, you may need help from others too. But i forgot to mention NullCPUPowerManagement.kext, that need to be deleted, as you're using your proper DSDT, extract your CPUpm SSDT, add plugin type, and copy it to the ACPI folder.1 point
-
I think you're missing some drivers, as HfsPlus, and the config.plist have to be cleaned from unused. The boot file not folder also need to be deleted maybe, I think it cause conflict with OC as its clover? In my case, these settings are primordial to let the laptop to boot, and do not know how to add them into the config:1 point
-
@carlo_67 For FX try injecting this kext, https://www.dropbox.com/s/a751p6tz3shc125/XLNCUSBFix.kext.zip?dl=01 point
-
An excellent piece of kit every Tosher should have in his bag of tricks - I could have done with this back in my Snow Leopard days, back then I had more crashes than Ayrton Senna1 point
-
Why not work together with the guy who made Clover Configurator and help him make it better? We seem to be really good at pointing out flaws rather than coming up with solutions. I'm sorry if this came out rude. But if the amount of people asking for help with Clover Configurator is no indication of how much people want such a tool, then I don't know what is. I get it that this is not the place to ask for help regarding 3rd party tools. But considering there is no official tool for that, made by the same people who made Clover itself, people who obviously know everything about it, then what choices do regular people have? Editing the plist manually (in Sublime, for example) is definitely doable, but I wouldn't call that user-friendly. Not to mention, in case you want to add something, you need to know what that is (which is not obvious), where and how to add it. So having all the possible options laid out nicely in the UI is definitely a plus. And, sorry to say this but Clover Configurator did a better job of keeping up with the changes in Clover itself than Clover Wiki page. So, unless you follow up with everything that's changing in Clover, you won't know what options do you have. And please don't suggest reading through the entire Clover Changes thread just to see that. Nobody's got time for that. PlistEdit Pro is another good option to edit plists. But it also doesn't give you options on what you can add. It only reads what's already saved on the plist. So..again, you need to know what you're looking for, and add it correctly. Which most people won't know. Same as Xcode. Which, if you're not developing anything (as a regular user), you don't need it. Not to mention it's taking a lot of space and it's a pain in the rear to remove. So I wouldn't recommend this just for editing plists. What I'm trying to say (and I see this with a lot of developers) is that what's very comfortable for you to use (cause you're used to it, you probably do this every day, and you have plenty of experience with it) isn't the same for other people. I would say most people. If you need an engineering degree to use a tool, then not many people will. Simply because most people are not engineers. That's all I'm saying.1 point
-
If it doesn't work in Windows even then I would assume you have a more fundamental problem than an SSDT will address. I'm pretty sure I've seen threads where others are using an Apple TB display successfully, but I can't be of any help. You've done already what I would recommend for MacOS. Your screenshot of the IOreg looks fine, so I would try getting it to work in Windows first. Perhaps a BIOS setting, or a different motherboard slot? Thunderbolt on a hackintosh is just PCI-e detection--not true Thunderbolt. So while those sections from the newer Mac models you are discussing certainly matter, they will need to be part of a completely different approach.1 point
-
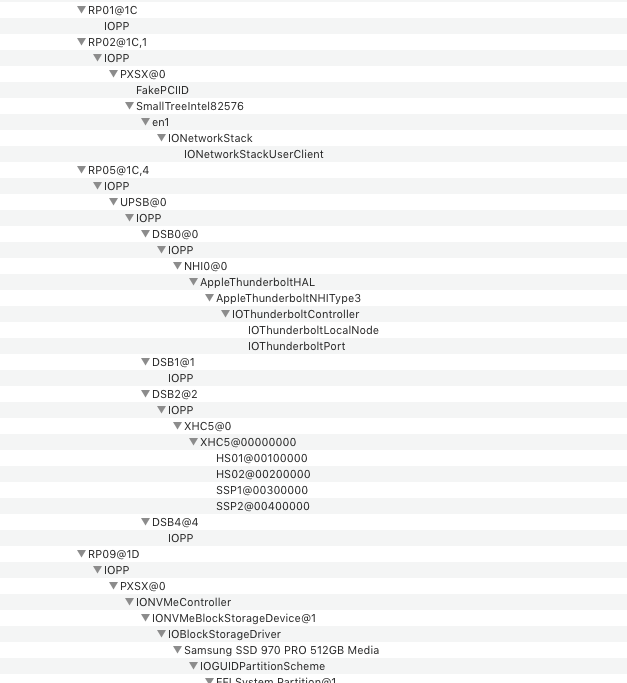
Thank you for the response @maleorderbride Of course, I've routed my video card's DP out to DP input of the motherboard. I've properly implemented the TB SSDT accordingly. In my case it is located on PCI0.RP05. I'm able to see UPSB, DSB0 and NHI on the tree, as well as XHC5 USB3.1/TB hub in IOReg (screenshot attached). Btw, USB-C storage devices work perfectly with good speeds when connected to those ports. I saw some succesful reports of running various UAD TB devices on Z390 Designare and even – LG 5K Ultrafine, which is modern TB3 display. Unfortunately, nothing happens when I connect my Apple Thunderbolt Display. I tried to plug it powered before PC boot, tried adjusting various BIOS settings, still no luck at all. Doesn't work in Windows 10, latest Ubuntu and macOS 10.14.2. But works perfectly with my Macbook Pro 2012 (just in case you might think it's faulty display). I haven't found anyone who could make Apple Thunderbolt Display work with Titan Ridge on PCH or as an add-in card. Starting to think if it is possible at all? It should be, because display worked perfectly with Alpine Ridge and some previous Thunderbolt capable motherboards. And in some cases I saw how it started to work right from the POST/Clover stage. Trying to solve this issue for more than a month. Already was in touch with Intel Thunderbolt team engineers (they say that it should work and Titan Ridge support all generations of TB devices), Gigabyte engineers (they say it is not validated to work, as Titan Ridge operates in native TB mode and works with only TB3 devices, while older devices would only work in legacy TB mode which is not longer supported). In the meantime, I was exploring the Macbook Pro 2018 SSDTs recently. This model also has the same Titan Ridge JHL7540 controller on PCH, which is also located on the PCI0.RP05. There's very interesting SSDT called "TbtOnPch". It contains a lot of various functions, including ACPI notifications, mode switching and many more. I think, that in all our TB SSDTs we tend to skip this things (and that's fine for most of use cases), while they may be very important for a complete Thunderbolt support implementation in our systems. There's also a very interesting fact I discovered while exploring the MBP 2018 IOReg: seems like it has both Titan Ridge (DSB0, NHI, 0x15ea(b)8086) and Alpine Ridge (UPSB, 0x15788086) chips inside. Maybe it was done by Apple in order to support some legacy devices. Just random thoughts. I just think that Apple Thunderbolt Display requires some special SSDT magic that may be there and that we currently don't have in our TB SSDTs. Unfortunately, I don't have such great ACPI skills to manually adapt and properly implement that table. In case you might be interested in having a look, I'm attaching the "TbtOnPch" and MBP's IOJones report. Also attaching my TB SSDTs as well (I have one more extended and one more minimal, based on yours). Just in case. Will highly appreciate any your thoughts on this. Thank you! iojones-mbp-dump.iojones tbt-on-pch.aml SSDT-Z390-DESIGNARE-TB3HP-V3.aml SSDT-TB3.aml
 1 point
 -
Attached is DSDT extracted from GA-EX58-UD4P F13 BIOS and has all d00d's patches applied. Rename it to DSDT.aml and see if it works for you. Note: Except AZAL to HDEF I kept all other device names unchanged in this DSDT, so if you look for Device (IDE1) it will show as Device (SATA) and Device (PRIM) will show as Device (PRT0) ...etc Also, this DSDT contains Device (LAN0) fix, so make sure to uncheck FixLAN option in Clover, or remove Device (LAN0) section from DSDT. GA-EX58-UD4P-F13-Fixed.aml1 point
-
The SSDTs are macOS independent! Your hypotheses now really start to be off the road . I don't believe in any different performance of both SSDTs (fully implemented or truncated) as when comparing the underlying simple basics (taken from SSDT-9.aml of the iMacPro dump) they are identical. You are creating lots of confusion with your contradicting statements and conclusions. BTW PCI snapshots for PCIE_4x1 and PCIE_16x2 should be identical if the SSDT has been properly implemented for each of the two slots. I don't know what you are intending to demonstrate by the above screenshot. What counts more are anyway the TB IOREG results. And they also should be the same for both slots! Alpine Ridge and TBEX 3 anyway work flawless also with my SSDT. I guess one should not only read your comments here but also those of hundreds of users in my respective threads in the other forum. This discussion here really starts to be totally off the road as already stated above. Else I would prefer to see clear statements from your side like... To improve SSDT-TB3HP change a.) code/ line.. b.) code/line because line a.) and line b.) in truncated SSDT-TB3HP implements code a.), code b.) ... Don't just intent to apply the codes, but rather try to improve what in your opinion is wrong in the codes. The community certainly will be grateful for all your efforts.. BTW... ASUS repeatedly confirmed in private conversations that the TTR needs a firmware update to fully work, when I addressed the wake on sleep issue with the ASUS Prime X299 Deluxe to them within a bunch of e-mails. They are not able to fix the issue within the ASUS Prime X299 Deluxe firmware , as based on their conclusions, there is no respective issue in the latter firmware. However, they have been able to reproduce the issue with the TTR on the ASUS Prime X299 Deluxe without using any of the two SSDTs you blame guilty for... The only part of the code that could affect sleep/wake would be Method (_PRW, 0, NotSerialized) // _PRW: Power Resources for Wake { Return (Package (0x02) { 0x69, 0x03 }) } which you can remove entirely without witnessing any difference..1 point
-
Note that with SMBIOS iMacPro1,1 the Nvidia Black Screen prevention has become obsolete. Thanks for the finding by @fabiosun. Thus NvidiaGraphicsFixup.kext can be removed from the /EFI/Clover/kexts/Other/ directory of your macOS USB Flash Drive Installer and 10.13 System Disk! Enjoy and have fun, KGP1 point