Leaderboard


Popular Content
Showing content with the highest reputation on 03/03/2021 in all areas
-
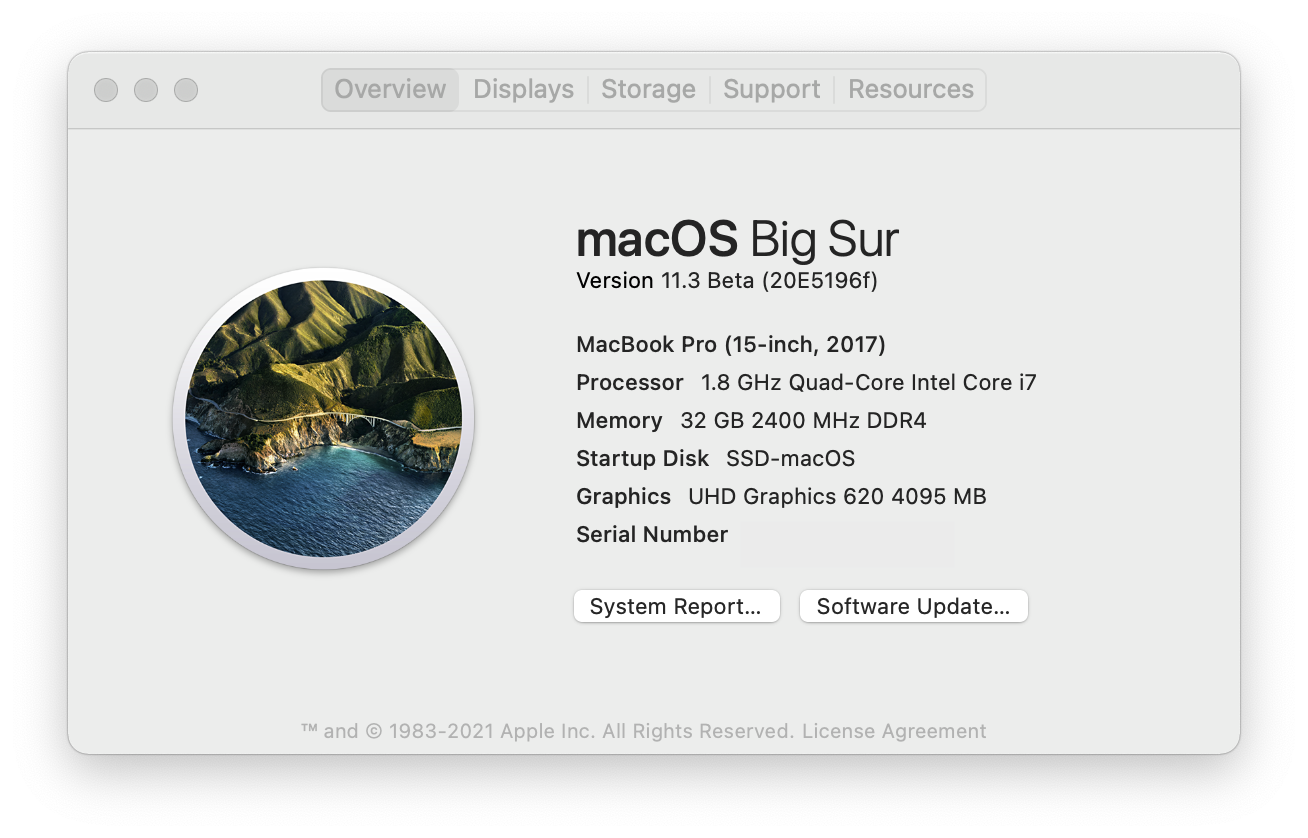
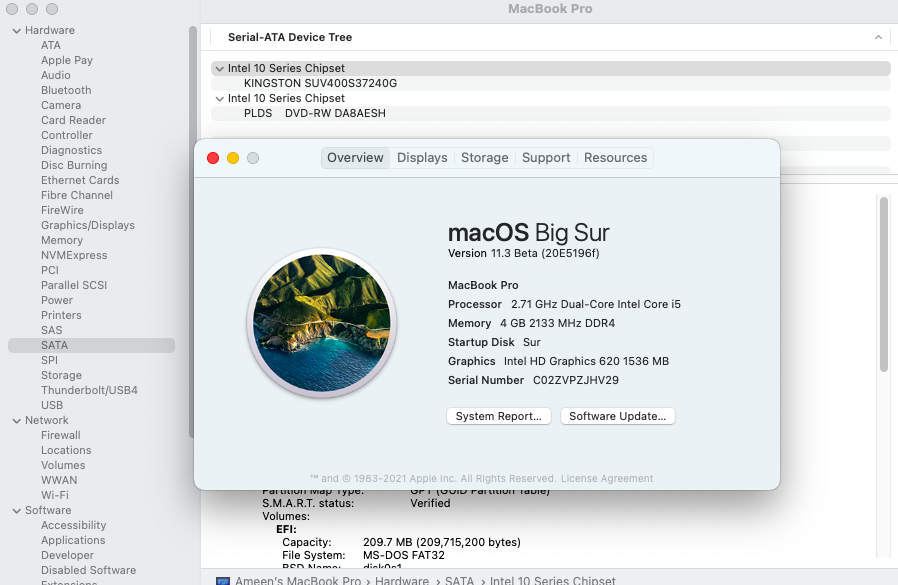
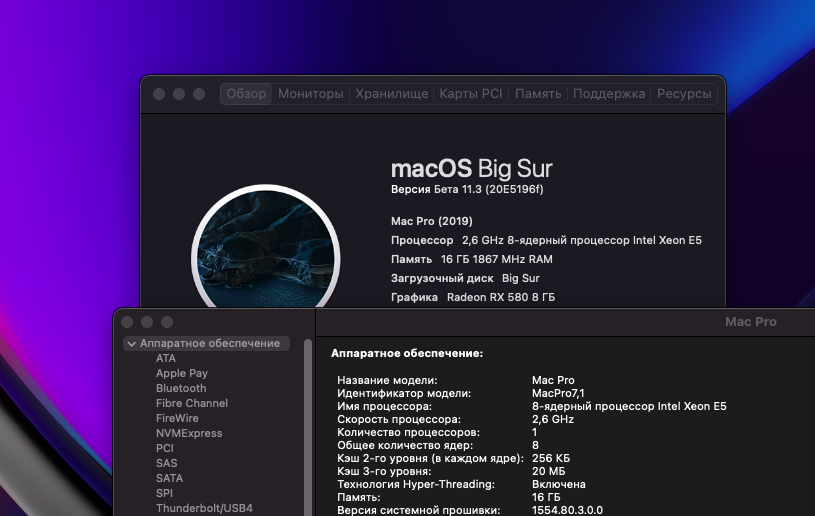
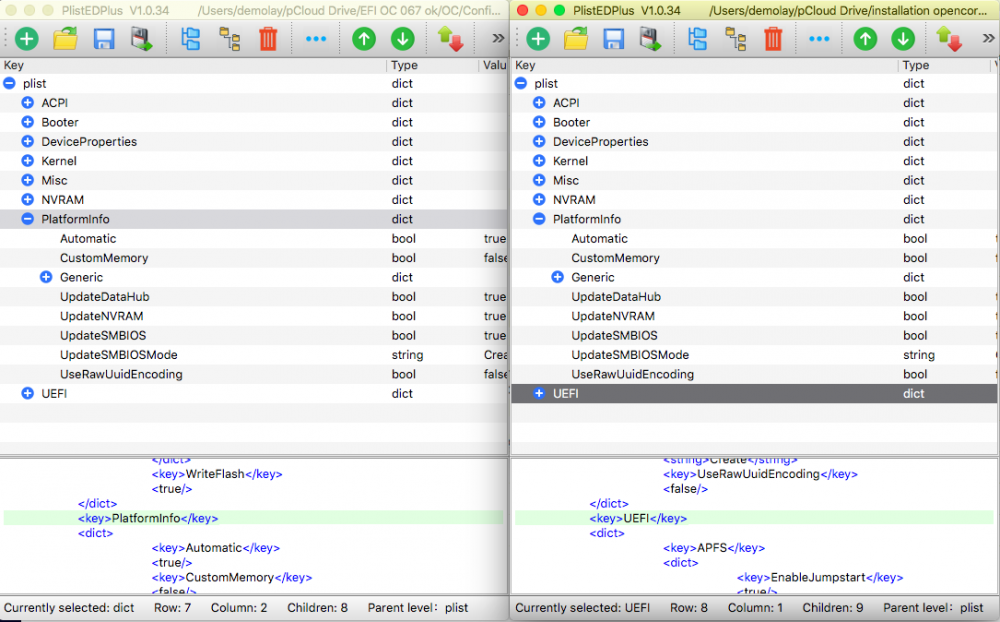
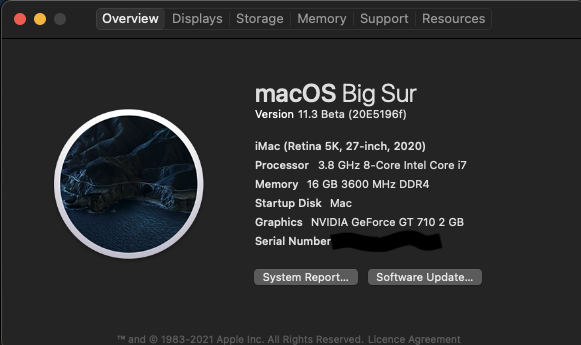
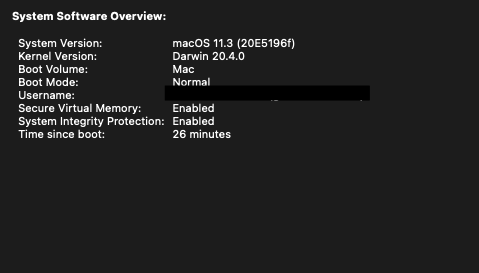
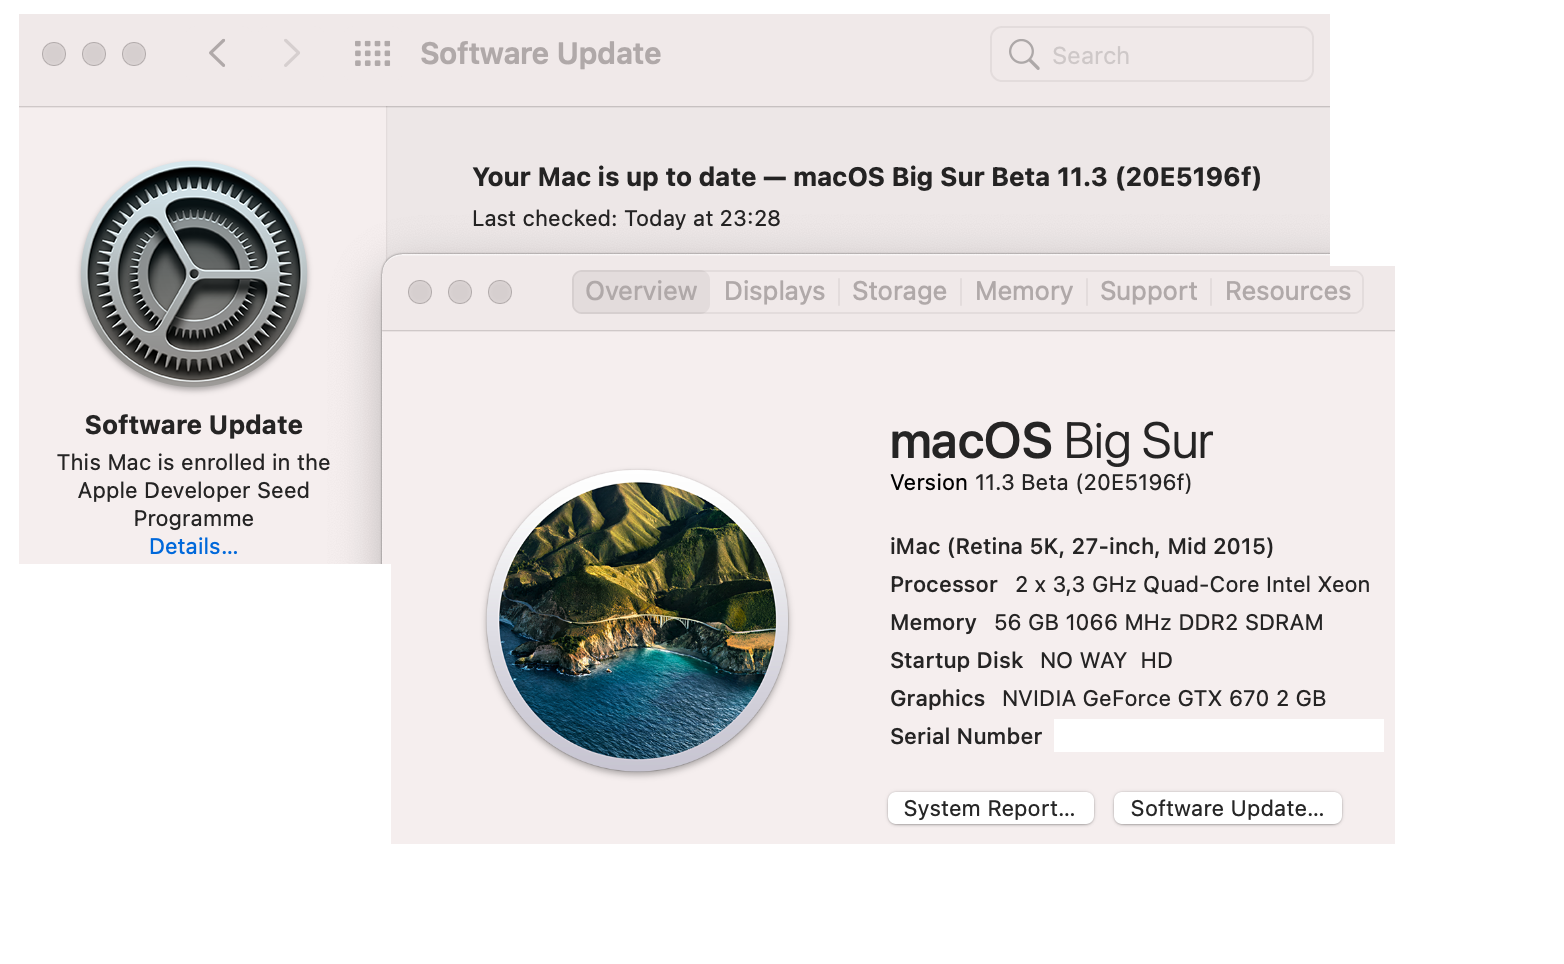
Apple has fixed Sata Controller on 11.3 beta 3 Now Sata controller shows correct information as a Intel 10 Series Chipset
 5 points
 -
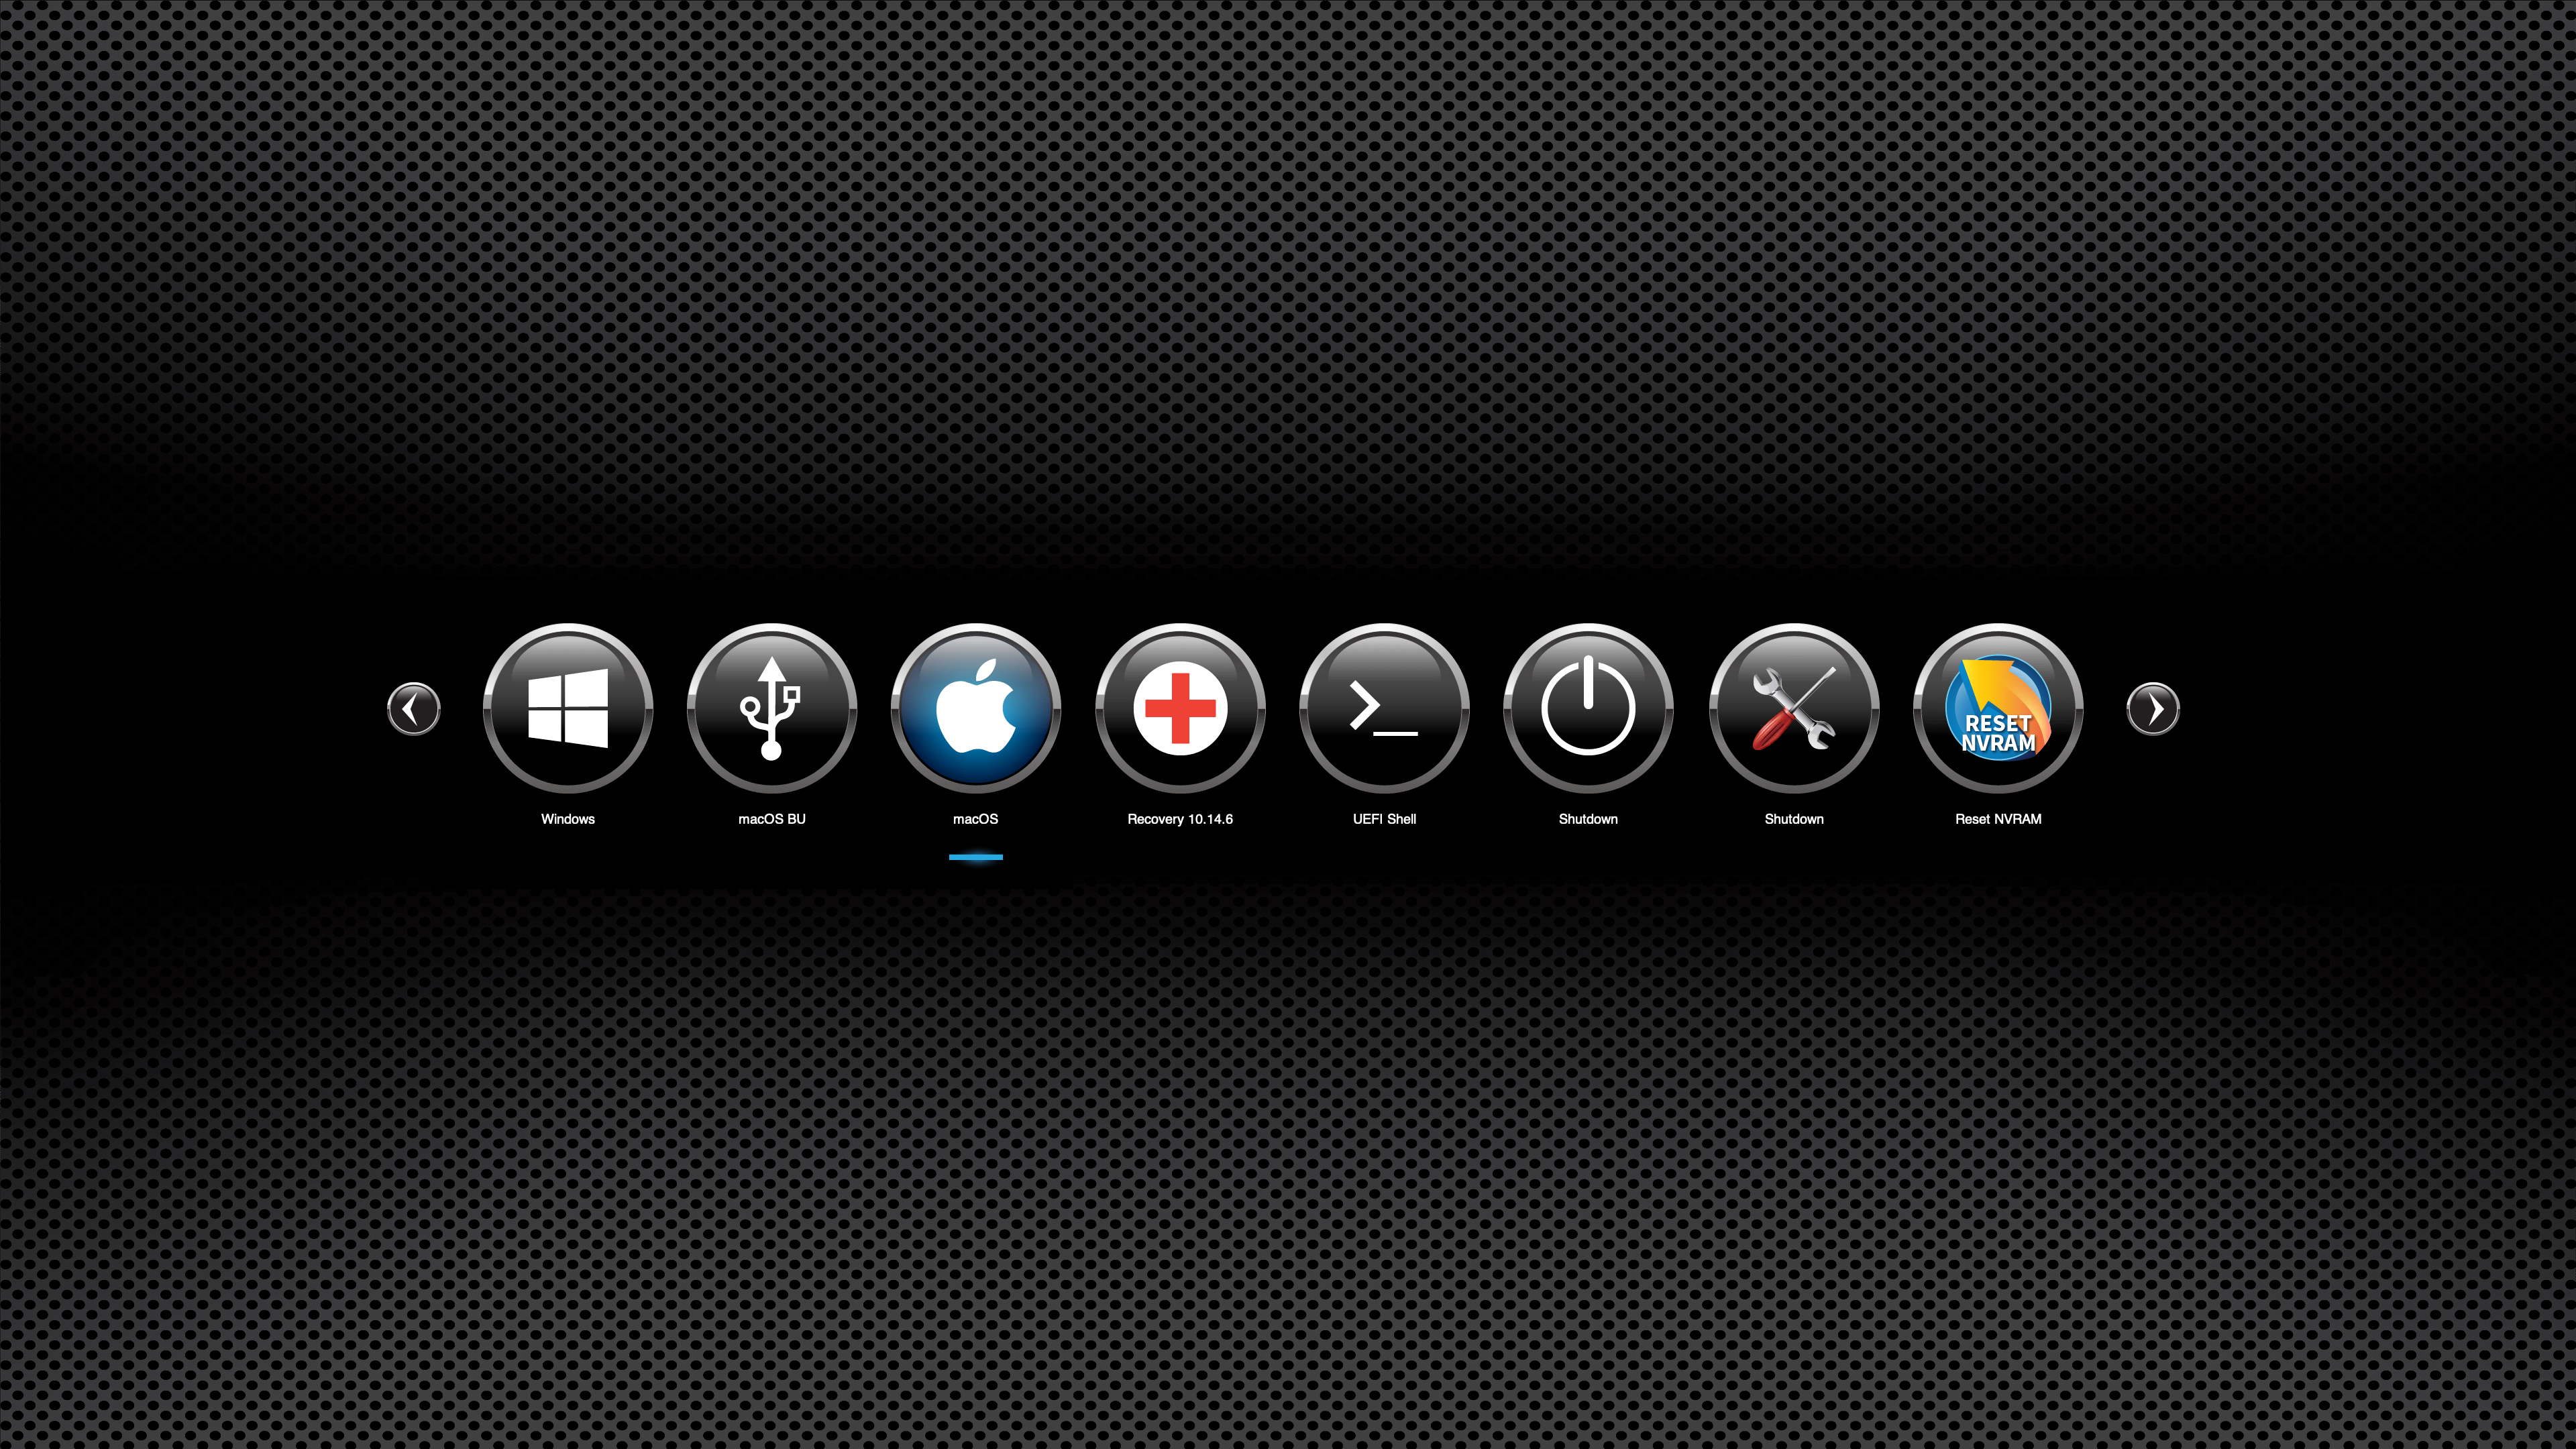
I've added a new icon set to my github. It's called BlueSteel (there are a few that do not appear in screenshot):
 5 points
 -
All right
 4 points
 -
X58 OpenCore 0.6.3 Legacy Update method Emulated NVRAM
 4 points
 -
Both suggestions worked Thank You @Riley Freeman and @iCanaro3 points
-
3 points
-
Magnifying Glass will do it...haha2 points
-
Point taken B - I won't be buying a metal detector in a hurry then.2 points
-
You might as well come over to my house and search my carpet for gold cos your have more chance of finding it then getting DRM working under 19,1 with Big Sucks lol2 points
-
100% agree with you B hence the reason I am quite happy to stay with Pro1.1 where everything just works but you know how it is - You get an itch that you just need to scratch and before you know it, you're looking around for a band-aid because you didn't know when to stop scratching.2 points
-
Nice work @pkdesign. Looks very clean That'll be down to naming the tool in the config.plist.2 points
-
20210304 * New: New Window * Optimized undo and redo * Other improvements The function of new window has been added, please download the latest version.2 points
-
Update no issue I see some body not able to Update SIP Disable so that's not an issue here
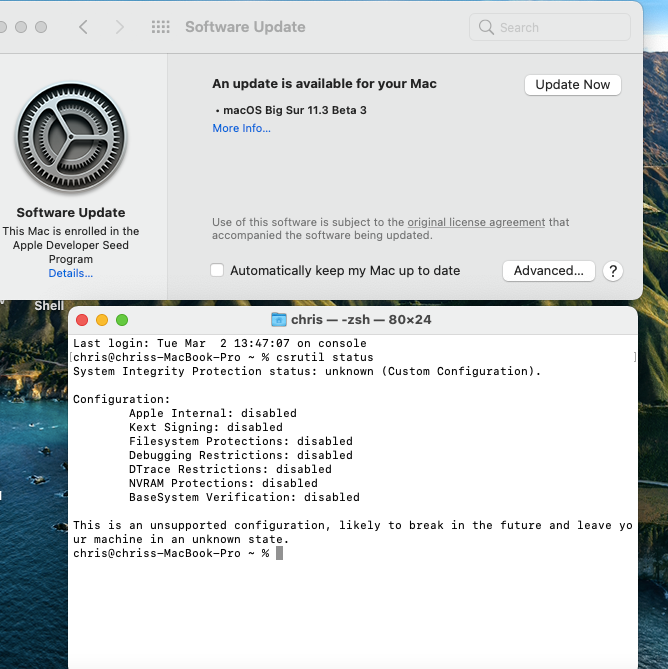 2 points
 -
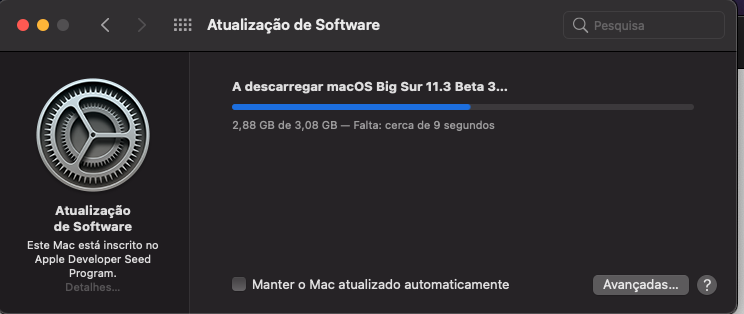
Done, I'm waiting for the next one, already...
 2 points
 -
it's working perfectly thank you again for all your intelligence
 1 point
 -
@AudioGod After reading these texts it makes me want to switch to a rig like yours just because of how well explained everything is1 point
-
Right on; my mention that I was on 19,1 must have gotten lost in the sheer volume of all that I had said about it. I'll consider how important the DRM is for me vs. generating new SN/MLB/UUID for 1,1 & re-registering paid apps. I had suspected it was a 1,1 vs 19,1 issue where unfairgva might work only with the former, thanks for confirming. Off to use my rig as currently configured for other stuff. Thanks again! UPDATE later that day: I bit the bullet & made the switch, and with the unfairgva=1 boot arg, your 1,1 EFI is working just fine for Netflix in Safari & TV in its own app. Thanks! UPDATE that weekend: I've moved back for now to SMBIOS 19,1, because anecdoctally (not rigorously tested), it seemed like turning the iGPU off and running absolutely everything destined for the screen through the dGPU was bringing up my power usage a little bit, Both sleep & Night Shift in ongoing testing were proving a bit more finicky under SMBIOS 1,1, than the reliability they have shown over the past few 19,1 AG EFIs. Not impossible to achieve automatically, just hard to predict under what conditions they might not work & have to be invoked manually, and Probably not on a personal mission to irk afficianados of The Hack, but rather to move the product stack further along toward their own silicon, the fruit company stopped selling any but "while supplies last" of the base model SMBIOS 1,1's today. I had already been a bit iffy about having a completely different generation/class of processor (Coffee Lake S) than what SMBIOS 1,1 said it had (HEDT Skylake); today's product announcement just pushed me back over toward what had been working well & more accurately emulates a "later model" (the 2019 19,1, rather than the 2017 1,1; that hopefully enjoys software support, in the form of putting anything out for it, for longer). Luckily, if you too are on SMBIOS 19,1, the "DRM Compatibility on macOS 11" heading near the bottom of this page https://github.com/acidanthera/WhateverGreen/blob/master/Manual/FAQ.Chart.md has defaults you can write that, as long as you've got unfairgva=1 in your boot args, show all the video I've tried in the TV app. Unlike the full support of DRM from the 1,1 SMBIOS, you can't play all music videos in the Music app. I haven't tried Netflix through Safari, because I'm fine with it through Firefox. Be aware though, writing & (if you decide to backstep from them) deleting defaults is a serious business & is outside the "Vanilla" Hack philosophy of prepping your machine in the EFI to function as much as possible like a real one of the target machines, without any other tweaks to the main OS or data parts of the drive's file system. Not only could it be considered bad form, but it could also mess up your other defaults if not done very carefully. Any editing of defaults you do is at your own risk. Upon completion of the above testing, I myself have put all my defaults back to what the system wrote for itself, meaning I've removed (very carefully, only) those defaults suggested by the page linked above. If I have a later need to watch a video on my rig, it's a lot quicker (as long as I am, again, very careful) to update the defaults to get them to play, than it is to switch back to SMBIOS 1,1. In the meantime, Vanilla.1 point
-
puoi citare qualsiasi cosa basta che non sia Iso, DMG e comunque una ridistribuzione di un installer o di un sistema MacOS.1 point
-
@eSaF Whats ODC? Is that some special form of OCD? LoL Shiki values are broken and no more under big sur so using 19,1 there is no fix available and by the sound of it the OC Devs have no intention of bringing shiki back to working. 1,1 and 7,1 are the only solutions for DRM and even then some people will need the unfair command to get it working properly. To much time and energy has been waisted on this topic now over the years and if I had the power on here I would ban any more use of this convo but I don’t so I can’t stop it but Zzzzzzzzzzzzzzzzzzzzzzzzzzz people.1 point
-
Not to dwell on the age old DRM problem on with some SmBIOS, I changed my Hack specs from a Pro1.1 where all aspects of streaming and watching videos and films in both Netflix, Amazon and Apple TV+ worked without any problems. I changed to an iMac 19.1 after upgrading the CPU and lost all of what I enjoyed with the pro1.1, trying all recommended methods to get DRM to work with the new 19.1 SmBIOS to no avail. The solution I adopted was to revert back to the Pro1.1 and after cleaning NvRAM etc and removing previous 19.1 attempts from iCloud, I am now back with full DRM contents on my rig again. The moral of my journey is if it is working satisfactorily leave well alone and find something else to break it will be a lot less painful and soul destroying. I still have the new iMac 19.1 EFI Folder on a USB Drive and I dare say the ODC urge in me will force me to have another dabble on a test disk but at the moment I am desperately suppressing that urge for the time being.1 point
-
Great job. Thanks I don't understand why there are two shutdown icons on the screenshot !1 point
-
updated my z490 hack but I have had to change over my GPU To my stand by card as though my own fault I got a water leak and its shorted out my water-cooled vega56. dose anyone know someone that repairs GPUS In the uk?
 1 point
 -
What happened to the bitbucket repo? It is not accessible.1 point
-
Well, I also did not know that specific tool icon can be placed next to the tool Thanks for the info1 point
-
Ohh boy let's go again... one more...
 1 point
 -
Hopefully you’ve got it working. Ps. We did discuss the Tools dir last year, but I guess that was a while ago now1 point
-
Hey @pkdesign I tried to give an explanation how to do this here: See if these examples help... Tools entries of config.plist <dict> <key>Arguments</key> <string>WarmReset</string> <key>Auxiliary</key> <true/> <key>Comment</key> <string>Perform warm reset</string> <key>Enabled</key> <true/> <key>Name</key> <string>WarmReset</string> <key>Path</key> <string>ResetSystem.efi</string> <key>RealPath</key> <false/> <key>TextMode</key> <false/> </dict> <dict> <key>Arguments</key> <string>ColdReset</string> <key>Auxiliary</key> <true/> <key>Comment</key> <string>Perform cold reset</string> <key>Enabled</key> <true/> <key>Name</key> <string>ColdReset</string> <key>Path</key> <string>ResetCold.efi</string> <key>RealPath</key> <false/> <key>TextMode</key> <false/> </dict> <dict> <key>Arguments</key> <string>Shutdown</string> <key>Auxiliary</key> <true/> <key>Comment</key> <string>Perform shutdown</string> <key>Enabled</key> <true/> <key>Name</key> <string>Shutdown</string> <key>Path</key> <string>ResetShutdown.efi</string> <key>RealPath</key> <false/> <key>TextMode</key> <false/> </dict> /EFI/OC/Tools/ Result1 point
-
il macOS ideale per tale hardware, con SMBIOS più confacente, a parer mio è high sierra; big sur ci va, ma non è il massimo. @SalSky tu con la EFI postata riesci ad avviare il tuo high sierra attuale?! ti copi e incollo che dice la guida di nonna doria, che ci prende abbastanza SSDTs required SSDT-EC-DESKTOP(opens new window) SSDT-IMEI(opens new window) Required for Sandy Bridge CPU with 7 series motherboard ie. B75, Q75, Z75, H77, Q77, Z77 Required Ivy Bridge CPU with 6 series motherboard ie. H61, B65, Q65, P67, H67, Q67, Z68 Once downloaded, place them into your EFI folder under EFI/OC/ACPI and head back to the install guide config.plist Setup Con una Z68 non serve legacy, si può usare UEFI e chi ha GPU AMD deve disabilitare il CSM1 point
-
@pkdesign That might well be the case but you should report that one over at the OC thread as it’s not meant to happen and you should be able to set it to default as it’s in the time frame for j137 (default) by the way Default = j137 and j137 = Default. (They are the same)1 point
-
Agreed, your English is fine buddy. In-fact your English is better then some peoples English including myself and I’m from London... Plus I suffer from IPad and IPhone word correction into the wrong word all the blooming time. Keep up the good work fella and well done.1 point
-
@miliuco -Your plain speak and easy to follow descriptive changes from one OC version to the next makes them easy to understand for noobs and all alike by simplifying some of the technical jargon so well done on that front.1 point
-
One of the more straight forward updates for a change.... Wait until 0.6.8 comes along and then your be back to having to do a 10 page essay on it... hehe1 point
-
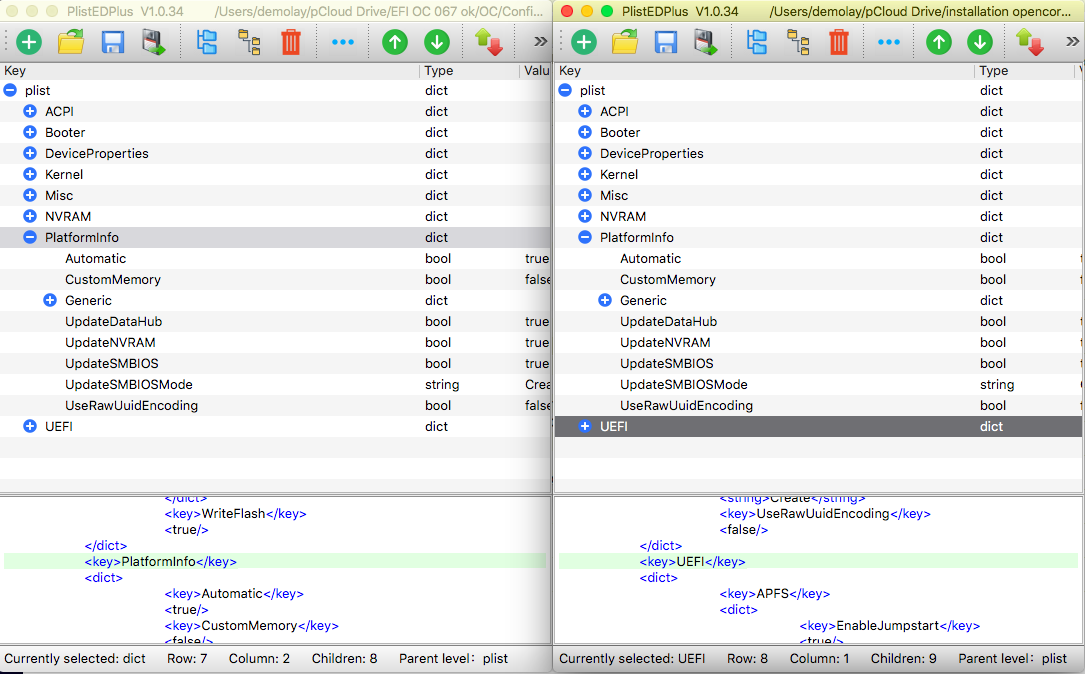
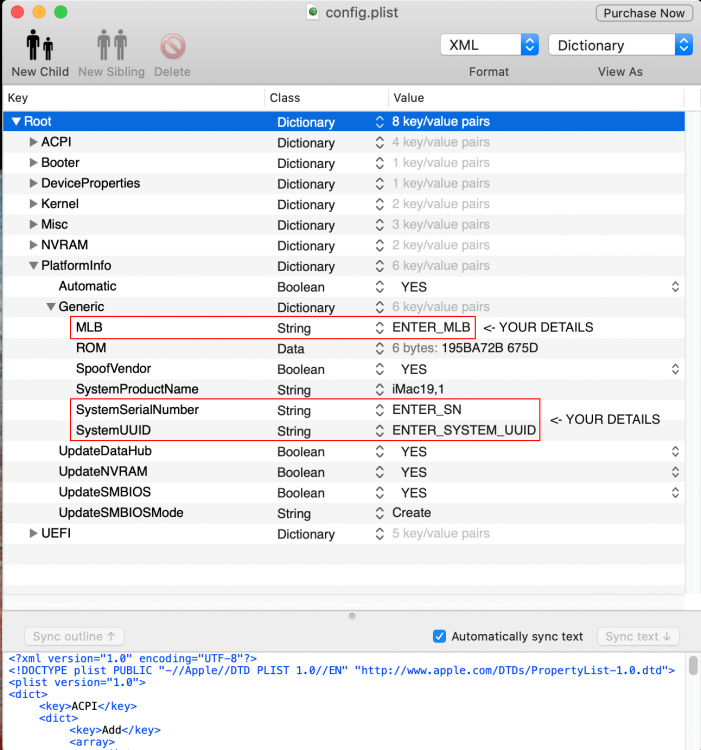
OpenCore EFI Update (Big Sur 11.3 Ready), 1st March 2021 The EFI has now been expanded and usb has been fully mapped to included the X570 Pro, Pro Wifi and Ultra. No changes to the EFI are needed for any of the above boards, Just add your info and away you go. If you want to use the internal intel wifi and bluetooth combo card then make sure you download and instal the correct kexts from here. https://github.com/OpenIntelWireless The EFI has now been updated to the my latest version. Changes made include, AMD Patches Updated for Big Sur 11.3 Compatibility Lilu 1.5.1 AppleALC 1.5.8, WhateverGreen 1.4.8, VirtualSMC 1.2.1, OpenCore Updated to Revision 0.6.7 (Big Sur 11.3 Ready), AppleMCEReporterDisabler.kext Dropped (No Longer Needed With Big Sur) USBMap is now universally correct for the X570 Pro, Pro Wifi and Ultra DRM For AppleTV is now fully working, OC 0.6.7 has corrected the SetupVirtualMap Quirk to work with X570 boards again allowing me to Enable it, Plus other minor tweaks and changes to the config. OpenCore EFI Update V0.6.7 - 01/03/2021 Gigabyte X570 Pro 067 EFI.zip - OpenCore v0.6.7, SMBios iMacPro1,1 IMPORTANT BIOS CHANGE Settings -> IO Ports -> Above 4G Decoding -> Disabled IMPORTANT NOTE - PLEASE DISABLE ABOVE 4G DECODING IN THE BIOS. I HAVE DISCOVERED A SERIOUS FLAW IN THE GIGABYTE BIOS EFFECTING THE GPU PERFORMANCE AND THE ONLY WAY TO FIX IT WAS TO DISABLE ABOVE 4G DECODING IN THE BIOS AND TO ADD THE BOOT ARGUMENT npci=0x2000 TO THE CONFIG.PLIST. Note 2 - I have decided to fully bypass OpenCore when booting into any other OS other then MacOS so now Windows and Linux no longer see your PC as a MAC and no parts of the ACPI, Patches, MacOS Details or anything else is loaded into any other OS. Note 3 - If your not using a 5700 XT or any other Navi GPU then remove agdpmod=pikera from the boot arguments. Note 4 - Do not try to carry across your old OpenCore Config.plist to the new EFI as to many changes have occurred in 0.6.6. Use the new Config.plist instead. For OpenCore Using PlistEdit Pro add your details by modifying the following Finally and as always, MAKE SURE YOU RESET YOUR NVRAM BEFORE BOOTING INTO THE NEW EFI. Additional Downloads PlistEdit Pro.zip - PlistEdit Pro (use to edit OpenCore)
 1 point
 -
I've continued to extend the Set3 icon range for the macOS drive images, this time with full out images in the icons.1 point
-
hola: ¿Como lo llevas? ¿lo solucionaste? Desde mi ignorancia aporto un granito de arena: https://dortania.github.io/Getting-Started-With-ACPI/#a-quick-explainer-on-acpi Controladores integrados (EC) Todas las máquinas Intel semi-modernas tienen un EC (generalmente llamado H_EC, ECDV, EC0, etc.) expuesto en su DSDT, y muchos sistemas AMD también lo tienen expuesto. Estos controladores generalmente no son compatibles con macOS y pueden causar pánico, por lo que deben ocultarse de macOS. Sin ECembargo, macOS Catalina requiere que esté presente un dispositivo con nombre , por lo que se crea un EC ficticio. Con las computadoras portátiles, el controlador integrado real aún debe estar habilitado para que la batería y las teclas de acceso rápido funcionen, y cambiar el nombre del EC también puede causar problemas con Windows, por lo que es preferible crear un EC falso sin deshabilitar el controlador integrado real. Mas tierra, digo arena: Nombro a Maldon en quien me baso y apoyo para hacer funcionar mi Big Sur, y él tiene preparado una imagen para instalar con un ssdt generico donde crea un device EC(unico) para que la instalación funcione: Device (_SB.EC)1 point
-
Playing around with [Windows] AngelCode Bitmap Font Generator + Candara font. I can confirm OpenCanopy actually hangs with "Do not include kerning pairs" option leave unchecked in Font Settings. Or will refuse to load if the font have font-size != 12px. Attached my bmf-config file + generated files. *Rename generated files .fnt to .bin and remove sequenced *_0.png suffix. Font.zip1 point
-
I finally got some time today to tick a few more icons off my list. Set3 icons have been updated with ResetSystemCold, ResetSystemFirmware, ResetSystemShutdown and ResetSystemWarm icons. These are to be used when using the ResetSystem.efi tool and you have it enabled in config.plist. The tool accepts different arguments; ColdReset, Firmware, Shutdown and WarmReset. For more information, see the OpenCore documentation. Usage: If you have ResetSystem.efi in OC/Resources/Tools directory then place the icon in OC/Resources/Tools directory and name it ResetSystem.efi.icns. Or maybe you wanted two icons visible and you duplicated ResetSystem.efi so renamed it ResetSystemWarm.efi and added that tool with associated argument to config.plist. In this case you would add ResetSystemWarm.efi.icns also. Important: As with any OpenCore tool, read the documentation first to make sure you understand what it does and how it can affect your system. I'll look at updating the SetBuilder script tomorrow.1 point
-
USB MAPPING GUIDE I just want to share my USBMap.kext and how to map them on Z390 Aorus Master in case someone might need it. MY SETUP : BACK PANEL : 4 USB2 ports and 6 USB 3 ports I left alone the 4 USB2 ports, since macos recognizes them no problem As for the 6 USB3 ports, i configured 3 ports for exclusively USB3 devices (meaning if i connect USB2 device on them, they wont be activated) and the other 3 as normal USB3 ports with backward compatibility. FRONT PANEL : 2 USB3 ports and 2 USB2 ports on my front panel For the 2 USB3 ports, I configured 1 for exclusively USB3 devices and the other one normally with backward compatibility. 2 USB2 ports works normally Note : Dont worry about the address, you dont need to patch or modify them. Their names (HS01,HS02,SS03,SS04, etc) are all you need to note The guide is for those who want to set it up differently. My USBMap.kext is attached just for reference. THE GUIDE So the process of USB mapping is essentially : Find out how many USB ports are available in IORegistryExplorer / Hackintool Find out how many USB ports are in your back panel and front panel Match the ports listed in IORegistryExplorer / Hackintool with the location on your PC front / back panel Select 15 ports out of them to put in info.plist inside USBMap.kext Edit info.plist inside USBMap.kext Finalise PART 1 - Find out how many USB ports are available in IORegistryExplorer / Hackintool Put USBInjectAll.kext in EFI/OC/Kexts folder Open your config.plist in EFI/OC folder with ProperTree.command app. Navigate to : Root Kernel Quirks XhciPortLimit and set it to TRUE 3. Restart 4. Open Hackintool. Select USB Tab. You will see your USB port list. 5. Alternatively, you can also use IORegistryExplorer app, select column view and navigate to : Root- iMac19,1- AppleACPIPlatformExpert- PCI0@0- AppleACPIPCI- XHC@14- XHC@14000000 Note : those start with HS are protocol for USB2, SS are protocol for USB3 devices. PART 2 - Find out how many USB ports are in your back panel and front panel Now list your USB ports on your PC. Just use paper and pen. PART 3 - Match the ports listed in IORegistryExplorer / Hackintool with the location on your PC front / back panel. Prepare a USB flashdisk and connect it to your USB port front and back panel ONE by ONE. Check with Hackintool which one turns to green. Make a note of their names. This way you can easily identify your PC USB ports. PART 4 - Select 15 ports out of them to put in info.plist inside USBMap.kext After you name all of them. CHOOSE which 12 ports you want to use! You will add these 12 names to your info.plist located inside USBMap.kext You need to include 3 more ports HS11, HS12, HS13 to your info.plist. They are the USB ports that is on your motherboard header. IF and ONLY IF you dont use your motherboard USB header at all, you can safely exclude them. Otherwise, if you have front panel, you should include them. PART 5 - Edit info.plist inside USBMap.kext Download any USBMap.kext Right click on USBMap.kext and select Show Package Contents Go to Contents folder, there should be info.plist file inside Copy the file to wherever you feel convenient to edit it Open Propertree.command app and open (Command + O) info.plist. You should see somebody else’s USB ports selection. Edit the names with your selections. 7. Save your editted info.plist and copy them back inside USBMap.kext/Contents folder replacing the original. PART 6 - Finalise Put the modified USBMap.kext inside EFI/OC/Kexts folder. Delete USBInjectAll.kext inside EFI/OC/Kexts folder. Open ProperTree.command app. Open (Cmd + O) file config.plist in EFI/OC folder. Navigate to : Root Kernel Quirks XhciPortLimit and set it to FALSE 5. Save your config.plist 6. Restart & it is done Hopefully, its useful for someone out there... cheers Correct me if i made any mistakes... Info.plist.zip USBInjectAll.kext.zip USBMap.kext.zip ProperTree-master.zip IORegistryExplorer.app.zip1 point
-
https://dortania.github.io/OpenCore-Install-Guide/extras/spoof.html1 point
-
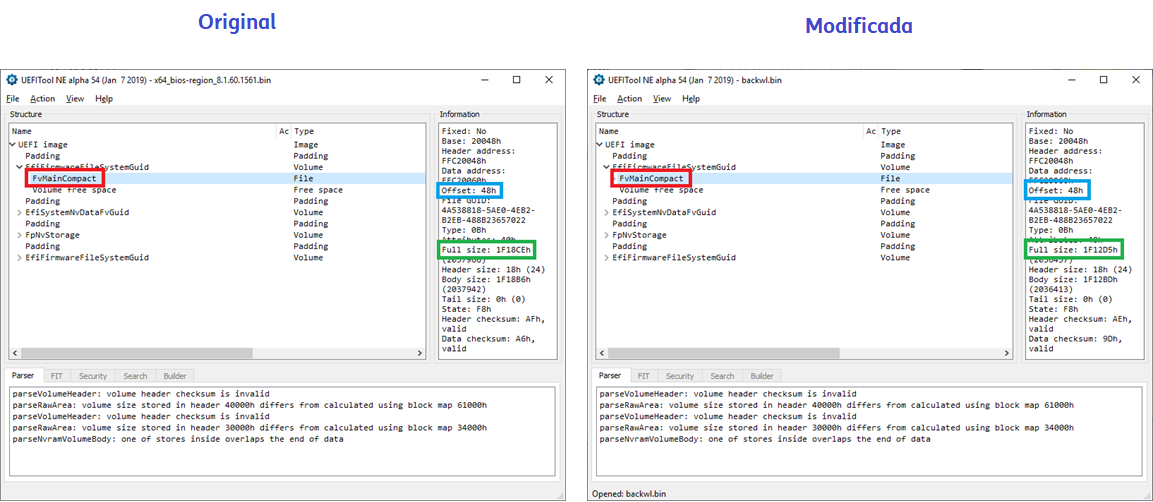
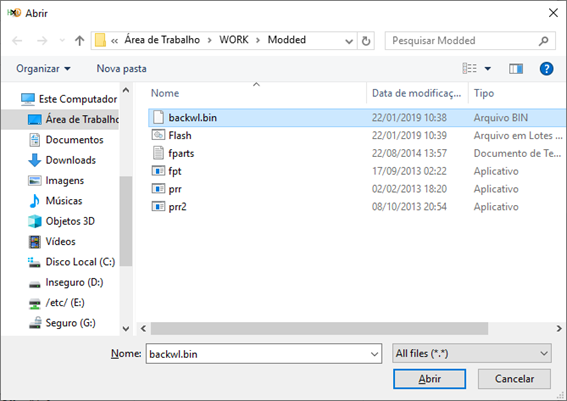
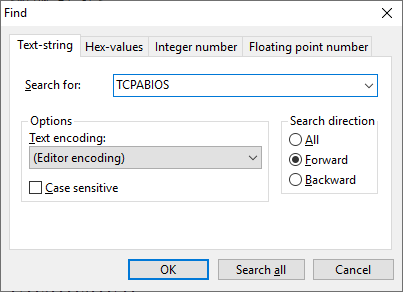
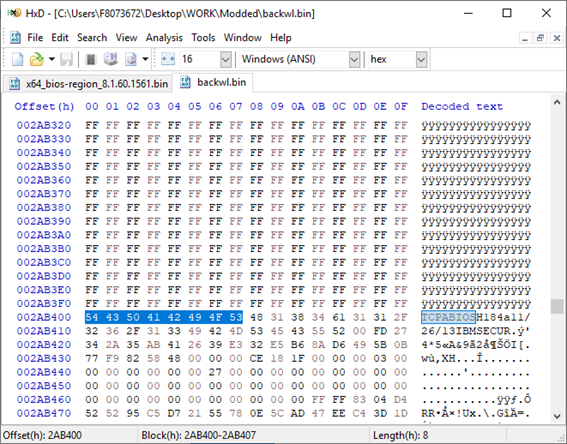
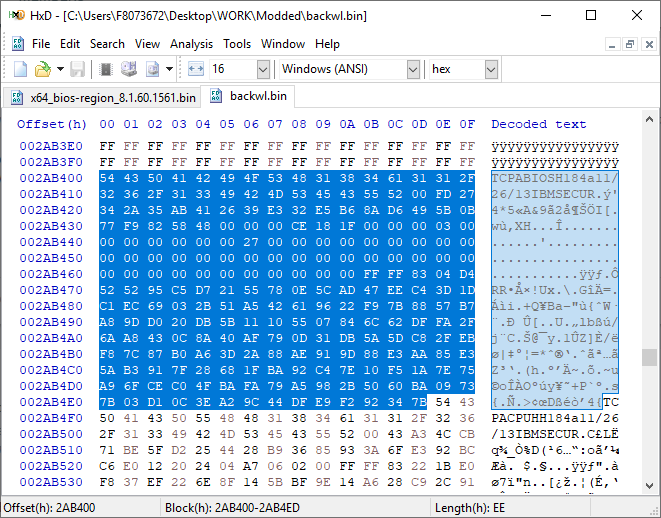
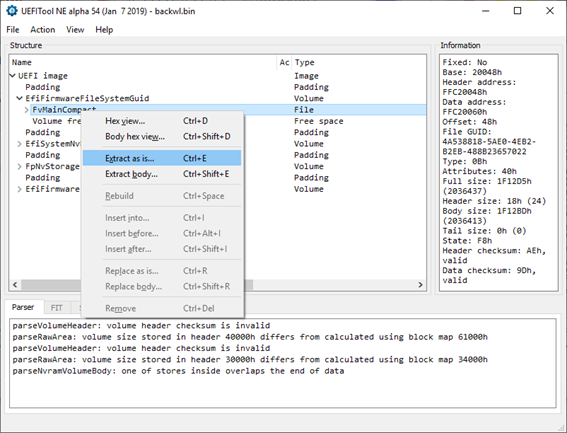
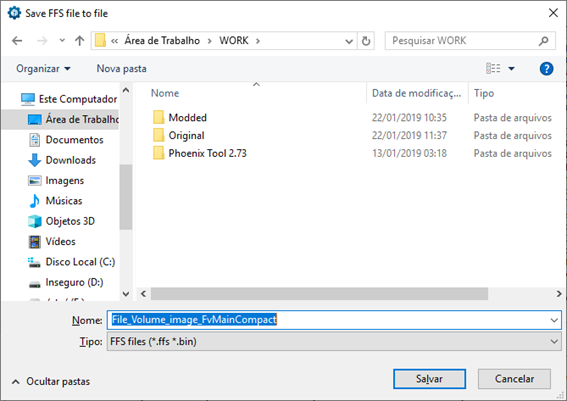
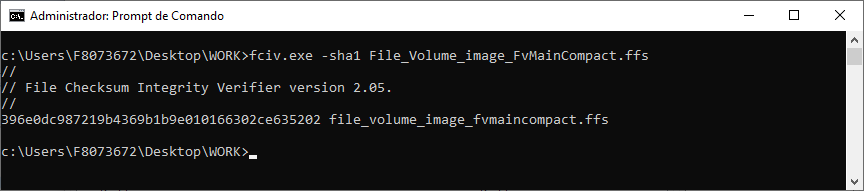
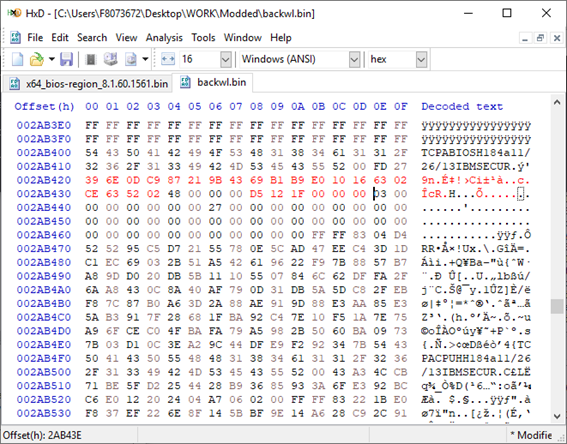
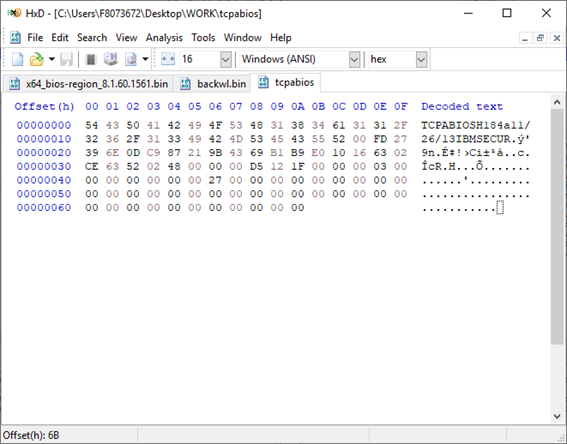
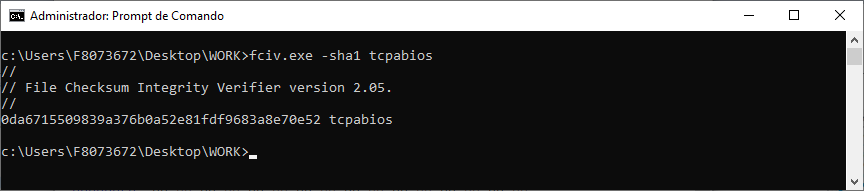
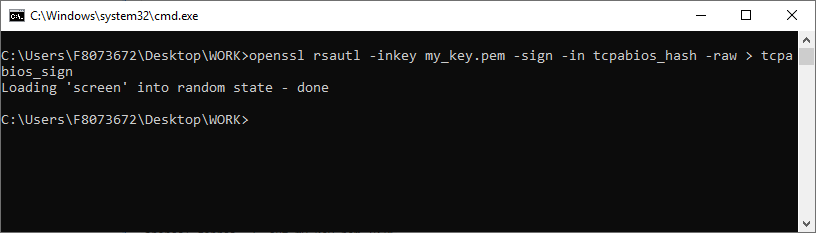
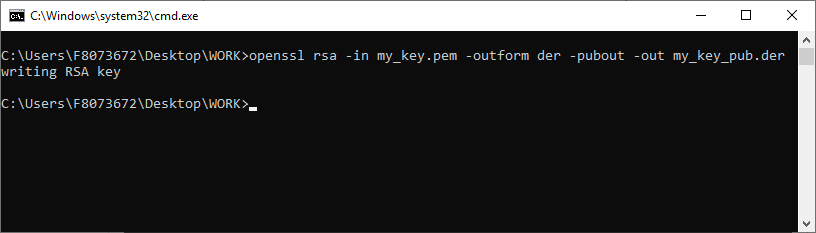
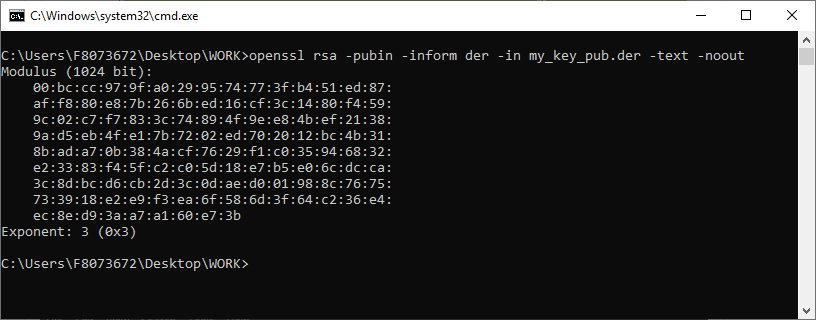
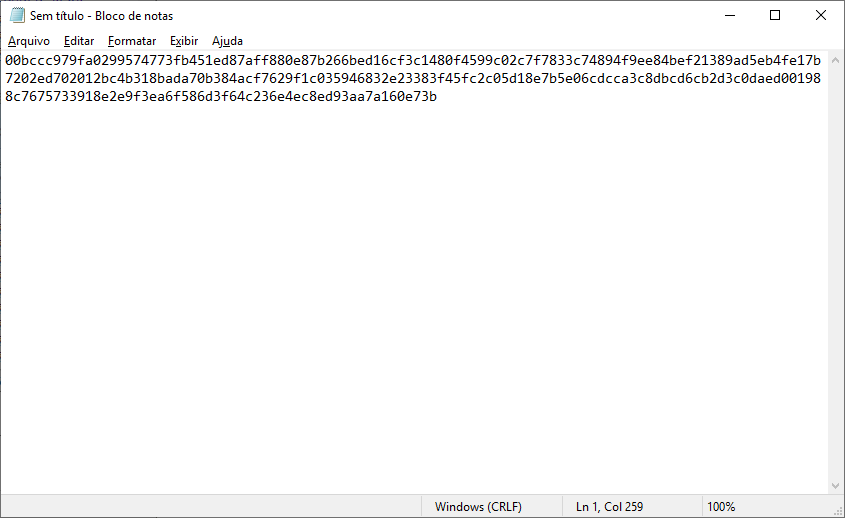
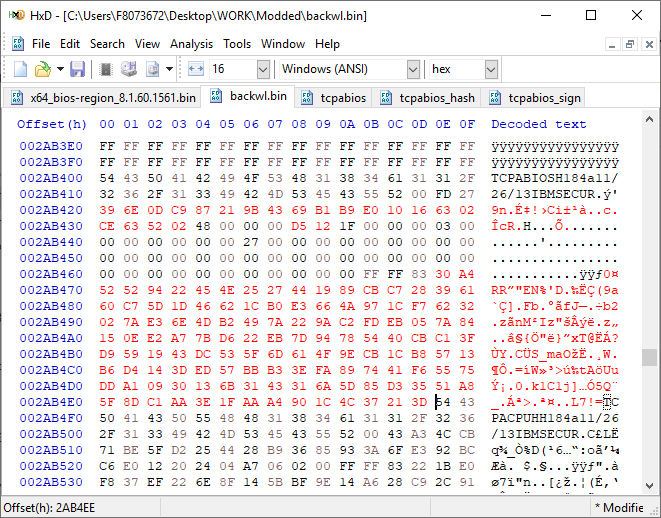
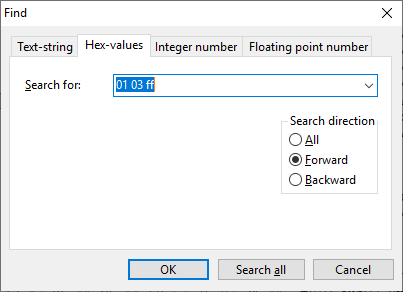
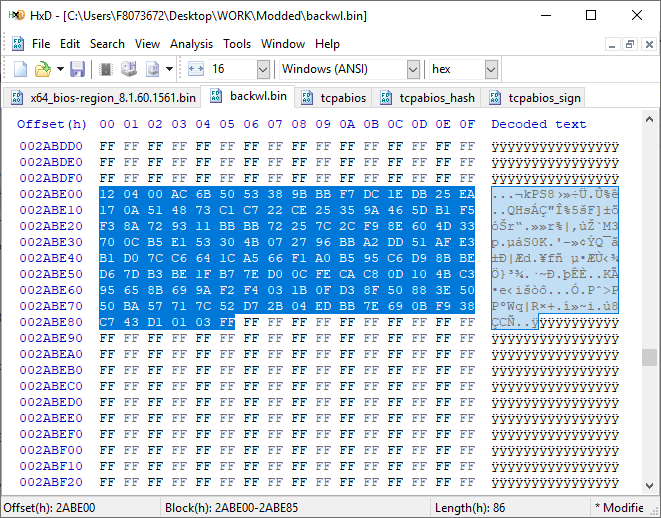
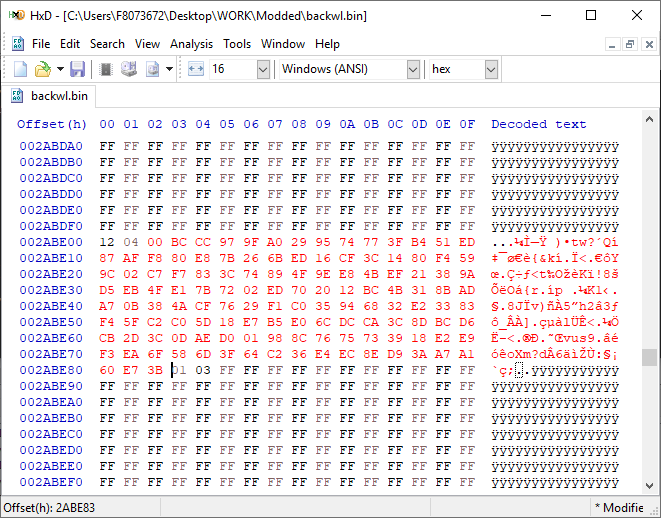
[GUIDE] Fix Insyde H2O BIOS signature (5 beeps on Lenovo) I recently bought a Lenovo L440 laptop to install the Mojave macOS and I replaced the wireless card with the DW1560 because the current one is not compatible. I discovered that there was a whitelist of enabled cards that manufacturers are adopting recently (in my case it uses a Phoenix Insyde BIOS H2O). I searched the BIOS Modding forums and found people who did the patch for me. But after replacing the BIOS I noticed that the computer keep beeping 5 times every time I boot. So, I went deeper into this issue and that's when I figured out how to solve it. Then I created this guide based on the information I found in some Russian forums. Preface When the BIOS integrity test fails, some Intel AMT functionality stops working and a sequence of 5 whistles is issued twice at boot. After modifying to remove whitelist (enable unauthorized WI-FI cards), unlock MSR 0xe2 (hackintosh), enable advanced menu, etc. the BIOS will not pass the integrity test causing this problem. This integrity check is done through the RSA signature of the BIOS block called TCPABIOS (more information below) with the public key in modulus 3 format also stored in the BIOS. This TCPABIOS block stores the checksums of each BIOS volume. What we will do is generate new checksum for those volumes that have been modified, generate a RSA (private and public) key pair, sign that block with the private key, and replace the public key. Tools needed - EFITool NE alpha 54: https://github.com/LongSoft/UEFITool/releases - HxD 2.1.0: https://mh-nexus.de/en/hxd/ - OpenSSL: http://gnuwin32.sourceforge.net/packages/openssl.htm (Download -> Binaries) - Microsoft File Checksum Integrity Verifier (FCIV.exe): https://www.microsoft.com/en-us/download/details.aspx?id=11533 Step by step Let's open the modified BIOS, locate the TCPABIOS block and understand its anatomy. 1. Open the BIOS with HxD (We will use the modded BIOS in the MyDigitalLife.com forum by the Serg008 user for the Lenovo B590 laptop in this guide) 2. Find the word TCPABIOS: 3. The block starts with TCPABIOS and ends before TCPACPUH 4. Anatomy: 54 43 50 41 42 49 4F 53 48 31 38 34 61 31 31 2F 32 36 2F 31 33 49 42 4D 53 45 43 55 52 00 FD 27 34 2A 35 AB 41 26 39 E3 32 E5 B6 8A D6 49 5B 0B 77 F9 82 58 48 00 00 00 CE 18 1F 00 00 00 03 00 00 00 00 00 00 00 27 00 00 00 00 00 00 00 00 00 00 00 00 00 00 00 00 00 00 00 00 00 00 00 00 00 00 00 00 00 00 00 00 00 00 00 00 FF FF 83 04 D4 52 52 95 C5 D7 21 55 78 0E 5C AD 47 EE C4 3D 1D C1 EC 69 03 2B 51 A5 42 61 96 22 F9 7B 88 57 B7 A8 9D D0 20 DB 5B 11 10 55 07 84 6C 62 DF FA 2F 6A A8 43 0C 8A 40 AF 79 0D 31 DB 5A 5D C8 2F EB F8 7C 87 B0 A6 3D 2A 88 AE 91 9D 88 E3 AA 85 E3 5A B3 91 7F 28 68 1F BA 92 C4 7E 10 F5 1A 7E 75 A9 6F CE C0 4F BA FA 79 A5 98 2B 50 60 BA 09 73 7B 03 D1 0C 3E A2 9C 44 DF E9 F2 92 34 7B Gray: Name and Block Information Red: Volume Information (Checksum and Header) Blue: Separation of the list of volumes and the block signature Green: Signature of the TCPABIOS block are the last 128 bytes List of Volumes: Each volume has the format: 00 FD 27 34 2A 35 AB 41 26 39 E3 32 E5 B6 8A D6 49 5B 0B 77 F9 82 58 48 00 00 00 CE 18 1F 00 00 00 03 00 00 00 00 00 (Prefix 3 bytes + checksum 20 bytes + offset 4 bytes + volume size 6 bytes + end delimiter 6 bytes) The volumes are enumerated and use the first byte in the prefix for this (00 FD 27), starting at 0. The BIOS used in this example has only one volume, but in the case of more than one volume, it would be: 00 FD 27 .., 01 FD 27 ..., 02 FD 27 ... - Checksum is SHA1 calculation of the volume. - Offset is the volume position within the BIOS. The bytes are inverted, in this case it would be 00 00 00 48, equals to 48h - Volume Size is also with the bytes inverted, then: 1F18CEh Then that's it. We need to correct this information (checksum, offset and size) 5. To extract the volumes open the BIOS with the UEFITool and see how to identify the volumes (our example there is only one volume if there were others would also be inside EfiFirmwareFileSystemGuid): In the original BIOS, circled in red we can see our volume. Note that in blue we have offset and green the size. Exactly as we checked up on HxD. In the modified BIOS we see that the size is different: Original: 1F18CEh Modified: 1F12D5h (we'll need this later) 6. Let's extract this volume to calculate the checksum by choosing the "Extract as is ..." 7. Use this command to get the checksum of this volume: fciv.exe -sha1 File_Volume_image_FvMainCompact.ffs Now we have the checksum that is 396e0dc987219b4369b1b9e010166302ce635202 8. Replace the information in the TCPABIOS block: Note that the volume size must have the bytes inverted, so if the total is 6 bytes and is 1F12D5h, becomes D5 12 1F 00 00 00 in place of CE 18 1F 00 00 00. If the offset is different, also perform the same process by inverting the bytes. Checksum change from 34 2A 35 AB 41 26 39 E3 32 E5 B6 8A D6 49 5B 0B 77 F9 82 58 to 39 6E 0D C9 87 21 9B 43 69 B1 B9 E0 10 16 63 02 CE 63 52 02 Do this for each volume in the BIOS. 9. Now we need to generate the checksum of the whole TCPABIOS block but without considering the last 131 bytes, that is to dismiss FF FF 83 + 80 bytes from the previous signature. Copy to a new file in HxD and save as tcpabios Use the command to generate the checksum of this block: fciv.exe -sha1 tcpabios Checksum of TCPABIOS block: 0da6715509839a376b0a52e81fdf9683a8e70e52 Create a new file in HxD and add 108 bytes with 00 and paste the checksum at the end and save as tcpabios_hash, thus: 10. Now let's generate the RSA private key with modulus 3: openssl genrsa -3 -out my_key.pem 1024 Sign the file tcpabios_hash: openssl rsautl -inkey my_key.pem -sign -in tcpabios_hash -raw > tcpabios_sign Now enjoy to generate the public key: openssl rsa -in my_key.pem -outform der -pubout -out my_key_pub.der And generate public key modulus 3: openssl rsa -pubin -inform der -in my_key_pub.der -text -noout Copy and paste the key into a text file to use soon. Remove all ":" and put everything on a single line, thus: 11. Open the tcpabios_sign file in HxD, copy the contents and replace the signature at the end of the TCPABIOS block: 12. Now let's locate the location of the public key in the BIOS and replace it. This key starts with 12 04 and ends with 01 03 FF and is after the TCPABBLK block. The key looks like this: 12 04 + 81 bytes + 01 03 FF. Search for 01 03 FF to locate more easily. Verify that before the 81 bytes have bytes 12 04 to make sure you found. Now substitute for the public key that was annotated in the text file previously, thus: Save and you're ready. Your BIOS is signed and ready.


 1 point
 -
OpenCore EFI Update (Big Sur 11.2 Ready), 2nd February 2021 The EFI has now been expanded and usb has been fully mapped to included the X570 Pro, Pro Wifi and Ultra. No changes to the EFI are needed for any of the above boards, Just add your info and away you go. If you want to use the internal intel wifi and bluetooth combo card then make sure you download and instal the correct kexts from here. https://github.com/OpenIntelWireless The EFI has now been updated to the my latest version. Changes made include, AMD Patches Updated for Big Sur 11.3 Compatibility Lilu 1.5.1 AppleALC 1.5.7, WhateverGreen 1.4.7, VirtualSMC 1.2.0 OpenCore Updated to Revision 0.6.6 (Big Sur 11.2 Ready), New OpenCanopy Icons USBMap is now universally correct for the X570 Pro, Pro Wifi and Ultra DRM For AppleTV is now fully working, Laggy Keyboard while using OpenCanopy has been corrected, Plus other minor tweaks and changes to the config. OpenCore EFI Update V0.6.6 - 04/02/2021 Gigabyte X570 Pro 066 EFI V2 040221.zip - OpenCore v0.6.6 V2, SMBios iMacPro1,1 IMPORTANT BIOS CHANGE Settings -> IO Ports -> Above 4G Decoding -> Disabled OPENCORE HAS CHANGED THE WAY THE BOOTSTRAP WORKS SO YOU WILL NEED TO RESELECT YOUR BIG SUR DISK (F12 DISK SELECT OR FROM WITHIN THE BIOS) AND THEN RESET YOUR NVRAM BEFORE BOOTING INTO THE NEW EFI FOR THE FIRST TIME, THIS IS VITAL. IMPORTANT NOTE - PLEASE DISABLE ABOVE 4G DECODING IN THE BIOS. I HAVE DISCOVERED A SERIOUS FLAW IN THE GIGABYTE BIOS EFFECTING THE GPU PERFORMANCE AND THE ONLY WAY TO FIX IT WAS TO DISABLE ABOVE 4G DECODING IN THE BIOS AND TO ADD THE BOOT ARGUMENT npci=0x2000 TO THE CONFIG.PLIST. Note 2 - I have decided to fully bypass OpenCore when booting into any other OS other then MacOS so now Windows and Linux no longer see your PC as a MAC and no parts of the ACPI, Patches, MacOS Details or anything else is loaded into any other OS. Note 3 - If your not using a 5700 XT or any other Navi GPU then remove agdpmod=pikera from the boot arguments. Note 4 - Do not try to carry across your old OpenCore Config.plist to the new EFI as to many changes have occurred in 0.6.6. Use the new Config.plist instead. 04/02/21 - I have done a small update to the 0.6.6 EFI adding new AMD Patches so its compatible with Big Sur 11.3. If you downloaded the EFI before the 4th then download the new V2 EFI and replace the old one. This way you will have no problems using Big Sur 11.3 now in beta form or when its released officially. For OpenCore Using PlistEdit Pro add your details by modifying the following Additional Downloads PlistEdit Pro.zip - PlistEdit Pro (use to edit OpenCore)
1 point
-
OpenCore EFI Update (Big Sur 11.1 Ready), 4th January 2021 The EFI has now been expanded and usb has been fully mapped to included the X570 Pro, Pro Wifi and Ultra. No changes to the EFI are needed for any of the above boards, Just add your info and away you go. If you want to use the internal intel wifi and bluetooth combo card then make sure you download and instal the correct kexts from here. https://github.com/OpenIntelWireless The EFI has now been updated to the my latest versions. Changes made include, AppleALC 1.5.6, WhateverGreen 1.4.6, OpenCore Updated to Revision 0.6.5 (Big Sur 11.1 Ready), OpenCanopy is Enabled as Standard, New OpenCanopy Icons SSDT-XHC has been rewritten and is now natively correct for the X570 Pro, Pro Wifi and Ultra USBMap is now universally correct for the X570 Pro, Pro Wifi and Ultra Plus other minor tweaks and changes to the config. OpenCore EFI Update V0.6.5 - 04/01/2021 Gigabyte X570 Pro 065 EFI 040121.zip 3.26 MB · 0 downloads - OpenCore v0.6.5, SMBios iMacPro1,1 PLEASE DON’T FORGET TO RESET YOUR NVRAM BEFORE BOOTING INTO THE NEW EFI FOR THE FIRST TIME, Note - If your not using a 5700 XT or any other Navi GPU then remove agdpmod=pikera from the boot arguments. Note 2 - Do not try to carry across your old OpenCore Config.plist to the new EFI as to many changes have occurred in 0.6.0. Use the new Config.plist instead. For OpenCore Using PlistEdit Pro add your details by modifying the following Additional Downloads PlistEdit Pro.zip - PlistEdit Pro (use to edit OpenCore)
1 point
-
Just a quick note and update for anybody that’s interested. I am going to change my motherboard over from the gigabyte X570 Pro to the X570 Ultra. As far as I can tell the EFI I made is spot on for the ultra board aswell bar the USBMap.kext so i Will expand the thread To include USB mapping for X570 Pro, Pro WiFi, Ultra and Elite and maybe even the X570 Master too. This will happen with the release of OpenCore 0.6.5.1 point


.thumb.jpeg.7082d67b3394c9399e80144027a7b397.jpeg)