Jump to content

Leopard on Series 7 NVIDIA nForce MCP + Intel CPU MOBOs


verdant
 Share

Installer Packages for nForce chipset MOBOs  

143 members have voted

  1. 1. Would you be willing to donate an amount of your choosing to Mysticus C* to enable him to continue making and updating nForce chipset + Intel CPU MOBO-focussed Kernel/Drivers Installer packages, Combo Updater Packages......possibly even a DVD......?

    • Yes, before new and/or updated packages are released
      22
    • Yes, after new and/or updated packages are released
      18
    • Yes, but only after I have used the new and/or updated packages successfully on my system
      60
    • Unsure, I may donate after I have used the new and/or updated packages successfully on my system
      38
    • No
      5
  2. 2. Level of Demand for Installer Packages for nForce chipset MOBOs

    • Would you like it if new and/or updated installer packages for nForce chipset + Intel CPU MOBOs were to be developed by an OSx86 forum member?
      103
    • Would you be willing to donate an amount of your choosing to such a developer using an nForce chipset + Intel CPU nForce MOBO?
      68
    • Would you like it if new and/or updated installer packages for nForce chipset + AMD CPU MOBOs were to be developed by an OSx86 forum member?
      27
    • Would you be willing to donate an amount of your choosing to such a developer using an nForce chipset + AMD CPU nForce MOBO?
      20
    • Do you have a DESKTOP nForce chipset MOBO?
      109
    • Do you have a LAPTOP/NOTEBOOK nForce chipset MOBO?
      13
  3. 3. Nature of donations offered

    • Would you prefer to donate hardware (in good faith on the basis of trust) acceptable to the developer, to enable him/her to build a system on which to develop the installer packages?
      21
    • Would you prefer to donate cash (in good faith on the basis of trust) to the developer to defray his/her upfront cost of acquiring a system on which to develop the installer packages?
      122


1,138 posts in this topic

Recommended Posts

wow, that looks great !


Yes, add the USB Fix , please


i have problem with it... my system will hang for a moment then all worked great.... hang again and than crashed....

The only thing that won´t work is my mouse.... keyboard and system worked in the background.


But now i have tried your combo update 10.5.5. ...

after the second installation (official apple-update) it restarts itself.... no chance to install the thirst patch :(

And now i´m trying install leopard again and again i have big problems..... maybe i should sell my nforce mainboard

and buy me a P35 Chipset Gigabyte Board... ?!


Next Problems is the nvidia geforce 8800GT Driver... but i will try your installer :) hope it works !

Link to comment
Share on other sites

Wow... all the time spent has finally paid off. Here it is 1:30 in the morning and I'm finally able to post my success story. First my specs, and then I'll get into what routes I took to finally get this puppy rollin.'


Specifications:


Board: EVGA 780i

CPU: Q6600 (all 4 cores smokin')

VIDEO CARD: EVGA 8800GTS

Graphics by NVIDIA:


Chipset Model: Graphics by NVIDIA

Type: Display

Bus: PCIe

PCIe Lane Width: x16

VRAM (Total): 512 MB

Vendor: NVIDIA (0x10de)

Device ID: 0x0600

Revision ID: 0x00a2

ROM Revision: NVinject 0.2.1

Displays:

FPD2485W:

Resolution: 1920 x 1200 @ 60 Hz

Depth: 32-bit Color

Core Image: Hardware Accelerated

Main Display: Yes

Mirror: Off

Online: Yes

Quartz Extreme: Supported

Rotation: Supported

Display Connector:

Status: No display connected


LAN: Started with onboard, then disabled onboard and replaced with a RTL8139 chipset ethernet card

SOUND: Onboard ALC888 Chipset (Alzalia Install Package will work, but I used the HDAPatcher v1.2 and found a dump file that you can download below)

SATA DRIVES: All functioning except my Blu-Ray Reader/Writer


I'm not sure what I left off, but that's okay; I'm just excited I was able to get it up and running. First of all I have to thank verdant, and Mysticus C* for the great information and help they've given to everybody. I read through these 11 pages and read through Mysticus C's guides on everything and now all is working. Here is the process I took.


I stumbled upon this thread by doing a search for getting the OSx86 project to work on 780i boards. I'd read numerous threads on people having success with the project, but had never really came across a thread dedicated to nvidia chipset/board owners. Guess I got lucky. So after stumbling upon it, I immediately downloaded the iAtkos 1.0ir3 release. Boy was I stoked.

First thing I did was adjust my BIOS settings to the following: (thanks to Verdant for these settings)


APIC Mode [Enabled]

MPS Version Control for OS [1.4]

Limit CPUID Max Val [Disabled]

Speedstep [Disabled]

CPU Thermal Control [TM1 & TM2]

C1E [Disabled]

Execute Disable Bit [Enabled]

Virtualization Tech [Disabled]


CPU Core 0 [Enabled]

CPU Core 1 [Enabled]

CPU Core 2 [Enabled]

CPU Core 3 [Enabled]


HPET [Enabled]


OnChip IDE Channel0 [Enabled]

Primary Master PIO [Auto]

Primary Slave PIO [Auto]

Primary Master UDMA [Auto]

Primary Slave UDMA [Auto]

IDE DMA transfer access [Enabled]

Serial-ATA Controller [Enable All]

IDE Prefetch Mode [Enabled]


HD Audio [Enabled]


RAID Enable [Enabled]

SATA 0 to 2 Primary RAID [Disabled]

SATA 0 to 2 Secondary RAID [Disabled]


OnChip USB [Enabled]

USB Keyboard Support [Enabled]

USB Mouse Support [Enabled]


ACPI function [Enabled]

ACPI Suspend Type [s3 (STR)]


Onboard LAN was also enabled at the time of install and did not seem to cause any problems. It was later disabled after I purchased a cheap RTL8139 chipset PCI ethernet card.

Firewire was also left enabled.


So I burnt the disc with my SATA Blu-Ray/DVD burner and away I went. I left the disc in the drive, and rebooted... booting up from the disc of course. On the first page of this thread I read that I have to install using nforce_core -v when installing. This didn't seem to do anything (not sure why). So I just went ahead with it anyways... using just the -v command. It went into verbose mode, showed a bunch of things and then sat at "still waiting on root device." I hadn't the slightest of clue on what this meant, but I assumed it was my SATA hard drives. So I rounded up an old IDE drive, hooked it up and tried again... same problem. So I hopped back onto insanelymac.com and jumped into Mysticus C's thread: "Nforce Chipsets: How to install Leo easy and fast with iAtkos v1.0i r3 - NForce Edition or Kalyway 10.5.2 DVD"


In doing some reading, I came across some information related to my issue stating it could be my SATA Blu-Ray/DVD drive. So I went back to my old PC, dug into it and grabbed both a regular IDE DVD Rom drive and a IDE DVD Reader/Writer. Popped in my iAtkos disc, booted from it, ran the -v command and sure enough I was on my way. No more "still waiting on root device" error. So I got to the installation screen and referred to post #13 of this thread:


First to protect your CPU you should set:


CPU Thermal Control [Enabled]


Second as regards Customize selections with iAtkos v1.0ir3:


1. Boot from iATKOS 1.0ir3 DVD - Press F8 at Darwin Bootloader and at boot: prompt type "nforce_core -v" without quotes.


2. Partition HDD as MBR and format install volume as Mac OS X Extended (Journaled) and give a unique name without spaces using Disk Utility with iATKOS 1.0ir3 DVD Installer running.


3. DVD Installer Selections:


iATKOS v1.0i Main System Y

Bootloader

Darwin x86 Bootloader N

Darwin EFI

Darwin EFI Bootloader Y

Stock AppleACPIPlatform.kext N

Stock Kernel N

Patches

Kernels

NForce NO-HPET SSE3 Kernel Y

NForce NO-HPET SSE3 Kernel N

SSE2 SSE3 kernel N

Remove CPUPowerManagement ... Y

Remove Thermal Kexts Y

Drivers

VGA N

System N

Network N

Useful Tools

LSPCI Y

Temperature Monitor N


4. On the required restart by the installer DVD, booting up with -v -f (generally recommended after installation)......report back what System Profiler shows under Graphics/Displays and under Audio......if you get any error messages during bootup on the black booting screen please report here in detail (preferably with a screen capture)..... :)


So I went ahead and rebooted, and already i was further than I had ever been in previous attempts at this project. MacOSX86 loaded and it was time to tweak. First I wanted to get the internet up and running. In my Vista install I had a program called MacDrive installed so if I messed up a kext file, I'd hop back into Vista and delete the kext, and try again. I first tried the latest release of "eno's nForceLAN onboard LAN driver for nForce MOBOs" (0.62.1n alpha_osx). I rebooted and it appeared that it detected my onboard lan ports, but kept telling me my ethernet cable wasn't hooked up. Now for some reason or another my DSL modem has an issue where I have to manually set the Duplex/Speed to 10MBPS with FULL or HALF Duplex or it will say my ethernet cable isn't hooked up (yes, even in Windows). So I attempted to manually change it via the "Network" tool in Leopard, but had no luck. Tried turning off the system, rebooting the modem, unplugging the cable, trying both lan ports, everything I could think of would not work. So I bailed on that idea and went to the local electronics store and picked up a cheap Dynex PCI ethernet card that had a RTL8139 chipset. Popped it in, fired up Leopard, manually set the speed and duplex settings and the internet was alive.


So now that I had taken care of that, it was time to try and get the video card to work. The method of jumping in and out of Vista to use MacDrive in order to delete Kext files got real old real quick, but I am new to this and wasn't sure what else to do. Plus it worked so at the time I was satisfied. My first attempt at the video card was nvnject 0.2.1 512MB. I installed the kext using OSx86 Tools but upon my first reboot... failure. It seemed to find the card, but with each reboot I was prompted to restart. Ouch. So I hopped into Vista, used the MacDrive program and browsed to the extensions directory. I deleted the bad kext, fired Leopard back up and was back up and running. It was time to get greedy now. Being as I had 10.5.1 from the iAtkos install, I figured I was better off updating everything and then trying to get the video card to work. Yet again I ran into a speedbump.


I got greedy in the beginning and hadn't yet stumbled upon the "CLONING" technique, so by 5 or 6 o'clock this afternoon I was pretty frustrated with reinstalls. I read Mysticus C's guide on "Complete Updates for Newbies and All -- Currently 10.5.5 Combo (Only Intel CPUs)" and before reading the small info on Cloning the drive, I just jumped ahead like a fool and tried updating my system. I downloaded the required patches and the Apple Combo Update and began. I booted using the CPUS=1 MAXMEM=2048 -v commands to install the update like the guide says to. Now I only have 2 gigs of ram, so I don't know if using the MAXMEM command even matters for me, but I did it anyways. The first patch, "Prepare for Combo Update" installed fine, no problems. Then I moved onto the Apple Combo Update. EEK! At 46% of the "Writing Files" process, it dies... locks up the system (no error message or anything... status bar stops, mouse cursor is locked up, keyboard won't work, IT'S FROZE!) and I have to do a hard reboot. I reboot and try to get back into Leopard, and it just stalls. Try safe mode, still no go. Time for a reinstall.


So I clean the drive and reinstall Leopard. Thinking it may be a fluke, I try the same process again using the same boot commands (CPUS=1 MAXMEM=2048 -v). I get to 47% (oh I'm excited now) and once again it locks up. Double ouch. Hmmm, well this sucks. Time to reinstall again. Before doing so, I return to Mysticus C's guide of applying the update and I can't really find anything regarding this problem. Granted I only scanned through 20 or so pages (not all 80+), but didn't really find anything. Finally, near the top of Mysticus C's guide I come across the technique of cloning. I read through it and I'm loving this idea. No more reinstalls! I clean up the drive, and create two evenly size partitions. One labeled "BACKUP" for my untouched, clean install, and the other "MACOSX" for my test dummy. I install iAtkos 1.0ir3 again onto my "MACOSX" partition and immediately after, I clone it to my "BACKUP" partition. Before making any changes, I test my backup partition. On my first test, the keyboard was working, but no mouse. So I reboot and boot to the "BACKUP" partition again; this time using the -v -f commands. Mouse works, things appear to be okay... time to play again.


I jump back into my "MACOSX" partition and this time I try to install the update without using the CPUS=1 MAXMEM=2048 commands. I get into Leopard and run the first patch... all is well once again. Now time to try the Apple Combo Update again. I run it, it reaches 44% of the Writing Files process and then I get a grey box telling me I need to restart my computer. Okay, I'll do that. I restart, and I'm in the same boat as before. It stalls and will not boot back into Leopard... no safe mode, no nothing. Oh but wait. This time I have a backup. I hit the ol' F8 key at bootup and load up my "BACKUP" partition. Now it's time to try and install these updates from this partition onto the "MACOSX" partition. I figured there was no way I was going to be able to get back into that install of Leopard, so why not give it a shot? I open up the Prepare for Combo Update Patch" and change the install location to my "MACOSX" partition, and it succeeds. Time for the big test. I run the Apple Combo Update, change the install location to my "MACOSX" partition, and wouldn't you know it, it makes it through 100% of the writing files process and succeeds on install. Now the fun part. I run the "Post Combo Update Patch" and change my install location to my "MACOSX" partition. I hit the "Customize" button and apply the following settings: (HUGE thanks to Verdant for these settings in post #172 of this thread)


When attempting to update to 10.5.5, I recommend you boot with cpus=1 maxmem=2048 -v before running the Mysticus C* pre and post update 10.5.5 Combo Update v1.1.4 packages........following instructions: pre update package (no restart), then combo updater (NO RESTART), and post update package with selections:


Kernel - 9.4.0 StageXNU

Chipsets Drivers - NForceTest

Video - NVIDIA - NVinject - 512MB PLUS NVIDIA GFX DRIVERS NForce Fix

Audio Drivers - Just Restore Audio

Network - Just Restore Network

Device Identification - None

System Functions - SMBIOS - MacPro PLUS AppleACPI - AppleAPIC (Older versions) for Bad Bios (i.e. default selection)


then re-booted with -v -f.....wait until PC shuts down.......and re-boot second time with -v -f too


You may want to try not using AppleACPI - AppleAPIC (Older versions) for Bad Bios (i.e. default selection) but if it does not work you will have to re-run post combo package to install it.......


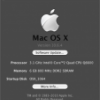
So I checked my settings against the above list, and proceeded with the install. I installed having the AppleACPI CHECKED. I know in the quote, Verdant said you may want to try it without using the AppleACPI, but I did indeed check it and everything seems good for me. Anyways, the patch install finished, and succeeded, so I went ahead and rebooted. I hit my F8 key so I knew I was rebooting back into my "MACOSX" partition (yes, the one I previously messed up). I used the -v -f commands like the guide says to do so on the first reboot. The system loaded and restarted by itself like the guide said it would. I then hit the F8 key again prior to boot up, once again making sure I was going into my "MACOSX" partition. I booted this time using -v to see what was going on, and low and behold my video card was detected. Even more impressive was the fact that Leopard loaded! And most impressive was the fact that my video card was functioning full tilt! 1900x1200 resolution with all features supported and enabled. Clicking on the Apple and the "About this Mac" shows I have 10.5.5 and all the correct CPU specs. How sweet it is!! I'm making this post with Leopard and everything seems really stable.


As far as sound goes, I wasn't sure exactly what to do. After running the updates, I believe my sound card was detected, but the only cable I had hooked up to my card was my optical digital cable that runs to my surround sound receiver. I wasn't hearing anything so I assumed it wasn't working. Verdant posted a link to the Azalia audio install package in a post further down, and after installing it I still wasn't hearing anything. Confused, I ran downstairs and grabbed some headphones, plugged them into the green speaker port and bang, I was hearing sound. Well I wanted my digital port to work, so I did some hunting.


I discovered the "AppleHDA Solution" thread and the first dump file I tried did not work. I browsed through the "AppleHDA Patcher Results" thread and stumbled upon a dump file that DID work and DID enable my Digital Out port. It wasn't long before I was jammin' music on iTunes through my surround sound receiver. I've attached that dump file just incase someone wants to try it. Please note I used v1.2 of the AppleHDA Patcher and DID NOT test any other ports on the soundcard. That's it for sound. I'll try getting my printer to work when I actually need it.


As for now, I'm making a backup of this partition and headed to bed as it's now reached the 2:30 mark. HUGE THANKS TO VERDANT AND MYSTICUS C!! Your guys' patience and helpfulness towards everyone is what got this working for me. This thing seems ultra stable at the moment. THANK YOU BOTH! Sorry for the long post... I'm obviously excited.


Brad

ALC888_GA_965P_S3_Rev3.3_.txt

Link to comment
Share on other sites

@ Brad


Glad to help you achieve OSx86 success at last.......thanks for the writeup.


Your audio codec is the Azalia audio codec..... download Azalia installer here...... :)

Link to comment
Share on other sites

verdant: i will include the usb fixes :(, i will finish the installer today, and make it ready for testing (testing because i m only human and make mistakes :) )


i know a lot of people messing around withouth knowing what they are doing... some complain i dont provide clean installer that is containing everything (all drivers) for their systems as I have a duty to entertain everyone... :) some says my guide is too long... when they have no idea what the guide is saying :) 95% of the guide is actually explanation rather than guiding... so people with no AI software in their brain just read one by one and apply it... for instance: clone guide is like 20-30 lines... which in real is 3 steps, open disk utility, put correct partitions to corrcet boxes (source target) and press the restore... same with the update guide, not so hard, but majority of people have no clue about what they are doing... so they mess up by choosing wrong options... i told people 1000 times to read the clone guide and learn it, people still refusing to do it, and continue to mess up things... this is a noob behaviour who wants everything working in one step without hassle... in real fact, by bricking your system couple of times you will learn a lot than having working everything in one time... if everything goes smooth all the time, u ll never learn anything... esp what you are doing/installing...


edward or brad? thanx for taking a bit of time, courage and learning the clone guide :) it will definetelly save u countless hours of pain of reinstalling and worrying about bricking... you can additionaly (if you have enough space) create more test partitions at your first installation, and can do tests more quicker, when you clone to 2-3 additional partitions :) so you dont have to reclone, just start installing/testing quickly to another... your test partitions do not need to be same size as main, just data amount + additional 3-4 gb space for virtual memory+temp files+additional files coming from updates... tahts it... this should total about 10-12 gb (7-8 gb main osx install, +3-5gb additional for other things---thinking you didnt install big programs like FCP or other full packages like adobe etc... if so, make the test partitions accordingly sized)

Link to comment
Share on other sites

i just cloned the OS X like in the guide...


rebooting after that, than this message appears in DOS:


Verifying DMI Pool Data .................

>00000080

<00000000

000000AF

*<000003F

J


help ?


Reinstall bootloader......using OSx86Tools or iATKOS V2.0i selecting Darwin EFI bootloader only.......

Link to comment
Share on other sites

now i deleted all partitions...

Now trying it with 3 Partitions how said in your thread.

All with MBR ... could i install it on the "main" partition.

If the system starts and works, insert DVD again and boot with DVD

and install it a second time on the "test"-Partition ?

maybe without selecting darwin bootloader ?

Link to comment
Share on other sites

@ Mysticus


;) Thanks I will try the installer on a test partition as soon as I can........and report back.......

Link to comment
Share on other sites

@ Verdant. I ran the audio installer you linked me up to, and it indeed worked for my speaker/headphone output. Thank you for that. Unfortunately I was unable to use my digital out port that hooks my system to my surround sound receiver.


I did, however, come across the HDAPatcher project, and was able to find an ALC888 dump file (ATTACHED BELOW) that patched my kext file correctly so that I can use my surround sound receiver with the onboard sound via the Digital Out port. Please note anybody that tries using this dump file; I used the 1.2 version of the hdapatcher, and DID NOT test anything other than the Digital Out port. I imagine if you just wanted to hook up some regular 2 channel speakers, the link above, that verdant posted, to the Azalia package, should work. Thanks again to verdant and Mysticus for all of their help on getting an extremely stable 10.5.5 Hackintosh :P

ALC888_GA_965P_S3_Rev3.3_.txt

Link to comment
Share on other sites

@ Verdant. I ran the audio installer you linked me up to, and it indeed worked for my speaker/headphone output. Thank you for that.


I came across the HDAPatcher project, and was able to find a ALC888 txt that patched my kext file correctly so that I can use my surround sound receiver with the onboard sound via the Digital Out port. So far, everything is great. Thanks again to you and Mysticus for all of your help.


Glad to help again.......it would also help other readers of this thread if you posted the link in this thread to the ALC888 dump that patched your audio kext correctly........thanks...... what has been helpful about your posting is that it is one of the most complete success stories for a 780i MOBO, showing what is achievable if a person follows the nForce guides carefully........:P

Link to comment
Share on other sites

verdant: once you test the package, put it in first post and make sure write up appropriate explanation for people to understand step by step, else, your topic will be flooded with noob questions... although i made the option "titles" in the installer pretty clear, you will find it amazing how many noobs will use wrong options... :P

before i forget, some information for you to know about the options


nforcelan option: will check and if found, rename the forcedeth and nforceethernet drivers with ".orig" extension , and, install the nforcelan and fix permissions automatically


nforceata options: it will check and if found, will rename the "titled option driver" with ".orig" extension, and replace the modded one with correct permissions.


nvdarwin:

step 1 is nforce fixed nvidia drivers (i added the class type identification to darwin provided packages)==

step 2 is pretty much nvinject :wacko:, it will check natit, titan, nvkush, nvinject, and if found, rename with ".orig" extension, and copy nvdarwin with correct permissions. ==

additionals are the tools provided in the darwin packages


usb mount and controller fixes:

usb mount fixes are just kernel and matching system.kext versions.

usb controller fixes are old pcgenusbehci, or latest appleusbehci inside iousbfamily/plugins...

(most people do not understand the difference between them and usually when they dont have usb controller issue, they still choose it, and causing sometime unexpected behaviours... however on correct places, it fixes shutdown and restart issues with problematic bioses :wacko: but it will be diffucult to explain the difference still because many people dont like to read completely throughly with intention of learning, more like looking for quick fix, and when they see words like USB and FIX they dont read the rest :wacko: )


good luck

Link to comment
Share on other sites

verdant: once you test the package, make sure write up appropriate explanation for people to understand step by step, else, your topic will be flooded with noob questions... although i made the option "titles" in the installer pretty clear, you will find it amazing how many noobs will use wrong options... :)


I am downloading package now.....about to test on a Kalyway 10.5.2 install, mostly as your nForce thread Customize selection guide but with AppleRTL8169.kext and additional fonts plus additional 3rd party apps selected but no video and no audio, with Taruga rev3 installer run post-install to set up audio.......will write up an explanation if it all works first time.....if not, then when any problems sorted...... :)

Link to comment
Share on other sites

read above edited post :)


good luck and enjoy


i m off to bed :) nitey...


So far so good.......Installer worked OK......no errors during installation.......will post screen shots of selections made......will update after further testing of system....... :)

Link to comment
Share on other sites

i will include another test package that i found recently, to see if this will help some of you regarding updating on nforce, there is another disabler driver which disables 2 drivers at once 1) applecpupowermanagement, and 2) appleefiruntime.kext, the second one usually causing the trouble for nforce i think ;) i used to have that along with applehwsensor driver


note that the new test package may have no influence in the update process if the panics/freezes caused by 64 bit and memory issues...

Link to comment
Share on other sites

sure i will add it to the update package, and will post the new link, but verdant can you confirm this kernel working on nforce?


I will download it and install it on a test system using OSx86Tools as soon as I have some time......hopefully later today but no promises.......as I am still testing the voodoo kernel etc...... :)


UPDATE:


I have renamed the nForceLAN.kext to nForceLAN.kext.orig.....no more random mouse cursor freezes, and am now running HighLoad memtest to test out the 6GB RAM as regards causing kernel panics with Voodoo Beta 2C and slashack's NForceATA.kext.......HighLoad is running memory test on 5020MB at present.....all tests passed!......see post #1...... :)


On my 650i MOBO, the nForceLAN.kext still appears to be the problem kext......... :)


Downloading Mysticus C* NForce Drivers v1.1 to test.........

Link to comment
Share on other sites

here is the latest link


i made another test pre patch for nforce... this will install new disabler kext for cpupowermanagement and efiruntime, i want to see if you will be able to udpate without system freezing (no cpu=1 or any other flag at boot for update pls ;) this is the purpose of the test)


test 1

=============

pre patch for nforce

combo

post patch (custmized)

??? nforce drivers packages? additionaly :) so you do all at once...


test 2

=============

nforce drivers package install, restart (so 64 bit enabled packages run)

pre patch (normal one)

combo update

post patch

nforce drivers agai to replace the replaced drivers (you know what it means, original update may replace some of the packages like appleviaata, kernel etc...)


============================

let me know the results... (i m more keen to see if the combo update will finish without freezing rather than it will work or not after restart which can be fixed easily :) on nforce)


this test will show

either the 64 bit issue is causing this trouble (if test 1 fails, bcoz no 64 bit driver, just disabled cpupowerman, and efiruntime) or some other drivers (if test 2 fails, bcoz 64 bit drivers will be loaded so should not have any problem with combo update)...

Link to comment
Share on other sites

I'm testing new MBP 10.5.5 version on my nvidia mb and I've noticed that new 9.5.1 vanilla kernel support nvidia chipset. Do you think that it could be add to your update?


http://rapidshare.com/files/156785059/9.5....system.zip.html


I installed the above file (System.kext) with OSX86Tools on my install and noticed no difference at all. What is this supposed to change? When using the uname -a command in Terminal, it shows I still have the Kernel that was installed with Mysticus C's Post Combo Update Patch. What am I missing here? Thanks.


Brad Edwards

Link to comment
Share on other sites

you probably didnt install the kernel, since the one from package is invisible, u didnt install it :( use the latest package i provided to install and test it... it is inside usb mount fix, 9.5.1 vanilla... but make sure you install the packages in a test partition so you dont mess anything in case things go haywire :D


update package will auto install it... in taht package, from nvdarwin option, step1 is auto selected, you may unselect or you may leave it as it is... restart (fingers crossed--hope it does not go on to a loop :D ) , and uname -a should show

Link to comment
Share on other sites

 Share

×
×
  • Create New...