Clarence Rubin Posted July 6, 2010 Share Posted July 6, 2010 CR, have you tried the Kexts in my guide? I posted the link a bit higher up ^^^. Yeah, those are the files I'm using. Does your headphone jack work with those kexts? Link to comment https://www.insanelymac.com/forum/topic/199818-snow-leopard-install-for-asus-p6x58d-premium/page/13/#findComment-1505496 Share on other sites More sharing options...
hugo19941994 Posted July 7, 2010 Share Posted July 7, 2010 Hi, Just a quick question - Has somebody been able to install hackintosh in a RAID0 volume? I know I should use AHCI, I would just like to know if it's possible before attempting anything... Thanks! Link to comment https://www.insanelymac.com/forum/topic/199818-snow-leopard-install-for-asus-p6x58d-premium/page/13/#findComment-1506723 Share on other sites More sharing options...
scotthooker Posted July 9, 2010 Share Posted July 9, 2010 I am so lost i've read lots of guides! I've got the boot132 loading perfect, the bios settings set appropriately but whenever I load up into the mac SL cd i just get a black screen and my CPU fan goes mental (at least I think its the CPU fan just goes on to max speed) Link to comment https://www.insanelymac.com/forum/topic/199818-snow-leopard-install-for-asus-p6x58d-premium/page/13/#findComment-1507789 Share on other sites More sharing options...
kup Posted July 9, 2010 Share Posted July 9, 2010 What GFX card are you using? Link to comment https://www.insanelymac.com/forum/topic/199818-snow-leopard-install-for-asus-p6x58d-premium/page/13/#findComment-1507802 Share on other sites More sharing options...
scotthooker Posted July 9, 2010 Share Posted July 9, 2010 ATI Rad 5770 which I know is not supported until recently... as I see in this thread http://www.insanelymac.com/forum/index.php...05802&st=40 the drivers have now been released. Do I have to get these drivers and load them into boot132. If this is the case I'll keep reading and work out how to do it myself (eventually) I don't like asking questions when there answers are there to be found! Not fair on you guys who write all the guides only to have someone pop up and ask the question again without reading what came before! Link to comment https://www.insanelymac.com/forum/topic/199818-snow-leopard-install-for-asus-p6x58d-premium/page/13/#findComment-1507850 Share on other sites More sharing options...
scotthooker Posted July 10, 2010 Share Posted July 10, 2010 I've given up! Tried everything and still can't get past the black screen! IF anyone can point me in the right direction of what to read on here I'd be forever thankful. I've exhausted the search bar! Link to comment https://www.insanelymac.com/forum/topic/199818-snow-leopard-install-for-asus-p6x58d-premium/page/13/#findComment-1508651 Share on other sites More sharing options...
kup Posted July 10, 2010 Share Posted July 10, 2010 I've given up! Tried everything and still can't get past the black screen! IF anyone can point me in the right direction of what to read on here I'd be forever thankful. I've exhausted the search bar! Netkas.org Try that and see if it can help? Link to comment https://www.insanelymac.com/forum/topic/199818-snow-leopard-install-for-asus-p6x58d-premium/page/13/#findComment-1508654 Share on other sites More sharing options...
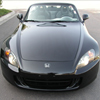
orlfman Posted August 1, 2010 Share Posted August 1, 2010 Okay here how you do it: (and somethings i'll assume 'cause i don't know them for sure - need your feedback) Short guide: 1 - since you have a macbook pro and can use it (i assume), that helps a lot - if your using that hd only for mac os x then go further with the guide (assuming) - just plug it to the mac and format it as GPT (like macs do) (assuming that's the case, and don't want to dual boot with windows etc) - then insert your snow dvd and let it mount or mount the img (if the case) - use the show hidden files tool to make the hidden files visible - double-click on the dvd/img icon, now you can see a folder system - navigate system>installation>packages>osinstall.mpkg - double-click on it and go with the install, BUT don't forget to choose the installation path the plugged in hd, and choose customized install and select only the essential system files (for a proper install and a successful screen install at the end) (the rest can be install after you're in the os as optionals, if you want to) -use tool and make files hidden again - that was the easy part - now the real easy part 2 - if your snow dvd/img was 10.6 version do the following if was 10.6.3, you don't need to - download (if you didn't yet) the 10.6.3 v.1.1 combo from apple site and install it on the plugged hd - now the super easy part 3 - from "support files" pack or if you prefer kup's 2 packs (same thing) - install chameleon (AsereBLN booter) !!! don't forget to choose the plugged in hd as path to install !!! - don't restart yet - from second folder, copy the Extra content to the Extra folder on the plugged hd or just replace it - but skip/remove these file asus.aml.zip; after you boot the os in your pc, you can generate your own dsdt.aml file (you can't do it from here, 'cause will be macbook pro's dsdt), so you'll use the one in Extra for now, and if it works to boot, you'll make one for yourself (i'll tell you how), and if doesn't work to boot (don't panic), come back and tell - ignore the third folder - download and install binary patched AppleHDA.kext as posted above - install the patched kernel, choosing the plugged hd as install path -now the super real easy part 4 - boot the hd in the pc - come back and tell if it worked - p s - when you have a real mac at hand, you could manage things easily; don't need for cd-boot, [url="http://www.insanelymac.com/forum/topic/279450-why-insanelymac-does-not-support-tonymacx86/"]#####[/url], etc THANK YOU THANK YOU THANK YOU THANK YOU! You sir are a GENIUS! I followed your steps since I have a Macbook Pro and it worked perfectly! I am typing this now in my new hackintosh! All I have to do is add in the Soundcard driver to fix the 10.6.4 issue and everything will be up and running fully functional! Thanks so much for posting that idea! After I make sure everything is fine, I will clone this installation and transfer it to my main 640gb Hard Drive! I attached a photo! Specs: Intel Core i7 Q980X Asus P6X58D-E Nvidia (Evga) 470 6gb of Kingstron HyperX DDR3 1600 EDIT: Got sound working! Only issue if my microphone, but not sure if mics are supported. No big issue, I can just use my Macbook Pro for Ventrilo for the time being. That and getting it to display Q980X in about mac lol. Link to comment https://www.insanelymac.com/forum/topic/199818-snow-leopard-install-for-asus-p6x58d-premium/page/13/#findComment-1522617 Share on other sites More sharing options...
iELLMO Posted August 10, 2010 Share Posted August 10, 2010 booted via the bootloader provided by Kup Using an asus p6x58d-e i7 930 zotac gtx 480 using: -v -x cpus=4 arch=i386 now i boot past chameleon after inserting retail dvd of SL but it hangs at "yukon: Ethernet address" (my mac address) anybody any ideas? Link to comment https://www.insanelymac.com/forum/topic/199818-snow-leopard-install-for-asus-p6x58d-premium/page/13/#findComment-1528313 Share on other sites More sharing options...
kup Posted August 11, 2010 Share Posted August 11, 2010 That is the GFX you're using. Please actually read the thread and/or previous posts as this has been discussed at great length several times. Link to comment https://www.insanelymac.com/forum/topic/199818-snow-leopard-install-for-asus-p6x58d-premium/page/13/#findComment-1528730 Share on other sites More sharing options...
Fran123 Posted August 12, 2010 Share Posted August 12, 2010 I've written a guide, I just need to finish and test the Boot132 CD. It can be used with my files posted up there ^^^ and the P6T Boot132 CD from here for now. You'll just need to work out the support files yourself until I complete the Boot132 CD. THIS GUIDE ASSUMES PEOPLE HAVE RESEARCHED THEIR GRAPHICS CARDS AND KNOW WHAT WILL AND WON'T WORK WITH SNOW LEOPARD. PLEASE KEEP GRAPHICS DISCUSSION IN THE GRAPHICS FORUM. PLEASE NOTE IT'S NOT FINISHED YET!!! Bios Setup. Follow the pictures below (borrowed from the P6T Deluxe thread here http://www.insanelymac.com/forum/index.php?showtopic=208724) === 1: Boot the System with the Provided Boot132 CD. 2: Once the Boot Menu appears, eject the CD, insert your Snow Leopard DVD and press F5. 3: The Menu should refresh and show the Snow Leopard Install DVD instead. 4: At this point you can enter any flags you require; -x (Safe Mode) -v (Verbose) arch=i386 (Enabled 32Bit mode) cpus=# (# = Number of cores) busratio=# (# = Multiplier of CPU, use 20 if you have an i7 920, 21 if you have a 930, 22 if you have a 940 and so on) "Graphics Mode"="1280x1024x32@85" (Width x Height x Depth x RefreshRate) -v -x cpus=1 arch=i386 busratio=20 5: Hit Enter and OSX should start to boot, eventually resulting in the Language Menu. Select your chosen Language and continue. 6: You will now be greeted with a very basic OSX desktop, focusing on the Installer in the center on the screen. Ignore that for now and on the top menu bar go to Utilities and then Disk Utility. 7: Select the HDD you wish to install to and click the Partitions Tab. Adjust the partitions according to your requirements (I would recommend 1 partition first time round). 8: Select GUID Partition Scheme and apply the changes. Disk Utility will format the HDD/Partitions. Once completed exit Disk Utility and you'll be back at the Installer. 9: Click through until you get the option to pick a Volume (HDD/Partition) to install Snow Leopard to. At this point you can also click Customise and choose which extra bits and pieces you wish to install (Printer Drivers and stuff). 10: The installation will continue through until the end but MAY tell you that it has failed right at the end, this is fine and expected. We'll fix this in the next few steps. 11: Reboot the System when prompted to do so and hit F8 to bring up the Asus Boot Menu. Eject the Snow Leopard Install DVD and insert the Boot132 CD once again. 12: Boot the Boot132 CD and you'll be back at the Boot Menu, this time with the Boot132 CD and your Snow Leopard HDD visible. Select the Snow Leopard HDD and apply the same flags as before, hit Enter and cross your fingers. 13: Watch the Video (or don't) and continue through the setup, you will need a password on your user account. Skip the registration with Command+Q (Windows Key+Q, or on some Keyboards this will be Alt+Q). 14: You should now be at the desktop with a CD Icon at the top right. Double Click it to open the contents in Finder. Navigate to the 'Post Install' Folder and the to the BootLoader Installer. 15: Run the BootLoader Installer and just click through to the end (you may wish to manually specify the location when prompted to do so). 16: Now switch back to your 'Post Install' folder and extract the contents of the archive to the Root of your installation HDD (this is the first Folder that includes all other Folders). 17: You should now have a Folder labled 'Extra' installed in the Root of your main HDD. 18: Back at the desktop, insert the Boot132 CD if you ejected it and navigate back to the 'Post Install' Folder. Copy and Paste both 'Kext Utility' and 'Kext Helper B7'to your desktop. 19: Double click 'Kext Utility' on the desktop, enter your password and let it run. This step is to reset permissions on your Kexts and allow the system to boot correctly without the Boot132 CD. At this point you could reboot and Snow Leopard should run just fine without the Boot132 CD. 20: If you wish to update Snow Leopard I recommend using the 10.6.2 Update located here (http://support.apple.com/downloads/DL959/en_US/MacOSXUpdCombo10.6.2.dmg). === 10.6.3 Update Installation. 10.6.3 causes issues with Audio right now, but there are several solutions to the problem. 1: Navigate to System/Library/Extensions on your Snow Leopard HDD and copy and paste the AppleHDA.kext to your desktop. 2: Download and install the 10.6.3 Update (http://support.apple.com/kb/DL1017) and install it as you did with 10.6.2 (or if you didn't install 10.6.2, just click through, it's pretty simple). 3: Once installed you will be required to reboot. Do so and when you return to Snow Leopard you'll have lost your Audio. Don't worry, this is why we backed up the AppleHDA.kext from 10.6.2 (or lower). 4: Open up 'Kext Helper B7' from the desktop, drag and drop the 10.6.2 AppleHDA.kext into it, enter your password and click 'RUN'. This should now be replacing your 10.6.3 AppleHDA.kext with the working one. Once completed close 'Kext Helper B7' and open 'Kext Utility' from your desktop. Enter your password and hit Enter. This is just to double check and reset permissions on your HDD. 5: Once completed, close 'Kext Utility' and reboot. This time you should have Audio back and working. === Advanced Power Managment. If you want to enable Advanced Power Managment on your Snow Leopard install, you can copy and paste the ' IOPlatformPluginFamily.kext' from the 'Post Install' Folder on the Boot132 CD into 'Kext Helper B7', run it as above and then close it and run 'Kext Utility' as above too. This should enable much better power saving and Speed Stepping on your i7 CPU. Hey, My specs are: Intel Core i7 920 (2.66GH) 4GB DDR3 Ram (1366) 750GB Sata Hard Drive ATI Radeon 4850 (1GB) Asus P6X58D-E So the Bootloader runs OK (shows 3 drives, CD Drive and 2 window's drive's) I press F5 so it refreshes and shows mac, i then enter the flags I need to run. As I have a 920, I add busratio=20. Lot's of text goes on the screen, thought after a-while I get the System Uptime In Nano Seconds problem (seems like a Kernal Panic) I have tried using the flag -v, thought that did nothing. Even at one time I used the whole list, Thought there was the same problem. Am I doing anything wrong? Thanks Francis Link to comment https://www.insanelymac.com/forum/topic/199818-snow-leopard-install-for-asus-p6x58d-premium/page/13/#findComment-1529132 Share on other sites More sharing options...
oz45 Posted August 14, 2010 Share Posted August 14, 2010 Help install Snow Leopard Intel Core i7-930 2.8GHz; ASUS P6X58D Premium; Western Digital Caviar Green 1TB;Palit GTX 470;OCZ DDR3 6Gb;Chieftec APS-850C Link to comment https://www.insanelymac.com/forum/topic/199818-snow-leopard-install-for-asus-p6x58d-premium/page/13/#findComment-1530560 Share on other sites More sharing options...
akirasee Posted August 18, 2010 Share Posted August 18, 2010 Help install Snow Leopard Intel Core i7-930 2.8GHz; ASUS P6X58D Premium; Western Digital Caviar Green 1TB;Palit GTX 470;OCZ DDR3 6Gb;Chieftec APS-850C use the boot132 disc and the files included in the other post and you'll be fine with the install. Link to comment https://www.insanelymac.com/forum/topic/199818-snow-leopard-install-for-asus-p6x58d-premium/page/13/#findComment-1532398 Share on other sites More sharing options...
oz45 Posted August 20, 2010 Share Posted August 20, 2010 How to create a DSDT. I tried Everest. Link to comment https://www.insanelymac.com/forum/topic/199818-snow-leopard-install-for-asus-p6x58d-premium/page/13/#findComment-1533772 Share on other sites More sharing options...
majorgeneraloneill Posted August 25, 2010 Share Posted August 25, 2010 Hi, Thank you very much for the installation guide for Mac OS X SL. I just built my computer and booted using Boot132 but unfortunately I hit a blank screen after the command line "Starting Darwin x86". Configuration: Asus P6X58D mother board Inter i7 980 extreme Gigabyte Nvdia GTX 460 (1GB version G.Skill 6GB DDR3 1600Mhz ram Two 500 GB Samsung HDDs with Windows 7 64bit currently installed on one of the HDDs. I changed all the BIOS settings as per instructions and entered the following flags in the boot132 screen: -v -x cpus=1 arch=i386 busratio=20 A sequence of command lines follow that last for about 2 minutes until the last few lines read Nvdia unknown, starting darwin x86 and the screen goes blank. The SL installation/language selection screen never appears.... Could this be related to nvdia's new graphics card? GTX 460 is based on the new GF104 architecture (unlike 465, 470 and 480 which seem to be working according to many posts in this forum) and I cannot seem to get a straight answer on whether Max OS X can run on this graphics card. Any help/answers will be much appreciated!! Cheers Link to comment https://www.insanelymac.com/forum/topic/199818-snow-leopard-install-for-asus-p6x58d-premium/page/13/#findComment-1537268 Share on other sites More sharing options...
daskog Posted August 25, 2010 Share Posted August 25, 2010 I have GTX 460 also and it is not supported yet as far as i know =( Link to comment https://www.insanelymac.com/forum/topic/199818-snow-leopard-install-for-asus-p6x58d-premium/page/13/#findComment-1537270 Share on other sites More sharing options...
kup Posted August 25, 2010 Share Posted August 25, 2010 GF104 is not supported yet. OZ. You need to read before you come rushing in here and ask a million questions. Link to comment https://www.insanelymac.com/forum/topic/199818-snow-leopard-install-for-asus-p6x58d-premium/page/13/#findComment-1537303 Share on other sites More sharing options...
Ended Zone Posted September 5, 2010 Share Posted September 5, 2010 OK... i see many people with 470 installing the 10.6 Retail ok yukon... problem.. i'll read about the solution if i find one if anyone knows how to do it?! Link to comment https://www.insanelymac.com/forum/topic/199818-snow-leopard-install-for-asus-p6x58d-premium/page/13/#findComment-1543322 Share on other sites More sharing options...
vidiot2010 Posted September 17, 2010 Share Posted September 17, 2010 Hi. I've tried the steps in post 145, but can't get to installation. The ISO I burnt was AsusP6TDeluxeV2_boot-132v1.15 Boot string was: -v -x cpus=4 arch=i386 busratio=23 There is a kernal panic on "No HPETS available" --- I cannot see anything in the P6X58D-E BIOS settings related to HPETS. I've read that removal of a setting using a "disabler.kext" may help -- I'm not sure how to implement this. I was wondering if anyone you has gotten a P6X58D-E install working could tell me if, at least, I have the correct boot ISO and string. Also, if anyone know something about avoiding the error, I would appreciate it. Thanks Link to comment https://www.insanelymac.com/forum/topic/199818-snow-leopard-install-for-asus-p6x58d-premium/page/13/#findComment-1549893 Share on other sites More sharing options...
SolutionMaster Posted September 22, 2010 Share Posted September 22, 2010 We have working Firewire!!!! And Speedstep, C-States (I saw 2.9GHz in MSR) and Sleep/Wake. Only changed the dsdt to the newest one. Everything else enabled as normal and plugged in as before. Well done dude!!!! Right, I'll make a guide and bootdisc (with BChemist's and IanT's permission of course) for this board but in the mean time here are the working kexts and dsdt to get fully functioning board (minus USB3/SATA3). Can we all give a MASSIVE thank you to BChemist for his work on the DSDT, it wouldn't have happened without him! EDIT: External Links... http://hotfile.com/dl/30445039/b22879f/P6X58D_FINAL.zip.html http://hotfile.com/dl/30445102/47f5179/Utilities.zip.html Hello, kup – thanks so much for the instructions and all the files. Everything works like a charm… except sound (when booting with your AppleHDA.kext I get an “ASSERTION ERRO AppleHDA… blah blah blah) In any event, I followed your instructions and also obtained suitable kexts for the video card (radeon hd5870). Since the sound wasn’t working I looked online and found an ALC889 kext for 10.6.4 on kexts.com After I rebooted, I saw the sound icon at the top and under settings, it gave me a list of all the inputs and outputs EXCEPT Digital Out! which is what I use to connect my computer to the sound system (optical cable) Any ideas? Thanks Link to comment https://www.insanelymac.com/forum/topic/199818-snow-leopard-install-for-asus-p6x58d-premium/page/13/#findComment-1552620 Share on other sites More sharing options...
BòòM Posted September 28, 2010 Share Posted September 28, 2010 Hey good day, i have the asus p6x58d premium mobo with 6 gb ram patriot at 1600 mhz, an envidia quadro fx 1800, and i have a snow leopard dvd dl, and the empire efi bootloader, i can charge the empire, try to start de snow leopard installer, but it stops when mapping memory and says apple ahciDisk queue manager : :set power state (0x3052800, 2 -> 1) timed out after 1000103 ms, ok i did install it once but it do not boot, or when installing it says "still waitting for root device" i don`t know what should i do.. i really need to get this to work, it`s not that i wanto i need it, because of mi job, so if anyone could help me i apreciate it. Link to comment https://www.insanelymac.com/forum/topic/199818-snow-leopard-install-for-asus-p6x58d-premium/page/13/#findComment-1556198 Share on other sites More sharing options...
voongoto Posted October 24, 2010 Share Posted October 24, 2010 Hey good day, i have the asus p6x58d premium mobo with 6 gb ram patriot at 1600 mhz, an envidia quadro fx 1800, and i have a snow leopard dvd dl, and the empire efi bootloader, i can charge the empire, try to start de snow leopard installer, but it stops when mapping memory and says apple ahciDisk queue manager : :set power state (0x3052800, 2 -> 1) timed out after 1000103 ms, ok i did install it once but it do not boot, or when installing it says "still waitting for root device" i don`t know what should i do.. i really need to get this to work, it`s not that i wanto i need it, because of mi job, so if anyone could help me i apreciate it. I had this error too, try this: when booting installation write rd=disk0 (if you're using one hd drive, of course) Link to comment https://www.insanelymac.com/forum/topic/199818-snow-leopard-install-for-asus-p6x58d-premium/page/13/#findComment-1569309 Share on other sites More sharing options...
lawkout Posted October 25, 2010 Share Posted October 25, 2010 I would just like to thank everyone for their support. Great Job!! I am up and running with 10.6 update after removing SleepEnabler.kext The only thing that I can not get working is the microphone... outside of the SATA6GB and USB3 which hopefully be supported soon. I read through this thread and it was mentioned that the mic may have not been supported yet nobody replied on the matter. Anybody have some insight on the microphone? ********Weeeeeeeeeeeeee******** I figured it out, I used AppleHDA_10.6.2.kext but forgot to run the permissions again. WOW! My rig is running SnowLeopard... You guys rock!!! Now for some benchmark testing. Link to comment https://www.insanelymac.com/forum/topic/199818-snow-leopard-install-for-asus-p6x58d-premium/page/13/#findComment-1570162 Share on other sites More sharing options...
voongoto Posted October 30, 2010 Share Posted October 30, 2010 Okay, after loads of failures ir sleepless nights I managed to get SL on my p6x58d + ati 5770. The problems I'm experiencing now: x64 mode always gives me kernel panic... I'm using Asere BLN boot loader RC4 all your provided kexts and kexts for my video card from netkas. And geekbench score on oc @4ghz is just 10960... Oh, and SL always hangs. If I try to open my second hd - it hangs for a while. If I try to unzip a file - again - hangs. I noticed one thing: on the meantime if I open any application or doing something with a dock, that unzipping or opening of a folder gets faster... And the system can't shutdown or restart properly. It always stucks on blue screen+rolling wheel and stays there forever. Any ideas on these? Thanks Link to comment https://www.insanelymac.com/forum/topic/199818-snow-leopard-install-for-asus-p6x58d-premium/page/13/#findComment-1572888 Share on other sites More sharing options...
spywolf138 Posted November 2, 2010 Share Posted November 2, 2010 So i finally decided to make my rig into a Hack Pro. I built a PC a few months ago with an Asus P6X58D-E, Intel i7-930, 8gb G-Skill Ripjaw 1600mhz, and an EVGA Nvidia GTX 470 1280mb. I originally built this PC with the intent to make it into a Hackintosh and i have been somewhat successful to this point. However, i have run into a few problems. I have read completely through this thread and a few others regarding the P6X58D and similar boards, but here is my problem: 1. Booting from HDD results in grayed out apple boot screen with the "hold the power down to reboot" message. I can boot in fine from the boot132 v1 disk from earlier in this thread, but only with -v tagged. I installed from SL 10.6.3 that i picked up last weekend, i then proceeded to install [url="http://www.insanelymac.com/forum/topic/279450-why-insanelymac-does-not-support-tonymacx86/"]#####[/url], following the provided guide, then i installed the 10.6.4 combo update. I also installed the Chameleon PrefPane with Chameleon 1.1.9 (or whatever that version is) I think i am a bit confused as to where exactly the DSDT file needs to go or which one to use. I used the DSDT patcher from earlier in the thread to extract a custom DSDT file, but now i don't know what to do with it. Also if anyone could provide me with insight as to which boot options i should be using I would greatly appreciate it. This thread has been a great help so far! Link to comment https://www.insanelymac.com/forum/topic/199818-snow-leopard-install-for-asus-p6x58d-premium/page/13/#findComment-1574791 Share on other sites More sharing options...
Recommended Posts