Leaderboard


Popular Content
Showing content with the highest reputation on 06/28/2019 in all areas
-
Public beta 1 now, same as db2. Script to download the Catalina full installer app. installScript_fullapp.zip 4 points
-
4 points
-
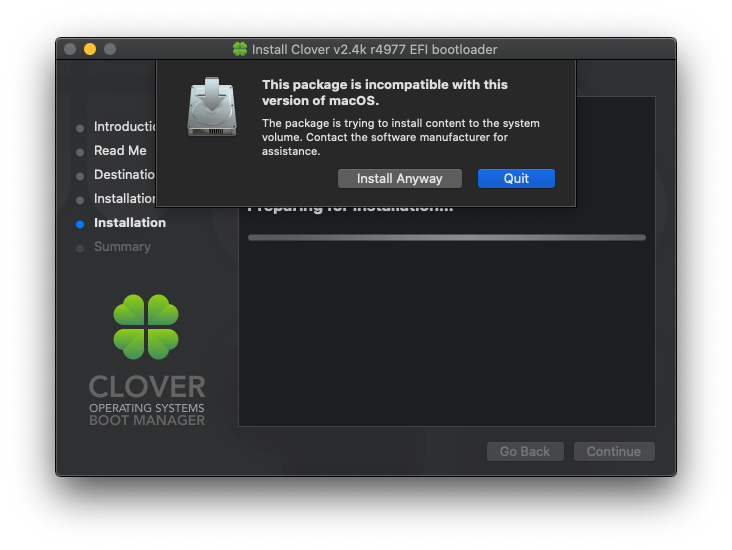
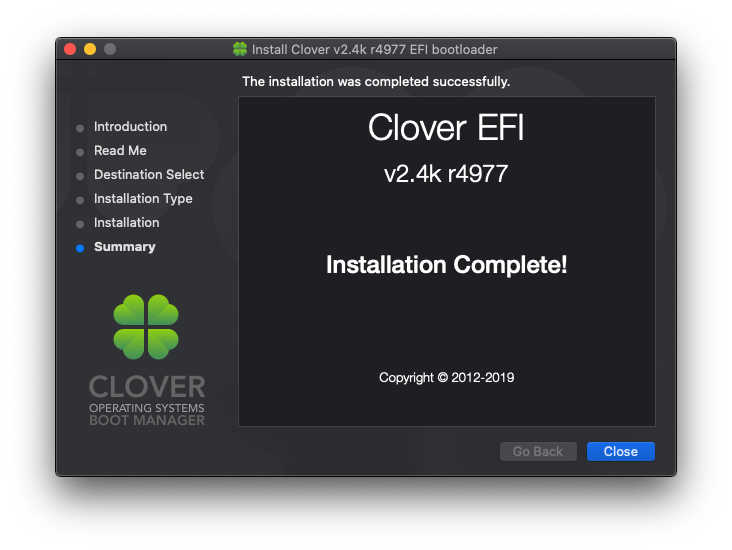
Hi Matt, Uhm...no such issues on my side. However, I'm still getting this weird warning. Maybe because Clover was built on Mojave...? No idea. Clicking Install Anyway does seem to install it properly though. How are you building Clover? Maybe you're selecting something else in Drivers....? I only chose the mandatory (automatically checked) drivers + OSXAptioFix3Drv. That's all. Also, we were previously talking about the post install script, which should prevent user from getting AptioMemoryFix and OSxAptioFix drivers, both at the same time. There seems to be a case where this does not happen. Because this is what I'm getting after installing Clover, while previously I had AptioMemoryFix in drivers64UEFI. My guess is that since the previous Clover installer did have AptioMemoryFix (and it was checked for installation) and this one doesn't (since I've switched to the default OsXAptioFix3Drv instead, and did not include AptioMemoryFix in the build anymore), the installer doesn't know AptioMemoryFix is already present, and it doesn't do anything based on that. Doesn't skip the installation of OsXAptioFix3Drv, and it doesn't remove AptioMemoryFix either to avoid conflicts. I'm looking forward to your opinions though. In my opinion this could be a real life scenario. If one day we ship Clover with AptioMemoryFix, and the other day we don't or we use something else instead, I see this as a potential problem on the long run, if people will end up with two (or more) Aptio fixes. And I've actually seen people with all 3 OsXAptioFixes in their drivers folders. Probably added manually, not through the installer. In which case there's not much we can do. But if that was through the installer...maybe we should think of a better solution to this other than relying on the post-install script to fix everything in the background. I think a bit more transparency wouldn't hurt anyone. Meaning let the user know in the UI that what they're trying to do is not ok. I don't know, it's just my opinion. If we just allow the user to choose whatever he wants and then "fix it" in the background, it will create confusion, they'll think it's a bug the fact that they didn't get their drivers installed as they selected, and they will never learn anything from that. They'll think it's Clover's fault for not installing everything they wanted, not their fault, for selecting (stupid) incompatible things in the installer UI.
 3 points
 -
I've created a Github fork of BrcmPatchRAM for my macOS Catalina fixes here Binary downloads are now here I've also added a bunch of device-id's to BrcmBluetoothInjector (for a complete list check out the release notes) You can report any issues at the forum post here2 points
-
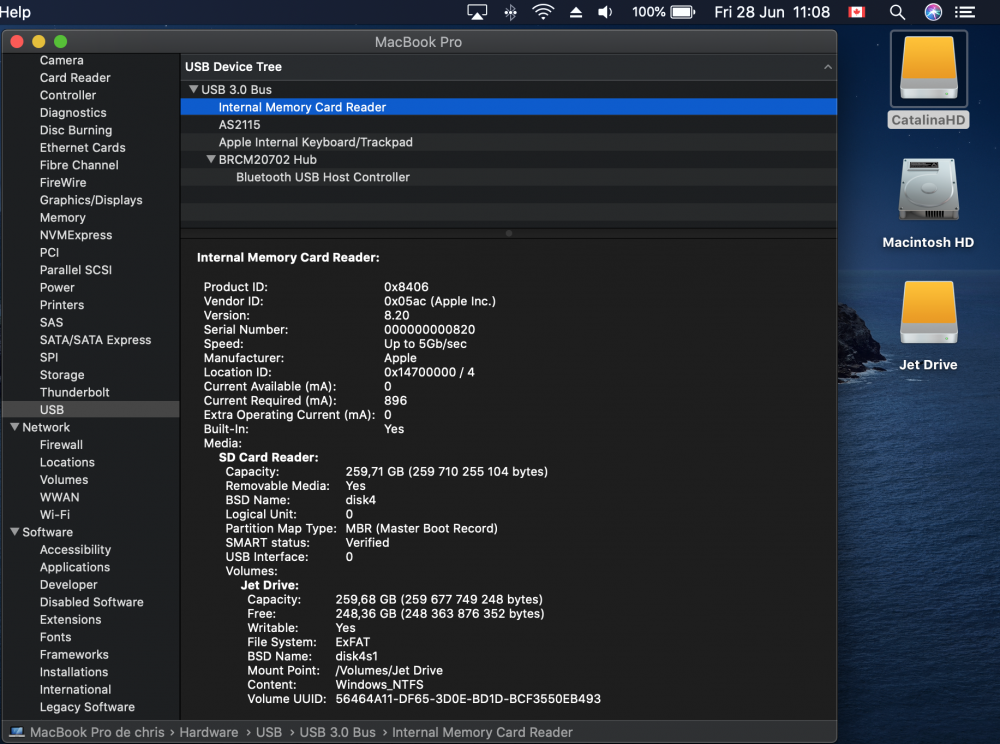
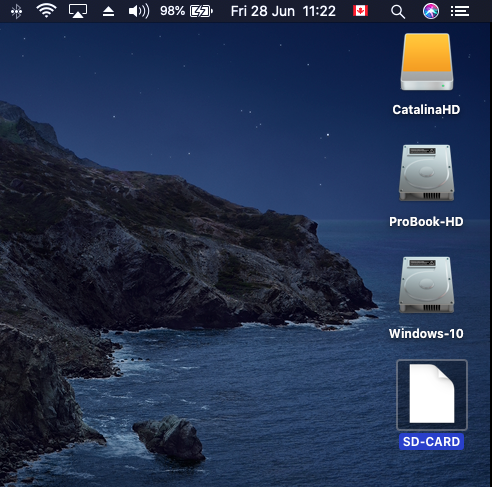
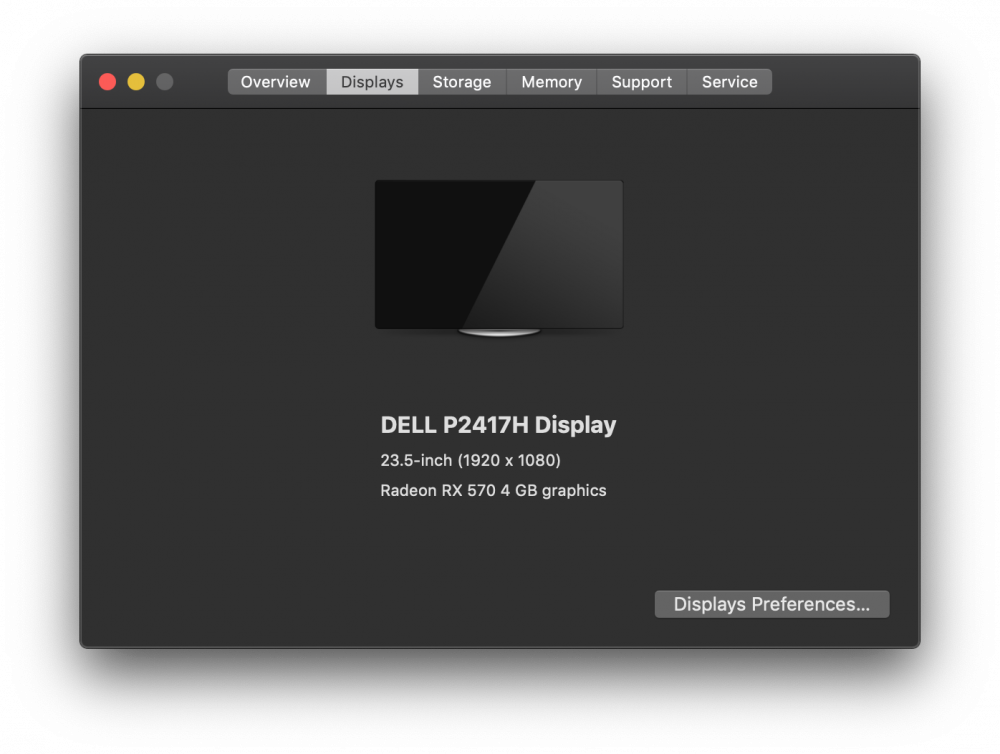
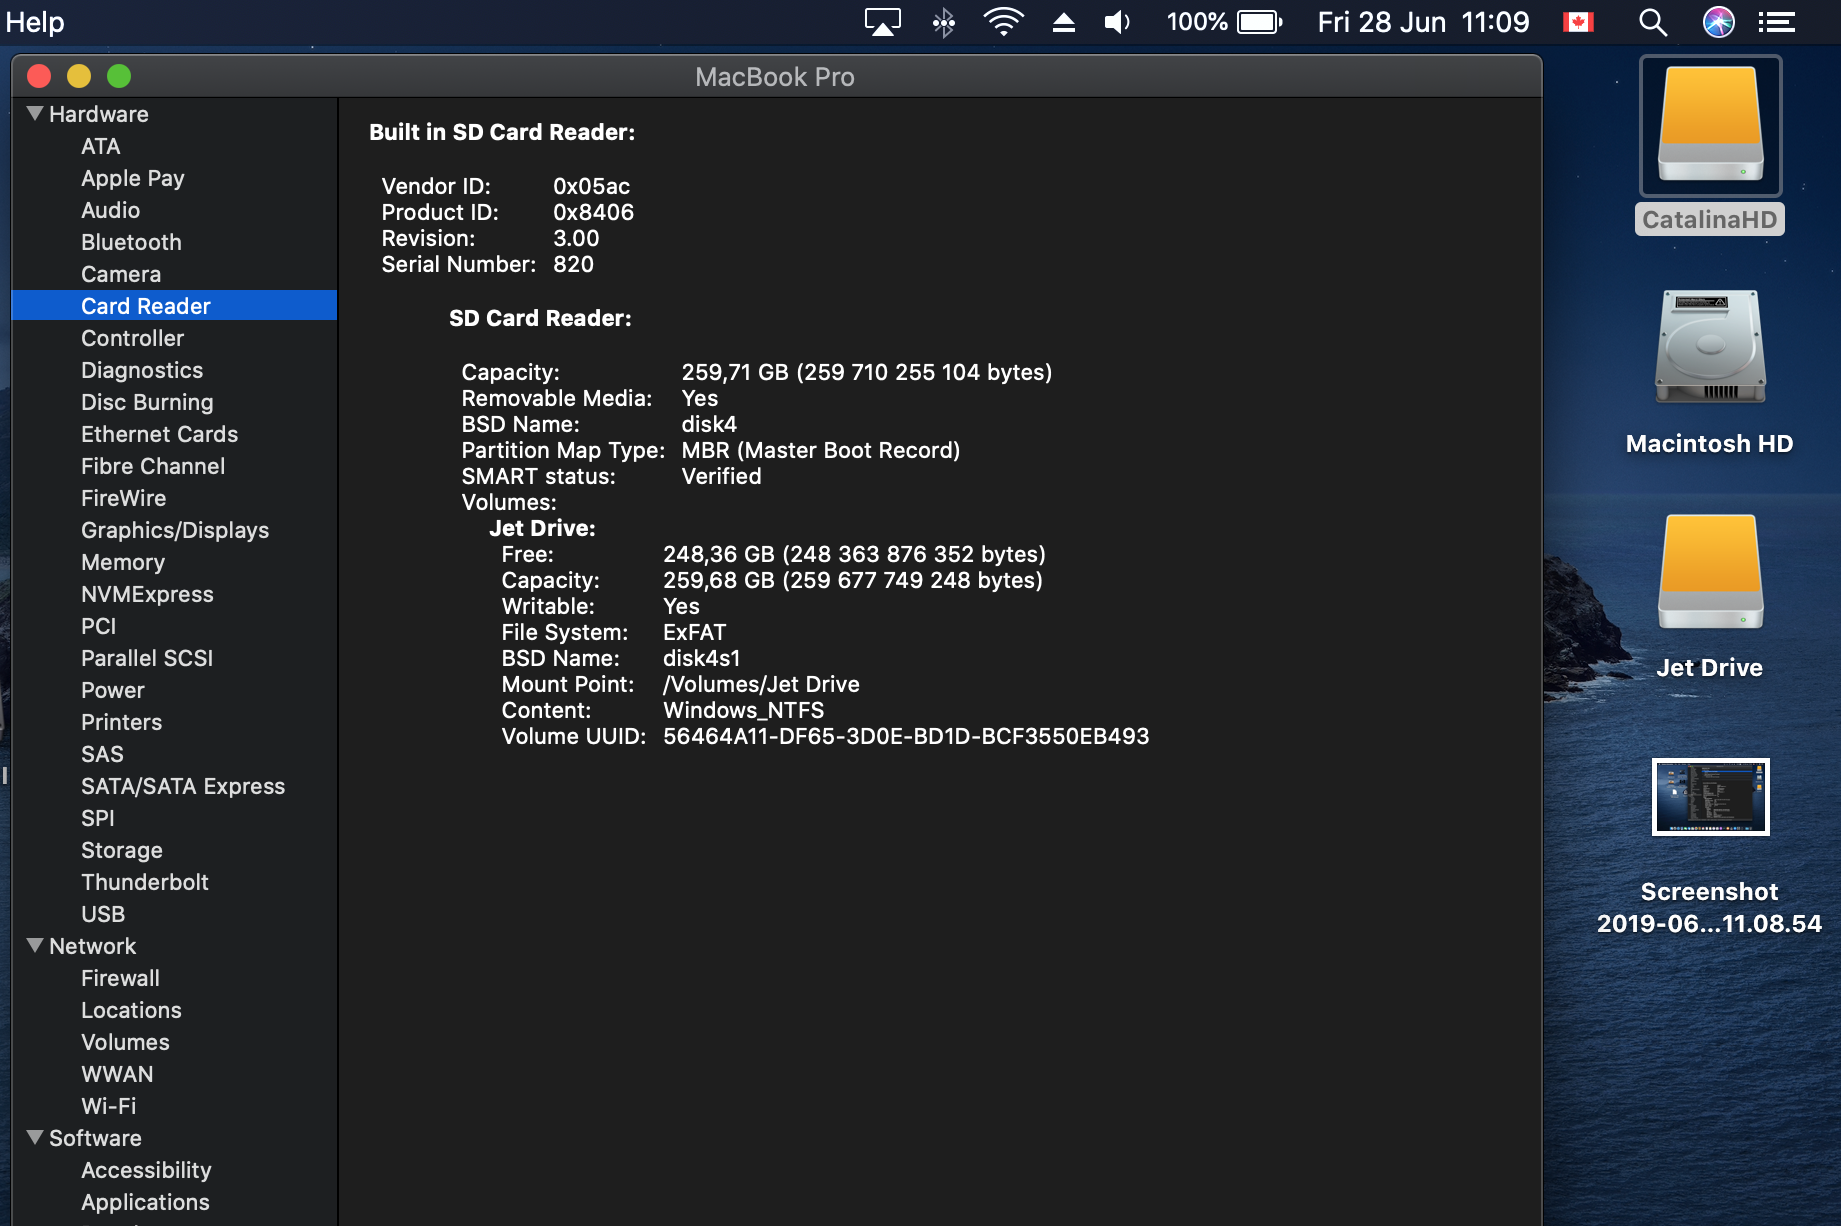
For all those who have a problem of icon on the SD card reader and of course my real MacBook Pro retina this problem is not present, it puts me the same icon as the external drive I have a Jet Drive SD card Here the icon of SD Card from my Hackintosh

 2 points
 -
Thanks Chris! I'm guessing this is normal then....? A new security "feature" implemented by Apple? But people might see it as a problem.2 points
-
HI @arsradu As for the issue of the warning I think that the Clover program is designed to install files in the system in usr/standalone/i386 and also in /etc I have other program .pkg who do not receive this warning and yet it installs in /Library So in my opinion Catalina recognizes clairely some repertory he does not want change2 points
-
Fixed ! :0) Thanks !2 points
-
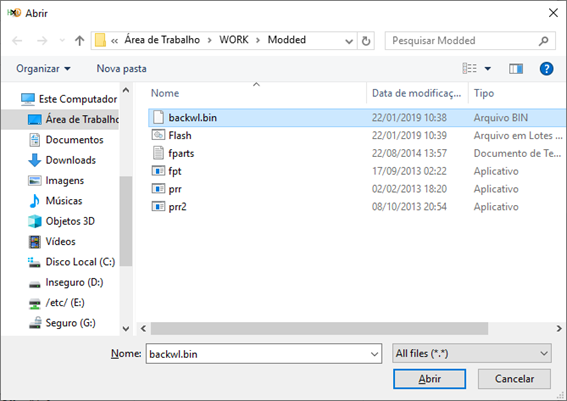
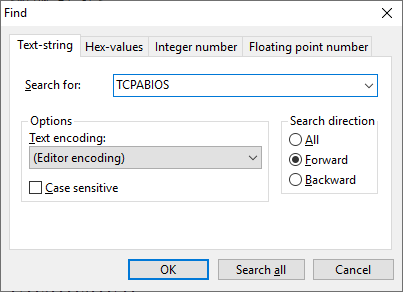
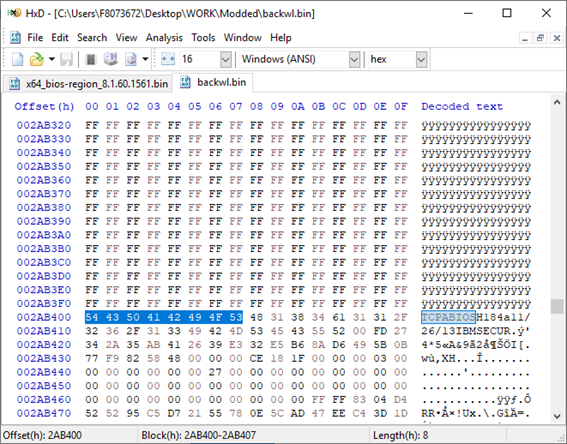
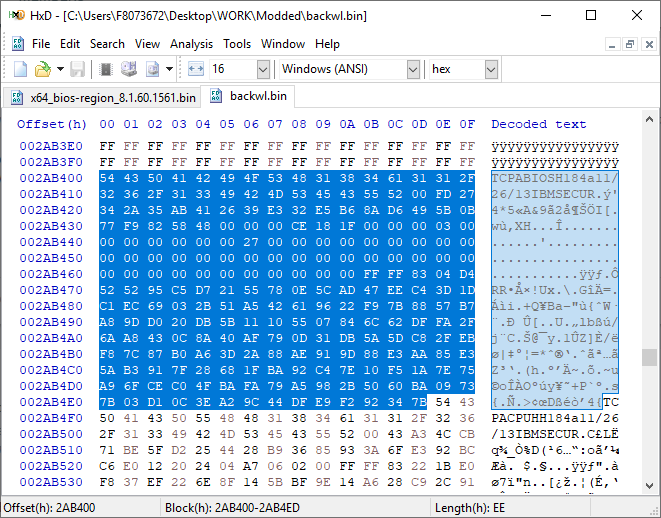
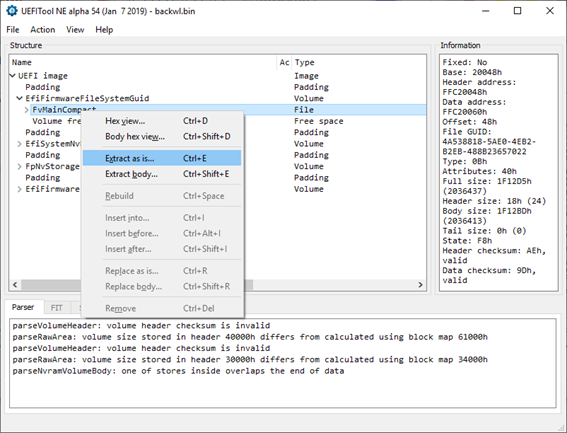
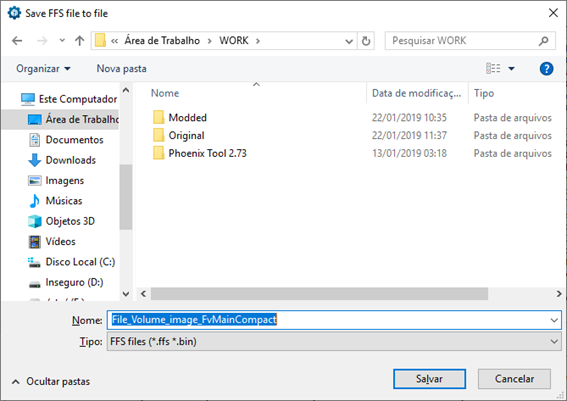
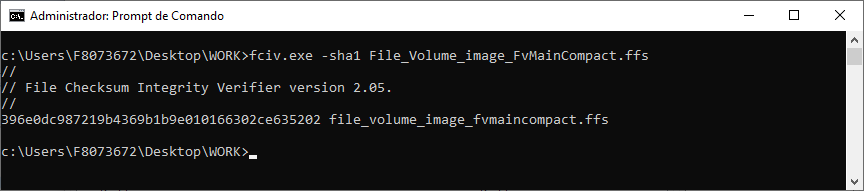
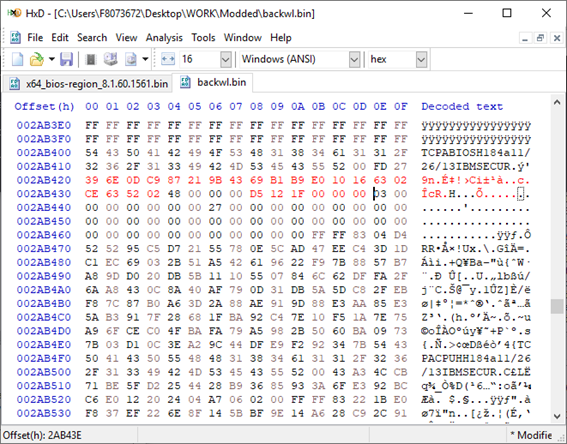
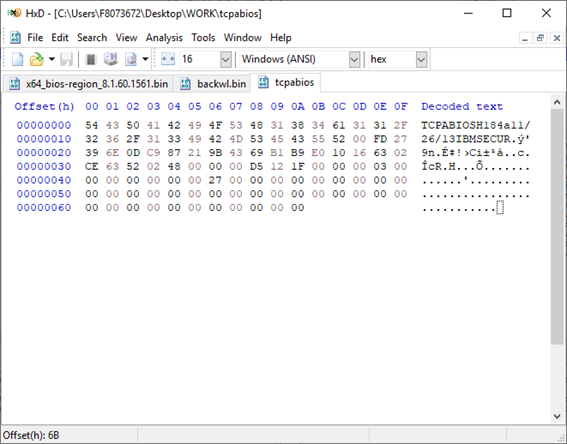
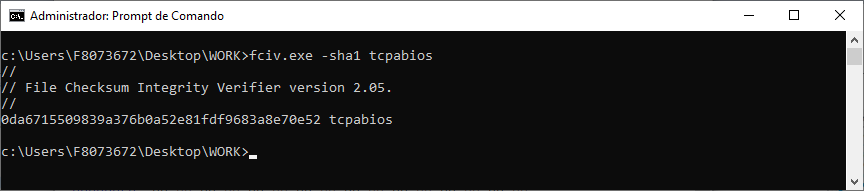
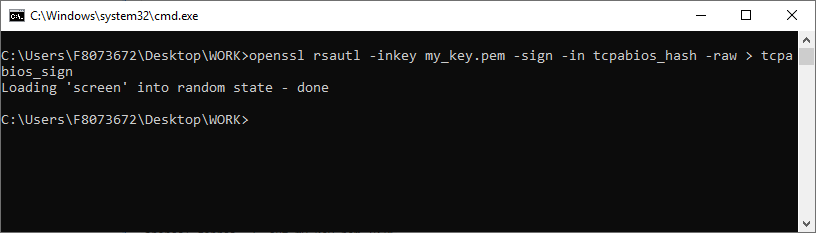
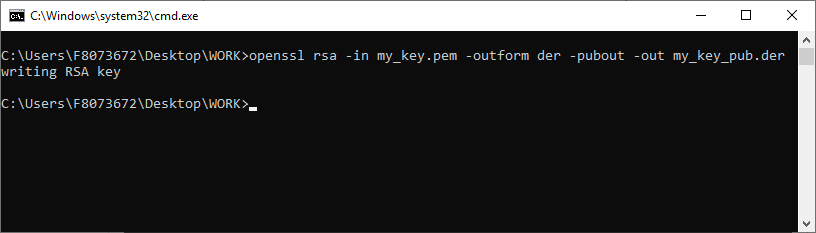
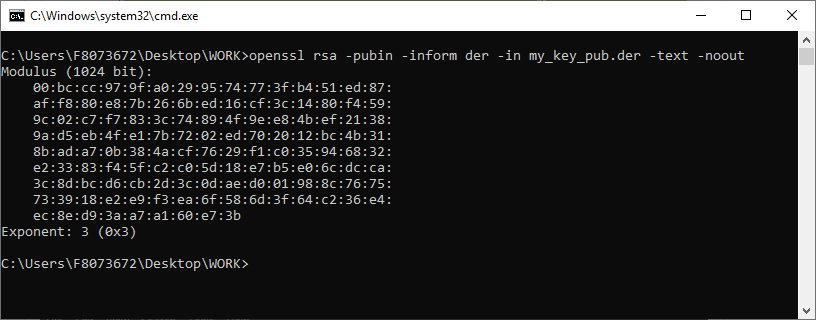
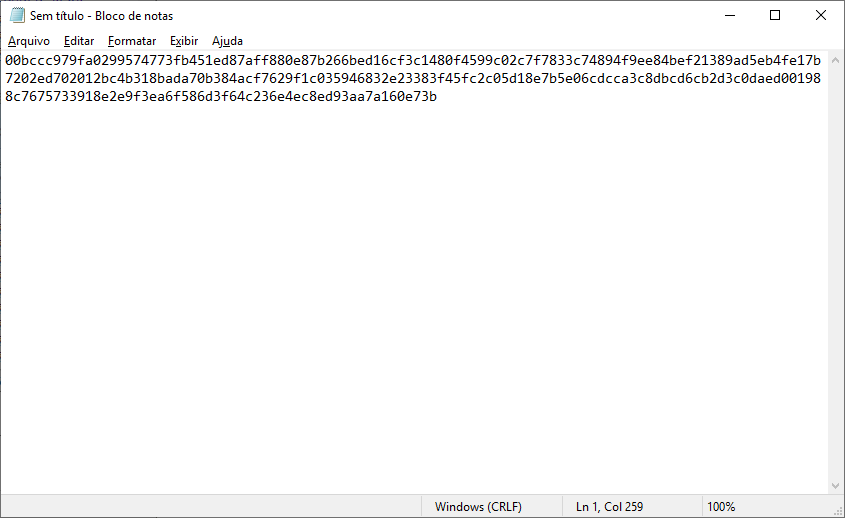
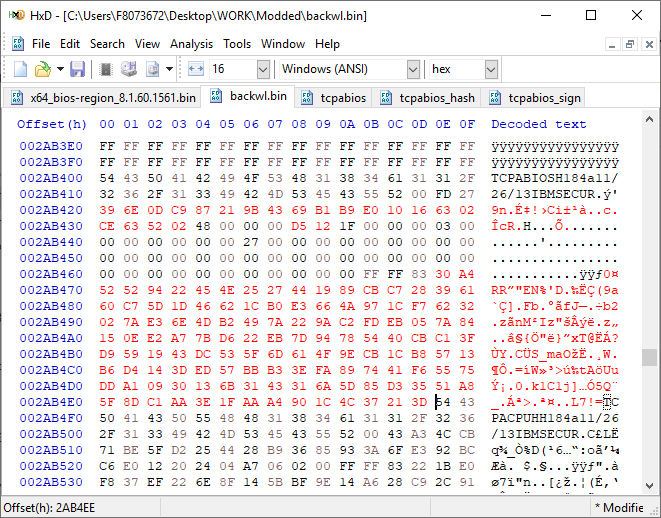
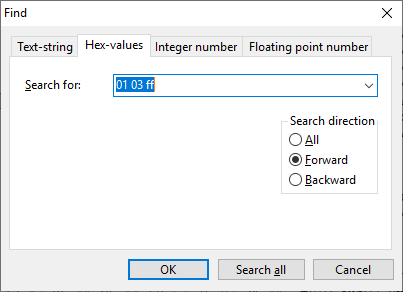
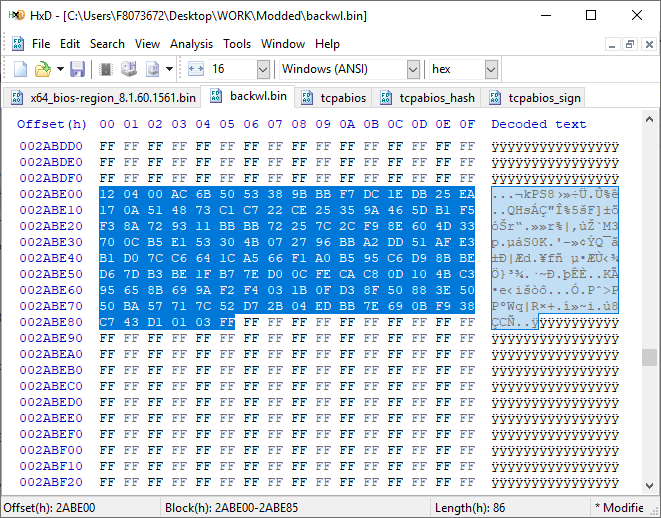
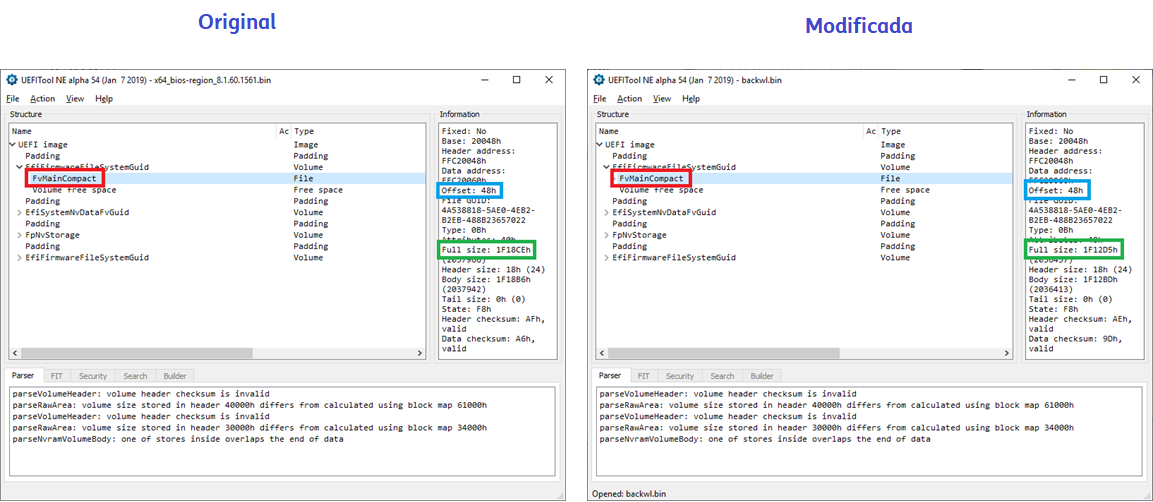
[GUIDE] Fix Insyde H2O BIOS signature (5 beeps on Lenovo) I recently bought a Lenovo L440 laptop to install the Mojave macOS and I replaced the wireless card with the DW1560 because the current one is not compatible. I discovered that there was a whitelist of enabled cards that manufacturers are adopting recently (in my case it uses a Phoenix Insyde BIOS H2O). I searched the BIOS Modding forums and found people who did the patch for me. But after replacing the BIOS I noticed that the computer keep beeping 5 times every time I boot. So, I went deeper into this issue and that's when I figured out how to solve it. Then I created this guide based on the information I found in some Russian forums. Preface When the BIOS integrity test fails, some Intel AMT functionality stops working and a sequence of 5 whistles is issued twice at boot. After modifying to remove whitelist (enable unauthorized WI-FI cards), unlock MSR 0xe2 (hackintosh), enable advanced menu, etc. the BIOS will not pass the integrity test causing this problem. This integrity check is done through the RSA signature of the BIOS block called TCPABIOS (more information below) with the public key in modulus 3 format also stored in the BIOS. This TCPABIOS block stores the checksums of each BIOS volume. What we will do is generate new checksum for those volumes that have been modified, generate a RSA (private and public) key pair, sign that block with the private key, and replace the public key. Tools needed - EFITool NE alpha 54: https://github.com/LongSoft/UEFITool/releases - HxD 2.1.0: https://mh-nexus.de/en/hxd/ - OpenSSL: http://gnuwin32.sourceforge.net/packages/openssl.htm (Download -> Binaries) - Microsoft File Checksum Integrity Verifier (FCIV.exe): https://www.microsoft.com/en-us/download/details.aspx?id=11533 Step by step Let's open the modified BIOS, locate the TCPABIOS block and understand its anatomy. 1. Open the BIOS with HxD (We will use the modded BIOS in the MyDigitalLife.com forum by the Serg008 user for the Lenovo B590 laptop in this guide) 2. Find the word TCPABIOS: 3. The block starts with TCPABIOS and ends before TCPACPUH 4. Anatomy: 54 43 50 41 42 49 4F 53 48 31 38 34 61 31 31 2F 32 36 2F 31 33 49 42 4D 53 45 43 55 52 00 FD 27 34 2A 35 AB 41 26 39 E3 32 E5 B6 8A D6 49 5B 0B 77 F9 82 58 48 00 00 00 CE 18 1F 00 00 00 03 00 00 00 00 00 00 00 27 00 00 00 00 00 00 00 00 00 00 00 00 00 00 00 00 00 00 00 00 00 00 00 00 00 00 00 00 00 00 00 00 00 00 00 00 FF FF 83 04 D4 52 52 95 C5 D7 21 55 78 0E 5C AD 47 EE C4 3D 1D C1 EC 69 03 2B 51 A5 42 61 96 22 F9 7B 88 57 B7 A8 9D D0 20 DB 5B 11 10 55 07 84 6C 62 DF FA 2F 6A A8 43 0C 8A 40 AF 79 0D 31 DB 5A 5D C8 2F EB F8 7C 87 B0 A6 3D 2A 88 AE 91 9D 88 E3 AA 85 E3 5A B3 91 7F 28 68 1F BA 92 C4 7E 10 F5 1A 7E 75 A9 6F CE C0 4F BA FA 79 A5 98 2B 50 60 BA 09 73 7B 03 D1 0C 3E A2 9C 44 DF E9 F2 92 34 7B Gray: Name and Block Information Red: Volume Information (Checksum and Header) Blue: Separation of the list of volumes and the block signature Green: Signature of the TCPABIOS block are the last 128 bytes List of Volumes: Each volume has the format: 00 FD 27 34 2A 35 AB 41 26 39 E3 32 E5 B6 8A D6 49 5B 0B 77 F9 82 58 48 00 00 00 CE 18 1F 00 00 00 03 00 00 00 00 00 (Prefix 3 bytes + checksum 20 bytes + offset 4 bytes + volume size 6 bytes + end delimiter 6 bytes) The volumes are enumerated and use the first byte in the prefix for this (00 FD 27), starting at 0. The BIOS used in this example has only one volume, but in the case of more than one volume, it would be: 00 FD 27 .., 01 FD 27 ..., 02 FD 27 ... - Checksum is SHA1 calculation of the volume. - Offset is the volume position within the BIOS. The bytes are inverted, in this case it would be 00 00 00 48, equals to 48h - Volume Size is also with the bytes inverted, then: 1F18CEh Then that's it. We need to correct this information (checksum, offset and size) 5. To extract the volumes open the BIOS with the UEFITool and see how to identify the volumes (our example there is only one volume if there were others would also be inside EfiFirmwareFileSystemGuid): In the original BIOS, circled in red we can see our volume. Note that in blue we have offset and green the size. Exactly as we checked up on HxD. In the modified BIOS we see that the size is different: Original: 1F18CEh Modified: 1F12D5h (we'll need this later) 6. Let's extract this volume to calculate the checksum by choosing the "Extract as is ..." 7. Use this command to get the checksum of this volume: fciv.exe -sha1 File_Volume_image_FvMainCompact.ffs Now we have the checksum that is 396e0dc987219b4369b1b9e010166302ce635202 8. Replace the information in the TCPABIOS block: Note that the volume size must have the bytes inverted, so if the total is 6 bytes and is 1F12D5h, becomes D5 12 1F 00 00 00 in place of CE 18 1F 00 00 00. If the offset is different, also perform the same process by inverting the bytes. Checksum change from 34 2A 35 AB 41 26 39 E3 32 E5 B6 8A D6 49 5B 0B 77 F9 82 58 to 39 6E 0D C9 87 21 9B 43 69 B1 B9 E0 10 16 63 02 CE 63 52 02 Do this for each volume in the BIOS. 9. Now we need to generate the checksum of the whole TCPABIOS block but without considering the last 131 bytes, that is to dismiss FF FF 83 + 80 bytes from the previous signature. Copy to a new file in HxD and save as tcpabios Use the command to generate the checksum of this block: fciv.exe -sha1 tcpabios Checksum of TCPABIOS block: 0da6715509839a376b0a52e81fdf9683a8e70e52 Create a new file in HxD and add 108 bytes with 00 and paste the checksum at the end and save as tcpabios_hash, thus: 10. Now let's generate the RSA private key with modulus 3: openssl genrsa -3 -out my_key.pem 1024 Sign the file tcpabios_hash: openssl rsautl -inkey my_key.pem -sign -in tcpabios_hash -raw > tcpabios_sign Now enjoy to generate the public key: openssl rsa -in my_key.pem -outform der -pubout -out my_key_pub.der And generate public key modulus 3: openssl rsa -pubin -inform der -in my_key_pub.der -text -noout Copy and paste the key into a text file to use soon. Remove all ":" and put everything on a single line, thus: 11. Open the tcpabios_sign file in HxD, copy the contents and replace the signature at the end of the TCPABIOS block: 12. Now let's locate the location of the public key in the BIOS and replace it. This key starts with 12 04 and ends with 01 03 FF and is after the TCPABBLK block. The key looks like this: 12 04 + 81 bytes + 01 03 FF. Search for 01 03 FF to locate more easily. Verify that before the 81 bytes have bytes 12 04 to make sure you found. Now substitute for the public key that was annotated in the text file previously, thus: Save and you're ready. Your BIOS is signed and ready.


 1 point
 -
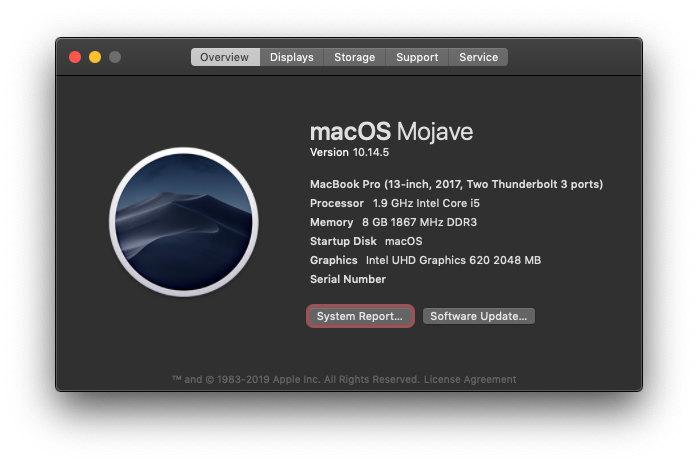
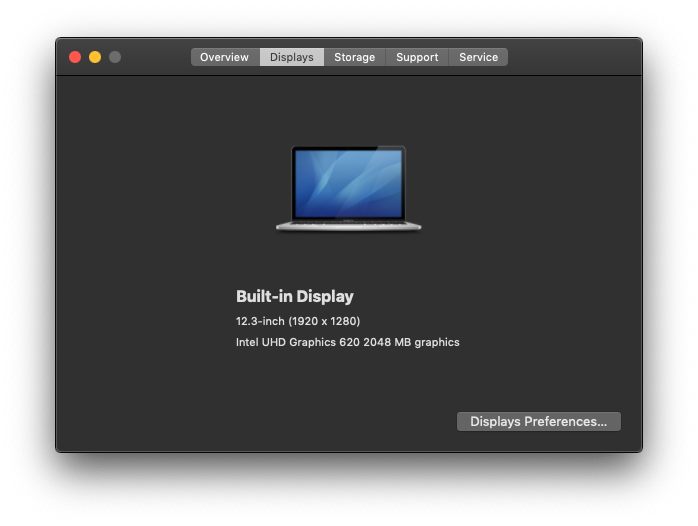
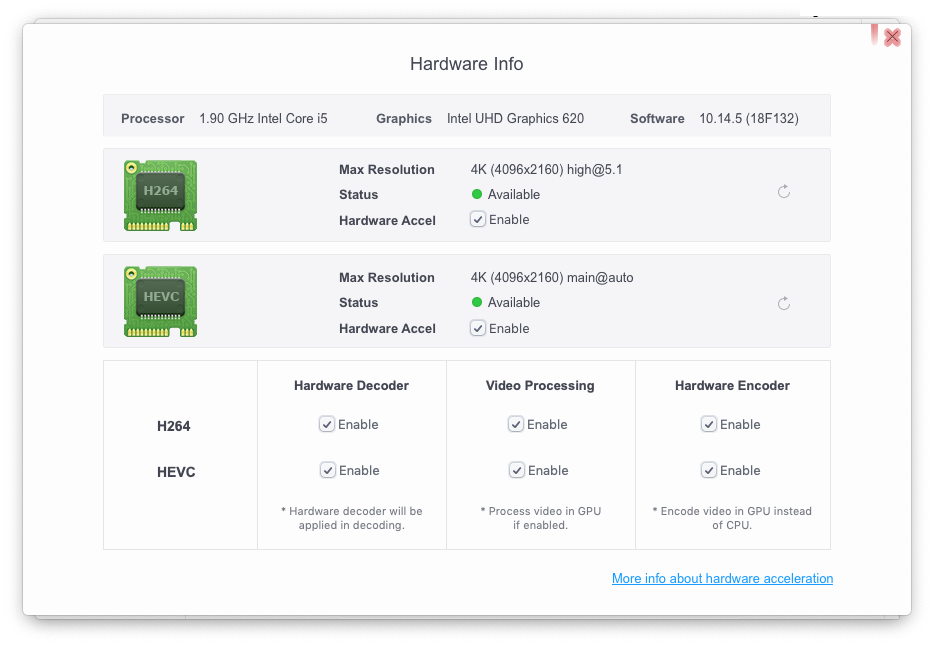
Dell Latitude 5290 2-in-1 UHD620 iGPU CLOVER Specifics - CPU : Intel® Core™ i5-8350U Processor (6M Cache, up to 3.60 GHz) - Graphics : Intel® UHD Graphics 620 - Sound : Realtek ALC3253 (ALC225) - Display : 12.3 Inch 1920 X 1280 (WUXGA+) 3:2 10 Points Multi Touch - Memory : Samsung LPDDR3 8GB 1867MHZ (4GB * 2 Dual Channel) - SSD : TOSHIBA KXG60ZMV256G 256GB (M.2 PCIE 3.0 X2 NVME/SATA3 SLOT * 2 ; 2280, 2242/2230) - Wireless : BCM943602BAED(DW1830) (WWAN Slot * 1) - External Port & Slot : USB 3.2 Gen 1 * 2, TYPE C * 2 (USB 3.2 Gen 1, Displayport, Power Delivery), I2C PORT * 1, Audio Jack * 1, Smart Card Reader * 1 USIM Slot * 1, Lock Slot *1 - Battery : 42WHr - Windows 10 Pro Bios/Clover Bootloader/macOS Version - Bios : 1.7.3 - Clover Bootloader : v2.4k r4920 (or Higher) - macOS : Above 10.14 Bios Setup - Load Optimized Defaults Drivers64UEFI - ApfsDriverLoader-64.efi - AptioMemoryFix-64.efi - FSInject-64.efi - HFSPlus.efi - VirtualSmc.efi Kexts - AirportBrcmFixup.kext - AppleALC.kext - BrcmFirmwareRepo.kext - BrcmPatchRAM2.kext - EFICheckDisabler.kext - Lilu.kext - NullEthernet.kext - SMCBatteryManager.kext - SMCLightSensor.kext - SMCProcessor.kext - SMCSuperIO.kext - USBPorts.kext - Hackintool generated, HS / SS port matching and realignment - VirtualSMC.kext - VoodooI2C.kext - VoodooI2CHID.kext - VoodooPS2Controller.kext - Add 'Info.plist - IOKitPersonalities - IONameMatch - Item 0 - PNP044E' - WhateverGreen.kext ETC After installation - Remove these boot flags -v debug=0x100 keepsyms=1 - Additional patches are required for iMessage and Facetime activation Intel UHD Graphics 620 - This build is suitable for 'Dell Latitude 5290 2-in-1' system uses iGPU of 'Intel UHD Graphics 620' If your iGPU is not 'Intel UHD Graphics 620', additional graphics patches might be required NullEthernet.kext & ssdt-rmne.aml - Null Ethernet is a way to prevent a Mac address-based license for some software from being broken when a wireless card is absent or replaced (including iCloud) If you do not need to consider blocking software licenses by changing your Mac address, you can remove it What Works Graphics/Display - Intel® UHD Graphics 620 QE/CI, 2048MB Vram - Type C DP 2 ports Video / Audio output Hot Swap - Brightness control - Lid Close Sleep with Magnetic Travel Keyboard - I2C touch screen Up to 4 points Gesture action (recognized as Magic Trackpad 2) Audio - Built-in speaker - Built-in microphone - Line input - DP Audio Output Input - I2C touch screen Up to 4 points Gesture action (recognized as Magic Trackpad 2) - I2C Keyboard (Magnetic Travel Keyboard) with Backlight - Touchpad (Magnetic Travel Keyboard, recognized as mouse) - Volume button, window button, power button Power Management - CPU/Speed Step - Battery - Type C PD 2 Ports Charging - Sleep/Wake Storage Device - Full Size/ Type C USB 2.0, 3.0 Hot Swap - m.2 NVME 2280/ m.2 SATA 2280 1 Slot and m.2 NVME 2230(2242)/ m.2 SATA 2230(2242) 1 Slot Wireless communication - iMessage/FaceTime/App Store - Wi-Fi, Bluetooth, Airdrop, Continuity with macOS compatible wireless card Report post Posted 1 hour ago Dell Latitude 5290 2-in-1 UHD620 iGPU CLOVER Specifics - CPU : Intel® Core™ i5-8350U Processor (6M Cache, up to 3.60 GHz) - Graphics : Intel® UHD Graphics 620 - Sound : Realtek ALC3253 (ALC225) - Display : 12.3 Inch 1920 X 1280 (WUXGA+) 3:2 10 Points Multi Touch - Memory : Samsung LPDDR3 8GB 1867MHZ (4GB * 2 Dual Channel) - SSD : TOSHIBA KXG60ZMV256G 256GB (M.2 PCIE 3.0 X2 NVME/SATA3 SLOT * 2 ; 2280, 2242/2230) - Wireless : BCM943602BAED(DW1830) (WWAN Slot * 1) - External Port & Slot : USB 3.2 Gen 1 * 2, TYPE C * 2 (USB 3.2 Gen 1, Displayport, Power Delivery), I2C PORT * 1, Audio Jack * 1, Smart Card Reader * 1 USIM Slot * 1, Lock Slot *1 - Battery : 42WHr - Windows 10 Pro Bios/Clover Bootloader/macOS Version - Bios : 1.7.3 - Clover Bootloader : v2.4k r4920 (or Higher) - macOS : Above 10.14 Bios Setup - Load Optimized Defaults Drivers64UEFI - ApfsDriverLoader-64.efi - AptioMemoryFix-64.efi - FSInject-64.efi - HFSPlus.efi - VirtualSmc.efi Kexts - AirportBrcmFixup.kext - AppleALC.kext - BrcmFirmwareRepo.kext - BrcmPatchRAM2.kext - EFICheckDisabler.kext - Lilu.kext - NullEthernet.kext - SMCBatteryManager.kext - SMCLightSensor.kext - SMCProcessor.kext - SMCSuperIO.kext - USBPorts.kext - Hackintool generated, HS / SS port matching and realignment - VirtualSMC.kext - VoodooI2C.kext - VoodooI2CHID.kext - VoodooPS2Controller.kext - Add 'Info.plist - IOKitPersonalities - IONameMatch - Item 0 - PNP044E' - WhateverGreen.kext ETC Intel UHD Graphics 620 - This build is suitable for 'Dell Latitude 5290 2-in-1' system uses iGPU of 'Intel UHD Graphics 620' If your iGPU is not 'Intel UHD Graphics 620', additional graphics patches might be required ***After installation*** - Remove these boot flags -v debug=0x100 keepsyms=1 - Additional patches are required for iMessage and Facetime activation What Works Graphics/Display - Intel® UHD Graphics 620 QE/CI, 2048MB Vram - Type C DP 2 ports Video / Audio output Hot Swap - Brightness control - Lid Close Sleep with Magnetic Travel Keyboard - I2C touch screen Up to 4 points Gesture action (recognized as Magic Trackpad 2) Audio - Built-in speaker - Built-in microphone - Line input - DP Audio Output Input - I2C touch screen Up to 4 points Gesture action (recognized as Magic Trackpad 2) - I2C Keyboard (Magnetic Travel Keyboard) with Backlight - Touchpad (Magnetic Travel Keyboard, recognized as mouse) - Volume button, window button, power button Power Management - CPU/Speed Step - Battery - Type C PD 2 Ports Charging - Sleep/Wake Storage Device - Full Size/ Type C USB 2.0, 3.0 Hot Swap - m.2 NVME 2280/ m.2 SATA 2280 1 Slot and m.2 NVME 2230(2242)/ m.2 SATA 2230(2242) 1 Slot Wireless communication - iMessage/FaceTime/App Store - Wi-Fi, Bluetooth, Airdrop, Continuity with macOS compatible wireless card Issues - If USB device is connected to Full size USB port with power connected state, it wakes up immediately after sleeping Fixed after Full size USB port as internal port As a result, if you connect a device above USB 3.0 to the Full size USB port, it will be recognized as an internal disk icon - When the battery is in use, the disk not ejected properly after sleeping Fixed with SafeSleepUSB.app or Jettison.app - WWAN communication via WWAN card, USIM, and Legacy_Sierra_QMI.kext is feasible, but has not been tried yet - DW1820A(BCM94350ZAE) - 1028:0021 (part # CN-0VW3T3) Issue 1 : WiFi Down sometimes - DW1830(BCM943602BAED) - VenderID : 0489, ProductID : E0A1, Firmware Version:v5 c4510 (v5 c4096) Issues 1 : Bluetooth not works after sleep Issues 2 : If check 'Wake for Wi-Fi network access', wifi speed will be very slow after sleep. - MicroSD slot not working properly If you use modified Sinetek-rtsx.kext, you can use HFS + formatted SD card, but there are still some problems - PCIE front and rear camera (AVStream2500, OV series camera) not recognized - Compared to Windows, white noise occurs a little on speakers - In case of new installation, Magic Trackpad 2 touch screen via VoodooI2C, VoodooI2CHID is not immediately recognized and suddenly recognized after specific setup / injection event after personal setting Once recognized, the touch screen will not be lost After recognized the touch screen, the touch pad of the Magnetic Travel Keyboard is disabled, which can be activated using Karabiner - 3:2 resolution HiDPI not works through known method Files and Details (Github) https://github.com/laelsirus/Dell-Latitude-5290-2-in-1-UHD620-iGPU-CLOVER
 1 point
 -
prress O key in clover boot screen, u can change all there1 point
-
u need a fakecpuid, ur processor don't have native support1 point
-
Hi Headkaze, I've just finished installing the new kexts and they work beautifully (For some strange reason I couldn't get the cp commands to work properly - error message about no such file or folder - so instead I used Kext Utility, rebooted and success). Many thanks for putting these together.
 1 point
 -
1 point
-
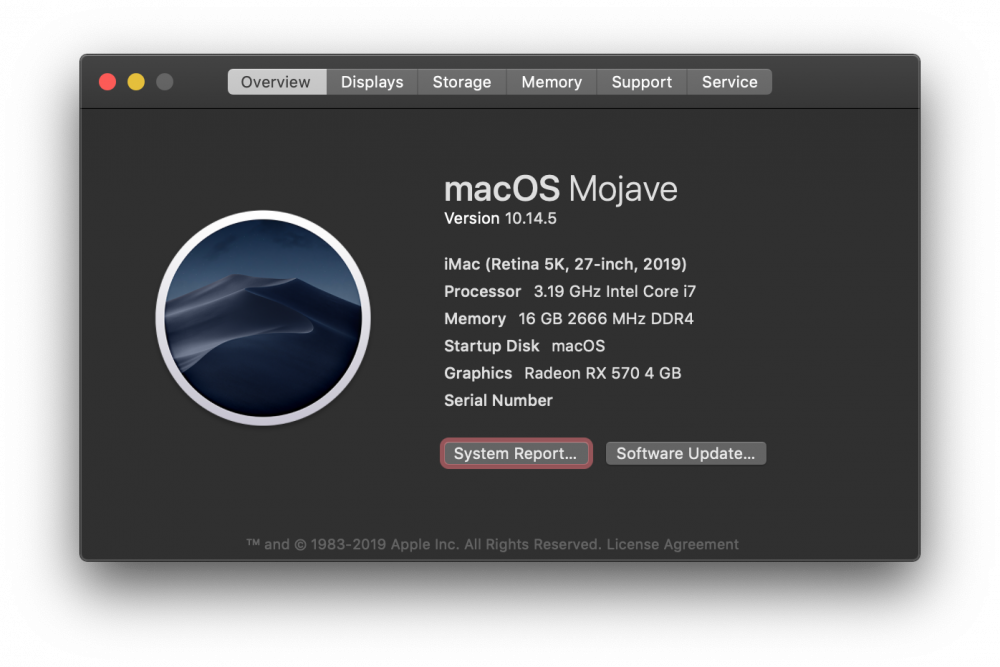
GA-B360M D3H with UHD630 iGPU AMD dGPU CLOVER Specifics CPU : Intel® Core™ i7-8700 Processor (12M Cache, up to 4.60 GHz) Mainboard : Gigabyte GA-B360M D3H Durable Edition Graphics : Intel® UHD Graphics 630, SAPPAIRE RX 570 4GB Sound : Realtek ALC892 Wireless : BCM943602CS Bios/Clover Bootloader/macOS Version Bios : F12 Clover Bootloader : v2.4k r4920 (or Higher) macOS : Above 10.14 Bios Setup Load Optimized Defaults [Internal Graphics] Enable Kexts AirportBrcmFixup.kext AppleALC.kext BrcmFirmwareRepo.kext BrcmPatchRAM2.kext EFICheckDisabler.kext FakeSMC_ACPISensors.kext FakeSMC_CPUSensors.kext FakeSMC_GPUSensors.kext FakeSMC_LPCSensors.kext FakeSMC_SMMSensors.kext FakeSMC.kext IntelMausiEthernet.kext Lilu.kext USBPorts.kext - Hackintool generated VoodooPS2Controller.kext Issues none Files and Details (Github) https://github.com/laelsirus/Dell-Latitude-5290-2-in-1-UHD620-iGPU-CLOVER
 1 point
 -
@uglyJoe @BALDY_MAN Thanks for testing bro, sorry for delay. I have built a new binary for testing with some new dbg messages. Hopefully we can locate the problem soon. If isnt, you will need to wait for me to install and test 10.15 by myself, sorry. Oz.. Oz.. Oz \m/ osis KernextPatcher.efi.zip1 point
-
I use Dids UDK 2018 script to build Clover (all works fine under Mojave). For my config i7 9700K, I use: mandatory (except smchelper), aptiofixmemory. All works fine before on Catalina, before r4977. EDIT: same issue with your Clover r49771 point
-
Yeah, but I mean...which method of building Clover did you use? Did you use the official steps provided by Slice a while ago for UDK2018, did you use another script? This is what I meant. And also, which drivers are you choosing for installation? I have a feeling that's where it gets stuck. Of course, and as always, I could be wrong. EDIT: also, attached you can find my own build, if you wanna give this one a try, for comparison. Keep in mind, though, that it's built without AptioMemoryFix. Clover_v2.4k_r4977.zip1 point
-
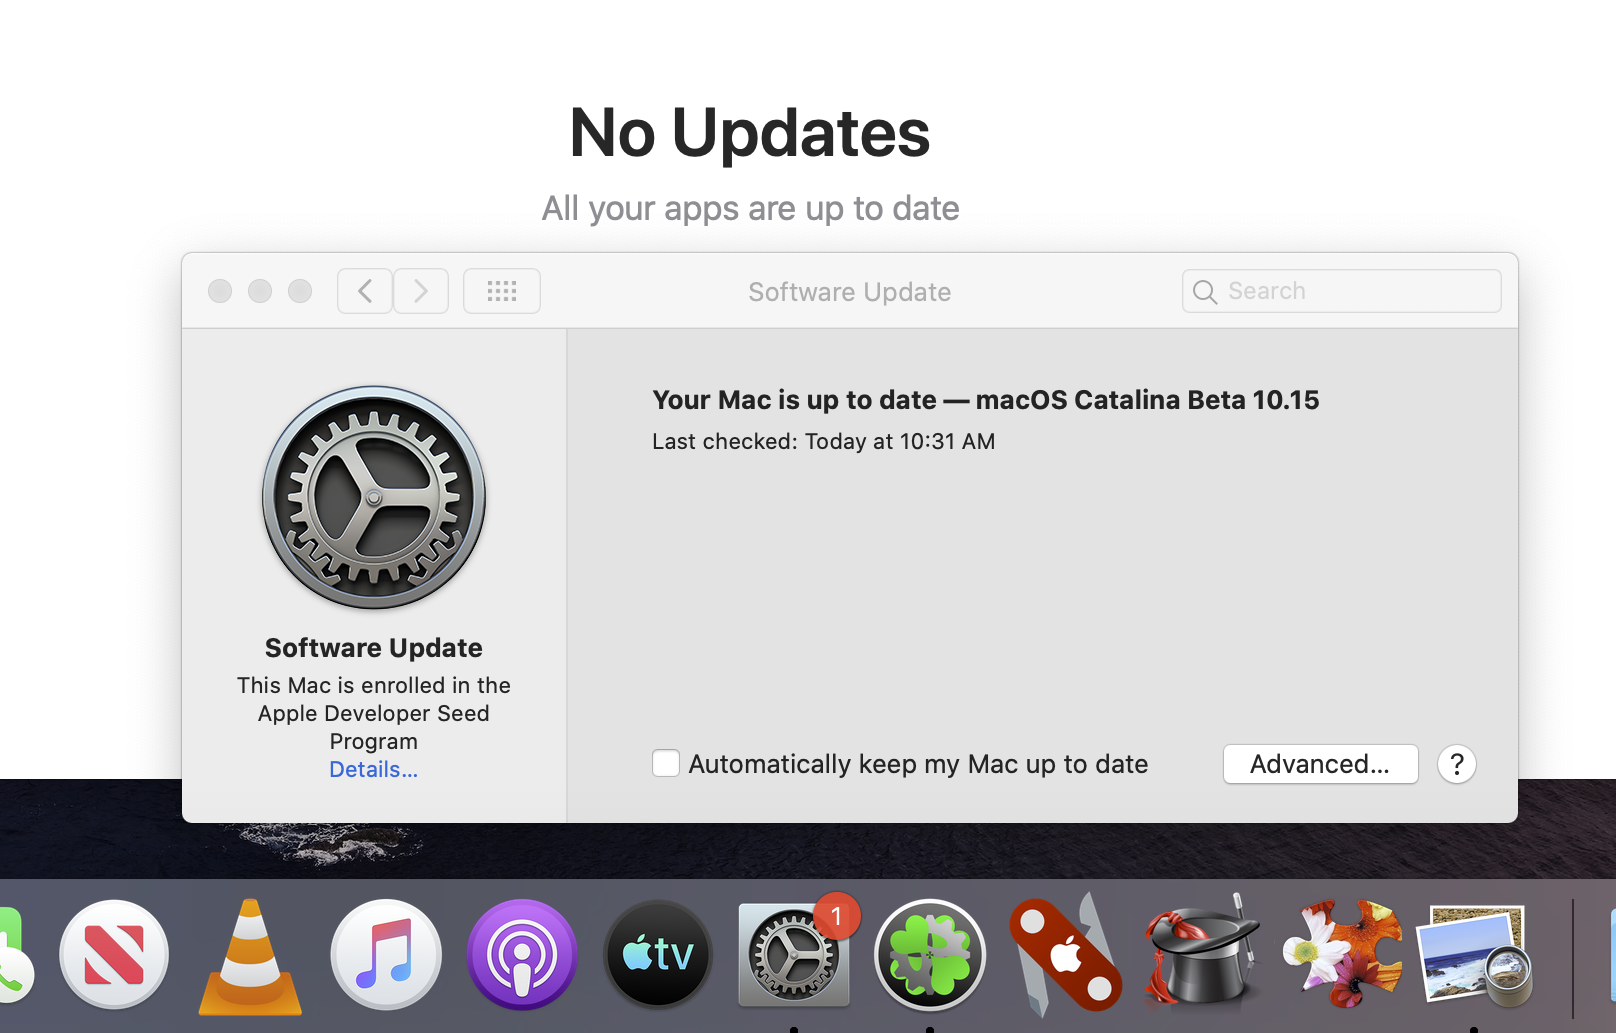
My System Preferences Dock icon has a notification badge. Usually, that means I have an update. But I don't. How can I tell what the badge is referring to? There are no badges on any of my System Preferences Icons when I open System Preferences. Is this a glitch? Is it unique to Catalina or does it happen in other versions of macOS as well? P.S. - killall Dock doesn't help. EDIT: This got rid of it: defaults write com.apple.systempreferences AttentionPrefBundleIDs 0 killall Dock defaults write com.apple.systempreferences AttentionPrefBundleIDs 1 killall Dock
 1 point
 -
Headkaze’s fork of the original repo has the wake patch but Goodwin’s original master repo doesn’t...1 point
-
Im glad you got it working, and that people still read this guide. Has been a while for me using a triple boot system.1 point
-
EVGA 600 Watt 80 PLUS Wired ATX PSU/Power Supply Black. £44.99 Those series are the best EVGA Supernova G2 Supernova P21 point
-
Rev 4976 Improve Apple ROM info
 1 point
 -
@tluck Thank You so much for Your answer. I tried removing WhateverGreen.kext, didn't help. Setting platform-id to 0x12345678 didn't help too. @jenyunhuang I'll just go out on a limb here and guess that his adapter is basically the same LVDS->eDP, because they're nearly identical from the outside perspective and as from I know through all the thinkpad-forums, these FHD-boards are the same. There are some differences between T420 FHD-boards and T420s / T430s - WQHD-Boards though. The T420s board is also sold from the same seller that I bought mine from on eBay. Strangely with his config.plist I get backlight (and backlight control in Sierra) on the internal screen which I don't get when using my EDID in his config.plist or using "my" config.plist. Since 3 hours im figuring out on how to edit the AppleBacklightInjector.kext in the EFI under "ApplePanels", where all the "F10Txxx"-listing are, to enable backlight with my EDID at least and from there on work further. My current ioreg status: T420:~ nutzer$ ioreg -l | grep ApplePanel | | "ApplePanels" = {"F10T0366"=<00110000008c00d80136018f01fe02a3034503e704c70535075a091c0b130d9b10591312>,"F10T159e"=<00110000001c002c003f00510068008a00ab00cc00fa0135018101dd024402c9035903e8>,"F10T02e3"=<00110000008c00d80136018f01fe02a3034503e704c70535075a091c0b130d9b10591312>,"F10T11ed"=<00110000004f007a00b000e30122017f01db023802b7035a042e052e064c07bc094b0ad8>,"F10T050b"=<00110000001c002c003f00510068008a00ab00cc00fa0135018101dd024402c9035903e8>,"F10T02e2"=<00110000008c00d80136018f01fe02a3034503e704c70535075a091c0b130d9b10591312>,"F10T213e"=<00110000008c00d80136018f01fe02a3034503e704c70535075a091c0b130d9b10591312>,"F10T313c"=<00110000008c00d80136018f01fe02a3034503e704c70535075a091c0b130d9b10591312>,"F10T40e2"=<00110000008c00d80136018f01fe02a3034503e704c70535075a091c0b130d9b10591312>} and: T420:~ nutzer$ ioreg -l| grep -i yEDID | | | | | "IODisplayEDID" = <00ffffffffffff0030aea340000000000c190104951f1178ea8545a45a54a1270c505400000001010101010101010101010101010101293680a070381f403020350035af1000001e0000000000000000000000000000000000000000000f00d1093bd1093b1e0a0006af3d12000000fe004231343048414e30312e33200a0036> | | | | | "IODisplayEDID" = <00ffffffffffff000469c324ef7700000a17010380341d782a2ac5a4564f9e280f5054b7ef00d1c0814081809500b300714f81c08100023a801871382d40582c450009252100001e000000ff0044334c4d54463033303730330a000000fd00324b185311000a202020202020000000fc004153555320564e3234370a2020019c020322714f0102031112130414050e0f1d1e1f10230917078301000065030c0020008c0ad08a20e02d10103e9600fd1e11000018011d007251d01e206e285500fd1e1100001e011d00bc52d01e20b8285540fd1e1100001e8c0ad090204031200c405500fd1e11000018000000000000000000000000000000000000000000d9> So my EDID is recognized correctly as I from what I see and think. When I watched the internal display while using the notebook, here and there I saw some white little lines/point flashing for milliseconds. What is the 1st framebuffer, something I could change? Call me "dumb". Reading @tluck guide with 2 open eyes would be better than with only one. Patched the AppleBacklightInjector, et voila1 point
-
Attached efi + screenshot + log KernextPatcher.zip1 point
-
Finally, got MBR HFS+ Catalina works perfectly now.1 point


.thumb.png.a43579d9e280a5c4c80807bf93412ae7.png)