Leaderboard


Popular Content
Showing content with the highest reputation on 03/28/2024 in all areas
-
Security on Apple computers provided by encryption by T2 chip which we have no. So why SecureBootModel is useless for us.6 points
-
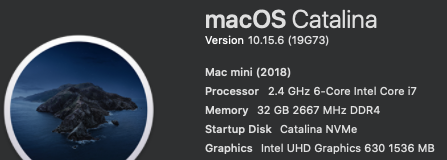
Apple Secure Boot is the technology used in Macs to verify the integrity of the operating system at boot: boot loader > kernel > system volume snapshot. If this check fails, macOS won't boot. Apple Secure Boot only works during the boot process, once macOS is running it no longer performs any function. Apple defines 3 Secure Boot modes: Full Security: Only allows to boot the installed operating system or another signed version of macOS in which Apple currently trusts. It also checks the integrity of the installed version. If the check fails, the system offers to reinstall macOS or boot from a different disk. Medium Security: Checks that the installed version of macOS is legitimate but not the integrity of the system. Lets you boot any signed version of macOS in which Apple has ever trusted. No Security: other systems or versions different from those mentioned in the secure options are allowed. There are no requirements on the boot operating system. Apple Secure Boot state on Intel-based Macs can be obtained from NVRAM: nvram 94b73556-2197-4702-82a8-3e1337dafbfb:AppleSecureBootPolicy If the variable is found, it can be one of the following: %02 - Full Security Mode %01 - Medium Security Mode %00 - No Security Mode If the variable is not found, Apple Secure Boot is not supported. SecureBootModel with other value than Disabled gives Medium Security, for Full Security you must use ApECID. SecureBootModel and ApECID: with SecureBootModel=Disabled>> no security (%00) with SecureBootModel=x86legacy or any of the valid values >> medium security (%01) with SecureBootModel= any of the T2 values plus ApECID non zero >> full security (%02). Notice that since OpenCore 0.7.2: x86legacy is designed for machines without T2 chip with Big Sur and Monterey j137 doesn't work on Monterey j137 is the recommended value for macOS 10.13.2 through 10.15.x systems older than macOS 10.13.2 must set SecureBootModel=Disabled users who don't want to have Apple Secure Boot for any reason can set SecureBootModel=Disabled, even in Big Sur and Monterey. In summary, these are muy opinions: I appreciate the interest that the Opencore developers have had in making our Hacks as similar as possible to a real Mac, including Apple Secure Boot. I know that it is impossible for everything to be exactly the same, but they have managed to give OpenCore features that very often make me forget that I am using a Hack and not a real Mac SecureBootModel=Disabled does not appear to lower the Hack's security below a required level, at least for personal PCs. SecureBootModel only acts at boot time to check the legitimacy/integrity of the booting system. Another thing is in multi-user environments (business...) where a malicious user can access the Hack to boot it from a device with manipulated macOS. I don't agree 100% with @Slice. There are Macs without T2 that have Apple Secure Boot medium security, for example iMac19,1 with macOS 10.14 or newer. But I do agree with him that having SecureBootModel enabled or disabled has no/little importance in Hacks. Without forgetting that Clover lacks this property and many thousands of users have used it and are using it to full satisfaction.4 points
-
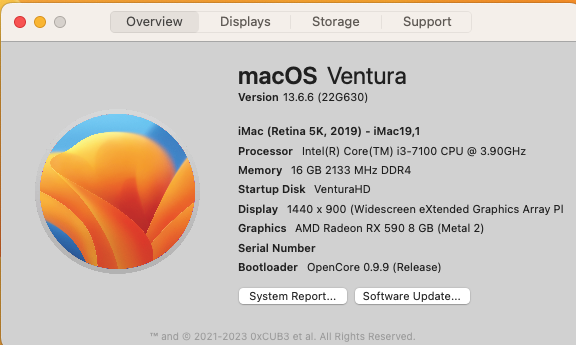
OpenCore 0.9.9, iMac19,1, SecureBootModel=x86legacy, Gatekeeper disabled (spctl --global-disable) -> update fails. Enabling Gatekeeper (spctl --global-enable) -> incremental update okey. This Gatekeeper issue has not happened in previous updates. After 13.6.6, scheduled sleep sometimes doesn't work (it was working fine before), as if screen and system sleep is disabled. Not investigated yet.3 points
-
Since it makes us happy, I can't resist it!! 😊
 3 points
 -
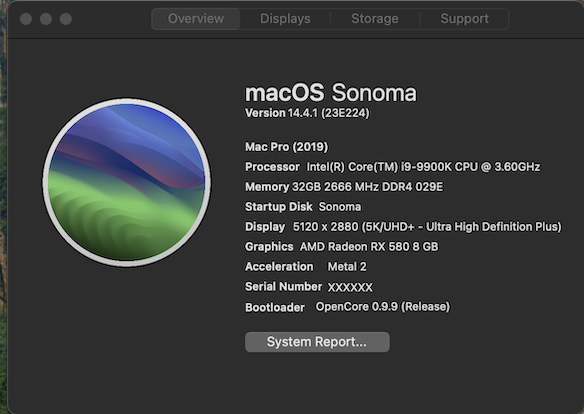
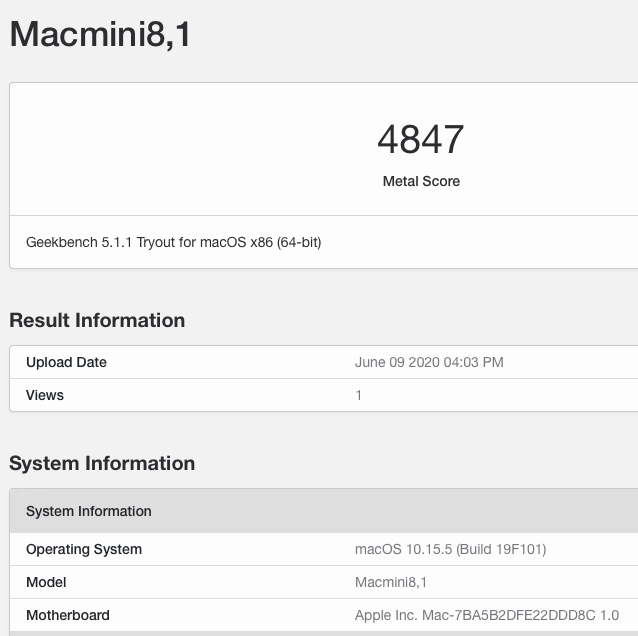
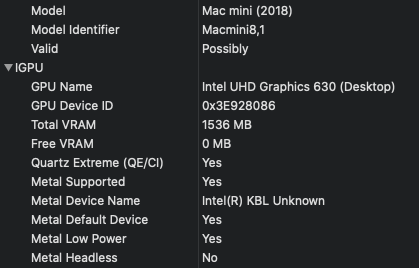
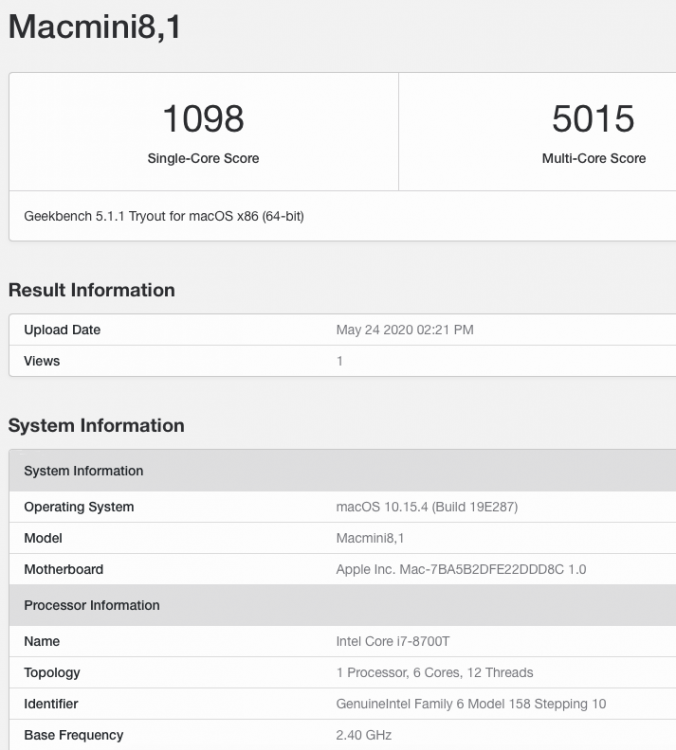
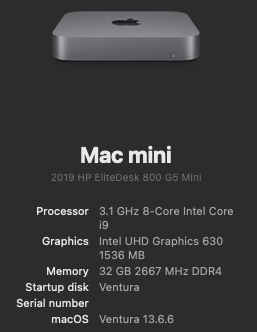
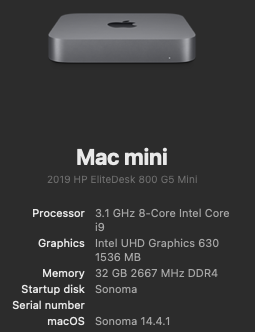
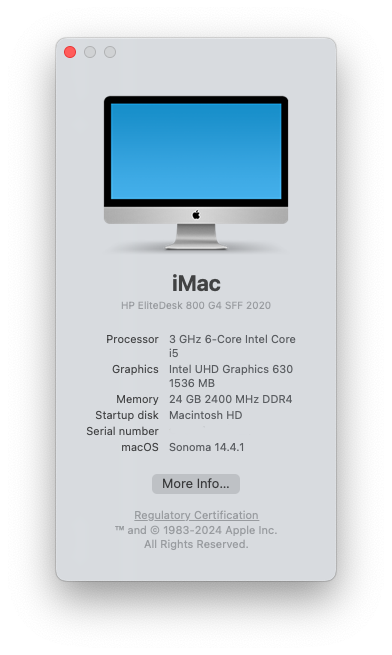
********************************************************************************** In this thread, I have fully documented the installation of macOS on my HP EliteDesk 800 G4 / G5 Mini. It is a PERFECT HackMini8,1 and is running very well for me without any issues. I hope this documentation helps you to install macOS on your hack. Please leave feedback if you think there is anything I can improve and let me know if you have any questions. ********************************************************************************** Background This is my first "modern" hack supporting UEFI and my first hack using Clover "on-the-fly" patches. My previous hacks Laptop: Thinkpad T61 / Nvidia NVS 140m Laptop: Dell Latitude E6410 / Nvidia G3100m Desktop: Gigabyte G31 / GeForce 9600 Desktop: Biostar TH55HD / Sapphire Pulse RX580 (Google "Catalina Biostar TH55HD" and look for user name deeveedee) are all perfectly running Catalina and I patched them all "manually" - all DSDT patches applied with MaciSL with virtually no Clover on-the-fly patching and all booted Legacy Clover. This UEFI hack was MUCH easier and took about 20 hours vs. a combined hundreds of hours for the old hacks. I wanted a hack that was a little more future proof and I think this is it. I hope you enjoy this as much as I am enjoying it. It is a perfect MacMini8,1. My system specs HP EliteDesk 800 G5 Mini (I9-9900 / UHD 630 / Q370 Chipset / 32GB DDR4 RAM) (also own 800 G5 Mini with i7-9700, 800 G4 Mini with i7-8700 and have owned 800 G4 Mini with i7-8700T - all work perfectly) 3 x DP Ports (connected to monitors using DP -> DVI adapters) 6 x USB 3.1 1 x USB Type-C 3.1 2 x NVMe SSD (M.2 PCIe x4 2280/2230 combo ports) 1 x SATA6 SSD 1 x Intel Ethernet RJ-45 Conexant CX20632 Audio Codec I am not using Wi-Fi. See below in "What is not tested" for Wi-Fi solutions. macOS Installation Important: You MUST BE LOGGED-IN to download attachments from this forum See macOS installation steps for OC and CLOVER here See Known Issues here for additional installation steps that may not yet be included in my attached config files See OC and CLOVER EFIs in attached to this post See BIOS configuration in attached BIOS configuration PDF document See how I developed my installation methodology here See references here See instructions here for installing two M.2 2280 NVMe SSDs and one SATA HD / SSD What is not working DRM (no hackintosh solution for DRM with UHD 630 iGPU) Everything else that I have tested is working perfectly What is not tested USB c 3.1 port (I have partially tested the USB 3 functionality of the port and it seems to be working fine with the USBPorts.kext in the attached EFI .zip archives) Wi-Fi / Bluetooth I am not currently using Wi-Fi/Bluetooth in this hack, but starting with Sonoma, Broadcom Wi-Fi is not supported without 3rd-party macOS root patches. I am not in favor of installing Open Core Legacy Patcher (OCLP) root-patches to enable Broadcom Wi-Fi (see my opinion here). If you need basic Wi-Fi/Bluetooth (and don't care about Apple-specific functions like Airdrop), I recommend Open Wireless project to enable Intel Wi-fi/Bluetooth. I don't believe that OCLP Wi-Fi root-patches are safe for secure computing operations (e.g., online banking or even accessing your Facebook page). If you prefer Broadcom Wi-Fi/Bluetooth, replace intel Wi-Fi with Broadcom Wi-Fi here and here. What is working Everything not mentioned above Sleep / Wake Multiple displays with IGPU graphics acceleration, hot pluggable display ports and DP->DVI adapters USB 3.1 ports Audio (internal speaker and headphone jack) Ethernet Microphone / front-right audio port (tested with CTIA-style 4-connector headset) Known Issues and their solutions - see here BIOS Version / Configuration Tested BIOS Versions for G4 Mini: 02.11.01 Rev.A or 02.12.00 Rev.A or 02.14.01 Rev.A, 02.15.00 Rev.A, 02.16.00 Rev.A, 02.17.00 Rev.A, 02.19.00 Rev.A, 02.20.01 Rev A, 02.21.00 Rev.A Tested BIOS Versions for G5 Mini: 02.07.01 Rev.A, 02.08.00 Rev.A, 02.09.00 Rev.A, 02.10.01 Rev.A, 02.11.00 Rev.A, 02.12.00 Rev.A, 02.12.10 Rev.A, 02.13.00 Rev.A, 02.14.01 Rev.A, 02.15.00 Rev.A See attached BIOS configuration in PDF document "HP EliteDesk 800 G4 Mini BIOS Configuration.pdf" Intel ME must be enabled for proper sleep / wake of UHD 630 UHD 630 Framebuffer Patching See here and here to understand my graphics properties for use with WhateverGreen.kext Read this to see my attempt at graphics patching without WhateverGreen.kext (WEG) to get a better understanding of what WEG is doing Current Versions Ventura 13.6.3 OpenCore 0.9.6 Lilu.kext 1.6.7 WhateverGreen.kext 1.6.6 AppleALC.kext 1.8.7 IntelMausi.kext 1.0.7 RestrictEvents.kext 1.1.3 VirtualSMC 1.3.2 NVMeFix.kext 1.1.1 Elements of this implementation that you may not see in other hacks HPET is disabled for the reason stated here RTC memory size is patched (like CLOVER's "Fix RTC") instead of using RtcMemoryFixup.kext for reasons here ScreenShots OC0.9.6-EFI-R001.zip HP EliteDesk 800 G4 Mini BIOS Configuration.pdf CLOVER-r5122-v6.zip


 1 point
 -
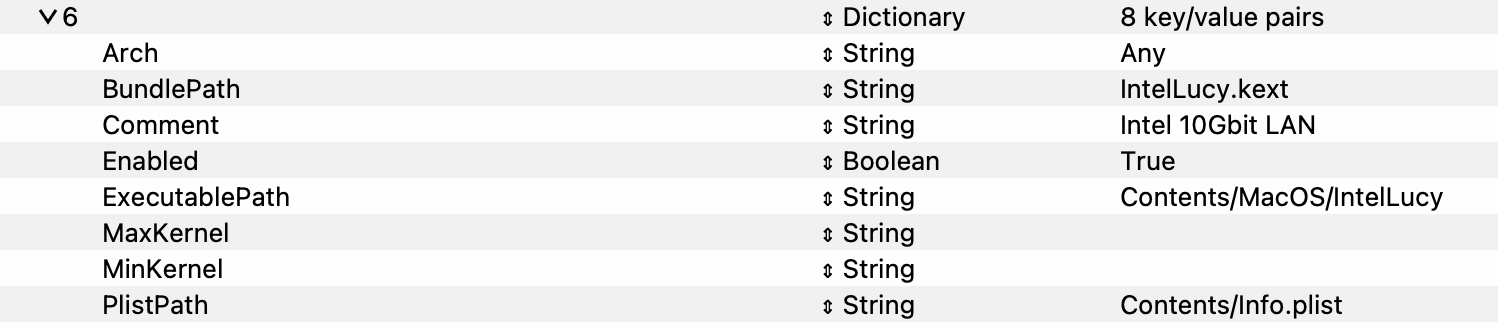
This project is dedicated to Lucy, my lovely little indoor tiger. IntelLucy is an open source driver for the Intel X500 family of 10 GBit Ethernet controllers. Key Features of the Driver Supports Intel X520, X540, X550 and 82598 Ethernet adapters. Support for multisegment packets relieving the network stack of unnecessary copy operations when assembling packets for transmission. No-copy receive and transmit. Only small packets are copied on reception because creating a copy is more efficient than allocating a new buffer. TCP segmentation offload with IPv4 and IPv6. Support for TCP/IPv4, UDP/IPv4, TCP/IPv6 and UDP/IPv6 checksum offload. Large Receive Offload: TCP/IPv4 packet streams are identified by the NIC and reassembled to large packets for handover to the network stack eliminating the overhead of packet header processing. Supports jumbo frames up to 9000 bytes (strongly recommended for 10 GBit/s operation). Designed to work with High Sierra and above. Supports Wake on LAN tagging. Supports hardware VLAN (untested). Support for Energy Efficient Ethernet (EEE) is planned for future releaes. No need for hardware modifications anymore (used to be required for SmalltreeIntel8259x.kext). Compatible with AppleVTD but also works fine with AppleVTD disabled. The driver is published under GPLv2. Current Status IntelLucy has been successfully tested with Catalina, Monterey, Ventura and Sonoma and is ready for use in production systems starting with version 1.0.0. Thanks to jumbo frame support, performance is much better than com.apple.DriverKit-AppleEthernetIXGBE. VLAN support has been fixed and tested in version 1.0.0 and is fully working now. I can't test Wake on LAN because I don't have an adapter with WoL support. Tested Configurations X520-DA1 with the following media: Passive DAC cable: working 10GBase-SR SFP+ modules: working 1000Base-T SFP modules: working X540-TA1: working (see note below). X540-TA2: both ports working (see note below). Known Issues Manual media selection doesn't work. The link is always established with the highest data rate both link partners support, i.e. 10 Gbit/s if both endpoints support it, 1 Gbit/s if the link partner is a Gigabit device, etc. As DAC cables and fibre optics usually are fixed-speed devices, only RJ-45 ports are affected by this limitation. Try to avoid media with flow control enabled as it might cause repeated connection drops due to transmitter hangs and serious performance issues. For WoL to work you need 4 things: An adapter which supports WoL (only a few X520 adapters support WoL). A mainboard which supports WoL from an add-in card. WoL must be enabled in the UEFI setup. Proper ACPI tables for MacOS to support wakeup. Installation Use OpenCore to inject the driver: Getting the driver A prebuilt binary is available in the download section: https://www.insanelymac.com/forum/files/file/1061-intellucy/ Source code can be found on GitHub: https://github.com/Mieze/IntelLucy Changelog Version 1.0.3 (2024-04-17): Disabled ASPM for the X520 adapters as it is broken and may case erratic behaviour. Enabled ASPM on X540 and X550 provided they report ASPM compliance. Fixed a link status reporting issue for RJ-45 ports (X540 and X550). Removed support for 10 Mbit/s data rate (unsupported on X520 and X540). Resolved a conflict between adaptive interrupt throttling and Receive See Coalescing. Version 1.0.0 (2024-04-07): Fixed relaxed ordering of PCIe transactions. Fixed and tested VLAN support. Version 1.0.0d9 (2024-03-27): Improved transmit performance. Version 1.0.0d6 (2024-03-20): Added support for Intel 82598. Version 1.0.0d5 (2024-03-19): First public release. IntelLucy configuration Parameters explained The Info.plist file contains a section with configuration parameters ("Driver Parameters") which will be explained in the following section: enableTSO4: Enables support for TCP segmentation Offload with IPv4. Using TSO4 the NIC receives large TCP/IPv4 packets from the network stack to be split up into smaller packets to be transmitted of the network. TSO4 is a major performance feature and required to achieve TCP transmission rates near wire speed. enableTSO6: Enables support for TCP segmentation Offload with IPv6. enableWakeOnAddr: Currently unused. enableASPM: Enables Active State Power Management (ASPM) on X540 and X550. rxBufferSize4k: Use 4KB receive data buffers instead of 2KB buffers. rxCoalescing: Enabled the use of Receive Side Coalescing which is the receive side counterpart of TSO4. The NIC identifies TCP/IPv4 packets belonging to a TCP stream, coalesces them into large packets (up to 64KB) and hands them over to the network stack reducing header processing overhead. Enabling rxCoalescing enforces the use of 4KB receive buffers. µsPollTime10G: Under heavy load receive and transmit interrupts are disabled and the NIC is polled periodically for packets waiting to be processed. This feature greatly reduces CPU load while operating at full speed. The polling period is given in µs and used when 10G Bit/s link speed is established. µsPollTime2G: Same as µsPollTime10G but for link speed 2.5 Bit/s (X550 only). µsPollTime5G: Same as µsPollTime10G but for link speed 5 Bit/s (X550 only) µsRxItrTime: Interrupt throttling is important to achieve high data rates while keeping CPU load low. This parameter determines the minimum timespan between two receiver interrupts in µs. Values below 10 enable adaptive throttling. µsTxItrTime: Same as µsRxItrTime but for the receiver interrupt.

 1 point
 -
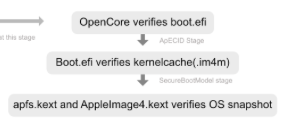
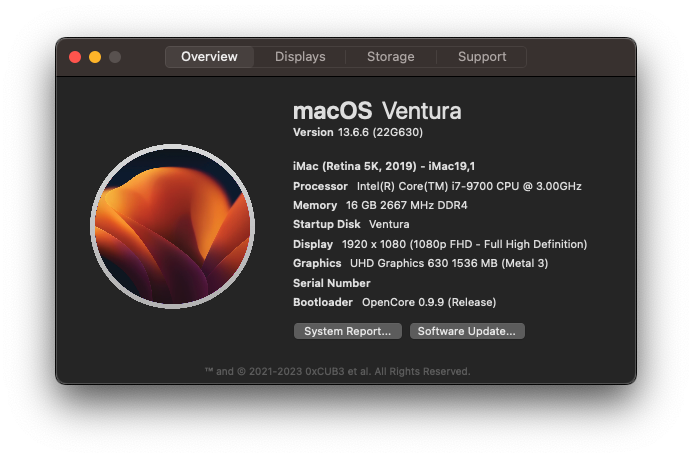
I have been challenged here regarding my belief that Open Core's SecureBootModel has value for hackintoshes. You can see my response here. I'll admit that my initial investigation of the Open Core SecureBootModel here was only a cursory read and I can't possibly understand the full macOS SecureBoot process, but all will need to forgive me if I doubt my critic's claim as being biased with judgement clouded by hatred for Open Core and Acidanthera. I am going to research this further and will report my findings here. I don't have a strong loyalty to Open Core or CLOVER, so my judgment won't be clouded. I am currently doing my research with the EliteDesk 800 G5 Mini (documented here) running with Open Core 0.9.9, SecureBootModel=j174 (MacMini8,1 as per this document). I am going to consider the use of Open Core vaulting and ApECID during my research. My current understanding of macOS SecureBoot on a hackintosh (without T2) is illustrated by the following (from here) : I don't consider verification of kernelcache and of the OS snapshot to be "useless." My research will be slow and my updates here will be infrequent, so I welcome posts in this thread from others. Hopefully the posts will remain constructive and fact-based.
 1 point
 -

Version 2.4.2
54,450 downloads
Open source driver for the Realtek RTL8111/8168 family. New Driver for Realtek RTL8111 Anybody who is looking for a add-on network card with Realtek NIC might want to consider the Delock 89357. This card is equipped with a RTL8111E-VL (chipset 16) which is known to work perfectly with my driver because this chipset is my primary test device. Please note that the current version of this driver is not compatible with AppleVTD!1 point -
Hi all friends, since I decide put my Broadcom Wireless Card + BT on my Aorus Z790 (with intel WI-Fi 6 Ax211 + intel BT), when I mapped my usb ports, I block intel BT and use BRCM Broadcom bluetooth working fine, and using compiled Clover 5156 or 5157 (not works with "another" boot loader), to send from my Desktop to my iPhone works fine or another real Mac. Include too my not real Mac Lenovo E470. I believe that coders will find way to work AirDrop with intel Wireless card.1 point
-
Update. Discovered that I had to add amfi=0x80 due to Amfipass.kext not being loaded. Used proper tree and it asked if I wanted to fix an inheritance issue between amfipass.kext and IOSkywalkFamily.kext (maybe not this one but one of the new kexts). Said yes and proper tree reordered my kexts in config.plist. Took out amfi=0x80 and it boots again w/o it. Updated system to 14.4.1 and OCLP had a background task that asked if I wanted to patch the system again. Said yes, it patched and rebooted. All good. WiFi works along with AirDrop with a Fenvi T919 in 14.4.1 Sonoma on a HP 800 G5 SFF. Also mapped my USB Ports using USBToolBox in Windows to get my internal (on motherboard) USB port to work so I could plug in the BlueTooth 4.X Fenvi cable. Bluetooth now also works. I'd like to investigate finding a BT 5.0 or even 5.1 to work in my hack. Want this to connect to my stereo in another room. Thank you all for your help. Especially @miliuco1 point
-
I agree that the value of OpenCore's SecureBootModel depends on the use cases. That has always been my point with security. If I disconnect my Mac from all networks and turn it off, then it is completely safe for use as a paper weight. We're not off-topic in this thread. i think it's important for people to be able to see what OpenCore's SecureBootModel does and then for them to make their own determination. My challenge is with blanket statements like "useless," "nonsense" and "has no/little importance in Hacks" when no context has been provided. Statements like this lead users to believe that they don't need to consider their use cases.1 point
-
Moved my post to the new @deeveedee thread. Read it here: https://www.insanelymac.com/forum/topic/359069-value-of-open-cores-securebootmodel-for-hackintoshes/?do=findComment&comment=28186481 point
-
@hackattak Posts 1 and 2 of this thread: https://www.insanelymac.com/forum/topic/358630-get-back-fenvi-t919-and-other-broadcom-wi-fi-on-macos-14-sonoma-thanks-to-olcp/#comment-2818615 Broadcom wifi working on Ventura or Sonoma prior to 14.4 can work on Sonoma 14.4 or 14.4.1, follow instructions (post 2 is for 14.4 or 14.4.1).1 point
-
Congratulations.1 point
-
iMac 19.1 SBM default and the update was successful. Bluetooth kexts are passive.
 1 point
 -
My test machine with the MSI MPG Z490 Gaming Plus also has an Aquantia AQC107 card which fully supports jumbo frames. That's why I decided to repeat the test with this card under Ventura. Like in the IntelLucy test setup, I also set MTU to 9000 for AppleEthernetAquantiaAqtion. Here are the results: laura@lucy ~ % iperf3 -w 384K -B 192.168.10.90 -c 192.168.10.32 Connecting to host 192.168.10.32, port 5201 [ 4] local 192.168.10.90 port 49374 connected to 192.168.10.32 port 5201 [ ID] Interval Transfer Bandwidth [ 4] 0.00-1.00 sec 646 MBytes 5.42 Gbits/sec [ 4] 1.00-2.00 sec 677 MBytes 5.68 Gbits/sec [ 4] 2.00-3.00 sec 678 MBytes 5.69 Gbits/sec [ 4] 3.00-4.00 sec 670 MBytes 5.62 Gbits/sec [ 4] 4.00-5.00 sec 669 MBytes 5.61 Gbits/sec [ 4] 5.00-6.00 sec 671 MBytes 5.63 Gbits/sec [ 4] 6.00-7.00 sec 678 MBytes 5.69 Gbits/sec [ 4] 7.00-8.00 sec 668 MBytes 5.61 Gbits/sec [ 4] 8.00-9.00 sec 667 MBytes 5.60 Gbits/sec [ 4] 9.00-10.00 sec 678 MBytes 5.68 Gbits/sec - - - - - - - - - - - - - - - - - - - - - - - - - [ ID] Interval Transfer Bandwidth [ 4] 0.00-10.00 sec 6.55 GBytes 5.62 Gbits/sec sender [ 4] 0.00-10.00 sec 6.55 GBytes 5.62 Gbits/sec receiver iperf Done. laura@lucy ~ % iperf3 -w 384K -B 192.168.10.90 -c 192.168.10.32 -R Connecting to host 192.168.10.32, port 5201 Reverse mode, remote host 192.168.10.32 is sending [ 4] local 192.168.10.90 port 49377 connected to 192.168.10.32 port 5201 [ ID] Interval Transfer Bandwidth [ 4] 0.00-1.00 sec 1.10 GBytes 9.48 Gbits/sec [ 4] 1.00-2.00 sec 1.11 GBytes 9.49 Gbits/sec [ 4] 2.00-3.00 sec 1.10 GBytes 9.49 Gbits/sec [ 4] 3.00-4.00 sec 1.13 GBytes 9.72 Gbits/sec [ 4] 4.00-5.00 sec 1.14 GBytes 9.82 Gbits/sec [ 4] 5.00-6.00 sec 1.14 GBytes 9.82 Gbits/sec [ 4] 6.00-7.00 sec 1.14 GBytes 9.82 Gbits/sec [ 4] 7.00-8.00 sec 1.14 GBytes 9.82 Gbits/sec [ 4] 8.00-9.00 sec 1.14 GBytes 9.76 Gbits/sec [ 4] 9.00-10.00 sec 1.14 GBytes 9.80 Gbits/sec - - - - - - - - - - - - - - - - - - - - - - - - - [ ID] Interval Transfer Bandwidth Retr [ 4] 0.00-10.00 sec 11.3 GBytes 9.70 Gbits/sec 0 sender [ 4] 0.00-10.00 sec 11.3 GBytes 9.70 Gbits/sec receiver iperf Done. laura@lucy ~ % iperf3 -w 384K -B 2a01:c22:bc0d:2000::d15 -c 2a01:c22:bc0d:2000::32 Connecting to host 2a01:c22:bc0d:2000::32, port 5201 [ 4] local 2a01:c22:bc0d:2000::d15 port 49379 connected to 2a01:c22:bc0d:2000::32 port 5201 [ ID] Interval Transfer Bandwidth [ 4] 0.00-1.00 sec 775 MBytes 6.50 Gbits/sec [ 4] 1.00-2.00 sec 780 MBytes 6.55 Gbits/sec [ 4] 2.00-3.00 sec 774 MBytes 6.50 Gbits/sec [ 4] 3.00-4.00 sec 777 MBytes 6.52 Gbits/sec [ 4] 4.00-5.00 sec 780 MBytes 6.55 Gbits/sec [ 4] 5.00-6.00 sec 782 MBytes 6.56 Gbits/sec [ 4] 6.00-7.00 sec 786 MBytes 6.59 Gbits/sec [ 4] 7.00-8.00 sec 785 MBytes 6.58 Gbits/sec [ 4] 8.00-9.00 sec 784 MBytes 6.58 Gbits/sec [ 4] 9.00-10.00 sec 783 MBytes 6.57 Gbits/sec - - - - - - - - - - - - - - - - - - - - - - - - - [ ID] Interval Transfer Bandwidth [ 4] 0.00-10.00 sec 7.62 GBytes 6.55 Gbits/sec sender [ 4] 0.00-10.00 sec 7.62 GBytes 6.55 Gbits/sec receiver iperf Done. laura@lucy ~ % iperf3 -w 384K -B 2a01:c22:bc0d:2000::d15 -c 2a01:c22:bc0d:2000::32 -R Connecting to host 2a01:c22:bc0d:2000::32, port 5201 Reverse mode, remote host 2a01:c22:bc0d:2000::32 is sending [ 4] local 2a01:c22:bc0d:2000::d15 port 49381 connected to 2a01:c22:bc0d:2000::32 port 5201 [ ID] Interval Transfer Bandwidth [ 4] 0.00-1.00 sec 1.08 GBytes 9.24 Gbits/sec [ 4] 1.00-2.00 sec 1.08 GBytes 9.26 Gbits/sec [ 4] 2.00-3.00 sec 1.07 GBytes 9.23 Gbits/sec [ 4] 3.00-4.00 sec 1.08 GBytes 9.24 Gbits/sec [ 4] 4.00-5.00 sec 1.07 GBytes 9.23 Gbits/sec [ 4] 5.00-6.00 sec 1.07 GBytes 9.23 Gbits/sec [ 4] 6.00-7.00 sec 1.08 GBytes 9.24 Gbits/sec [ 4] 7.00-8.00 sec 1.07 GBytes 9.23 Gbits/sec [ 4] 8.00-9.00 sec 1.08 GBytes 9.24 Gbits/sec [ 4] 9.00-10.00 sec 1.07 GBytes 9.18 Gbits/sec - - - - - - - - - - - - - - - - - - - - - - - - - [ ID] Interval Transfer Bandwidth Retr [ 4] 0.00-10.00 sec 10.7 GBytes 9.23 Gbits/sec 0 sender [ 4] 0.00-10.00 sec 10.7 GBytes 9.23 Gbits/sec receiver iperf Done. As you can see, receive performance is quite good but transmit performance is lousy, it's even worse than com.apple.DriverKit-AppleEthernetIXGBE and I wonder what Apple has done to their network drivers because they used to be better in the past?1 point
-
@rocaz As far as I know, you should be using MacBookPro11,2 EFI for both of your machines (IG) MacBookPro11,3 is for the same machines with Discrete Graphics: Try this EFI folder which has been made by OpenCore Legacy Patcher 1.4.3 (Nightly) If the issue still persists there might be a chance of a hardware issue, to troubleshoot the issue further more you can remove the SSD from you MacBookPro, turn it on and do the NVRAM reset 3 times in a row by holding the key combinations until you MacBook Pro reboots 3 times then you either see the Apple Logo or the Folder with a question mark which indicates that the system can't find the Startup Disk. You can also use a fresh macOS Big Sur install USB disk using the terminal command without putting the OCLP's EFI in the EFI partition to see if the installer loads or not. MacBookPro11,2.zip1 point
-
1 point
-
Upgrade of my HackMini8,1 from 13.6.5 -> 13.6.6 completed without issues. Open Core 0.9.9, SecureBootModel=Default. Not using OCLP or itlwm (Ethernet only, no Wi-Fi, no Bluetooth).
 1 point
 -
In order to upgrade my HackMIni8,1 from 14.4 -> 14.4.1, I needed to temporarily set Open Core > config.plist > Misc > Security > SecureBootModel = Disabled. After the upgrade to 14.4.1, I restored SecureBootModel = Default. If you forget to set SecureBootModel = Disabled and the upgrade borks your Sonoma volume, you should be able to recover by booting a Sonoma 14.4.1 USB installer with SecureBootModel = Disabled and installing 14.4.1 to the damaged volume.
 1 point
 -
SBM= Disabled Update ok
 1 point
 -
First update attempt failed Second attempt failed changing SecureBootModel=Default Third attempt successful disabling BRCM and BlueToolFixup.kexts (of course kexts for OCLP disabled)
 1 point
 -
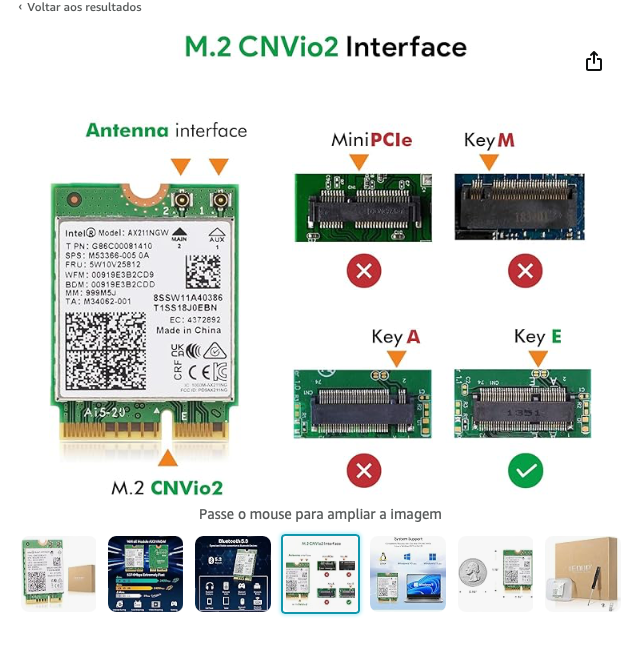
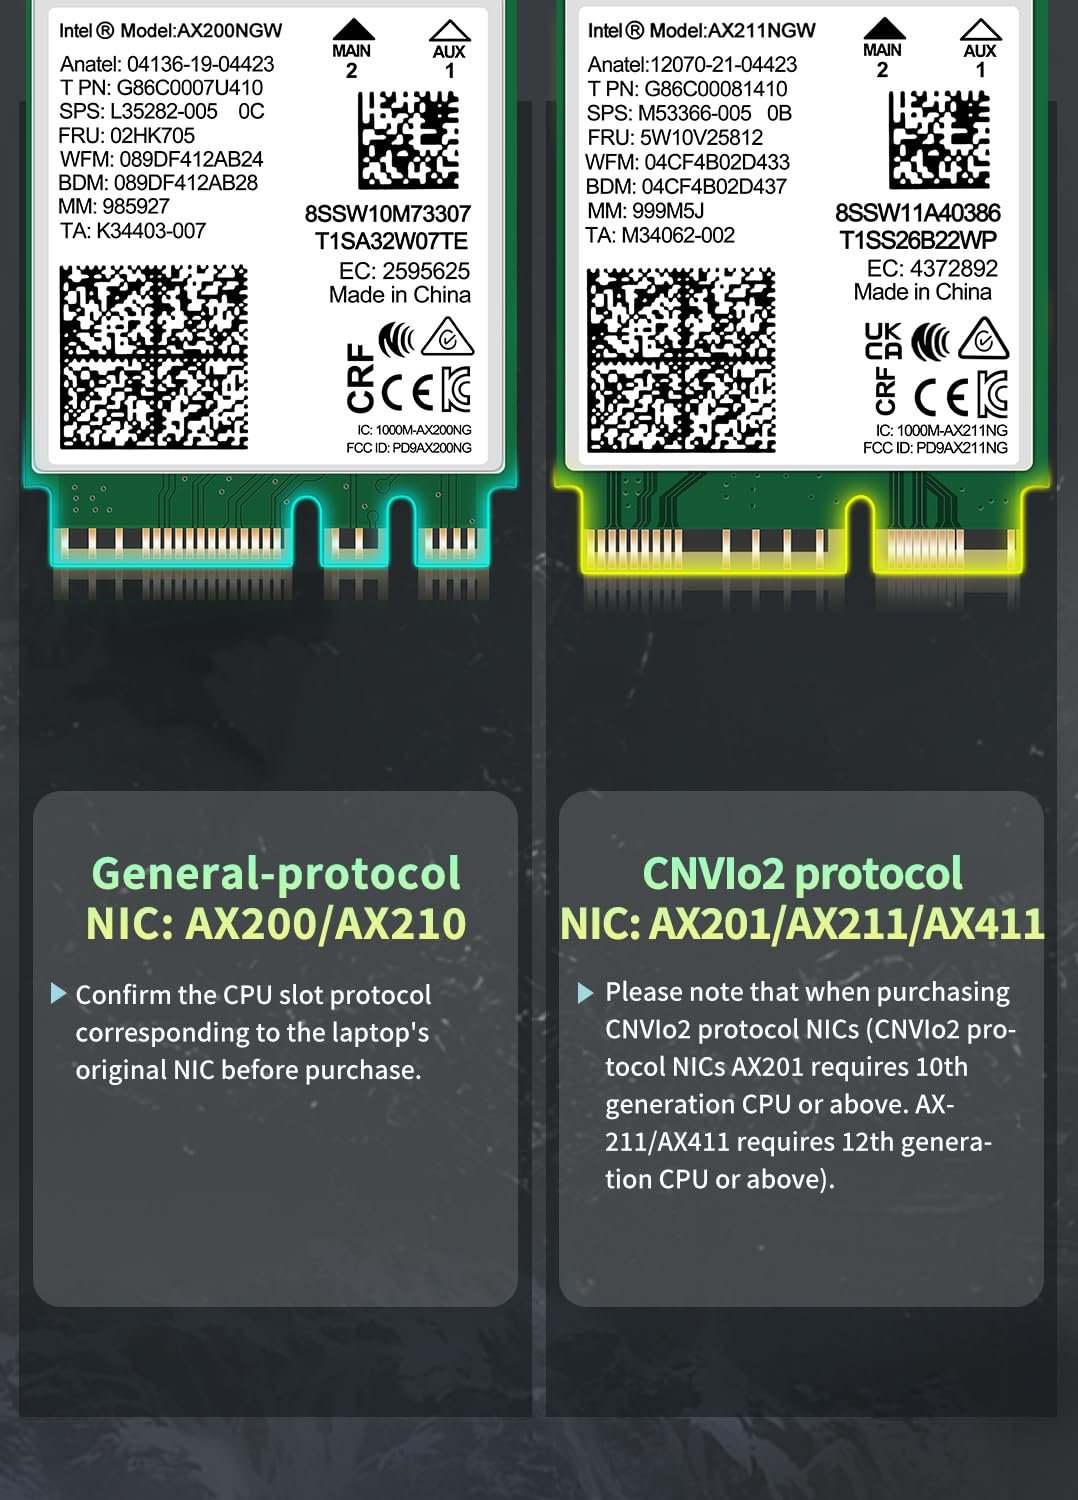
@maly70 Try look here Placa sem fio Intel AX211NGW Wi-Fi 6 M.2: CNVio2, Bluetooth 5.3, adaptador de rede Tri Band 2.4/5/6 GHz para laptop compatível com Windows 10/11 (64bit) Linux Chrome OS disponível apenas com CPU Intel 12+ geração 【Interface NGFF (M.2) CNVio2】Esta placa LAN sem fio AX211 está disponível apenas com 12 gerações de CPU e placa-mãe de protocolo M2 CNVio2.
 1 point
 -
No kext. Need to add another one1 point
-
Installing another Drive for Windows or Linux should not pose any problems at all.1 point
-
I doubt he will ever give up, he's got that ......'Tie me Kangaroo down Sport'........ attitude being a Man from the Land Down under.1 point
-
Latest OCLP commit (as of this post) adds non-metal patching for 14.4. Looks like OCLP 1.5.0n has been re-numbered as 1.4.3n. EDIT: Latest OCLP 1.4.3n (with Commit bbc8902) has fixed the Sonoma 14.4 Login Window crash on my Dell Latitude E6410 with non-metal Nvidia Tesla.1 point
-
I tested OCLP 1.5.0 nightly build and am finding that Sonoma 14.4 still does not work with OCLP non-metal Nvidia post-install patches (no surprise). If you do have a non-metal hack and you experiment with 14.4 / OCLP, you may find that keyboard entry does not work after booting 14.4 (after the login window crash). Without keyboard entry, you might have difficulty using OCLP to "Revert Root Patches" since you need to enter your root password. An easy way to work around this keyboard entry limitation is to have a file with your root password (only for testing). If you need to revert root patches with OCLP and you don't have functional keyboard entry, you can copy your root password from the temporary file and paste it into OCLP's root password dialog.1 point
-
Try OC https://easyupload.io/ax3wzb reset nvram before booting After this you can book a trip to Lourdes or Medjugorje 😇 ... It is not possible Seriously, is the bios set correctly? https://dortania.github.io/OpenCore-Install-Guide/config.plist/comet-lake.html#intel-bios-settings1 point
-
EDIT: I stumbled upon the solution to set SecureBootModel=Disabled for Sonoma 14.4+ installation as a lucky guess based on my testing with OCLP. I see that others had this SecureBootModel solution at least a month before I did. ----------------------------------------------------------------------- *** Leaving this post for historical reasons. So far, the only way I have found to install Sonoma 14.4 on this hack (MacMini8,1) is with Open Core's SecureBootModel = "Disabled." After Sonoma 14.4 is installed, SecureBootModel can be restored to its original value. *** Earlier, I claimed to have upgraded from 14.3.1 to 14.4. I had performed my Sonoma upgrade "unattended" and I just noticed that I'm still on 14.3.1 (the upgrade did not happen). I will need to test the 14.3.1 -> 14.4 upgrade again when I get time. EDIT: 14.4 installs after I changed Open Core's SecureBootModel from 'Default' to 'Disabled.' In OC config.plist: Misc > Security > SecureBootModel. EDIT2: My Sonoma 14.4 installation methodology is as follows: Create USB installer with Sonoma 14.4 Add a new APFS volume Copy Open Core EFI to the USB installer that you created in Step 1. Change Misc > Security > SecureBootModel in the USB Open Core config.plist to "Disabled" Boot with the USB installer and install Sonoma 14.4 to the new APFS volume you created in Step 2 Use Migration Assistant to migrate from your original Sonoma volume (e.g. Migrate from Sonoma 14.3.1) Reboot from your unmodified OC EFI (with SecureBootModel = "Default") About This Hack: Sonoma 14.4 EDIT3: For those who want to experiment further with SecureBootModel, see here. It may be that we need to modify the OC config.plist for our HackMini8,1. I haven't tested variations of SecureBootModel and welcome testing and feedback from others. EDIT4: I tested installation of Sonoma 14.4 on my hack (MacMini8,1) with SecureBootModel = "j174." It does not work. The only way I have found to install 14.4 on my hack is with SecureBootModel = "Disabled". After installation of 14.4, I can restore the original value of SecureBootModel for normal operation.
 1 point
 -
-Tutorial HERE -OpenCore MOD EFI folders HERE If you share these folders elsewhere, don't forget the credits. You don't need add any extra SSDT like SSDT-EC, SSDT-USBX, etc. Generate one full SMBIOS with one good serial for your machine. -Essentials kexts, configs and patches for Intel and AMD with Clover and OpenCore bootloader Some Basic Information -Use USB2 port for easy installation with no remap USB -If you have only IGPU use -igfxvesa bootarg for easy installation -Delete old EFI folder and paste new. Don't use merge files -Don't use Drag and Drop into EFI partition. Use Copy/Paste instead -Reset NVRAM one time - OpenCore use entry "Reset Nvram" / Clover use F11 key on boot screen Bios/UEFI Configuration -Sata = AHCI mode -Secure Boot = Disable if need -CSM = Disable with AMD cards -How to copy EFI folder to EFI partition *If you used SSDT instead DSDT uncheck RebaseRegions in Acpi tab *You can request one full ACPI solution HERE and Premium Users HERE *After installation you need remove unnecessary files like unused Lan kexts *If your GPU don't need agdpmod=pikera, remove this bootarg *If your LAN card don't need dk.e1000=0 and e1000=0, remove these bootargs *Generate a good and valid serial for you *Users with IGPU check HERE info about video patch --OPENCORE FOLDERS-- --OPENCORE DESKTOP-- -Desktop LGA77x Download HERE (Read instructions for Legacy HERE) -Desktop SandyBridge Download HERE -Desktop IvyBridge Download HERE -Desktop Haswell and Broadwell Download HERE -Desktop SkyLake Download HERE -Desktop KabyLake Download HERE -Desktop CoffeeLake Download HERE -Desktop CometLake Download HERE -Desktop RocketLake Download HERE -Desktop AlderLake and RaptorLake Download HERE -Desktop HEDT SandyBridge-E and IvyBridge-E Download HERE (x79 Chipset) -Desktop HEDT Haswell-E Download HERE (x99 Chipset) -Desktop HEDT Broadwell-E Download HERE (x99 Chipset) -Desktop HEDT Skylake-XW and CascadeLake-XW Download HERE (x299 Chipset) -Desktop AMD Bulldozer, Jaguar, Ryzen and Threadripper Download HERE AMD users need check some new things, check screenshot below --OPENCORE NOTEBOOK-- -NoteBook SandyBridge Download HERE -NoteBook IvyBridge Download HERE -NoteBook Haswell Download HERE -NoteBook Broadwell Download HERE -NoteBook SkyLake Download HERE -NoteBook SkyLake for macOS Ventura and Sonoma Download HERE -NoteBook KabyLake Download HERE -NoteBook CoffeeLake and WhiskeyLake Download HERE -NoteBook CoffeeLake Plus and CometLake Download HERE -NoteBook IceLake Download HERE -NoteBook TigerLake Download HERE --CLOVER FOLDERS-- --LGA 775 Download HERE (ICH7, ICH8, ICH9, ICH10) --LGA 1366 Download HERE (x58) --CHIPSET SERIES 5, 6, 7, 8, 9 Download HERE --NOTEBOOKS CHIPSET SERIES 5, 6, 7, 8, 9 Download HERE --CHIPSET SERIES 10, 20 Download HERE (SKYLAKE / KABYLAKE) --CHIPSET SERIES 30, 40 Download HERE (COFFEELAKE / COMETLAKE) --CHIPSET SERIE 50 Download HERE (ROCKETLAKE) --CHIPSET SERIE 60 Download HERE (ALDERLAKE) --CHIPSET SERIE 70 Download HERE (RAPTORLAKE) --NOTEBOOKS CHIPSET SERIES 10, 20 Download HERE (SKYLAKE / KABYLAKE) --NOTEBOOKS CHIPSET SERIE 30 Download HERE (COFFEELAKE / WHISKEYLAKE / COMETLAKE) --NOTEBOOKS ICELAKE Download HERE --CHIPSET SERIE x79 Download HERE --CHIPSET SERIE x99 Download HERE --CHIPSET SERIE x299 Download HERE Credits: Clover Team, OpenCore Team, AMD Team, Mieze and many others!1 point
-
👉 Rules Our goal is ensure that the forum remains a helpful & friendly place to learn about how to run Mac OS X on non-Apple hardware, and of course other general banter. We want you to be able to discuss anything and everything here, and to do so we ask that you check out these guidelines for forum use. Do not upload anywhere else files when developers specifically ask not to. We take this matter very seriously, as developers are the very heart of our community. No Flaming. This includes racism, threatening, personal attacks, victimization or hateful content. Retaliation will not be tolerated either; if a member has broken a rule, please use the report feature on the forum and the staff will deal with the situation appropriately. No posting of direct or indirect links to warez or pirated pieces of software, this includes cracks, serials and torrents. Do not publicly argue the decision of a moderator. If you disagree with a moderator take it up with them in private via PM. Only one (1) login is allowed per member. Duplicate accounts will be banned or deleted. Bumping of posts is not permitted. Other than being less annoying it also keeps the posts more informative. Meaningless and useless posts may be removed at Moderator's discretion. Only post your post once (1). This keeps the forum cleaner and makes it easier to find what you are looking for. No advertising or business offers of any kind. No posting of copyrighted material. This includes copying and pasting news articles from news websites. Attached materials must come with clear descriptions of what they are and what they do, linking to this information elsewhere is not sufficient. Materials derived from Open Source must include source code, as well as an explanation of what has been done to it. Discussion of P2P, torrent sites, or similar download sites of any kind will not be tolerated. We do not want to know your illegal downloading habits. Do not post spyware or any other malware. This includes linking to other sites which may contain it. Posting just to promote another site, product, or service (spamming) is not allowed. This site is not here for you to promote your own or anyone else's material. Discussion of commercial spin-offs of the OSx86 scene is allowed if it’s to understand their existence, but no discussion of how to use them, nor any support for these commercial spin-offs are allowed as they are not in the spirit of the OSx86 scene. Example of commercial spin-off: tonymacx86. Why InsanelyMac does not support tonymacx86 VERY IMPORTANT: PLEASE READ! (ABOUT TONYMACX86 AND iATKOS M / Y / EC / SR) 👉 Posting Guidelines If you have a question please do your best to use the search feature and search the forum before creating a new topic. Post in the correct forum and read the forum description. This will make sure that your post will not be removed. Pick an appropriate title and tags (if any) for your post. A good title makes it easier to find what you are looking for. Using informative tags allows for improved searching of related topics. All posts must be clearly written and easy to read. For example, if you have long blocks of text, use the Code option, etc. Limit "empty lines" as much as possible, use punctuation where you can and be concise. Posts may be edited for this reasons by InsanelyMac staff at their discretion. Please remember that you are in a public forum, a bit of courtesy is always welcome. It's always nice to start by saying "Hi" or "Hello" before asking a question or seeking help. Also a "thank you" would be appreciated, especially if the help you get is effective. Your topic does not deserve any more attention than others seeking help hence topic titles must reflect their content, and topic titles containing things like: 'please help' 'look here' 'cash reward' 'urgent' or other inaccurate descriptions will be removed. This includes all-caps titles. Give your hardware specs when necessary (asking for support) and any other time where it may be beneficial to have them listed. Watch this video to guide you how to do that: [Video] How to add a signature. 👉 Signatures, Avatars and Nicks Keep your signature/avatar clean and tidy - should you receive a PM from the staff regarding your signature/avatar, please make the requested alterations or it may be removed/shortened appropriately. To keep pages loading fast for everyone, we request that your signatures and avatars contain no animations or high-definition graphics of any kind. Signatures should be no more than 6 lines of text using a regular font. If you can't fit all of your system specs in that you'd like, why not create a small graphic to contain the information? They should also contain no referral or affiliate program graphics. Avatars should be in "good taste," a qualification that is broad enough to let us determine what is and isn't. Goth-devil-child-wild-eyed-in-the-violent-blackness probably qualifies as being in bad taste. Nothing offensive, pornographic, or vulgar. Nicknames must be readable by the system (without question marks). This will ensure that your nickname can be searched, and that other users can contact you. They should also not contain staff member groups (administrator, moderator, developer, etc.) to prevent confusion. Nicknames should also show respect to the community, thus nothing containing offensive language. Email addresses must be real. Accounts not in line with the last two rules will be edited or deleted without warning. 👉 Policing Do not publicly discuss the decision of a moderator. If there is any issue with a decision of a staff member PM them or contact an admin. Moderators have the ability to suspend or impose posting restrictions upon accounts based on the user's history. Records are kept to keep track of user's behavior and point out repeat offenders. Attempts to circumvent posting restrictions will lead to your account being banned, and any other accounts affiliated with your account being banned also. These rules cover a broad spectrum and are set up to preserve a free and open (and fun) place for discussion. They, in conjunction with common sense and good judgment, should steer you in the right direction. We're all human and we know that people make mistakes... but that's also not an excuse. More rules are subject to appear on this board as we see fit, so please check back from time to time for your own benefit. Thanks for joining our community and helping make it the best it can be. In case the rules localizations should differ, the English rules are the standard.
 1 point


.thumb.jpeg.7082d67b3394c9399e80144027a7b397.jpeg)