Leaderboard


Popular Content
Showing content with the highest reputation on 08/27/2018 in Posts
-
SMCHelper is incompatible with VirtualSMC. Why does no one read the FAQ? https://github.com/acidanthera/VirtualSMC/blob/master/Docs/FAQ.md#what-are-the-requirements6 points
-
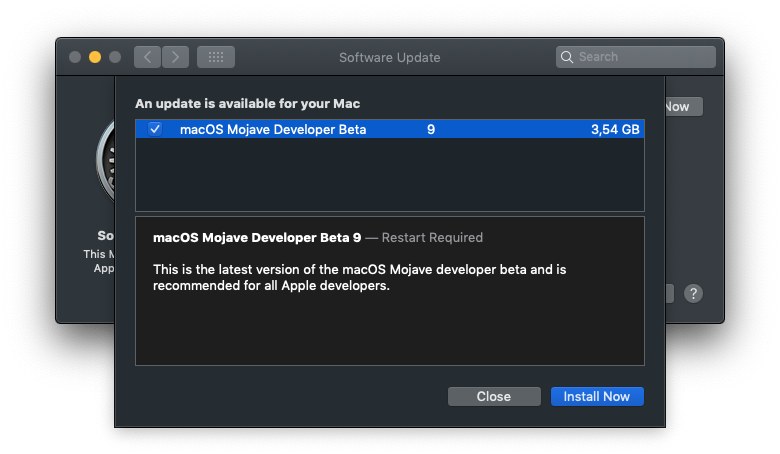
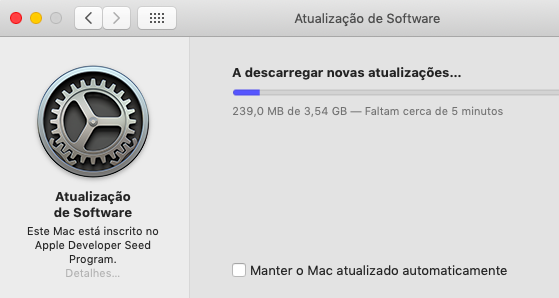
beta 9
 5 points
 -
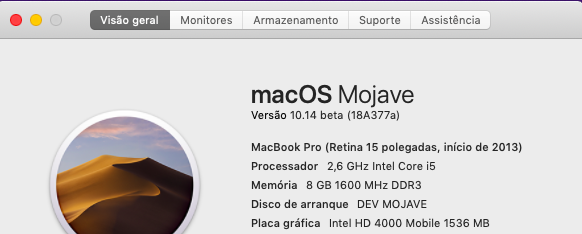
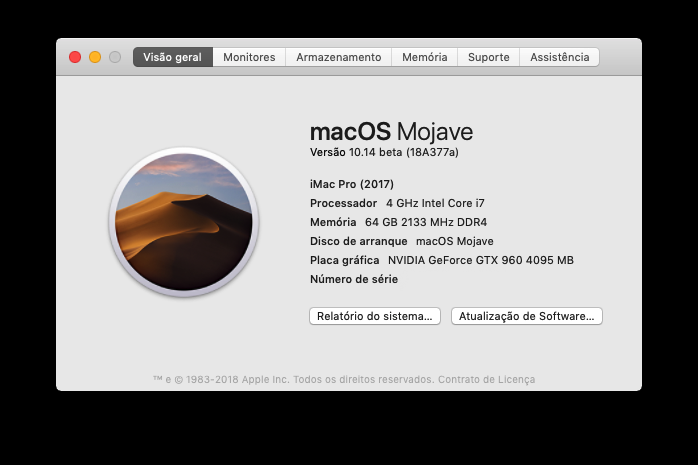
New Developer Beta 9 is out: Build 18A377a3 points
-
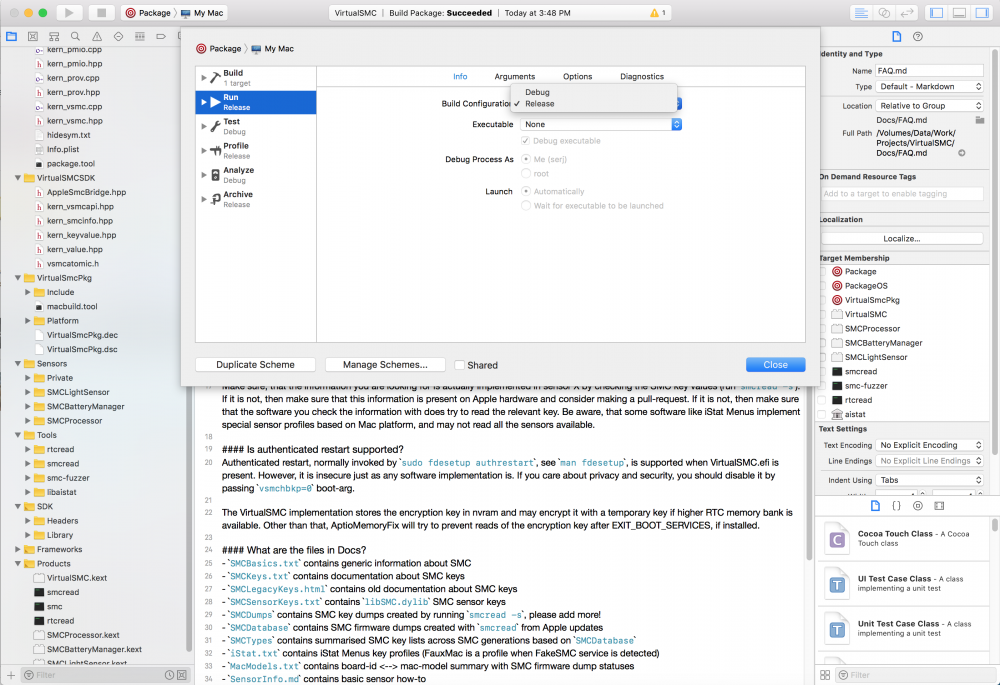
Product -> Scheme -> Edit scheme Latest Release Build 1.0.0 (RELEASE)_d1095da5ce7eb5d279800d339d32e628dab93547.zip
 3 points
 -
olá novo dev beta 9 bom hack
 2 points
 -
Ok thanks for the help everything is working again on my optiplex 790, it has been a long time for me to install OSX but after 2 days of struggling it works. Nice to see that the optiplex topic is still alive. Great work to all2 points
-
https://fileinfo.com/extension/dsym2 points
-
Thank you @vandroiy20122 points
-
Basic functionality (booting the system) should be possible even without lilu according to faq. Sent from my SM-G960F using Tapatalk2 points
-
Pavo, noticed some key duplicates in your dump, e.g.: [VC0C] type [sp3c] 73703363 len [ 2] attr [80] -> 0D4A [VC0C] type [sp3c] 73703363 len [ 2] attr [80] -> 0D4A That was a bug (though an unrelated one), please check the latest commit that it no longer happens (should contain VC0C and VC1C), best to dump again. "Not readable" keys are also unrelated, that's how SMC is supposed to work.2 points
-
KGP, Pavo, and all experiencing "missing" cores. Check smcread -s, you will find the temperature for all your cores properly listed. See the key names here: https://github.com/acidanthera/VirtualSMC/blob/master/Docs/SMCKeys.txt#L847 If it is not the case, well, I can explore it with you, but this is unlikely. Tt was well tested, and VSMC supports up to 36 cores (Apple max, due to alphabet limitations). Relevant FAQ entries explaining why some software is broken (nobody reads docs, I get it): https://github.com/acidanthera/VirtualSMC/blob/master/Docs/FAQ.md#why-does-sensor-x-not-show-the-information-in-y https://github.com/acidanthera/VirtualSMC/blob/master/Docs/SensorInfo.md#recommendations In short, iStat Menus provides a custom profile (FauxMac) when it detects FakeSMC, which creates and uses SMC keys not existent on a real mac: https://github.com/acidanthera/VirtualSMC/blob/master/Docs/iStat.txt#L1953 This is not the case for VirtualSMC, and VirtualSMC will not invent its own keys but only use the ones found on a real mac. iStat Menus thinks that a hack running vsmc is a real mac, and for this reason the corresponding profiles of each mac model are used (each profile is listed in the document above). Different mac models have different sensor list and different limitations (e.g. core count). That means, iStat Menus will not *try* to read more SMC keys than it expects to find in a corresponding mac model. This behaviour is nothing but a bug of iStat Menus, as even on a real mac the CPU can be upgraded with more cores, and depending on the firmware/software more keys could appear (especially on T2). One could also use VirtualSMC to provide more keys on a real mac. If you find it uncomfortable, you should consider writing your own monitoring software or bugreporting iStat Menus author suggesting to: — remove the "count" limitations — allow custom sensor profile creation This is the most reasonable decision. Also, while it may surprise you, but the values CPUSensors report are actually wrong on systems with multiple CPUs, and I strongly doubt the core values are correct everywhere as well (due to wrong topology/ht analysis) Hope it helps and answers all the questions. Really, docs are your friend, it is no fun to write things twice.2 points
-
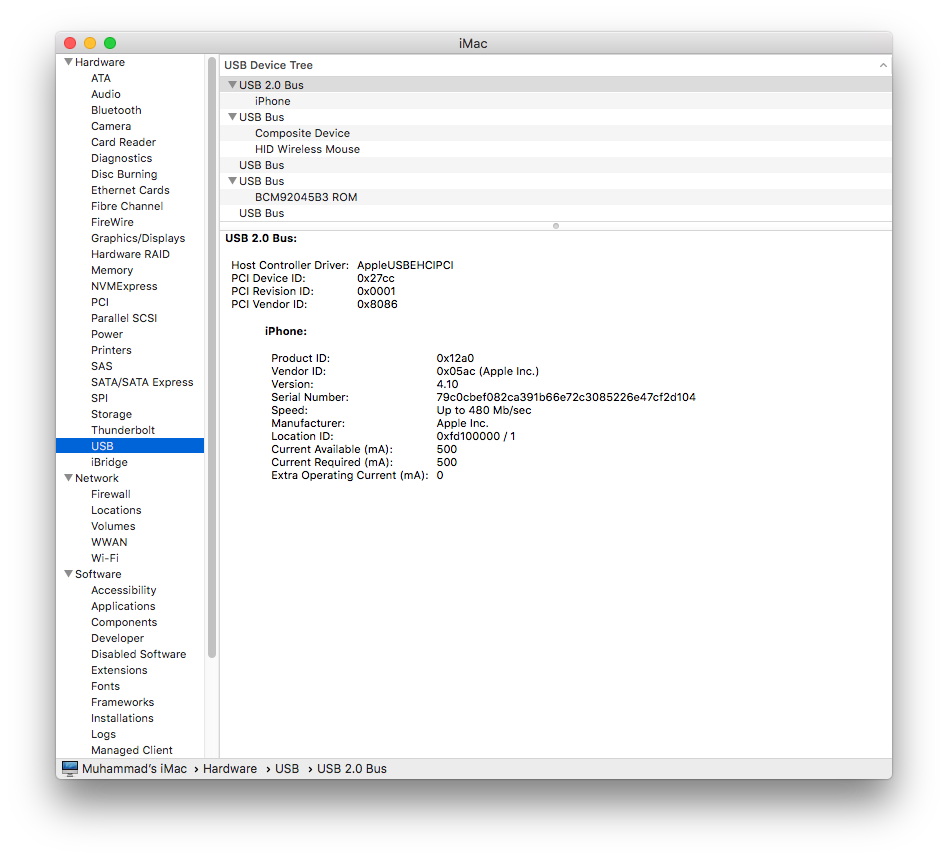
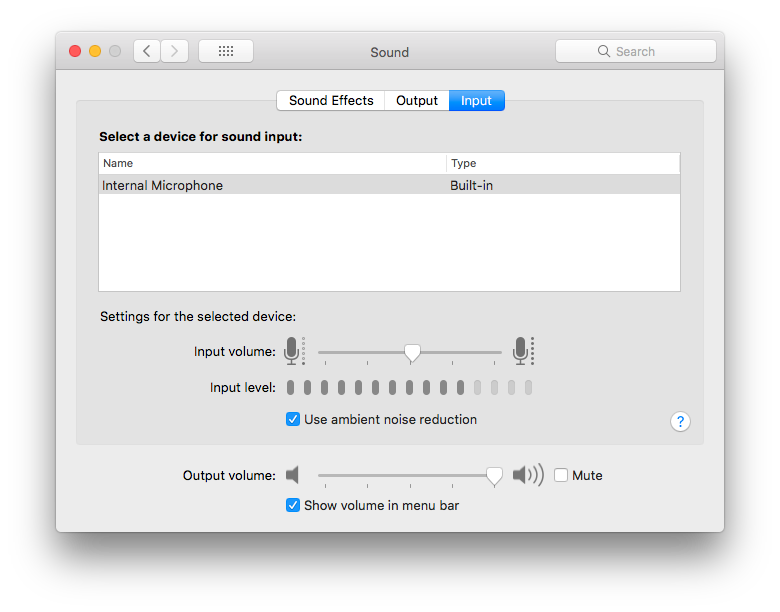
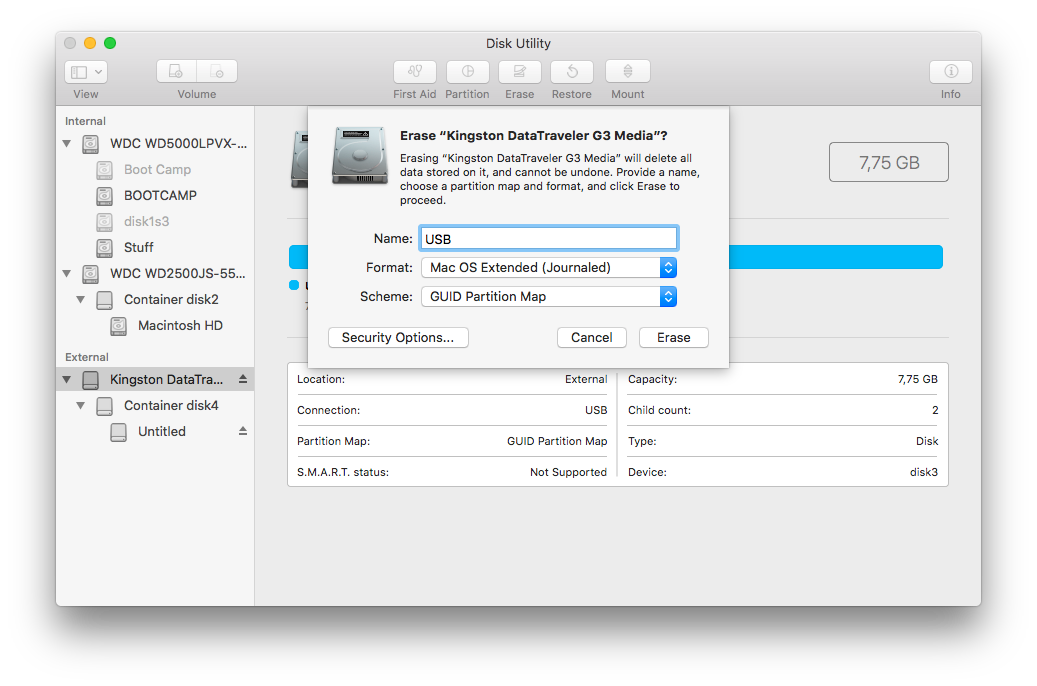
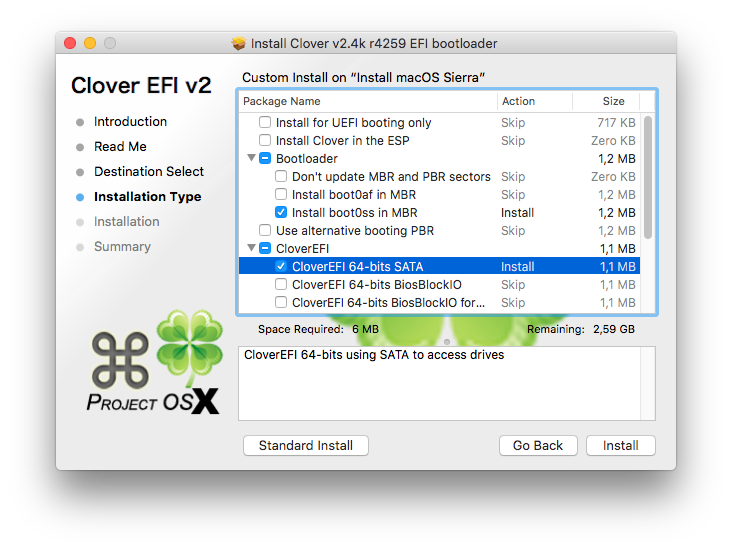
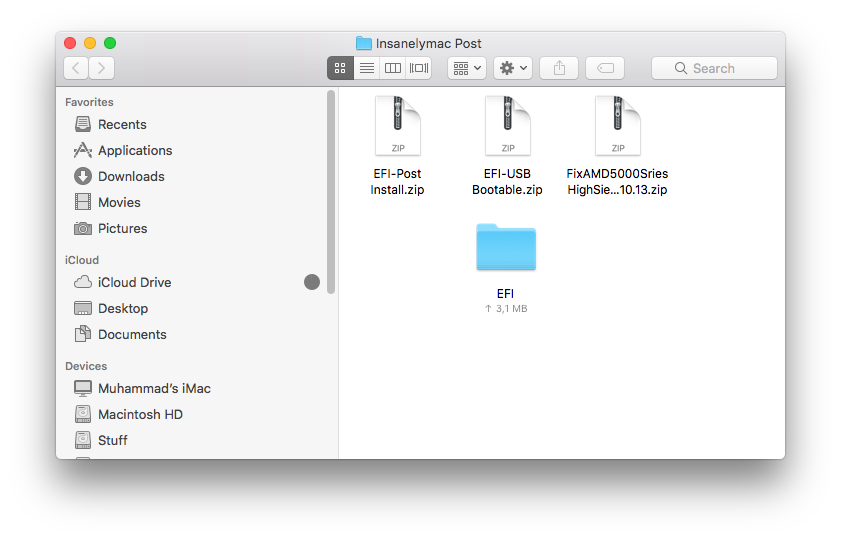
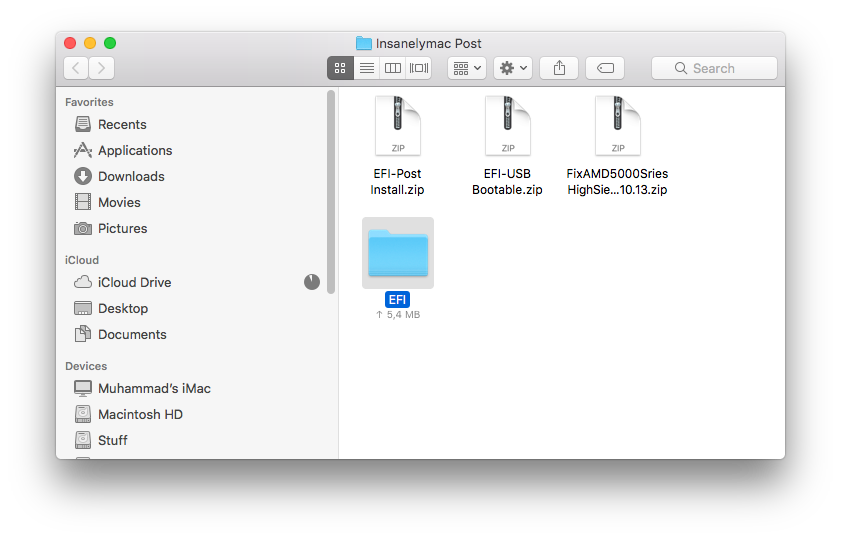
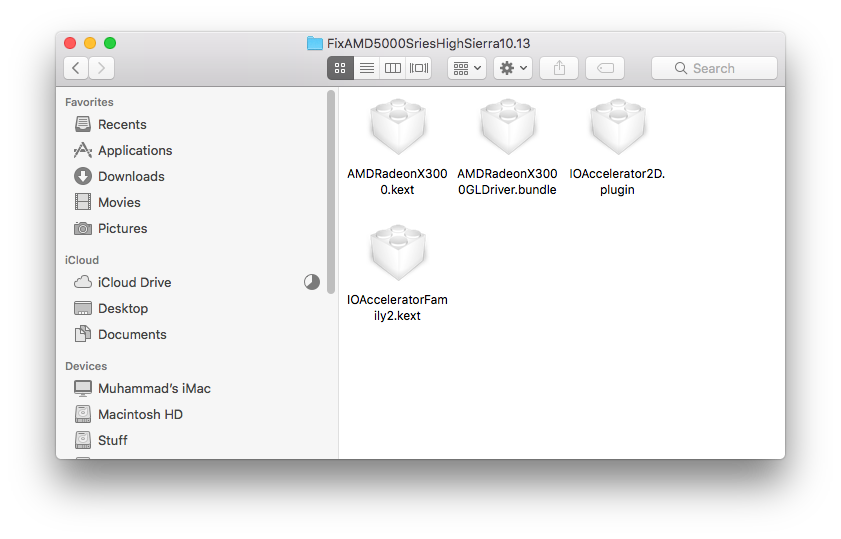
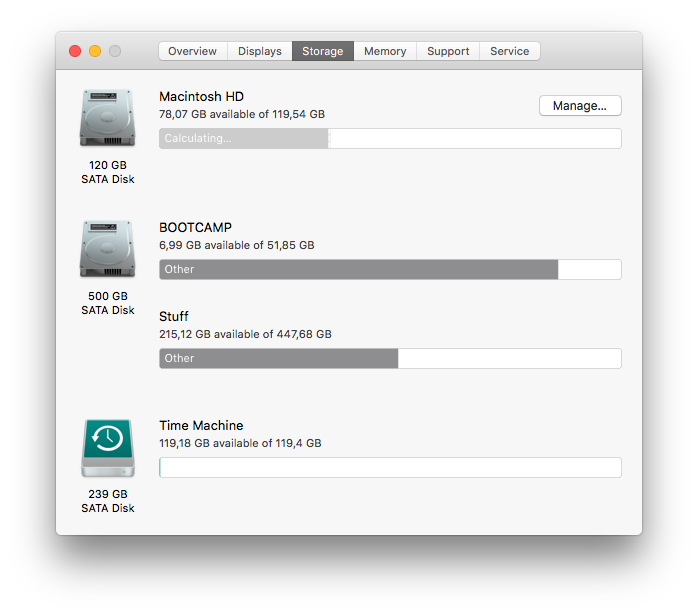
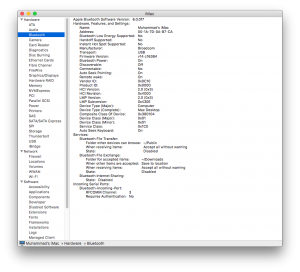
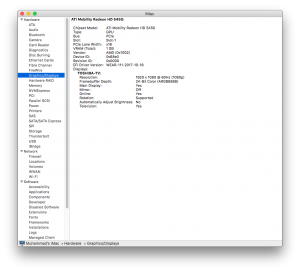
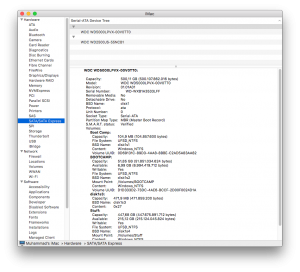
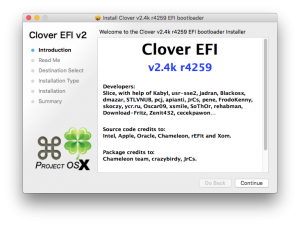
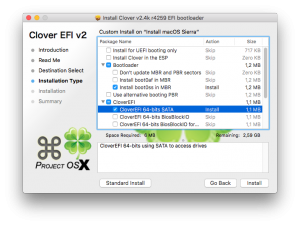
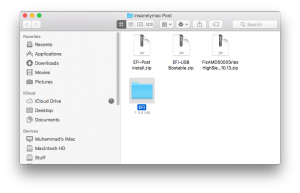
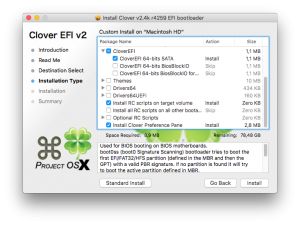
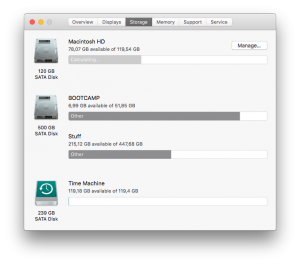
My Original Specifications - Proccessor Intel Core 2 Duo E7500 2.93 Ghz - RAM 2 GB PC10600 DDR3 - HDD WD Blue 250 GB - DVD-R 9mm - LAN Broadcom BCM57780 NetLink Gigabit Ethernet - Codec Audio Chipset ACL269 Rev 0x0100 - OS Windows 7 Professional (OEM License) - GPU Intel GMA X4500 My Mod - RAM 4 GB (2 GB + 2 GB) PC10600 DDR3 - Replace DVD-R 9mm With HDD Caddy 9mm SATA to 9.5mm SATA (i put 500 GB WD Blue 9.5mm inside the HDD Caddy) - GPU ATI Mobility Radeon HD 5450 1 GB DDR3 - OS macOS Sierra 10.12.6 (16G1212) with SMBIOS iMac 10,1 on WD Blue 250 GB HDD (GUID) + Windows 7 Professional SP 1 (64-bit) (OEM License) on WD Blue 500 GB HDD (MBR) - Broadcom BCM4322 PCI Wireless Adapter - USB Bluetooth Dongle Tools and Softwares - USB FlashDrive 8GB - Clover OS X El Capitan-V7 by chris1111 (in some case if my attach EFI Folder is not work, you may need to install El Capitan by making USB Bootable using this tool) - Install macOS Sierra.app or Install OS X El Capitan.app from App Store (just like i said before in point 2, i downloaded both 10.13 High Sierra the latest version and 10.11 El Capitan) - For installing macOS Sierra, i am using CreateInstallMedia Command to make a USB Bootable - Clover v2.4k Rev. 4259 as Bootloader with EFI Folder in my attach (i attach 2 Folder, the first one is for USB Bootable that you can use too for Post Install without DSDT Patch for AMD5450 Graphics and the second one is for Post Intall with DSDT Patch for AMD5450 Graphics) - Kext Wizard (Optional) Tutorials 1. Format your USB FlashDrive to HFS+ with GUID Partition format and named "USB" (without quotes). Next, open Terminal and use this command "sudo /Applications/Install\ macOS\ Sierra.app/Contents/Resources/createinstallmedia --volume /Volumes/USB --applicationpath /Applications/Install\ macOS\ Sierra.app/ --nointeraction" (without quotes). 2. Now, install Clover v2.4k Rev. 4259 and select like this : - Install Clover in the ESP - Bootloader, select Install boot0ss in MBR - CloverEFI, select CloverEFI 64-bits SATA - For theme, do not select anything because i already have a theme in my attach EFI Folder - Driver64 do not select anything like i said in Point 4 (Theme) - For Drivers64UEFI do not select anything like i said in Point 4 (Theme) 3. Copy my attach EFI Folder (USB Bootable) to your EFI Partition in USB Bootable. 4. Just boot from your USB FlashDrive and make installation like normal. I make partition like this : - WD Blue 250 GB (Internal HDD) : "Macintosh HD" (the name is optional) for OSX (if you are using SSD, you can choose APFS format or HFS+ if you are using HDD), and "Time Machine" for macOS backup. - WD Blue 500 GB (in HDD Caddy) : "BOOTCAMP" for Windows, and "Stuff" for saving any data (i choose NTFS on Stuff partition for simple cross-platform OS). 5. Again, install Clover v2.4k Rev. 4259 but now install it to your Harddrive (Macintosh HD or Macintosh SSD) and add a new option at Clover Option Installer Menu like this : - Install RC scripts on target volume - Install Clover Preference Pane (Optional, but i select this) 6. If you are using ATI Mobility Radeon HD 5000 Series in macOS High Sierra 10.13.x (just High Sierra), you need to install additional kext from macOS Sierra 10.12.6 that's i already atach too using Kext Wizard if you not do that, you will get Black Screen (it's happen when you using my EFI Folder with DSDT Patch or you using Fake Clover ID). 7. Last, mount your EFI partition of your Harddrive and Copy EFI Folder you have downloaded from my attach (Post Install with DSDT or USB Bootable without DSDT) then paste it in EFI Partition of your harddrive. 8. Reboot, and you will get QE/CI for ATI Mobility Radeon HD 5000 Series (if you are using this Graphics Card), Full Working of LAN and Audio (for Audio, just Back Panel is working.. for Front Panel is not working because it's not detected at System Preferences. Already use some Audio Inject and all Audio Ports detected but only Output port in Back Panel is working..) Fix and Patches (from Andres ZeroCross post in InsanelyMac) for dual-booting with Windows using 1 HDD 1. After install Windows with UEFI Mode then you will never boot to Clover GUI. We can't change Boot Entry via Shell Command or Bios Setup. There is no option for this. Solution is - Boot with your USB Installer, then mount EFI Partition of Your Harddrive and go to "EFI/Microsoft/Boot" and change "bootmgfw.efi" to "bootmgfw-orig.efi". - Then go to "EFI/CLOVER/" and Copy "CLOVERX64.efi" and paste at "EFI/Microsoft/Boot" then rename it to "bootmgfw.efi" - Restart and you can boot in to CLOVER GUI again Inside my /EFI/CLOVER/kexts/Other : - FakeSMC.kext - FakeSMC_CPUSensors.kext - FakeSMC_ACPISensors.kext - Lilu.kext - WhateverGreen.kext - WhateverGreen.kext.dSYM - AppleALC.kext - AppleALC.kext.dSYM - BCM5722D.kext Everything just Working Fine.. Sleep, Shutdown, Restart and iMessage+FaceTime with MLB+ROM from MBP Late 2012. for BIOS, i am not disable anything.. like Serial Port and VT-D (Intel Virtualization) but in some case maybe you need to disable one or all of them i mentioned. But for Graphics, i set manualy to PEG because i am using additional Graphics Card. Download Links EFI (USB Bootable) : https://drive.google.com/open?id=0B8iEbJG0g9wFRDZ0NmFTVFllaVk EFI (Post Install) : https://drive.google.com/open?id=0B8iEbJG0g9wFa2tPMlhNMEhDXzA Kext for fix AMD5000 Series in HS 10.13.x : https://drive.google.com/open?id=0B8iEbJG0g9wFWjNGbXM4WnNpWTg Credits to : - Allah S.W.T - Rehabman - chris1111 - Andres ZeroCross - Badruzeus Shava - Group Hackintosh Indonesia on Facebook - And others, that's i cannot mentioned your name one by one


 1 point
 -
usa esse app e muda pra dev updates https://olarila.com/files/Utils/SWUSwitcher.app.v1.0.4.zip1 point
-
Thank you! When we get to beta 15 i report! EDIT: Ok reporting now...
 1 point
 -
Installed and now testing - booted and rebooted a few times with no problems on a Z97/4790K system and will test it on a few other boxes.1 point
-
Finally some updates, i am working on tinu 2.1 and on my new app EFI Partition Mounter (which is the new efi partition mounter sub tool i am introducing in tinu 2.1, but as a standalone tool) and starting from today it has been 1 year since i started working on TINU, in fact the first code file i have made, the InfoviewController.swift file is dated august 24th 2017, so to celebrate that i have an announcement, i have finally managed to use system apis to do the authentication for tinu and for my new tool as well, i found a way to implement this easily by using apple script, but the problem now is that there is some code to re-work and also it may require to ask the password different times during the install media creation process, if you know any way to keep the authentication with multiple apple scripts let me know. and also for the clover part i have collected all the info i need to write the code and make it to work, inluding automatic download of the latest version of the clover installer, which is then used to install clover automatically by the app, using the settings choosen by the user to install clover. But TINU 2.1 is almost ready and it's a whole reorganizement of the clode, making it more simple, efficient and modular, (this allowed me to pull out just what i need to make the EFI partition mounter available also as a standalone tool), and tinu also recived a lot of improvements and bug fixes too, including some UI modifications to improve the usability of the app. That's all for now, just a post to update you and celebrate 1 year of tinu development.1 point
-
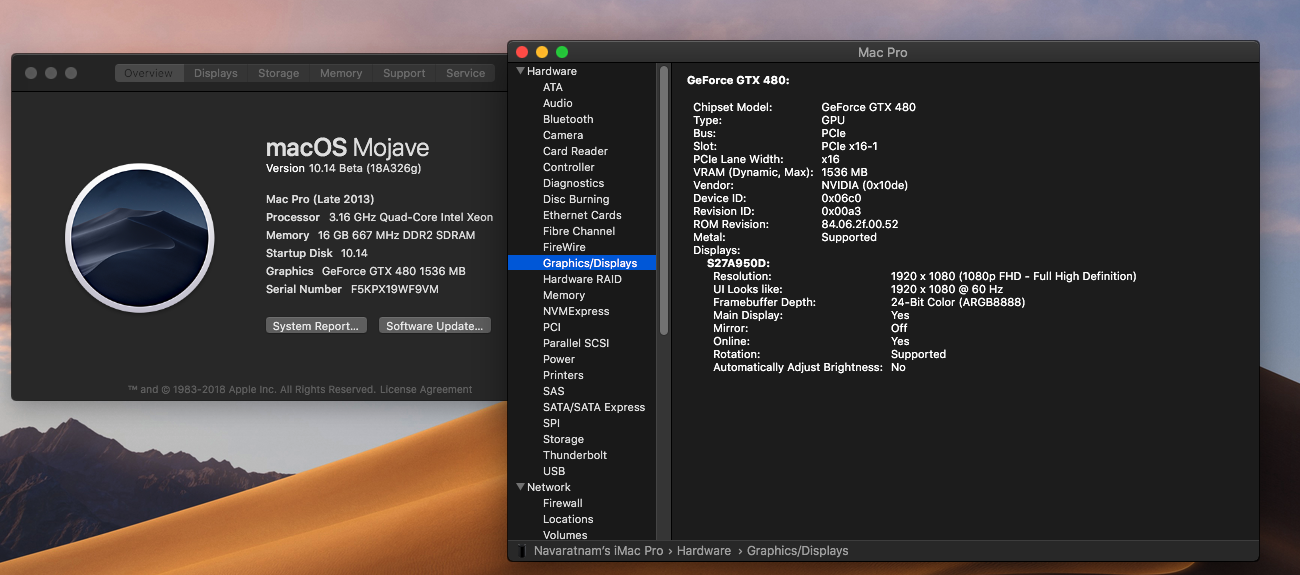
GTX 480 worked I just rollback 10.13.4 NVDA and GeFore 15 kexts install with Easykext Utility Replace 10.13.4 System ▸ Library ▸ Frameworks ▸ CoreDisplay.framework ▸ Versions ▸ A CoreDisplay
 1 point
 -
Mi Gaming Laptop Stock Wallpaper + Google = https://c.mi.com/thread-882945-1-0.html1 point
-
Hello RehabMan / Others involved, Regarding the Plextor/LiteOn/Hynix "special patch", I see it mentioned as "IONVMeFamily Preferred Block Size patch". However I can't see the relation of this patch to block size (I think the description is wrong), and I also don't understand why we need 4 variants (0x01, 0x02, 0x04, 0x08). If we look at what we are patching (for High Sierra, which by the way is the same for Mojave Beta1): ... 8A 48 1A (mov cl, byte [rax+0x1a]) F6 C1 10 (test cl, 0x10) 0F 85 41 01 00 00 (jne some_32bit_offset) 80 E1 0F (and cl, 0xf) 0F B6 C9 (movzx ecx, cl) ... The test in this code is on byte 26 (0x1a) of the Identify Namespace, which represents Formatted LBA Size (FLBAS). Its structure is something like this: struct { UCHAR LbaFormatIndex : 4; UCHAR MetadataInExtendedDataLBA : 1; UCHAR Reserved : 3; } FLBAS; // byte 26 M - Formatted LBA Size (FLBAS) Bits 3-0 indicate the index of the chosen format variant for the namespace, and Bit 4 indicates whether metadata for a command is transferred as part of an extended data LBA. The test instruction of original code checks if Bit 4 (0x10) of FLBAS is set to 1 (this bit corresponds to MetadataInExtendedDataLBA), and if it is, the jne instruction performs the jump. The problem here is that OSX decides that metadata should be used, only by the data at byte 26 (FLBAS), which these drives don't properly respect, and doesn't perform further checks. Linux driver, for example, takes that value into consideration only if the active LBA Format data structure has MS (metadata size) > 0: NVME_NS_FLBAS_LBA_MASK = 0xf; NVME_NS_FLBAS_META_EXT = 0x10; ... ns->ms = le16_to_cpu(id->lbaf[id->flbas & NVME_NS_FLBAS_LBA_MASK].ms); ns->ext = ns->ms && (id->flbas & NVME_NS_FLBAS_META_EXT); Or another possible place to check, would be byte 27 of the Identify Namespace (MC), that shows the metadata capabilities (but not necessarily the active setting): struct { UCHAR MetadataInExtendedDataLBA : 1; UCHAR MetadataInSeperateBuffer : 1; UCHAR Reserved : 6; } MC; // byte 27 M - Metadata Capabilities (MC) Under linux, we can easily see the inconsistency for this drive: $ sudo nvme id-ns /dev/nvme0n1 NVME Identify Namespace 1: ... flbas : 0x11 mc : 0 ... lbaf 0 : ms:0 lbads:9 rp:0x1 lbaf 1 : ms:0 lbads:12 rp:0 (in use) FLBAS bit 4 is set to 1, but MC bit 0 is set to 0. We can also see the two available LBA formats (512 and 4K), none of which allows metadata (ms=0, which stands for metadata size, clearly means unsupported) So, in the above code (when unpatched), FLBAS bit 4 would trigger the jump, although no metadata is present in extended data LBA, leading to an assert (as probably OSX NVME driver doesn't support such metadata). Anyway, about the proposed patch: it is clear that in the patch we reverse bit 4 (0x10) of FLBAS to disable checking for metadata, but my question is, why additionally in the presented patch variants we also add tests on bits 0-3 of FLBAS, which may just trigger as well the assert? (each of the 4 variants 0x01 0x02, 0x04, 0x08 adds a test on one of the bits 0-3, when the original check does not test at all against LbaFormatIndex, so I can't really see the logic in that). It is clear that the "proper" solution would be to add further checks for metadata presence, but as the intention here seems just to disable checking for metadata, why not, for example, just reverse bit 4 (0x00) instead of all the variants? This would result in something like this, and should work for all cases (the relevant code is the same for 10.12.x->10.14b1): <dict> <key>Comment</key> <string>IONVMeFamily: Ignore FLBAS bit:4 being set - for Plextor/LiteOn/Hynix</string> <key>Disabled</key> <false/> <key>Name</key> <string>IONVMeFamily</string> <key>Find</key> <data>SBr2wRAPhQ==</data> <key>Replace</key> <data>SBr2wQAPhQ==</data> </dict> Edit (Feb 2019): Updated the Find/Replace pattern above to be compatible also with the coming 10.14.4 (it remains compatible also with older versions), as the underlying code described at the beginning of this post was changed into the following equivalent: ... 0F B6 48 1A (movzx ecx, byte [rax+0x1a]) F6 C1 10 (test cl, 0x10) 0F 85 44 01 00 00 (jne some_32bit_offset) 83 E1 0F (and ecx, 0xf) ...1 point
-
Still VGA and no USB 3??1 point
-
ARM Hackintoh Gigabyte MP30-AR0 is an ARM Server Motherboard Powered by Applied Micro X-Gene 1 SoC MP30-AR0 specifications: Processor – AppliedMicro X-Gene 1 processor with 8 ARMv8 cores up to 2.4GHz (TDP 45W) System Memory – 8 x DIMM slots, Single, dual rank UDIMM modules @ 1333/1600 NHz supported (up to 16GB) Storage – 4x SATA III 6Gb/s ports + 1x SD card slot Connectivity – 2x 10GbE SFP+ LAN ports (integrated), 2x GbE LAN ports (Marvell 88E1512), 1x 10/100/1000 management LAN Graphics – Video Integrated in Aspeed AST2400. 2D Video Graphic Adapter with PCIe bus interface up to 1920×1200@60Hz 32bpp. Expansion Slots – 2x PCIe x16 (Gen3 x8 bus) slots Other Internal I/O 1 x CPU fan header 4x system fan headers 1x USB 2.0 header 2x Front panel headers 1x APM strap header 1x HDD back plane board header 1x PMBUS header 1x BMC JTAG header, 1x JTAG PLD header 1x BIOS_H header 1x Chassis intrusion header 1x SATA DOM jumper, 1x BIOS recovery jumper, 1x ACK selection jumper 1x IPMB connector Rear I/Os 2x USB 2.0, 1x Mini USB 1x VGA 1x Serial 2x SFP+, 3x RJ45 1x ID button with LED, 1x Power button with LED, 1x Status LED Power – 1x 24-pin ATX main power connector; 2x 4-pin ATX 12V power connectors Dimensions – 244 × 244 mm (microATX form factor)1 point
-
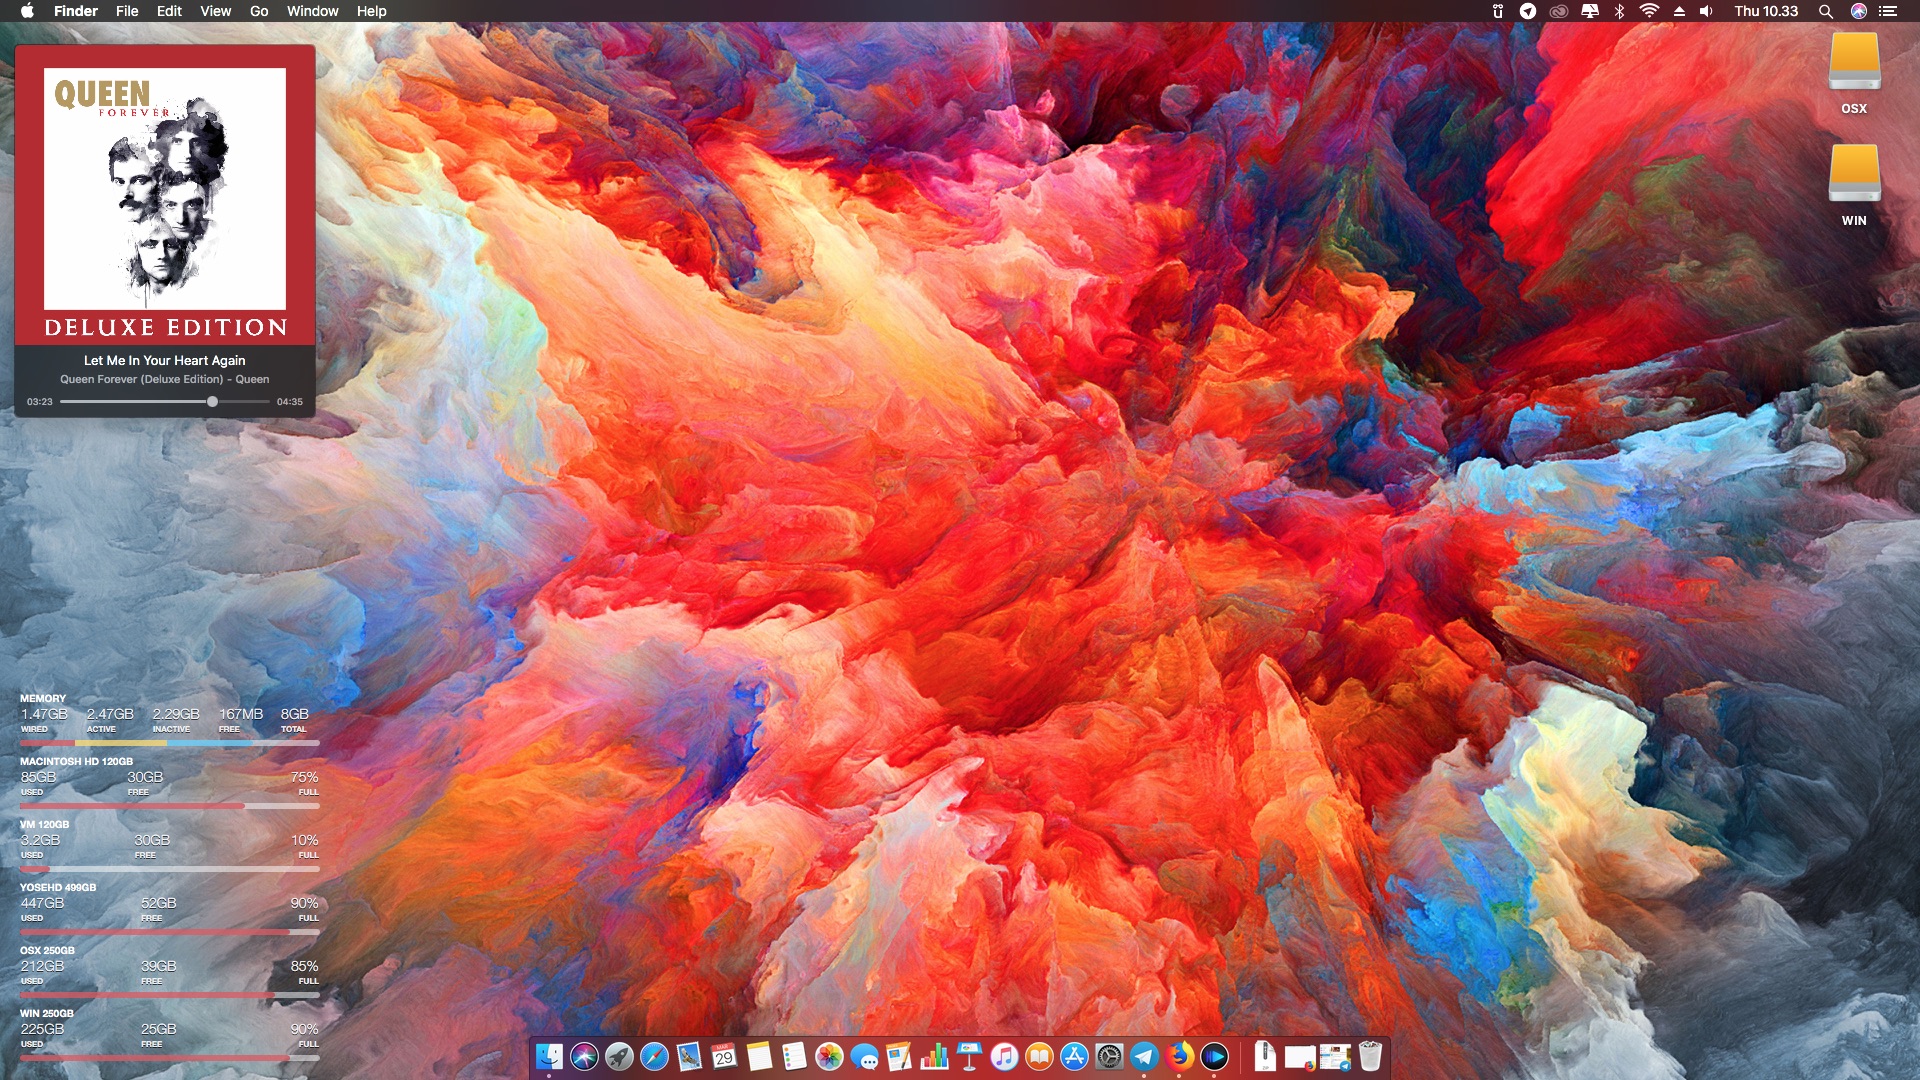
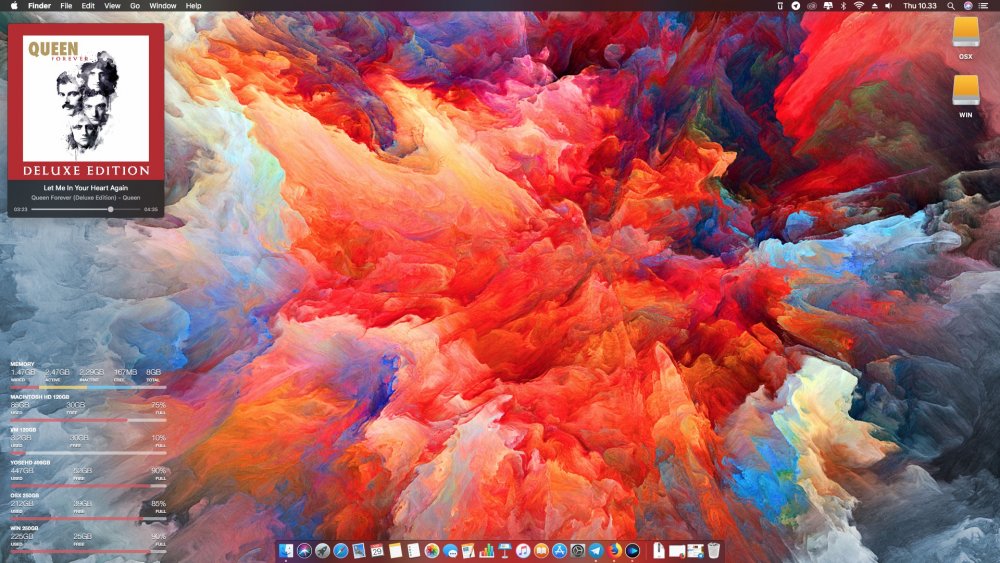
When Mi & Apple be united source : Mi Gaming Laptop Stock Wallpaper Übersicht (modif : disk usage & mem) IINA for playing Queen Deluxe Edition
 1 point
 -
1 point
-
Yep! easy way.... sudo perl -i -pe 's|\x00\x74\x07\xb8\xff\xff|\x00\x90\x90\xb8\xff\xff|sg' /path/to/your/APFS.efiErmaC1 point
-
Trolling: Haiku can be nice too.
 1 point
 -
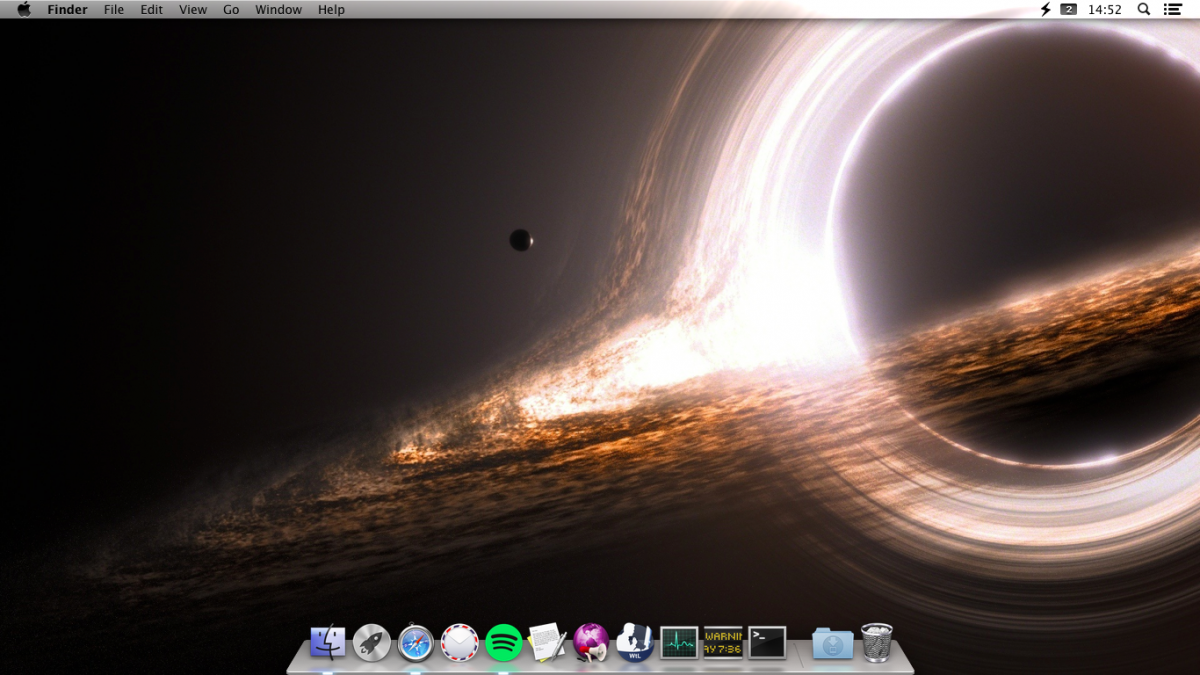
Gargantua Interstellar:
 1 point
 -
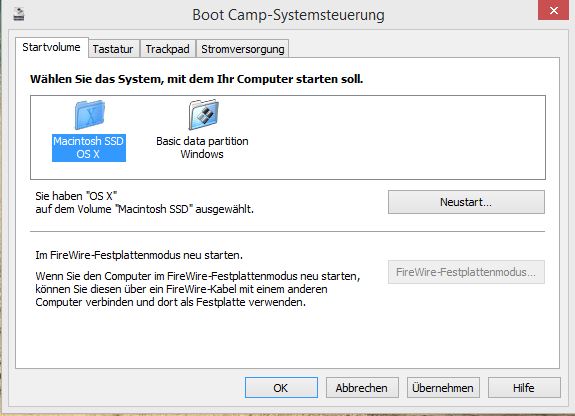
hi all if any is one interested how to install Bootcamp Drivers on your Windows 7/8/8.1 For Apple Keyboard/TrackPad/Maus/TimeSynchronic/etc. 1.Donwload the attached file 2.open DMIEDIT.exe 3.edit the green market spot with the Smbios value from your hack. 4.Open Update drop-down menu and select All item Or single click <All> icon on Toolbar. 5.download Bootcamp driver from apple. 6.open the downloaded folder Bootcamp/Drivers and the $WinPEDriver$ folder delete all drivers except Apple drivers 7.that's it, now you can install it easily via the setup.exe my Apple Keyboard and TrackPad works 100% Good luck all DMIEDITWINGUI.zip
 1 point
 -
Ciao Maurizio Grazie di aver provato Da quanto scritto vedo tutto funzionante e senza problemi. Molto bene. Mi occorre.... e' ottimo quanto hai fatto. Fammi sapere quando hai installato qualche app per la stabilita'. Ti ringrazio Molto Fabio P.S. Aspettiamo l'uscita della 10.8.31 point
-
Ciao Maurizio Grazie della risposta e ho visto tutto ok Prova a testare questo dsdt by ErmaC L'installazione l'hai fatta su HD sata oppure su SSD Fabio P6T_SE_i7_920.zip1 point
-
Ti spiego : Tempo fa testai Lionize e fine installazione ho dovuto finire l'installazione da un altro sistema, chiesi ad ErmaC Se hai finito l'installazione con "Finalize" non hai dovuto usare un secondo sistema. Fabio1 point
-
Ci mancherebbe, se posso aiutare lo faccio volentieri. Versione installata di ML 10.8.2 sei apposto. Una domanda l'installazione l'hai finita con " Finalize" Fabio1 point
-
Ecco a te Segui la procedura che ti ho indicato. Fabio i7 950.zip1 point
-
Faccio anche di meglio Te lo passo già compilato Descrivimi Hardware della tua macchina...Mainboard, Cpu, ecc. Fabio1 point
-
Impossibile che pesi così tanto al max saranno 10 mb La cartella si trova in root Fabio1 point
-
Sbagli e ti spiego : Quando hai creato la usb elimini come hai detto il kext ati6000 (fatti una copia) ripari i permessi e basta non devi niente. Al boot della usb dai il comando GraphicsEnabler=No fai l'installazione. Con un secondo sistema devi installare con Kext Wizard FakeSMC.kext riavvii. Al boot selezioni HD dove hai ML con -v GraphicsEnabler=No Quando arrivi qui proseguiamo. Fabio1 point
-
1) Sei sicuro di come hai preparato la usb 2) Impostazioni del bios 3) All'avvio hai provato a dare il comando -v npci=0x2000 Fabio1 point
-
Grazie Piu' tardi li sposto all'inizio del post. Fabio P.S. sto scrivendo dall'iphone1 point
-
Nello Slot 1= devi montarci la scheda video. La scheda 4870 che hai dove l'hai montata. Fabio1 point
-
@ pru Di niente Fabio1 point
-
Devi installare IOAHCIFamily.Kext ( lo puoi prendere dalla mia guida : http://www.insanelymac.com/forum/topic/282652-guida-installare-os-x-mountain-lion-108-rtm-su-asus-p5q-deluxe/ ) La gestione del boot la gestisce Chameleon per i due sistemi settando i dischi in Ahci, però dipende dall'installazione dei OS. Fabio1 point
-
Tutto OK bene. Fai una installazione nuova poi proseguiamo con un passo alla volta. La procedura : 1) Installazione Mountain Lion 2) Installazione Boot Chameleon 3) Installazione vari Kext 4) Kext Wizard riparazione di permessi e cache Fabio1 point
-
Come da Regolamento : Discussioni riguardanti spin-offs commerciali della scena OSx86 sono consentite se per capirne la natura, ma discussioni su come usarli o altri tipi di promozione non saranno ammessi in quanto discordanti con lo spirito della scena OSx86. Questo vale specialmente per tonymacx86 e le sue "bestie". Modificando il post e riproponendo la domanda sai ( frizzo e fonfo quando leggo usato chiavetta creata con UxxBxxxx, bootloader con MxxxxBxxxx ) chiedi pure a me. Dato che il post lo aperto io mi piacerebbe che restasse pulito. Fabio1 point
-
Sono sempre più convinto che sta prendendo una strada sbagliata questo topic. Da una cosa ad un altra boo!......maa!.... Fabio1 point
-
Questo post lo aperto per testare la scheda madre Asus P6T Deluxe V2 come da titolo quindi non andiamo Per altri problemi aprite il post nella sezione giusta Grazie Fabio1 point
-
Ciao stil86 Allora con il secondo HD funzionante lasciando attaccato HD dove hai installato Mountain Lion Vai in S/L/E del HD di Montani Lion Apri kext Wizard e installi FakeSMC.kext Riavvii Comando al boot -v su HD Mountain Lion Fabio1 point
-
Piccolo Aggiornamento Se alla fine dell'installazione nella barra in alto non appare per aprire il lettore DVD potete risolvere così : Seguite questo percorso : Root /System/Library/Core Services/ Menu Extras e fai doppio click su Eject.menu,appare nella barra in alto l'icona per aprire il lettore. Funziona sia tastiera che cliccandoci sopra. Fabio1 point
-
Sta diventando Veramente Interessante L'installazione fatta su questa scheda mi piace sempre + Come OS X questa GM la vedo molto snella e veloce. Per il momento tutto bene. P.S. aiuto arrivato dal by ErmaC1 point
-
Ecco Cilio Scusami ma mi sono dimenticato di risponderti alla domanda fatta . Aggiungo che l'installazione lo fatta su SSD La cosa strana come detto prima è il boot lentissimo. In Lion 10.7.4 al boot tre giri di rotellina e sono alla scrivania con la GM circa un minuto1 point