All Activity
- Past hour
-
 luck8mediasocial8 joined the community
 -
 cakhiatv8org joined the community
 -
 Kun Real Estate joined the community
 -
 Dustin Sparks joined the community
 -
forest386 joined the community
-
 Pratik Munot changed their profile photo
 -
 Ahmed Othman changed their profile photo
 -
 Kristen Scott changed their profile photo
 -
 UPGroup Venues joined the community
 -
 Manshi Kumar joined the community
 -
 Anubis Great changed their profile photo
 - Today
-
 good88vnitcom changed their profile photo
 -
.thumb.jpg.9d62d581e76991157051887dc41d2f8e.jpg) new88vicomm1 changed their profile photo
new88vicomm1 changed their profile photo -
 uu666uscom joined the community
 -
pinoy365 joined the community
-
Hello @MaLd0n My codec is ALC888S but the codec info doesn't finds. I've attached the report from your tool. I never tried VoodooHDA but neither AppleALC or HDAUniversal works. The sound works fine on Windows and Linux Codec-Info-Report.txtCodec-Info-Report2.txt
-
.thumb.jpg.d3189ef153903397e19fa81575c2ee02.jpg) EE88x changed their profile photo
EE88x changed their profile photo -
 Raging Coupon changed their profile photo
 -
 Md Sihab changed their profile photo
 -
 RESERVED
 -
"Guess who's back, back again? Frank Nitty's back, tell a friend." Lol 😂 So, after being on hiatus for quite a few years, I'm making my triumphant return, and for those of you who aren't aware, I started my own YouTube channel (in which I spread the news on this post), and I recently posted a video in an effort to bring awareness to the unfortunate shuttering of Intel Mac support and my one desire to pay homage to that era was to get macOS running on a Hackintosh by way of the OpenCore bootloader... So, I finally I did it after devoting a relentless amount of spare time, more than I care to admit 😅. Kudos to the "Acidanthera" open-source team for their contribution by providing the OpenCore bootloader, specifically OpenCore v0.8.1 which I had been using, and "Dortania" for their "OpenCore Install Guide" even though I had a hard time (PAUSE) following along a few times during some of the steps I had encountered which is where my guide comes in. This thread is a walkthrough on how to install macOS Monterey. I know I'm behind, but I got to start somewhere NOT so far removed from High Sierria, my last Hackintosh installation. Throughout this guide, I have linked the page or post based on information I gathered to put this guide together in order to credit that person instead of having to name drop them individually. These are fully detailed instructions to make things easier for newbs. All the steps mentioned here have been corroborated by me based on extensive testing, research and repetition to ensure success. Basically, I figured out everything so hopefully you won't have to go through the trouble I did. PLEASE DO NOT PM ME FOR HELP. REPLY TO THIS GUIDE BELOW, THANKS. SO, LET'S GET STARTED!!! WHAT YOU WILL NEED: 1. macOS Monterey 12.2.1 (21D62) 2. A computer running an Intel Processor 3. Access to OS X on VMWare (for Windows), Mac, or Hackintosh 4. 1x compatible/supported graphics card 5. OpenCore v0.8.1 and up 6. A USB flash drive at least 16 GB MY SPECS: 1. Intel® Core™ i7-4770K Processor (De-lidded) 2. Cooler Master Hyper 212 Black CPU Air Cooler 3. ASUS Sabertooth Z97 Mark 2 Motherboard 4. ASUS TUF Gaming AMD Radeon™ RX 6800 XT Graphics Card 5. ADATA Ultimate SU800 3D NAND 2.5" 1TB Internal SSD [Windows Installation] 6. Western Digital Velociraptor 1TB 10K RPM SATA HDD (WD1000CHTZ) [macOS Installation] 7. CORSAIR Vengeance Pro 32GB 4x8GB DDR3 2400MHz PC3 19200 Desktop RAM 8. LG BH12LS35 Blu-Ray Burner 8. ASUS TUF Gaming 1000W Gold Power Supply BEFORE YOU BEGIN: 1. Remove any USB peripherals besides keyboard and mouse. 2. Update your system to BIOS version 3503; More details below. MODIFYING BIOS UPDATE VERSION 3503 TO ENABLE NVRAM SUPPORT (BACKGROUND): 1. After purchasing the ASUS Sabertooth Z97 Mark 2 motherboard on eBay recently, something told me to do some research pertaining to its compatibility when installing the macOS operating system since the methods I had employed during my earlier attempts were to no avail, and it had come to my attention that there were more problems than what had appeared on the surface. Case in point, back in 2016, there was a discovery of a "terrible memory corruption" bug affecting users of ASUS APTIO IV Z97 motherboards to not have working NVRAM from within the BIOS which results in a kernel panic and/or boot loop when attempting to install macOS. To further clarify, NVRAM is not working with APTIO V firmwares compared to APTIO IV, meaning that APTIO IV drivers "implement a variable whitelist" and prohibit "writing anything, but the variables from the list... which were found on older Z87 APTIO IV motherboards... so NVRAM works fine on them," but "once the firmware was upgraded, it is no longer possible to use the older driver, like on Z97 motherboards due to a completely new stack" since they utilize a new NVRAM driver implementation. So, in short, there is no native NVRAM support and for that reason, in the Clover bootloader, you had to replace the original "OsxAptioFix2Drv-64" with a modified version (or version 2) by "vit9696" in which a fix has since been "committed as [of] r4369." 2. However, in the case of the Z97 Sabertooth motherboard, I threw caution to the wind and made the conscious effort to modify BIOS version 3503 in order to add the missing NvramSmi driver from BIOS version 1104 which doesn't have the whitelist (as mentioned earlier) to bring parity with APTIO IV motherboards and I was able to flash it to my motherboard by using its USB Flashback Utility before installing macOS Monterey, and I followed this guide to do so. CFG Lock does come included as an option after updating to BIOS version 3503 and once you unlock (disable) it in your BIOS (which unlocks MSR 0xE2), you can restore native NVRAM support (based on my understanding). 3. On a side note, throughout all my research, I wasn't seeing any record of macOS successfully being installed on the Z97 Sabertooth motherboard, and to further add, it wasn't until 2019 when OpenCore went into development that it was possible to turn systems into a Hackintosh containing this same board which explains why I had so much trouble using the Clover bootloader to get my USB macOS installer to work. 4. Unfortunately, an inherent side effect of using the modified BIOS from earlier is that it breaks XMP in the process, causing Windows and Mac to display the default, minimum frequency of 1867MHz even when manually setting the memory frequency to its maximum spec of 2400MHz. So, as a counter measure, I followed this guide here which requires you to replace the "PE32 Body" section from BIOS version 1104 with one from BIOS version 3503 then extracting the NvramSmi driver from the BIOS that was just modified and replacing it with one from an unmodified BIOS version 3503 then I followed this guide here to convert it to a ROM file and I used AFUWIN64 Tool v3.05.04 to flash it within Windows since the "capsule headers" were removed which I can confirm works. 5. To check if you have working native NVRAM (Non-Volatile Random Access Memory), open Terminal and enter in the following commands: sudo -s nvram -c nvram myvar=OSx86 exit Restart the system after exiting Terminal followed by reopening Terminal and type the following command: nvram -p | grep -i myvar If nothing returns, namely the stored value "OSx86" then that means NVRAM is not working. 5. Clearing NVRAM which offers benefits such as "resetting SIP" for example, requires that you press the spacebar after launching the OpenCore boot menu to bring up hidden menu entries such as "Reset NVRAM" in order to clear the NVRAM data which causes the computer to automatically restart for changes to take effect. You can also boot into macOS with "-s bootarg" (single user verbose) and type "sudo nvram -c," and reboot to accomplish this task as well. STEP 1: BIOS SETTINGS 1. Start off by entering the BIOS and accessing Advanced Mode. Go to Exit to select 'Load Optimized Defaults'. 2. Go to Boot and disable 'Fast Boot' then scroll down to Secure Boot and access Key Management to disable 'Secure Boot State'. If need be, clear any installed keys [as in delete each key] in order to do so. NOTE: Restart the system if you're prompted to do so in order to remove the keys. a. Access Secure Boot again and set OS Type to 'Other OS'. 3. Back out to Boot and go to CSM (Compatibility Support Module) to disable 'Launch CSM'. NOTE: Ensure that all Secure Boot keys have been deleted. Not doing so will trigger a red Secure Boot Violation prompt to appear onscreen when initiating the Hackintosh install process, inadvertently causing the BIOS to revert to UEFI motherboard compatible settings while blocking any unauthorized bootloader signing as a safety mechanism. After saving the settings and upon reboot, if you're prompted with a message that the GPU in use lacks UEFI support and that CSM has been enabled while being presented with the option to press "F1" to go into the BIOS setup or press "F2" to continue to the next available boot device, select "F2" to boot from the USB installer. 4. Back out and scroll down to Hard Drive BBS Priorities to set boot sequence of the available hard disks; After installing macOS, set the first "Boot Option" as "UEFI OS". 5. Back out to Advanced → PCH Storage Configuration → SATA Mode Selection = AHCI. 6. Back out to Advanced → System Agent (SA) Configuration → Graphics Configuration and set 'Primary Display' to "PEG" (or alternatively "PCIE") and disable 'CPU Graphics Multi-Monitor'. 7. Back out to Advanced and scroll down to access APM Configuration → 'ErP Ready' and disable it [equates to "S3 only, Suspend to Ram"]; the rest of the options should be disabled by default. 8. Go to Advanced → CPU Configuration and disable 'Intel Virtualization Technology'. 9. Scroll down to CPU Power Management Configuration to disable 'CFG lock'. 10. Go to Advanced → USB Configuration and enable 'Intel xHCI Mode'. 11. [Optional] Go to Ai Tweaker → Go to Ai Overclock Tuner and enable 'XMP' and use the profile available. Scroll down to 'DRAM Frequency' and set it to the specified frequency of your memory. 12. [Optional] From Advanced Mode → go to Monitor → click on 'Qfan Tuning'; it allows the BIOS to run assessment to detect lowest speed and configure minimum rotation for each fan. a. Set 'CPU Fan Speed' to "Ignore" (to prevent "CPU FAN Error") and set other available CPU fans to 'Monitor'. b. Scroll down to "CPU Q-Fan Control" and set it to "PWM Mode". c. Set "Chassis Fan 1/2/3/4 Q-Fan Control" to "PWM Mode". d. Go to "Qfan Control(F6)" at upper part of the screen; for each "CPU / CHA# FAN" available, set the fan curve to the "Silent" configuration option by selecting its respective radio button for each available fan exactly like the pic below → Apply 13. [Optional] Go to Tool → "ASUS Overclocking Profile" to save your BIOS settings profile (to a USB stick). "Exit" to leave "ASUS Overclocking Profile" menu. 14. Go to Exit → "Save Changes & Reset". STEP 2: CREATING A BOOTABLE USB TO INSTALL OF MONTEREY 12.2.1 1. OpenCore and the macOS installer are placed on separate partitions on the USB stick. This guide will use 'diskutil list' in Terminal instead of Disk Utility to format the USB with GPT partitioning for Clover UEFI support. 2. You must determine its disk identifier before you can partition the USB. Plug the USB stick into a Mac (or Hackintosh), run Terminal and type 'diskutil list'. The following screenshot will serve as a reference: As you can see the the USB stick’s identifier is /dev/disk4. 3. Type the following entry into Terminal to format the USB stick (two partitions, via GPT): diskutil partitionDisk /dev/disk4 1 GPT HFS+J "OS X" R During the process the following occurred: • /dev/disk4 GPT partitioning initiated • by default EFI was automatically created • remainder "OS X", HFS+J is partitioned 4. It resulted in the following screenshot: 5. Download macOS Monterey 12.2.1 (21D62) ISO and copy over "Install macOS Monterey" app into the 'Applications' folder. 6. Type the following command in the open Terminal window: sudo /Applications/Install\ macOS\ Monterey.app/Contents/Resources/createinstallmedia --volume /Volumes/OS\ X a. Follow the onscreen prompts to create macOS Installer on the USB flash drive. This will take some time (over 20-25 min). 7. After the process has complete, close Terminal and open Disk Utility. You'll notice that there are (2) instances of "Install macOS Monterey." Eject the image associated with the ISO you downloaded earlier while retaining the one tied to your USB stick and close Disk Utility. 8. Download a copy of OpenCore v0.8.1, and extract the contents from the zip they're contained in. 9. Use a utility such as Clover Configurator to mount the EFI partition of "Install macOS Monterey." 10. From within the contents you extracted, you'll notice a folder labeled "X64" which contains a sample EFI folder; drop it into the EFI partition you just mounted. 11. Now open the EFI folder where there will be a variety of subfolders; at this point, we'll need to do some housekeeping: a. In the EFI/OC/Drivers/ directory, delete all of the files except for OpenRuntime.efi; it's necessary in order for OC to operate properly. Optional drivers to keep include ResetNvramEntry.efi (meant for resetting system NVRAM from the bootloader menu) and HfsPlus.efi (meant for allowing you to boot from HFS+ volumes). b. In the EFI/OC/Tools/ directory, delete all of the files except for OpenShell.efi; Although optional, it's recommended for easier debugging. 12. Next, we want to store kext files necessary for your use case: a. Place the following kexts into the /EFI/OC/Kexts/ directory: • VirtualSMC.kext [v1.3.7]; Alternative to FakeSMC to emulate Apple SMC in the kernel. Requires Lilu. • Lilu [v1.7.2]; used to patch other kexts. • VoodooPS2Controller.kext; for enabling PS/2 keyboard. • IntelMausiEthernet-V3.0.0; for your ethernet: Intel I219-V Gigabit NIC kext. • NVMeFix [1.1.3]; patches "IONVMeFamily" Apple NVMe storage driver which fixes power management and initialization on non-Apple NVMe; requires macOS 10.14+. • SATA-Unsupported.kext; adds support for a large variety of SATA controllers utilized by HDDs/SSDs. Use CtlnaAHCIPort.kext for macOS Monterey instead. • RestrictEvents.kext; meant for blocking unwanted processes causing compatibility issues on different hardware and unlocking the support for certain features restricted to other hardware. • WhateverGreen; meant for patching graphics which all GPUs benefit from. • AppleALC; enables native audio by injecting the layout id supported for Realtek ALC1150 audio chip through dynamic patching without modifying any kexts. Audio will no longer be affected after each macOS update and SIP can remain enabled. More details here. Requires Lilu. Mount EFI partition and add the following entry under Devices-Properties in the config.plist to inject working layout id 1 (or 2 or 3). NOTE: AppleHDA must be native, original and remain unpatched. 13. Apple limits the set amount of USB ports that can be detected in macOS so as a counter measure, you'll need to use a utility such as USBToolBox to map all the USB ports from Windows so that they are working based on the current configuration of your setup without ever having to rely on USBInjectAll.kext any longer. a. Before installing macOS on the PC, it is recommended to map the USB ports to avoid running into any port limit issues. • Download the latest release for Windows; You can choose between the Windows.exe, but if your antivirus gives you hell about it, you have the option of resorting to use the Windows.zip file. • Select "C." and ensure that the default settings are sufficient for your use case. • Select "D." to "discover ports" and wait for the app to tabulate the list of ports available. • Connect a USB device (i.e., USB stick) into each USB3 port one by one, but verify that the app can detect a connection before switching to the next port. • Once the process has complete, select "S." to access the "Select Ports and Build Kext" screen. From here, in my case, I selected "A." to "Select All" followed by selecting "P." to "Enable All Populated Ports." • Lastly, select "K." to "Build UTBMap.kext" which requires USBToolbox.kext so download it if you haven't done so before proceeding. • If all went well, a "UTBMap.kext" should've generated in that directory location injected with an Info.plist as a result. • Store a copy of the "UTBMap.kext" along with "USBToolBox.kext" in the /EFI/OC/Kexts/ directory, and make sure to update your config.plist, and delete the leftover "UTBDefault.kext." 14. Obtain a copy of your PC's DSDT by using SSDTTime from within Windows. a. Download the "SSDTTime-master" clicking on the green button labeled "<> Code" (near the top) followed by "Download ZIP." b. Run SSDTTime from within Windows by either double-clicking on the .bat file or launching it from Command Prompt. c. Select option "P. Dump the current system 's ACPI tables" in order to generate a "Results/OEM" directory containing your "DSDT.aml" along with a variety of other ACPI tables and retain a copy of the DSDT.aml made available. 15. Next, we need to generate the following SSDTs compatible with the Haswell platform: a. SSDT-PLUG; with SSDTTime still open after dumping the DSDT, select option "5. PluginType" which should've resulted with both SSDT-PLUG.aml and SSDT-PLUG.dsl generated with matching plists containing patches as a result. Just retain a copy of the SSDT-PLUG.aml made available. b. SSDT-EC; following the generation of SSDT-PLUG, with SSDTTime still open, select option "2. FakeEC" which should've resulted with both SSDT-EC.aml and SSDT-EC.dsl generated with matching plists containing patches as a result. Just retain a copy of the SSDT-EC.aml made available. 16. Now it's time to add those SSDTs to Open Core. a. Store both the SSDT-PLUG.aml and SSDT-EC.aml you just generated in the ACPI folder: /EFI/OC/ACPI/. Do NOT add your custom DSDT(.aml) to OpenCore. 17. At this point, we need to configure a working "config.plist" to suit our system we intend to use to install macOS. a. Obtain a copy of "Sample.plist" which should be located in a folder labeled "Docs" from within the OpenCore zip file downloaded earlier and move it to EFI/OC/ then rename it to "config.plist." b. Next, we'll need to setup the "config.plist" by using ProperTree, a cross-platform GUI universal plist editor along with GenSMBIOS meant to generate our SMBIOS data automatically. • They both can be downloaded from their respective pages by clicking on the green button labeled "<> Code" (near the top) followed by "Download ZIP." c. Run ProperTree from within Windows by double-clicking on the ProperTree.bat file. • With your EFI folder intact, make a copy of it to use in Windows so we can access the config.plist that was stored in it earlier. d. With ProperTree still open, open the config.plist by pressing CTRL+O to browse for its location and selecting it. e. Next, we need to perform a "Clean Snapshot" by pressing CTRL+Shift+R and pointing to EFI/OC/ so that all the entries get removed in order to add all of our SSDTs, Kexts and Firmware drivers to the config.plist as a result. • You'll notice that ProperTree has merged entries for our SSDTs, Kexts and firmware drivers into the config.plist once the process has completed. • If you decide to do some further cleanup such as removing any instances where you see "#WARNING" entries, "deleting" them won't affect anything so that's up to you. • It is recommended to the delete the following sections before proceeding with this guide in order to tidy up the config.plist by removing things we don't need to make it more lite: /ACPI/Delete, /ACPI/Patch, /Booter/MmioWhitelist, /Booter/Patch, /Kernel/Block, /Kernel/Force, /Kernel/Patch, /Misc/Entries, /NVRAM/LegacySchema and /UEFI/ReservedMemory. NOTE: Anytime you remove or add a file in the EFI folder, it must match what's listed in the config.plist or you risk encountering an error or worse, OpenCore fails to boot. So, as a counter measure, use the "OC snapshot tool" (CTRL+R) in ProperTree whenever you make any modifications in order to update the config.plist. f. Based on our motherboard's platform (Haswell), determining the Device ID for the CPU we're using requires that we refer to Intel's ARK page for our given CPU; in my case, the i7-4770K's Device ID is "0x412." • "PciRoot(0x0)/Pci(0x1b,0x0)" located under /DeviceProperties/Add in ProperTree in which "layout-id" inhabits is the section where AppleALC audio injection takes place by way of the kext we installed earlier. However, prior knowledge of your motherboard's audio codec is required in order to properly match it with AppleALC's layout. In my case, the Sabertooth Z97 Mark 2's audio codec is "ALC1150." • After cross referencing the audio codec with the list of AppleALC's supported codecs, ALC1150's corresponding "hardware revision" along with its available "layout IDs" are as follows: 0x100001, layout 1, 2, 3, 5, 7, 99 g. Rather than utilizing the "layout-id" property in DeviceProperties to enable audio at this time, we'll be using the boot-arg "alcid=xxx" where in place of xxx, we'll be changing it to one of the working layout IDs matching the audio codec since "alcid" will override any layout-IDs currently in existence. • In ProperTree, scroll down to /NVRAM/Add, and spot the relevant GUID containing the "boot-args" property and edit the "Value" column of that row with the following: alcid=1 (to inject layout id 1 for starters; or try 2 or 3) • Keep in mind, you should only be using one layout ID at a time, NOT multiples IDs or multiple "alcid" boot-args at once. If one doesn't work, then try another one. h. We'll be applying the following changes in the /Kernel/Quirks section as these relate to kernel settings: Key Enabled Comment AppleCpuPmCfgLock NO Need if running 10.10 or older and cannot disable CFG-Lock in the BIOS AppleXcpmCfgLock YES Not needed if CFG-Lock is disabled in the BIOS DisableIoMapper YES Not needed if VT-D is disabled in the BIOS LapicKernelPanic NO HP Machines will require this quirk PanicNoKextDump YES PowerTimeoutKernelPanic YES XhciPortLimit YES Disable if running macOS 11.3+ i. Perform the following changes in /Misc according to the image below: • Set /Misc/Boot/HideAuxiliary=True: This function hides supplementary entries such as macOS Recovery and tools which can help speed up boot times when using multi-boot systems, but pressing the spacebar while in the Bootloader menu will reveal those entries. • Set "Timeout" to "5" under /Misc/Boot; Depending on how much you adjust this value in seconds prevents the PC from automatically booting into a default boot entry that being an operating system for that specified amount for time. However, setting it to "0" disables it altogether. • Perform the following changes in /Misc/Debug meant for helping debug boot issues in OpenCore: Quirk Enabled Comment AppleDebug YES Enables boot.efi logging. Supported only on 10.15.4+ ApplePanic YES Attempts to log kernel panics to disk DisableWatchDog YES Disables the UEFI watchdog to help with early boot issues DisplayLevel 2147483650 Shows even more debug information, requires debug version of OpenCore SysReport NO Helps with debugging, e.g., dumping ACPI tables; limited to DEBUG versions of OpenCore Target 67 Shows more debug information, requires debug version of OpenCore • We'll be making the following changes in /Misc/Security which are necessary: Quirk Enabled Comment AllowSetDefault YES BlacklistAppleUpdate YES ScanPolicy 0 SecureBootModel Default Leave as Default for OpenCore to automatically set the correct value corresponding to your SMBIOS Vault Optional Don't omit this setting, or you'll regret it if it's not set to Optional, and it's case-sensitive. j. We'll be applying the following changes in the /NVRAM/Add section according to the image below: • Details regarding what settings should be changed and reasons for it: GUID Comment 4D1EDE05-38C7-4A6A-9CC6-4BCCA8B38C14 Tied to OpenCore's UI scaling; Leave as default DefaultBackgroundColor: Background color used by boot.efi 00000000: Syrah Black BFBFBF00: Light Gray 4D1FDA02-38C7-4A6A-9CC6-4BCCA8B30102 OpenCore's NVRAM GUID; most users can ignore unless affected by RTCMemoryFixup. 7C436110-AB2A-4BBB-A880-FE41995C9F82 System Integrity Protection bitmask boot-args Description -v Enables verbose mode, and necessary to use to monitor if any problems arise since it presents the boot process instead of the Apple logo while the OS is loading. debug=0x100 Disables macOS's watchdog by preventing a reboot on a kernel panic. Whatever leftover info can be helpful for troubleshooting. keepsyms=1 Goes hand-in-hand with debug=0x100 since it causes the OS to printout all the "useful" info during a kernel panic. alcid=1 Meant for configuring layout-id for AppleALC as discussed earlier. agdpmod=pikera A GPU-specific boot-args meant to disable board ID checks for some Navi GPUs (such as the RX 6800XT I'm using) so don't use it on non-Navi cards. Without it, you'll get a black screen. Key Value Comment csr-active-config 00000000 Settings for 'System Integrity Protection' (SIP). 00000000 is the default setting for csr-active-config which enables SIP. Although different values may be used, it's recommended to keep this enabled. run-efi-updater NO Prevents Apple's firmware update packages from installing, breaking boot. prev-lang:kbd en-US:0 Meant for specifying language format of the keyboard. Although it's recommended to keep blank, I changed it to my native language/country of origin (en-US:0) switching the type from "Data" to "String" to avoid converting entry to HEX. WriteFlash YES Enables writing NVRAM variables to flash memory without tampering with other values that NVRAM currently has in existence such as boot-args. k. At this point, we'll be using CorpNewt's GenSMBIOS application to setup the SMBIOS info under /PlatformInfo/Generic which is based on our system's current hardware configuration: SMBIOS Hardware iMac16,2 Haswell with only iGPU iMac17,1 Haswell with dGPU iMac16,2 Broadwell NOTE: Although the iGPU feature for Haswell is still supported on macOS Monterey, you'll have to resort to using a Macmini7,1 SMBIOS when using a NUC to run macOS Monterey. • Launch GenSMBIOS and select option 1 to "install MacSerial" followed by option 3 to "generate SMBIOS," choosing which option closely resembles our hardware configuration; in my case, I'll be using the iMac17,1 SMBIOS. You'll eventually get a similar readout as follows: • Transfer the following information to your config.plist: Generic/SystemProductName = Type; Generic/SystemSerialNumber = Serial; Generic/MLB = Board Serial; and Generic/SystemUUID = SmUUID. Generic/ROM can be found from an Apple ROM on a real Mac, your NIC MAC address, or any random MAC address (as in 6 random bytes); in this instance, we'll use 11223300 0000. Lastly, /PlatformInfo/Automatic = True; generates PlatformInfo based on Generic section instead of DataHub, NVRAM, and SMBIOS sections. • Keep in mind, it is necessary to use an invalid serial number as part of your config.plist. NOTE: The installation of macOS Monterey can be performed via "iGPU " or "dGPU” when using SMBIOS iMac17,1 in the config.plist. l. The /UEFI section doesn't require much of any adjustments so this portion of guide will contain a brief overview: • /UEFI/ConnectDrivers = True; forces .efi drivers. However, changing to "False" will automatically connect added UEFI drivers, but not all drivers may load on their own. • The /UEFI/Drivers section should only reflect drivers currently present in your OpenCore EFI partition. For instance, in my case there's HfsPlus.efi, OpenRuntime.efi, and ResetNvramEntry.efi. • Since the release of Big Sur, OpenCore only loads APFS drivers as default so you will need to set a new minimum version/date if booting macOS Catalina and older, or risk your macOS partition becoming hidden in OpenCore. However, this does not apply to macOS Sierra and older since HFS was still being used rather than APFS. • Under /UEFI/APFS, change both the Min Version and Min Date to the following, respective to the OS that's being affected: macOS Version Min Version Min Date High Sierra (10.13.6) 748077008000000 20180621 Mojave (10.14.6) 945275007000000 20190820 Catalina (10.15.4) 1412101001000000 20200306 No restriction -1 -1 • /UEFI/Audio, Input, Output, & ProtocolOverrides we can leave as default. • We'll be applying the following changes in the /UEFI/Quirks section: Quirk Enabled Comment IgnoreInvalidFlexRatio YES Needed for Broadwell and older, not for AMD and Skylake or newer. This important setting is responsible for presenting error "[EB|#LOG:EXITBS:START]" when NOT enabled, preventing the installer from reaching verbose boot so don't forget that. Ask me how I know… ReleaseUsbOwnership YES UnblockFsConnect NO Mainly required for HP motherboards • The /UEFI/ReservedMemory section can be ignored since it mainly refers to systems with faulty memory and Sandy Bridge iGPUs. m. At this point, we are ready to save our config.plist and store it into our EFI partition under EFI/OC. 17. With the USB installer ready, connect it to the PC, and remember before restarting the system to set the USB stick to have boot priority first and on the OpenCore boot menu screen, select "install macOS Monterey (external)" to begin the installation. a. Proceed through the various prompts and when choosing the storage medium to install Monterey on, it must be both the GUID partition Scheme and APFS. b. You'll then be presented with a prompt showing the progress bar and timer, estimating the duration of time it will take to complete the installation, starting at 33 minutes. • As things progress, the installer screen will go blank without warning at the 12-minute mark in the middle of the installation process which lasts for around 2 minutes and your system will automatically reboot. Once the system boots back up, choose "macOS installer" from the OpenCore boot menu screen which should be selected by default; it will automatically load the installer and pick up where it last left off, showing the Apple logo and progress bar with approximately 30 minutes so allow the installer to run its course. c. With the progress bar at around the 33% completion mark, the screen will turn blank with 12 minutes remaining again and reboot once more. • Be sure to select "macOS installer" again from the OpenCore boot menu screen once it boots back up. However, this time, only verbose mode will display a full-on readout with nothing, but fast-moving text down the screen until it's finished and then the system will reboot itself again. d. On the current OpenCore boot menu, the drive you installed Monterey on will now be selectable so go ahead and choose that. • It will proceed to show the Apple logo along with a progress bar followed by another stream of text scrolling fast down the screen and eventually the system will automatically restart. e. Once the system boots back up to the OpenCore boot menu screen, select your macOS drive you installed Monterey on which should be selected by default, and after going through verbose mode once more, eventually you'll be presented with the macOS Welcome screen, indicating that macOS Monterey is fully useable to customize to your liking. 19. After addressing the preliminary prompts and the macOS desktop has loaded, mount the EFI partition of the USB installer, and now you're able to transfer over the "EFI" folder onto the EFI partition of the drive you installed Monterey on, allowing you to run macOS without needing the USB installer. So, with all that being said, I hope you learned something today. Enjoy! 😁
-
 Midnight Blush changed their profile photo
 - Yesterday
-

The OCLP-Plus 3.x (Tahoe Patch Set).
MakAsrock replied to MakAsrock's topic in New Releases and Updates
It didn't do anything new compared to kgp 😉 I made a slightly more specific one, but it still works. And I didn’t think of attacking anyone, I just don’t have time to figure out other people’s bugs. 🫠 Wrangling my pension out of Bituach Leumi is draining all my time and energy. -
The OCLP-Plus 3.x (Tahoe Patch Set).
deeveedee replied to MakAsrock's topic in New Releases and Updates
I have no skin in the game, so no reason to defend (or attack) him. It's easy to attack and criticize someone trying to do something that no one else has done. Not even the original OCLP Devs have produced patches for T2 Macs. If he succeeds, his methods won't be "buggy." I recall astronaut Neil Armstrong testifying before U.S. Congress when he claimed that relying on commercial companies for crew transportation to space was risky and would leave the U.S. without an independent human-launch capability for years. Now we have SpaceX. -
[Pre-release] macOS Sequoia 15.7.8
deeveedee replied to deeveedee's topic in New Releases and Updates
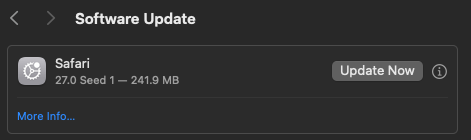
Safari 26.6 Seed 4 applied without issues EDIT: And now 27 Seed 1 (I'm not updating to this yet).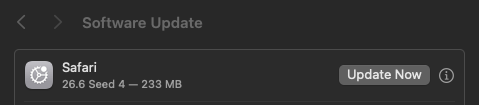
-
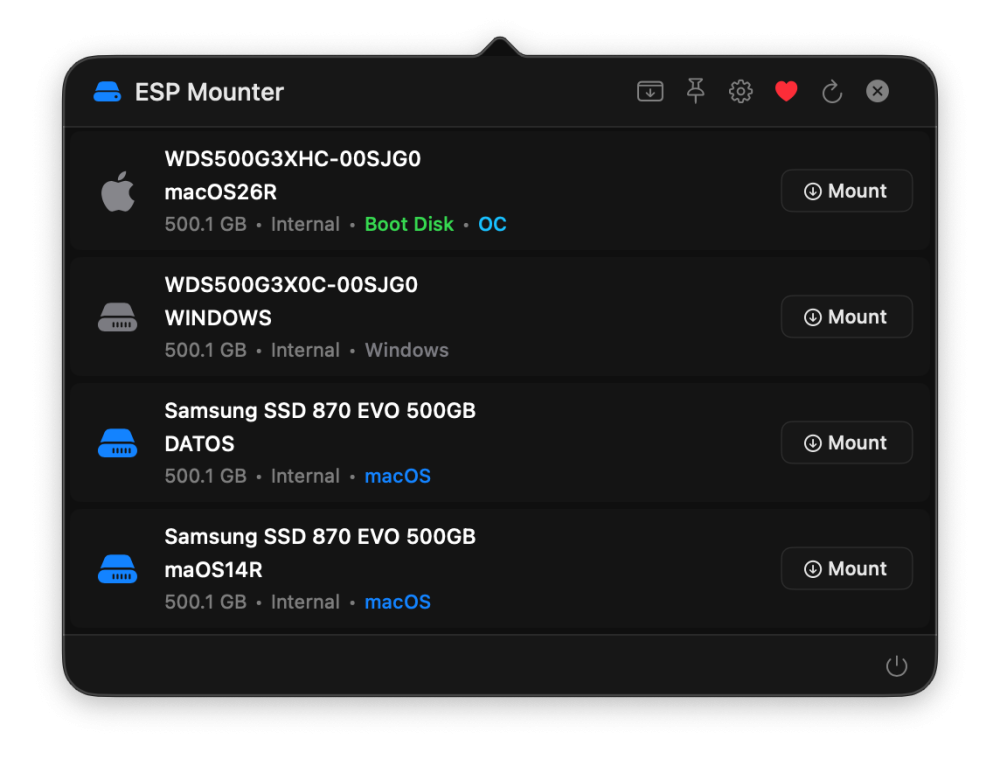
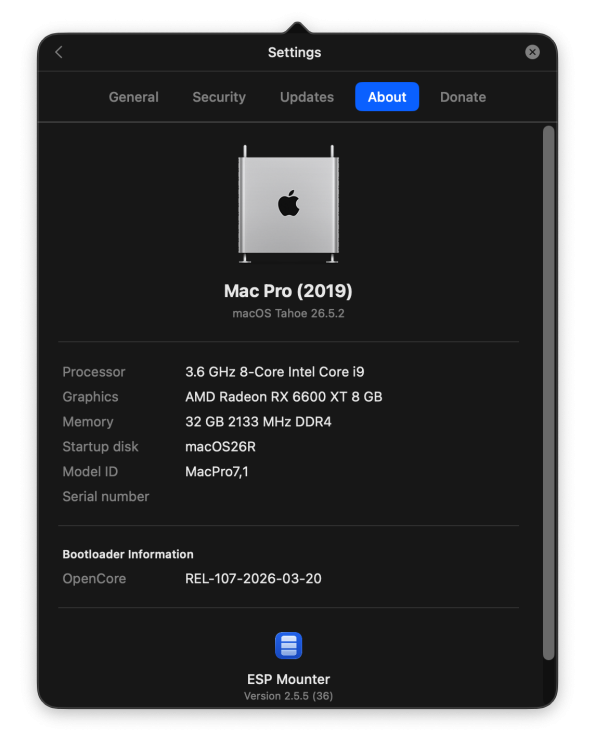
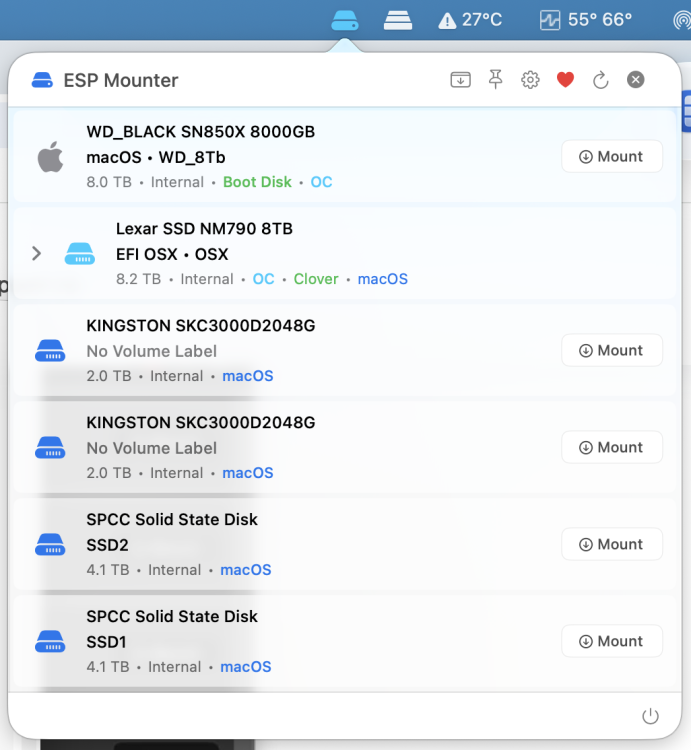
@Cyberdevs The app runs fine in the Hackintosh, system well detected. I'll try later in the M4 and comment. Good job. But remember that I'm a fan of the shared code in the free projects.
-
The OCLP-Plus 3.x (Tahoe Patch Set).
MakAsrock replied to MakAsrock's topic in New Releases and Updates
I can't help him in any way because the overall logic there is buggy. 🙁 -
@Cyberdevs Hello, my great friend. I always feel like helping whenever I can, and if my M4 can somehow be useful to you, feel free to reach out to me here or on WhatsApp. I’ll be happy to help you with whatever you need. I really enjoy using Copilot and VS Code. I’ve already helped a few friends get the most out of AI, and that’s something I’m always happy to do if I can offer some guidance. But the real coder will always be you. Thank you for your kind words. I’m truly happy to be able to talk with you.🤩👊🏻🇧🇷
-
@fabiosun Thanks for the feedback. I'm glad that it works What about the hardware info? I've made some changes but not sure if it detects your AMD CPUs data correctly.
-
Hi thanks all is fine i have no tested anymore from a bit tested by now it works
-
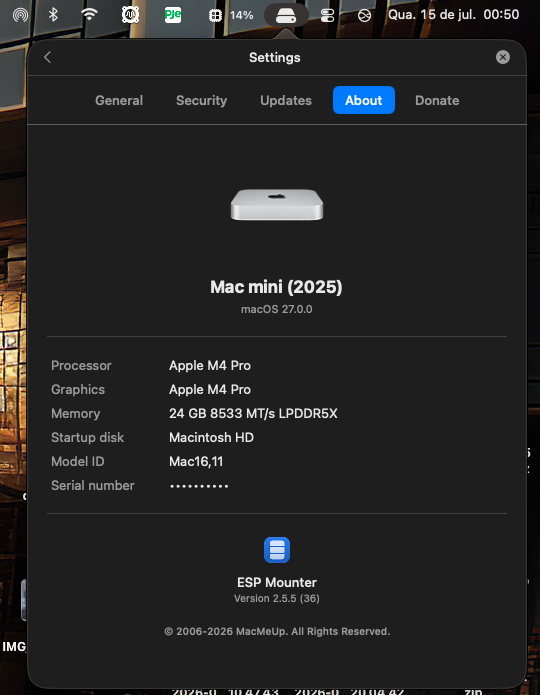
@fabiosun Hi there, How are you doing? I was wondering if you are still unable to run the app with the latest update.
-
@Max.1974 Hi my friend, I'm doing fine, thanks, how are you doing? Thanks for the feedback. I sse the Mac mini's icon is not detected correctly so I need to check and see why is that happening. Since I don't have any Apple Silicon Macs I can't verify the hardware detection correctly and thoroughly.
-
@Cyberdevs its an excellent app my friend, I hope all doing good! God bless you!!
- Last week
-
[Pre-release] macOS Sequoia 15.7.8
deeveedee replied to deeveedee's topic in New Releases and Updates
Sequoia 15.7.8 (24G817) breaks Norton 360's Transparent Proxy, causing it to block Safari, update checking and other network traffic. This has happened before and is usually addressed by the next macOS update (possibly an update from Norton). The temporary solution is to toggle System Settings > Network > Filters > Norton Transparent Proxy. Toggling it once in a login session resolves the problem for that session.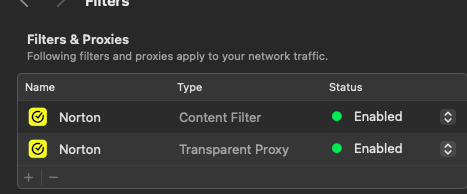
-

The OCLP-Plus 3.x (Tahoe Patch Set).
chris1111 replied to MakAsrock's topic in New Releases and Updates
Exactly -
The OCLP-Plus 3.x (Tahoe Patch Set).
deeveedee replied to MakAsrock's topic in New Releases and Updates
Not when privileged_helper_tool is built with "make debug." I think that was Chris1111's point. -
The OCLP-Plus 3.x (Tahoe Patch Set).
chris1111 replied to MakAsrock's topic in New Releases and Updates
No not in debug, Iam build OCLP and OCLP mod without issue also OCLP Tahoe Patchset -
The OCLP-Plus 3.x (Tahoe Patch Set).
MakAsrock replied to MakAsrock's topic in New Releases and Updates
Because the Privelled Helper Tool requires an Apple Developer Certificate. -
 But I think the end of Tahoe is not near because we will improve it how we can.
 -
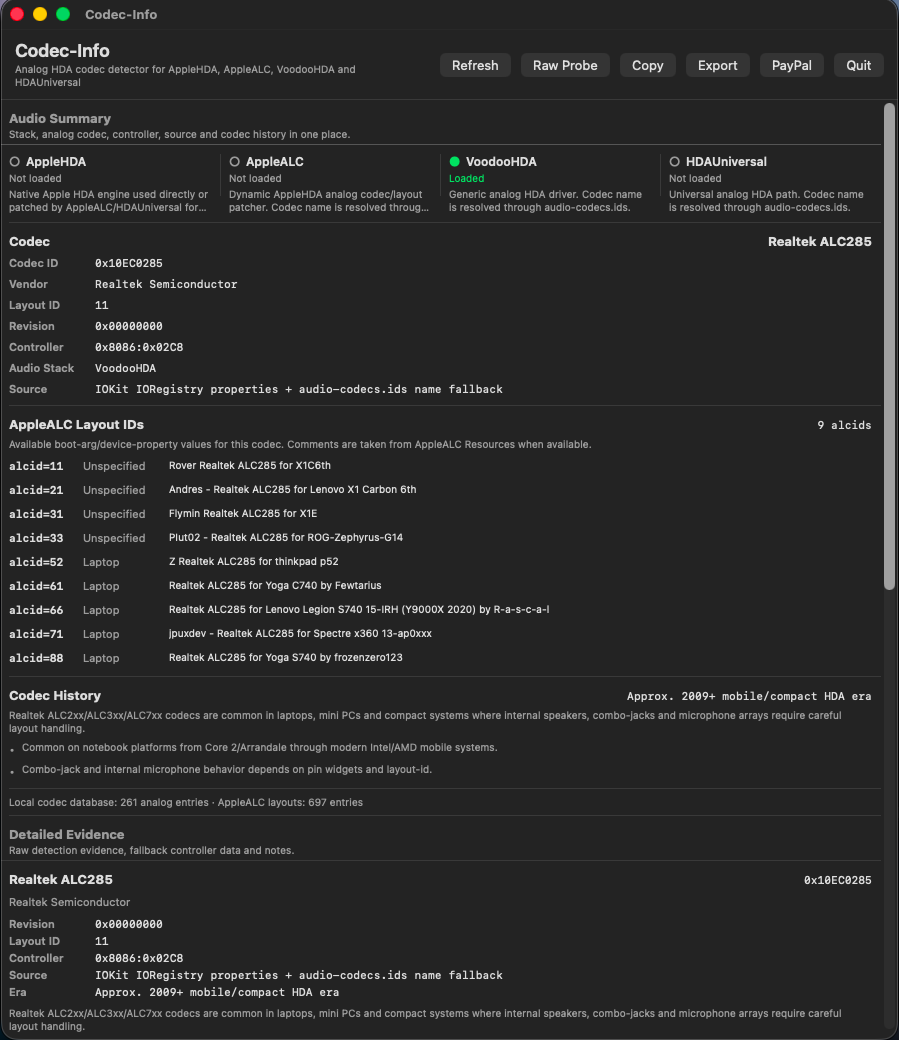
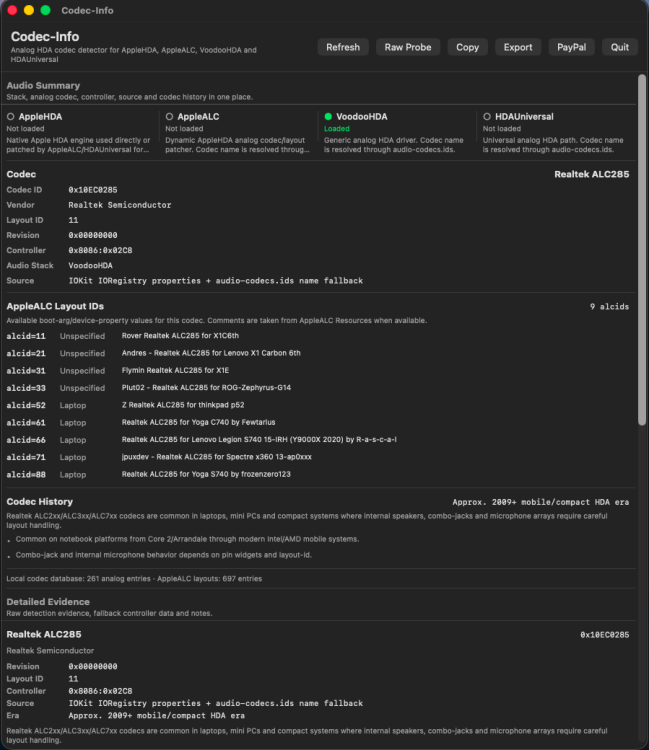
Thank you, @Slice. Installation of VoodooHDA.kext 3.6.2 was easy on my HP EliteBook 850 G7 running macOS Tahoe 26.6 Beta (25G5065a): Remove other audio kext from /Library/Extensions (in my case, I removed HDAUniversal.kext) Set csr-active-config = <03000000> and Reboot Modify VoodooHDA.kext/Contents/Info.plist: VoodooHDAEnableVolumeChangeFix = True cp -R VoodooHDA.kext /Library/Extensions When prompted, Allow VoodooHDA in System Settings > Privacy & Security Reboot Set csr-active-config = <01000000> Audio working perfectly. I don't have AMD HDMI on this hack, so I can't test AMD HDMI/DP audio, but audio quality with my internal speakers is outstanding. EDIT: Codec-Info EDIT2: Audio quality is really outstanding.
-
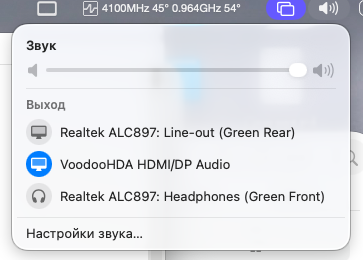
Big thanks, @MaLd0n for you sources 4.1. I take from them a minimal part of AMD HDMI hot-plug and it works!!! My version is 3.6.2. I have a purpose to write only minimal right codes without quirks and workarounds so that it will be the good basis for a new investigations. Hope my sources are academic. VoodooHDA.kext-362.zip
-
@Alpha22 Thanks for the feedback