Zoran Bogunovic Posted April 20, 2010 Share Posted April 20, 2010 Well done, might have to adapt some of your concepts for myself one day Link to comment https://www.insanelymac.com/forum/topic/93600-my-nearly-finished-hack-the-tosh/page/5/#findComment-1452339 Share on other sites More sharing options...
Baudouin Posted April 22, 2010 Author Share Posted April 22, 2010 Well done, might have to adapt some of your concepts for myself one day I would be honored, thank you. Link to comment https://www.insanelymac.com/forum/topic/93600-my-nearly-finished-hack-the-tosh/page/5/#findComment-1453591 Share on other sites More sharing options...
Baudouin Posted May 8, 2010 Author Share Posted May 8, 2010 As I said earlier in the topic, it took me a while to choose the solutions. I finally used three types of connectors : 1) the connectors to screw (with O ring) onto the waterblocks with straight connection for the north and south-bridges, mofsets (voltage regulators) and also the tank reservoir : 2) the standard plumber's connectors for the pipes in and out to the motherboard and from the two flexibles which go on the other side to the serpentin and the pipe coming from the pump : How will the serpentin be attached to the bottom plate inside the Macpro case : the flexible bringing the liquid to the serpentin inside the Macpro case from the second mosfet inside the G5 case is already attached : The sensor will lay under the bottom plate : Here the serpentin is resting with the vernis on. My friend, plumber and central warming specialist advised me to put two lays of vernis to avoid any oxydation and color changement with the warm liquid: 3) small pieces of transparant plastic tubes to connect the copper pipes to the processor, ram metallic tubes and the graphic card : the outgoing from the GPU has to be connected with a small pipe to the northbridge: All the pipes have been vernis. The pipe coming from the last ram to the northbridge has been redirected to the incoming connector from the GPU. Last step before bringing all the pipes in position. The pipes are drying after being vernished : this long one will go from the pump to the incoming from the processor via the flexible connected under the bottom panel. For now it is put upsidedown for drying the two pieces will connect the pump to the reservoir and the reservoir to the long one. The long one has to be cut because I decide to put the reservoir at the bottom part of the DVD drives holder instead of in the upper side the last piece which connect the outgoing from the GPU waterblock to the northbridge Tomorrow, all the pipes will be put definitely in place. Next step is to insert the Thermaltake water level sensor inside the reservoir and then connect the two cases . Link to comment https://www.insanelymac.com/forum/topic/93600-my-nearly-finished-hack-the-tosh/page/5/#findComment-1464379 Share on other sites More sharing options...
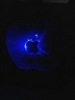
Baudouin Posted January 29, 2013 Author Share Posted January 29, 2013 One more thingsFirst, the plexi board was changed for an internal cut G5 case door, the Mobo is attached to a PC mobo plate which is screwed onto the internal G5 case door by using the attached points for the closing G5 door system.Second, the 3D lighted Apple logo has been transplanted onto the G5 door.Third, the plexi case for the PSU has been switched for a modded G5 PSU; cut in two parts, one for the plug hole in the G5 case and the other for the PSU located in the lowered bottom case.And finally I succeed to pop-in the plexi Apple logo onto the G5 external door. the lights on plexi board the lights onto G5 door other side of the G5 door all lights cables glued Link to comment https://www.insanelymac.com/forum/topic/93600-my-nearly-finished-hack-the-tosh/page/5/#findComment-1884546 Share on other sites More sharing options...
Baudouin Posted February 2, 2013 Author Share Posted February 2, 2013 I am working on small pieces of meshpannel from broken G5 cases, to hide the upper and bottom openings at the "hands" and "feet" from both G5 case, where is located the main system and the Powermac case where is located the LCS. The two flexibles which will transport the cooling liquid from one case to the other will outcome from the bottom of the PMac case and enter at the top of the G5 case. Link to comment https://www.insanelymac.com/forum/topic/93600-my-nearly-finished-hack-the-tosh/page/5/#findComment-1885517 Share on other sites More sharing options...
Baudouin Posted February 3, 2013 Author Share Posted February 3, 2013 The parts are cut. Will upload some pix tomorrow. I made four of them . Link to comment https://www.insanelymac.com/forum/topic/93600-my-nearly-finished-hack-the-tosh/page/5/#findComment-1885871 Share on other sites More sharing options...
Baudouin Posted February 5, 2013 Author Share Posted February 5, 2013 Here are two pix, the two holes are for the wires which will transfert the Liquid cooler and the other at the front top side is for connecting the four HDD inside the MPcase to the Mobo inside the G5 case . Link to comment https://www.insanelymac.com/forum/topic/93600-my-nearly-finished-hack-the-tosh/page/5/#findComment-1886232 Share on other sites More sharing options...
Baudouin Posted February 6, 2013 Author Share Posted February 6, 2013 I have just rivet the pieces of meshpanel onto the upper parts of the G5 case. Still have to make the holes for the wires. I took out the opening system for the dvd drive. I will attach a piece of meshpanel as I had done with the MPcase. Link to comment https://www.insanelymac.com/forum/topic/93600-my-nearly-finished-hack-the-tosh/page/5/#findComment-1886523 Share on other sites More sharing options...
Baudouin Posted February 11, 2013 Author Share Posted February 11, 2013 About fans, I used only G5 fans, connected at 5V to the molex plugs, the originals dvd drive fan, hdd drives fan, back side fans at the back and front of the case. Teknojunkie was kind enough to make diagrams for these connections :http://www.insanelym...ac-g5-diagrams/ The 60"power fans are connected to the Mobo System fan connector and not to the Mobo Power fan connector, because the Power fan connector is 12V and the System fan has a speed Control and therefore very quiet. Link to comment https://www.insanelymac.com/forum/topic/93600-my-nearly-finished-hack-the-tosh/page/5/#findComment-1887909 Share on other sites More sharing options...
Baudouin Posted February 12, 2013 Author Share Posted February 12, 2013 I got the Meshpanel today and surprise surprise, the holes have the same dimensions as those of the G5 case. The previous Mespanel holes were smaller. But the panel is a little shining not mat as the G5 case. I will use it to top the case for hiding the tubes coming from the MacPro case to bring the Liquid Cooling. Link to comment https://www.insanelymac.com/forum/topic/93600-my-nearly-finished-hack-the-tosh/page/5/#findComment-1888183 Share on other sites More sharing options...
Baudouin Posted February 12, 2013 Author Share Posted February 12, 2013 Just finish the top case with the shining Meshpanel with holes with same size as the G5 case. The upper level and the bottom case had already been covered with anodized Meshpanel with small holes . 1 Link to comment https://www.insanelymac.com/forum/topic/93600-my-nearly-finished-hack-the-tosh/page/5/#findComment-1888262 Share on other sites More sharing options...
Baudouin Posted February 13, 2013 Author Share Posted February 13, 2013 Actually, the system is dismanteld on my desk, because I am working on both cases. Concerning the Liquid Cooling, I need to buy a new pump and connect the two cases. Link to comment https://www.insanelymac.com/forum/topic/93600-my-nearly-finished-hack-the-tosh/page/5/#findComment-1888582 Share on other sites More sharing options...
WhatTheTech Posted February 13, 2013 Share Posted February 13, 2013 Just finish the top case with the shining Meshpanel with holes with same size as the G5 case. The upper level and the bottom case had already been covered with anodized Meshpanel with small holes . You know, if you described this to me in a conversation, I probably wouldn't think I would like it. Also I rarely like modding the exterior of the G5...but this somehow ir pretty darn cool...great job! Link to comment https://www.insanelymac.com/forum/topic/93600-my-nearly-finished-hack-the-tosh/page/5/#findComment-1888583 Share on other sites More sharing options...
Baudouin Posted February 13, 2013 Author Share Posted February 13, 2013 Thanks a lot WhatTheTech. Still this plate is too shining, will sand a piece of, just to check to remove this flashing effect. Link to comment https://www.insanelymac.com/forum/topic/93600-my-nearly-finished-hack-the-tosh/page/5/#findComment-1888584 Share on other sites More sharing options...
Mr.D. Posted February 18, 2013 Share Posted February 18, 2013 you have done the exact opposite of what I want to do - that is to just cut out the logo, recess it inwards by the thickness of a sheet of lexan, reattach the apple logo to the inside of that lexan, then side light the lexan. My problem is I don't have access to a water or laser cutter, so a one-off cut like that would be very cost prohibitive. Yes, I could dremel it out, but I want to save the apple that I am cutting out. your mod looks sweet. kudos! Link to comment https://www.insanelymac.com/forum/topic/93600-my-nearly-finished-hack-the-tosh/page/5/#findComment-1889982 Share on other sites More sharing options...
Baudouin Posted February 18, 2013 Author Share Posted February 18, 2013 Thank you Mr. D. I still have a G5 door lying around. I can cut the logo out and send it to you. I can cut the apple and flee in one piece, you can adjust it as you like or just the apple logo, just tell me what you need. Link to comment https://www.insanelymac.com/forum/topic/93600-my-nearly-finished-hack-the-tosh/page/5/#findComment-1890114 Share on other sites More sharing options...
Mr.D. Posted February 18, 2013 Share Posted February 18, 2013 ummmmmm... well, what I would like is the G5 door with the apple logo (including the stem) - but two separate cut-outs, with those pieces still intact so I could epoxy them to a piece of lexan mounted on the inside of the door. I have tried and tried to drw what I want in sketchup but I must be THAT old because I cant figure it out. I am not familiar with the term 'flee' so I'm not sure I know what ya mean... hopefully I have described what I am looking for. PM me for more details! ya just got me excited about something that I thought I wouldn't ever get done - THANKS! EDIT: I want to cut the grey out, preserve it, glue it to the inside on a piece of lexan. Give it a 3D effect, especially when I light it. hope that helps more... Link to comment https://www.insanelymac.com/forum/topic/93600-my-nearly-finished-hack-the-tosh/page/5/#findComment-1890159 Share on other sites More sharing options...
Baudouin Posted February 18, 2013 Author Share Posted February 18, 2013 Is this what you want ? But it has to be done with the grey, apple and leaf but in one or two pieces ? Sorry I ment the leaf not the flee. Link to comment https://www.insanelymac.com/forum/topic/93600-my-nearly-finished-hack-the-tosh/page/5/#findComment-1890168 Share on other sites More sharing options...
Mr.D. Posted February 18, 2013 Share Posted February 18, 2013 that is what I am looking for... not such a big cut... just the cut of the grey apple and the leaf/stem/flee.thingy. Its much smaller, and therefore much harder - why I figured I'd never get it done because it would require a laser cutter or a water cutter. Link to comment https://www.insanelymac.com/forum/topic/93600-my-nearly-finished-hack-the-tosh/page/5/#findComment-1890183 Share on other sites More sharing options...
Baudouin Posted February 18, 2013 Author Share Posted February 18, 2013 I put those pix of what I did just to get the idea. I can cut the grey apple and the leaf and send it to you. But in one piece or two separates, apple and leaf ? Link to comment https://www.insanelymac.com/forum/topic/93600-my-nearly-finished-hack-the-tosh/page/5/#findComment-1890202 Share on other sites More sharing options...
Mr.D. Posted February 18, 2013 Share Posted February 18, 2013 well... what I am looking for would be all three.. what I had in mind was to use that door, with the apple and leaf glued to a piece of lexan, put the lexan on the inside of the door, then light the lexan (similar to the glowing blue you have)... so I would want all three pieces: door, apple, and leaf. What are we talking about on cost? shipping the apple and leaf would be cheap.. the whole door - quite a bit more I'd imagine. Link to comment https://www.insanelymac.com/forum/topic/93600-my-nearly-finished-hack-the-tosh/page/5/#findComment-1890203 Share on other sites More sharing options...
Baudouin Posted February 18, 2013 Author Share Posted February 18, 2013 You can cut out the two pieces taking care to keep the door clean and I send you the apple and the leaf cut clean. I will let you kow the shipping price from Belgium to the US. Link to comment https://www.insanelymac.com/forum/topic/93600-my-nearly-finished-hack-the-tosh/page/5/#findComment-1890214 Share on other sites More sharing options...
Mr.D. Posted February 19, 2013 Share Posted February 19, 2013 Good call. Then I don't have to worry about saving my pieces which means I can cut a little rougher and sand/file the edges on the door. Very cool! Thanks for this, I'm totally stoaked to do this now! Link to comment https://www.insanelymac.com/forum/topic/93600-my-nearly-finished-hack-the-tosh/page/5/#findComment-1890237 Share on other sites More sharing options...
Baudouin Posted February 19, 2013 Author Share Posted February 19, 2013 Good call. Then I don't have to worry about saving my pieces which means I can cut a little rougher and sand/file the edges on the door. Very cool! Thanks for this, I'm totally stoaked to do this now! Exactly, and I will cut with 1mm plus around the two pieces so that you can adjust them as you want, if you made a bigger hole somewhere around. Link to comment https://www.insanelymac.com/forum/topic/93600-my-nearly-finished-hack-the-tosh/page/5/#findComment-1890321 Share on other sites More sharing options...
Baudouin Posted February 19, 2013 Author Share Posted February 19, 2013 I put the two towers up each other to visualize the volume needed to make a rack with metal plates surrounded by glass panels . Link to comment https://www.insanelymac.com/forum/topic/93600-my-nearly-finished-hack-the-tosh/page/5/#findComment-1890340 Share on other sites More sharing options...
Recommended Posts