
How Much Storage Do You Need to Backup iPhone?
Want to know how much space you need to back up your iPhone? Yeah, it’s a tricky one—just look at the countless posts trying to crack the code. To clear things up, our team put together this text. You’ll find everything you need to figure out how much free space your backup requires, how to free it up, and what backup alternatives exist if iCloud isn’t cutting it. Let’s get straight to it.
How to Check the Backup Size on iPhone
First things first, let’s use Apple’s own tools to see how much space your next backup might claim.
- On your iPhone, open Settings.
- Tap your name at the top, then iCloud.
- Then Manage Account Storage or iCloud Backup (on newer iOS versions).
- Choose your iPhone, and look for Next Backup Size.

That figure isn’t set in stone—it can grow if you add more apps or photos—but it’s a solid snapshot of your immediate needs.
As you can see on our screenshot, it says, “This iPhone cannot be backed up because there is not enough iCloud storage available” (wording can differ). If that’s your situation as well, you have two choices, you can either turn off some items in your backup or pony up for a bigger plan. It’s a simple step that spares you a bunch of hassle later.
How Much Storage Is Needed to Back Up Your iPhone?
So, how much space does an iPhone backup actually take? The answer isn’t one-size-fits-all. It depends on what’s on your device, what’s already synced to iCloud, and whether you’re backing up everything or just the essentials.
If you’re using Apple’s free 5GB of iCloud storage, a full backup likely won’t fit unless you have a very light setup—think minimal apps, few messages, and hardly any photos. A typical iCloud backup can range anywhere from 1GB to over 100GB; it all depends on the amount of data stored on your device.
What affects backup size?
- Photos & videos – If you don’t use iCloud Photos, these get included in the backup.
- Messages & attachments – Those GIFs, videos, and memes in your text threads? They add up.
- App data – Some apps store a ton of data, even if you rarely use them.
- Device settings & preferences – Not a huge factor, but still part of the backup.
How many GB are needed for an iCloud Backup? For a very rough estimate:
- Light user (few apps, minimal photos & messages) → 2GB – 5GB
- Average user (moderate app usage, some photos, iMessage history) → 5GB – 20GB
- Heavy user (lots of apps, full-resolution photos, years of messages) → 20GB – 100GB+
If your backup size exceeds available iCloud space, you’ll need to either reduce the backup size or upgrade your storage plan—which we’ll break down next.
How to Make Space for iPhone Backup
Apple is more than happy to sell you an iCloud+ plan, but before handing over your money, let’s go through ways to shrink your backup size. Chances are, you can free up enough space for an iPhone backup in iCloud without spending a dime. Of course, we’ll touch on iCloud+ later, but most people prefer free ways to make their backup fit within their existing iCloud plan—so let’s start with those.
1. Toggle Off Apps in iCloud Backup
Not everything on your iPhone needs to be backed up. Some apps store everything on their own servers, so backing them up in iCloud is pointless, there’s no reason for them to eat up your iCloud storage.
To stop unnecessary apps from taking up space:
- Open Settings and tap [Your Name] at the top.
- Select iCloud, then Manage Account Storage > Backups.
- Tap your iPhone from the list.
- Scroll through the list of apps and toggle off the ones you don’t need in your backup.

A few large apps can instantly shrink your backup size by several gigabytes. Once you’ve trimmed down your backup, check the estimated size again. If it now fits within your available iCloud storage, you’re all set. If not, keep going—we’ve got more ways to free up space.
2. Clean Up Photos and Videos
If your backup is still too big, photos and videos are likely the biggest culprit. But let’s clear up a common misunderstanding—because many people aren’t quite sure how photo backups work.
You might have heard of—or even used—iCloud Photos. It’s a separate feature from iCloud Backup, and whether it’s on or off makes a difference in how your photos are stored.
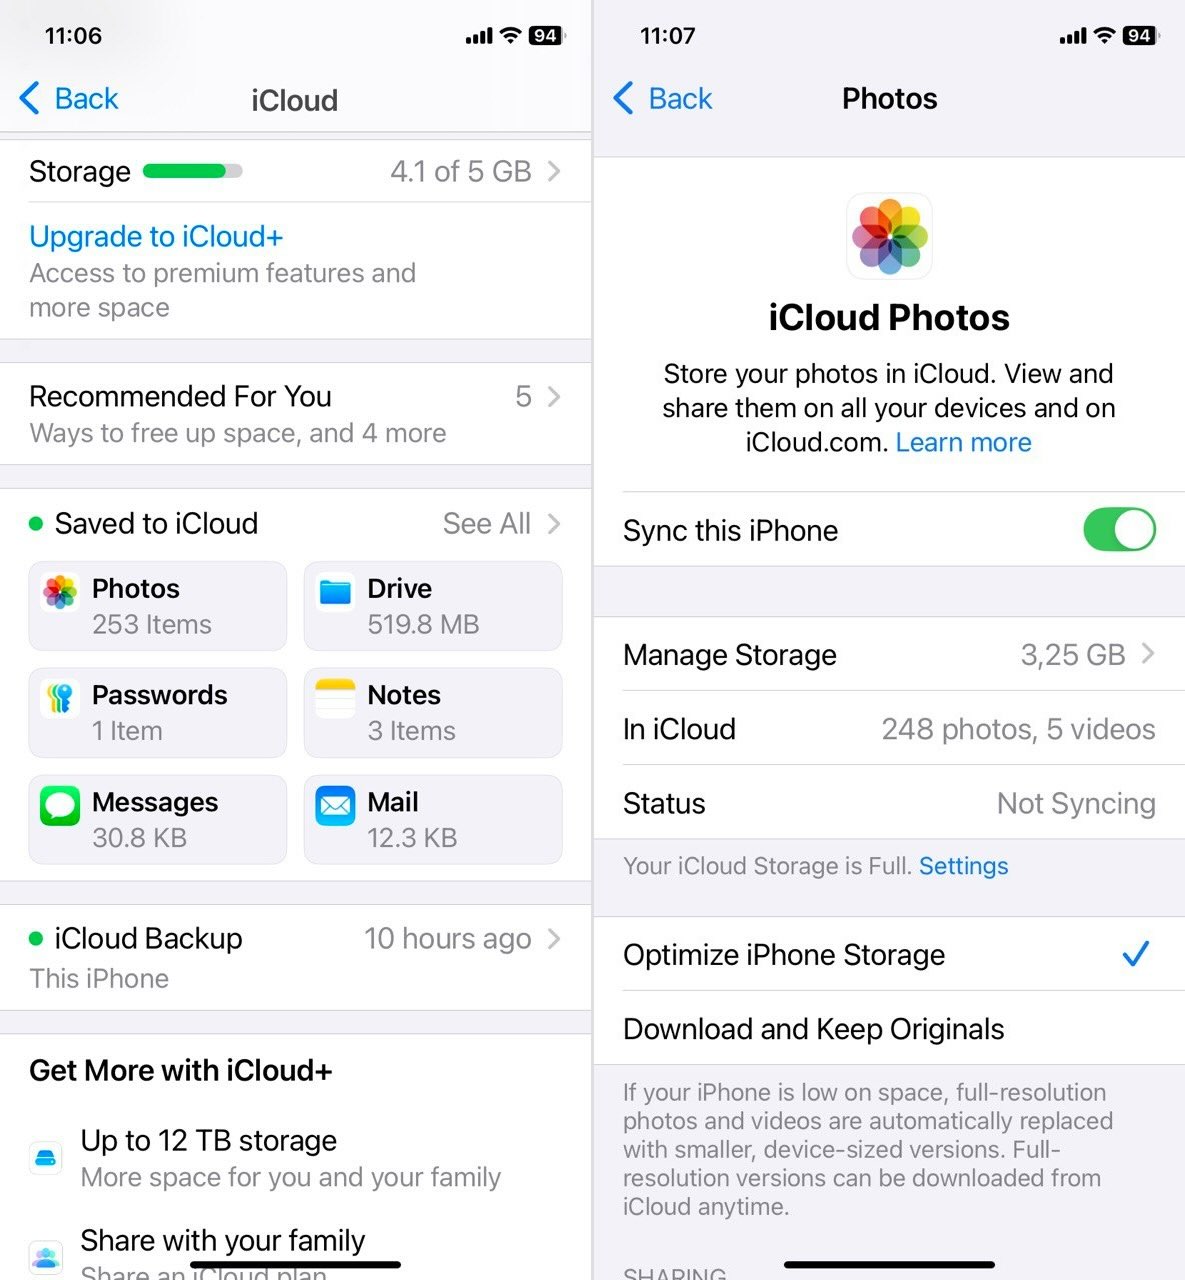
Apple splits photos into two distinct categories: iCloud Photos and iCloud Backup. If you turn iCloud Photos on, your pictures go straight to iCloud’s sync service, so they do not occupy space in your daily backup. That setup reduces the size of your backup file. If iCloud Photos is off, every photo and video in your camera roll lands in your iCloud backup, which significantly increases backup size. Apple’s official guidance confirms this distinction.
So, your photos always occupy iCloud storage in one way or another. Yes, you can disable both iCloud Photos and the Photo Library in your iCloud Backup settings—but that means your photos won’t be stored anywhere in iCloud. If you lose your phone or your local storage fails, those pictures are gone for good. Kind of defeats the purpose, right?
Instead, a smarter move is to clean up your photo library so it takes up less space. You could go through your Photos app manually, but let’s be real—who wants to scroll through thousands of pictures and videos just to find the ones worth deleting? Plus, iOS doesn’t even let you sort by file size.
That’s where iPhone cleaner apps come in. Most of these apps are paid, but we recently conducted our own research to find the best free cleaners, and we think we’ve found a few solid choices. One that stood out—Clever Cleaner: AI Photo Cleaner by CleverFiles. This free app does the heavy lifting for you. It’s completely unrestricted, unlimited, ad-free, and fast—seriously fast. Want to see how fast? We broke it all down in our full Clever Cleaner review.

- Similars – The app’s AI identifies and clears both identical and visually similar images. Unlike your iPhone’s built-in duplicate detector, which only catches exact matches, Clever Cleaner finds similar images—like multiple shots of the same person or object from different angles.
- Screenshots – Quickly detects and removes all screenshots in a single tap.
- Lives – Converts Live Photos into standard images by stripping that short video clip, so you free up extra space without losing the main picture. Pretty unique feature.
- Heavies – Sorts files from largest to smallest (especially helpful with large videos) to quickly delete the biggest storage hogs first.
The process is super simple. Here’s an example of how to clean your library of duplicates using Clever Cleaner:
- Download Clever Cleaner, open it, and grant access to your Photos.
- Tap the Similars tab. The app will automatically group similar photos.
- Tap Smart Cleanup at the bottom. The app will suggest photos for deletion. The AI automatically selects the best photo to keep in each group.

- Want to keep a specific group? Tap Restore to remove it from the deletion list.
- If you approve the AI’s selections, use Slide to delete all marked photos.
- Prefer manual review? Tap on a group to compare photos yourself.
- You can choose a different Best Shot to keep.
- Tap Move to Trash if you want to delete the photos, or tap Skip All to keep them.
- When you’re done, just tap Empty Trash at the bottom and confirm deletion once more.

3. Delete or Manage Old Device Backups
If you’ve owned multiple iPhones over the years, there’s a good chance you have old backups sitting in iCloud, taking up space. Apple doesn’t automatically delete them when you switch devices, so they can pile up. Here’s how to check for and delete them:
- Open Settings and tap [Your Name] at the top.
- Go to iCloud > Manage Account Storage > Backups.
- You’ll see a list of backups for all devices linked to your iCloud account.
- Tap on any old or unnecessary device and hit Delete Backup.

Keep in mind—deleting a backup removes all data associated with that device, so make sure you don’t need it before clearing it out. But if the backup belongs to an iPhone or iPad you haven’t used in years, it’s just wasting space.
After deleting unnecessary backups, check your available storage again. If your current iPhone’s backup still doesn’t fit, there are a couple more steps you can take before upgrading your iCloud plan. Let’s keep going.
4. Clean Up iCloud Drive and Mail iCloud
Your iPhone backup isn’t the only thing competing for space in iCloud. Files stored in iCloud Drive and emails sitting in Mail iCloud also take up room. If your iCloud storage is full, clearing out unnecessary files and emails can free up enough space for your backup to fit—without removing anything from your iPhone.
How to Clear iCloud Drive Storage
iCloud Drive holds files you’ve saved from apps like Pages, Numbers, Keynote, and third-party cloud storage apps. If you’ve ever manually saved a document, screenshot, or large download to iCloud Drive, it’s worth checking for old files you no longer need:
- Open the Files app on your iPhone.
- Tap Browse > iCloud Drive.
- Look through your folders and delete any large or unnecessary files.
- Empty the Recently Deleted folder to permanently remove them.

How to Free Up Space in Mail iCloud
If you use Mail iCloud as your primary email, your inbox might be holding onto years of emails and attachments that eat into your storage. To clean it up:
- Open the Mail app and go to your iCloud inbox.
- Sort by attachments or search for large files.
- Delete old emails you no longer need.
- Empty the Trash folder to permanently free up space.

While clearing out files and emails won’t directly shrink your iCloud backup, it can free up enough iCloud storage overall to allow the backup to go through.
5. Clean Up Messages to Reduce Backup Size
And don’t forget about Messages—many people, like a Redditor here, don’t realize how much space their texts and attachments take up in iCloud Backup. Even if Messages in iCloud is turned off, your entire chat history—including photos, videos, and GIFs—gets backed up.
If your iCloud backup size seems unexpectedly large, old large messages could be the hidden culprit. Here’s how to fix it:
- Open the Messages app and find conversations with lots of attachments.
- Tap the contact’s name at the top of a conversation.
- Go to Photos, Videos & Documents—this shows all the media in that chat.
- Delete anything unnecessary, especially large video files.

To stop this from happening again, you can set Messages to auto-delete old conversations:
- Go to Settings > Messages.
- Tap Keep Messages and change it from Forever to 1 Year or 30 Days.
6. Upgrade Your iCloud Storage Plan
If you’ve tried everything, but your iCloud backup still won’t fit, it might be time to consider an iCloud+ upgrade.
As we mentioned earlier, Apple gives every user 5GB of free iCloud storage, but let’s be honest—that’s barely enough for most people. If your backup size is consistently too big, upgrading to a larger plan might be the simplest solution.
How to upgrade your iCloud storage:
- Open Settings and tap [Your Name] at the top.
- Select iCloud > Manage Account Storage (or iCloud Storage).
- Tap Get More Storage or Upgrade to iCloud+.

Now, choose a plan:
- 50GB ($0.99/month) – Enough for backups if you manage storage wisely.
- 200GB ($2.99/month) – Best for families or those who store a lot of photos and videos.
- 2TB ($9.99/month) – Ideal for multiple devices and heavy iCloud users.
Once you upgrade, your backup will resume automatically. The extra space also gives you more breathing room for iCloud Photos, iCloud Drive, and any future storage needs.
Alternative Backup Options
If iCloud isn’t working for you—whether it’s because of limited storage, slow backups, or just personal preference—there are other ways to back up your iPhone. Apple provides a local backup option using a Mac or PC, and third-party software can give you even more control over what gets saved. Here’s how to back up your iPhone without relying on iCloud.
Finder Backup
Backing up via Finder stores your data on your computer, providing a local solution. This method can be particularly useful when dealing with large amounts of data, as it’s only limited by your computer’s storage capacity.
- Use a USB cable to connect your iPhone to your Mac.
- On your Mac, open a new Finder window.
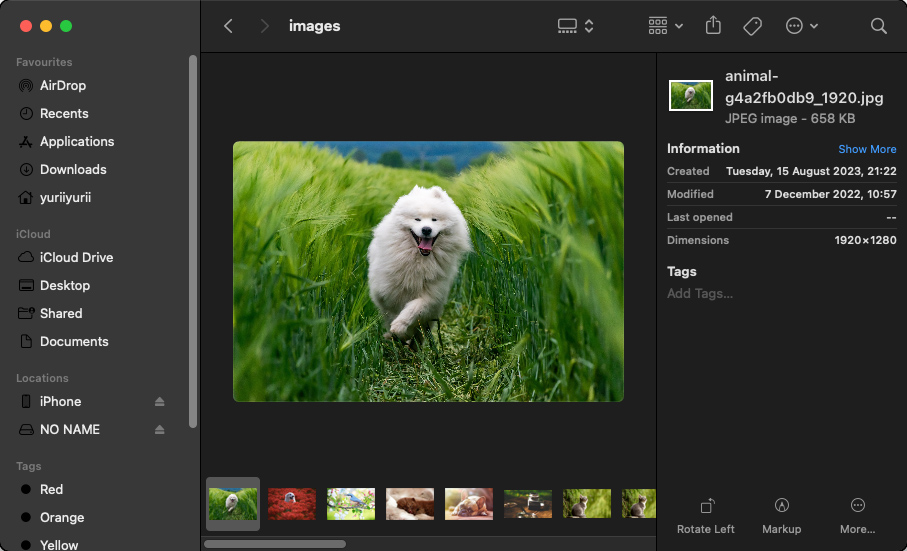
- In Finder, locate your iPhone listed under “Locations” and click on it.
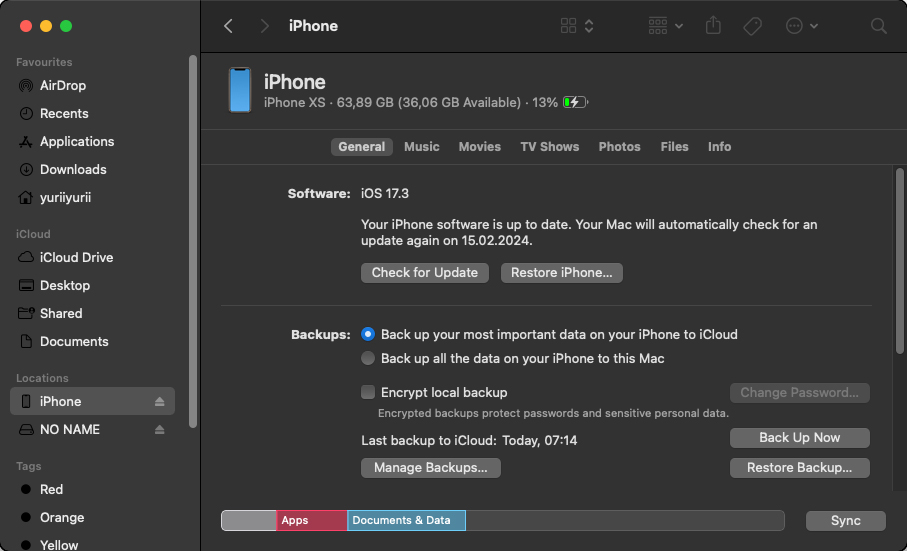
- Under the “General” tab, click “Back Up Now” to begin the backup process to your Mac.
Third-Party Software
If iCloud and local backups aren’t flexible enough, third-party backup software offers more control. Unlike Apple’s built-in options, these tools can be a great alternative, especially for users who need more control over their backups or who prefer not to use iCloud or iTunes. We recomend to start your search with these apps:
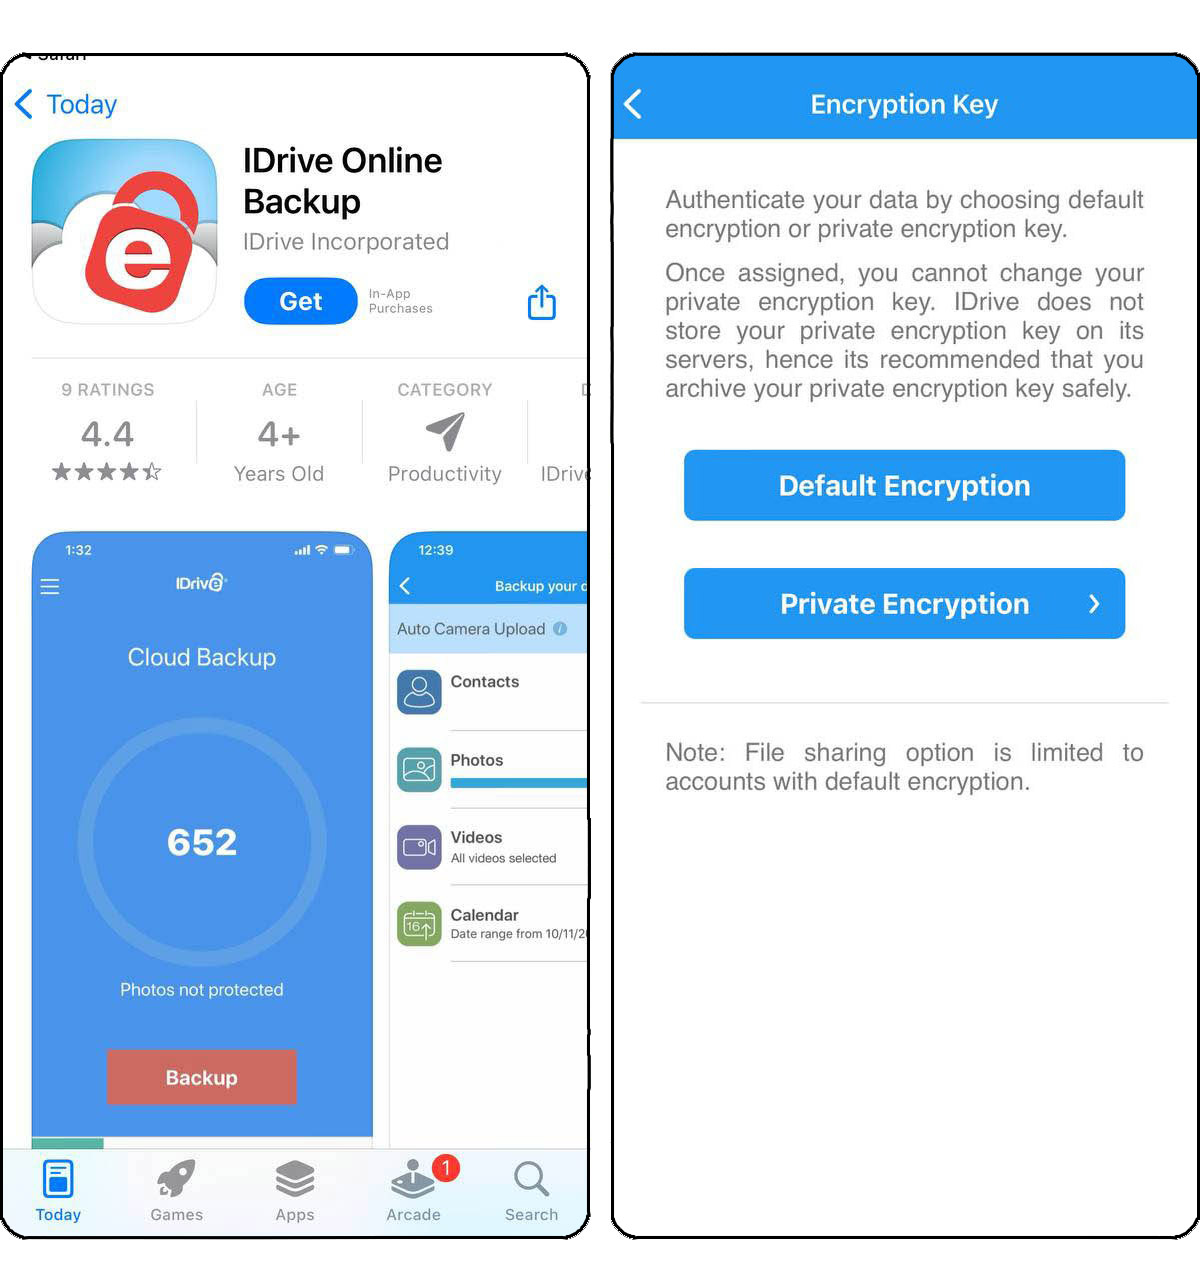
- IDrive: IDrive offers a cloud-based backup solution ideal for users needing to manage large files without relying on physical storage. The service is compatible with iOS 13.0 or later and provides various storage plans to accommodate different user needs. While IDrive is appreciated for its functionality, some users have noted the need for improved customer service communication.
- iMazing: iMazing provides a solution for backing up a wide range of file types from your iPhone to a computer. It stands out for features like automatic backup scheduling, backup encryption, and the ability to archive backups to prevent data loss. iMazing also supports customized data restoration and efficient data transfer between devices, making it a versatile tool for iPhone data management.
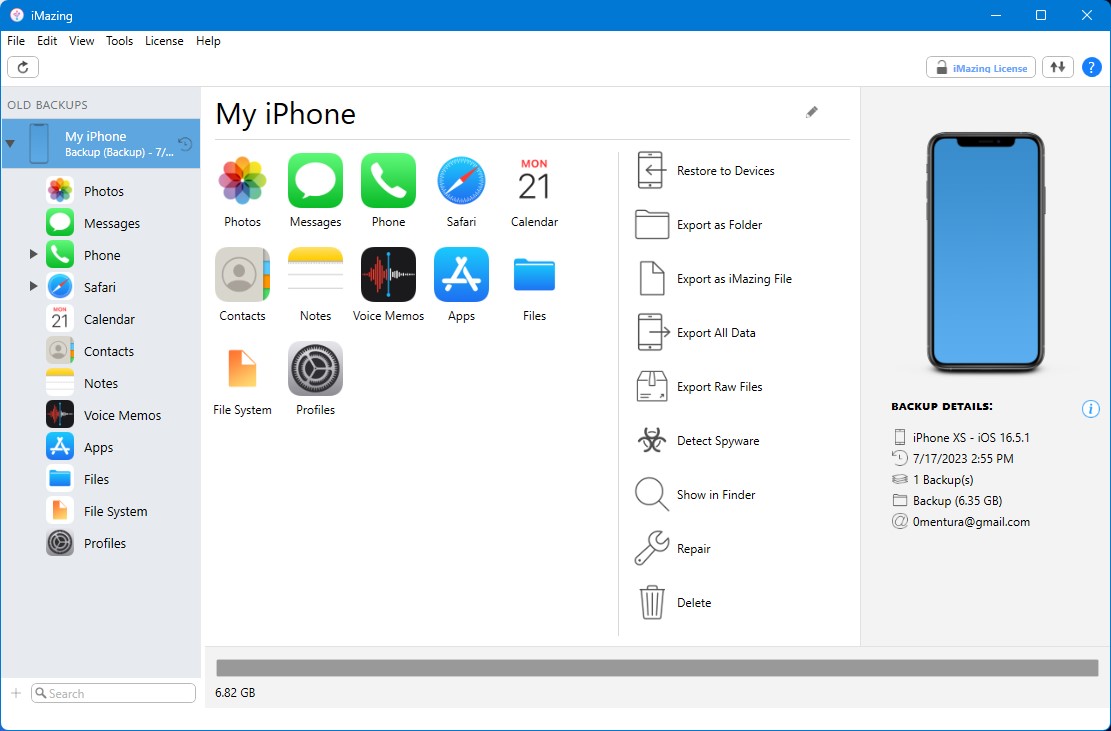
Both alternative backup options offer unique advantages for iPhone backup solutions beyond iCloud, catering to various user preferences and needs.
Short and Sweet Version
How much iCloud storage do you need to back up your iPhone? It all depends on what’s on your device, backups can range from a few GBs to over 100GB. Apple gives you 5GB for free, but that’s usually not enough.
🤏 How to check your backup size:
Go to Settings > [Your Name] > iCloud > iCloud Backups > Your iPhone. Check “Next Backup Size.” If it’s bigger than your available storage, you’ll need to free up space or upgrade iCloud.
✅ Ways to free up space for your backup:
- Disable unnecessary app backups – Turn off apps that don’t need to be in iCloud (Settings > iCloud > Backups).
- Clean up photos & videos – Delete unneeded media or use a cleaning app for automatic cleanup.
- Remove old device backups – Delete backups from devices you no longer use.
- Clear out Messages – Delete chats with large attachments or enable Messages in iCloud so they don’t get backed up separately.
- Manage iCloud Drive & Mail – Delete unnecessary files and emails with large attachments.
Alternative backup methods:
💻 Mac (Finder) – Connect your iPhone, open Finder, and hit Back Up Now (macOS Catalina or later).
🖥️ PC (iTunes) – Connect your iPhone, open iTunes, select your device, and click Back Up Now.
🔄 Third-party tools – Apps like iMazing, IDrive, and Dr.Fone let you save backups to external drives or cloud services and offer more flexibility than Apple’s options.
FAQ
Wireless external storage like NAS can also be used, but it typically requires additional setup and possibly third-party apps to facilitate the backup process. For a step-by-step guide on backing up your iPhone to an external drive using iTunes or Finder, Apple’s official support website offers instructions and support.
If you cancel iCloud+ or downgrade to the free 5GB plan, Apple doesn’t immediately delete your backup—but you’ll need to act fast.
- Apple keeps your existing backups for 180 days after cancellation.
- If your iCloud storage now exceeds the free 5GB limit, new backups won’t be created, and existing ones won’t update.
- After 180 days, if you haven’t resubscribed or freed up space, your backup will be permanently deleted.