How to Get More iPhone Storage Not iCloud
Looking to get more iPhone storage not on iCloud? Apple would be happy to sell you more iCloud space, but not everybody uses it, and not everyone even considers it an option. If that’s you, below you’ll find many easy ways to increase your iPhone’s storage. We have tested all these methods ourselves (and used them on our own personal iPhones), and now we’ll share them with you.
Can I Buy More iPhone Storage That’s Not iCloud?
Apple doesn’t let users upgrade an iPhone’s internal storage after purchase. Unlike some Android devices with expandable microSD slots, iPhones come with a fixed amount of space, and there’s no way to add more once you’ve bought the device.
If you’ve searched “Can I buy more iPhone storage that’s not iCloud?”, the answer is no—at least not in the way you might hope. There are a few workarounds, especially if your goal is to get more free storage. First, of course, there are alternative cloud options outside of iCloud. And second, there are ways to increase available space by clearing up the storage you already have.
And since most people really just want more free storage right on their device (and not in some cloud elsewhere), we’ll start with that.
Free Up Existing Storage to Get More Space Without Using iCloud
Need to get more storage on your iPhone without paying? In this section, we’ve gathered the best ways to free up space without purchasing more or relying on iCloud. All of these methods are easy, cost nothing, and most are available out of the box.
Method 1: Get Rid of Unnecessary Photos and Videos
First potential way to get more storage on an iPhone without iCloud is tidying up your media library. All those photos, Live Photos, screenshots, large 4K videos, and multiple saved or imported copies—for most people (and maybe for you), this is what takes up the bulk of storage.
You could go through the Photos app manually—scroll, review, decide, delete photos, and so on. Apple even has a Duplicates cleaning feature built in to offer a bit of assistance. But honestly, doing it all manually is a bit of a slog. Plus, Duplicates only work for exact matches, so those 15 similar selfies from yesterday won’t appear in this folder. That’s where a third-party app makes way more sense.

It stands out for a few key reasons. It scans and removes clutter automatically, quickly, and most importantly at no cost. Unlike Apple’s built-in tool, it detects similar photos, not just exact duplicates. It also includes a screenshot cleaner and the “Heavies” feature that can sort photos and videos by size, so you can delete the biggest, least-needed files first—something iOS’s native Photos app simply can’t do.
And when we say this app is 100% free, we mean that. We didn’t encounter a single ad, paywall, or locked feature, which is rare for an app offering this much. You can read more about this free app in our full review, where we cover its full feature set, including Live Photo conversion, which is also a creative way to get more local storage on an iPhone without iCloud.
But let’s get back to practice. Here’s how to use it to remove unnecessary photos and videos:
- Search for “Clever Cleaner” in the App Store or use this link to download it.
- Open the app and go to the Similars tab.
- Select Smart Cleanup to start scanning your photo library. The app will detect similar and duplicate images in seconds.

- Review the suggested deletions. If there’s a photo you want to keep, tap Restore to remove it from the selection (or Restore All if you’ve changed your mind).

- If the selection looks good, Slide to delete and confirm to remove the unwanted files.
- For more control, tap on a group to manually choose which photos to keep or remove. The app automatically selects the “Best Shot” in each group, but you can change it if you prefer another one.

- When ready, select Move to Trash to delete the chosen photos or Skip All to move to the next group.
- Once finished, tap Empty Trash and confirm deletion to remove the files.

In our tests, we were able to clean around 1.2GB of similar photos and over 17GB from the media library in total. On a 64GB iPhone, that means you can add around 25% more iPhone storage that’s not iCloud.
Also, according to the official Clever Cleaner cleanup app page, “Once downloaded, you’ll have access to all its powerful tools for free, forever.” Free and forever—we’d love to hear those words more often.
Method 2: Delete Unused Apps
This one is obvious, but still a great way to free up a significant amount of storage. All those apps you haven’t touched in years? They’re just sitting there, taking up space. Here’s a guide on how to delete unused apps:
- Open the Settings app on your iPhone. This is where you can manage your device’s storage and view information about app usage.
- Tap on General and then iPhone Storage. Here you’ll see a list of all your apps and the amount of storage each one uses.
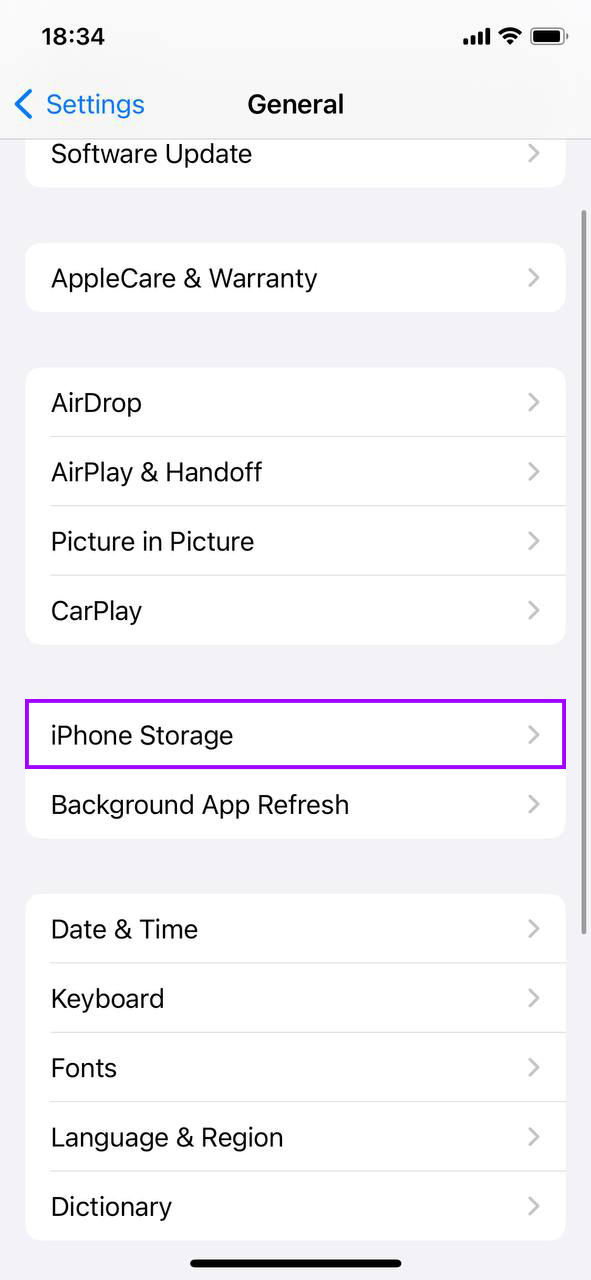
- Give it a moment to load. You’ll see a list of apps sorted by the amount of storage they consume. Apps using the most storage are listed at the top.
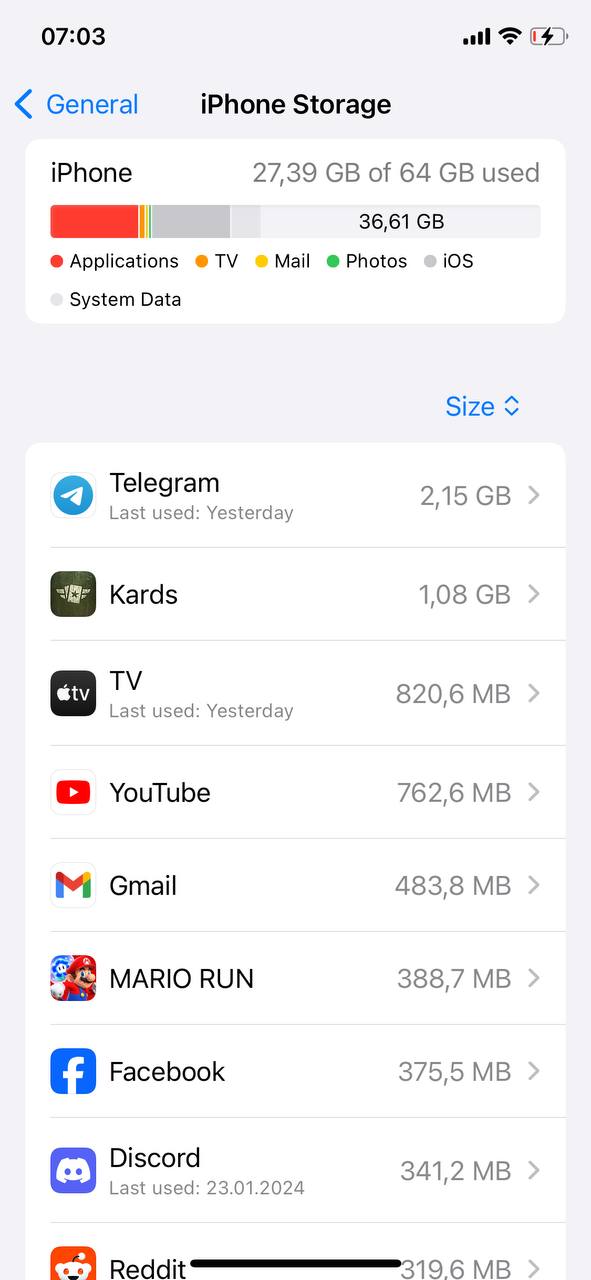
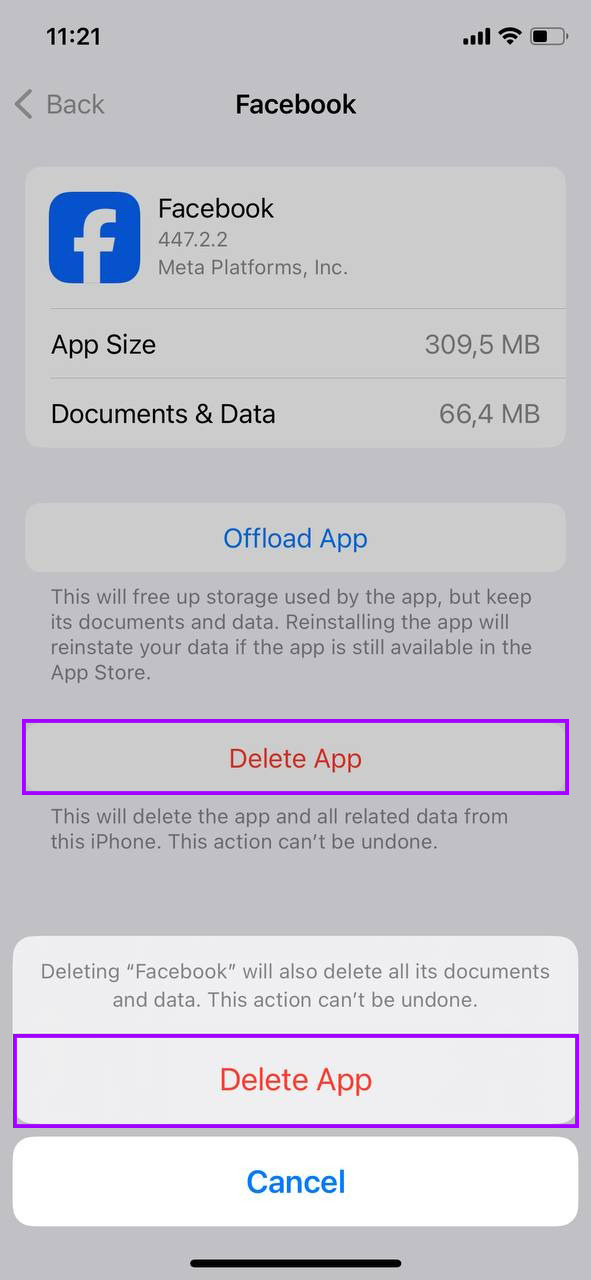
- Tap on an app that you don’t use often. You will see detailed information about the storage it uses, including the app size and its data.
- If you decide you do not need the app, tap Delete App. Confirm your choice. This action removes the app and all its related data from your device, instantly freeing up storage space.
Repeat this process for other apps you find unnecessary, and enjoy a few more gigs of free storage.
Method 3: Clear Browser Cache
At method number three, we have a browser cache. Web browsers store temporary files to improve browsing speed, but these files can use up your limited storage. Here’s how to clear the cache in Safari and other browsers on your iPhone:
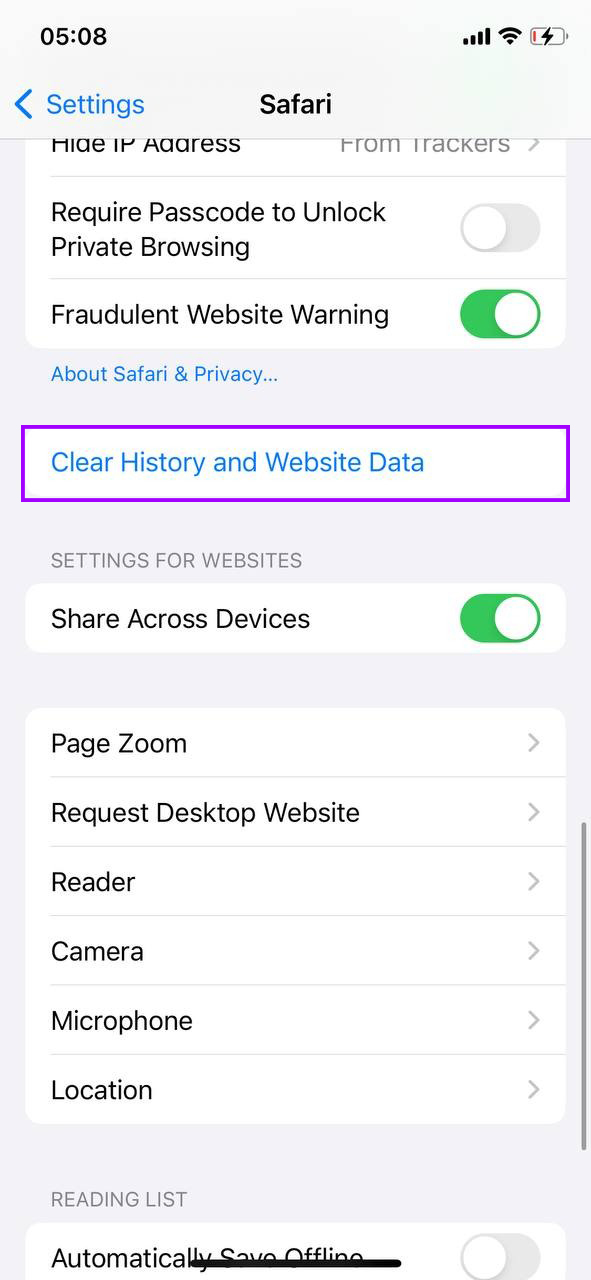
- Open Settings, scroll down and tap on Safari.
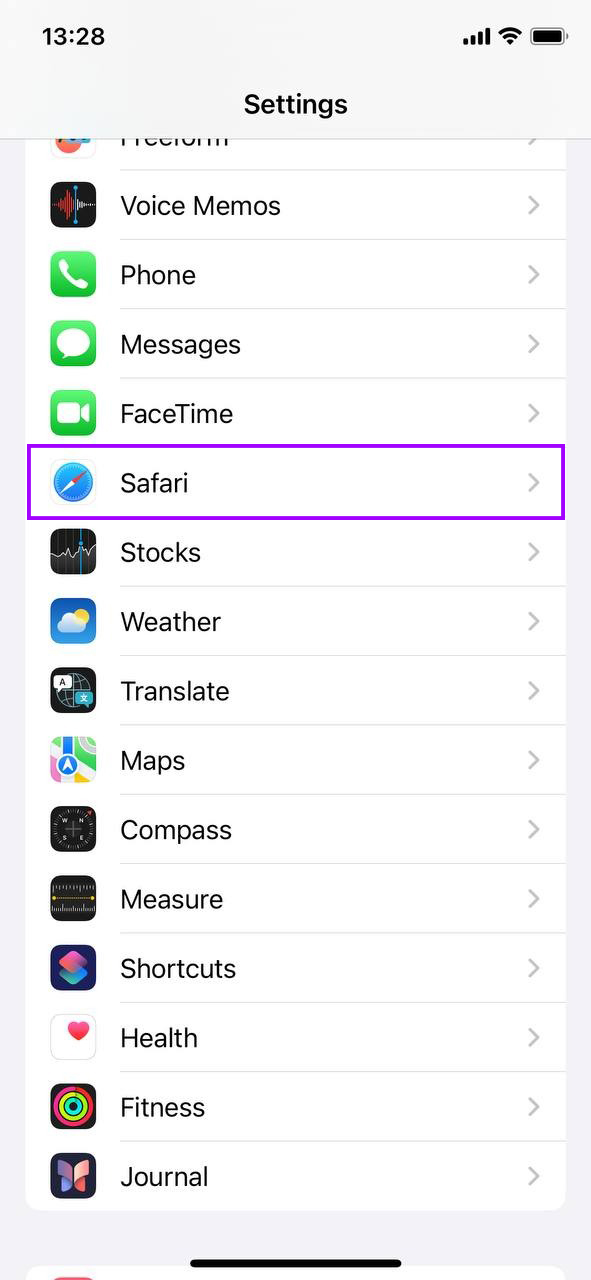
- In the Safari settings menu, find and tap on Clear History and Website Data. Confirm by tapping Clear.
- For browsers like Chrome or Firefox, open the browser app, go to its settings menu, and look for options like Clear Browsing Data or Privacy.
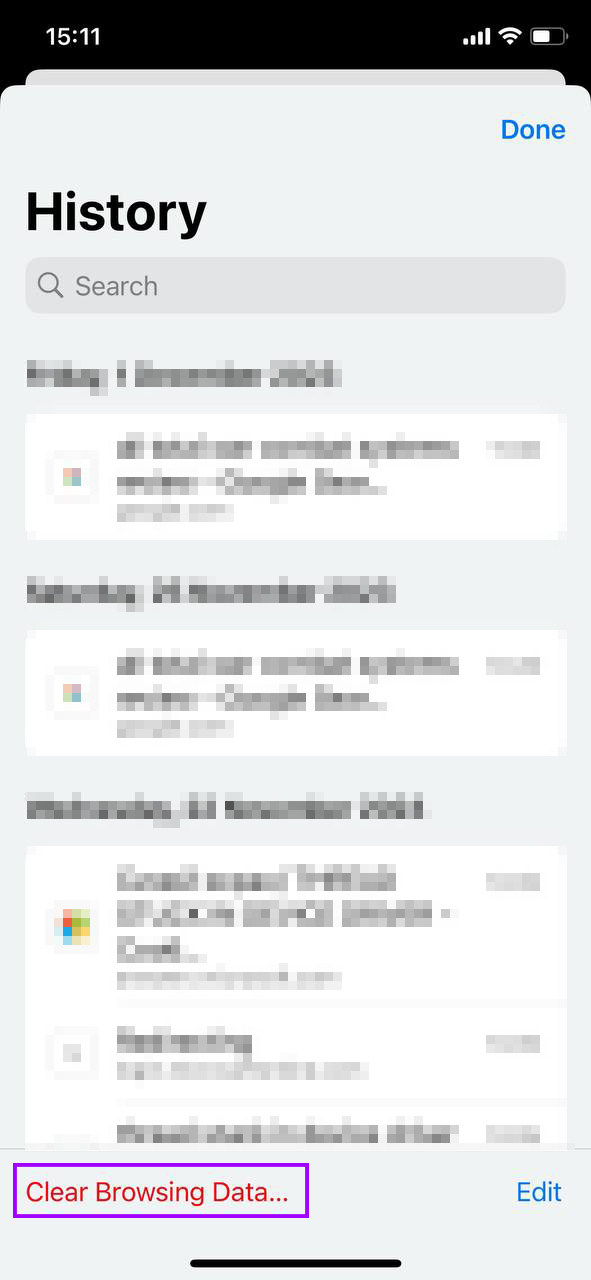
- Choose what to clear, such as cookies, cached images, and files. Confirm your choices and clear the cache.
Browsers aren’t the only apps that can pile up cached data. If you actively use messaging apps or social media platforms like Snapchat, Telegram, or WhatsApp, you might have gigabytes of hidden storage taken up by media files, cached data, and old messages. These apps handle cache differently, so you’ll need to check in-app settings to clear out unnecessary files.
For most apps, start with in-app Settings and look for options like:
- Data
- Storage
- Storage Management
Some apps don’t provide any built-in option to clear cached data. If you can’t find a Clear Cache or Storage Management setting, there’s still a simple way to free up space—delete the app and reinstall it.
Method 4: Manage Old Messages and Attachments
Another sure way to get more storage on your iPhone without paying is to clear old messages and attachments. Texts themselves don’t take up much space, but attachments are a different story. Here are a few ways to do so:
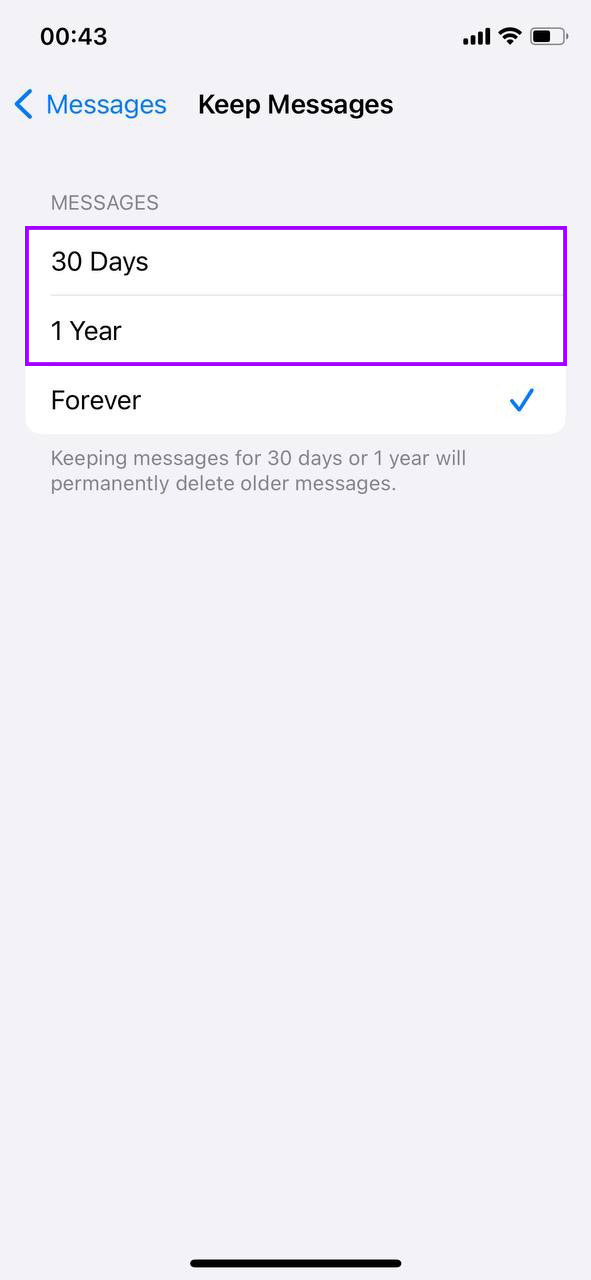
- Go to Settings > Messages and scroll down to the Message History section. Tap Keep Messages and choose either 30 days or 1 year. This setting automatically deletes older messages.
- Still in the Messages settings, tap Review Large Attachments. You can see all the attachments that are taking up significant space. Select items you want to delete and tap the trash icon.

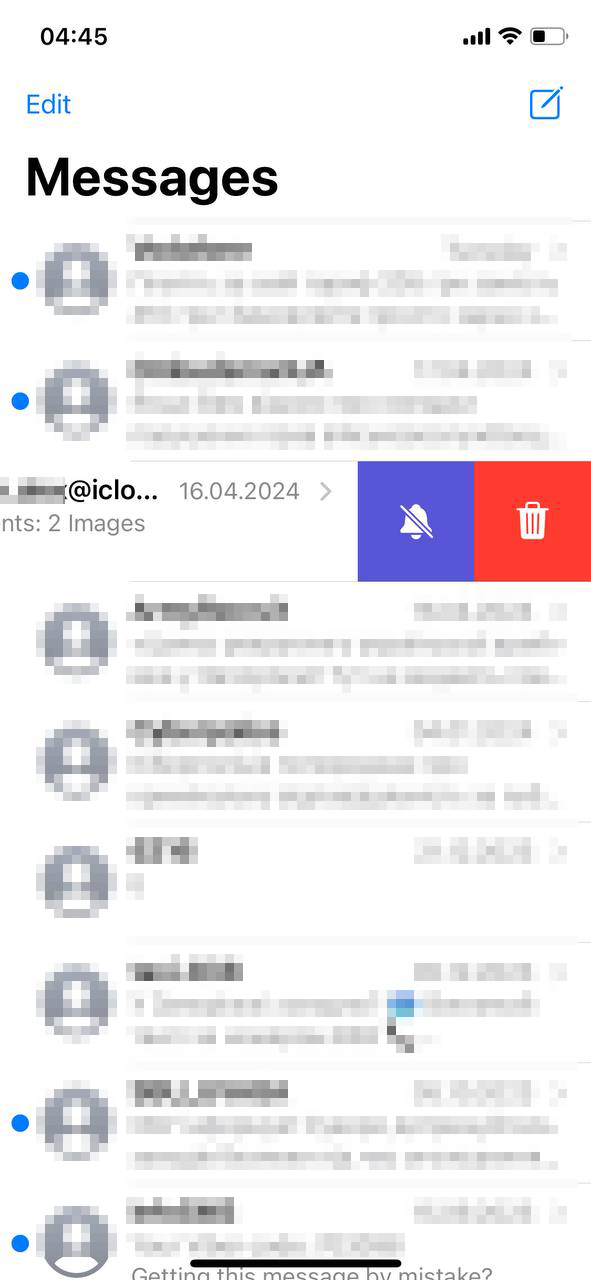
- Open the Messages app and swipe left on any conversation you wish to remove. Tap Delete to remove all messages in that conversation, freeing up space.
By regularly cleaning out old messages and attachments, you get more iPhone storage, so your device has enough free space for new content and apps.
Method 5: Delete Old Downloads
In our experience, this is often an overlooked method to get more storage on your iPhone without paying for extra cloud storage or physical storage upgrades. Every file you download from Safari or other apps stays in your local storage indefinitely. Unlike temporary files, iOS does not automatically clear downloads and many people forget to check this folder. If you haven’t looked at it in a while, you might find gigabytes of unnecessary PDFs, videos, and documents sitting there.
Here’s what to do:
- Open the Files app and tap Browse at the bottom.
- Navigate to On My iPhone and hit Download.
- Scroll through the list.
- Tap Select in the top-right corner, then choose the files you want to delete.
- Tap the trash icon, then confirm the deletion.
- After that, go to Recently Deleted in the Files app and clear it for immediate storage recovery.
By the way, some apps create their own folders on your local storage, so don’t stop at just the Downloads folder. Apps like document scanners, video editors, and file managers often save files in separate locations. If you clean out every useless file here, you can get a lot more iPhone storage without relying on iCloud.
Method 6: Organize and Delete Music and Podcasts
Managing your music and podcasts is another effective way to get more storage on your iPhone without paying. Here’s how to keep your audio library under control:
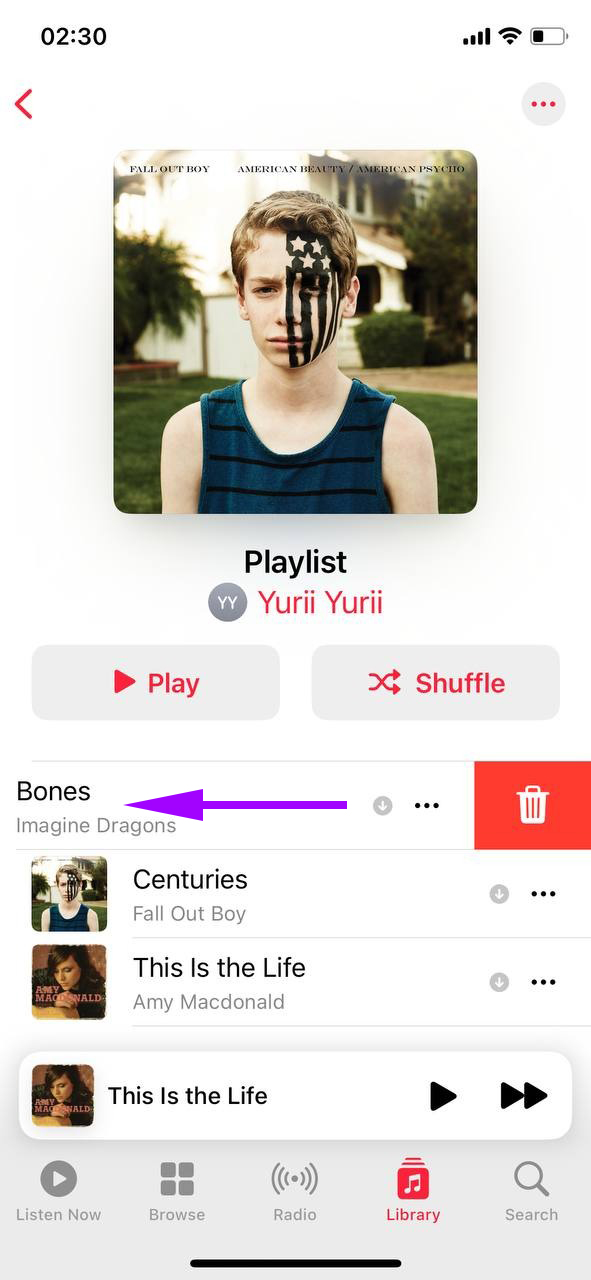
- Open the Music app. Go to your library, find any albums or songs you no longer need, and swipe left to delete them. This helps keep your music collection fresh and relevant.
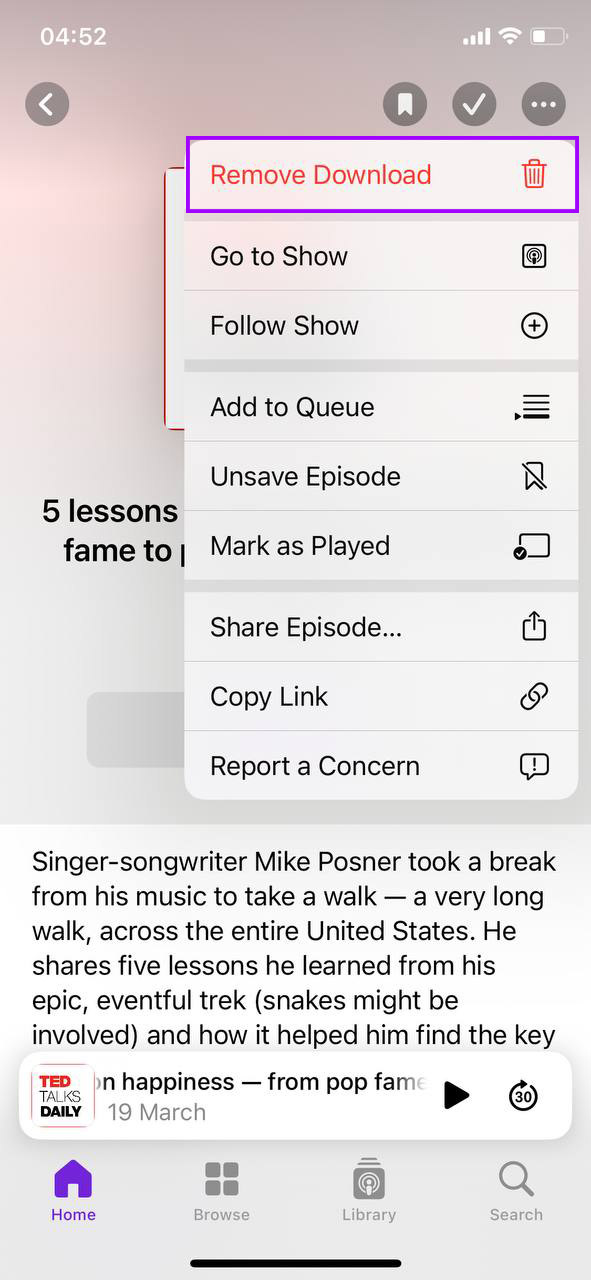
- In the Podcasts app, go to ‘Library’, tap on ‘Shows’, and then select a show. Tap on old episodes you’ve already listened to and choose ‘Remove Download’ to clear them from your device.
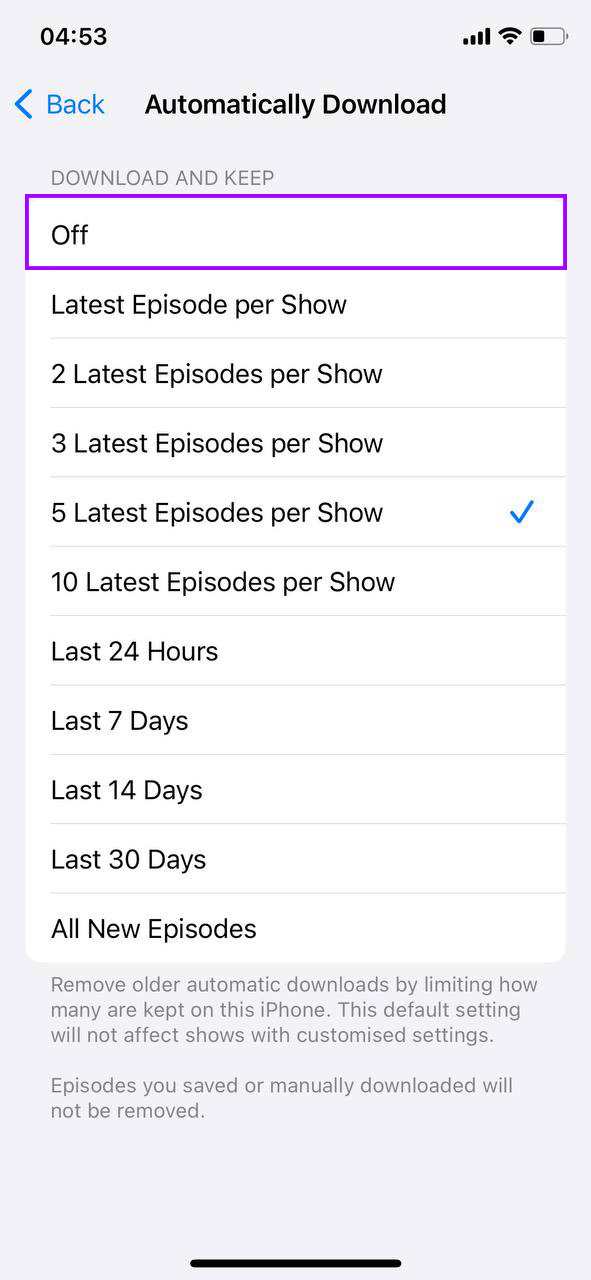
- To prevent future overload, adjust your podcast settings to limit automatic downloads. Go to Settings, tap on Podcasts, and disable ‘Automatic Downloads’ or set episodes to delete after you’ve listened to them.
Explore Alternative Cloud Storage Options
As we touched on at the beginning, there are alternatives to Apple’s iCloud. While iCloud offers the simplest integration with everything on your iPhone, you’re not bound to it.
If you want to expand your iPhone’s storage capabilities, don’t mind using the cloud, but iCloud just isn’t your thing—here are some great alternatives worth checking out:
Google Drive and Google Photos
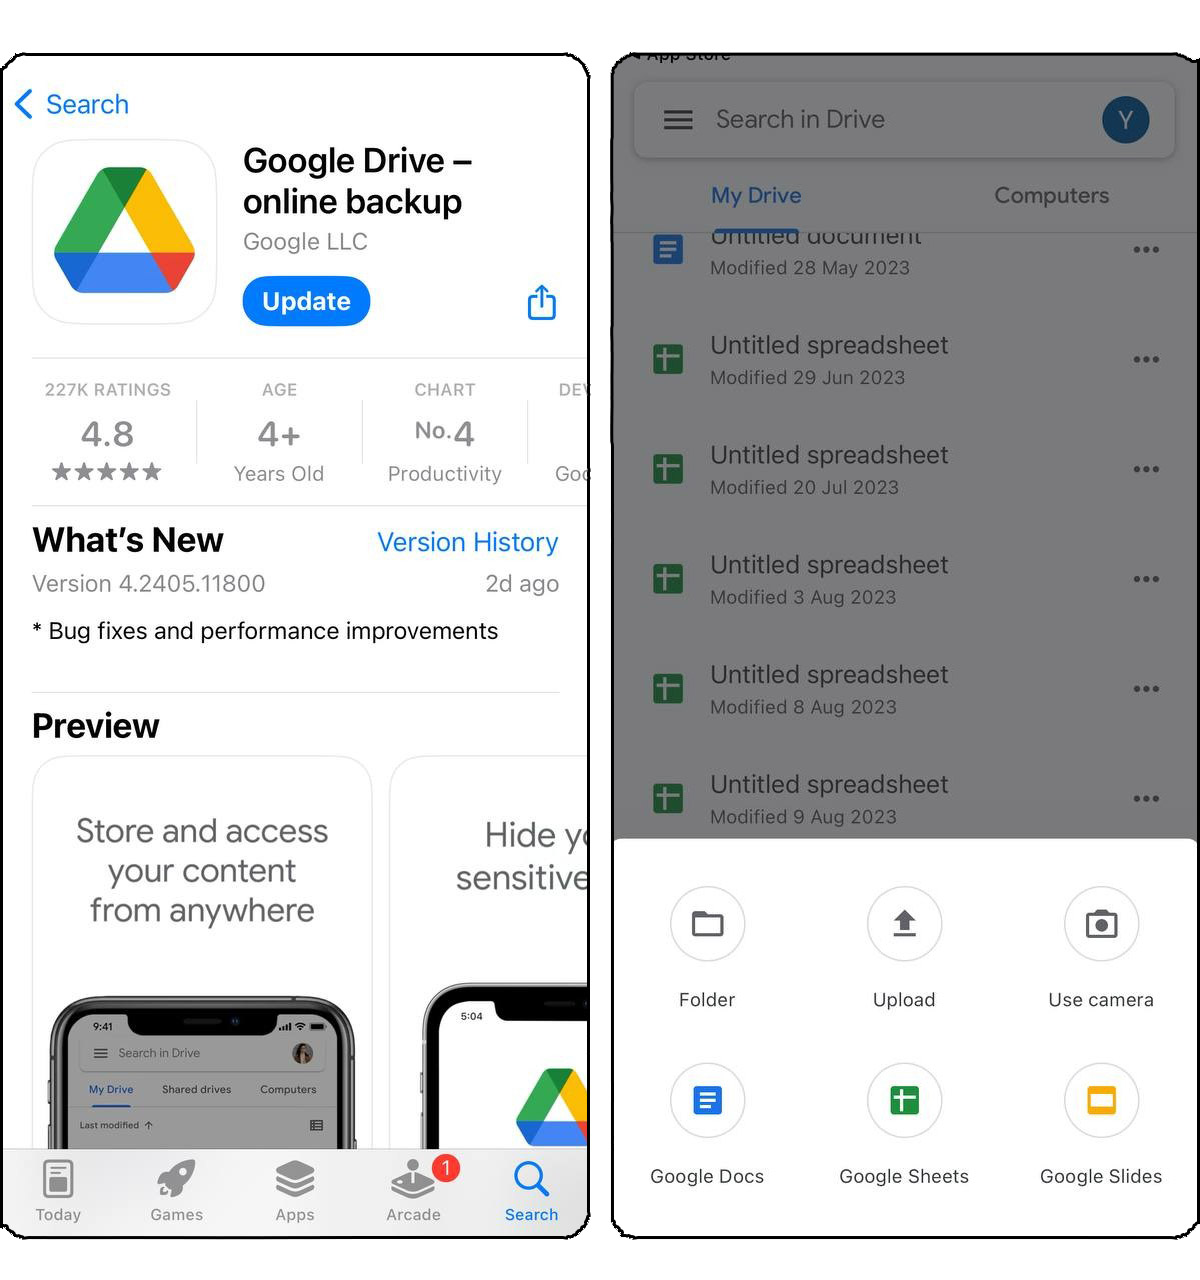
Google Drive provides a solid alternative for storing photos, documents, and other files without relying on iCloud. It works well with Google Photos and offers automatic backups for media; a practical option for expanding storage beyond your iPhone.
- With Google Drive, you can store documents and photos and keep them accessible across devices.
- Files sync automatically, so you can retrieve them anytime from a computer, tablet, or another phone.
- It also makes sharing large files easy—instead of struggling with attachments, you can generate a shareable link and send it instantly.
For storage, Google offers 15GB for free, which is shared across Drive, Gmail, and Google Photos. If you need more space, Google One plans start at $1.99 per month for 100GB. While not a direct replacement for internal storage, it’s a cost-effective way to keep files off your device while maintaining easy access.
Dropbox
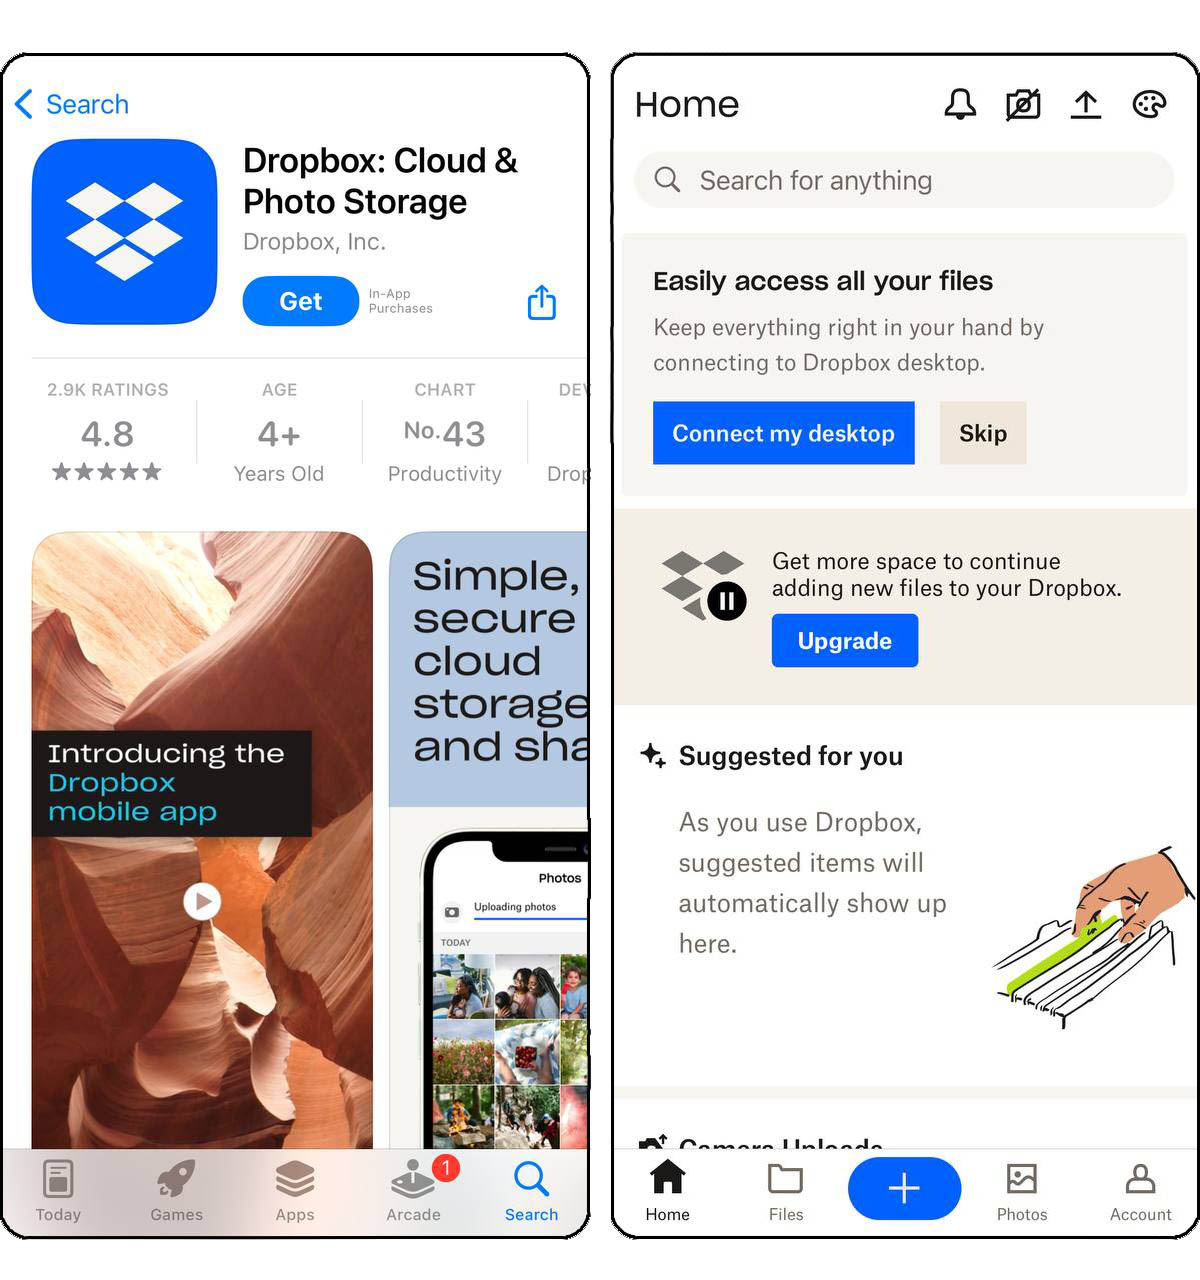
Dropbox is known for its versatility in handling a wide variety of file types, including videos and large documents. It’s a good option for backup and file sharing.
- With Dropbox, you can store large files and entire folders off your iPhone while still having easy access when needed.
- Files remain available across devices, so you can open, edit, or share them from a phone, tablet, or computer.
- The free plan starts with 2GB of storage, which works well for storing basic documents or smaller files.
- If you need more space, Dropbox Plus offers 2TB for $9.99 per month.
Microsoft OneDrive
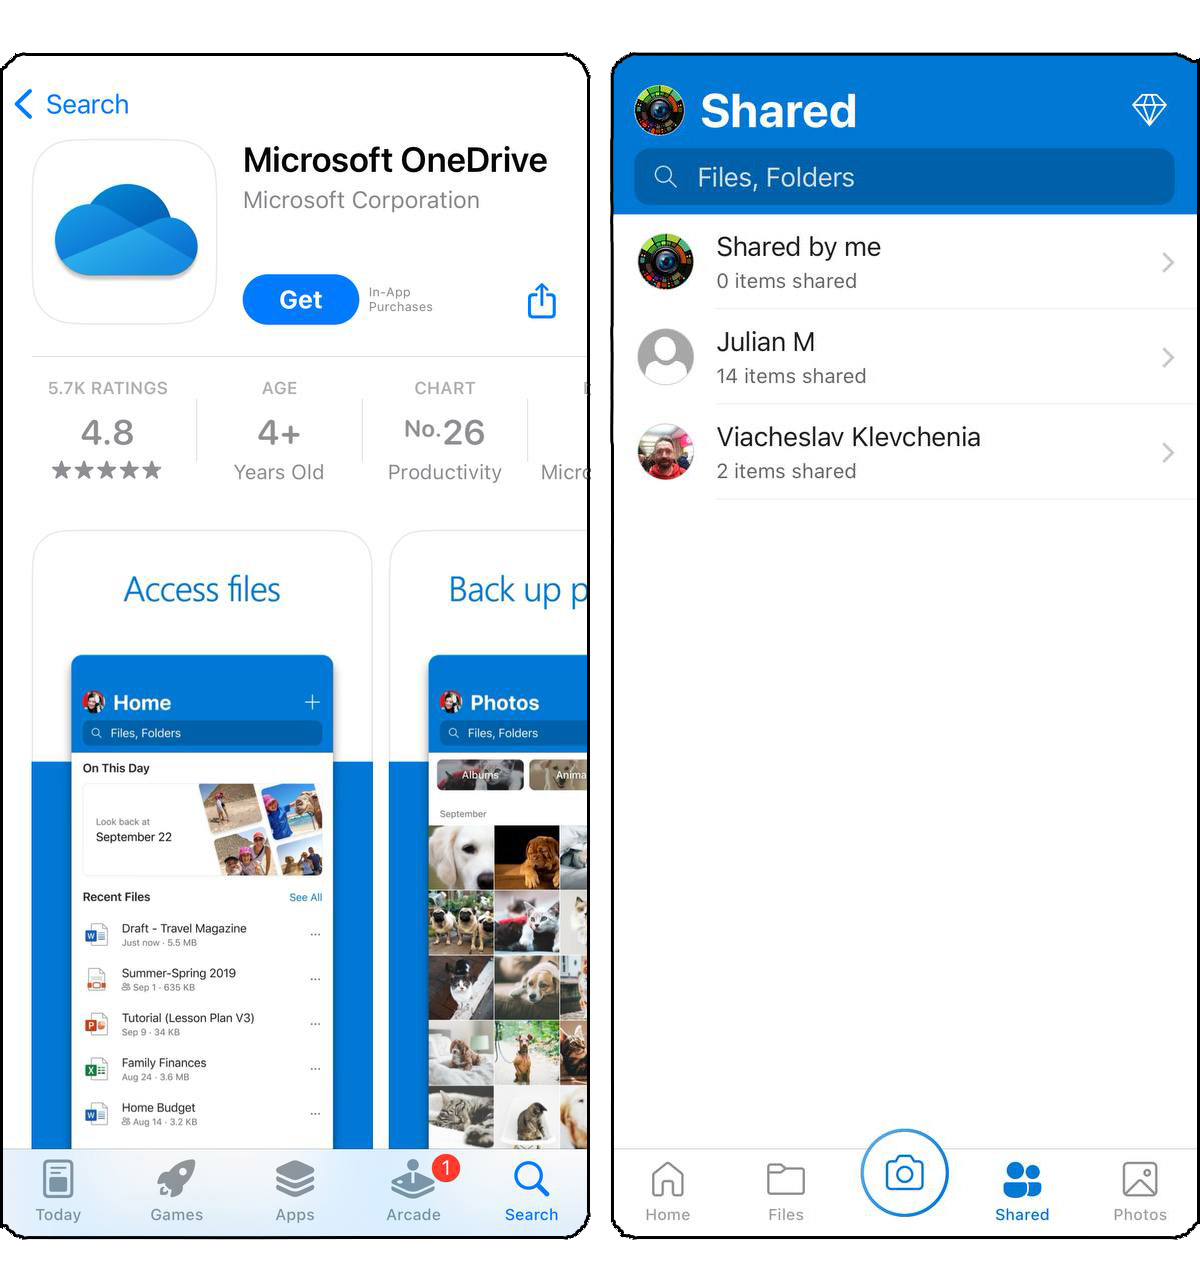
For those who rely on Microsoft products, OneDrive offers a seamless way to store and manage files while keeping everything in sync across devices. It integrates effortlessly with Microsoft Office, and is a convenient choice for those already using Word, Excel, or Outlook.
- OneDrive automatically syncs Office documents,
- Allows you to access and edit files from your iPhone, computer, or tablet without needing manual transfers.
- It also includes photo backup options.
- Microsoft provides 5GB of free storage, which is enough for moderate number of documents and photos.
- If you need more space, paid plans start at $1.99 per month for 100GB, while Office 365 subscribers get 1TB included. For anyone already in the Microsoft ecosystem, OneDrive makes offloading files simple.
Get a Physical Drive
And if cloud services aren’t your thing at all, and you want to expand your iPhone’s storage capabilities without relying on the cloud—maybe you’re often offline, need to move files quickly, or just don’t want to depend on Wi-Fi or data—consider investing in a physical storage solution such as portable SSDs or iOS-compatible flash drives. These devices provide secure and easy ways to manage your files directly from your iPhone.
Portable SSDs offer large storage capacities ranging from 256GB to 2TB, which are perfect for users needing substantial extra storage. They are highly durable with no moving parts, so the risk of data loss from physical damage is minimal. Additionally, SSDs support faster data transfer speeds, ideal for large files such as high-resolution photos and videos.
iOS-compatible flash drives provide a plug-and-play solution for iPhone users. These drives can be connected directly to your iPhone via the Lightning port without any setup required. Plus, their small and lightweight design makes them extremely portable, perfect for on-the-go access to your files.
Physical drives compatible with the iPhone let you offload and transfer a wide range of data—including photos, videos, music, documents, PDFs, and much more.
- To connect an external storage, you may need a Lightning to USB Camera Adapter, USB-C to SD Card Reader, or other compatible adapters.
- The external storage device must be formatted as APFS, APFS (Encrypted), macOS Extended (HFS+), exFAT (FAT64), FAT32, or FAT.
- Once connected, open Files > Browse, then select the external drive under Locations to access files.
Some external hard drives need a separate power source to work with an iPhone.
Both SSD drives and flash drives are excellent ways to buy more iPhone storage not iCloud, and enhance your device’s capacity for new content and backups without recurring costs. To explore popular options, visit brands like Samsung for SSDs and SanDisk for iOS-compatible flash drives.
Final Words
As you can see, getting more iPhone storage is not that hard. We started this guide with simple, free methods that anyone can try. In our experience, those methods should solve storage issues for most people, since the majority want to fix this quickly, without spending extra money. But, if money isn’t the issue and you simply want to avoid Apple’s cloud, other cloud services exist, as we discussed above.
External devices also offer a helpful alternative, especially for photo enthusiasts or those who don’t require constant access to all their files.
However, sometimes none of these methods fit. Perhaps you already cleaned every file possible on your 64GB model, and external storage doesn’t suit your daily needs. In this scenario, a new iPhone with greater internal storage makes sense. Current models all start at 128GB, which is a significant improvement. Keep in mind that iPhones with more storage usually maintain their resale value better, potentially saving you from another upgrade too soon.
If you found this guide helpful, we’d love to hear from you! Drop us a comment or share it with someone who always complains about their storage (we all know at least one). And hey, if you still have more questions or just want some extra tips, join our iPhone forum—it’s full of people who’ve been exactly where you are now. Hope to see you there!
FAQ
You can also consider cloud services like Google Drive, which offers 15GB for free, or upgrade to 100GB for about $1.99/month. Dropbox provides 2GB free, with premium plans starting around $9.99/month for 2TB.