How to Delete All Photos From iPhone (iOS 26)
About to purge your photo library but can’t find a “Delete All” button in the Photos app? Yeah, super common problem. As of iOS 26, Apple still doesn’t give us exactly what we want, but that’s where we come in.
Today, we’ll show you a dead-simple way to delete all photos from your iPhone, basically in three taps. Plus, we’ll cover other situations you might run into along the way.
What Exactly Do You Want to Do With Your Photos?
In our experience, most people who land on guides like this are here for one simple reason: Apple still doesn’t let you select all photos in the main Photos section. Sure, there’s a “Select All” button, but it only shows up in specific albums. Try to use it in All Photos and… nothing.
So, we’ll start with that. But that’s not the only reason people come looking for help. What if you want to delete specific photo types? What if your iPhone is hooked into iCloud and you don’t want to lose everything up there too?
To make things easy, we’ve split the guide into clear sections so you can skip straight to what matters to you:
| Section | What It’s About |
| How to Delete All Photos Directly on iPhone Using the Photos App | The fastest way to delete every photo from your iPhone, even without a “Select All” button in Photos. We’ll show you the trick. |
| How to Delete All Pictures From iPhone (But Keep Them in iCloud) | If you want to clear your photo storage but leave your photos safe in iCloud, this section shows how. |
| How to Delete All iPhone Photos Using a Mac or PC | If you’d rather handle this from your computer instead of your iPhone, this section’s for you. |
| How to Automatically Delete All Useless Photos (and Other Clutter) | This section is for those who want to get rid of specific photo types they no longer need, like screenshots, duplicate images, or other unnecessary clutter, automatically. |
How to Delete All Photos Directly on iPhone Using the Photos App
Okay, so like we already said, there’s no real “Select Alll” button in the All Photos view. But here’s the trick we use that works almost as fast. Once you know it, you’ll never go back.
Here’s how to do it:
- Open the Photos app.
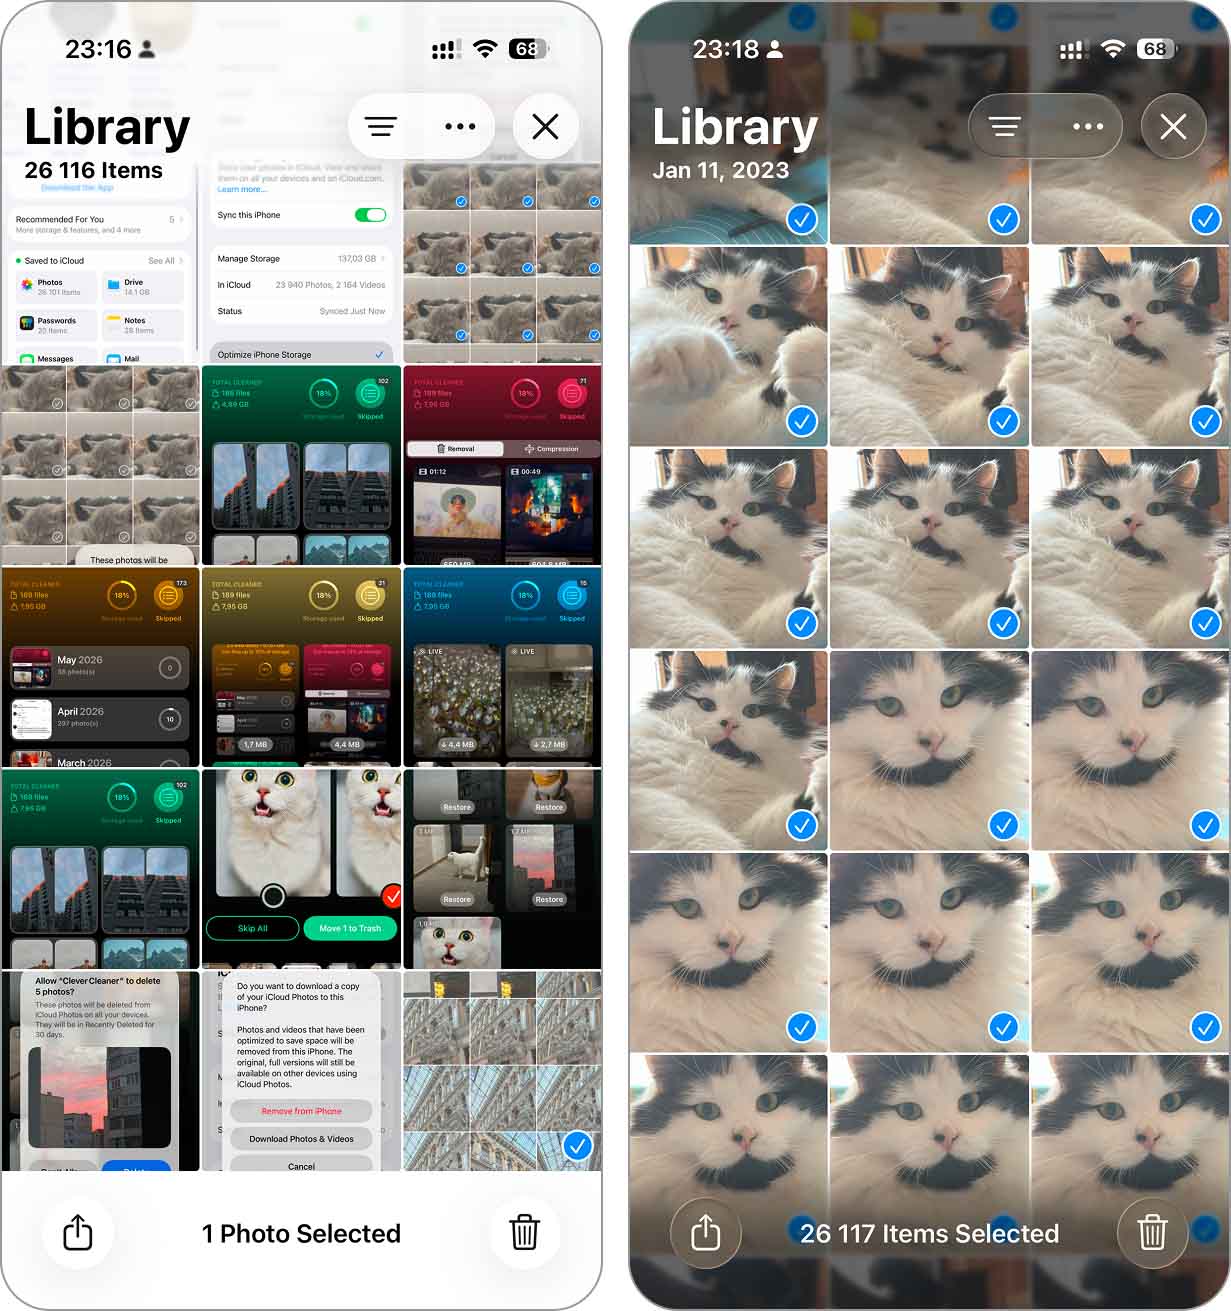
- Tap Select in the top right.
- Press the last photo in the bottom row, then start dragging your finger across the row and slightly upward to begin selecting more photos.
- Without lifting your first finger, use a second finger to tap near the top of the screen. We usually just tap the clock. This instantly scrolls all the way up while selecting everything in between.
- When you reach the top, lift both fingers.
- Tap the trash icon and confirm to delete all selected photos.
You’ve basically pulled off a “manual Delete All.” It’s rather satisfying.
Don’t forget to empty the Recently Deleted album afterward. That’s the part some people miss. Otherwise, your photos will still be taking up space for the next 30 days.
- Open the Photos app.
- Scroll down to Recently Deleted.
- Tap Select, then Delete All in the bottom left.
- Confirm when asked.
So, if you’re using iCloud to sync your photos and don’t want to lose them everywhere, make sure to check out the next section.
How to Delete All Pictures From iPhone (But Keep Them in iCloud)
If you want to clear out your iPhone’s photos but keep them safe in iCloud, the trick is to know how iCloud Photos works.
This method works for people who have iCloud Photos turned on and Optimize iPhone Storage enabled.
When Optimize is on, your iPhone stores lightweight, low-resolution versions of your photos locally, while the full-resolution originals are safely kept in iCloud. So when you turn off iCloud Photos and choose Remove from iPhone, those local copies get deleted, but the high-res versions in iCloud remain untouched.
When iCloud Photos is turned on, it syncs everything across all your devices. So if you delete a photo from your iPhone, it disappears from iCloud and any other Apple device linked to your account.
Not currently using iCloud Photos? No problem. You can turn it on, enable Optimize iPhone Storage, and wait for your photos to fully upload before moving on. This makes sure everything is backed up to iCloud before you remove it from your device.
Here’s how to work around that and still keep your iCloud library intact:
- Open the Settings app.
- Tap your Apple ID name at the top of the screen.
- Select iCloud.
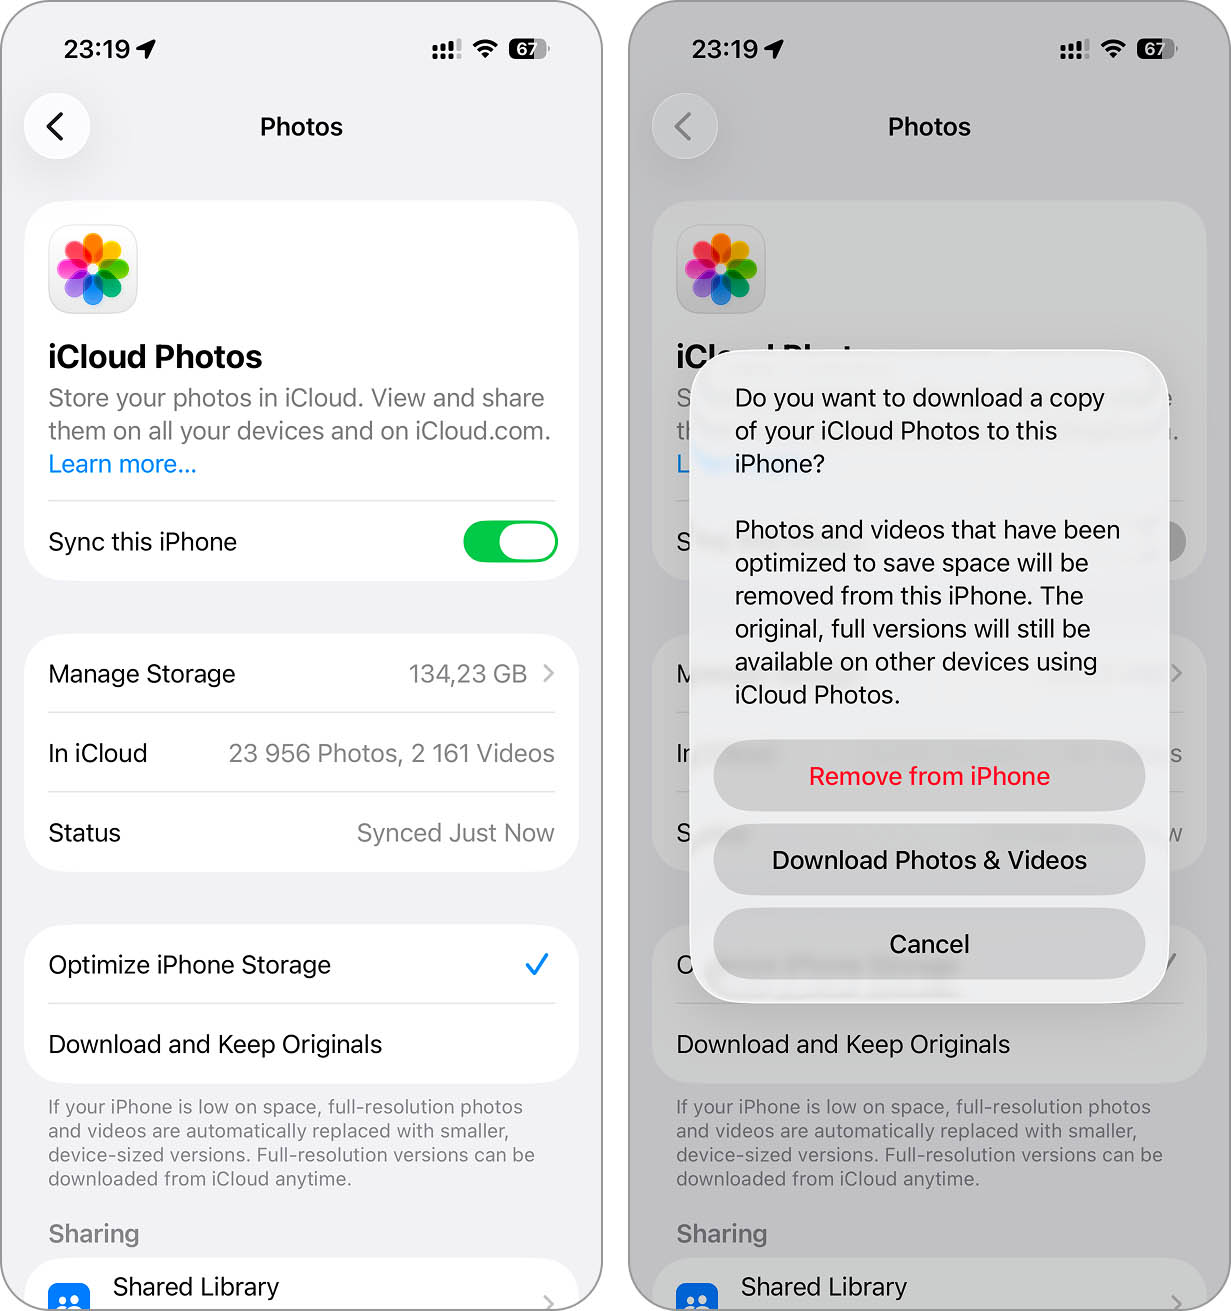
- Tap Photos.
- Toggle off iCloud Photos (Sync this iPhone in iOS 26).
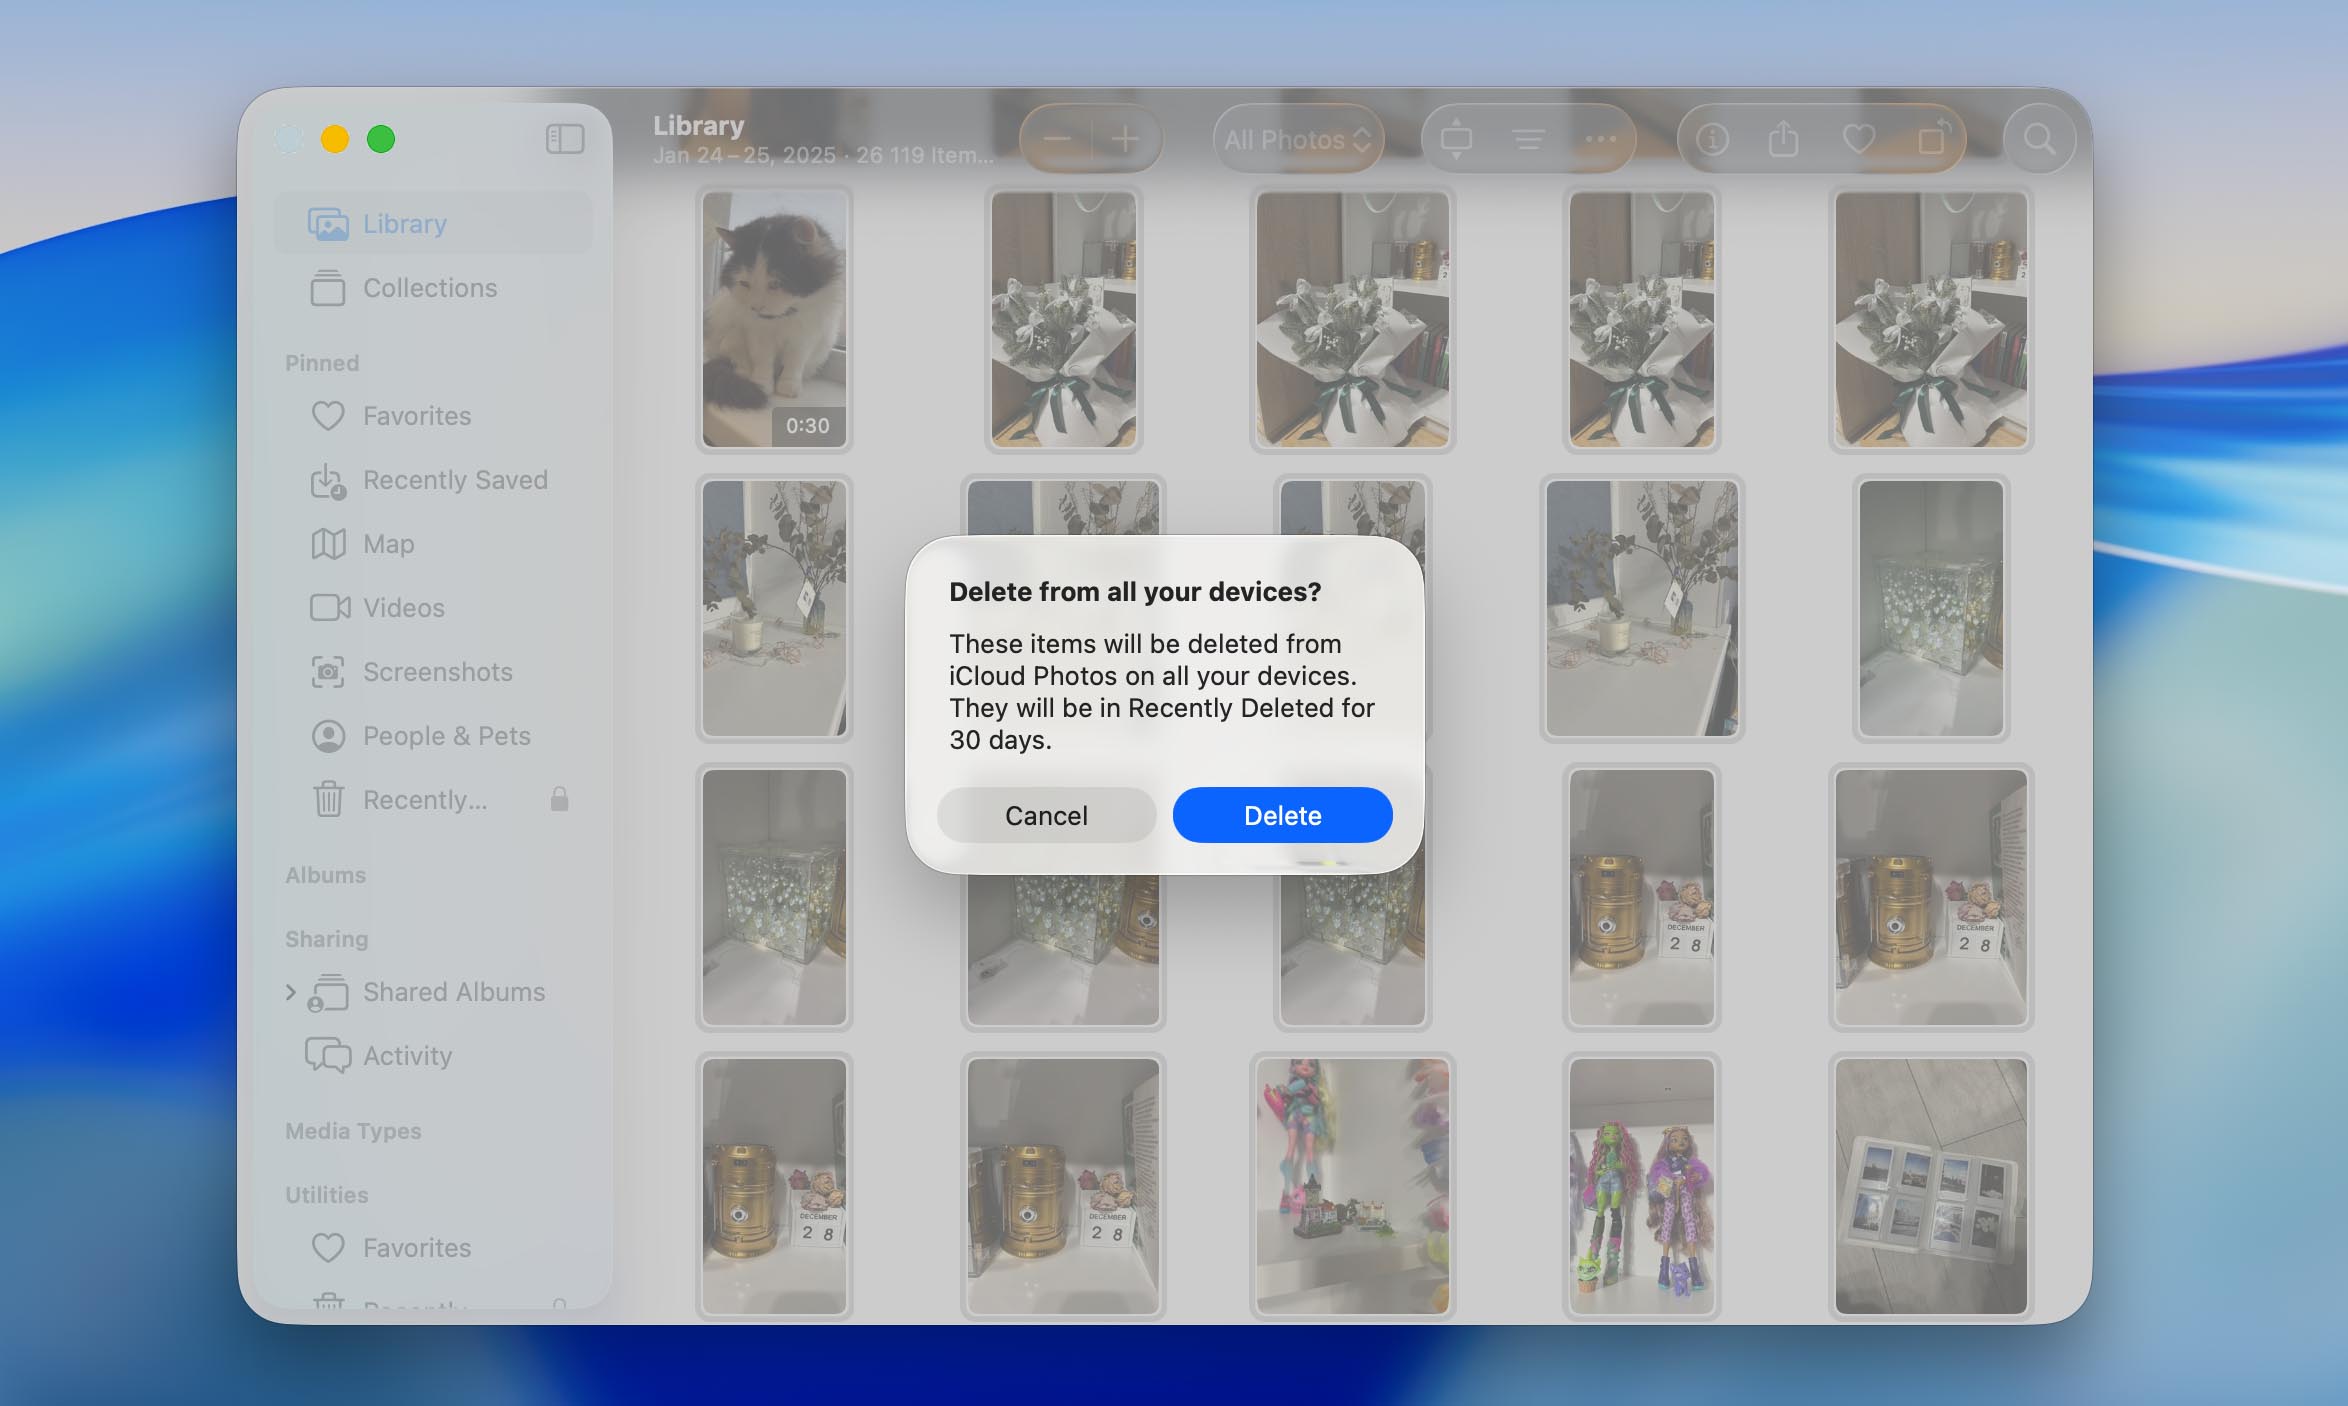
- When prompted, choose Remove from iPhone. If you’ve been using iCloud with Optimize iPhone Storage enabled, this will instantly clear all the local, space-saving copies of your photos and videos. The full-resolution originals will remain safely stored in iCloud and won’t be affected.
And that’s it. All your photos are gone from the iPhone. Or at least, they should be. If you’ve recently opened certain photos or videos, iOS may have downloaded the full-resolution versions back to your local storage. In that case, those specific files might not get removed. So it’s a good idea to scroll through the Photos app afterward and double-check that everything is actually cleared out.
You can still access everything from your Mac, iPad, or honestly any browser. Just head over to iCloud.com, log in, and your full photo library will be waiting for you.
How to Delete All iPhone Photos Using a Mac or PC
Now this one’s for those who want to delete all their photos without even touching the iPhone. If your device is synced with iCloud, this works seamlessly. Maybe your phone’s not with you right now, or maybe you just prefer the comfort of a big screen and a mouse. We get it.
Here’s how to erase all photos from your iPhone using a Mac:
- Open the Photos app on your Mac.
- Make sure you’re signed in with the same Apple ID used on your iPhone.
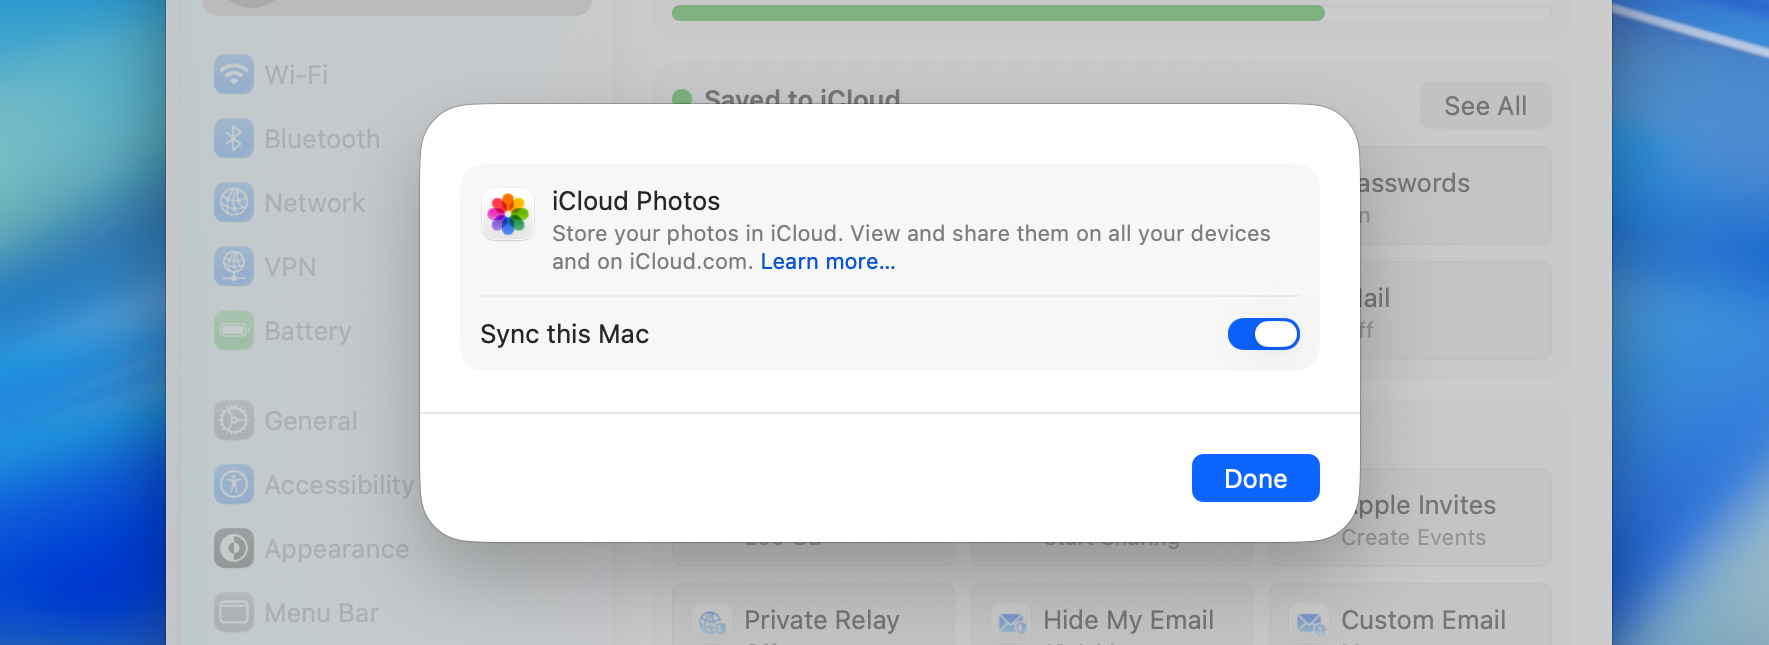
- Also, confirm that iCloud Photos is turned on in System Settings > Apple ID > iCloud > Photos, so your Mac sees the same synced photo library as your iPhone.
- Go to the Library tab in the sidebar.
- Press Command + A to select all your photos.
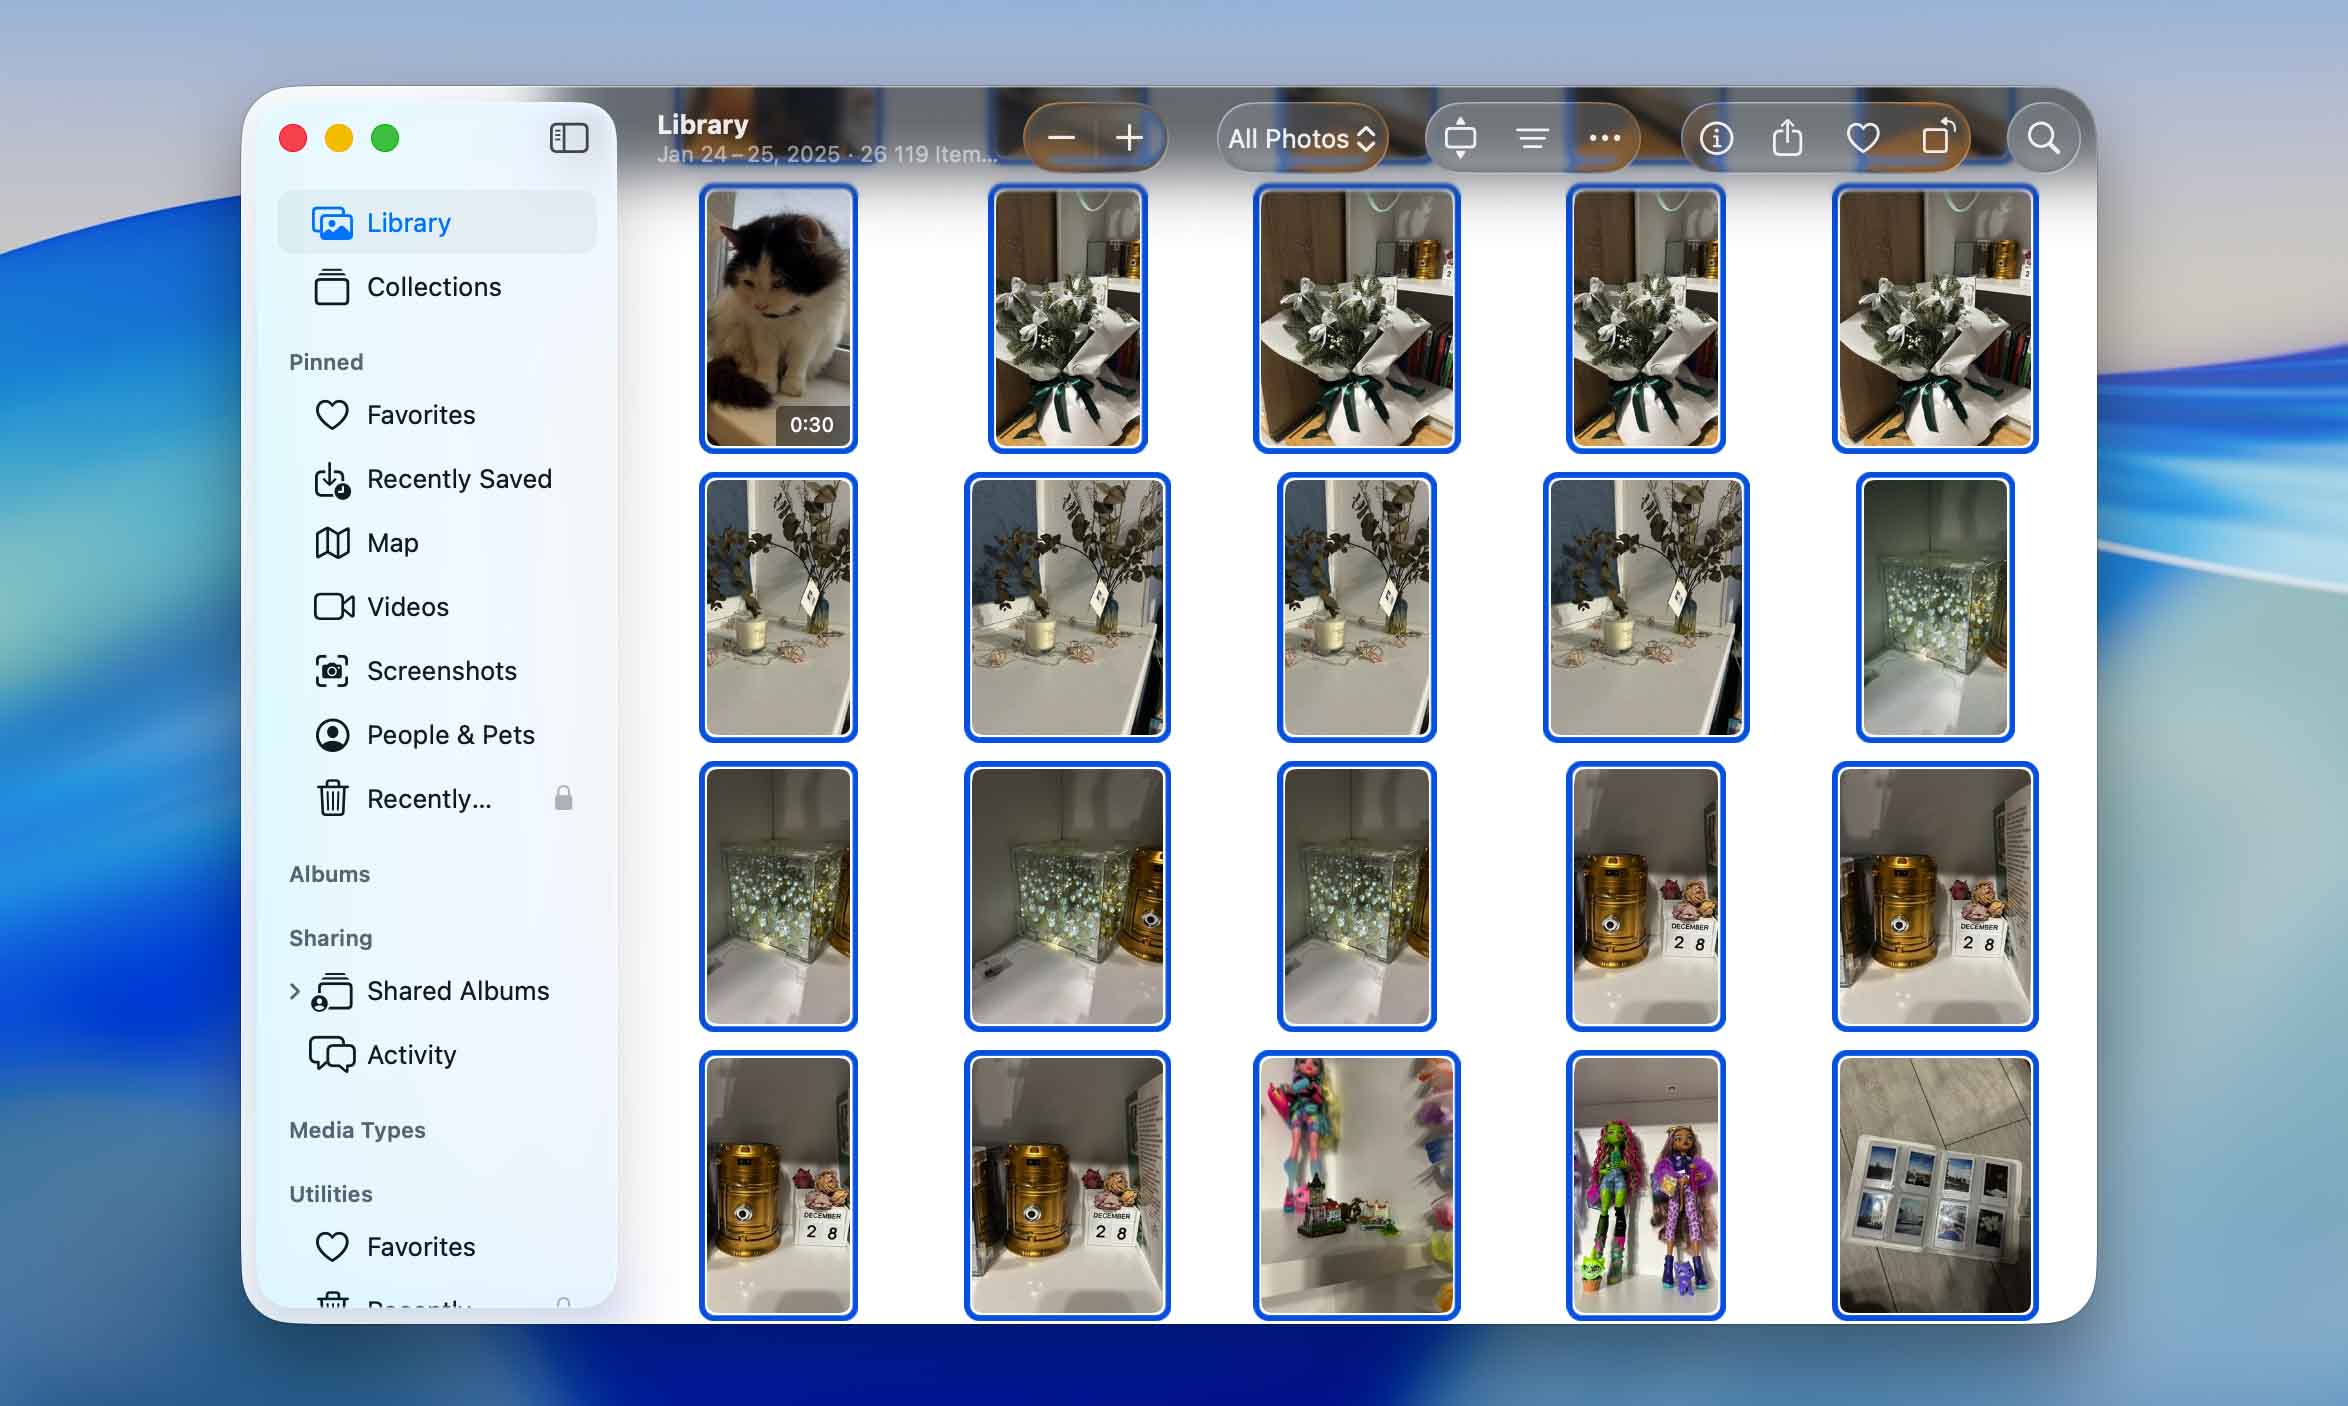
- Hit the Delete key on your keyboard.
- Click Delete or Delete Items to confirm.
To finish the job:
- In the sidebar, scroll down and open Recently Deleted.
- Click Delete All in the top-right corner, then confirm.
To do it on a PC, laptop, or honestly any device with a browser and an internet connection, open iCloud.com from any browser, log in with your Apple ID, find Photos, and follow almost the exact same steps.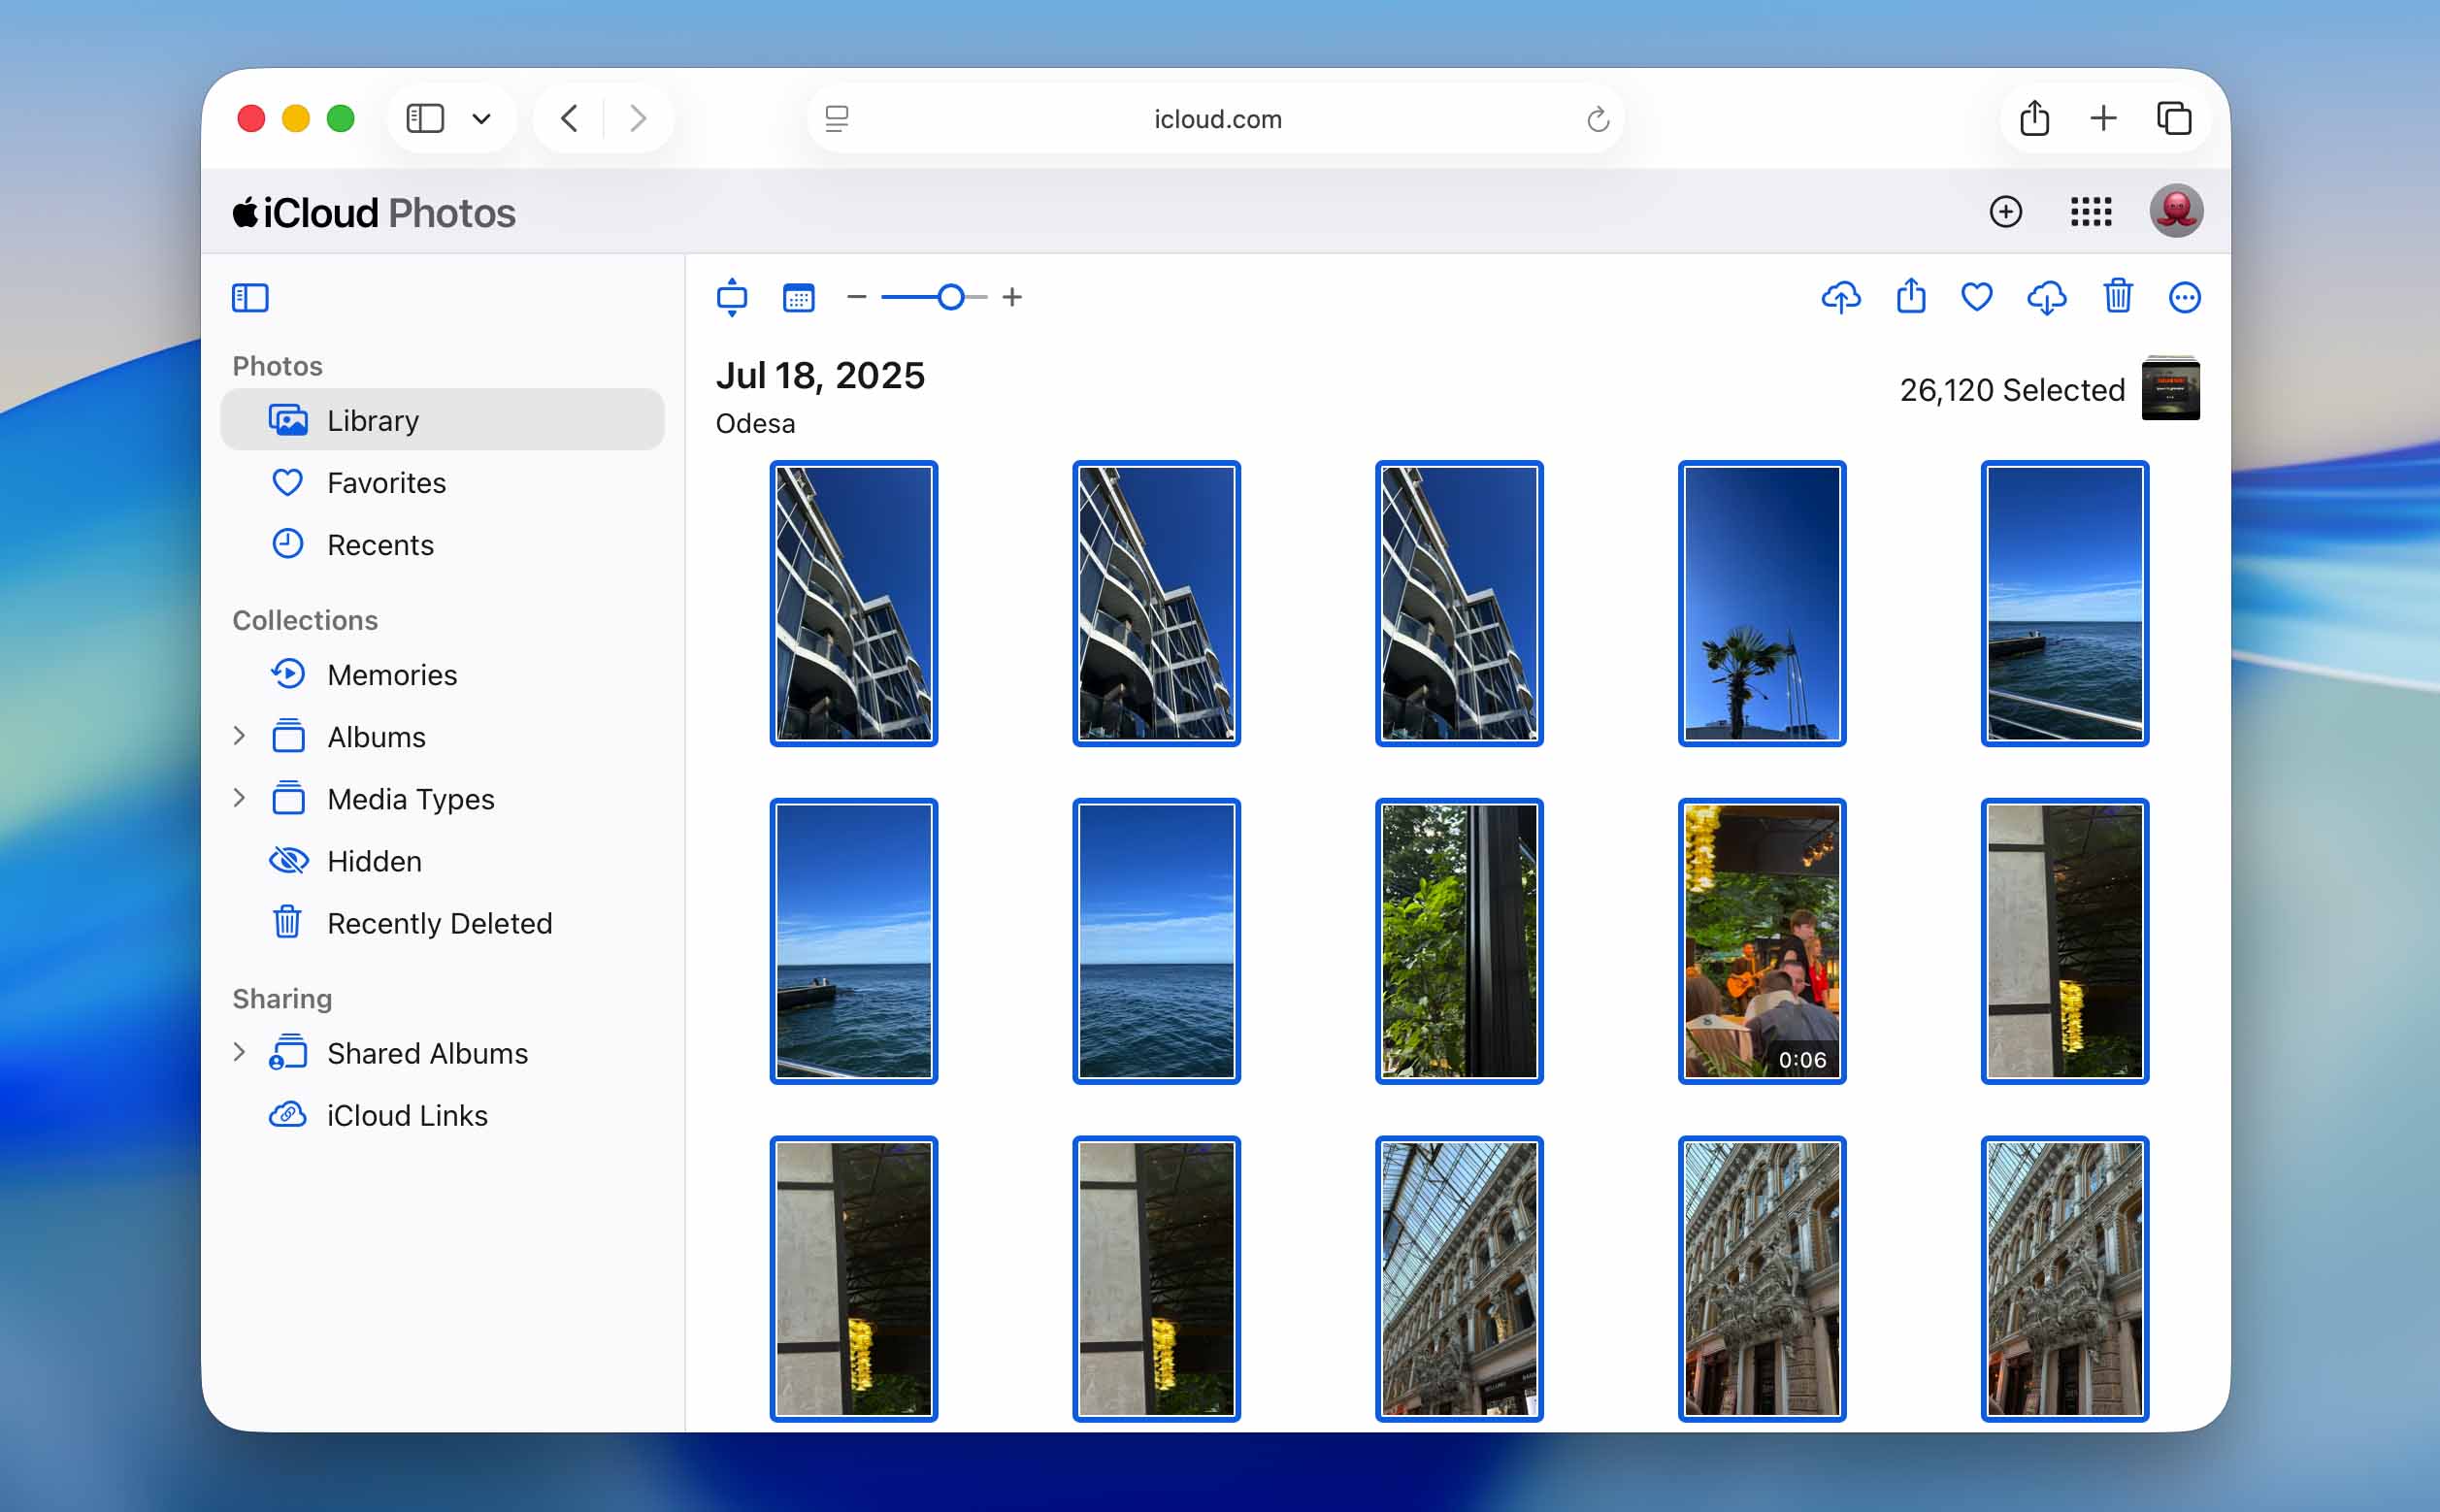
Your iPhone will sync and mirror the changes, but it might take a little time for everything to catch up. If your phone is in Low Power Mode or doesn’t have a solid internet connection, the sync could pause or slow down. Make sure it’s charged up and connected to Wi-Fi so iCloud can do its thing smoothly. Once it’s done, your deleted photos will vanish across all synced devices automatically.
How to Automatically Delete All Useless Photos (and Other Clutter)
Let’s say you don’t want to wipe your entire photo library, just the stuff that’s not worth it. Screenshots, duplicates, or those dozens of near-identical selfies. Unfortunately, the built-in Photos app isn’t really built for deep cleaning.
There are a few native tools that help a little:
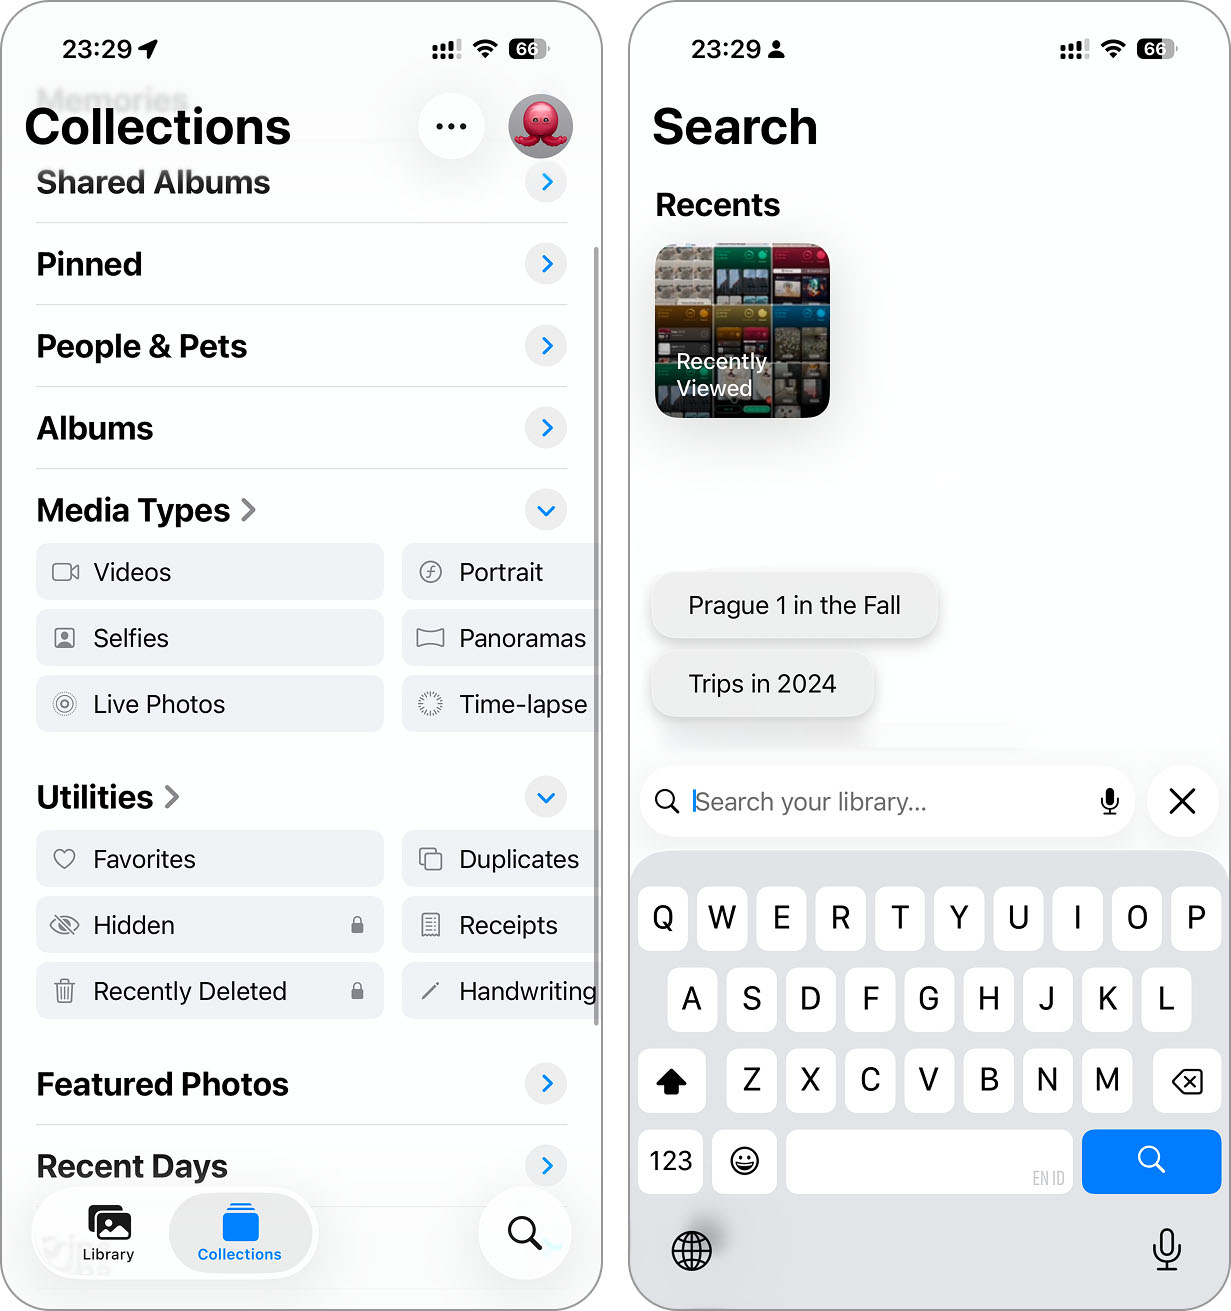
- You can filter by Media Types in Photos.
- Merge exact copies using the Duplicates folder under Utilities.
- And even use smart Search to dig up photos based on content. Smart Search is actually one of the more underrated features in the Photos app. You can type in things like “Miami 2025” or “screenshots,” and the app will instantly pull up photos that match. It even works with broad categories like “documents,” “food,” or “spring.” So if you remember what you want to delete, or what it looks like, you can track it down fast.
But still, there’s no way to select all of those results in one tap, clear out similar images, or sort them by size to clear the biggest files first.
That’s why many people, ourselves included, turn to third-party apps that do what the built-in tools can’t. We recently updated our list of the best iPhone AI photo cleaners, and let’s just say: AI is doing some serious heavy lifting. These apps can automatically clear out a ton of unnecessary photos in a minute or two.
To show you how that works, we’ll walk through the app that landed the #1 spot on our list: Clever Cleaner: AI CleanUp App. Surprisingly, the only app that was completely free, and we mean actually free, with no paywalls or even ads (we never saw a single one), turned out to be the best of the bunch.

Here’s how to use it to get rid of the duplicates and similar photos:
- Type “Clever Cleaner” into the App Store search, or go straight to its page using this link.
- Open the app and tap the Similars tab.
- Tap Smart Cleanup. It automatically marks useless duplicates and similar photos for deletion.
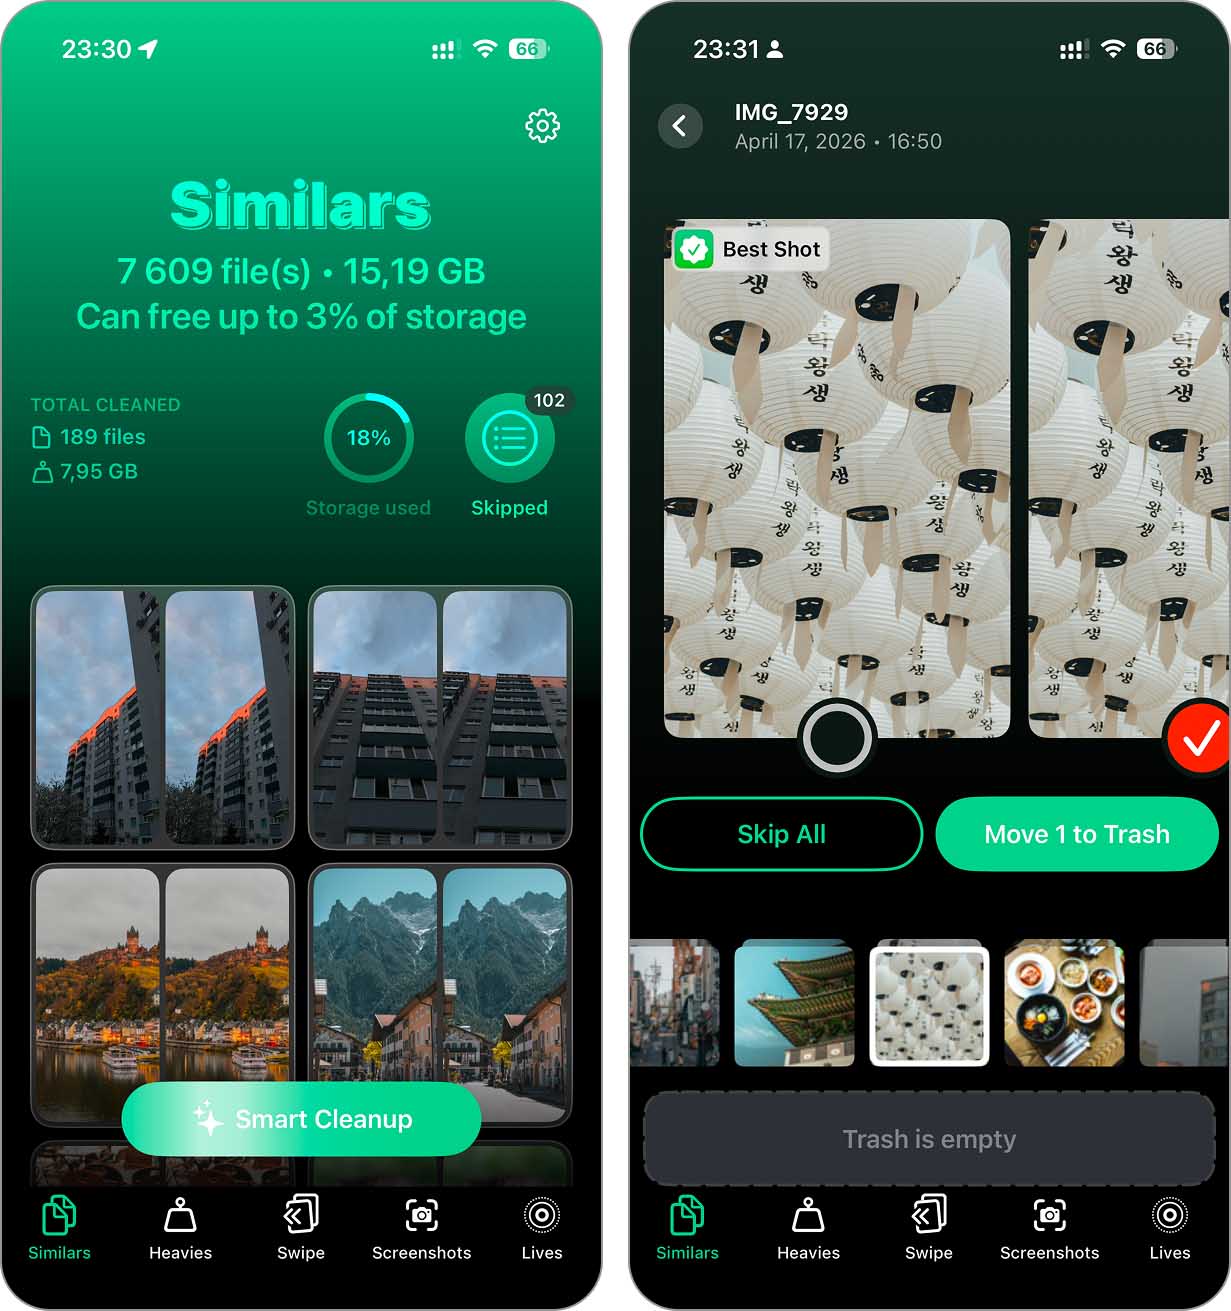
- Want to double-check? Tap any group to review. It labels the best one as Best Shot, but you can select a different one.
- When you’re done, tap Empty Trash, then use Slide to delete to clear everything in one go. If needed, you can still use Restore from the trash before it’s fully deleted.
- The app may ask to delete from iCloud Photos. Confirm if you’re okay with that.

We’ve tested the app’s AI detection extensively (you can read all about it in our full review), and in our estimate, the AI was dead-on in about 95% of grouping cases. That’s a seriously high accuracy rate. Paired with its solid Best Shot selection, you can confidently hit Smart Cleanup and let the app handle everything. It’s reliable enough that we’ve trusted it on our own libraries.
One more thing to know: the developer, CleverFiles, promises on the official Clever Cleaner cleanup app page that the app will remain free for all users who have it installed now, even if they add premium features down the line. Not a bad deal at all.
As for what the app offers right now, it’s not only Similars:
- 🎥 Heavies: Sorts your largest videos and photos by file size, making it easy to clear out space-hogging media (something native iPhone tools can’t do as you know). It also includes a built-in option to compress large videos if you’re not quite ready to delete them.
- 📅 Swipe: Groups all photos in your library by the month they were added, giving you full control to review and delete them with simple swipes. A super handy way to stay on top of clutter without going fully automatic.
- 🖼 Screenshots: Collects all those screenshots scattered across your library so you can bulk-delete them with one tap.
- 📷 Lives: Lets you convert any or all Live Photos into still images automatically. A pretty unique and genuinely useful feature.
Before You Go
The steps above should cover most ways to clear all photos from your iPhone, but by now, you’re probably done with it. Still, before you go, there are a few extra things we want to mention:
- First, not all photos live in the Photos app. While most do, it’s easy to forget that some pictures and videos, especially ones you’ve saved from messages, AirDropped, or downloaded from Safari, might be sitting quietly in the Files app, tucked away in local storage or iCloud Drive. If you’re serious about clearing out space or wiping things clean, it’s worth checking there too.
- Then there’s the Hidden album. Some people forget it even exists. If you’ve hidden photos in the past (intentionally or not), they won’t show up in your main library, but they’re still on your device. Head to Photos > Utilities or Albums > Hidden to check if anything’s there.
- Also, don’t forget about photos stored as message attachments. Images and videos sent through Messages can take up a surprising amount of space, and they won’t be affected by your actions with photo library. We actually have a separate guide for that. Check out How to Delete Photos & Videos From Text Messages on iPhone if you want to clean those up too.
- And finally, if the reason you’re looking to nuke your entire media library is because you’re handing your iPhone off to someone else, there’s an easier way. Instead of deleting photos, you can go all in with a factory reset, which wipes everything and gives the next person a clean slate. (Settings > General > Transfer or Reset iPhone > Erase All Content and Settings).
If you need more help, check out our FAQ section or reach out using this contact form. We’re always happy to help.
FAQ
Yes, but there’s no official “Select All” button in the main section of the Photos app. However, you can use a simple gesture trick: select a few photos at the bottom, then, without lifting your finger, use a second finger to tap near the top of the screen. This quickly selects everything in between. Once all photos are selected, tap the trash icon to delete them. Don’t forget to empty the Recently Deleted album afterward.
This method takes care of everything in the Photos app, but if you’ve saved media in other places, like the Files app, you’ll need to delete those separately.
This usually happens when iCloud Photos is turned on. With iCloud syncing enabled, anything you delete gets removed from your iPhone, but if the sync is interrupted or the deletion isn’t fully processed, those files can reappear during the next sync cycle.
Also, if you’re using a third-party cloud app (like Google Photos or Dropbox), make sure you’re not seeing backed-up copies being re-downloaded or displayed from the cloud. To fully remove photos, check your iCloud settings and make sure the deletion is synced across all devices.
Sort of. There’s a way to make it easier, but it’s not perfect. In the Photos app, scroll down to People & Pets. Tap the person’s face, and you’ll see all the photos where your iPhone has recognized them. From there, tap Select, and manually choose the ones you want to delete.
Of course, for this to work, the photos need to be properly tagged and recognized, which depends on how consistent your iPhone has been at identifying that person. If the face recognition hasn’t caught everything, some photos might slip through the cracks.