How to Mass Delete Multiple Photos at Once on iPhone
Do you need to mass delete photos from your iPhone to save storage, or simply because you no longer need them, but dealing with too many photos feels annoying and slow? This is a common situation for iPhone users, but nothing here is complicated, as iOS already offers several ways to delete photos in bulk, and with the right flow, the process takes only a few minutes. We tested all methods available and will share the ones that work best in real use.
How to Delete Multiple Photos from the Photos App on iPhone
No matter how you use your iPhone, most images end up in the Photos app. Everything you shoot with the iPhone camera, all screenshots, and many image attachments saved from messages and other apps collect there over time. That’s why it makes sense to start here and delete unnecessary iPhone photos in bulk before looking at other locations on your device.
Method 1: Delete Photos Directly from the Library
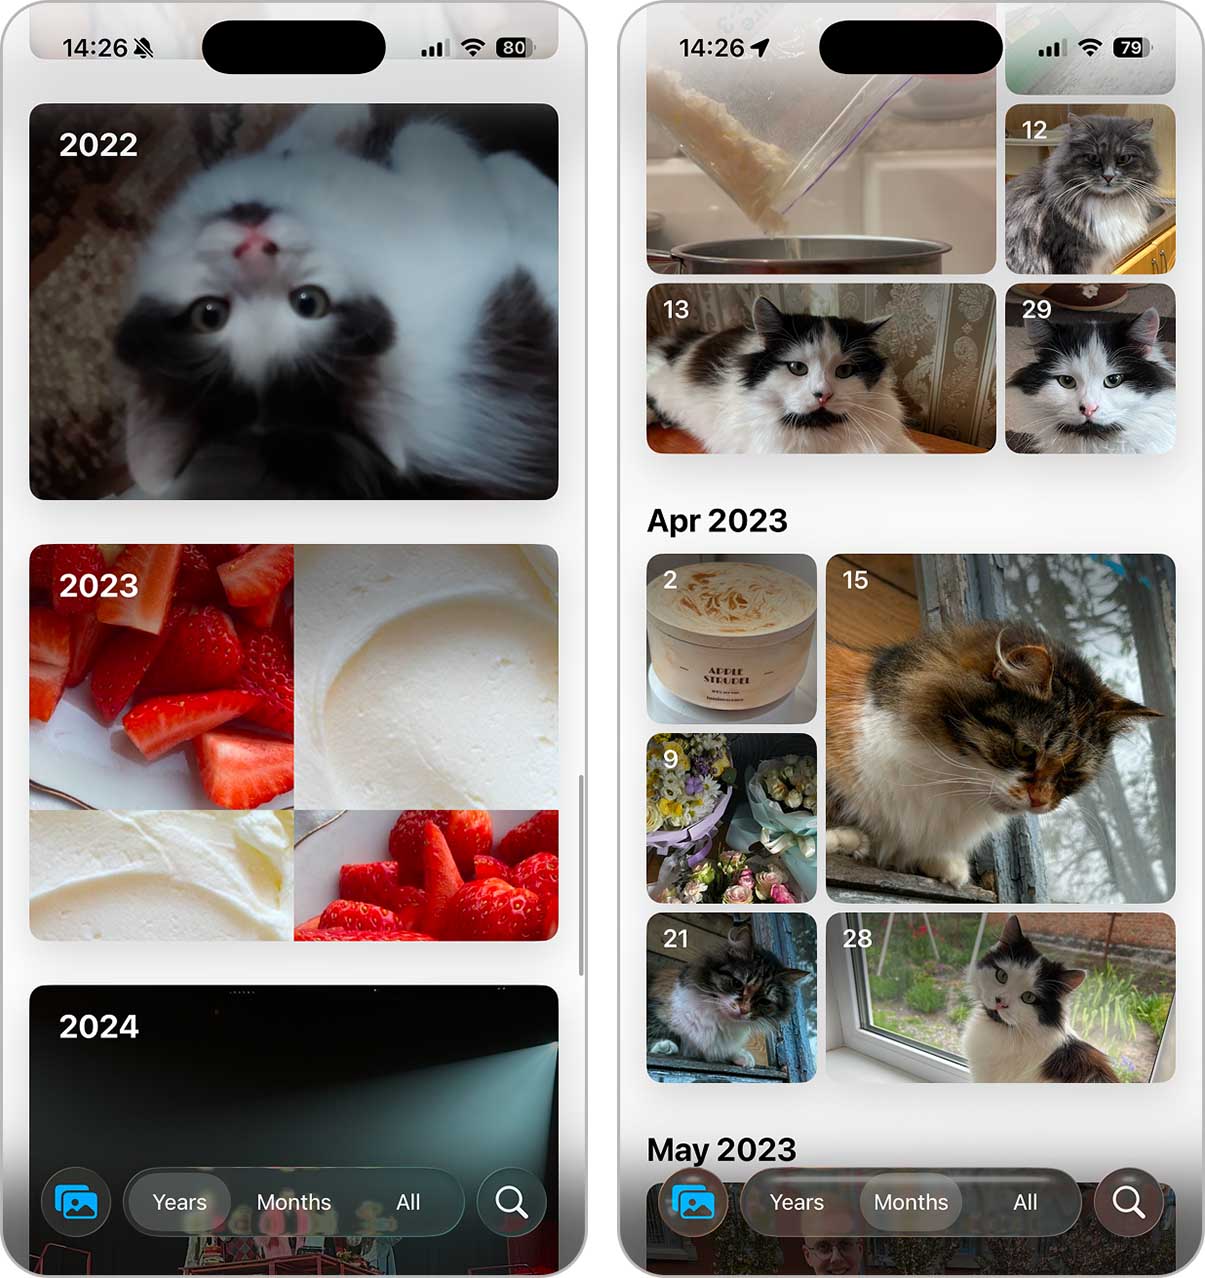
Let’s start with the simplest option, which you likely already know — deleting photos directly from the Library section in the Photos app. This is the default view where all images appear in chronological order.
This method works best when you want to quickly remove a large number of photos without sorting them into albums or categories.
- Open the Photos app on your iPhone.
- Go to the Library tab, where all photos and videos appear in a single timeline.
- Tap Select in the top-right corner.
- Drag your finger across multiple photos to select them faster, or tap individual images if you need more control.

- Tap the trash icon and confirm the deletion.
This method works and does not require any extra tools, but it can be time-consuming if your photos are spread across different timelines. It also requires attention – it’s easy to accidentally select photos you want to keep or miss some that should be deleted. Best suited for smaller cleanups or when you know exactly which date range you want to remove.
Method 2: Delete Photos in Bulk from an Album
If the photos you want to delete are already grouped inside an album, this method can be much faster than working from the Library. Instead of scrolling through your entire photo timeline, you can bulk delete photos from an album on iPhone in just a few taps. This works for both iOS-generated albums (such as Favorites or People & Pets) and custom albums you created yourself.
- Open the Photos app and go to the Collections tab.
- Open Albums to see all albums displayed as tiles.
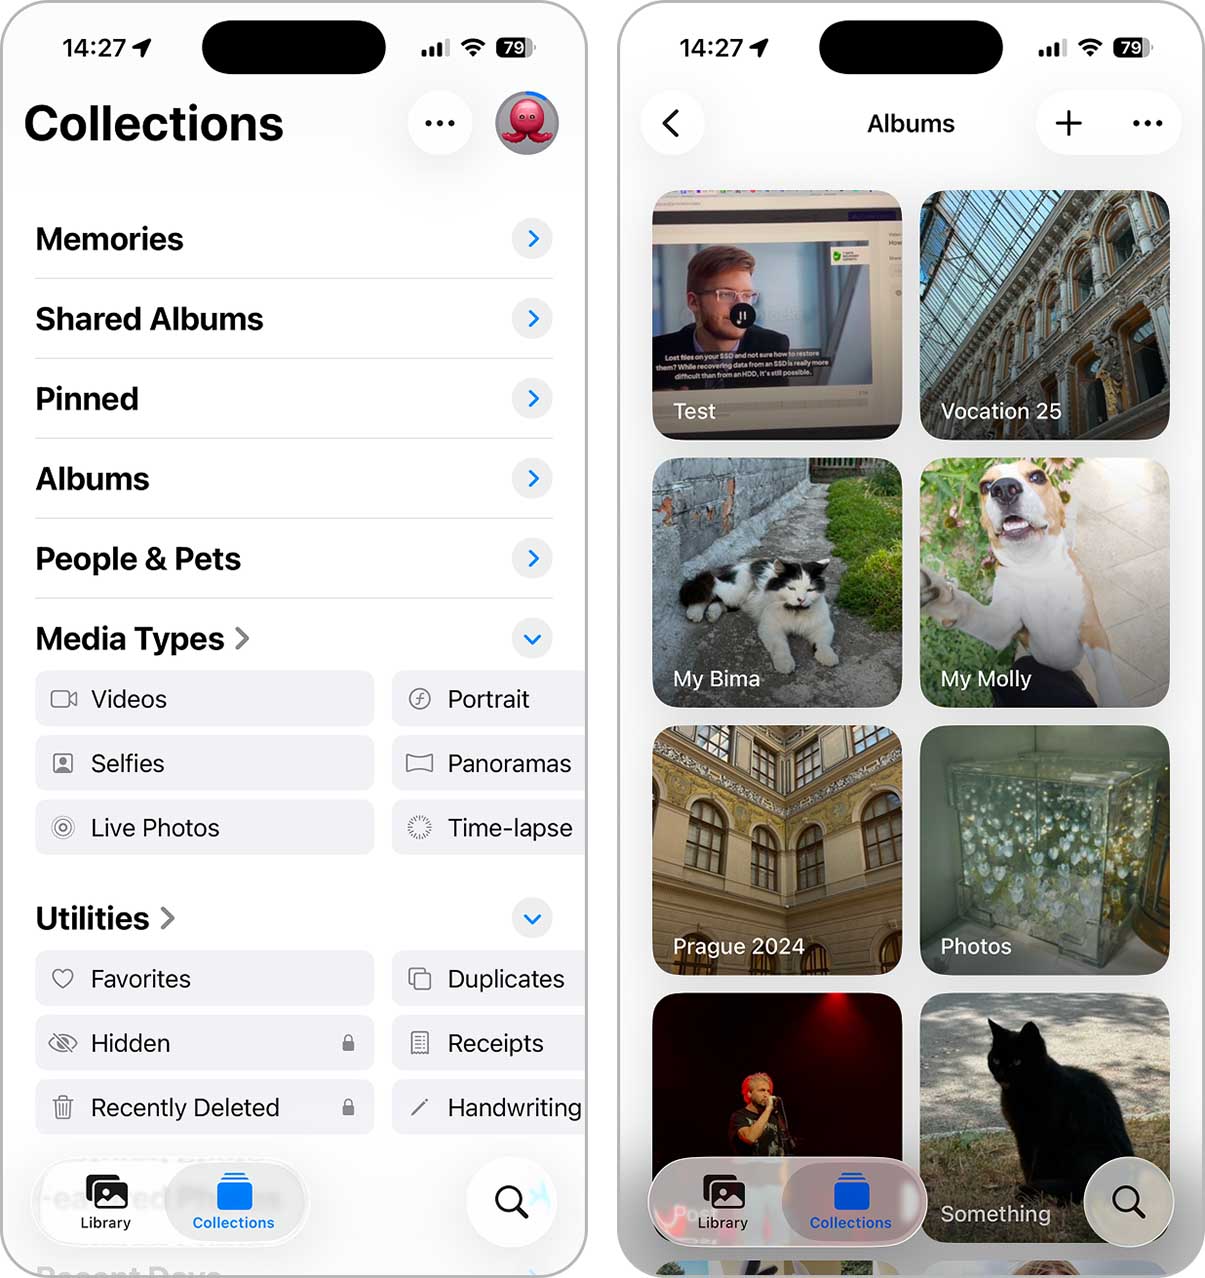
- Tap the album that contains the photos you want to remove.
- Tap Select in the top-right corner, then tap Select All to choose every photo in the album at once.

- Tap the trash can icon and confirm deletion.
A great option for users who focused on organizing their photo library from the start and kept everything neatly sorted into albums and folders. Even if that’s not your case, this method still works very well thanks to iOS media-type albums (Selfies, Portraits, Panoramas, and more), which make bulk deletion fast and controlled.
Method 3: Use Third-Party iPhone Photo Cleaner Apps
If your goal is not just to delete photos you no longer need, but to delete multiple photos at once on iPhone to free up storage faster, which is also often discussed on our forum, third-party iPhone cleaners can be a better option. These tools focus on speed and automation and offer features that are not available in the Photos app.
Photo cleaner apps can detect duplicate and similar-looking images, show file sizes, group content by type, and help you remove unnecessary photos in bulk. This often makes the cleanup process both faster and more precise.
The App Store offers hundreds of photo cleaners, but many of them rely on paywalls or limit basic actions behind subscriptions. For this reason, we recommend Clever Cleaner, a fully free iPhone cleanup app with no hidden restrictions. It allows you to bulk delete duplicates, similar-looking photos, screenshots, and Live Photos. You can choose the tool that fits your situation, but below we show an example using the Similars feature, which works well for duplicates and near-duplicates.
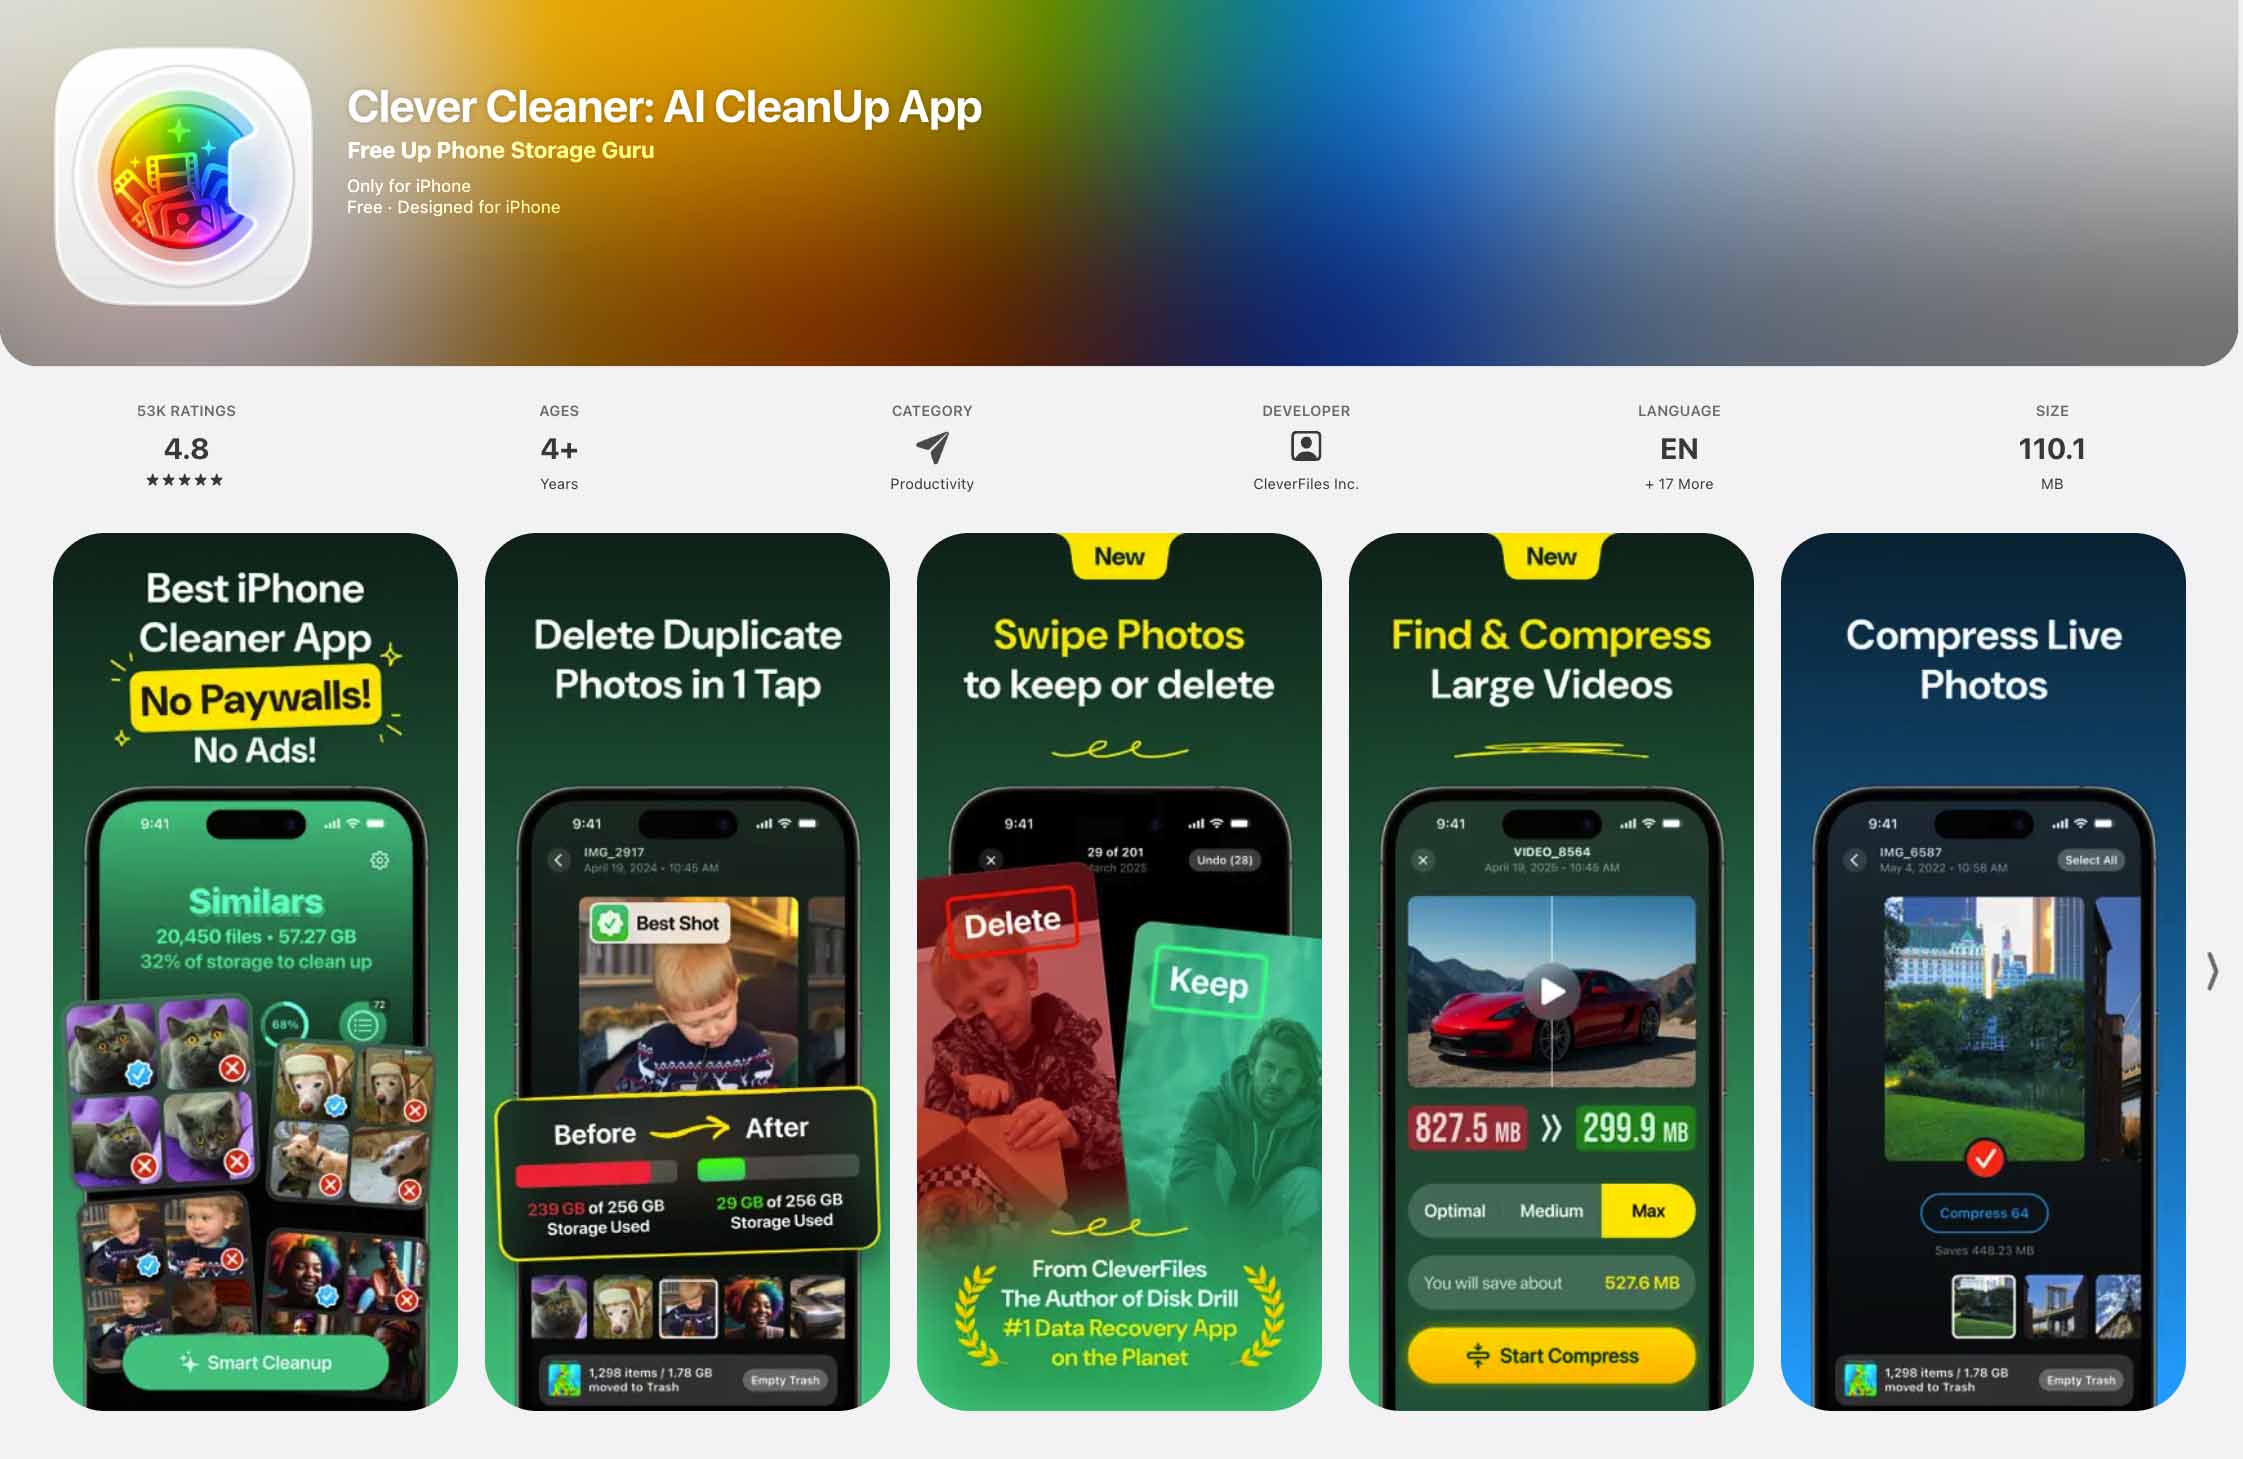
- Download Clever Cleaner from the App Store or use the QR code on their official site.
- Open the app and allow full access to your photo library.
- The app automatically opens the Similars section, where it groups duplicate and similar-looking photos.
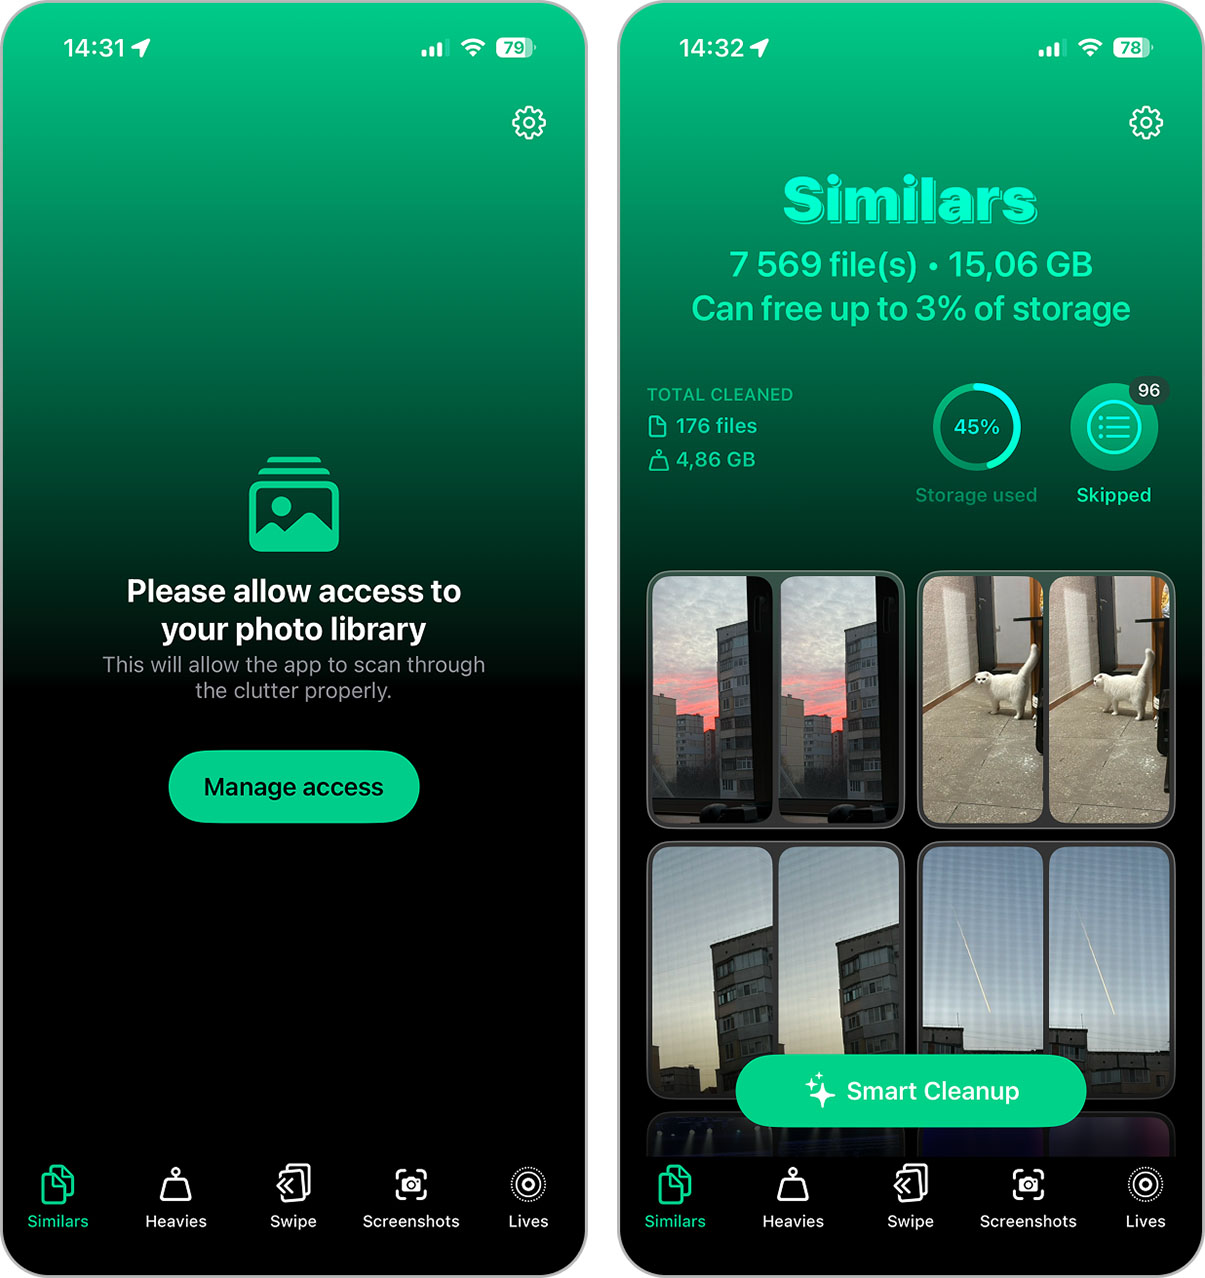
- You will see photo groups with duplicates and similar-looking shots. Open any group to review it. In each group, Clever Cleaner marks a Best Shot. If you prefer another photo, tap the one you want to keep and switch the selection.
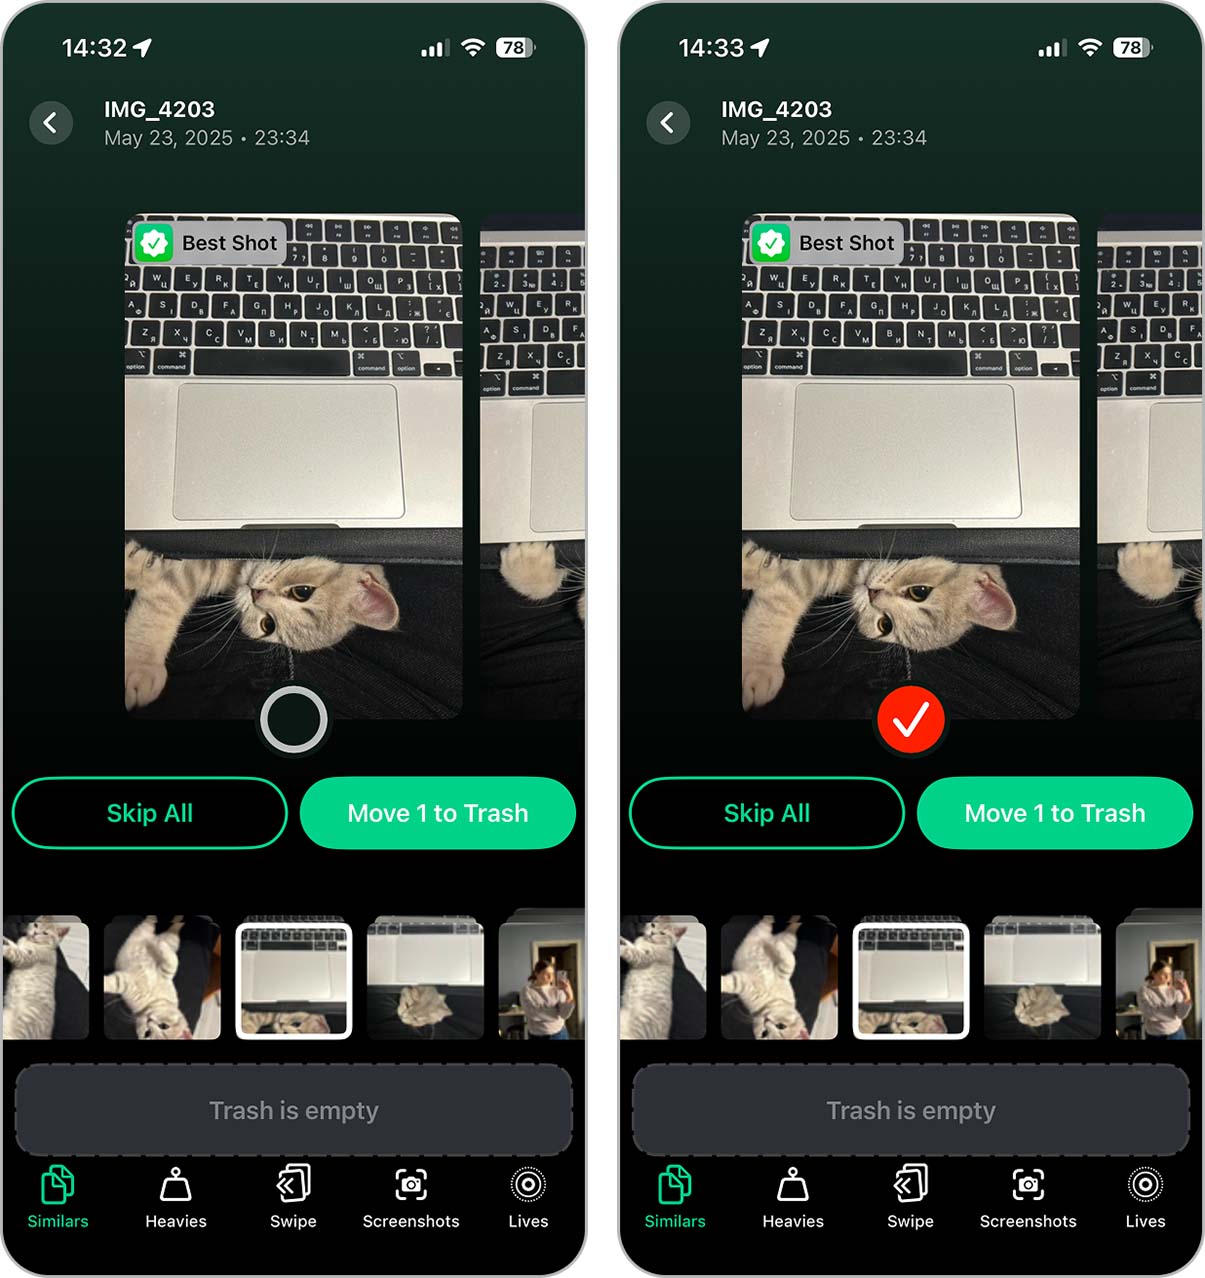
- For a quick cleanup, tap Smart Cleanup to use the app’s suggested deletions for all groups.
- In the preview screen, review the items. If something should stay, tap Restore for that photo.
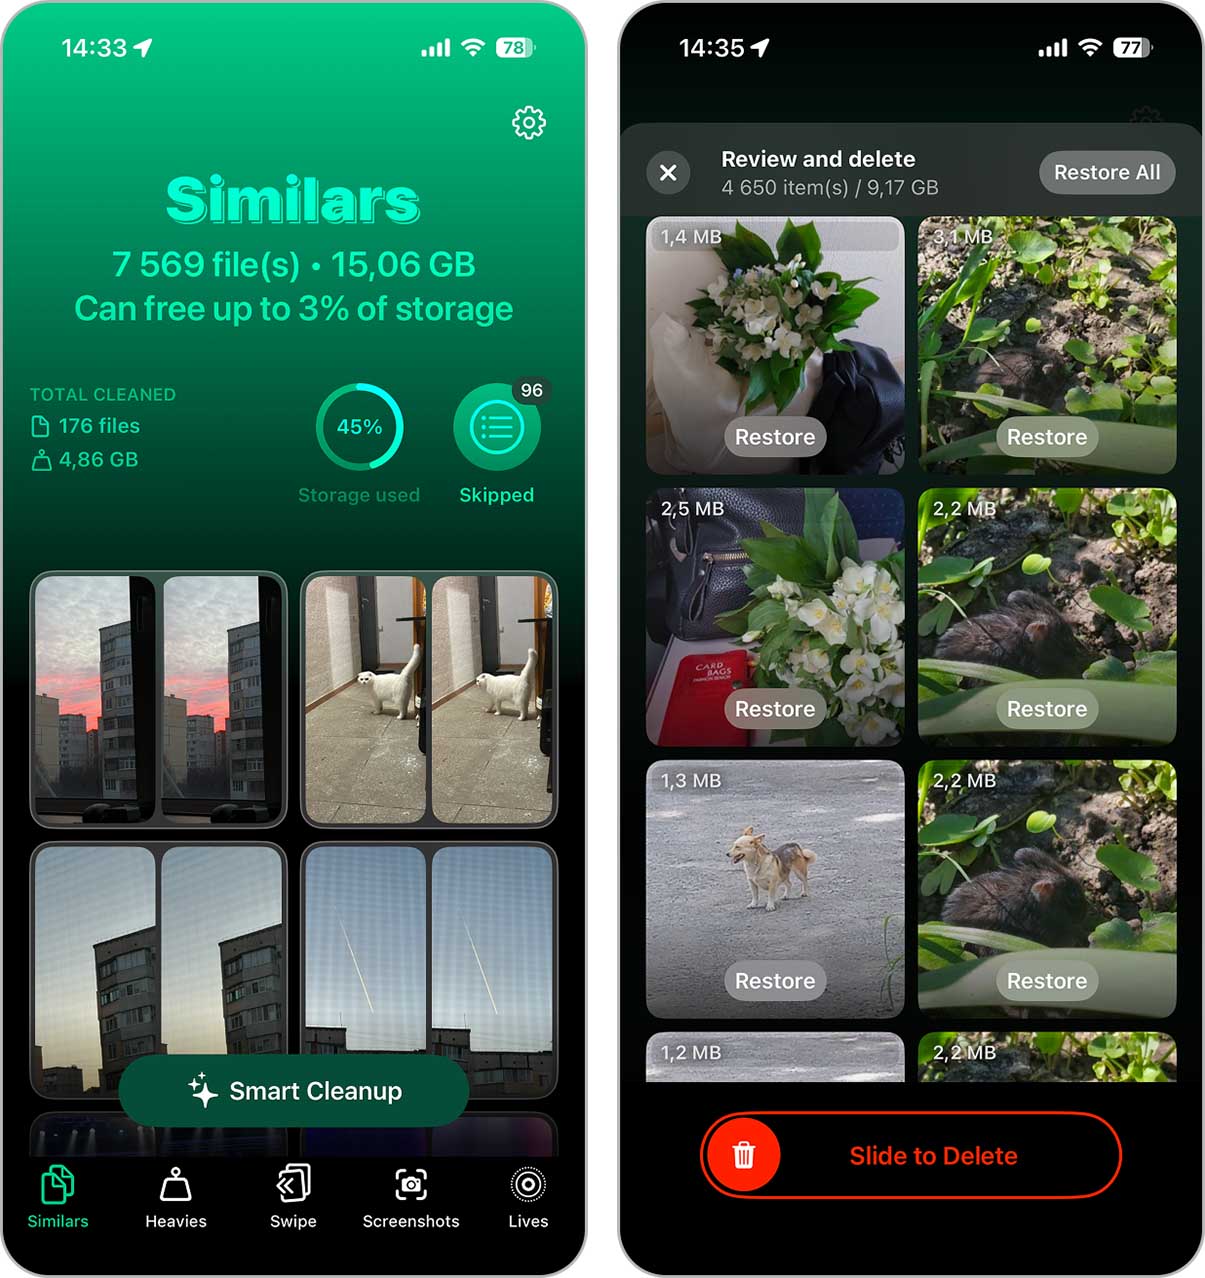
- Confirm deletion by using the Slide to Delete control, then tap Confirm.

We also have a full review of Clever Cleaner, where we explain why the app is free and take a closer look at all its tools. While photo cleanup is one of the most common topics in our internal stats and forum discussions, and a lot of users start with duplicate and similar photos, since they usually take up space without adding much value. However, gallery cleanup does not stop there and Clever Cleaner includes several other modules that help review and remove unnecessary content in different ways, depending on how your photo library is organized:
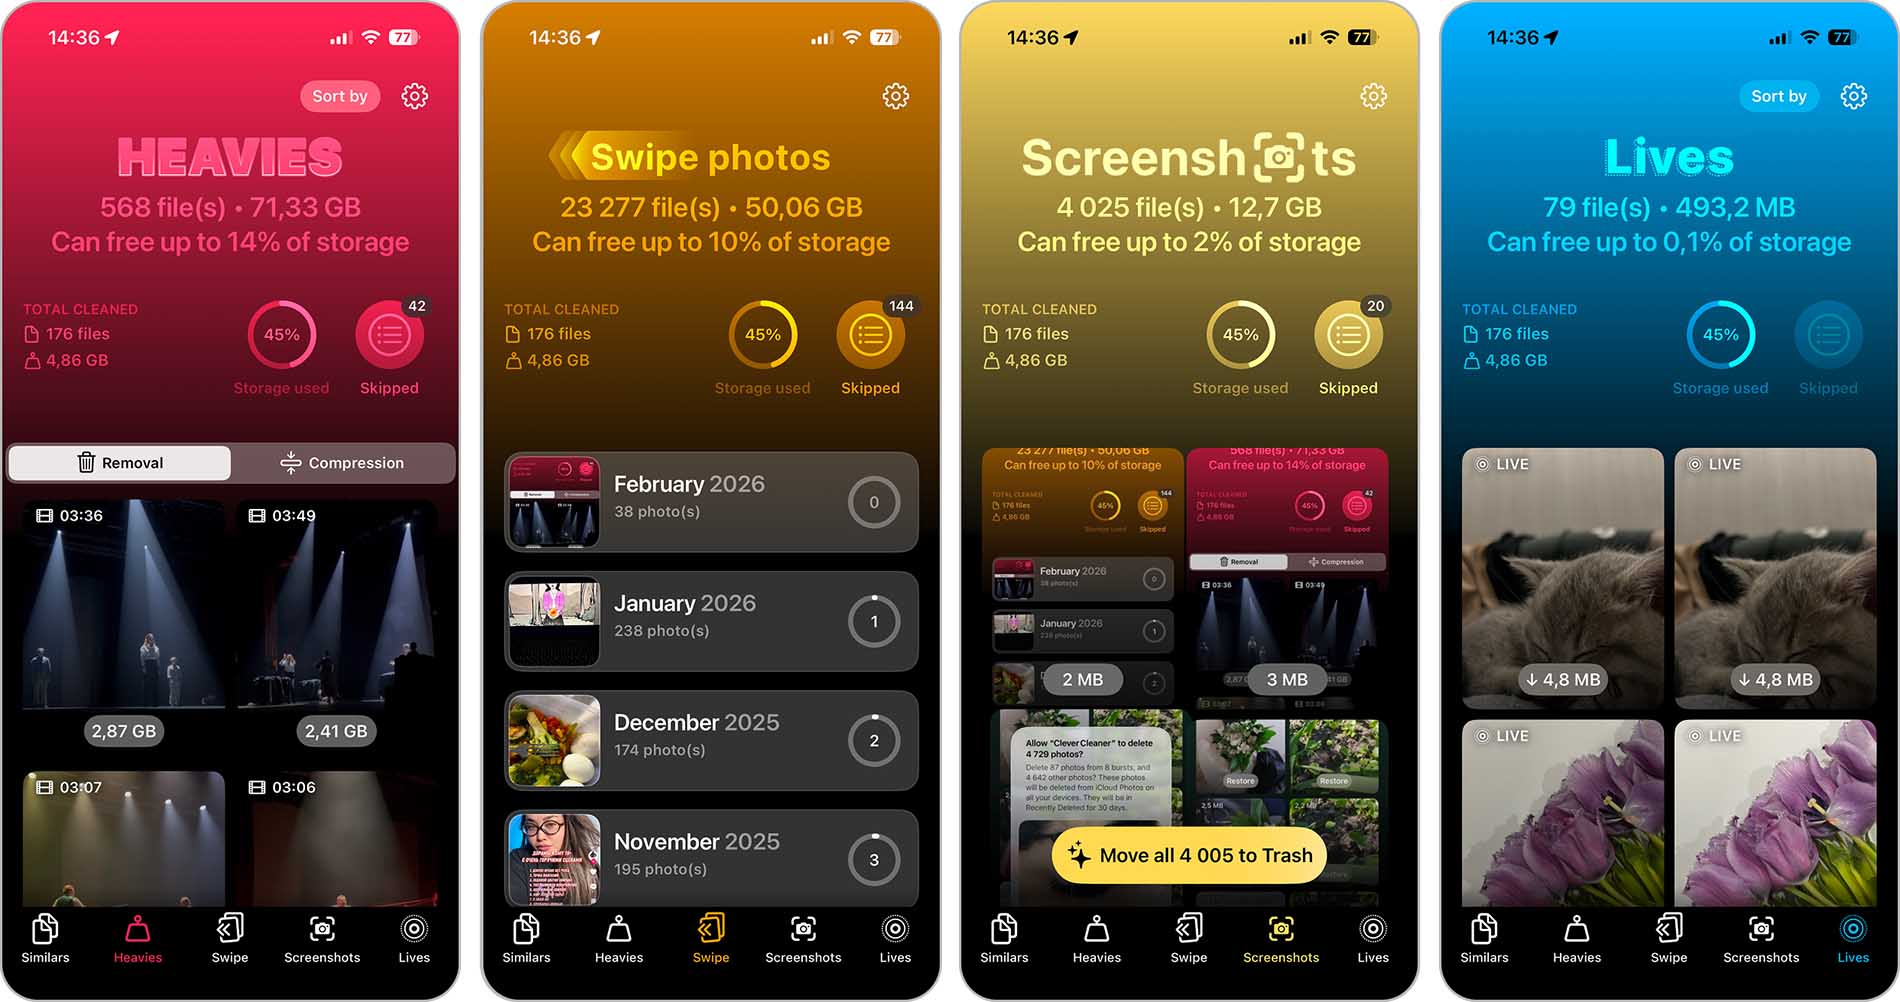
- Heavies finds the largest videos in your library and lets you review them quickly. This section also includes a video compression tool.
- Swipe mode groups photos by month and lets you swipe left to delete or right to keep, which speeds up large cleanups.
- Screenshots collects all screenshots in one place so you can delete them in bulk without searching manually.
- Livesconverts Live Photos into still images, with the option to remove or keep the original Live version.
This option requires almost no manual control. When using the Similars feature, you can remove large batches of photos without worrying about losing something important, since at least one copy is always kept. It’s also easy to turn this approach into a regular cleanup routine rather than a one-time fix.
Method 4: Delete Photos via iCloud Photo Library
Using iCloud Photo Library allows you to manage your photo collection through iCloud and delete photos across all synced devices at once. When you remove photos this way, they disappear from your iPhone, iPad, and any other device connected to the same Apple ID.
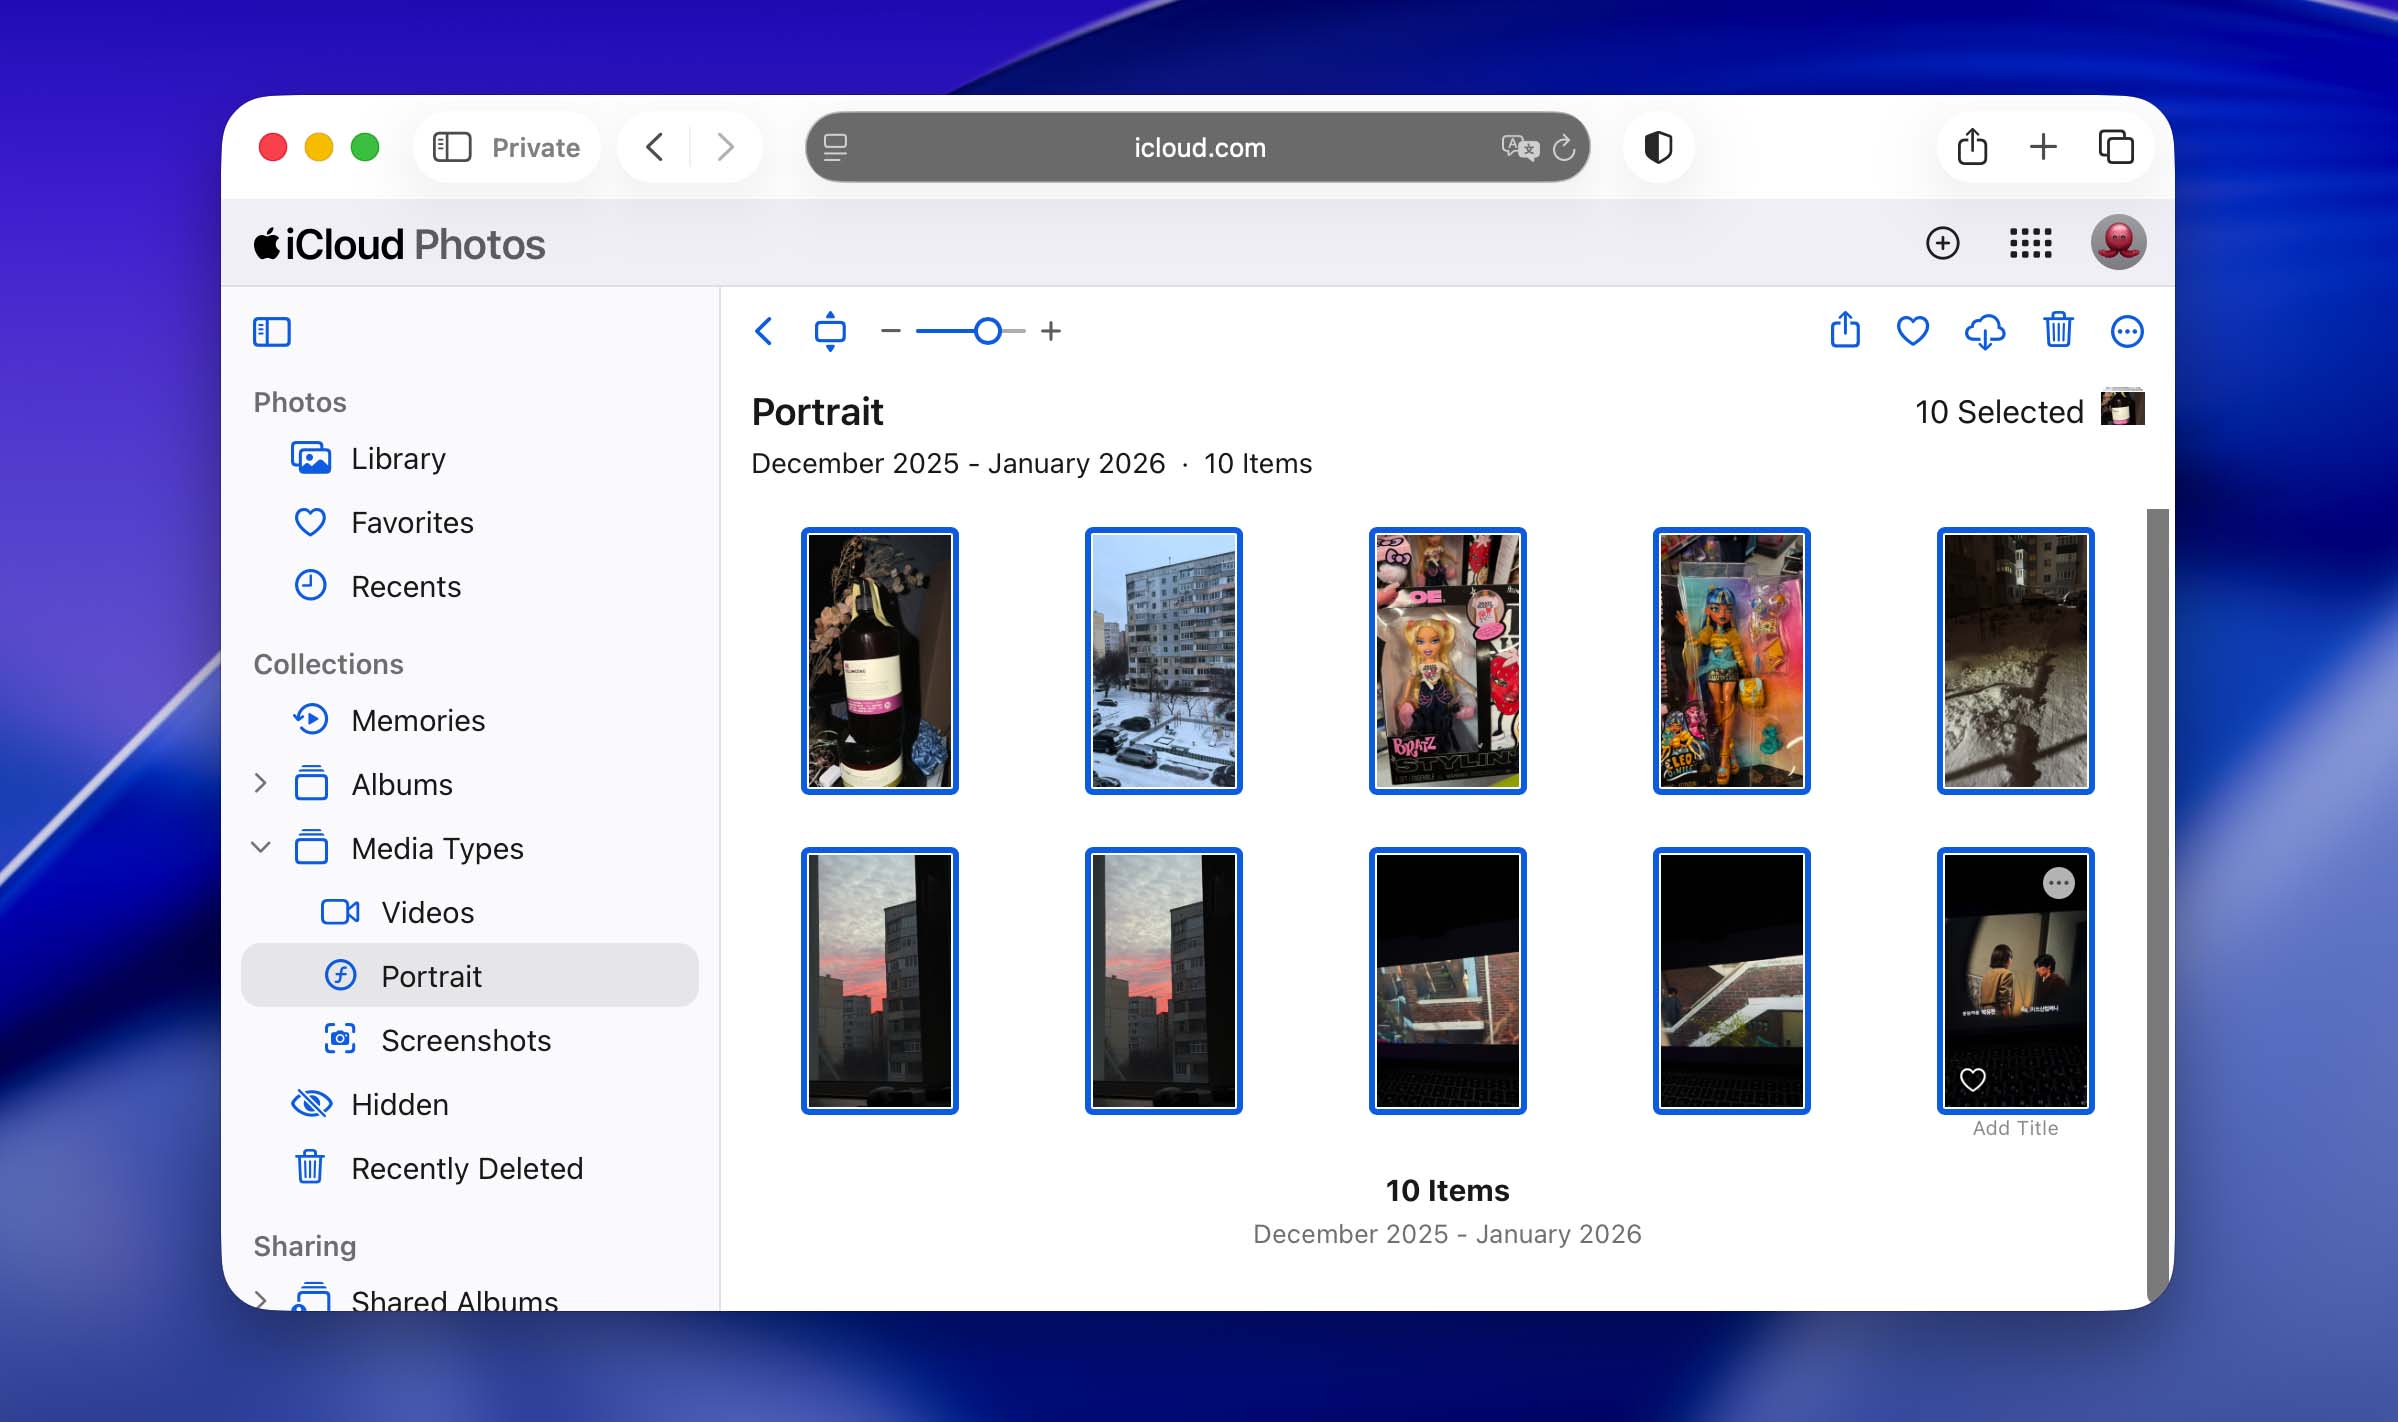
We do not focus on this method directly on the iPhone because the iCloud web interface is much easier to use on a computer. A larger screen, mouse or trackpad support, and proper multi-selection make bulk photo deletion faster and more precise compared to working from a small touchscreen.
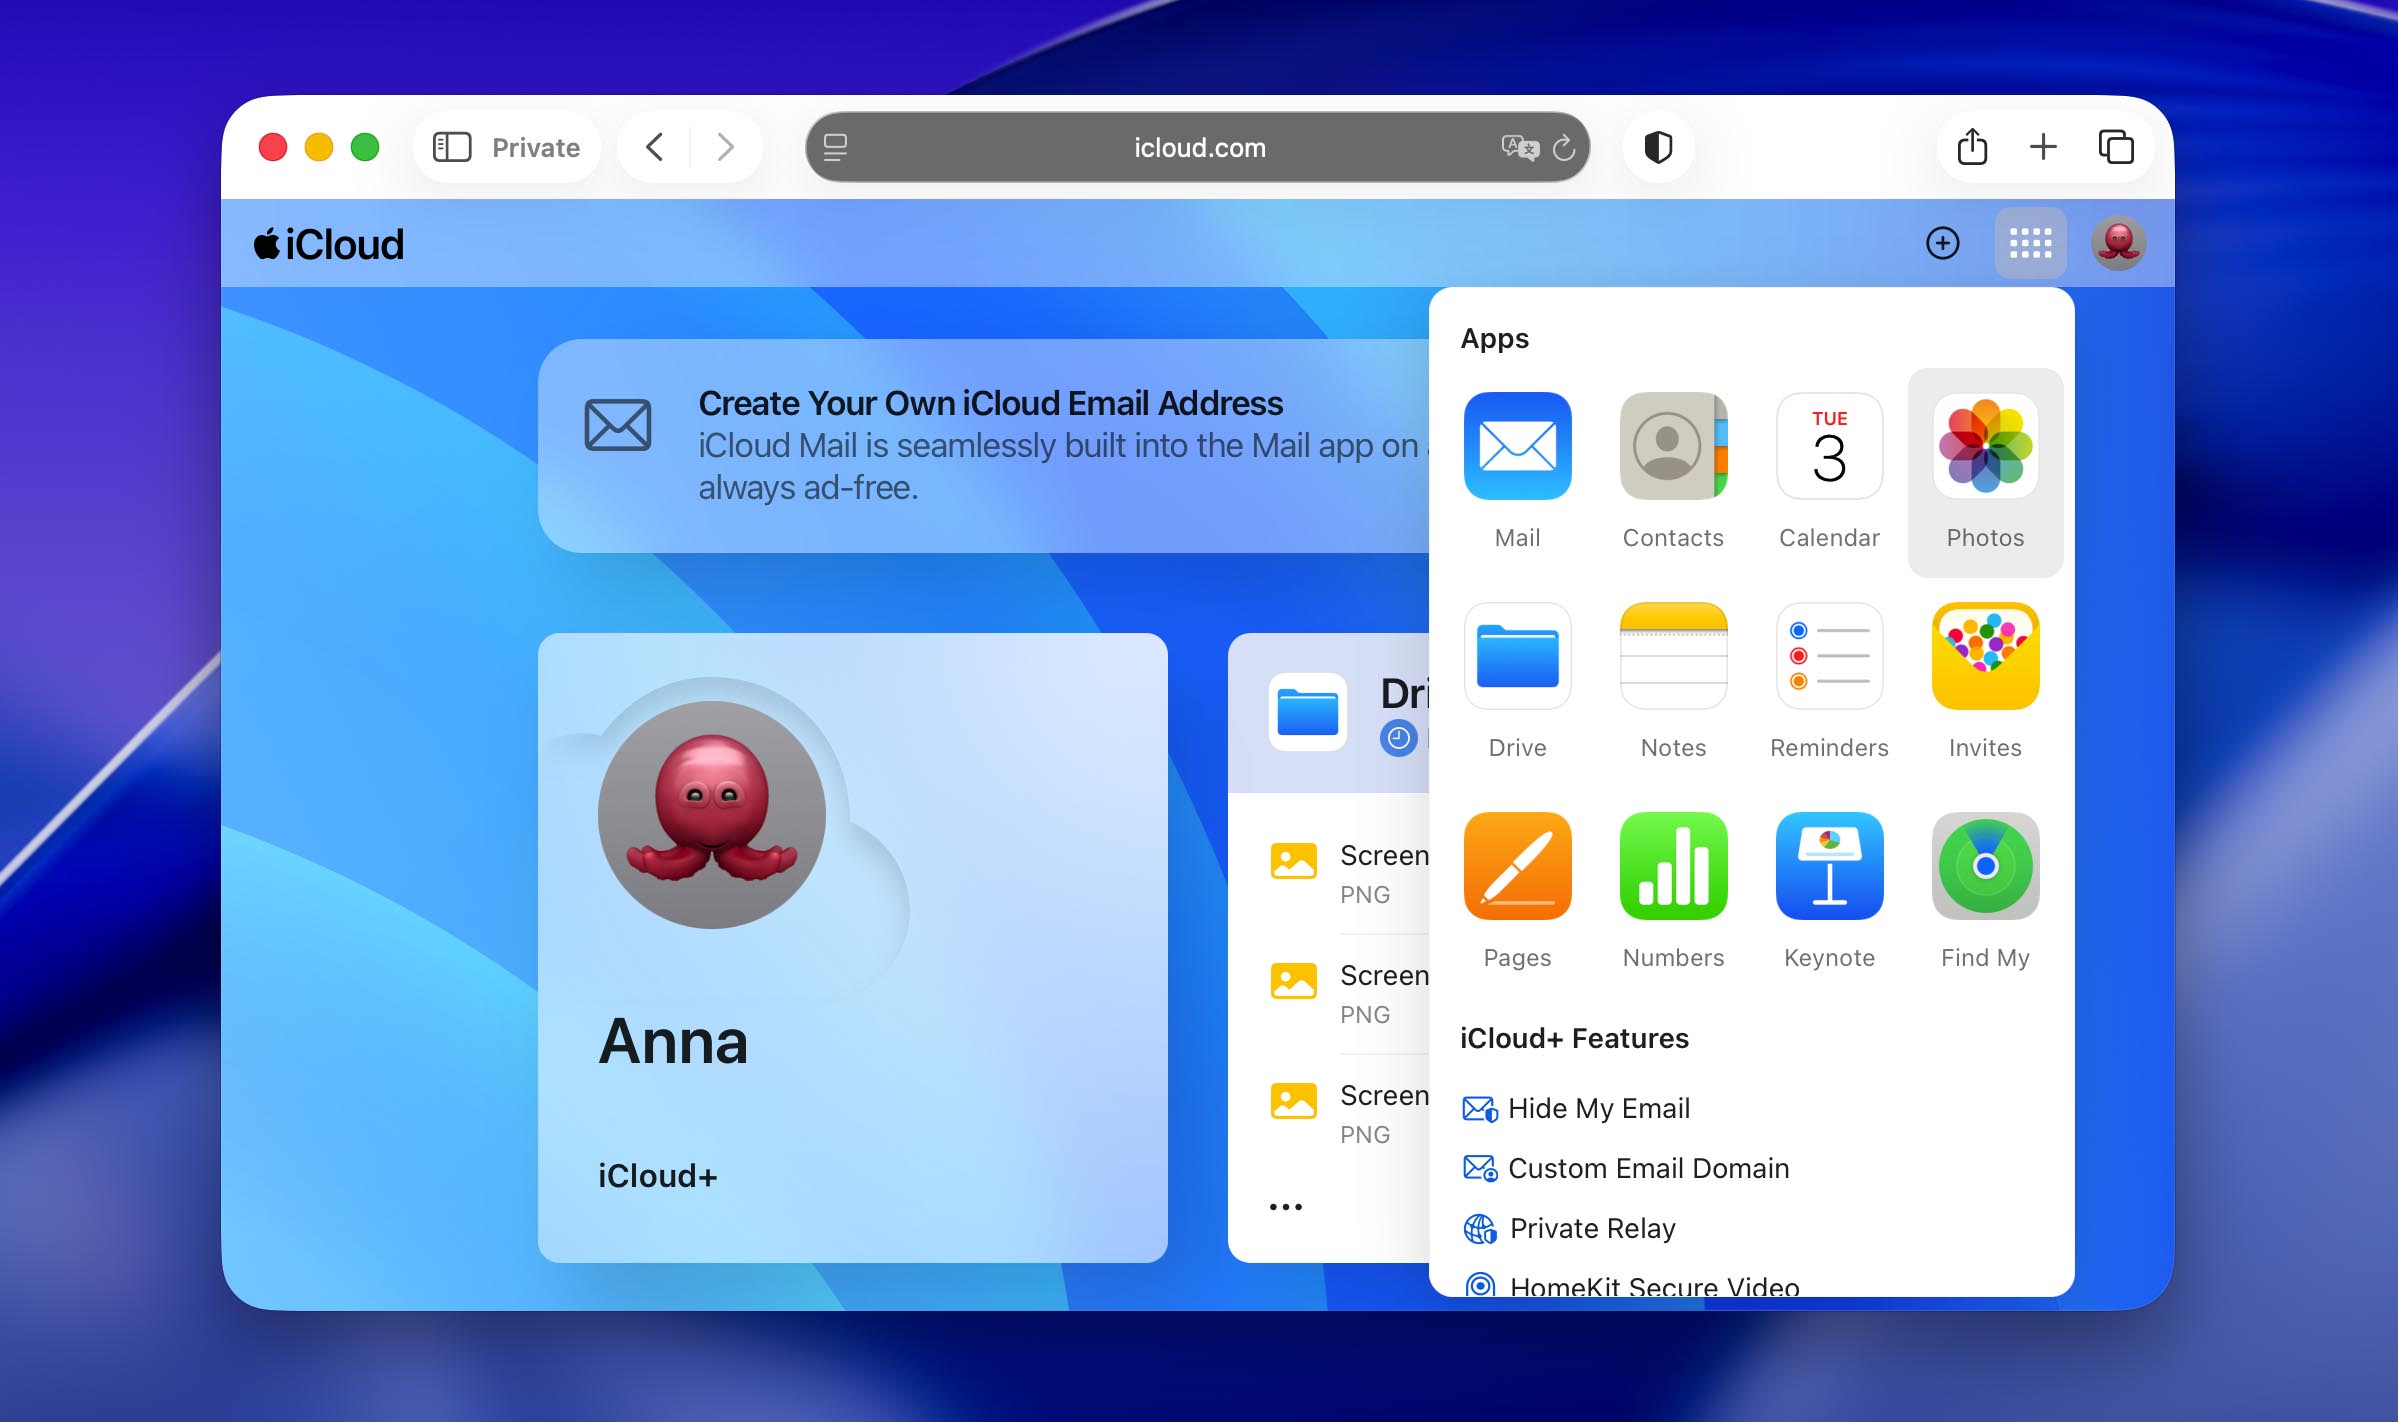
- Open a web browser on your computer and go to iCloud.com.
- Sign in with the Apple ID connected to your iPhone.

- Click Photos to open your iCloud photo library.
- Hold Shift (to select a range) or Command/Ctrl (to select individual photos).
- Click the trash icon in the top-right corner and confirm deletion.
Once the deletion syncs, the photos will also be removed from your iPhone and other synced devices. Depending on your internet connection and library size, this may take a short amount of time. Just in case, sync-related behavior can be confusing, so you may want to check the guide on how to delete synced photos and other media from an iPhone to avoid deleted photos reappearing later.
Convenient if you use iCloud sync. It allows fast bulk deletion on a computer, but requires keeping an eye on your internet connection to avoid sync issues that could cause deleted photos to reappear on the iPhone. At the same time, this method is completely useless if you don’t use iCloud at all.
Method 5: Connect iPhone to a Computer for Photo Deletion
Earlier, we mentioned that working from a computer often gives you more control thanks to a larger screen and easier selection. If you don’t use iCloud, it may seem that the only way to delete multiple pictures on an iPhone is directly on the device itself. In reality, that’s not the case.
You can also manage and delete photos by simply connecting your iPhone to a computer with a cable.
On a Mac, iPhone photos integrate directly with Apple’s built-in tools. This makes it easy to review images, import them to your Mac, and delete them from the iPhone during the same process.
- Connect your iPhone to the Mac using a cable.
- Unlock the iPhone and tap Trust if prompted.
- Open the Photos app on your Mac and in the sidebar, under Devices, click iPhone.
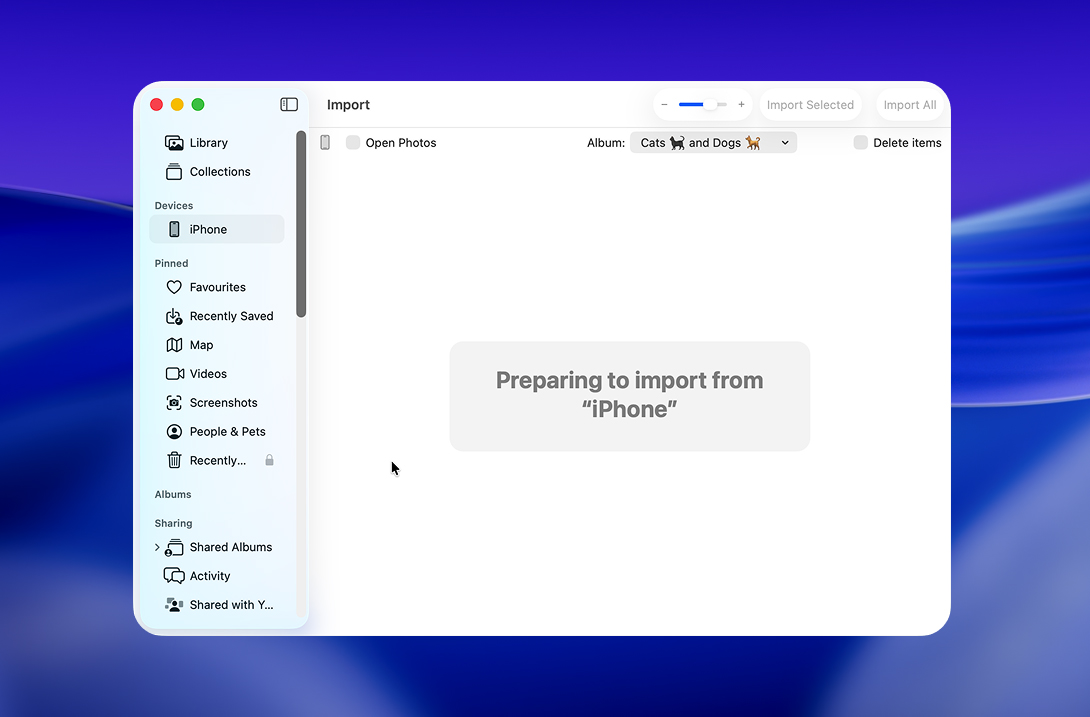
- Select the photos you want to keep on your Mac. Use Shift to select a range, or if you want everything, click Import All New Items (or Import All if available).
- Turn on Delete items after import (this option appears on the import screen).
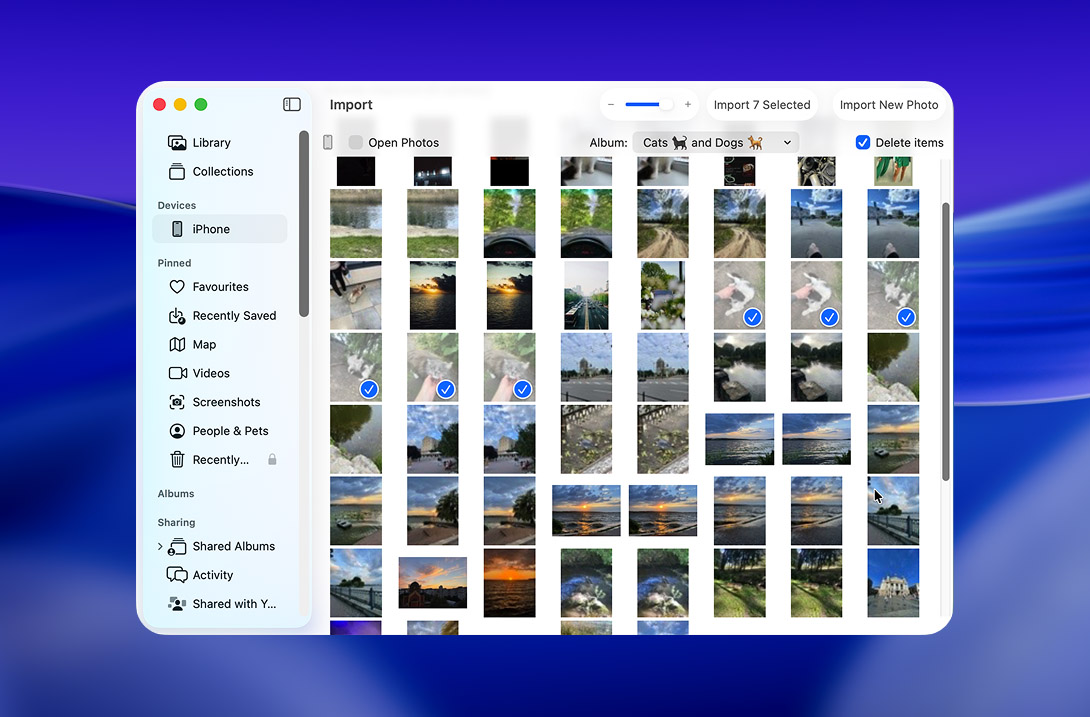
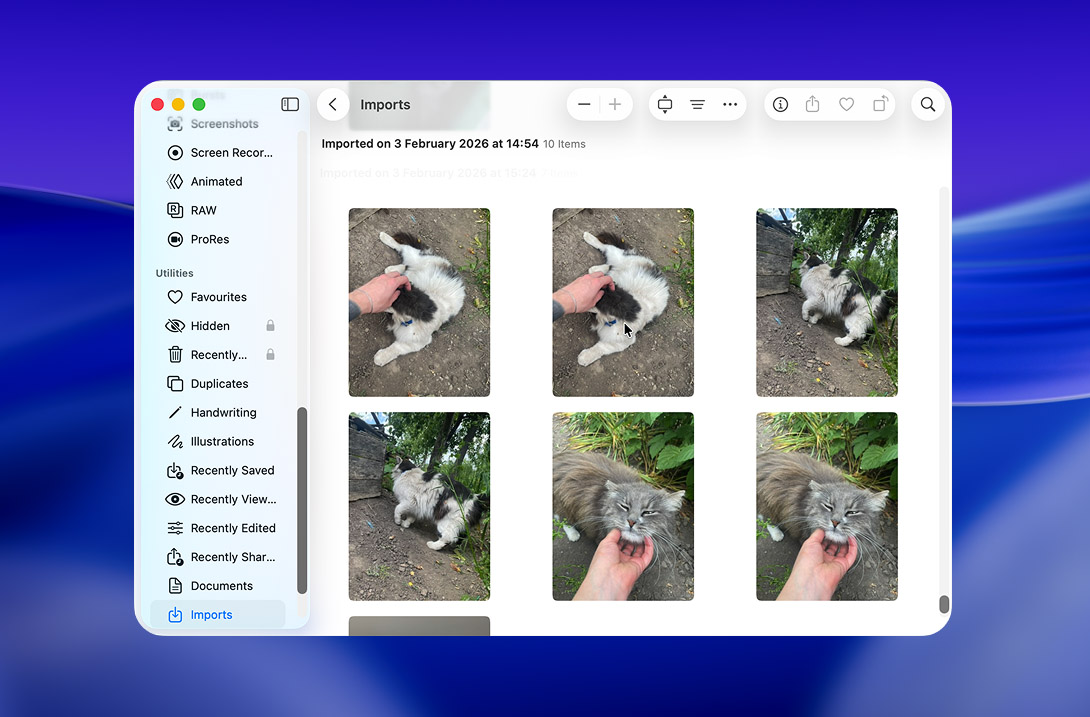
- Click Import Selected (or Import All New Items) and wait for the process to finish. After import, Photos removes the imported items from the iPhone automatically (when the delete-after-import option is enabled).
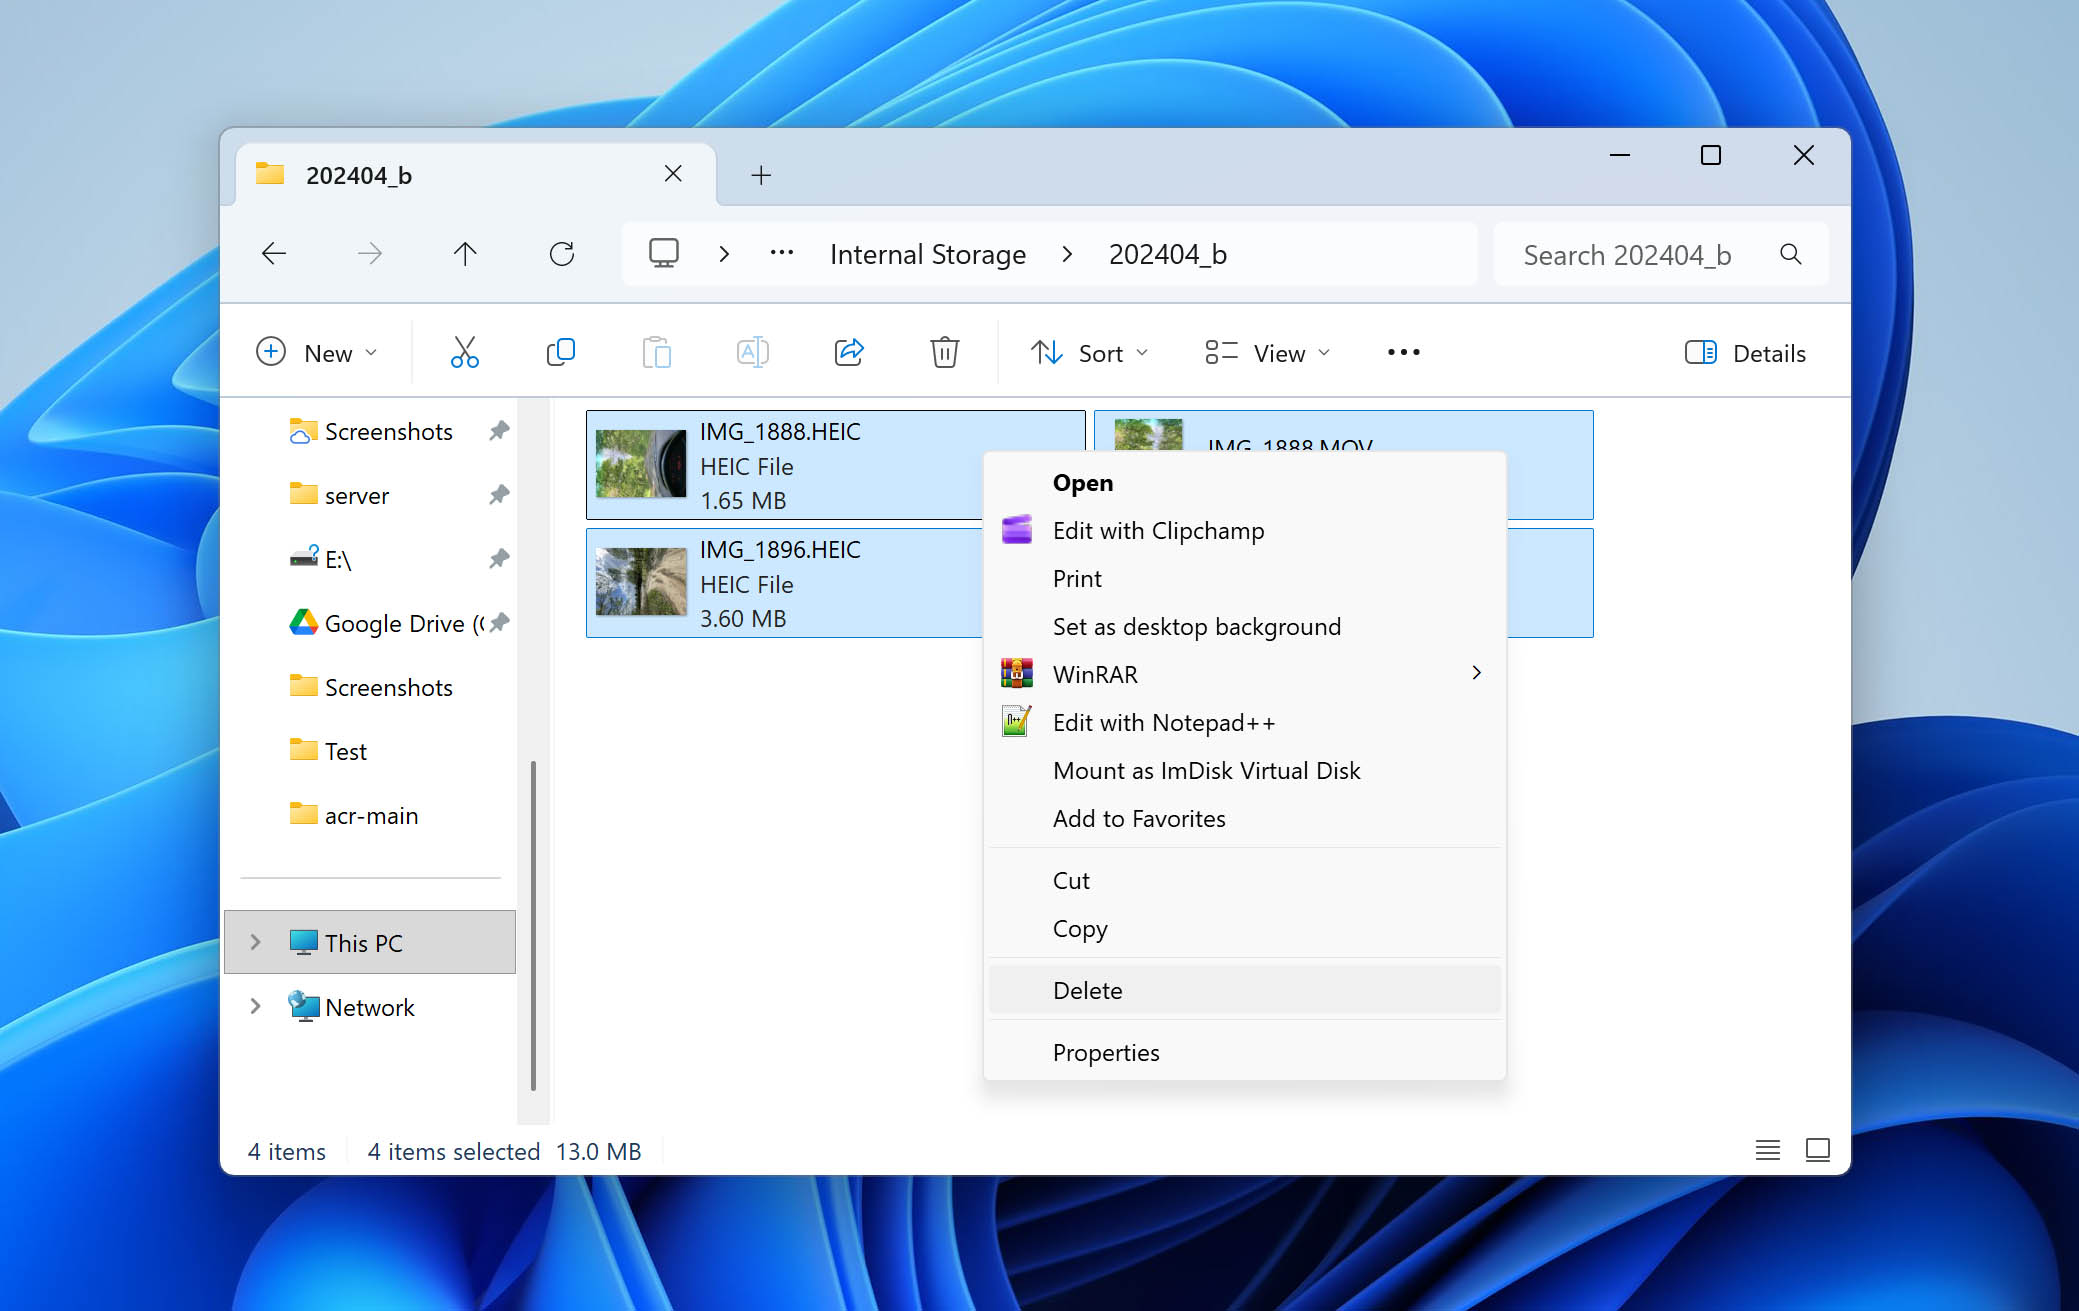
On Windows, the iPhone appears as a connected storage device. This allows you to access photos directly through the file system and delete them manually.
- Connect your iPhone to the computer using a USB cable.
- Unlock the iPhone and tap Trust This Computer if prompted.
- Open This PC and go to Apple iPhone, then Internal Storage.

- Open the folders to view your photos and videos.
- Select multiple files and press Delete.
Not the most convenient option for us, since it requires finding a cable and setting aside extra time. That said, it works well for users who prefer working on a larger screen than an iPhone. It’s also a solid choice if you already use a computer for post-processing photos or sharing content.
How to Delete Multiple Pictures on iPhone Stored in the Files App
Besides the Photos app, images can also be stored in the Files app on iPhone. This usually happens when you download photos through a browser or save images from other apps and choose the Files app as the destination, or store images in iCloud Drive. Because these images do not appear in the Photos library, they require a different approach, so below are several methods that help you bulk delete photos from your iPhone.
Method 1: Delete Photos by Selecting Them on iPhone
If your images are stored inside the Files app, the most straightforward way is to delete them manually by selecting multiple files at once. This method works well when photos are scattered across folders or when you want to keep full control over what gets removed.
- Open the Files app on your iPhone.
- Go to Browse and open the location where your images are stored (for example, On My iPhone or iCloud Drive).
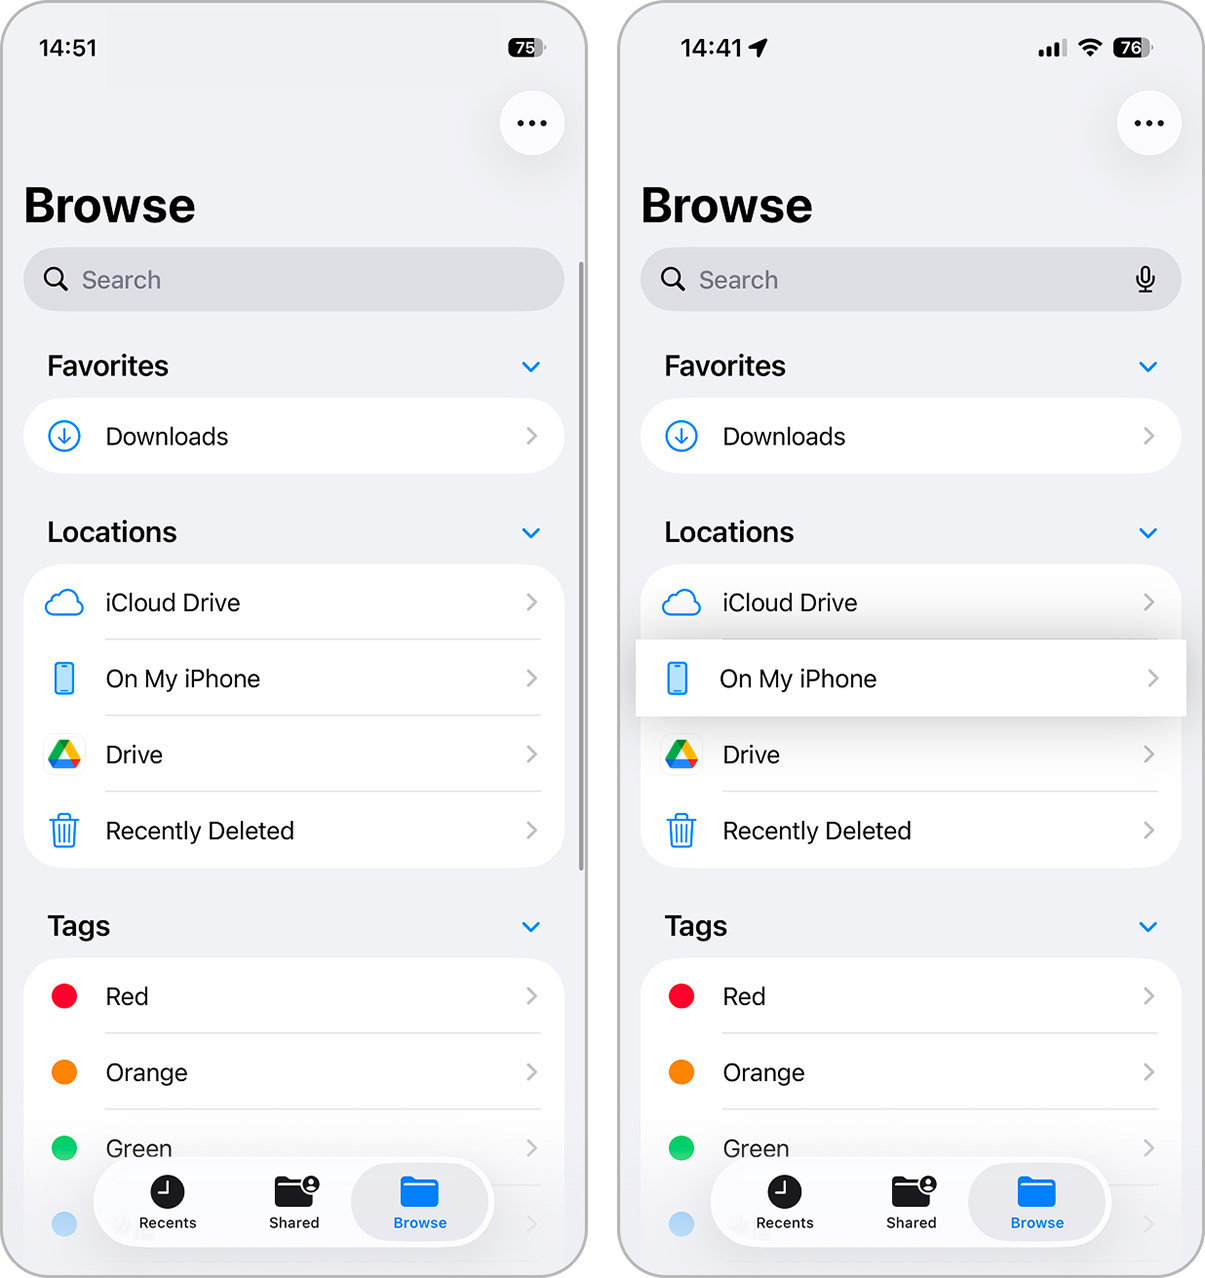
- Navigate to the folder that contains your photos.
- Tap Select in the top-right corner, select multiple images by tapping them one by one, or simply move your finger if they are all located nearby.
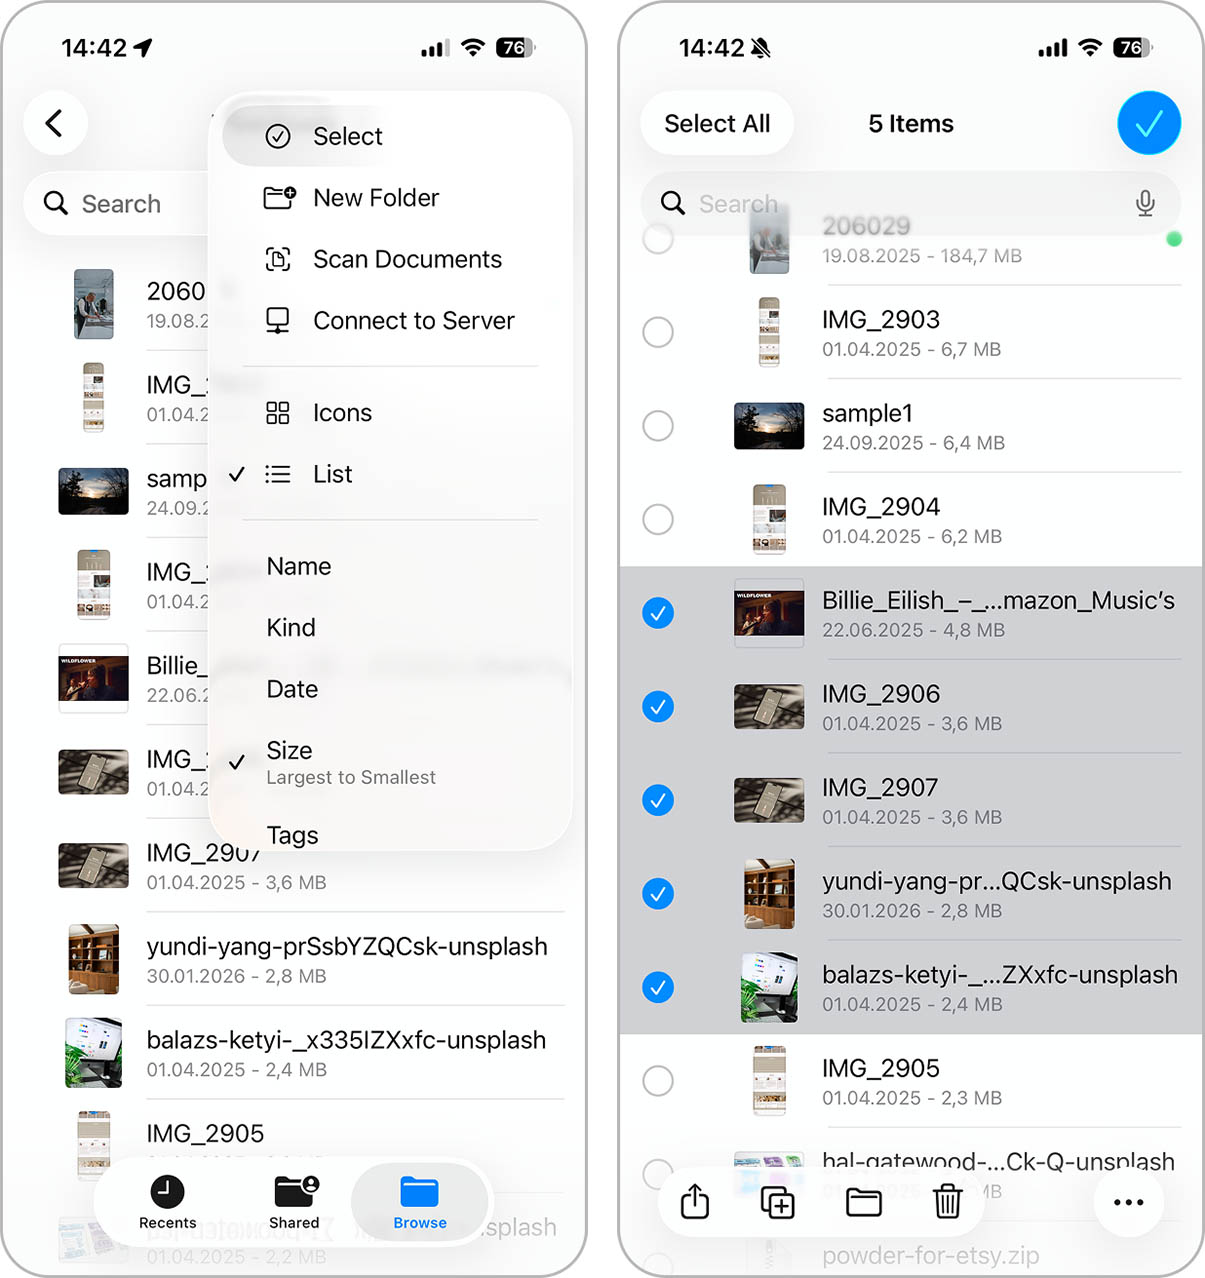
- Tap the trash icon and confirm deletion. This removes the selected image files from the Files app in one action.
If you usually keep things organized and store images in dedicated folders, you can remove everything at once by deleting the entire folder (just tap and hold the folder, then tap Delete). This is often faster than selecting files individually.
The Files app also supports file tags. If you used tags to organize your images, you can open a specific tag and delete all photos associated with it in bulk, which is another quick way to clean up multiple pictures at once.
A solid option if you often use the Files app as a storage location for images. This area is definitely worth checking for bulk image deletion, that said, it’s a bit unfortunate that this part of iOS is largely closed to cleaner apps, which limits automation. As a result, manual cleanup is still the only real option here.
Method 2: Bulk Delete Images from iCloud Drive Using a Computer
Just like photos stored in iCloud Photos can be deleted in bulk from a computer, images saved in the Files app and stored in iCloud Drive can also be removed the same way. Using iCloud.com allows you to select and delete multiple files at once, which is much faster than doing it directly on the iPhone.
This method works on both macOS and Windows and is especially useful when most of your Files app content is synced with iCloud.
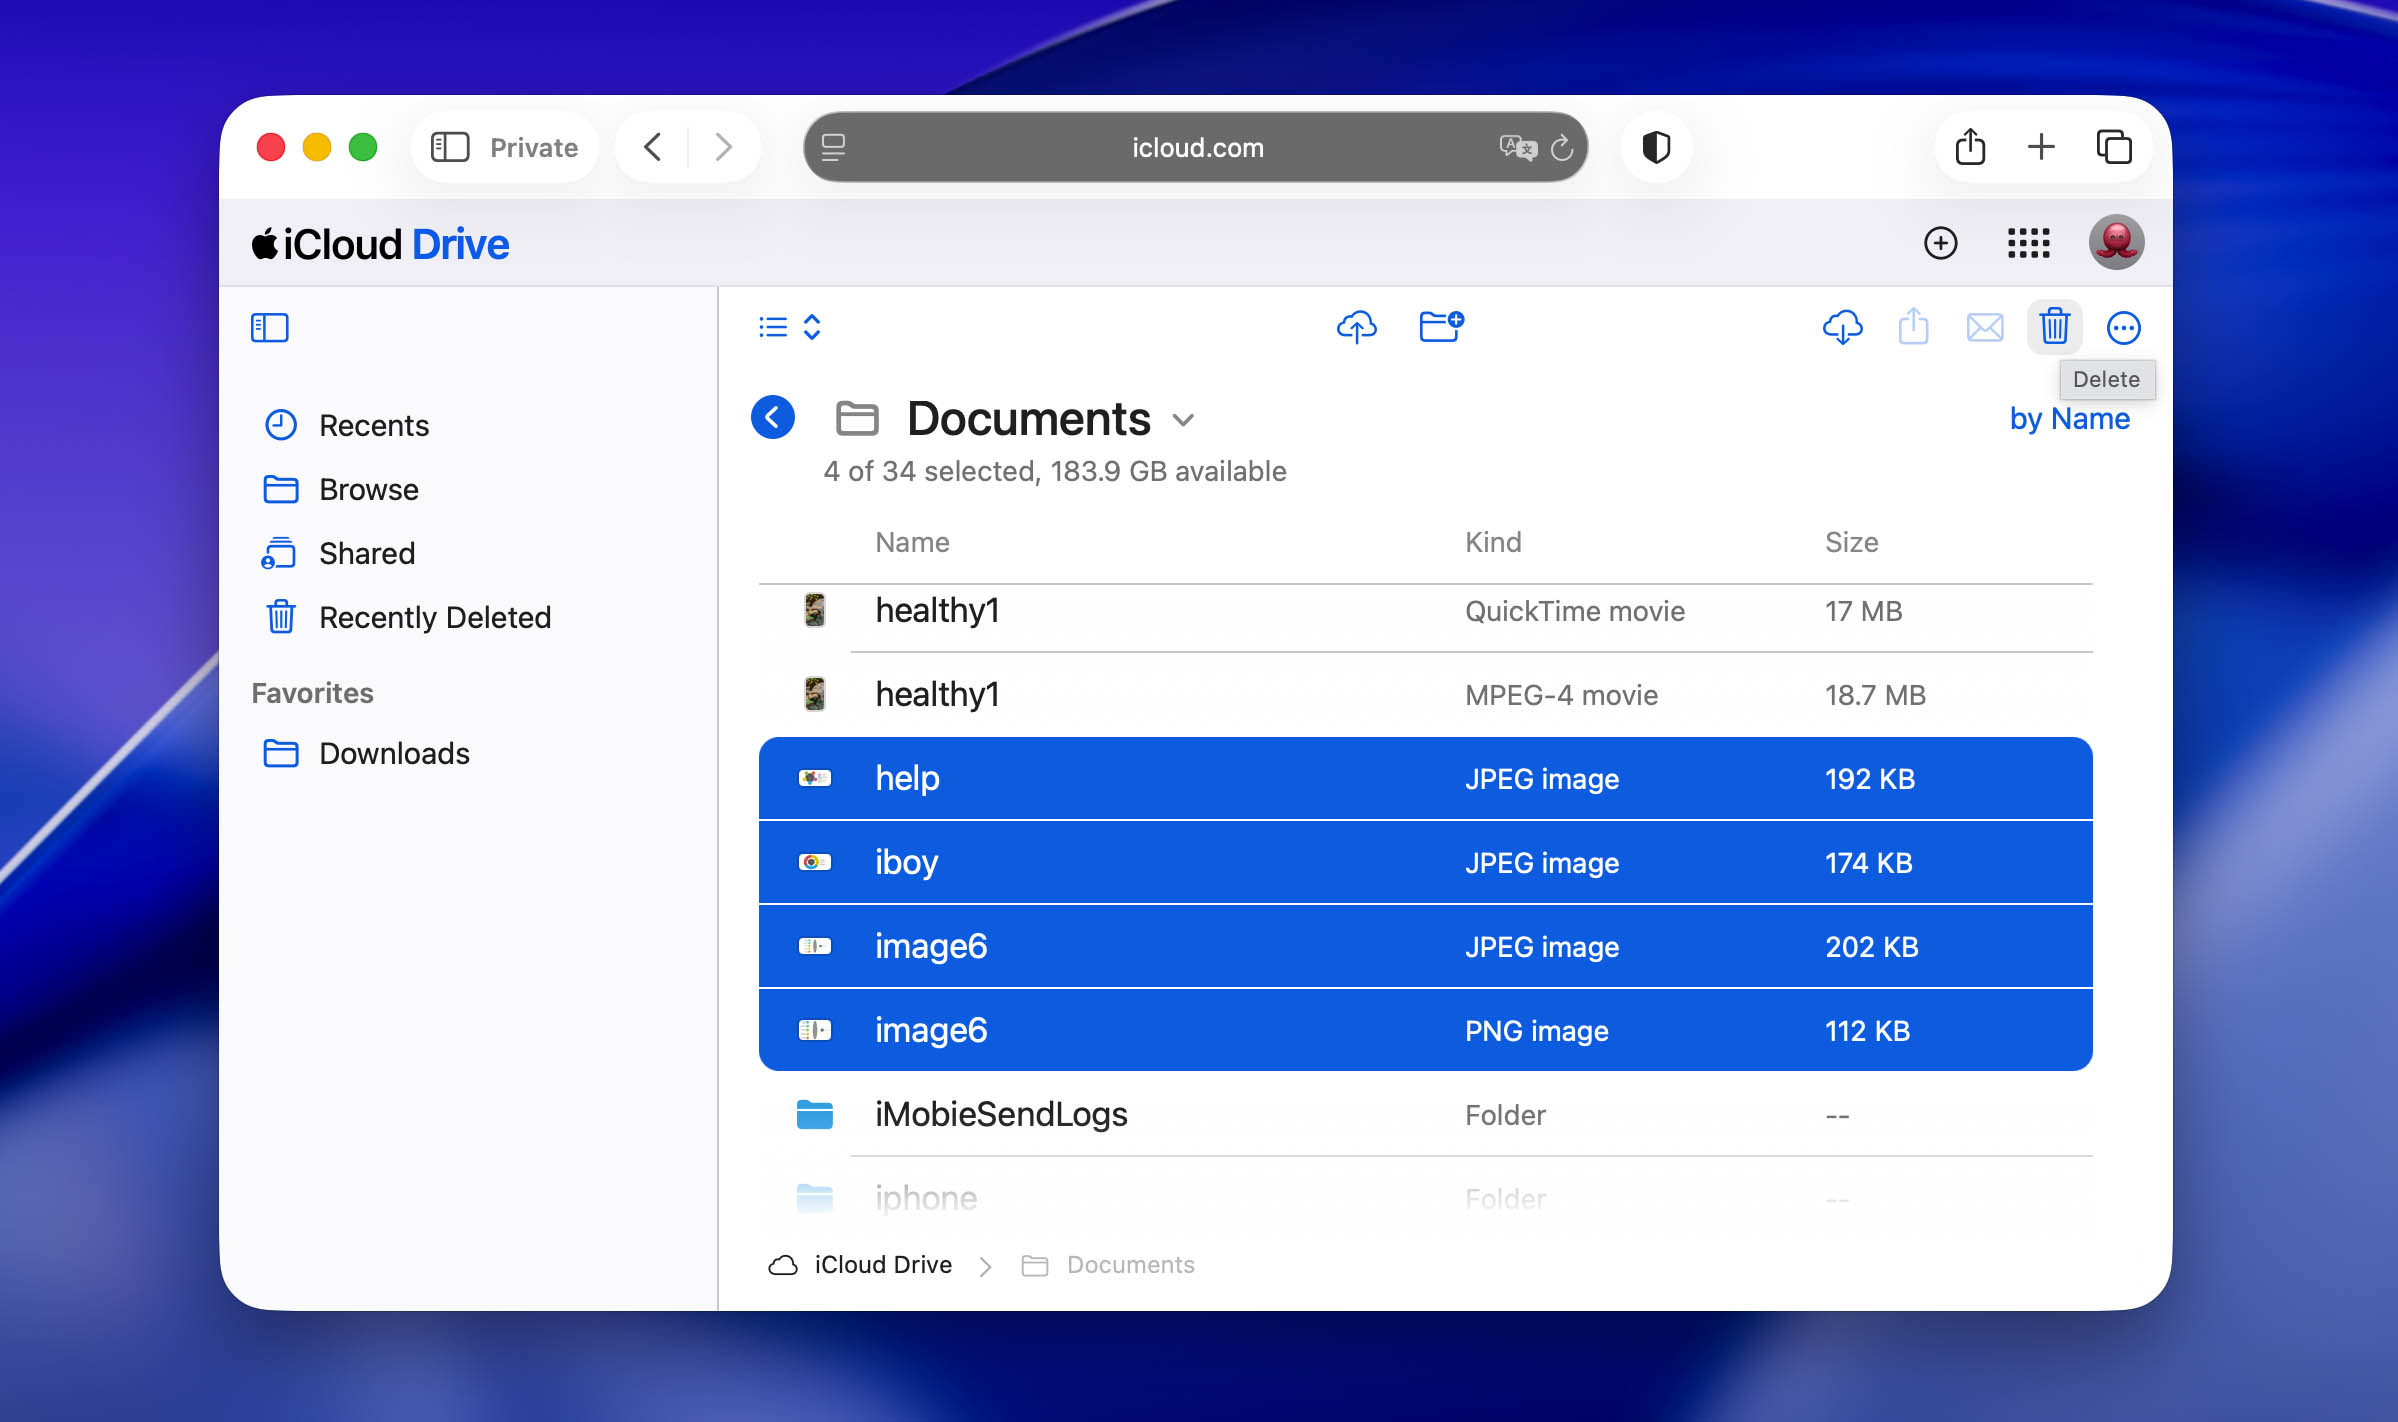
- Open a browser on your computer and go to iCloud.com.
- Sign in with the Apple ID linked to your iPhone and open iCloud Drive.
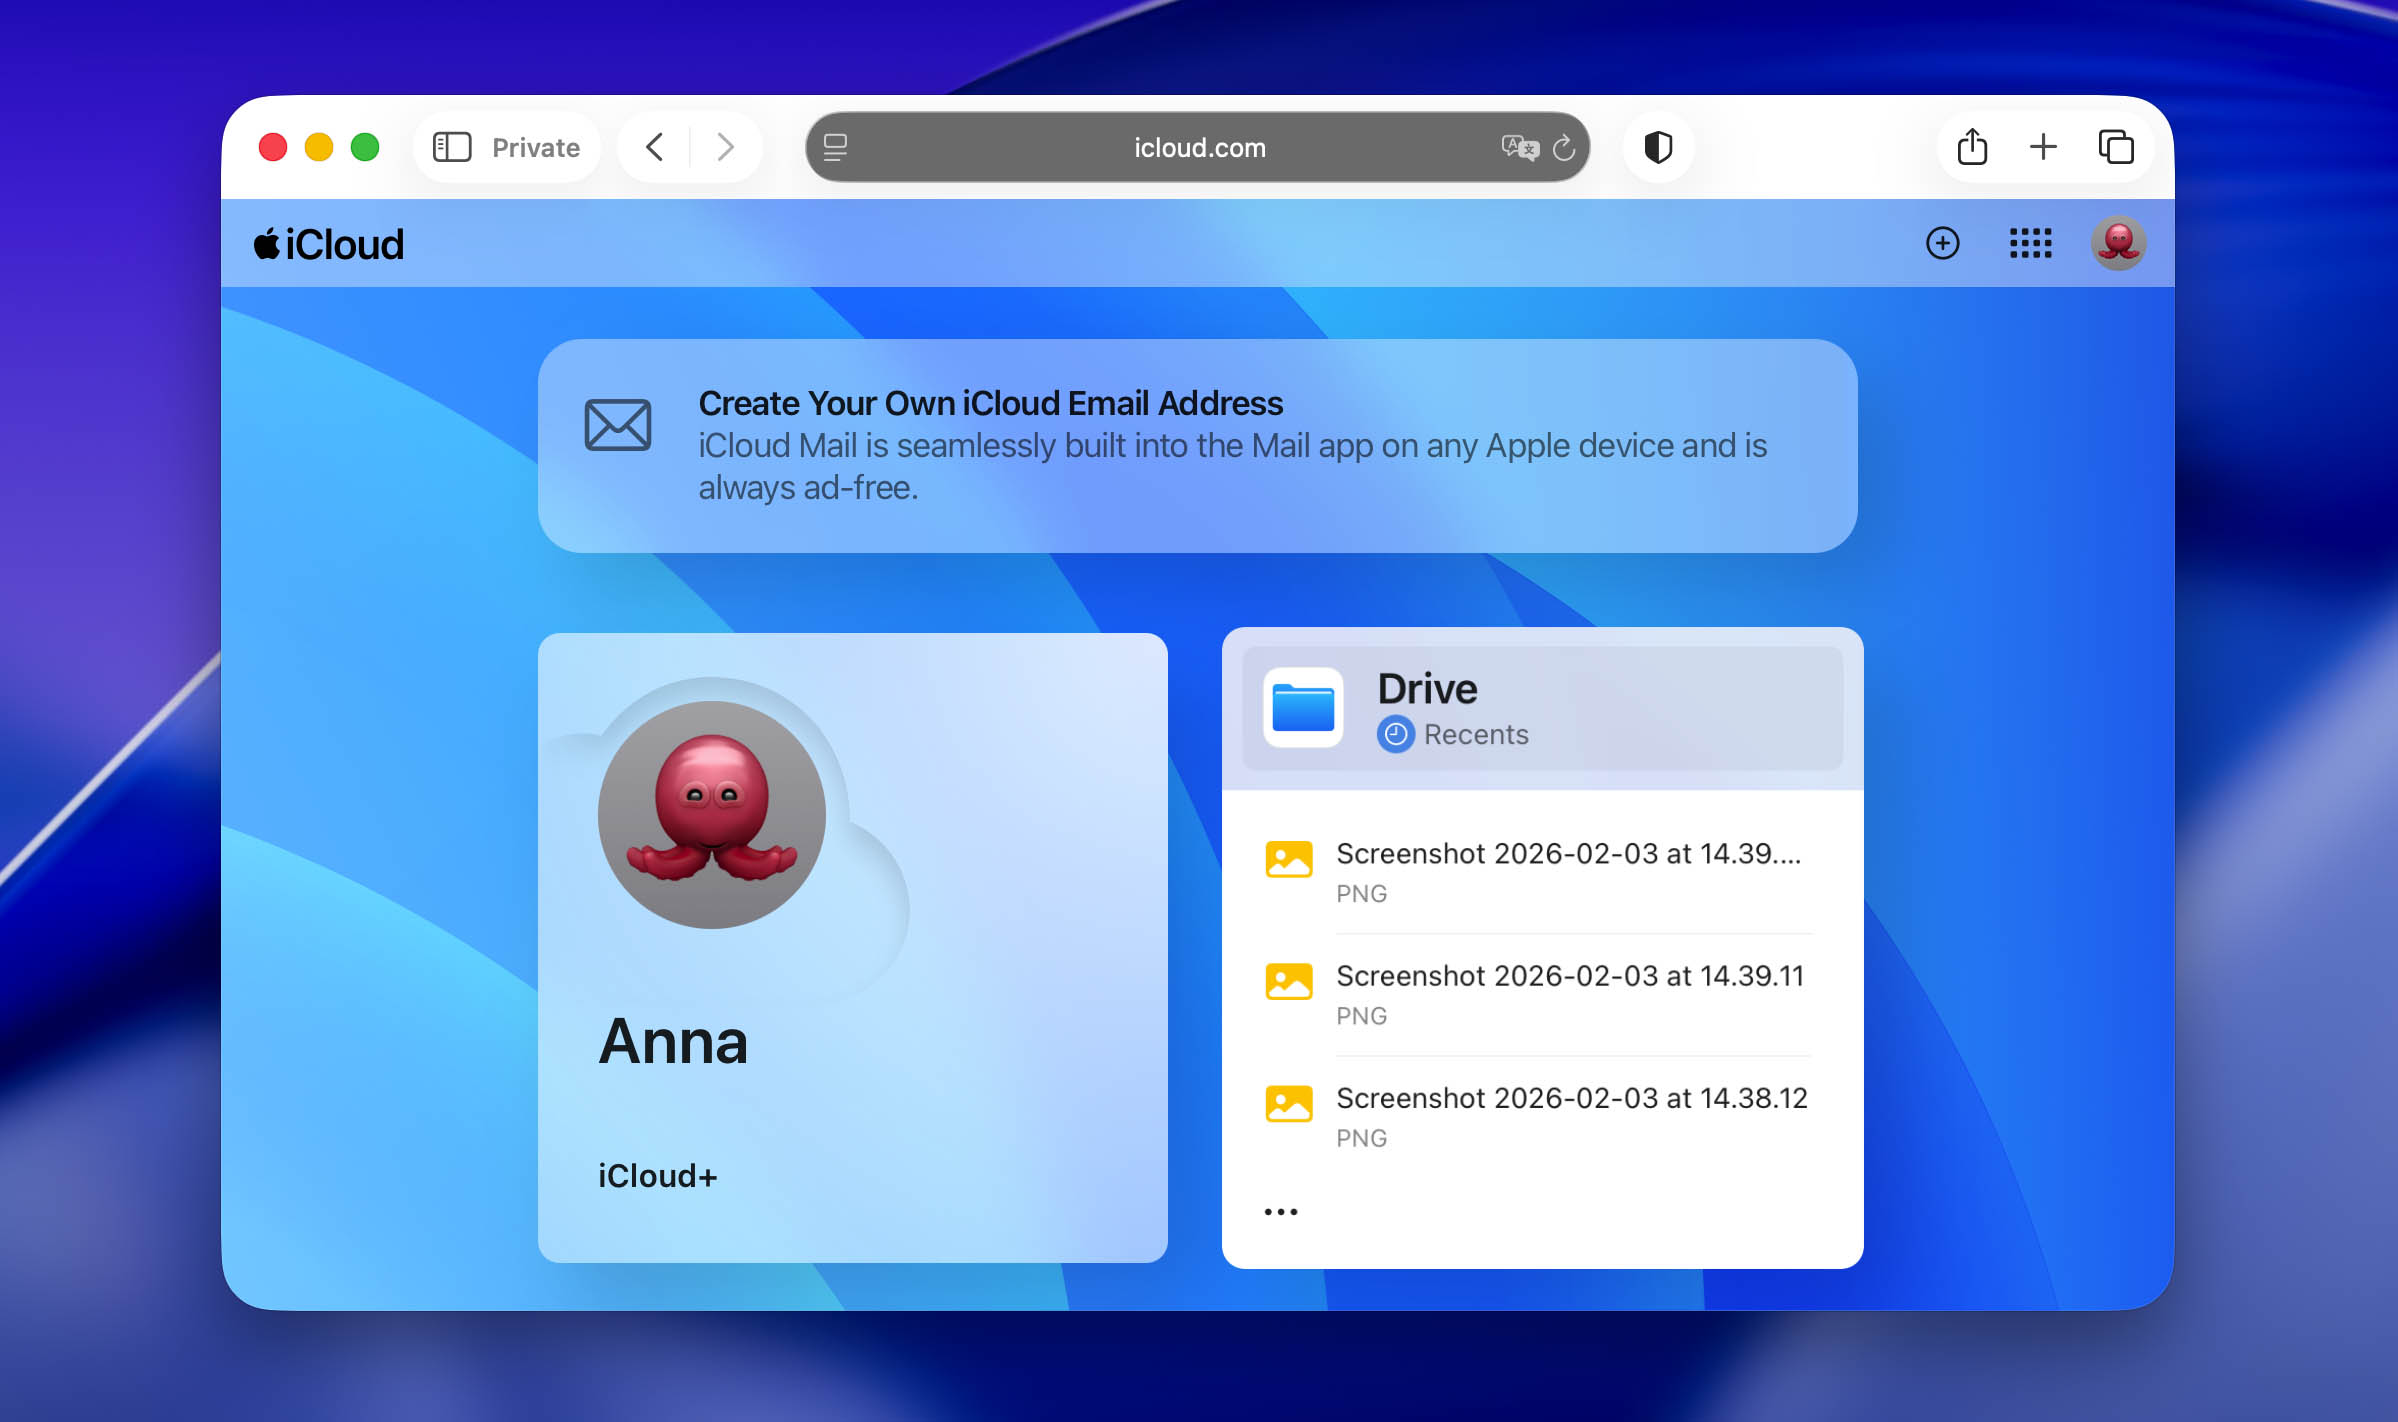
- Hold Command(Mac) or Ctrl(Windows) to select individual items and click the Delete option (or press the Delete key).
Once deleted, these files are removed from iCloud Drive and will no longer appear in the Files app on your iPhone after sync completes.
There isn’t much to add here, since this is more of a direct alternative to the previous method rather than a completely different way. It suits users who prefer working with the iCloud interface on a computer, but everything described here can also be done directly on the iPhone through the Files app.
Conclusion
In this guide, we focused on the two main areas where you may need to delete multiple photos from an iPhone – the Photos app and the Files app. If you sum it up, there are enough options for both areas, so you can choose the method that fits your habits and setup best.
The most convenient option for us for the Photos app is using a cleaner app like Clever Cleaner, which automates most of the work and saves time. For the Files app, manual deletion usually makes more sense, since this area tends to store fewer images and many of them are random downloads. But if you use iCloud, bulk deletion through the iCloud web interface on a computer can also be a good option.
That said, these two areas are not the only places where photos can pile up. Message attachments also deserve attention if your goal is to free up iPhone storage. We have a separate guide that explains how to clean attachments on iPhone, so it’s worth checking if space is an issue. And finally, don’t forget that photos are just one category, so videos and apps often take up even more space and should be reviewed as well.
FAQ
There is no native way in iOS to delete multiple photos without selecting them at all. The Photos app always requires some form of selection, whether manual or via Select All inside certain albums.
That said, you can still minimize or completely avoid manual selection by using alternative approaches:
- In albums like Screenshots, Favorites, or People & Pets, you can tap Select > Select All and delete everything at once.
- On iCloud.com, you can select large ranges using Shift or remove entire batches much faster than on an iPhone screen.
- Apps like Clever Cleaner can delete photos automatically by category, such as duplicates, similar photos, screenshots, or Live Photos. In this case, you don’t manually select individual images – the app groups and suggests removals for you.
Yes, it is possible to mass delete photos using the Shortcuts app. You can create a shortcut that finds a group of photos based on specific criteria and deletes them in one action.
- Open the Shortcuts app, and tap + to create a new shortcut.
- Tap Add Action and search for Find Photos.
- Configure filters inside Find Photos, for example, Date Taken is in the last 30 days/ Album is Screenshots/Limit to 500 (optional, but safer for testing).
- Add the Delete Photos action, save the shortcut, and run it. iOS may show a confirmation prompt before deletion. This is normal.
Deleted photos are still moved to Recently Deleted, so storage space will update only after that album is cleared.