How to Sort Videos by Size on iPhone and Find the Largest Ones
Want to know which videos are eating up the most space on your iPhone? Apple doesn’t make it easy, so we put this guide together. We’ll show you 3 ways to sort videos by size (and even get rid of the ones taking up the most space). We’re using iOS 26 for this, but if you haven’t updated yet, no problems—these methods work on older versions too.
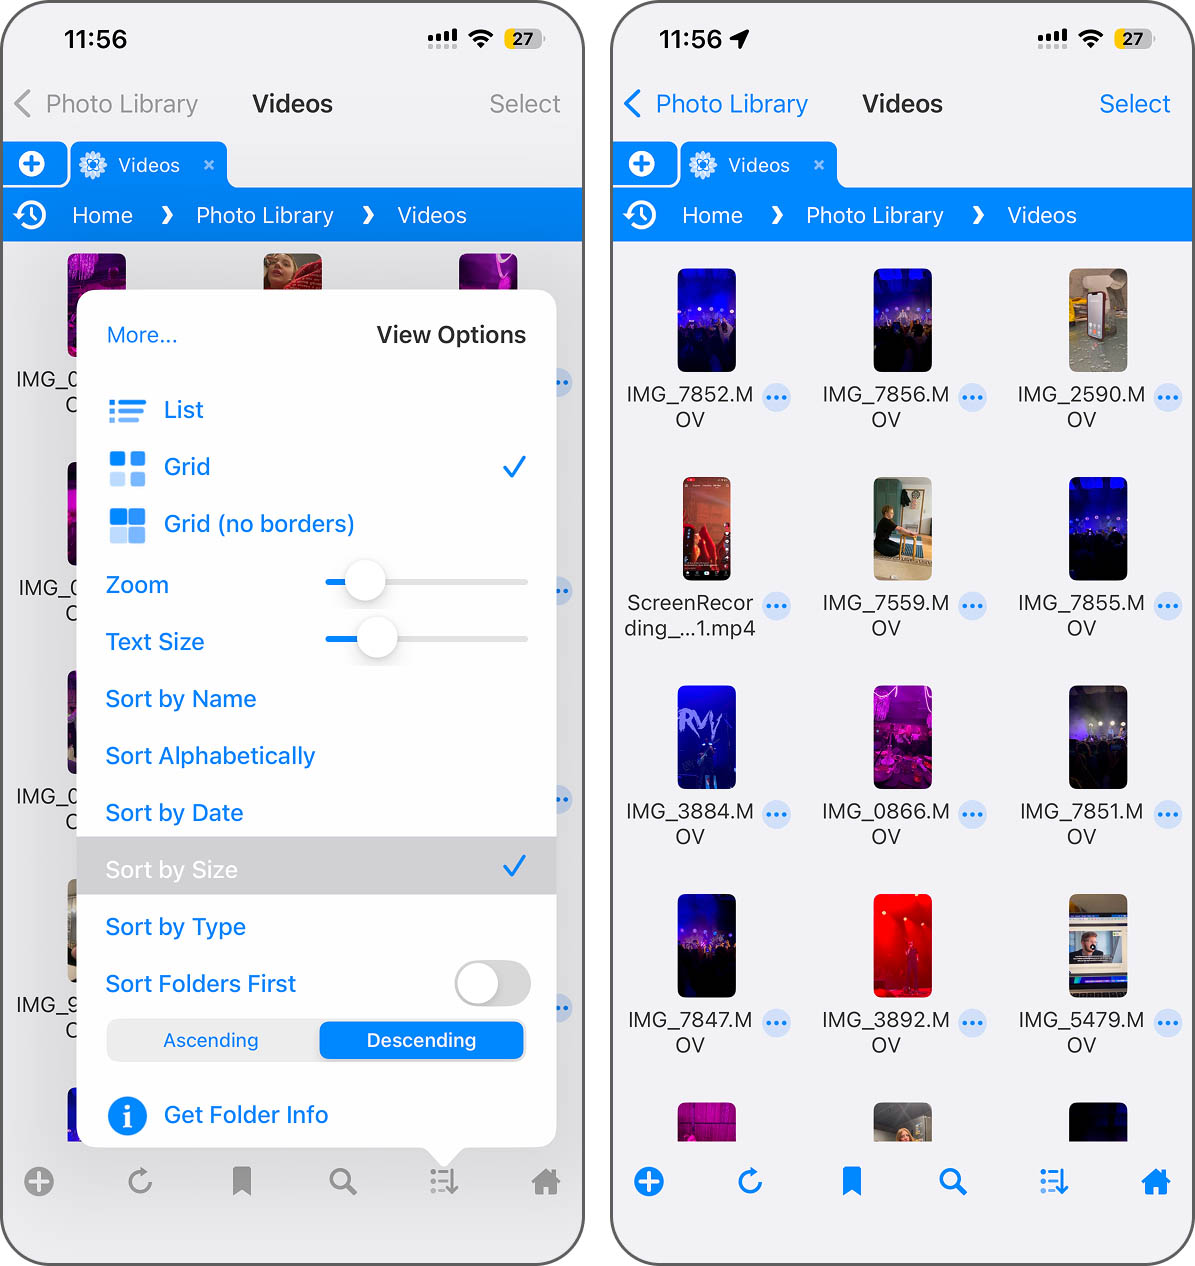
Is Sorting Videos by Size Possible with Default iOS Features?
Many users often search for ways to find and delete large videos on their iPhone to free up space. One often-asked question is whether iOS allows users to sort videos by size. As time goes, Apple has gradually improved file management in recent versions—iOS 18 introduced some useful changes, and the public beta of iOS 26 brought more updates to the Photos app. Still, neither version includes a simple “sort by size” option for videos, that feature remains missing.
- The default Photos app on iOS provides a feature to view videos, but it lacks a direct option to sort or find the largest videos on iPhone based on file size.
- Users looking to see the largest videos on their iPhone can utilize the ‘Albums‘ feature, which groups videos together, but this still does not offer size-based sorting.
- For a more detailed view of storage usage, users can navigate to ‘Settings’ > ‘General’ > ‘iPhone Storage’. This section provides an overview of storage consumption, though it does not specifically show videos by size.
So as you see iOS still does not offer a direct feature to sort videos by size on iPhone. However, there are different workarounds to this issue, though most of them boil down to third-party options.
Workarounds to Identify Large Videos on iPhone
Since iOS doesn’t include a native sort-by-size option for videos, we tested every possible workaround. Half of the methods rely on third-party apps—these are the ones we recommend most, since they work quickly and require no guesswork. But if you’d rather avoid installing anything, we also discuss two native tools that help you find large videos. These built-in options don’t involve the Photos app, and while they aren’t the most convenient, they still work in specific scenarios.
Method 1: Leverage Specialized Cleaning Apps
One of the easiest ways to sort videos by size on iPhone is by using a cleaner app. Why a cleaner app? Because most people looking to find the largest video files want to free up space. Since videos take up the most storage (a single 4K clip just a few minutes long can consume several gigabytes), many cleaner apps include a feature that automatically finds (and deletes) them in just a few steps.
One such app that can sort your videos by size is Clever Cleaner: Free Storage Cleaner App. It’s a new and completely free app from CleverFiles, and we’ve used it in our recent tests. Unlike many so-called “free” apps that limit features or push constant ads, Clever Cleaner offers full functionality at no cost.
Here’s how you can use it:
- You can type “Clever Cleaner” into the search bar in the App Store, or you can go straight to its App Store page using this link to download it.
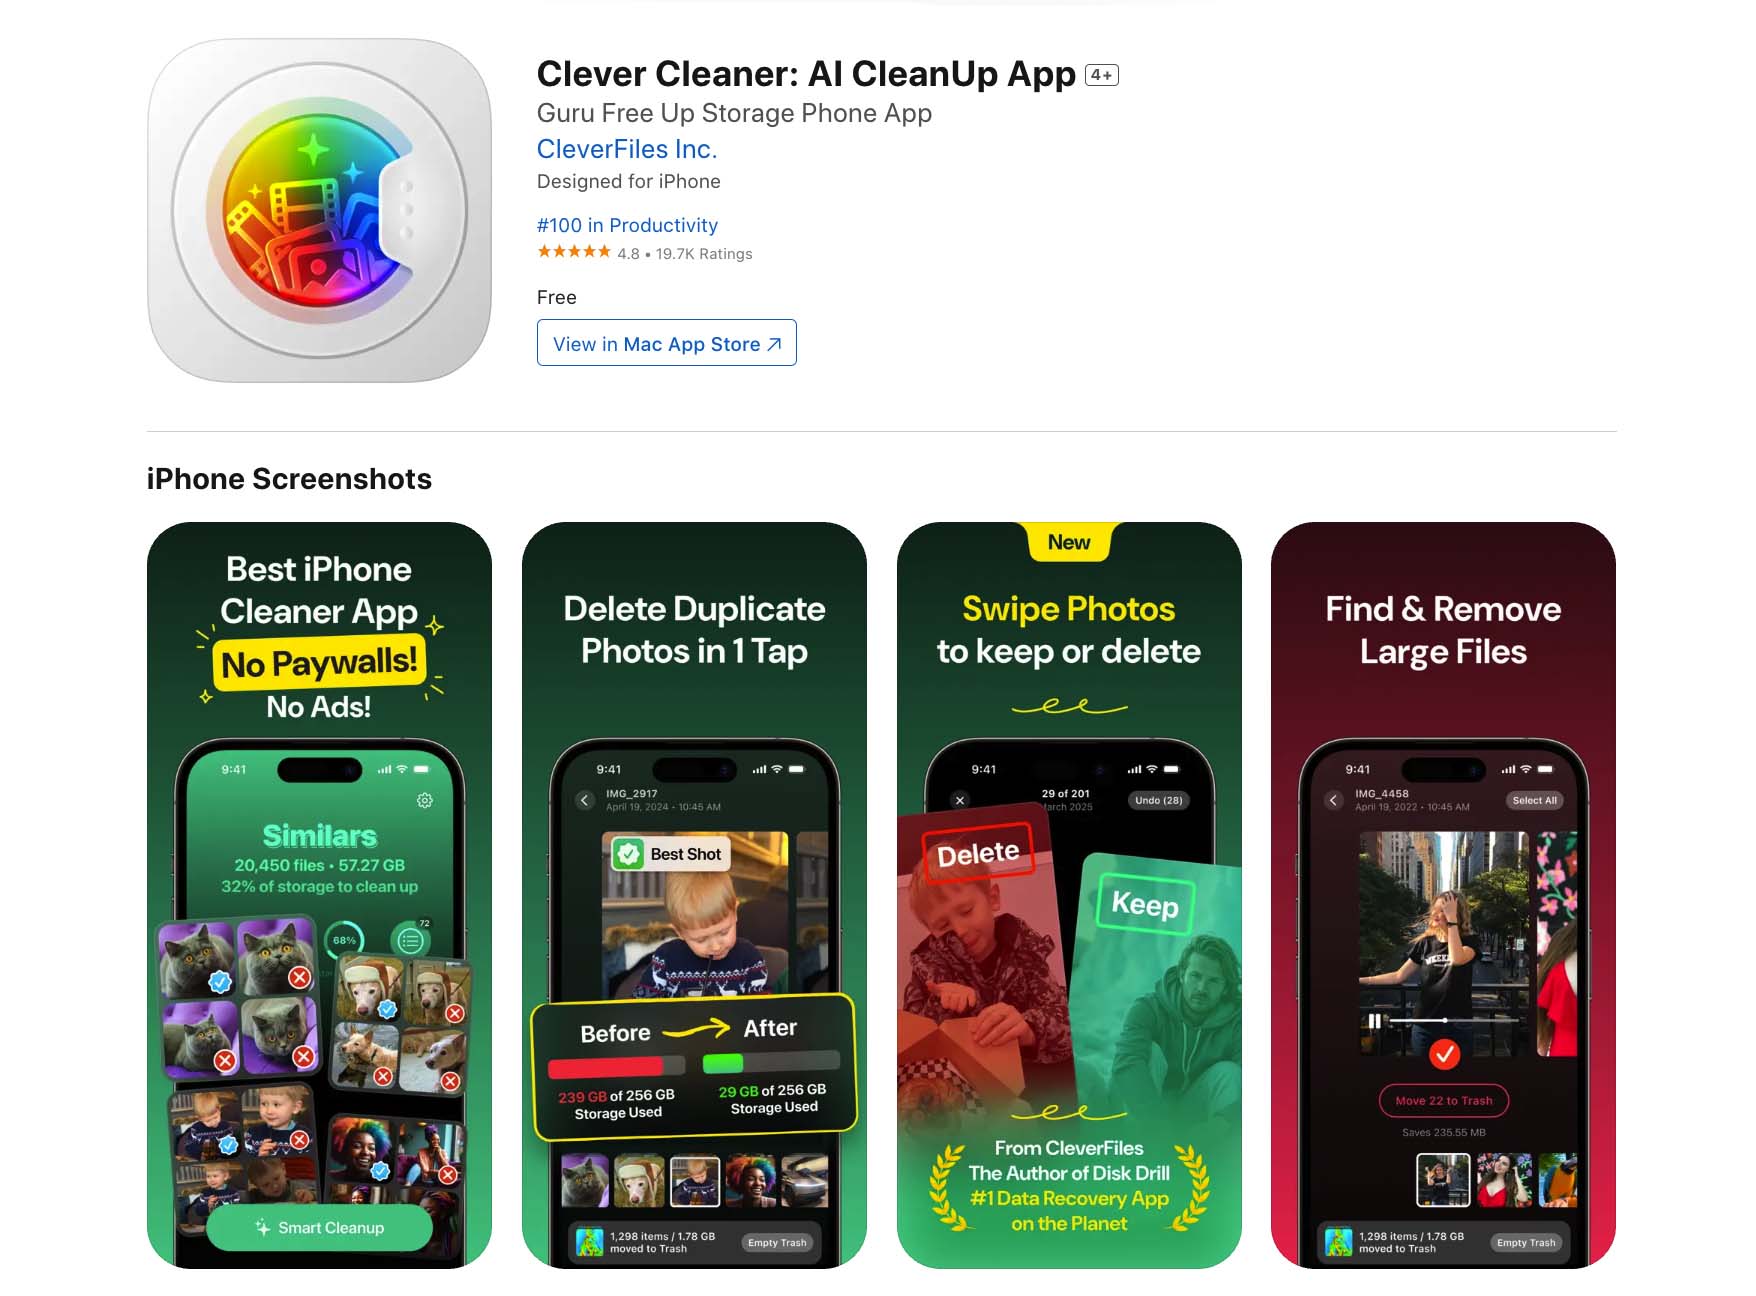
- Open the app and grant permission to access your Photos library.
- At the bottom, you’ll see four categories: Similars, Screenshots, Lives, and Heavies. We’ll explain each of these in detail later, but for now, you need Heavies—this is where your largest files are listed.
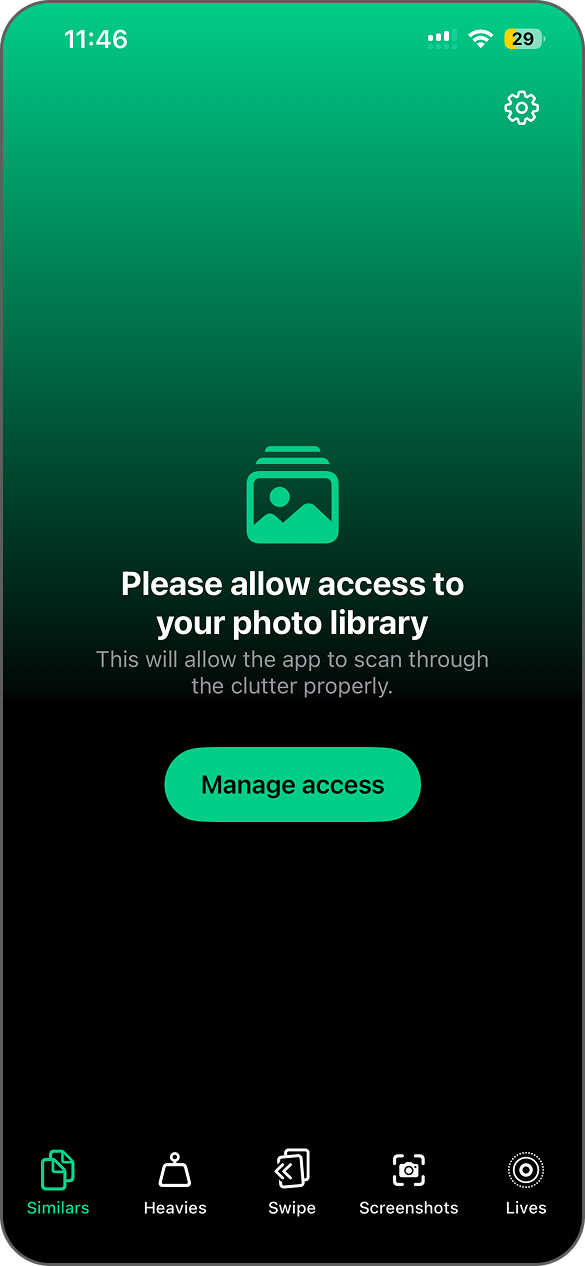
- Tap on “Heavies,” and you’ll see all your videos sorted from largest to smallest, with the file size and duration displayed for each one. That’s it—you now have a full list of videos from the Photos app. If you decide to delete them, follow the few more steps below.
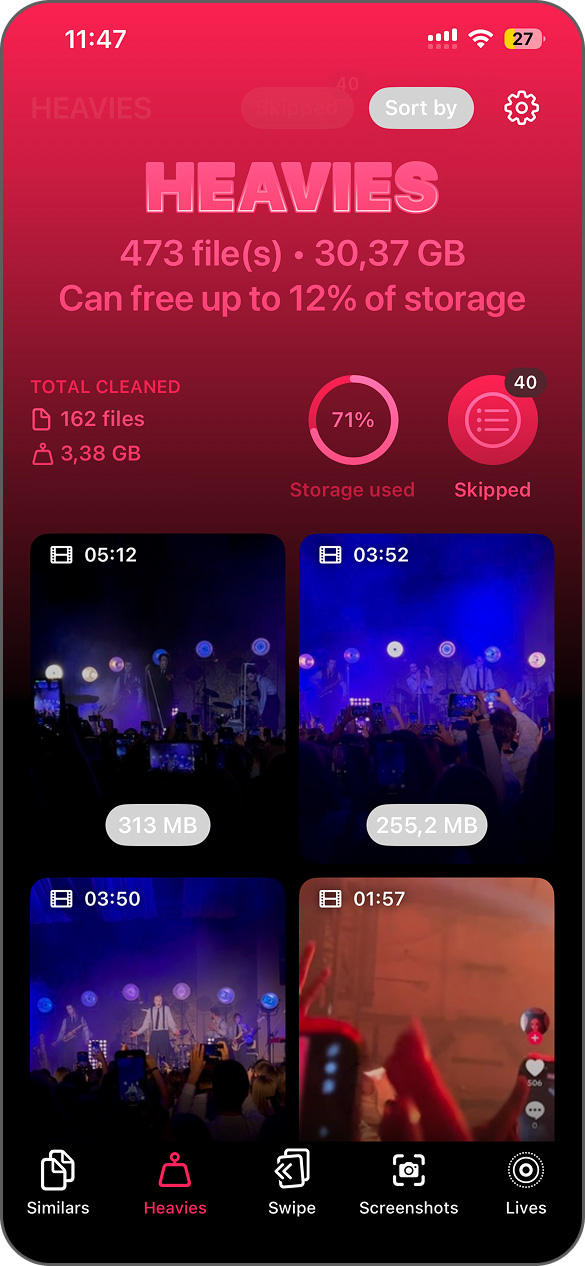
- Tap on any video to open the selection screen. Here, you can swipe left or right to quickly preview and choose which videos to delete. If you want to remove multiple files at once, tap Select All to mark every video in the list.
- As you select videos, you’ll notice that right under the Move to Trash button, the app displays how much space you’ll free up.
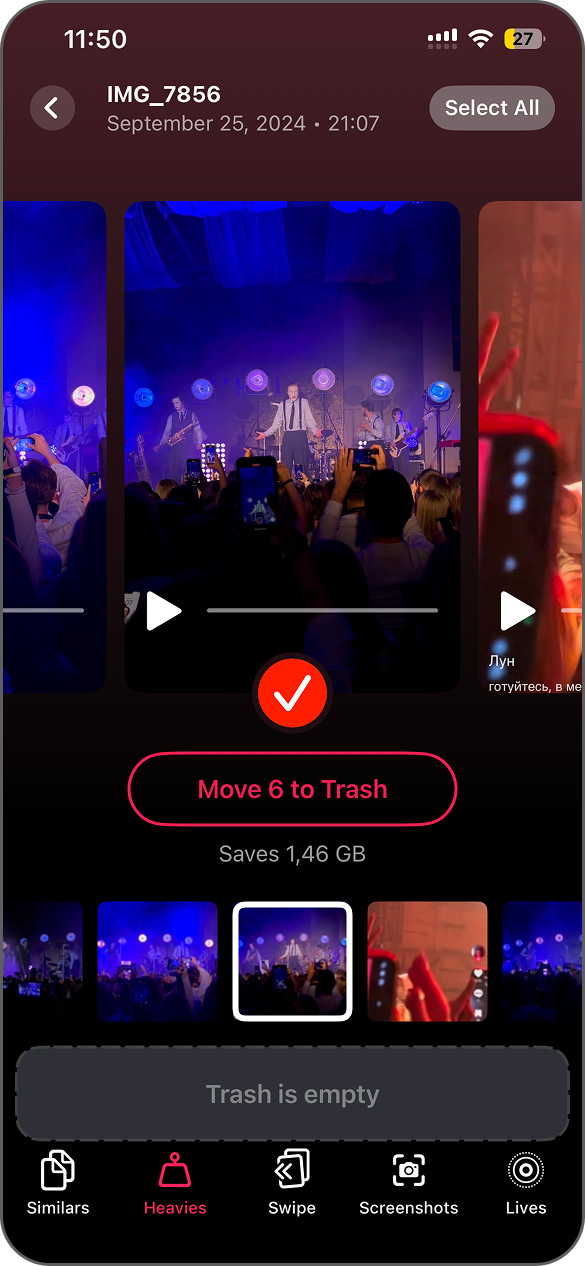
- Once you’ve made your selections, tap Move to Trash.
- Now, at the bottom, you’ll see the Empty Trash button.
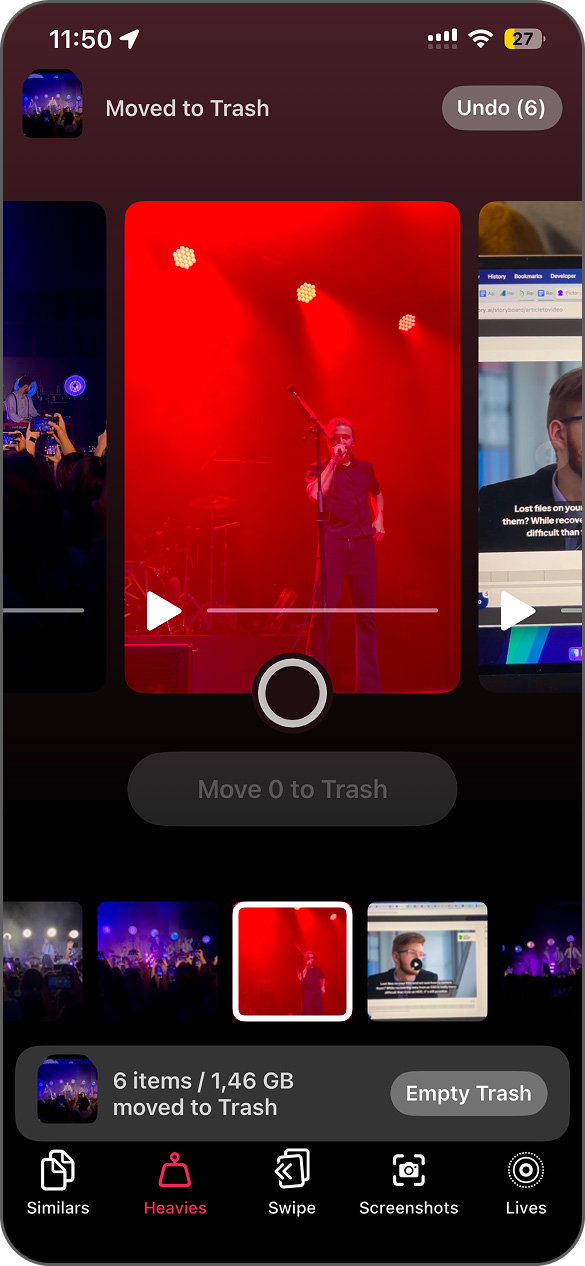
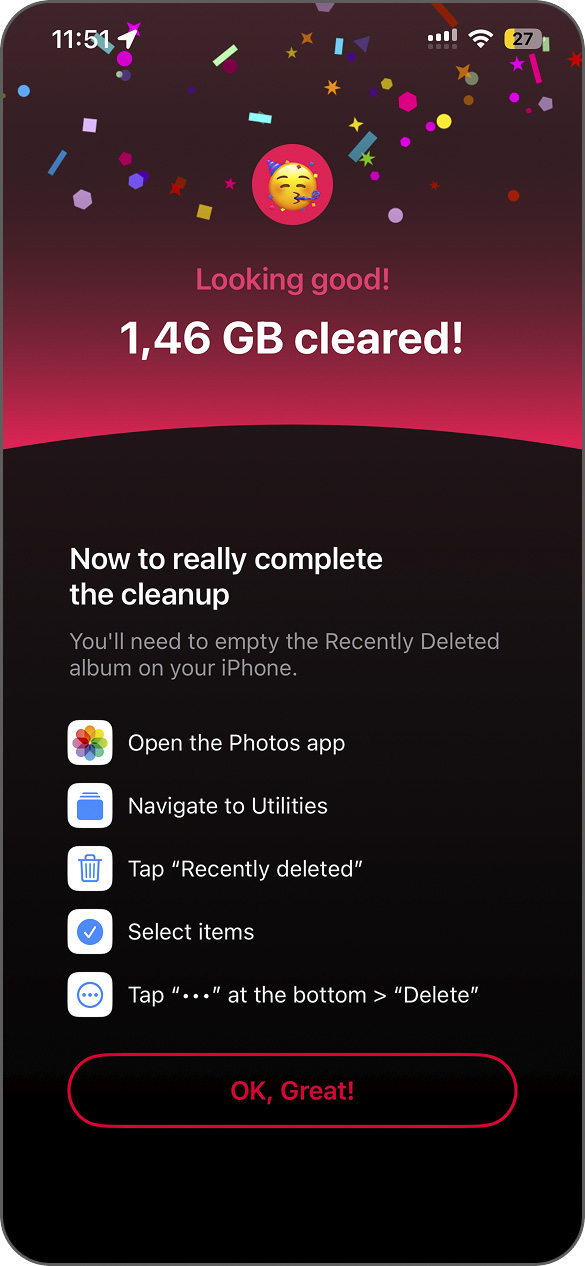
Once you tap it, the selected files will be sent to the Recently Deleted album in Photos.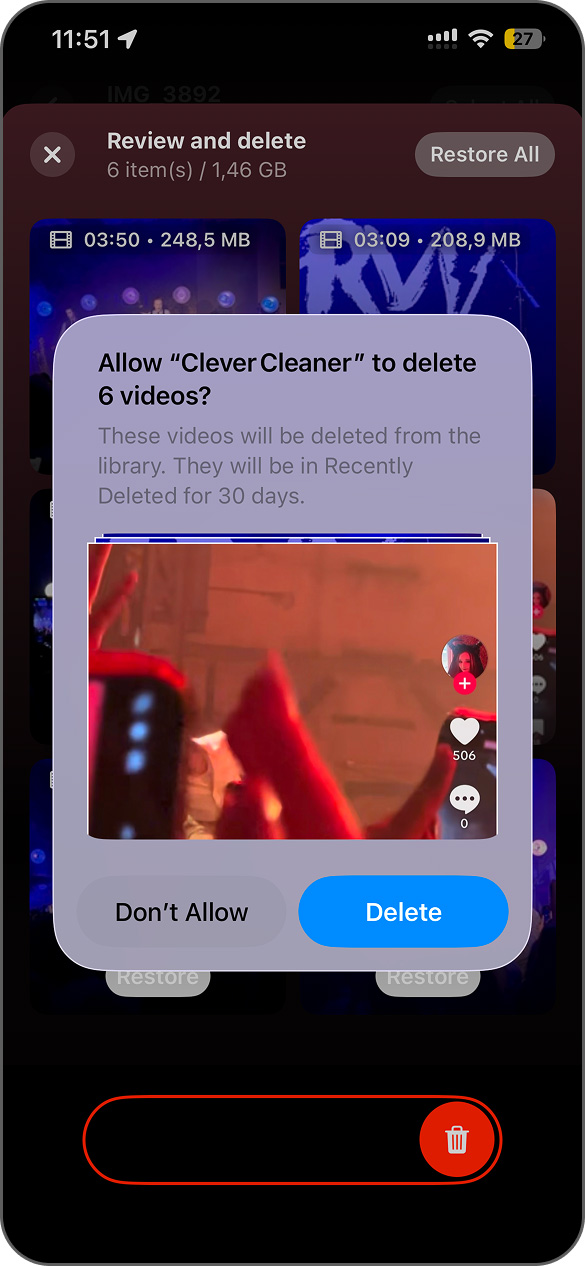
- From there, you can either restore them within 30 days or permanently delete them to free up space immediately.
What other features does the app offer, and what do they mean?
- Similars – Probably the most useful feature for clearing out duplicate and near-duplicate photos. You might wonder why it’s needed if the Photos app already has a utility for duplicates, but that tool only catches exact matches. Clever Cleaner goes further, and finds similar shots, like burst shots, repeated angles, and nearly identical images. Tap Smart Cleanup to let the AI handle it automatically, or open each group and decide manually.
- Swipe – Ideal if you don’t want to sort images by category. The app shows all photos grouped by month. You can go through them gradually: swipe right to keep a photo, swipe left to delete it. The process feels fast and intuitive.
- Screenshots – Screenshots pile up fast and often serve no long-term purpose. Clever Cleaner calculates how much space they use and gives you two options: remove them all at once or check them manually before deleting.
- Lives – Live Photos consume more storage than regular ones. This feature converts them to still images, which keeps quality intact while saving space. The app shows real-time storage savings as you select photos.

Additionally, according to its official Clever Cleaner cleanup app page, this app will remain free for all early users. Anyone who downloads it now and keeps it installed will have full access for free, forever. The developer, CleverFiles, has used this model for their other apps in the past, so we have no reason to doubt this pledge. More proof can be found in this video:
Method 2: Use Third-Party File Management Apps
Unlike cleaner apps such as Clever Cleaner, which are designed specifically to free up storage space and often combine multiple cleaning tools, file management apps are aimed at browsing, organizing, and manually handling files. They won’t automatically scan your system for unused data or offer bulk cleaning suggestions, but they can still help when your main goal is to locate and manage large video files. These apps mirror the contents of your Photos app, Files app, and sometimes iCloud Drive, providing built-in options to view, sort, and manage files on your iPhone. While they require more manual work compared to cleaning apps, they give you precise control over what to keep or remove.
- FileBrowser provides a detailed view of your file system and supports sorting videos by size. In our opinion, the interface looks slightly outdated, but that doesn’t interfere with functionality. You can access any storage location, whether it’s your photo library, the Files app, or iCloud Drive. Once inside, you can sort files by size and quickly find the largest videos. The app also lets you delete, share, move, or manage files directly from within its interface.
- Documents: File Manager & Docs works differently and fits better if your main goal is to find and delete large videos. It includes a dedicated feature for cleaning up large files. When enabled, the app displays all videos from your Photos library and allows sorting them by size, either from largest to smallest or the other way around. However, if you want to share or move these videos, you’ll need the paid version. Those extra tools appear separately from the sorting function.

Method 3: Use Your iPhone’s Built-In Apps
The methods above already cover everything you need to find large videos on your iPhone, whether you just want to view them or remove them. Still, we couldn’t skip the options that work without any third-party downloads. We know some users prefer not to install extra apps, so this section focuses on two built-in tools that let you sort videos by size using only the apps that come preinstalled on your iPhone. Just a heads-up: these methods aren’t the most convenient and won’t work in every case, but we’ll explain exactly when they do.
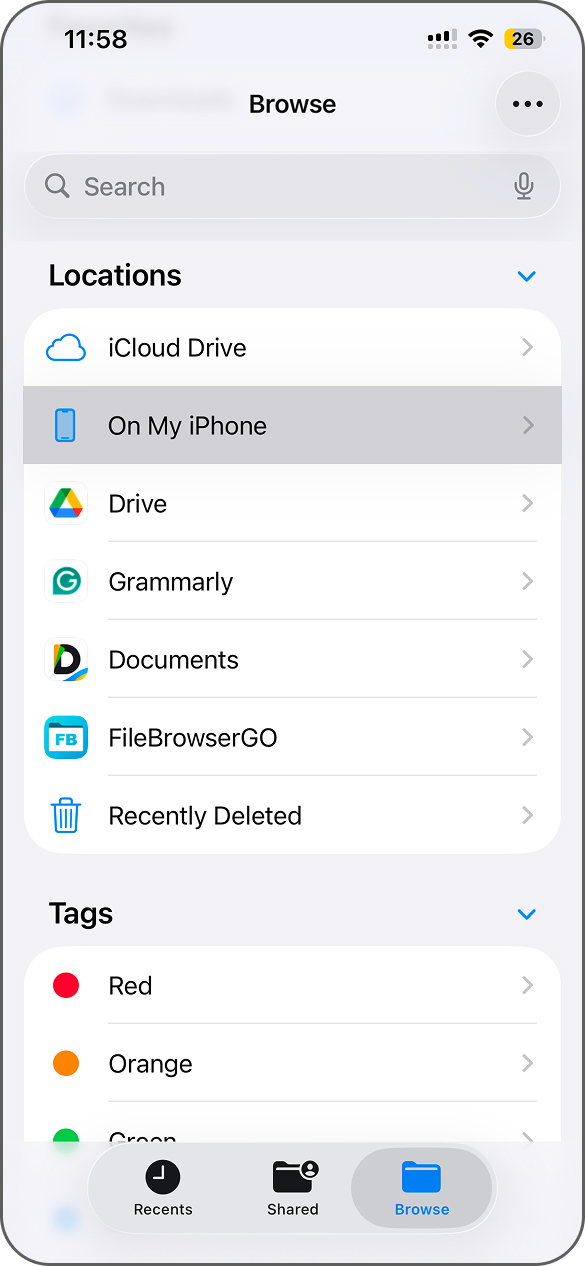
3.1 Use the Files App (For Manually Saved Clips)
First method you can try is the native Files app, but be aware that this works only for videos stored outside your Photos library, such as those saved to iCloud Drive or On My iPhone. If you’ve manually downloaded or transferred videos to the Files app, you can easily sort them by size.
Here’s how:
- Open the Files app.
- Go to the folder where your videos are stored (iCloud Drive, On My iPhone).
- Tap the three-dot button in the top-right corner.
- Find sorting options and select Size.

- Your files will now be sorted from largest to smallest, making it easy to find the biggest ones.
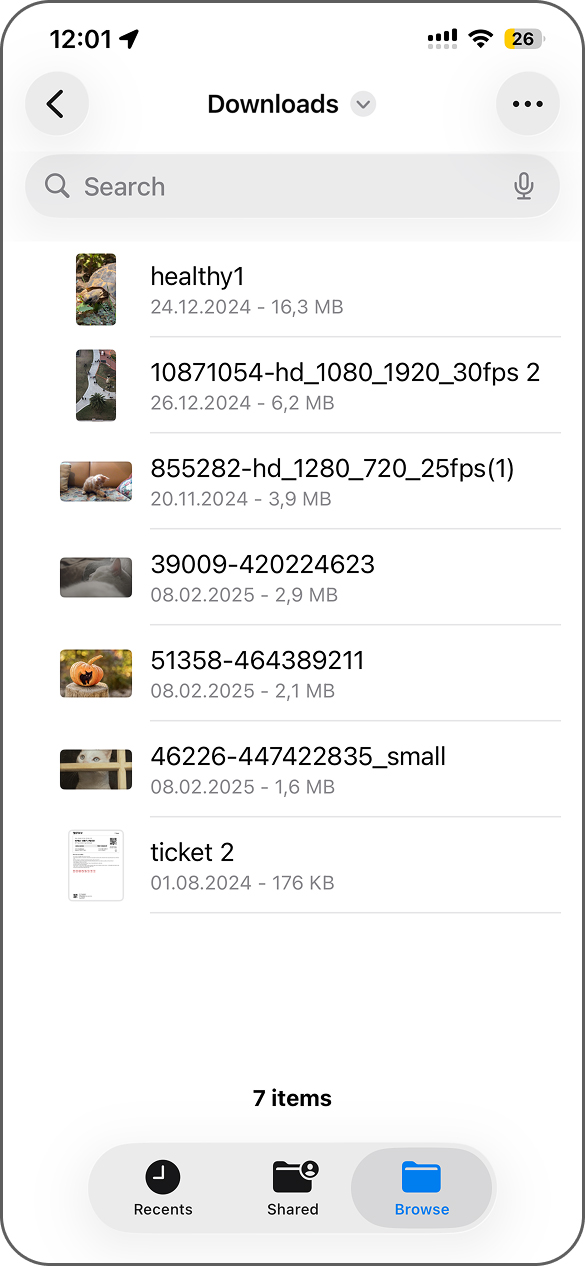
This method won’t work for videos in the Photos app, but if you store clips in Files, it’s a built-in way to organize them by size.
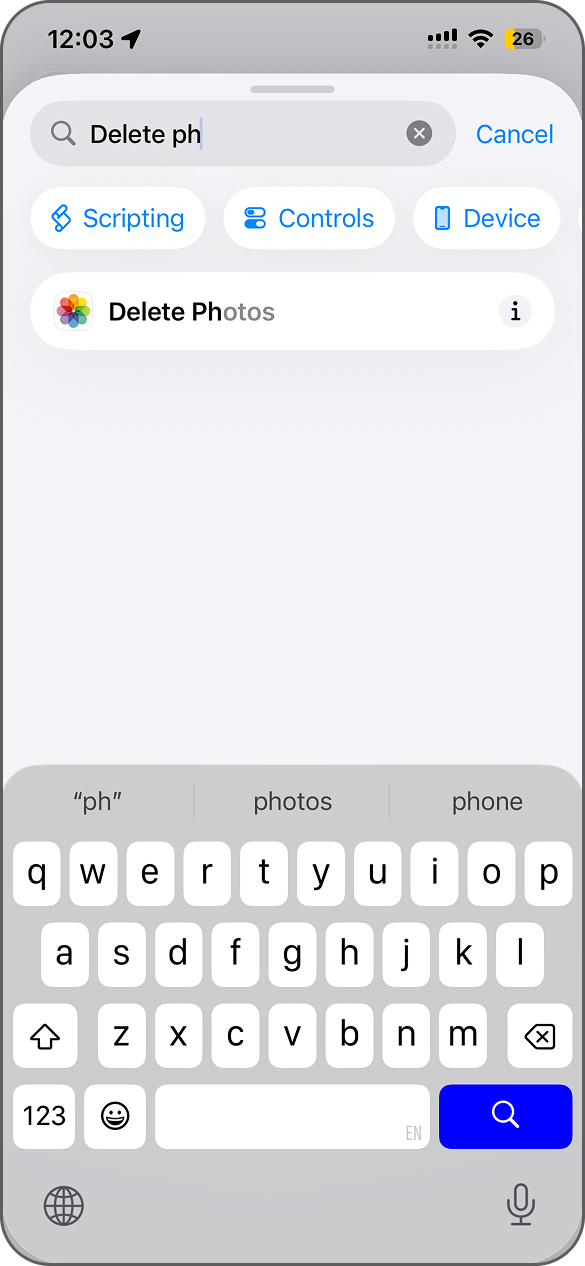
3.2 Use the Shortcuts App (For Videos in the Photos App)
Since most videos on the iPhone end up in the Photos app, we looked for a native method that would help sort them by size, without downloading anything from the App Store. The best option we found involves the Shortcuts app, which comes preinstalled on iPhones starting with iOS 13.
Shortcuts is a built-in automation tool that allows you to create commands based on a set of chosen conditions. It covers many areas of iPhone use, including storage cleanup, app management, and yes, working with videos stored in the Photos app. If you’ve never opened Shortcuts before, the interface may seem a little confusing. Don’t worry. We’ve written out the steps below clearly. Follow them as shown, and you’ll get the results you need.
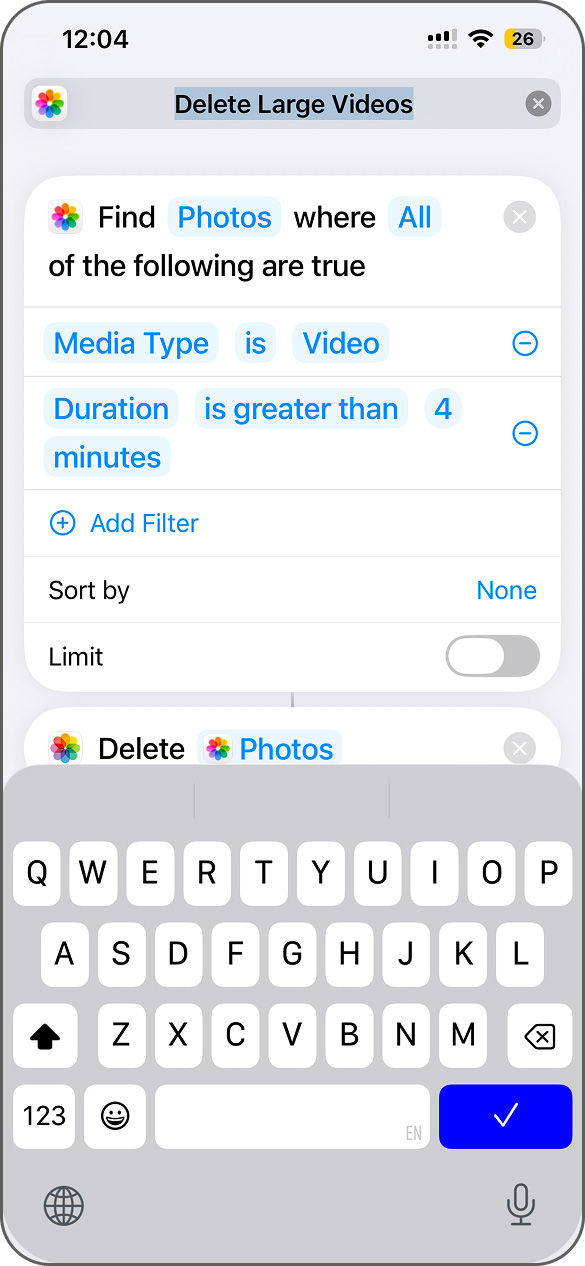
How to create the shortcut:
- Open the Shortcuts app on your iPhone and tap the + to start a new shortcut.

- Tap Search Action, find the Find Photos option, and select it.

- In the Find Photos block, tap Add Filter and pick Media Type is Video.

- Tap Add Filter again and choose Duration > is greater than > [pick a number] > seconds or minutes, depending on what you want to find (you can’t directly sort by size, but longer videos usually take up more space).
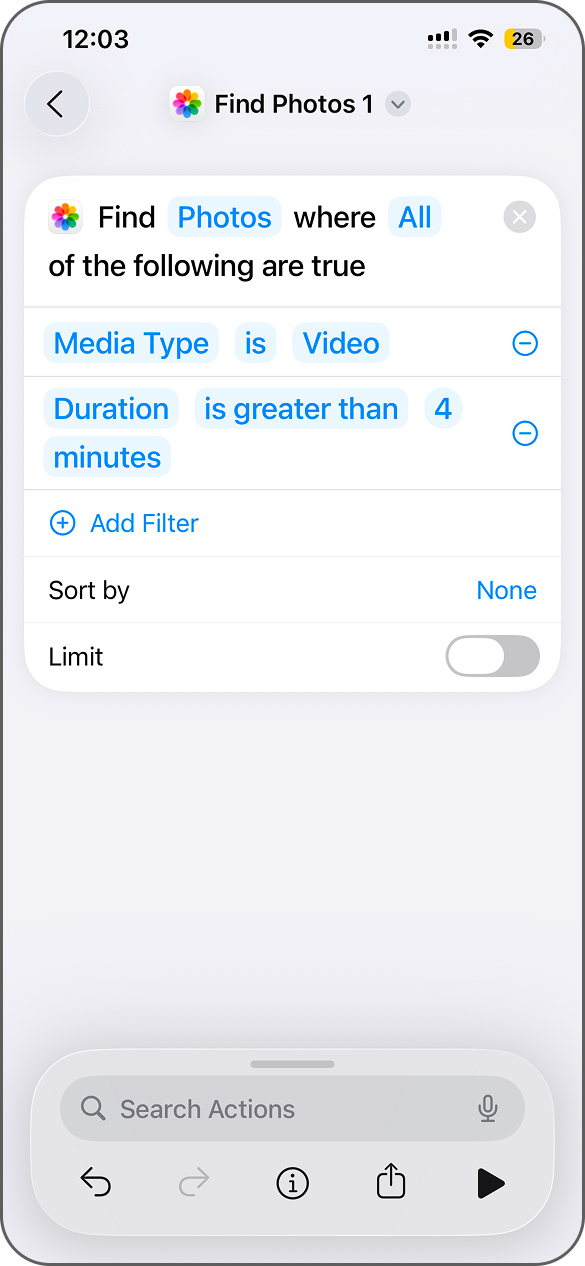
- Tap Search Action again, select Delete Photos, and add it.
- Tap the shortcut name at the top, rename it to Delete large videos, then hit Done.
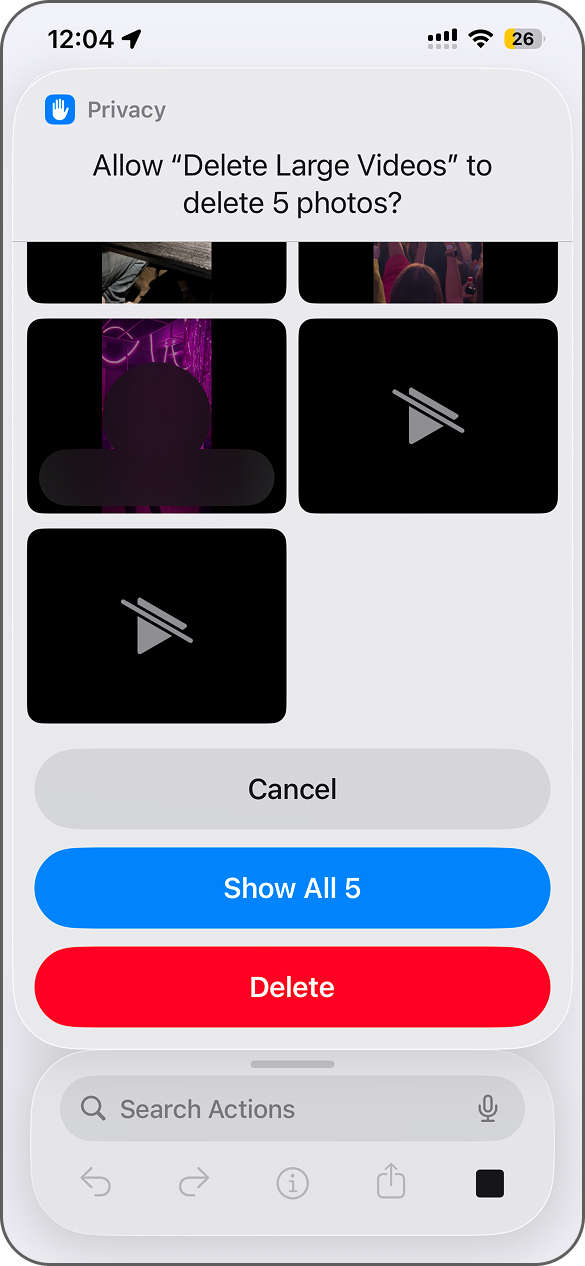
- Tap the play icon to run the shortcut. The results will appear, showing all videos that match your conditions. From there, you can delete them or preview each one.
This method only works based on the filters you set. For example, if you create a shortcut to find videos longer than 3 minutes, it will ignore everything shorter. To catch other clips, you’ll need to adjust the filters and rerun the shortcut.
Final Tips
So, what do we end up with? Even with the release of iOS 26 and all the improvements it brought, the iPhone still doesn’t offer a convenient way to sort videos by file size inside the Photos app. The only native place where size-based sorting exists is the Files app, and in most cases, it contains far fewer videos than Photos.
The most practical workaround is to use third-party tools, such as Clever Cleaner or media managers, which are built specifically to identify large files and make storage cleanup easier. If you prefer to avoid installing apps altogether, the alternatives are less straightforward: you can set up shortcuts to surface longer videos and delete them manually, or simply go through your video library in Photos and clean it up by hand.
Which method works best is a matter of personal preference. For us, the most convenient option is obvious, but the final choice is entirely up to you. Keep in mind, a single large video can take up as much space as hundreds of apps, but there are other places to look as well.
For example:
- Junk files from system processes and background tasks.
- Messenger cache from apps like WhatsApp, Telegram, and iMessage.
- Large attachments from messages and emails.
- Unused apps that take up storage without you realizing it.
Be sure to check those as well, and your iPhone will thank you with more free space and better performance.
FAQ
It depends on how you receive and save them. If someone sends you a video through iMessage, and you tap Save, the video moves into your Photos library and starts taking up space there. If you leave it inside the message thread without saving, it still uses storage, but it stays under the Messages category in iPhone Storage.
With WhatsApp, the default setting usually saves received videos straight to the Photos app. In that case, they immediately count toward your Photos storage. You can change this in WhatsApp settings by turning off Save to Camera Roll, which keeps videos inside the app only. Just note that even if you don’t save them, large videos in chats still take up internal space, just not in Photos.