iPhone Storage Still Full After Deleting Photos? Here’s How to Fix It
Deleted photos but still see the “Storage Almost Full” alert on your iPhone? It’s a common snag, but it’s definitely not a dead-end. We’ve put together many (8 to be exact) proven and tested methods to help you free up space almost effortlessly and finally put the whole “iPhone storage still full after deleting photos” saga behind you. Ready to take control of your iPhone storage? Let’s get started.
Why iPhone Storage Is Still Full After Deleting Photos
We recently got a letter from a reader facing this exact issue, saying, “I deleted all my photos but it still says storage full on my iPhone. What’s going on?” This inspired us to investigate and break down the common culprits for you:
- Recently Deleted album: Here’s a kicker – when you delete photos, they move to the Recently Deleted album and stay there for 30 days. They’re not gone until you clear this album.
- Cached data and temporary files: Your iPhone keeps temporary files to make apps run faster. These sometimes junk files can pile up and take up space without you realizing it.
- Messages and attachments: Don’t forget about the photos and videos you’ve received in messages. These can use up a lot of space, even if you’ve cleared out your photo album.
- Unused apps and hidden data: Apps that you don’t use much can still store data on your phone. Sometimes, even when you delete the app, the data stays behind.
- iCloud sync and backup settings: Your iCloud settings might be saving copies of your photos both in the cloud and on your device, which means deleting photos doesn’t always free up space on your iPhone.
Note. Your iPhone can pinpoint exactly what’s taking up space. To check, go to Settings > General > iPhone Storage. Wait for the breakdown to load, and you’ll see a detailed view of what’s using up your storage. It might not even be photos—mail or applications could be the issue. And if it is photos, there are plenty of less obvious ways to clean them out (as we’ll show you).
How to Free Up Storage When Deleting Photos Isn’t Clearing Space on iPhone
Now that you know what causes it, it’s time to deal with the issue itself. From the overlooked nooks and crannies of your iPhone storage to some settings tweaks, we’ve lined up everything you need to know to get your storage stats moving in the right direction. Ready to turn the tables on your iPhone storage?
Method 1: Check Recently Deleted Folder
Think you’ve cleared out photos but found your storage unchanged? Here’s a first step many miss:
- Open Photos: Tap on the Photos app to get started.
- Hit Albums: At the bottom, you’ll see ‘Albums’. Give that a tap.
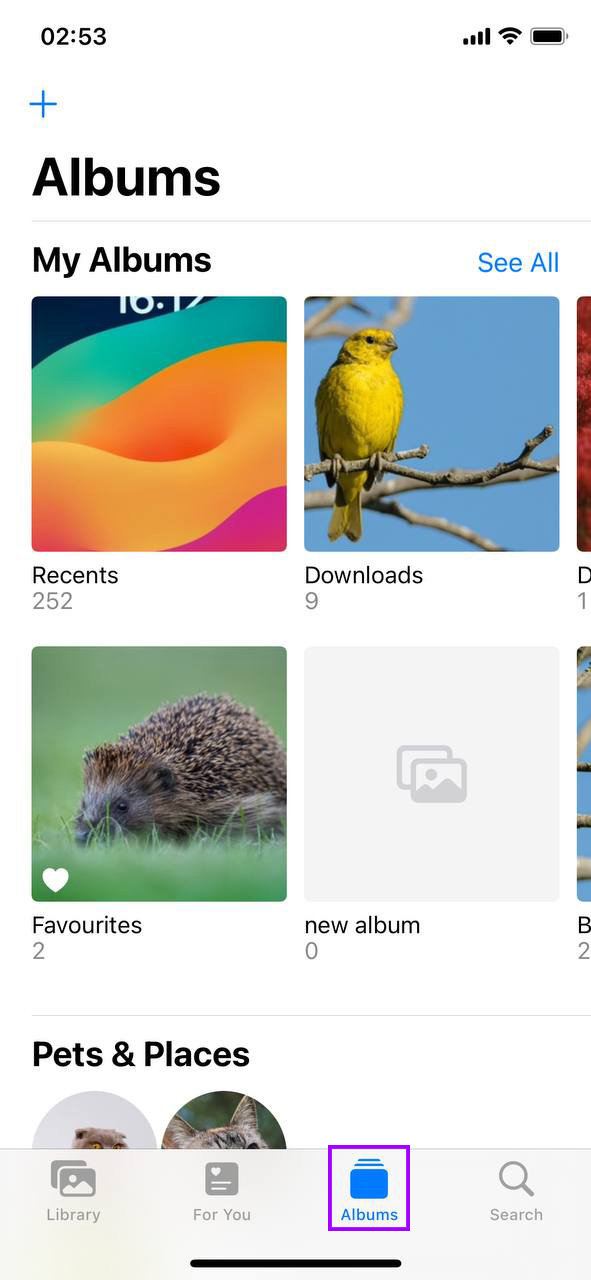
- Scroll to Recently Deleted: It’s tucked away under ‘Other Albums’. Found it? Great, tap on it.
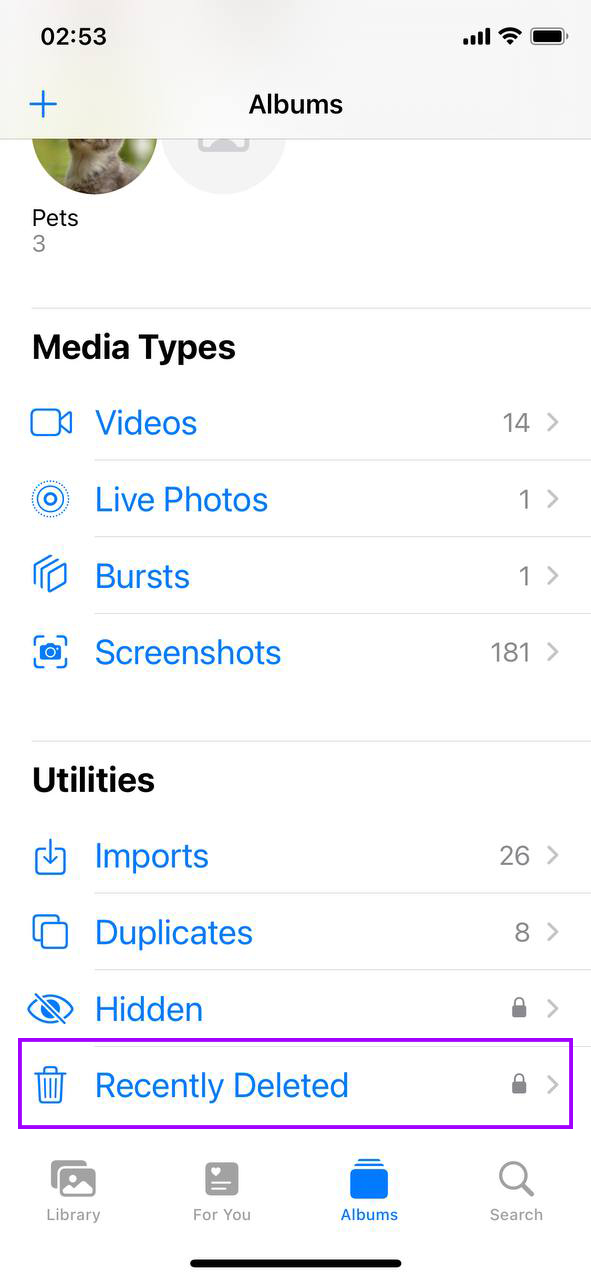
- Time to Select: Top right corner, hit ‘Select’. Now, you can choose individual photos or just ‘Delete All’ to clear the lot.

- Delete for Good: With your photos selected, tap ‘Delete’ and confirm. Those photos are now officially off your storage.
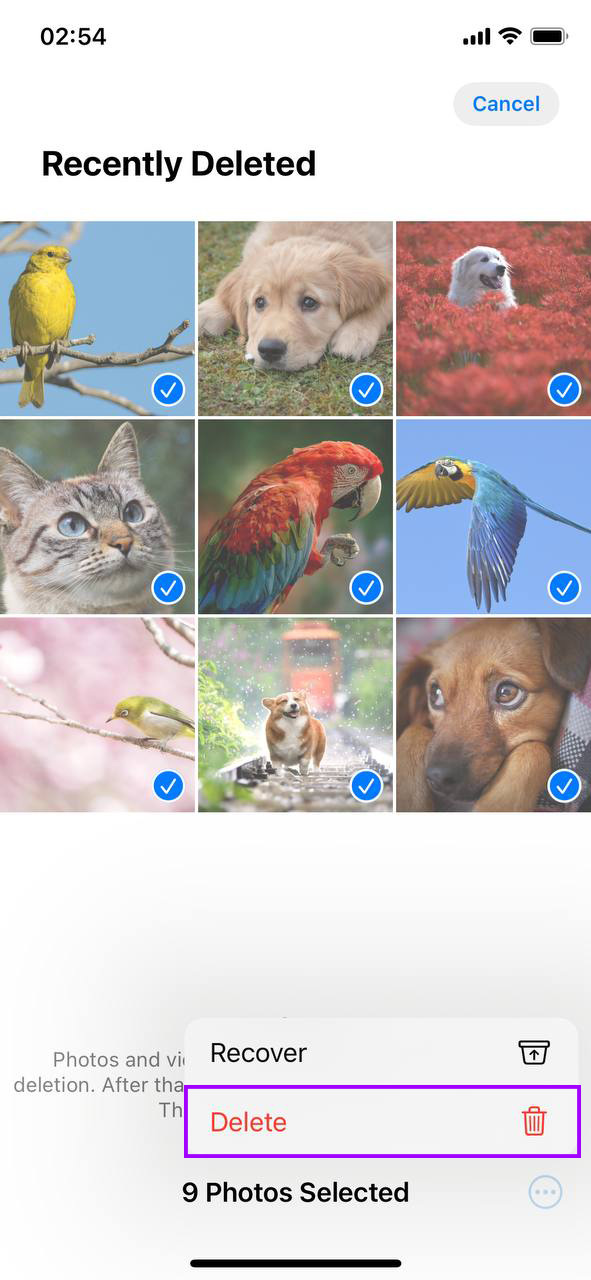
This step is the first one to take for anyone puzzled by their iPhone storage not decreasing after deleting photos. Just making sure what you delete is really gone, clearing up space that seemed stubbornly full.
Method 2: Find More Media to Delete Using Third-party Apps
With iPhones, it’s often the case that built-in features just aren’t enough to handle the deeper cleanup your storage might need. That’s exactly why third-party apps exist. Our team has tested plenty of AI cleaner apps from the App Store, but recently, we had the chance to try a new free Clever Cleaner app for iPhone.
Clever Cleaner is perfect for the purposes of this article because it tackles issues in your Photos library that the native Photos app simply can’t. For example, it can:
- Identify and Remove Duplicate & Similar Photos: Unlike the native Photos app, Clever Cleaner doesn’t just identify exact duplicates. With the help of AI, it also detects similar photos, such as those taken in bursts or with slight variations. This is ideal if you’re the type to snap multiple shots to get the perfect one. With a simple press of the Smart Cleanup button, the app quickly scans for all similar images for deletion. You can either follow its recommendations or go through each group manually.
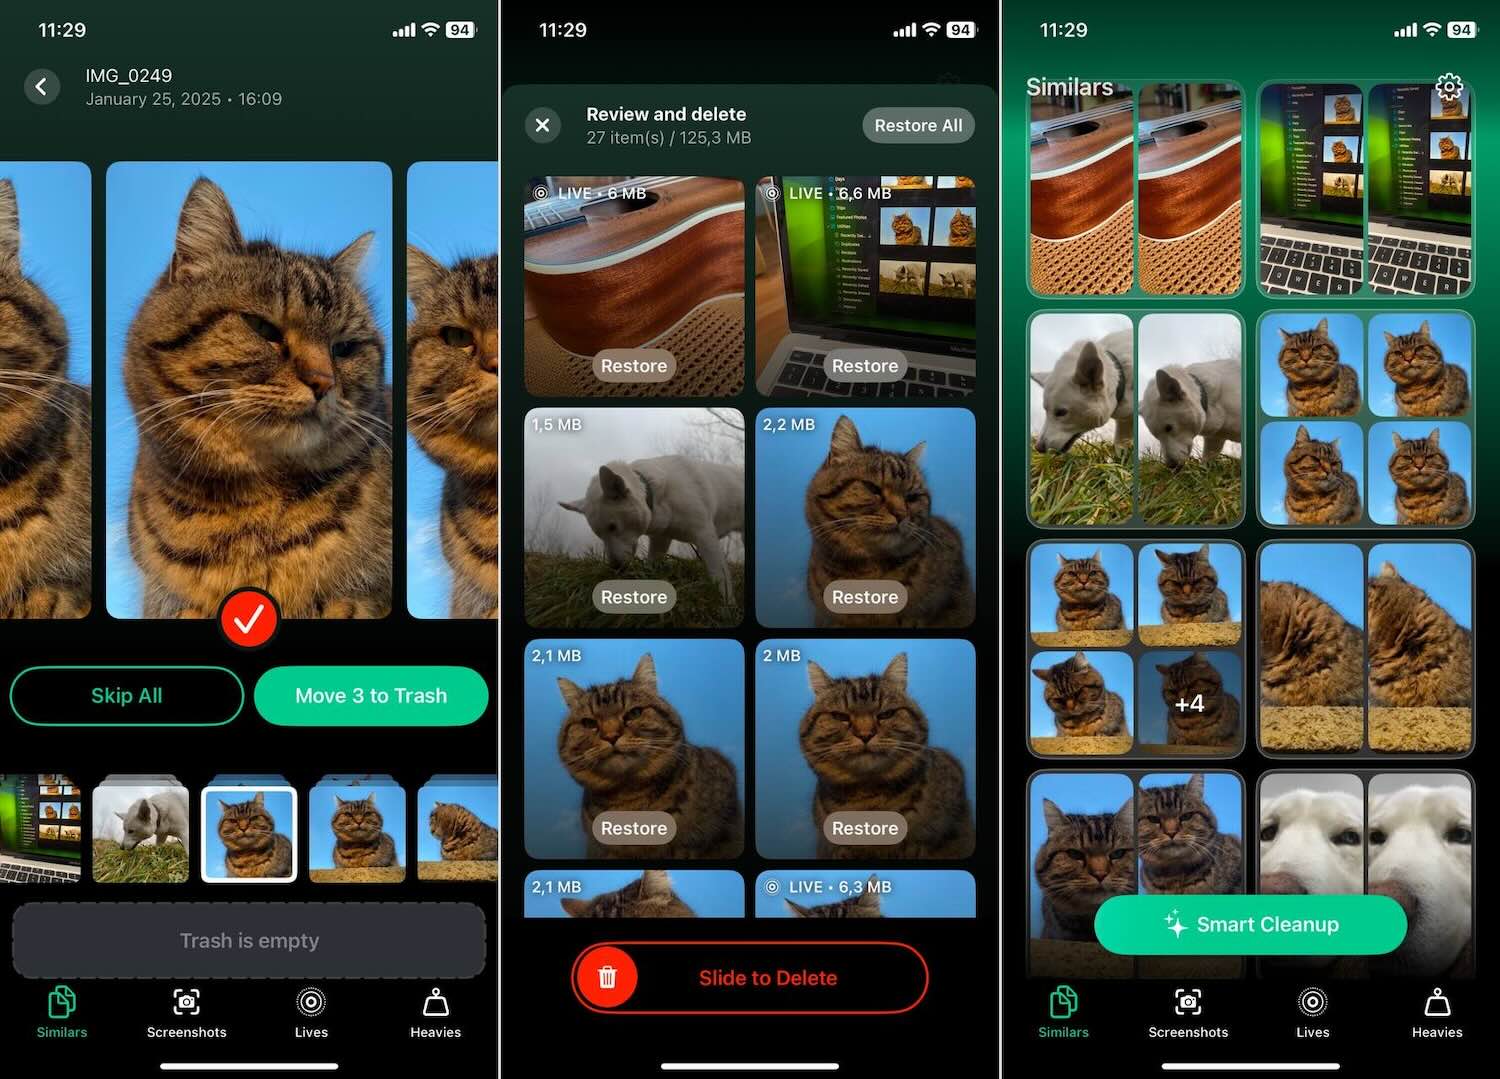
- Identify and Remove Screenshots: Clever Cleaner can identify all the screenshots you’ve taken and show you exactly how much space they’re using, both in MB/GB and as a percentage of your storage. With one button, you can move them all to the trash, or you can review and delete them individually if you prefer.

- Optimize Live Photos: Clever Cleaner can quickly “compress” your Live Photos so they don’t take up nearly as much space. By compress, we mean converting them into standard still photos without the animation, but with no loss in quality. As you select the Live Photos to optimize, the app shows you in real-time how much space you’ll free up. It’s a simple way to reduce storage usage while keeping the integrity of your favorite photos intact.
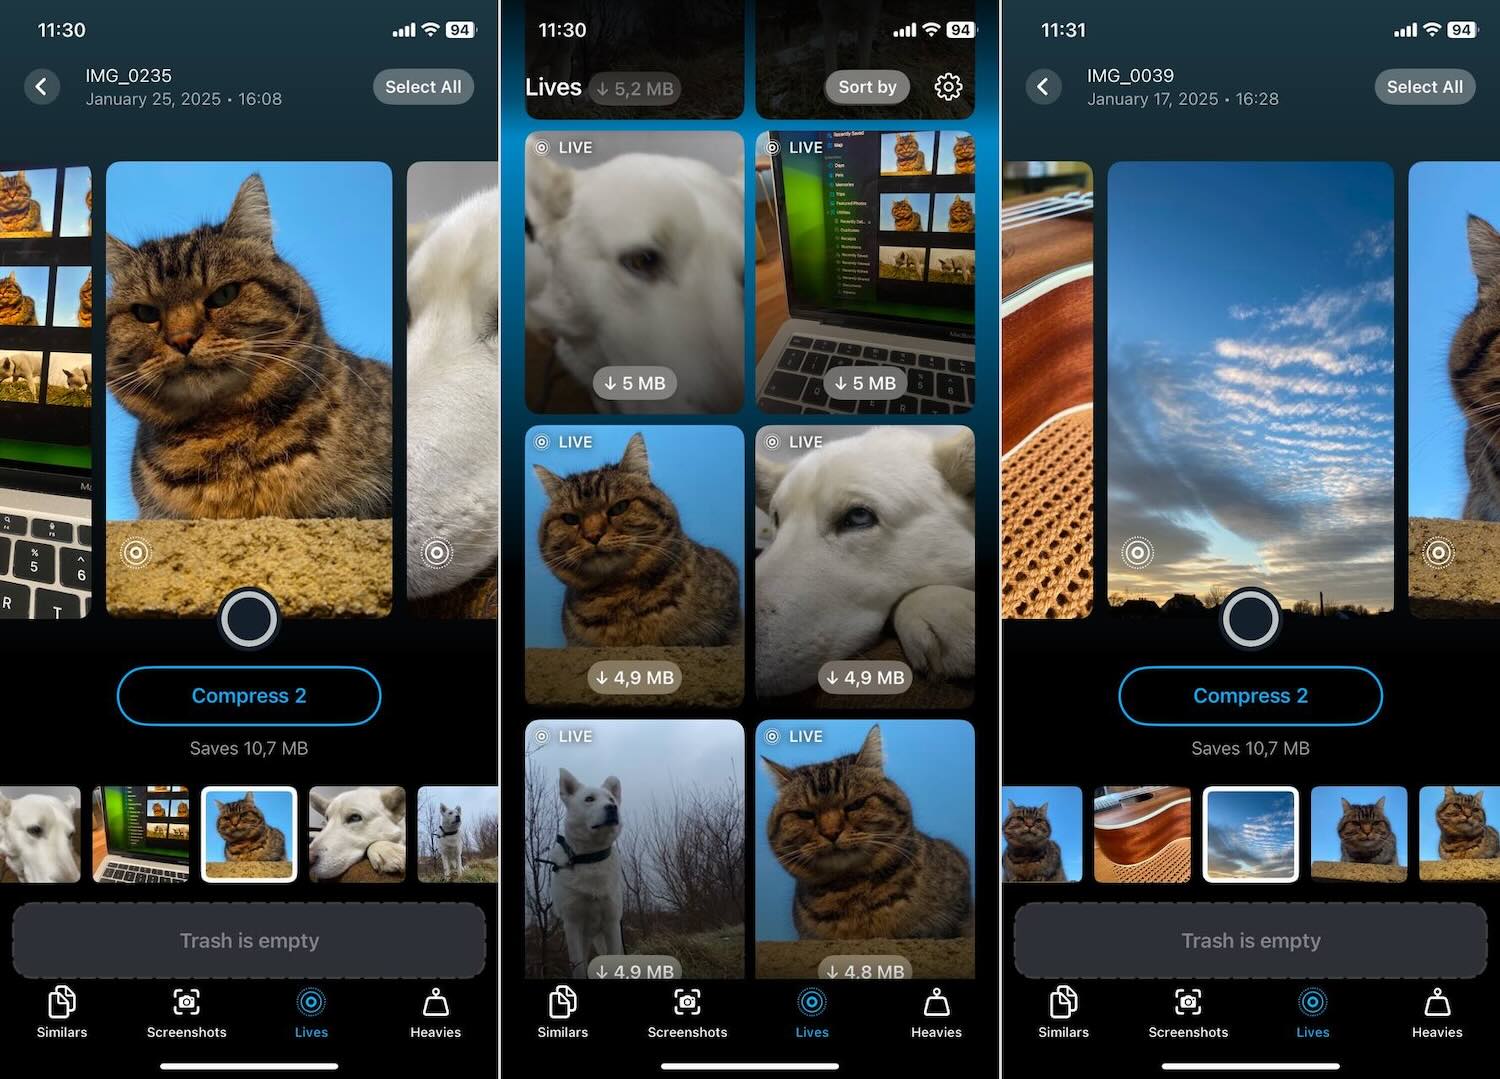
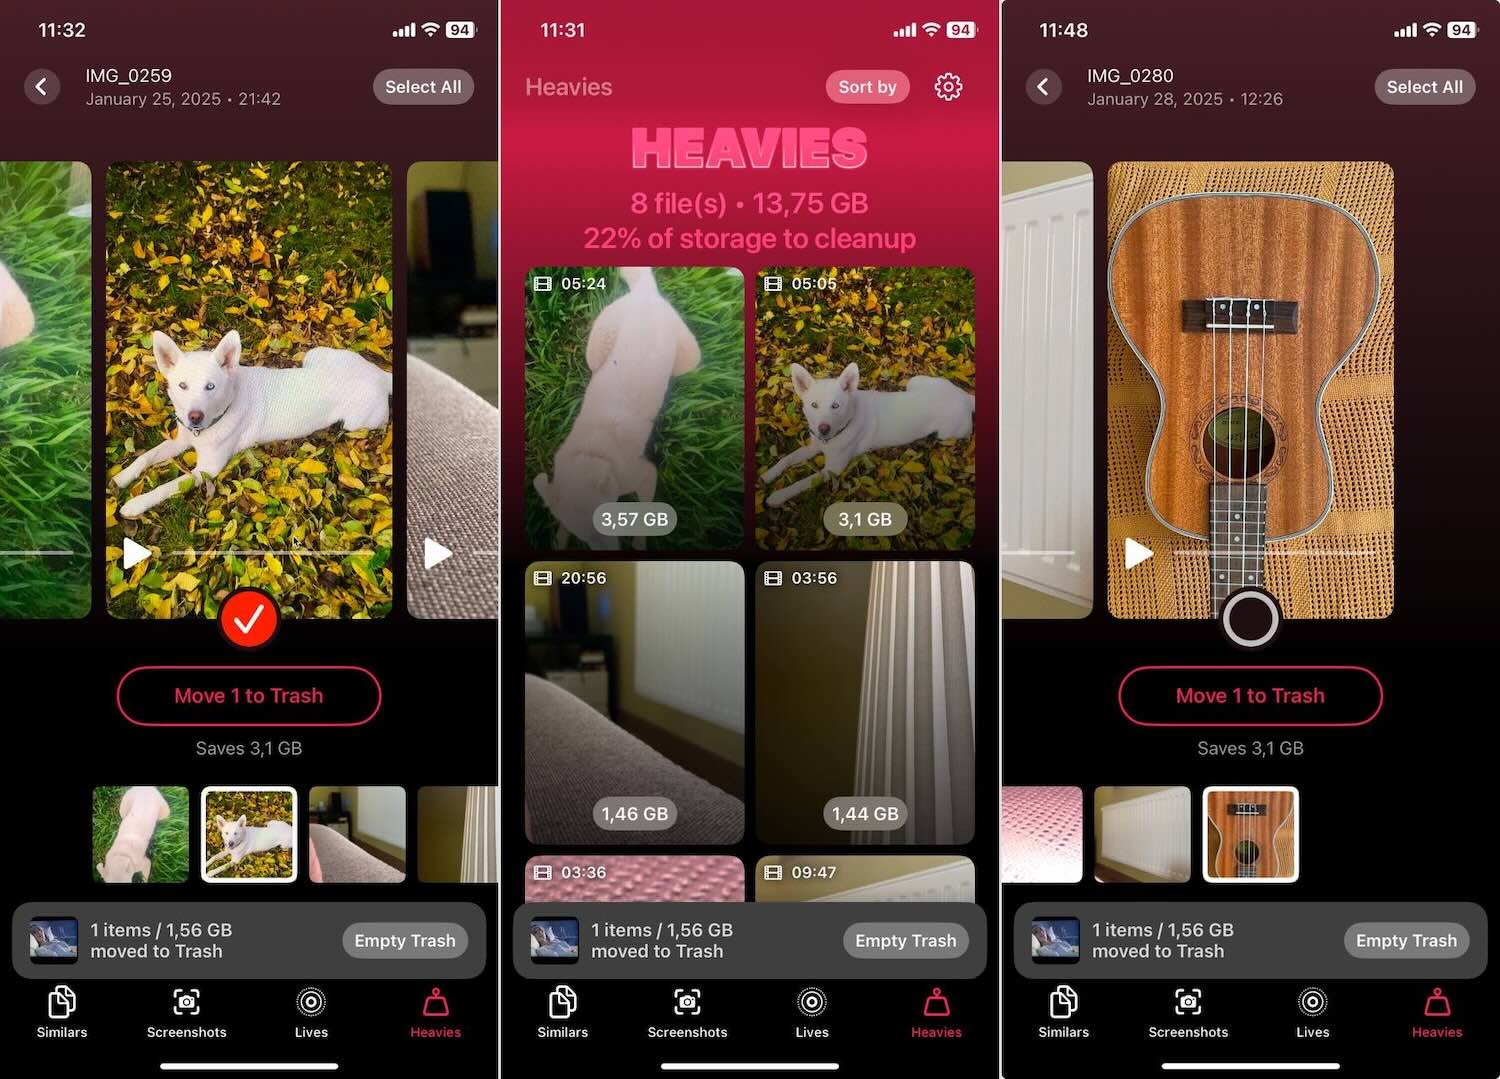
- Find “Heavies” Feature: Clever Cleaner makes it easy to quickly identify the largest files in your library—whether they’re photos or, more commonly, videos—that are taking up the most space. It sorts all your media from largest to smallest. This way, you can see at a glance which files are eating up your storage. From there, you can decide what to keep and what to trash.
Note. While testing Clever Cleaner, we didn’t encounter any paywalls, locked features, or ads—a pretty generous offer for a free app. On the official Clever Cleaner: AI iPhone Storage Cleaner website, the developer promises to keep it completely free forever for anyone who downloads it now and keeps it on their phone. It’s worth mentioning that they’ve done something similar with their other products, like Disk Drill, so there’s no reason to doubt this promise. Here’s an example of a helpful review that evaluates Clever Cleaner alongside other iPhone storage-cleaning apps.
We evaluated this app thoroughly and didn’t run into any issues or glitches. Even though it’s new, everything is intuitive and easy to use. Plus, if you accidentally delete something—the app moves files to the trash first, so you can easily restore them back to your library right from the app itself. Want to know more about Clever Cleaner? Check out our review here.
Method 3: Restart Your iPhone
Sometimes, the simplest tricks work surprisingly well. A quick restart of your iPhone can clear out temporary files, refresh the system, and potentially free up some much-needed storage space. Even after you delete photos, the system might still index changes and misreport your storage status as full. A restart can help the system recalibrate and accurately reflect the new storage reality. Here’s how to do it:
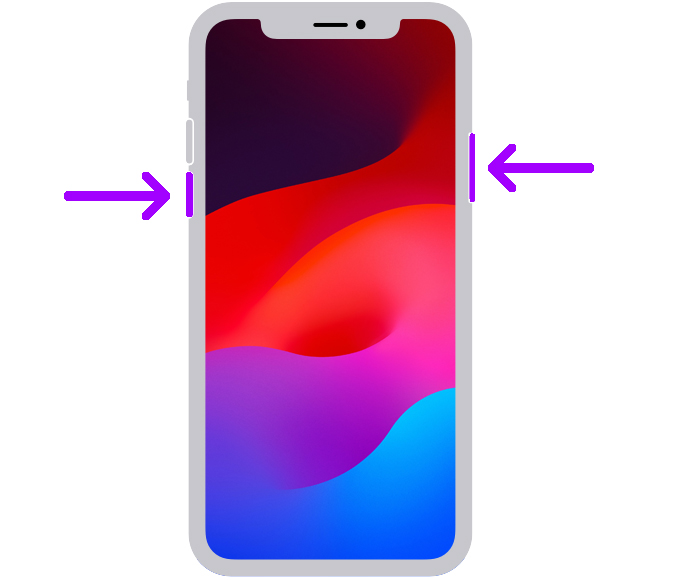
- Hold the Power Button: For most iPhones, you’ll hold the side or top button until the power off slider appears. If you’re using an iPhone with Face ID, you might need to hold the side button and either volume button simultaneously.
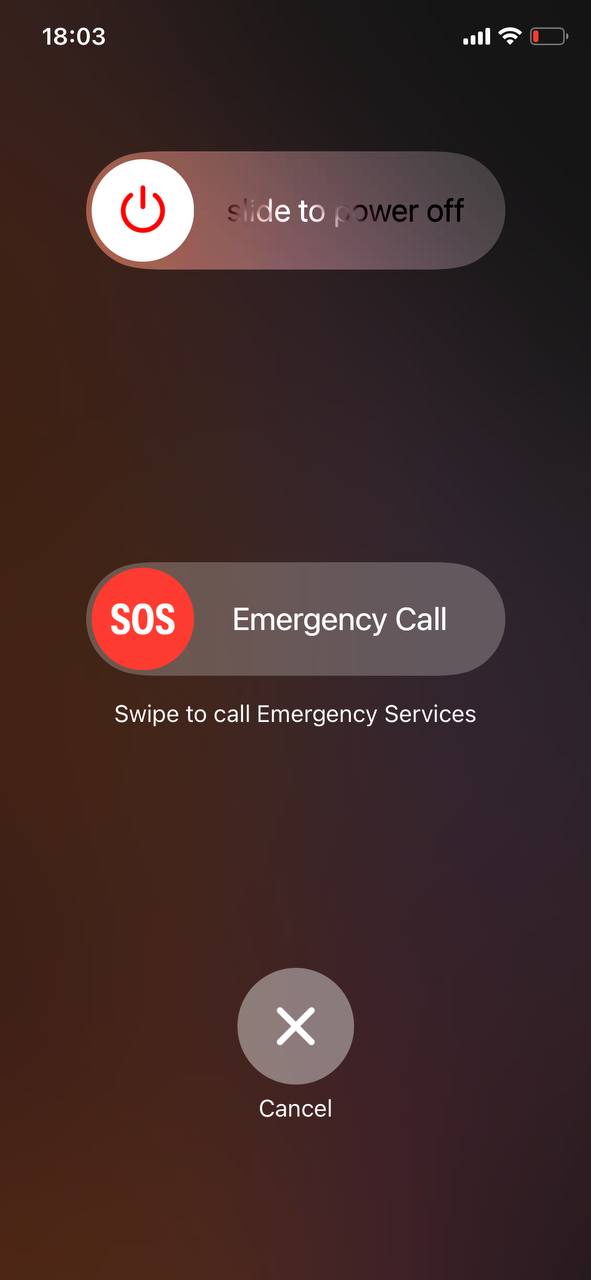
- Slide to Power Off: Swipe the slider, and your iPhone will begin shutting down. It’s a small wait from here.
- Restart: Once your iPhone is off, press and hold the side/top button again. Let go when you see the Apple logo. Your iPhone is waking back up.
This simple “trick” often works if you’ve recently deleted a bunch of stuff but the “iPhone storage full after deleting photos” issue persists.
Method 4: Update to Latest iOS
Running on an outdated iOS can sometimes mess with your storage metrics. Outdated iOS versions also might not handle storage as effectively, leading to issues when iPhone storage still full after deleting photos. Here’s how to be sure you’re on the latest version:
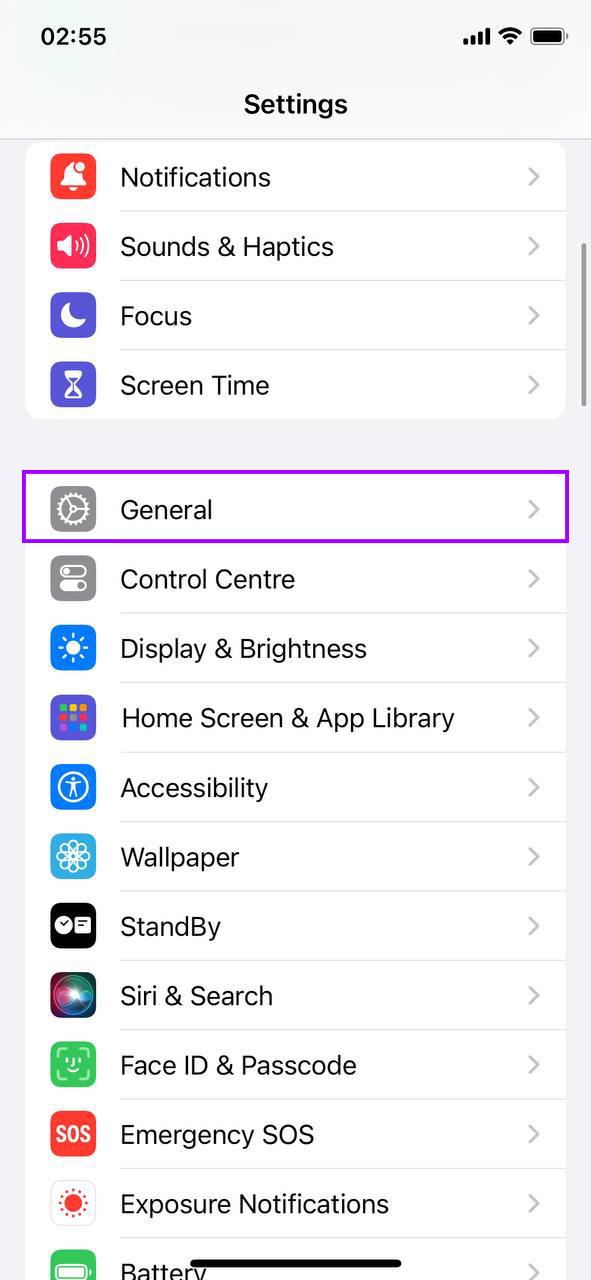
- Open Settings: Start by tapping the Settings icon on your home screen.
- Tap on General: Once in Settings, find and tap on the “General” option.
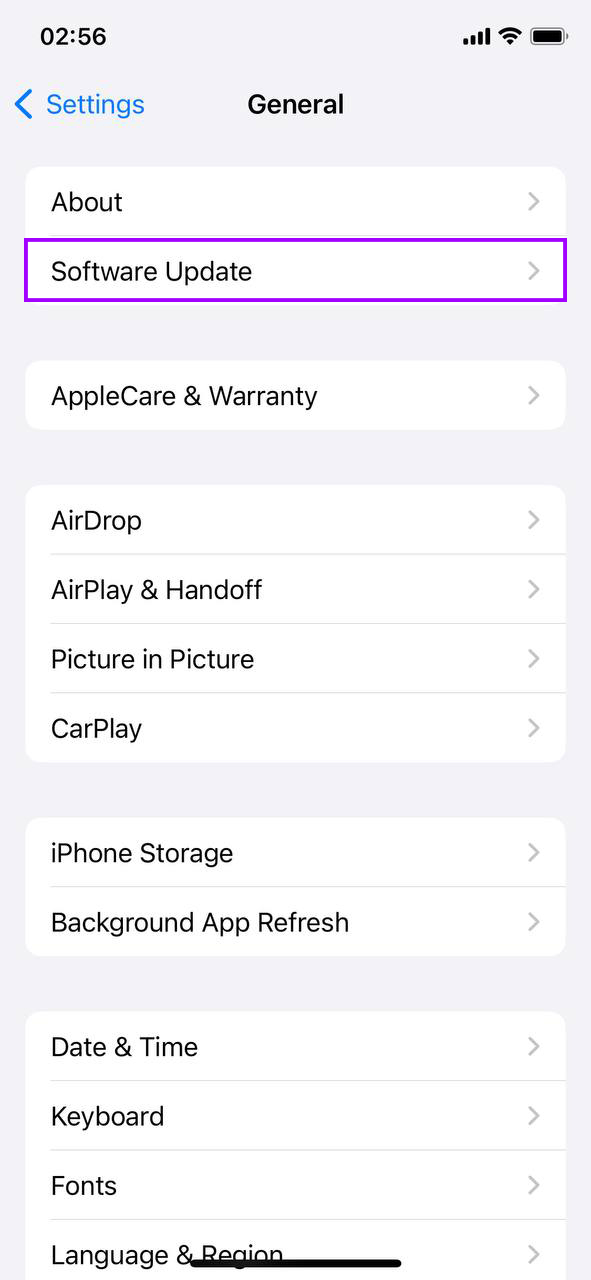
- Software Update: Next, tap “Software Update” to check if there’s an update available for your iPhone.
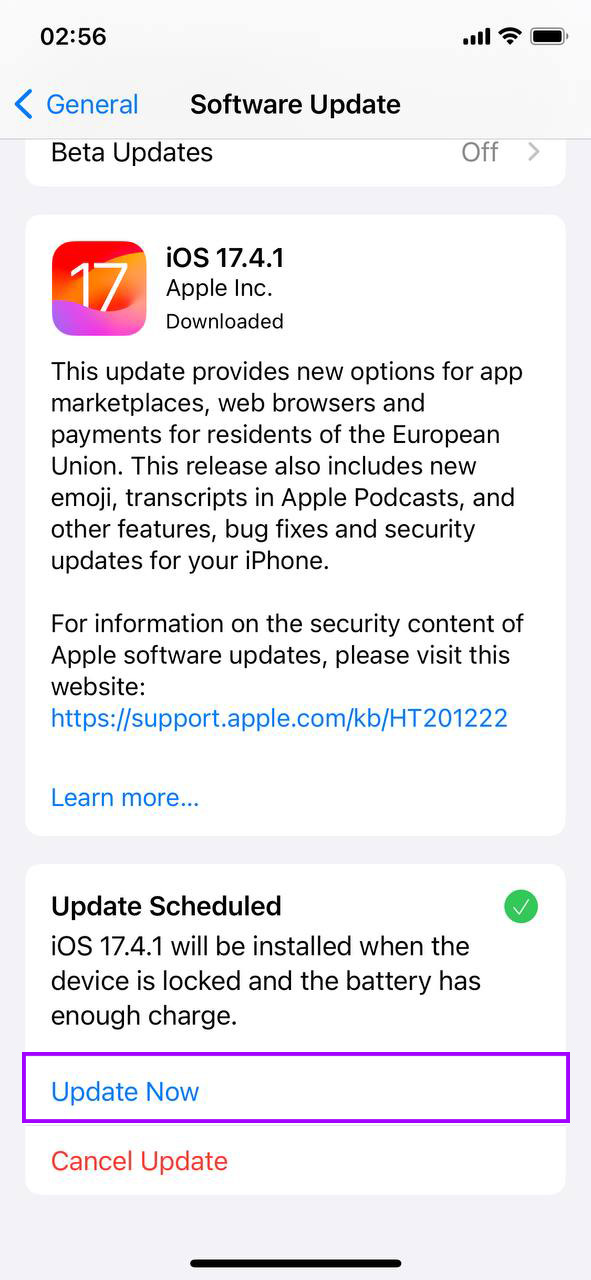
- Download and Install: If an update is available, you’ll see the option to “Update Now.” Tap it, and your iPhone will start updating. Make sure you’re connected to Wi-Fi and have enough battery life, or plug your phone into a charger before starting the update.
An updated iOS can sometimes resolve underlying issues that cause your storage to not reflect actual usage accurately. This is especially relevant if you’ve noticed that deleting photos not clearing space on iPhone becomes a recurring problem.
Method 5: Modify Date and Time (for Hidden Photos)
Sometimes, your iPhone might hide photos due to incorrect date and time settings, making it seem like your storage isn’t freeing up even after deletions. Adjusting these settings might show these hidden photos, allowing you to delete them and free up space. Here’s how to tweak your date and time settings:
- Access Settings: Tap on the Settings app from your home screen to get started.
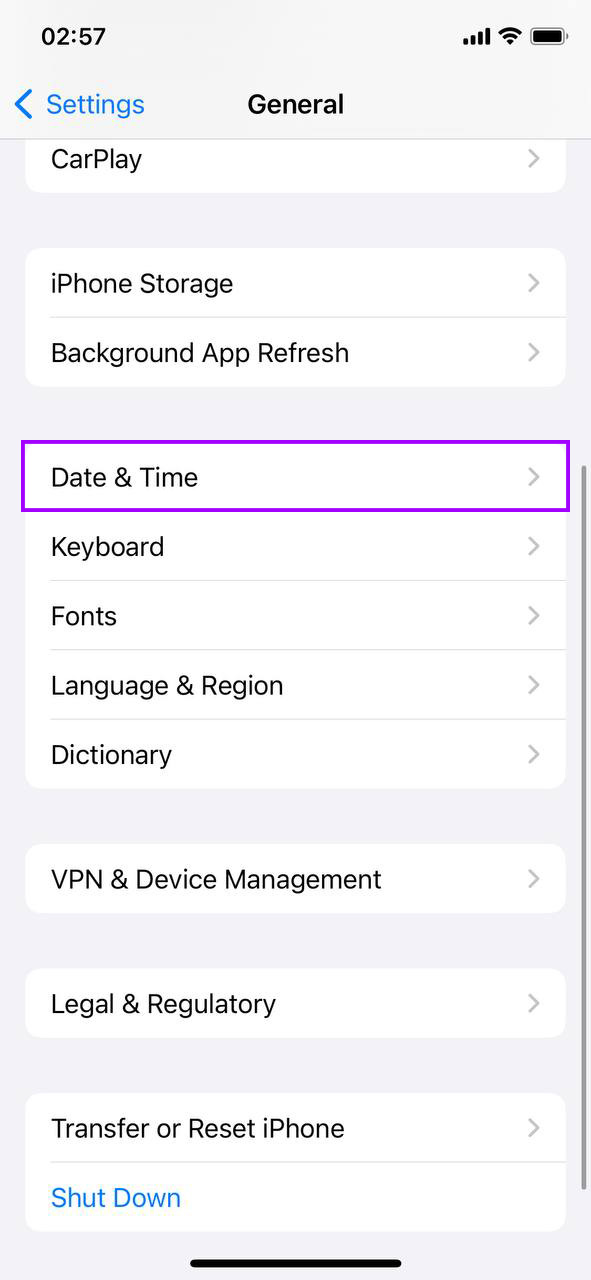
- Find “General”: Scroll down and select the “General” option within your Settings menu.
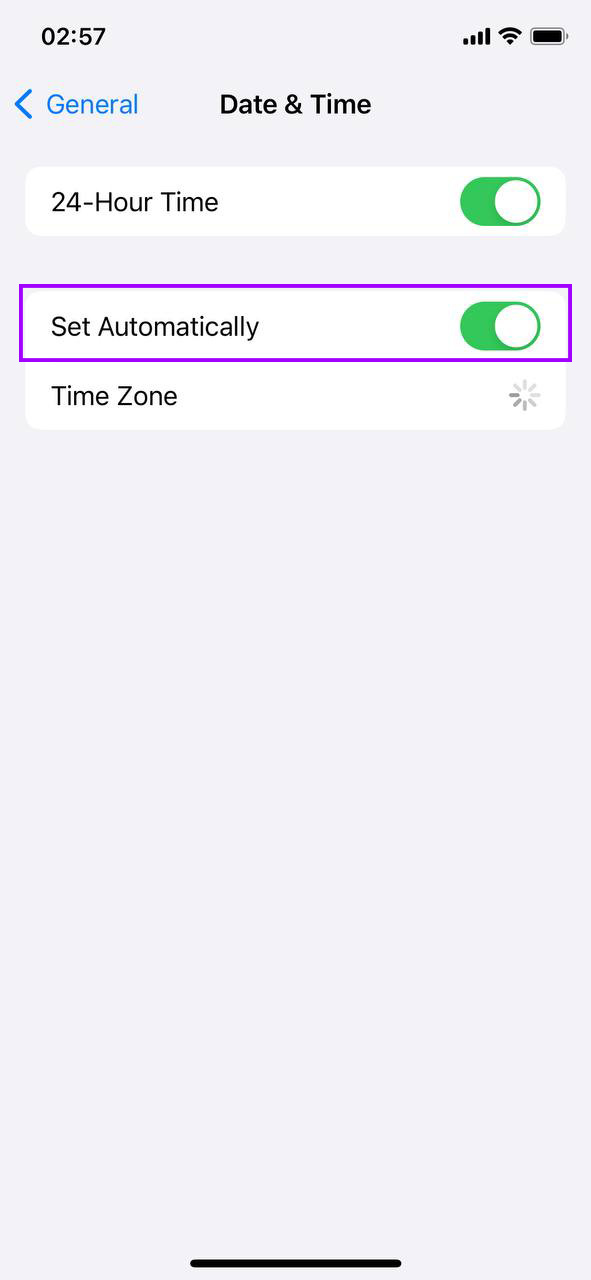
- Tap “Date & Time”: Inside the General settings, find and tap on “Date & Time.”
- Turn Off “Set Automatically”: If “Set Automatically” is enabled, toggle it off to manually set the date and time.
- Adjust Date and Time: Manually change the date to a year or two in the past and then check your Photos app for any photos that may appear as a result of this change.
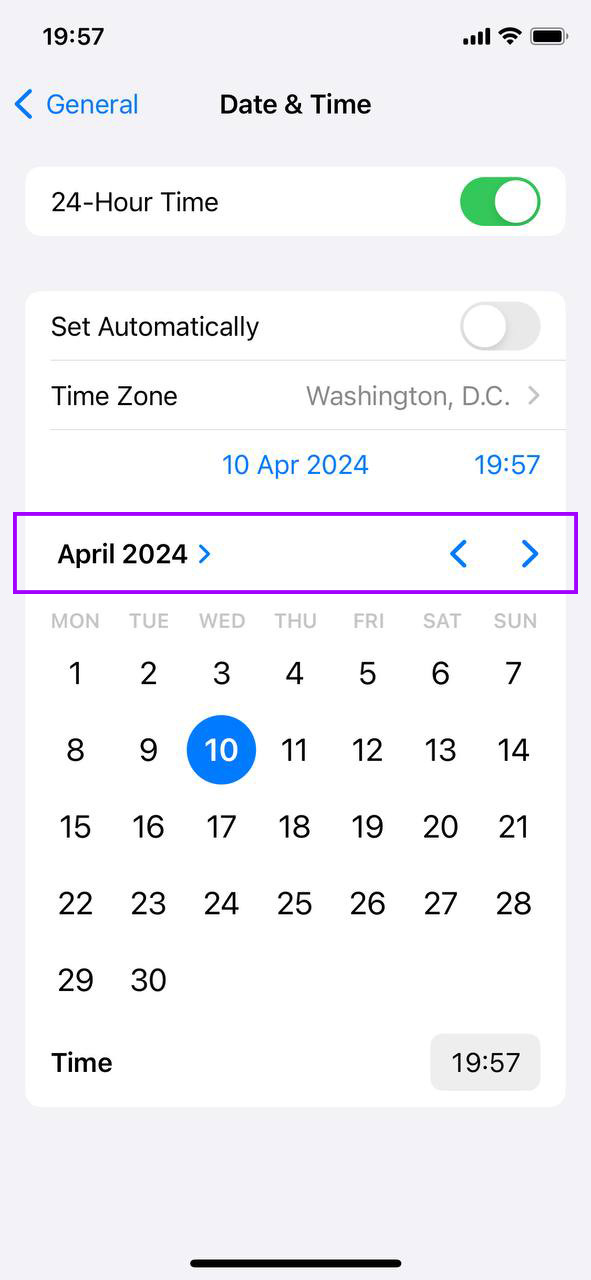
- Reset Date and Time: After checking for and dealing with hidden photos, don’t forget to go back into your settings and either set the date and time manually to the correct values or toggle “Set Automatically” back on.
This method can be a clever workaround if you’re puzzled by the still full storage, uncovering photos that were hidden due to incorrect time stamps.
Method 6: Check and Enable Optimize iPhone Storage
Got iCloud Photos turned on? It might be saving full-resolution photos directly to your iPhone, eating up valuable space. Here’s how to check if Optimize iPhone Storage is enabled and make sure your photos don’t take up more space than they need to:
- Jump into Settings: Tap that gear icon to get started.
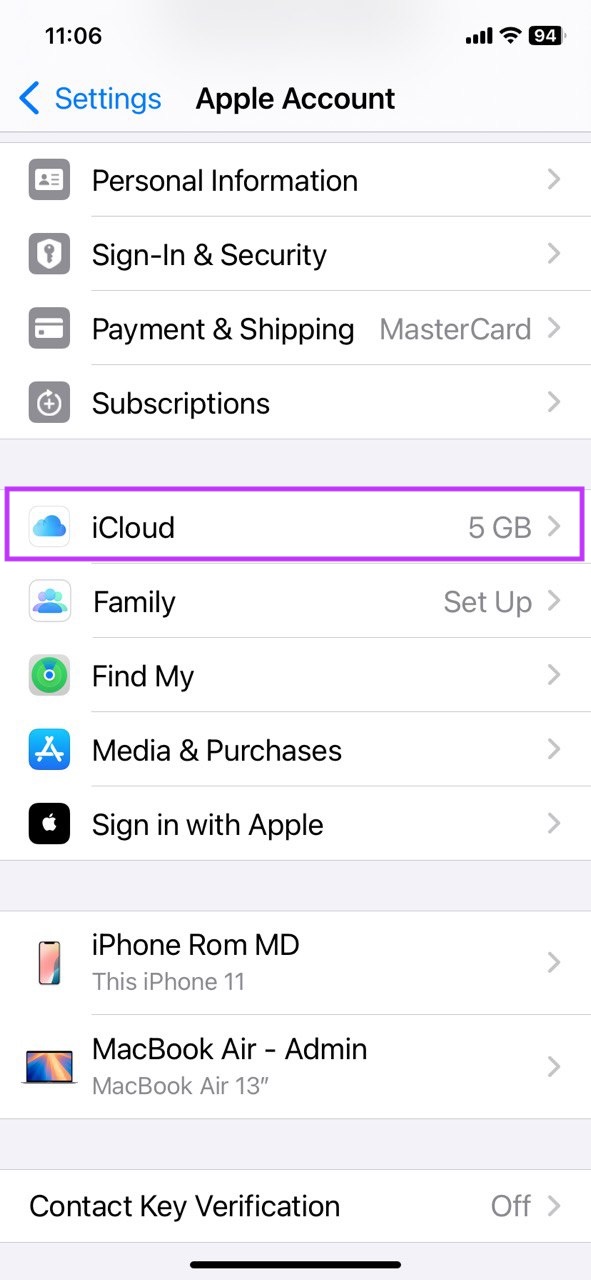
- Tap Your Name: Right at the top of Settings, that’s where your Apple ID and iCloud settings live.

- Go to iCloud: It’s listed right there; tap it to see what’s syncing.
- Find Photos: Among the options, you’ll find “Photos.” That’s your target.
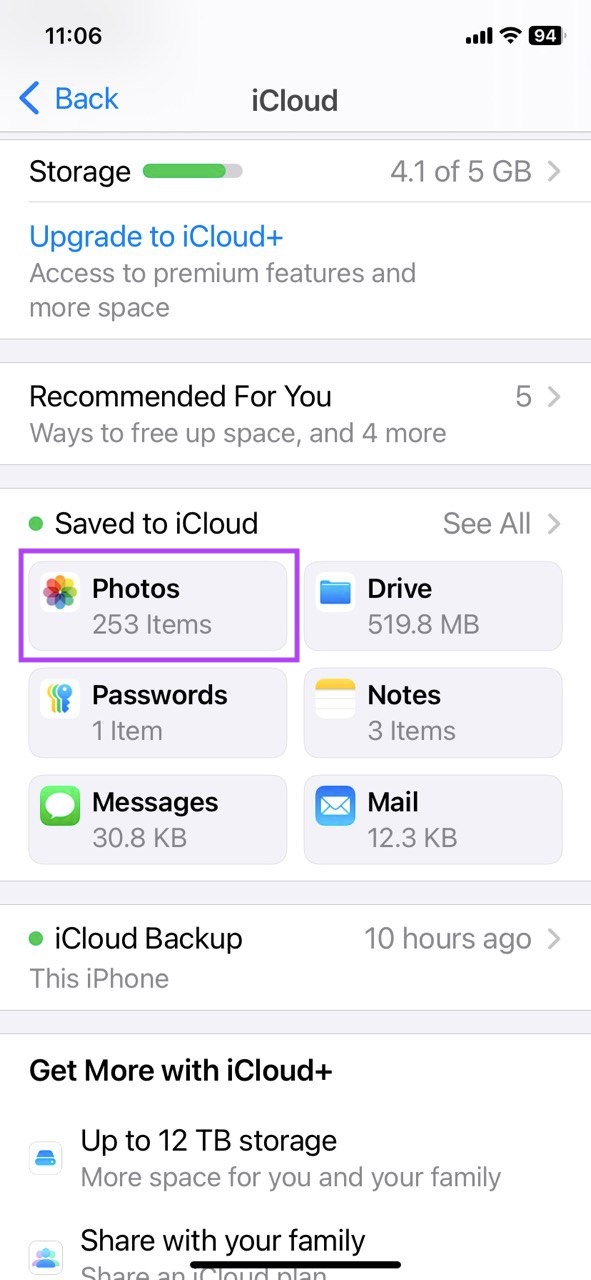
- Enable Optimize iPhone Storage: Look for the Optimize iPhone Storage option. If it’s not already turned on, tap the toggle to enable it. This setting makes sure that your iPhone stores smaller, optimized versions of your photos while keeping the full-resolution originals in iCloud.

This action shifts your iPhone to store only lower-resolution versions of your photos (high-quality images will stay in the cloud), which could seriously free up some space. It’s a smart move if you’re scratching your head when you deleted all photos but it still says storage full issues.
Method 7: Free Up Other Storage
Photos might not be your only space hog. Ever noticed how ther storage seems to take up more room than it should? Apps, messages, and hidden data can bulk up your storage too. Let’s slim it down:
- Settings First: Tap that gear icon to open Settings.
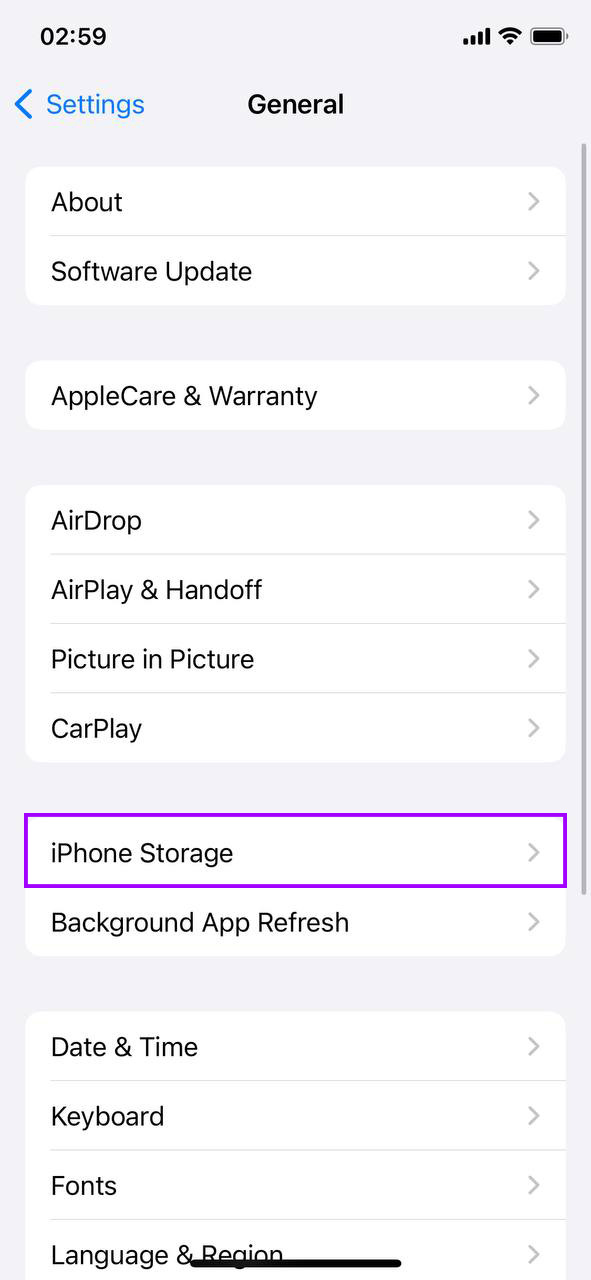
- General Next: Scroll to find “General” and tap it.
- Find iPhone Storage: Inside General, look for “iPhone Storage” and tap to enter.
- Wait for the Breakdown: Your iPhone will take a moment to show you what’s using up your space. This chart is gold for spotting storage hogs.
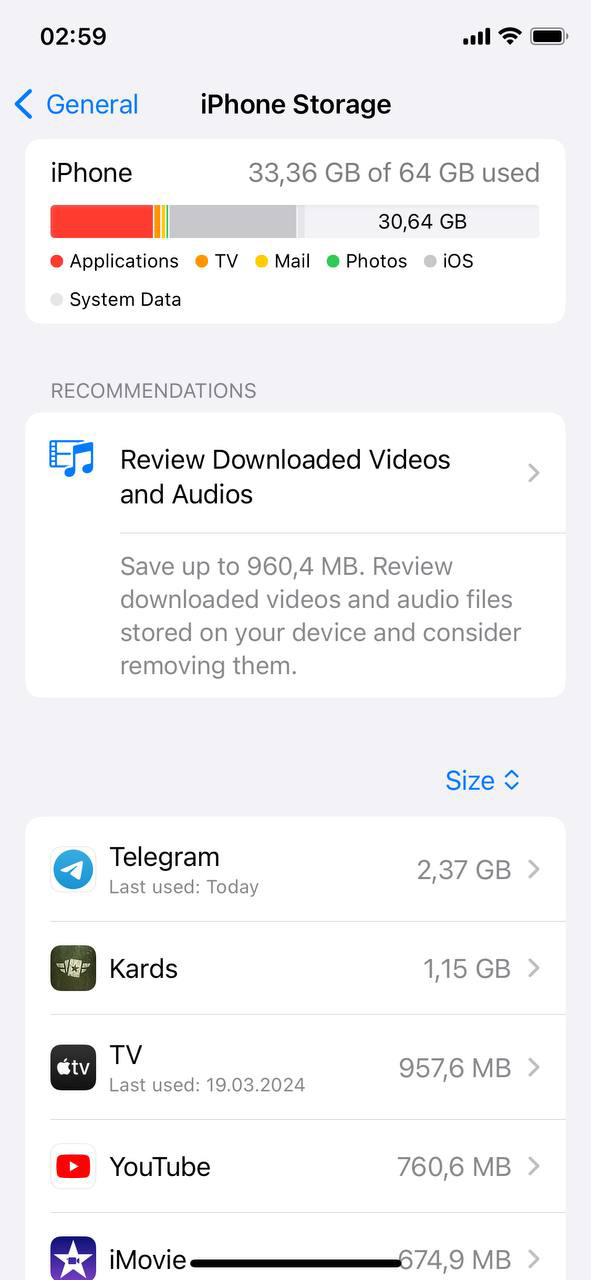
- Decision Time: See any apps you hardly use? This might be the time to say goodbye. Also, check out the recommendations for quick fixes to free up space.
Getting a grip on ‘Other Storage’ can make a big difference, especially when iPhone photos are deleted but storage is still full issue persists.
Method 8: Factory Reset (Last Resort)
At your wit’s end with the “Storage Almost Full” message? If all else fails, a factory reset could be the clean slate you need. But caution: this wipes your iPhone clean. Here’s the safe way to do it:
- Back Everything Up: First things first, save what matters. Use iCloud or your computer to .
- Settings Time: On your iPhone, open Settings.
- Hit General: Scroll to find “General” and tap it.
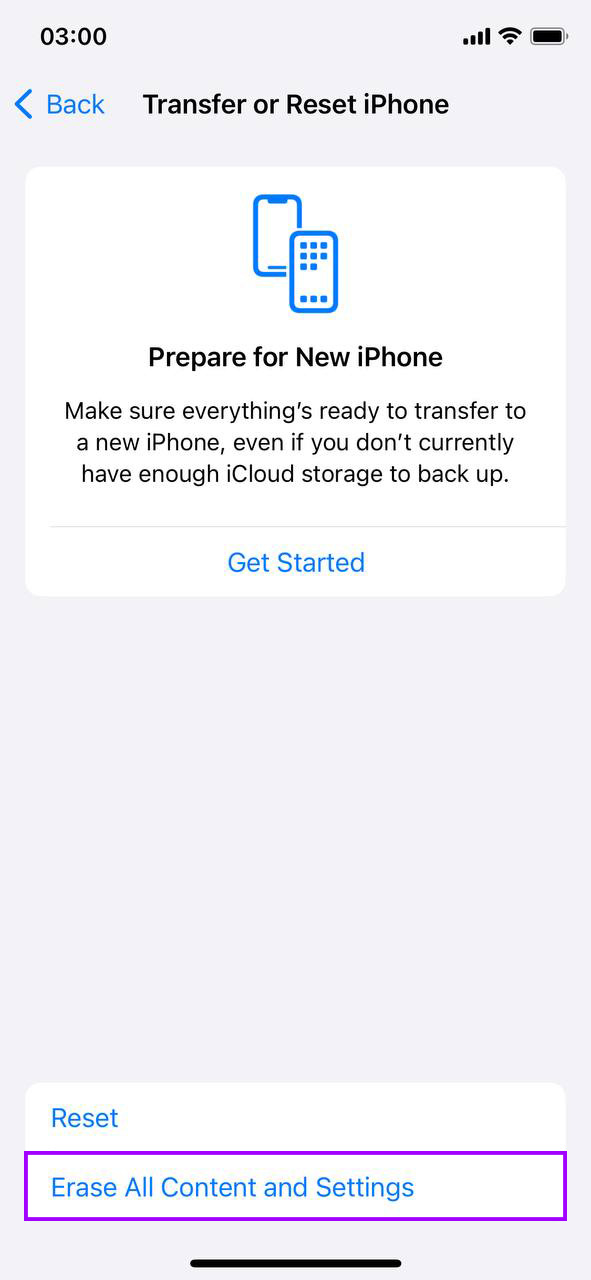
- Erase All Content and Settings: Down at the bottom of General, there’s “Transfer or Reset iPhone.” Tap it, then “Erase All Content and Settings.” You might need to punch in your passcode and Apple ID to confirm.
- Set Up Fresh: After the reset, your iPhone restarts fresh. Set it up as new or restore your backed-up data.
This step is the nuclear option for the most stubborn issues. It’s the way to go when you’ve tried everything from app clean-ups to storage management and still can’t shake off that full storage warning.
Remember, a factory reset means starting from scratch, so it’s worth trying other methods first to clear up space without losing everything.
Final Tips
So, there you have it. If your iPhone storage still feels like an uphill battle after deleting photos, and you’re constantly trying to free up space, here are a few additional popular tweaks you can try:
- Turn off Live Photos: Open the Camera app, and at the top of the screen, you’ll see the Live Photos icon—it looks like a target. If it’s yellow, that means Live Photos are on. Tap it to turn it off, and the icon will turn white. From now on, your iPhone will only capture still photos, which take up far less space.
- Disable “Keep Normal Photo” for HDR: Go to Settings > Camera, and scroll until you find the “Keep Normal Photo” option. By default, your iPhone saves both the HDR and the normal version of each photo. To stop this, toggle off the “Keep Normal Photo” option. This will keep only the HDR version, saving a lot of storage over time.
- Compress your photos: If your photos still take up too much space, you can use compression tools or apps to shrink their file size without ruining the quality. This is especially useful for large photo libraries.