How to Merge Duplicate Photos on iPhone: 2 Easy Methods (iOS & Apps)
Duplicate and near-duplicate photos turned your library into a mess? Well, thanks to multiple developments, it’s now easier than ever to merge duplicate photos on your iPhone. Whether using Apple’s built-in Photos app or a more advanced third-party app, we’ll show you exactly how, step by step. Let’s do this.
Read This Before You Merge Duplicates on iPhone
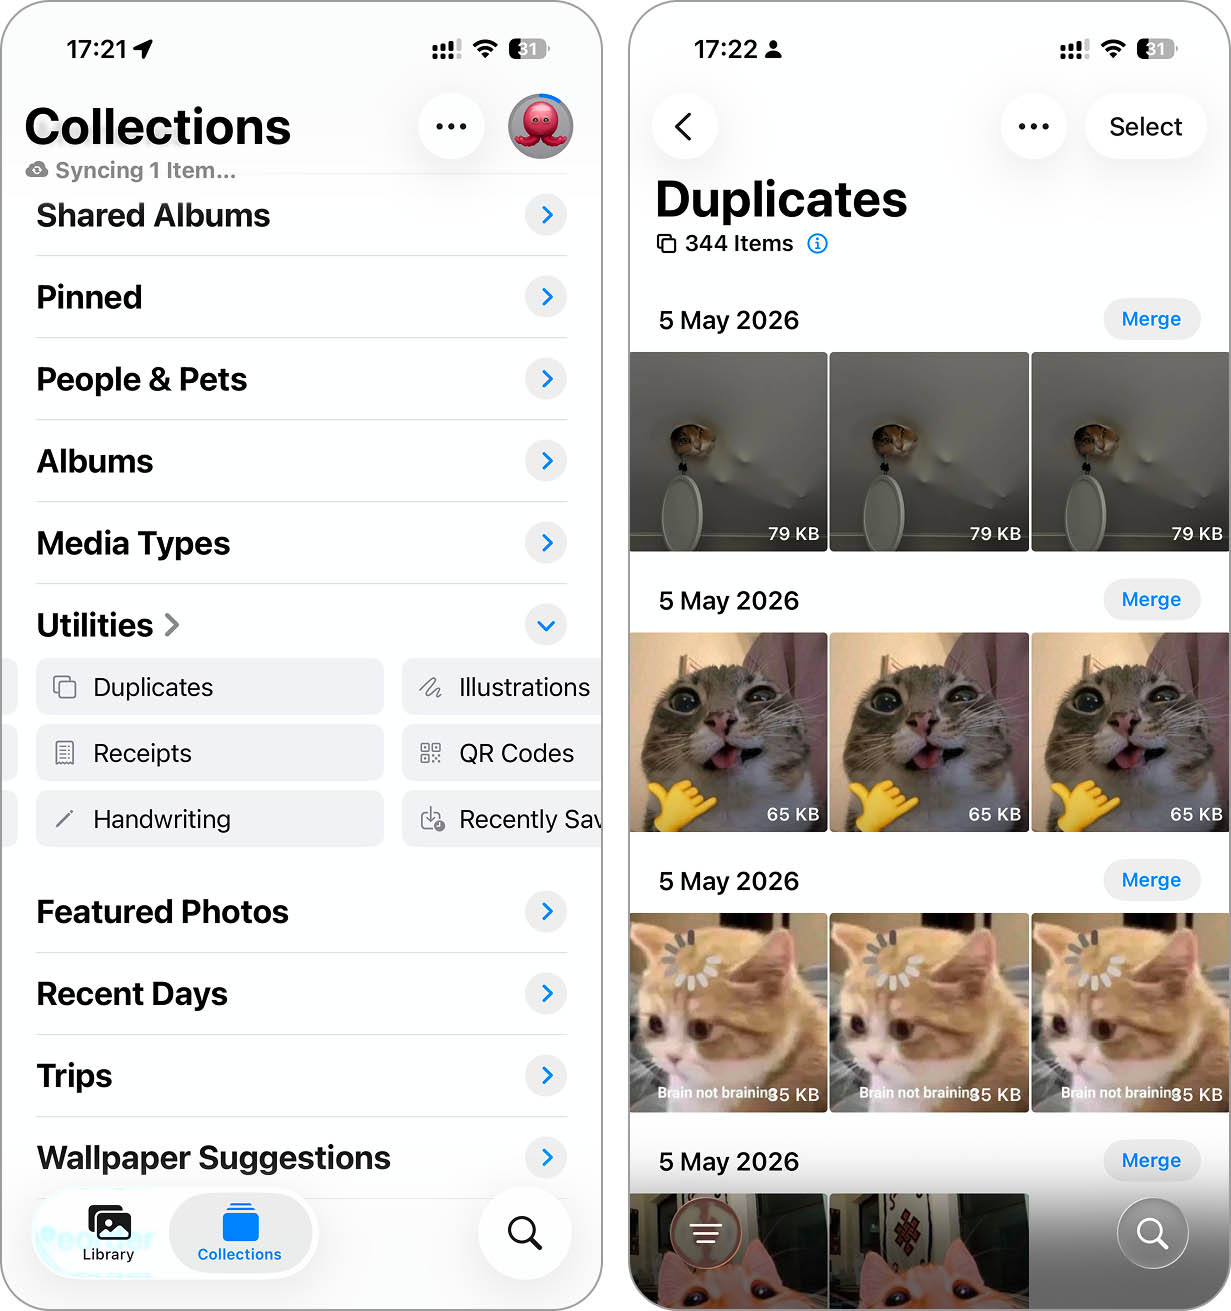
As you may already know (or maybe not yet), since iOS 16, Apple has had an automatic process that finds duplicate photos on the iPhone and allows you to merge them. iOS scans your entire photo library and groups identical images into a dedicated Duplicates album under the Utilities section in Photos.
But before we show you how to merge all duplicate photos on iPhone using this feature, we need to quickly explain that what you consider duplicates often differs from what iOS considers duplicates.
Take the example below. You probably consider these two photos duplicates because they look practically identical, and the difference between when they were taken is only a few seconds. But iOS does not see them as duplicates.

That’s because, for iOS, duplicates are usually two (or more) completely identical image files. And as you can probably guess, almost nothing shot with a camera will qualify. Even if photos look the same to the human eye, iOS will still treat them as different images. So what usually appears in the Duplicates album? Mostly photos that were downloaded twice, transferred multiple times, or manually duplicated. Everything else (similar selfies, repeated shots, burst photos) normally won’t show up there.
Why are we explaining this separately? Because this difference determines which cleanup method will actually work best for you.
2 Methods to Merge Duplicate Photos on iPhone
Let’s get to business. We’ll show you two methods to merge duplicate photos on an iPhone – one using Apple’s native Duplicates utility, and another using a third-party app that expands what’s actually possible.
Which one should you choose? Well, if your problem is mostly identical images (repeated downloads, transferred copies, or manually duplicated photos), then Method 1 with the built-in iPhone tool will probably be enough. But if the real problem is near-duplicates, which usually take up far more space and aren’t detected by Apple’s built-in tool, then Method 2 with a third-party cleaner is the better option.
Method 1: Merge Duplicate Photos Within Photos App
Now, let’s go to the native features already available. As we said, though they have some limitations, they’re still helpful, and we can’t miss out on them.
There’s also one thing we haven’t mentioned yet. It might take time for iOS to index newly added photos, so duplicates won’t always show up immediately. In many cases, it’s best to leave your iPhone charging and check the results again after a few hours (sometimes even a couple of days). Or, if you don’t want to wait, you can skip straight to the alternative method with a third-party cleaner.
So here’s how to merge the same photos on iPhone using Apple’s built-in tool:
- Navigate to the Duplicates album, as described in the previous section of this article.
- Tap ‘Select‘, then ‘Select All‘, and finally ‘Merge‘ to merge everything at once.
- Confirm the action after tapping the Merge button to complete the process.
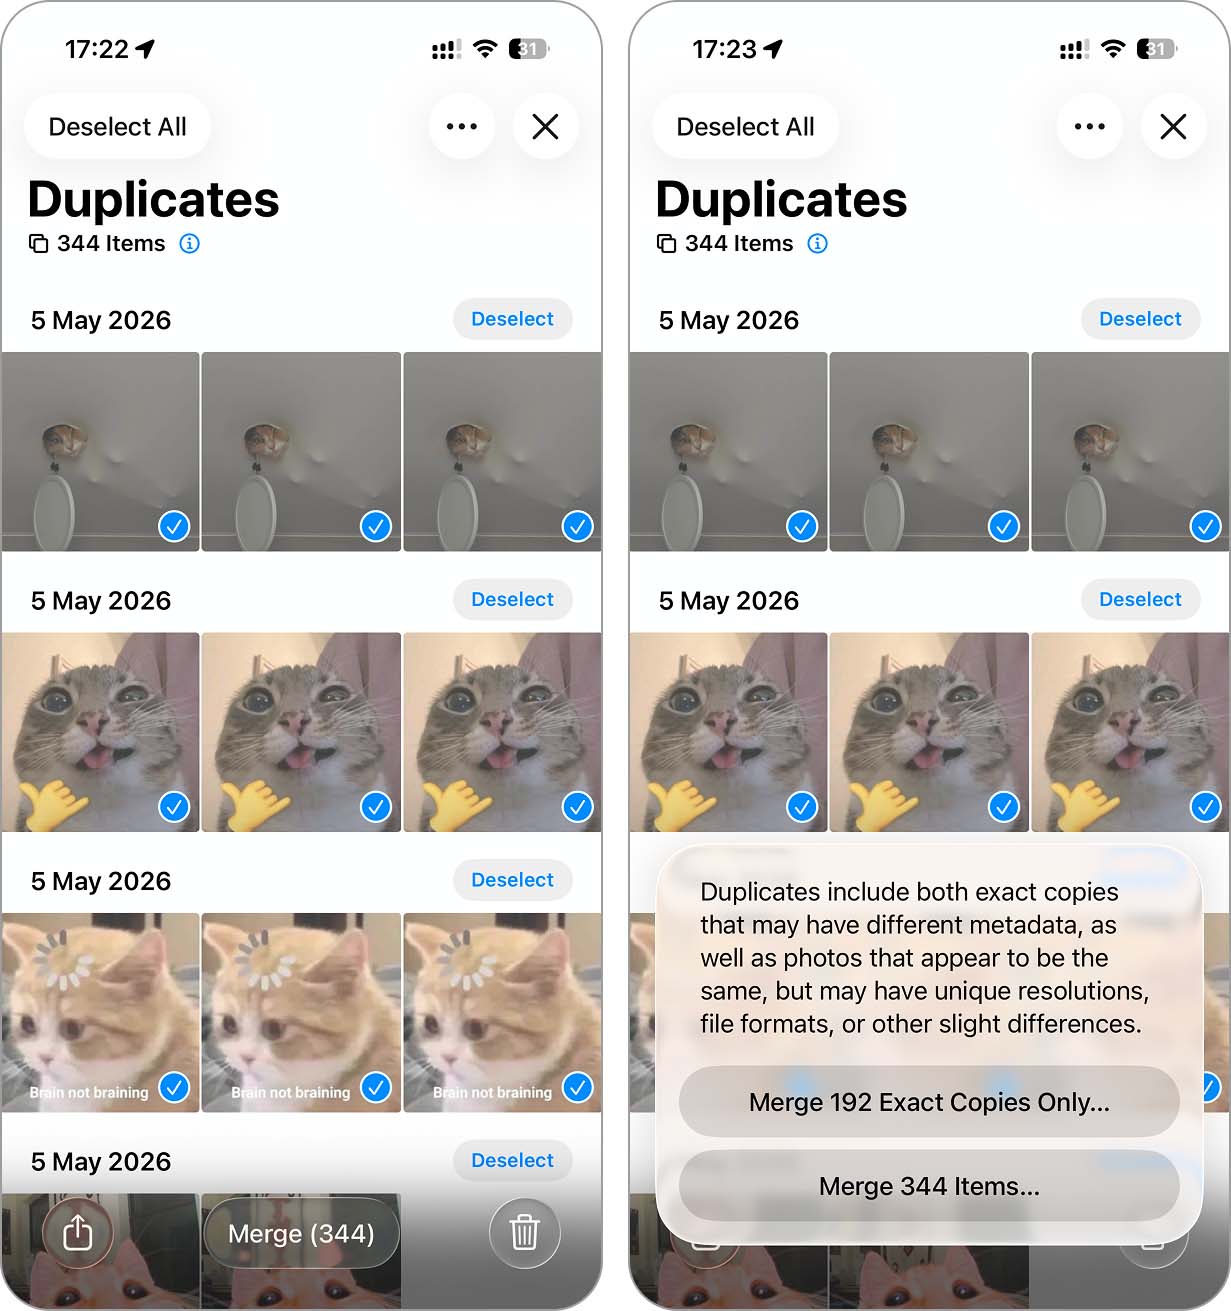
- Exact copies – These may have different metadata but are otherwise identical.
- Duplicates with slight differences – These might have different file formats, resolutions, or minor variations but are still duplicates of the same photo (not similar images like we discussed earlier).
Regardless of which option you choose, iOS will combine the data from those photos into a single file and remove the extra copy afterward.
This isn’t the only way to combine duplicate photos on iPhone. You can also do it selectively, group by group, by simply tapping the Merge button at the top of each duplicate set. And if a group contains more than two photos, you can manually select only the copies you want to merge instead of combining the entire group. To do that, open the duplicate set, tap Select, choose the specific photos, and then press the Merge at the bottom of the screen.
Method 2: Use Third-Party Apps to Merge Duplicate (and Similar) Photos
This option is the easiest and most convenient. Third-party duplicate finders are popular for a reason–they have none of the limitations of Apple’s built-in feature and are definitely the fastest way to merge duplicates and near-duplicate photos on an iPhone. We tested dozens of the most popular options in the App Store, and you can check our findings in this ranking of the best duplicate finder iPhone apps.
For this article, we’ll use the app that took the #1 spot–Clever Cleaner: AI Duplicate Cleaner. It earned that position thanks to its high-end AI detection algorithms, which were incredibly accurate in our tests, and because you can actually use it for free.
Here’s how to merge duplicates on iPhone using Clever Cleaner:
- Type ‘Clever Cleaner’ in the App Store search bar or download it using this link.
- Launch Clever Cleaner and grant permission to scan your photo library.
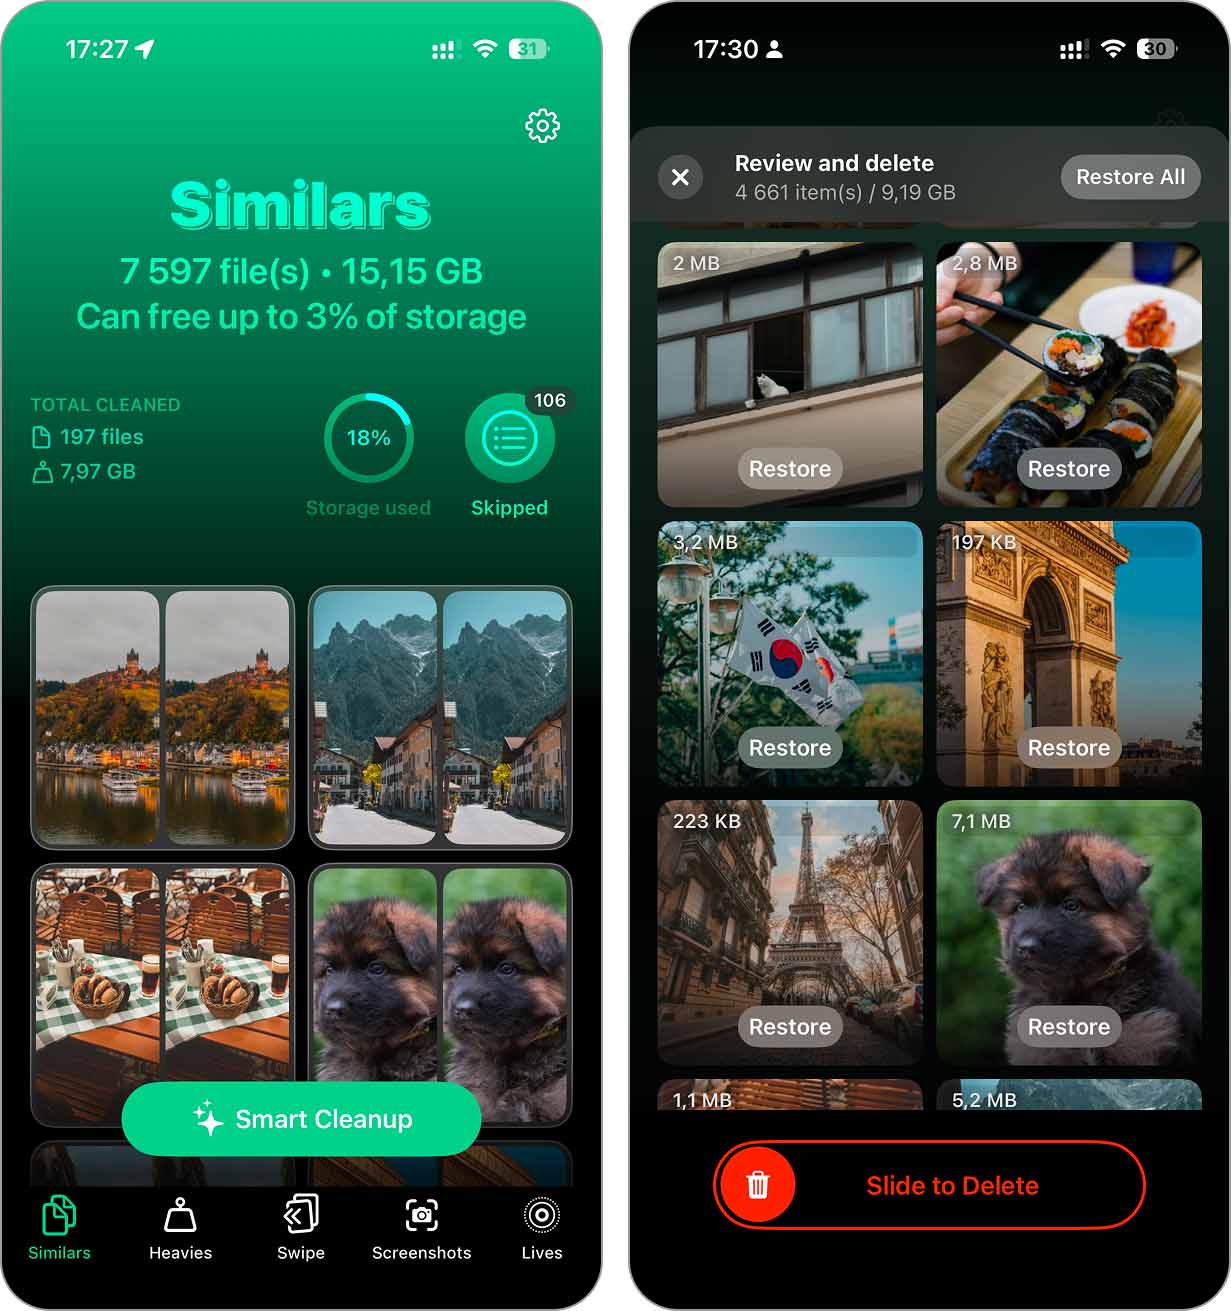
- Go to the ‘Similars‘ tab, where you’ll find both exact duplicates and near-identical images.
- Tap ‘Smart Cleanup‘ to automate the process and merge near-duplicate photos in just a few seconds while AI analyzes and selects photos for deletion.
- Review the AI suggestions, since the app automatically marks lower-quality or redundant images so these duplicate or near-duplicate photos can be “merged” (in reality, the app deletes the extras and keeps only the best shot based on clarity, resolution, and other factors).
- Tap ‘Restore‘ to deselect any images you want to keep.
- Confirm the cleanup with ‘Slide to delete’ if everything looks good, and the app will handle the rest.
For those who want a more selective approach, Clever Cleaner offers a semi-automatic way to merge duplicates. The app organizes similar photos into groups under the ‘Similars‘ tab and preselects the best-quality shot. You can tap on a group, review the images, and either accept the selection or manually pick the ones to keep.
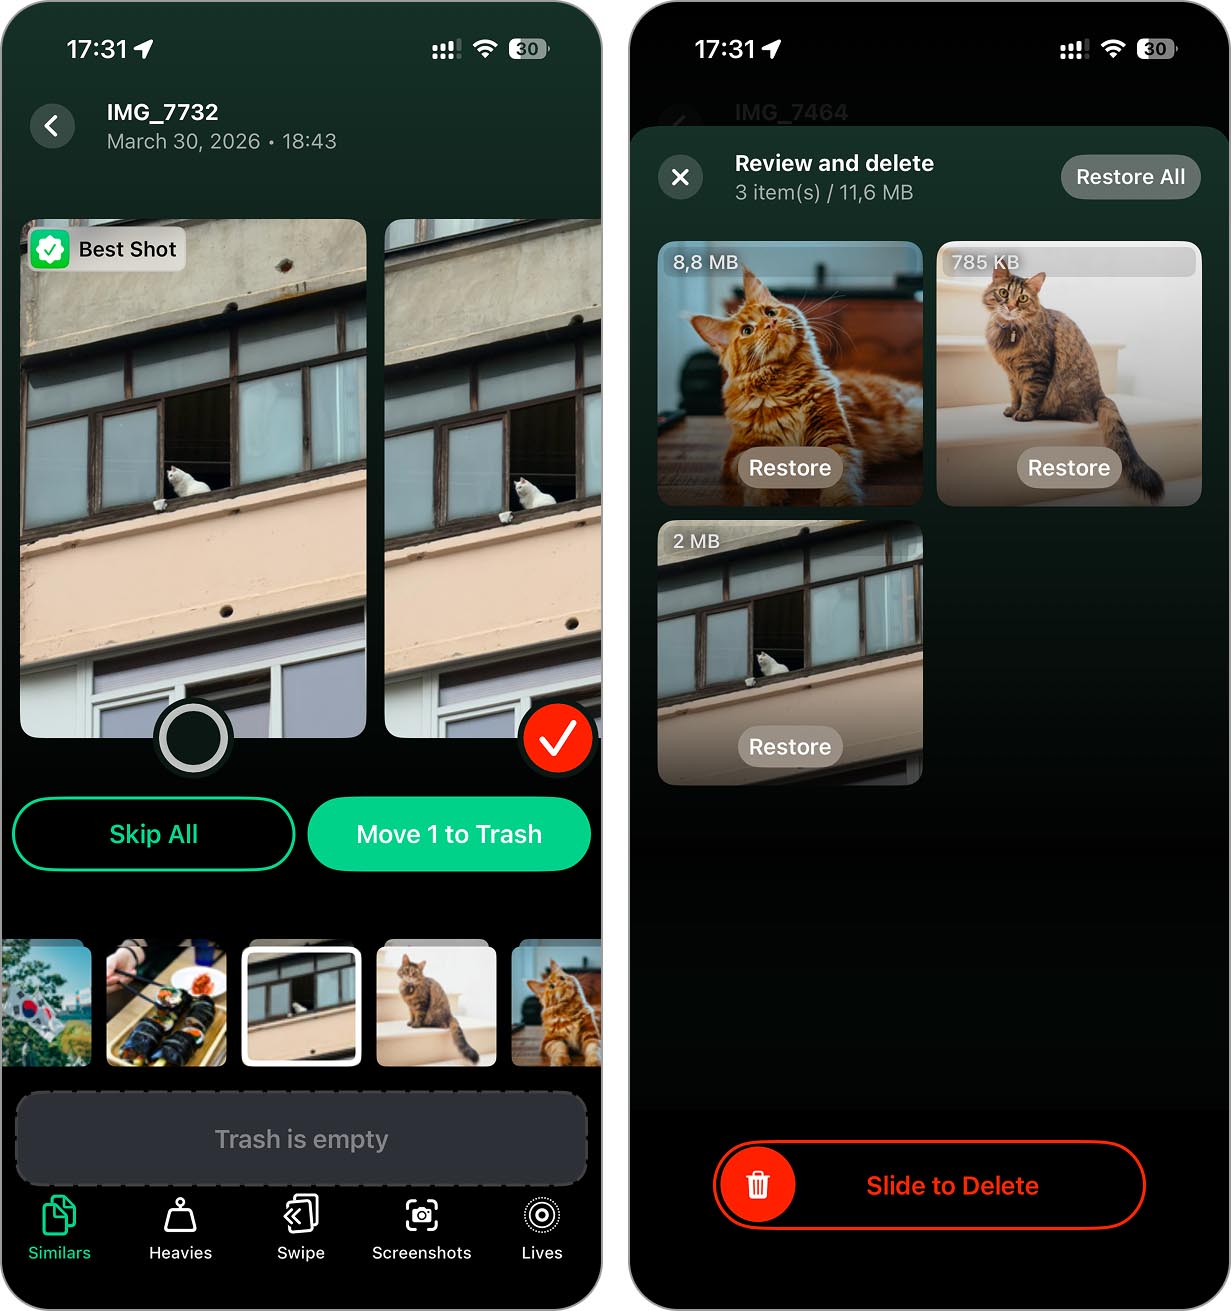
If you don’t want to delete anything in a group, tap ‘Skip All‘ to move on. To remove unwanted duplicates, tap ‘Move to Trash‘. Once you finish, tap ‘Empty Trash‘ and confirm the action. The app will then move the selected photos to the ‘Recently Deleted‘ album, where they will stay for up to 30 days. If you don’t want to wait for automatic deletion, you can manually clear everything from ‘Recently Deleted‘ to free up space immediately.
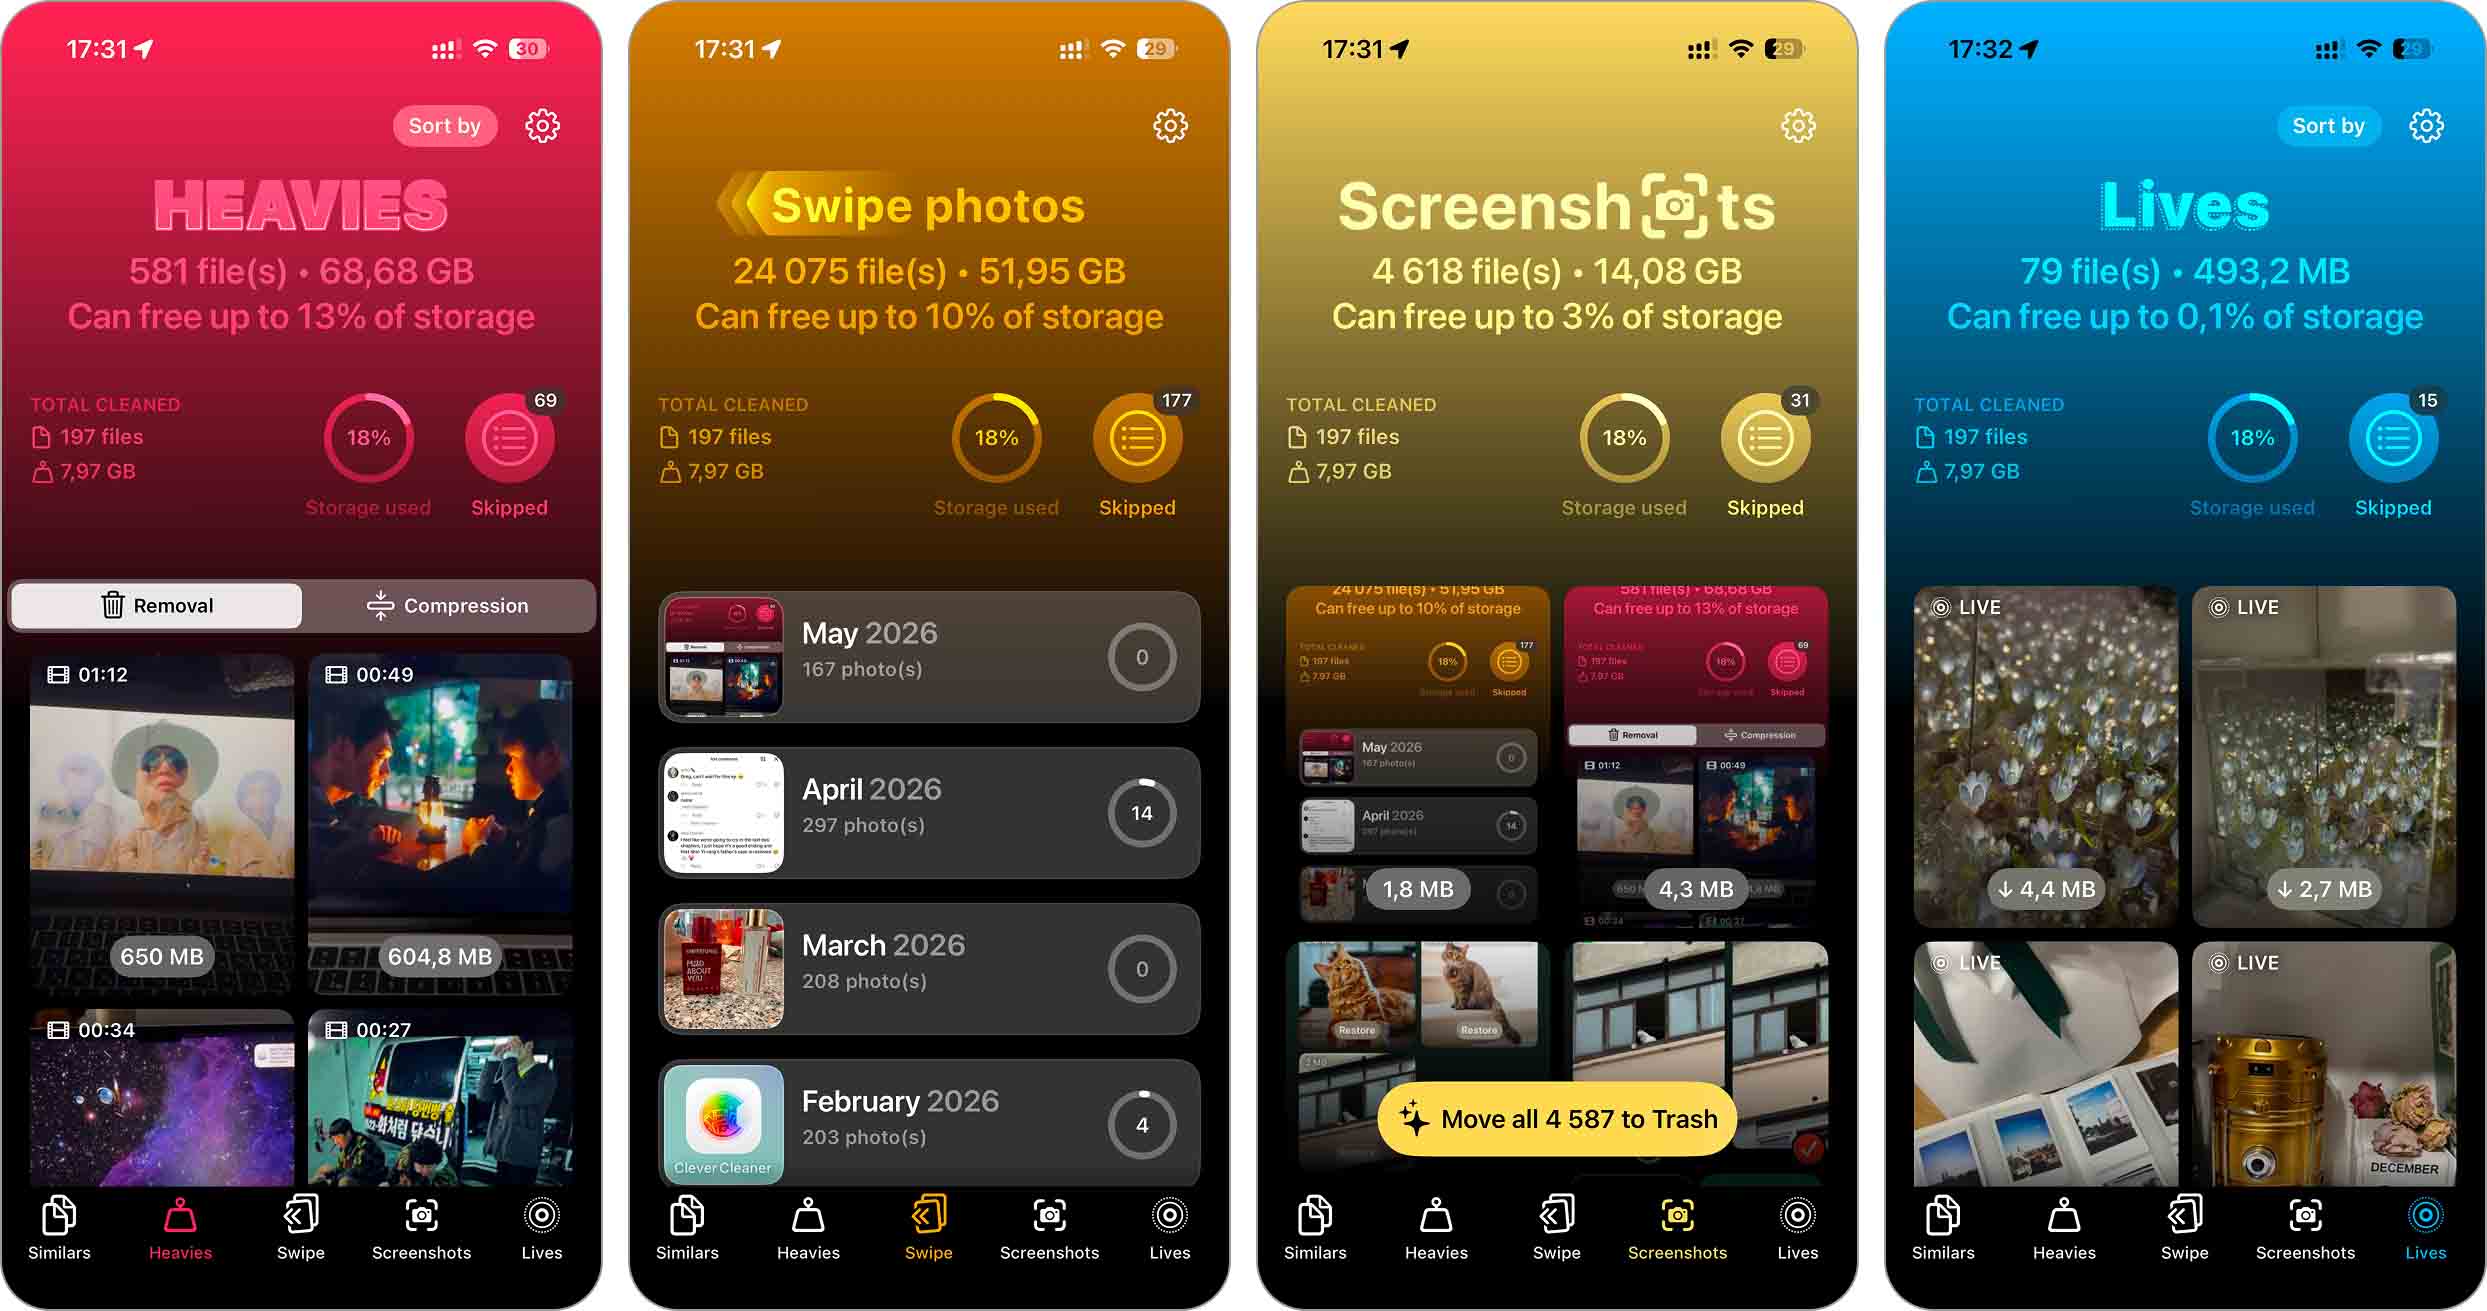
- Heavies. See all videos sorted from largest to smallest for quick removal, a feature the Photos app surprisingly lacks.
- Compression. Compress videos that take up too much space but can’t be deleted right now (this option is available inside the Heavies section).
- Swipe. Go through photos grouped by the month they were added to your library and quickly delete or keep them with swipe gestures.
- Screenshots. Delete all old screenshots in one tap.
- Lives. Convert selected Live Photos into still images to save storage (a rare option not found in most other apps).
Final Words
As they say, prevention is better than cure. While merging duplicates is easy, it’s definitely better to avoid them in the first place, it will save you time and storage in the long run. From our experience, if we had to name the most common mistakes that lead to this problem, they would be:
- Multiple imports of the same images from iCloud, a Mac, or external storage.
- Edits that produce new versions (crops, filters, other modifications) instead of updating the original.
- Manual transfers with AirDrop or third-party apps can result in extra copies of the same image.
- Direct downloads from messages, social media, or email, which sometimes store the same image more than once.
Of course, in everyday use, it’s impossible to stay vigilant all the time and avoid every mistake. But there are ways to make things easier and keep your iPhone library in top shape.
To keep your photos organized and duplicate-free, check out our guide:How to Organize Photos on iPhone Without Duplicates. We go beyond duplicates and cover custom albums, smart tags, “hidden” iPhone features, and tricks to keep your library in top shape. Be sure to check it out–it’ll make future cleanups much easier!
FAQ
For a more thorough and fully automatic cleanup, you can use an app like Clever Cleaner, which we covered in this article. It can merge both duplicates and similar photos with its Smart Cleanup feature. The app automatically selects the Best Shot based on quality and removes all lower-quality versions in one tap for your entire library.