How to Handle APFS Data Recovery
Data loss on an APFS drive can result from deletion, corrupted volumes, or formatting errors, leaving you without access to your files. The solution is to use specialized tools to recover lost files, repair volumes, and restore deleted data. These tools have been proven reliable across various scenarios, and this guide provides detailed steps to help you recover data from hard drives, repair APFS volumes on Mac, and retrieve lost files.
What is APFS and Why It’s Important for Mac Users
Apple introduced the Apple File System (APFS) in 2017 with macOS High Sierra, replacing the older HFS+ file system. APFS was designed to improve efficiency and performance, particularly on solid-state drives (SSDs), though it is compatible with both SSDs and traditional hard drives. While it provides several enhancements, including faster file access, better data integrity, and strong encryption, APFS is optimized for flash storage and SSDs. Features like space sharing between volumes, snapshots, and native encryption make it ideal for modern Macs, offering superior file system management compared to HFS+.
Despite these advantages, the complexity of APFS can make data recovery more difficult in the event of data loss. For example, the TRIM command on SSDs permanently deletes data blocks, making recovery nearly impossible if TRIM is enabled. Encryption and snapshots further complicate recovery efforts, requiring specialized software to retrieve files effectively. In the following sections, we guide you through tools and methods to recover files from APFS drives, addressing challenges like encryption, SSD-specific issues, and corrupted volumes.
How to Handle Data Recovery from Encrypted APFS Drives
Before we recover data from an encrypted APFS drive, the drive must be decrypted. APFS supports native encryption at both the file and volume level, making all data stored on the drive unreadable without the correct decryption key. This encryption, often managed through FileVault, transforms data into an unreadable format that requires a password or recovery key to access.
When FileVault encrypts an APFS volume, it scrambles the entire contents of the drive, including the file system metadata, making it impossible for recovery software to interact with the data structure. Without decryption, recovery tools cannot identify file locations or metadata, and thus, no data recovery is possible. Decryption restores access to the file system, allowing recovery software to perform a scan for lost or deleted files.
How to decrypt an APFS drive:
- On your Mac, click the Apple menu and select “System Settings.”
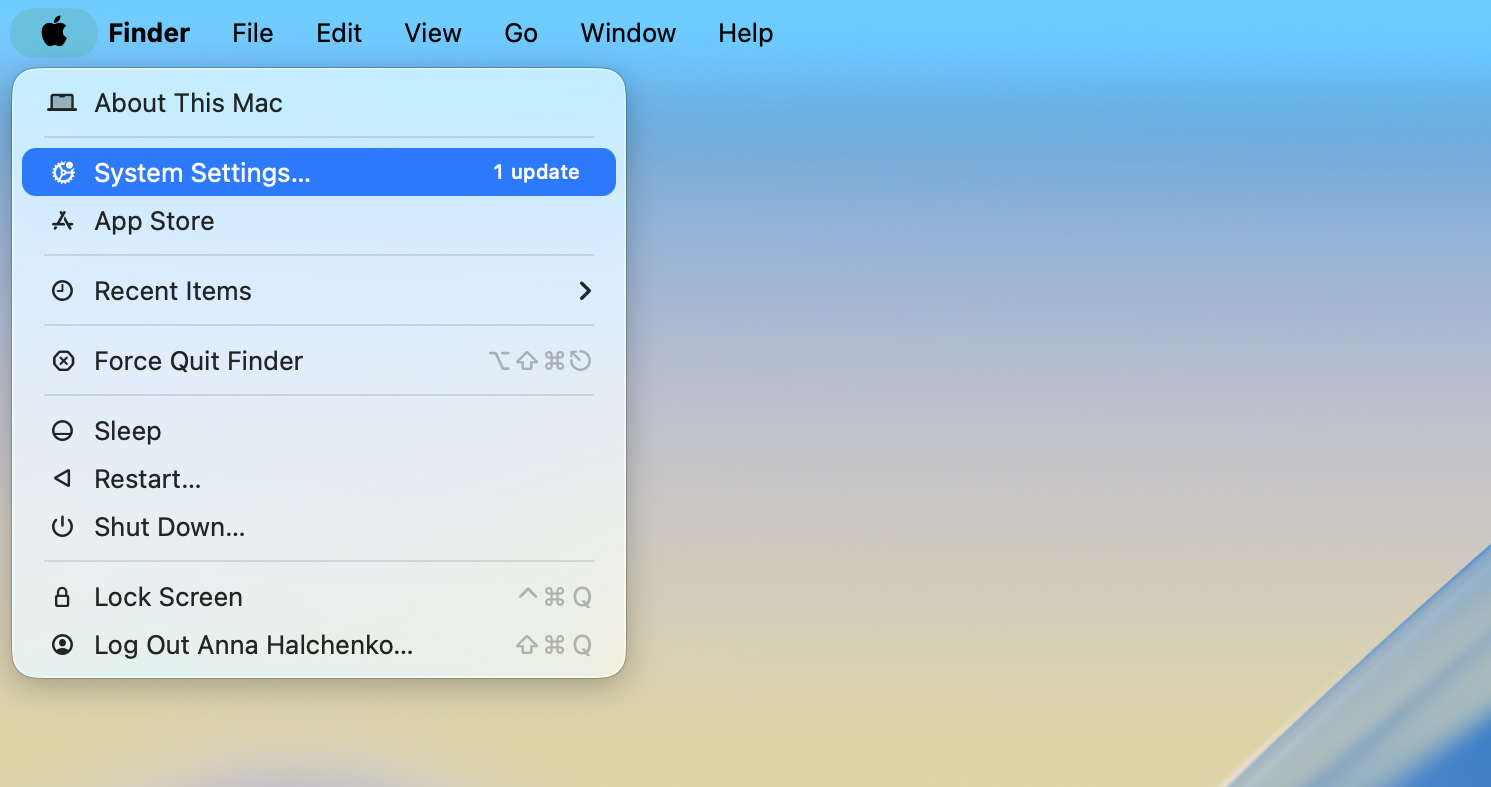
- In System Preferences, find and click “Security & Privacy.”

- Navigate to the “FileVault” tab. If FileVault is turned on, the drive is encrypted.
- Click “Turn Off FileVault.” Enter your administrator password when prompted. The decryption process will begin, and depending on the size of the drive, it may take several hours to complete.

- Once the decryption finishes, the drive will return to an unencrypted state, allowing recovery software to access its contents.
After completing the decryption process, we can proceed to recover files with data recovery software.
How to Recover Deleted Files from an APFS Drive on Mac with Recovery Software
Many data recovery software options are available to recover data from APFS drives. In this article, we cover two reliable tools: Disk Drill and PhotoRec. Both provide effective solutions, though they cater to different user preferences—Disk Drill offers an intuitive graphical interface, while PhotoRec uses a command-line approach.
Option 1: Disk Drill
Disk Drill is a popular and highly trusted data recovery tool, known for its excellent recovery performance and user-friendly interface. One of the reasons for its widespread popularity is how it simplifies the often complex process of data recovery, making it easy and streamlined for users.
Unlike many recovery utilities, Disk Drill handles APFS metadata with remarkable precision. It can rebuild the original folder structure, recover files with their names and hierarchy intact, and restore the logical layout of an APFS volume, regardless of the file types involved. Whether you’re recovering from accidental deletion or repairing a damaged APFS container, Disk Drill delivers consistent results even in complex recovery scenarios.
Here’s how to recover data on the APFS drive with Disk Drill:
- Visit the official Disk Drill website and download the software. To avoid overwriting lost data, install it on a different drive from the one where the deleted files were stored.
- After installation, launch Disk Drill from your Applications folder. If you’re working with an external APFS drive, connect it to your Mac before proceeding.
 ❗Before scanning, make sure to grant Disk Drill Full Disk Access in System Settings > Privacy & Security > Full Disk Access. This permission allows the app to detect and scan all internal and external drives. If you plan to recover data from your Mac’s system disk, you will also need to enable Disk Drill’s kernel extension (kext). The app will display on-screen prompts to guide you through the activation process. Restart your Mac once the kext is approved to ensure full functionality.
 - Disk Drill will list all connected drives and partitions. Find and select the APFS drive from which you lost data, then click “Search for lost data.”

- Disk Drill will begin scanning the selected drive, detecting files that can be recovered. Depending on the drive’s size and amount of data, the process may take some time. You can technically start recovering files during the scan, but we recommend waiting until the scan finishes. Once complete, Disk Drill will estimate the recovery chances for each file (marked as High, Average, or Low), giving you a clear idea of which data is most likely to be restored intact.

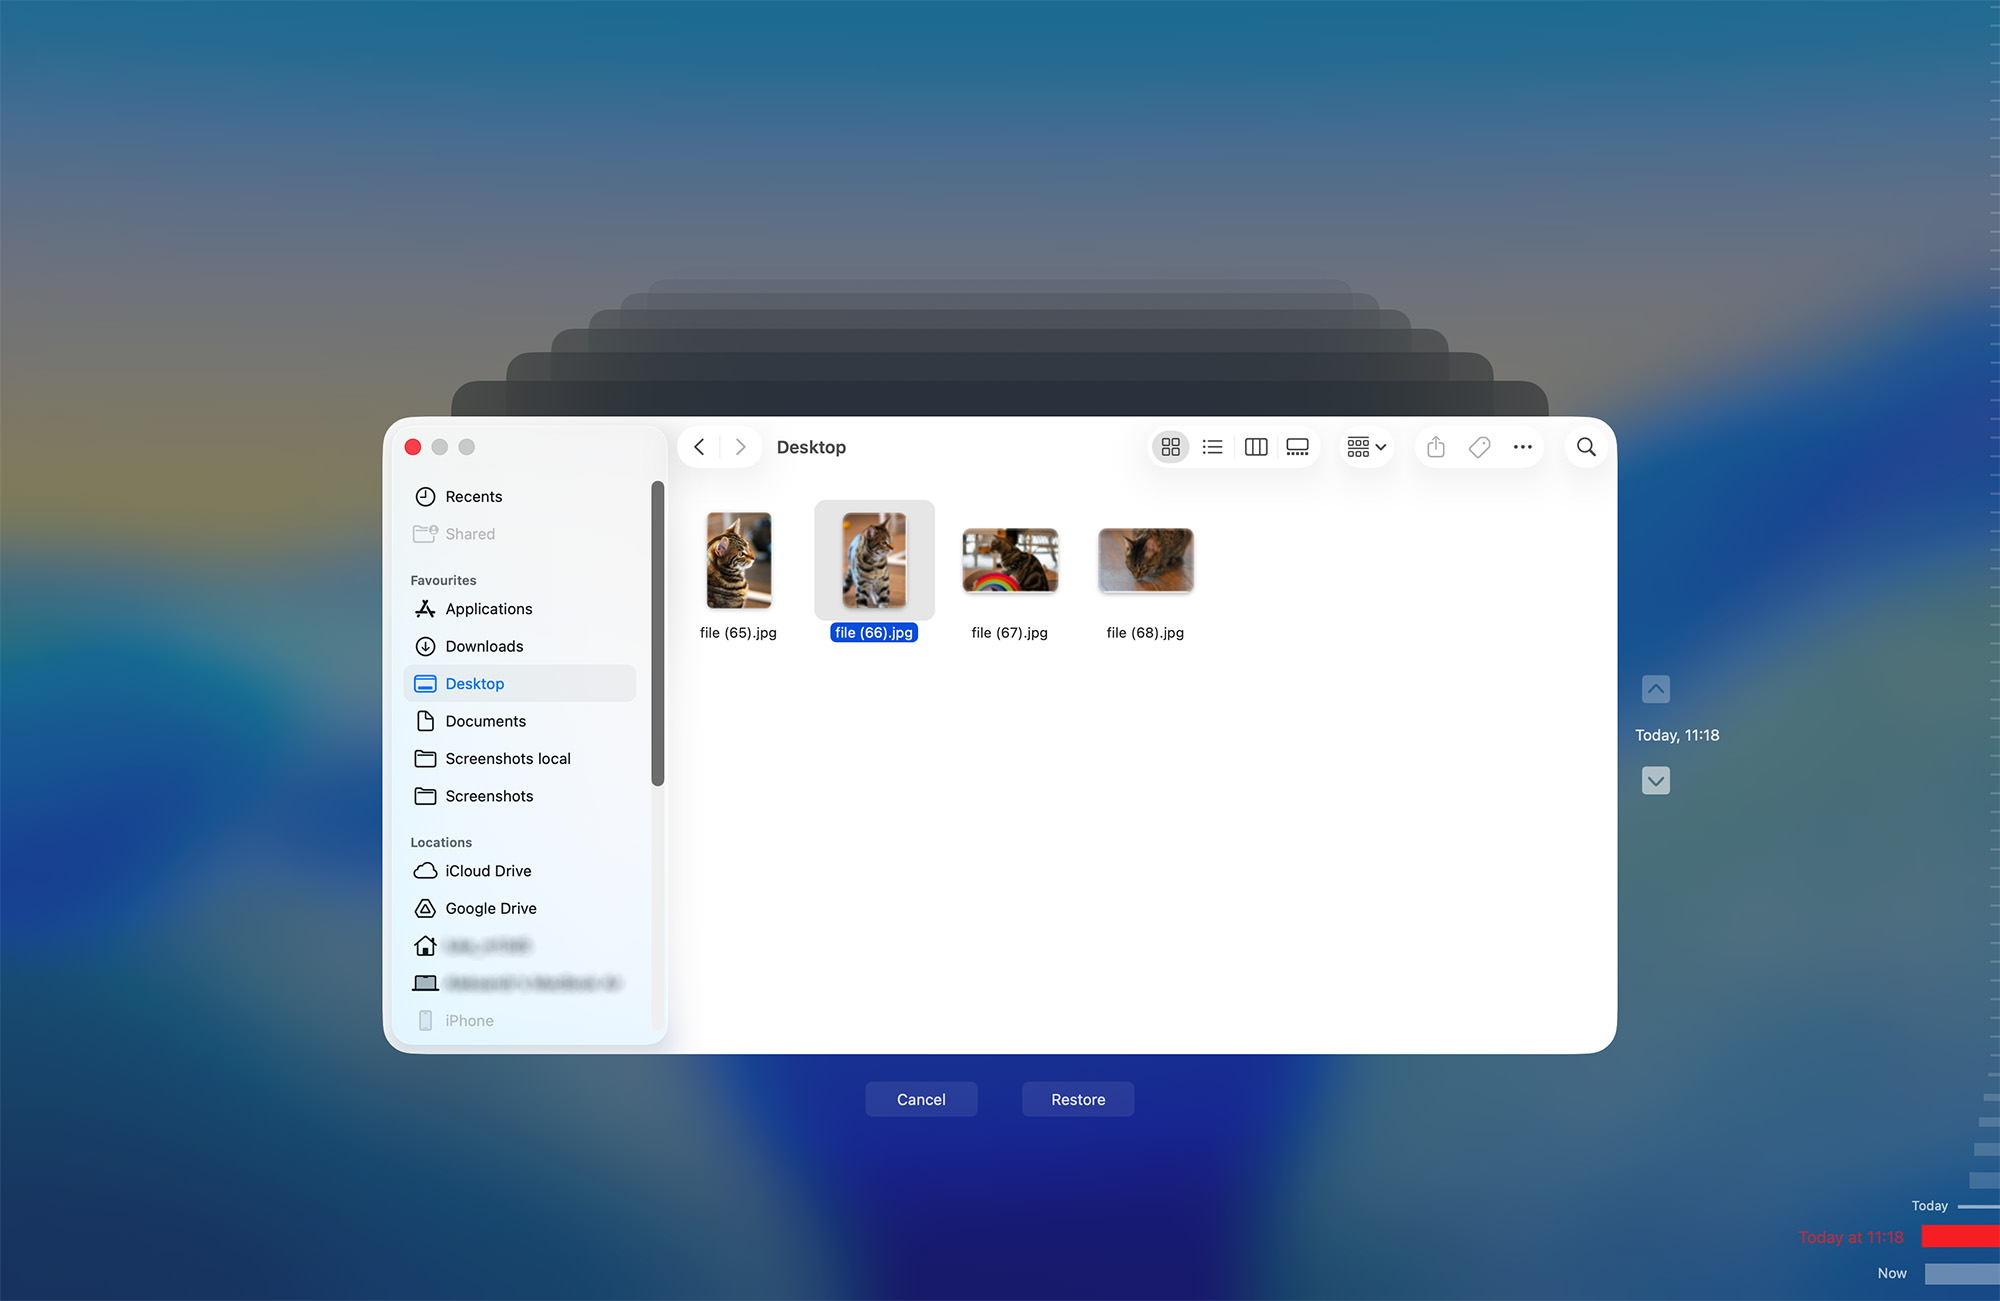
- When the scan is complete, Disk Drill will notify you. At this stage, you can either click “Recover All” at the top of the screen or choose “Review Found Items” to see a detailed list of recoverable files. You can preview files by hovering over them and clicking the “eye” icon to confirm whether they are intact and recoverable.
- If you choose to select files manually, you can preview them by hovering over each file and clicking the “eye” icon to confirm whether it is intact and recoverable. Mark the ones you want and click “Recover.”

- Disk Drill will prompt you to select a recovery folder. Choose a different drive or partition to prevent overwriting other recoverable data, then click “Next” to save your files.

Option 2: PhotoRec
PhotoRec is another popular option for recovering deleted files from APFS drives. One of its best qualities is that it is completely free and open-source. Unlike many other tools, PhotoRec uses a signature-based method to scan the drive, meaning it doesn’t rely on the file system. Whether it’s APFS, FAT, or any other file system, PhotoRec can recover files based purely on their signatures. However, unlike Disk Drill, PhotoRec operates entirely through Terminal. You don’t need to type commands (all navigation happens via your keyboard, with on-screen prompts guiding you through every step). The interface may look minimal, but the process is straightforward once you follow the instructions displayed on the screen.
- PhotoRec is bundled with TestDisk. Download it from the official website or install it using Homebrew if you’re familiar with command-line tools.
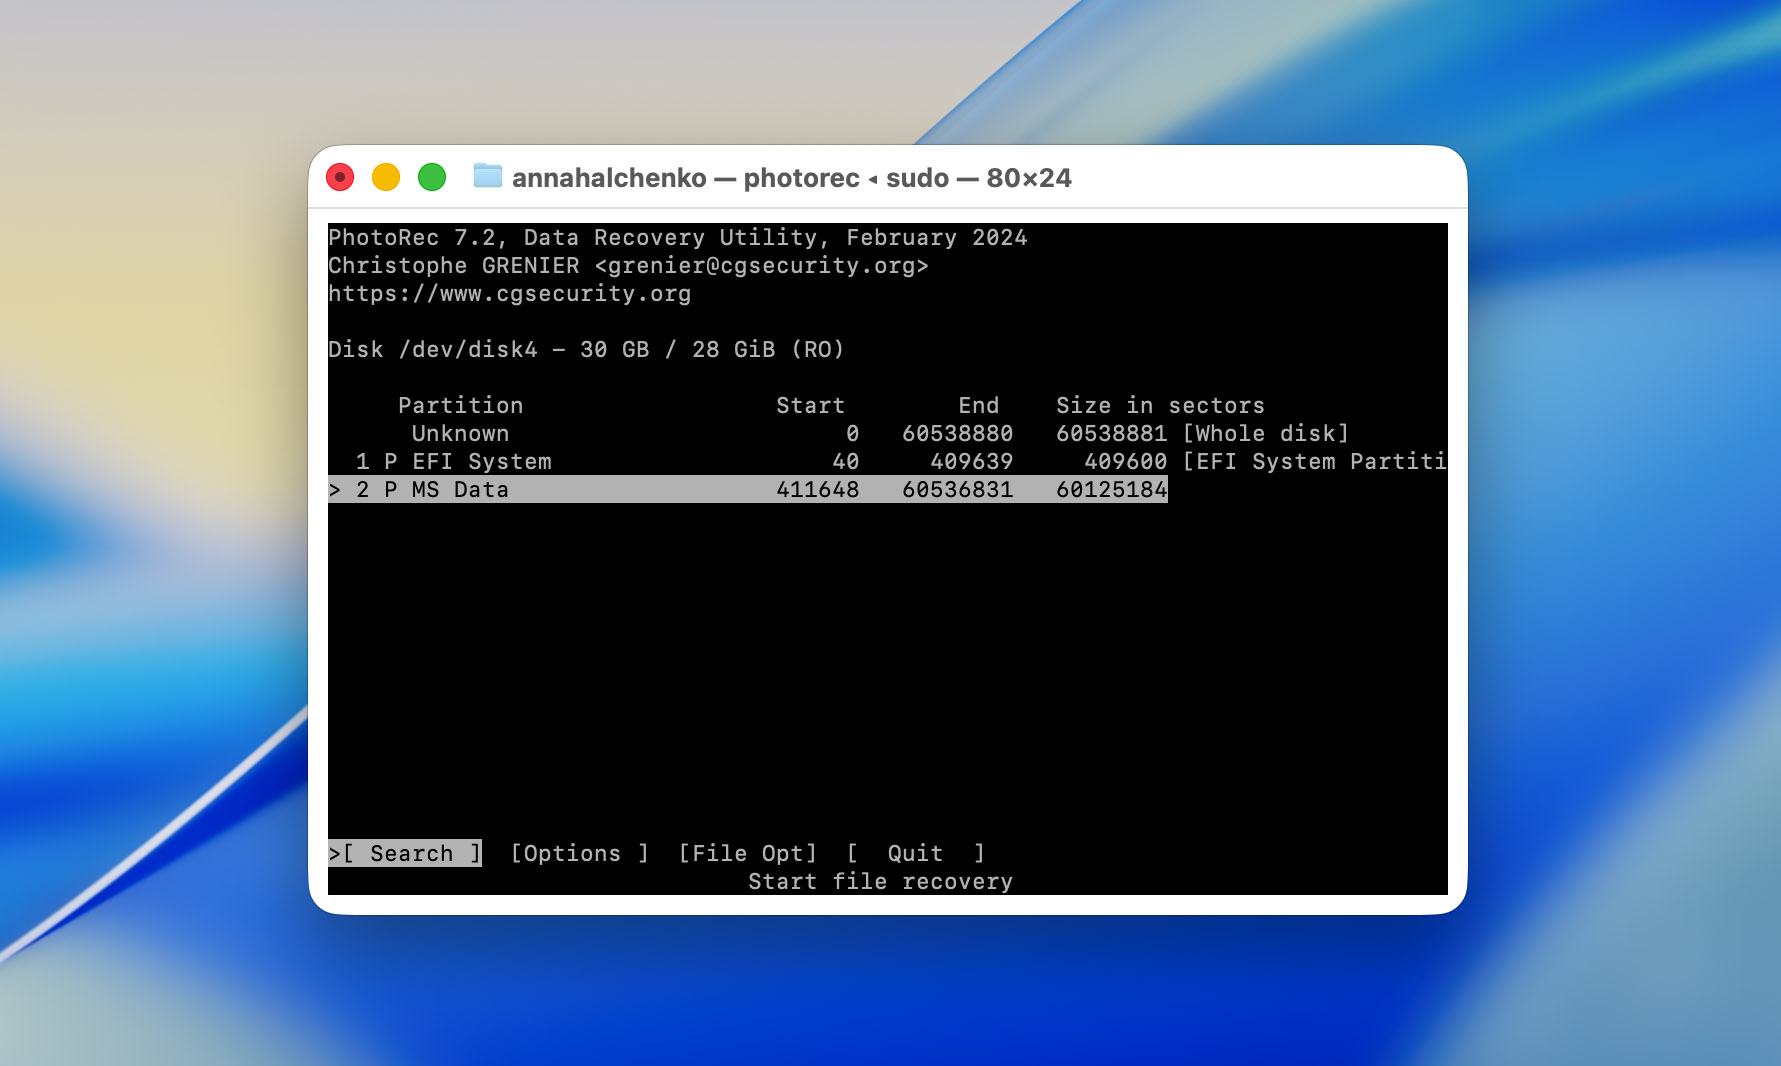
- Open Terminal and launch PhotoRec using the command sudo PhotoRec. This gives the necessary administrator privileges to access the drive for recovery.

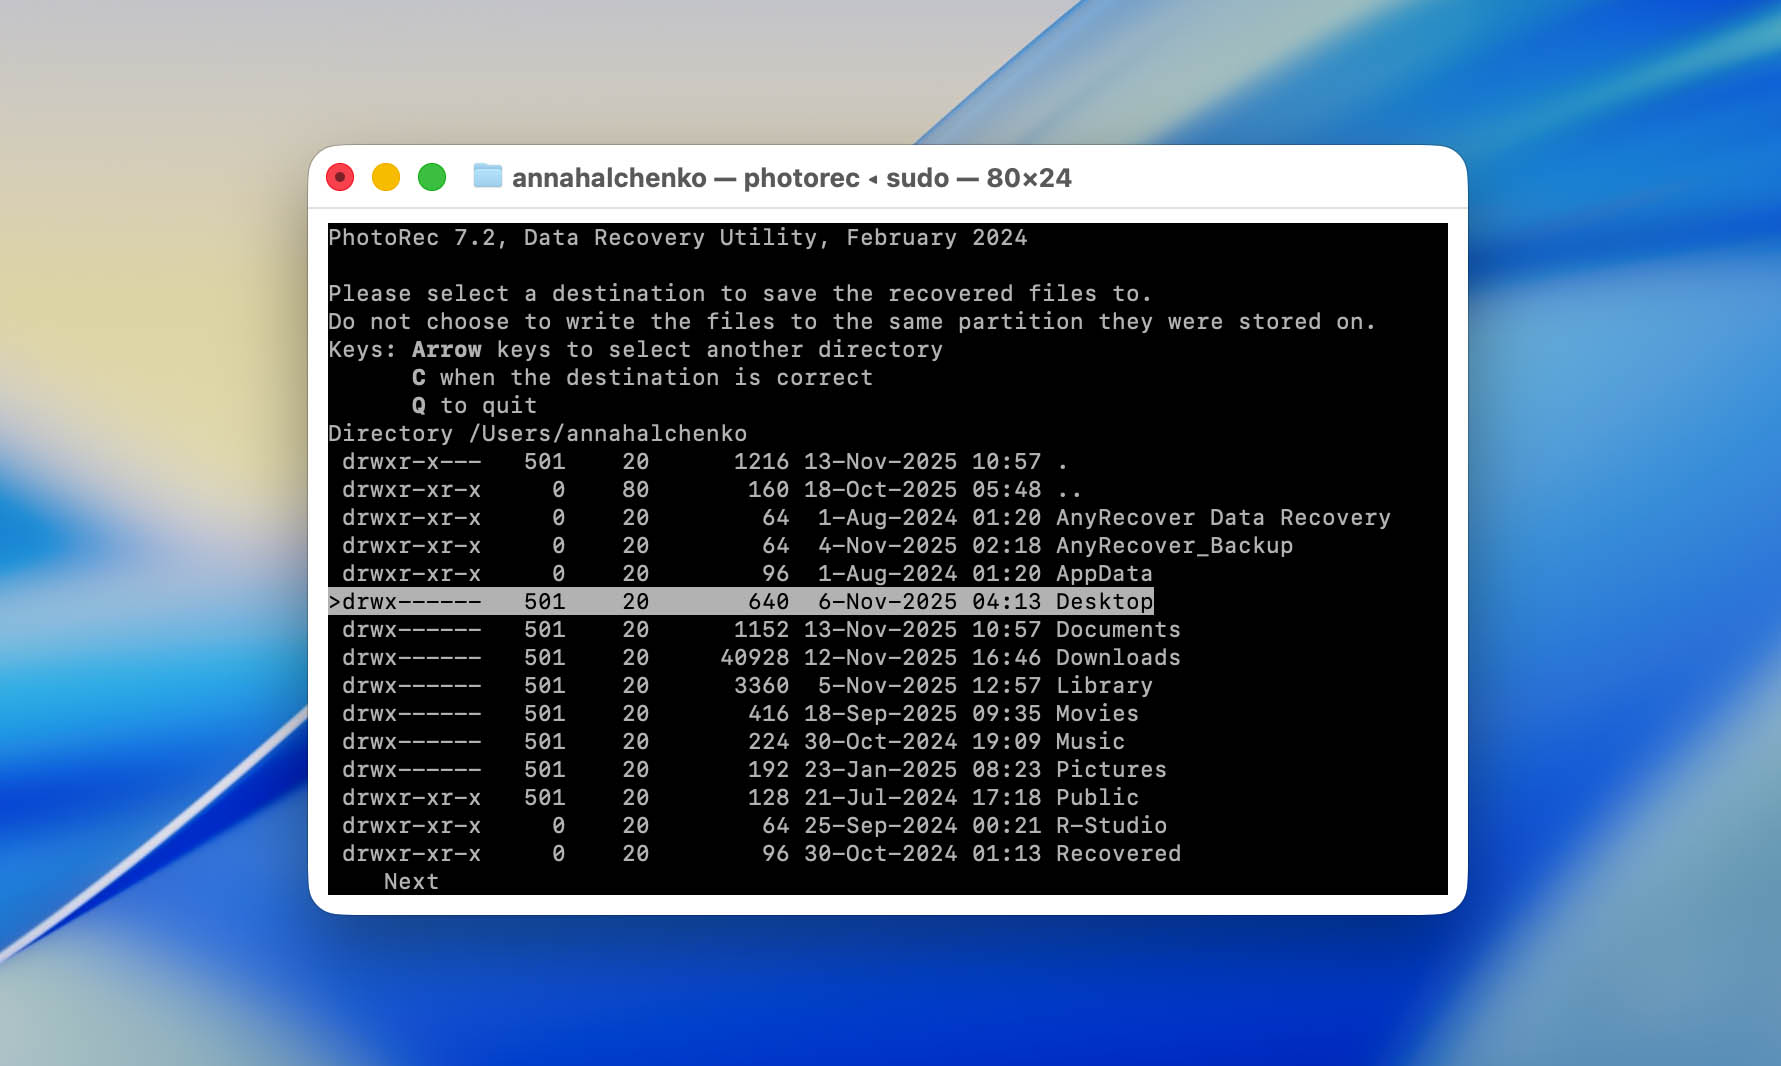
- After launching PhotoRec, it will display all connected drives. Use the arrow keys to select the APFS drive from which you want to recover data.

- Once you’ve selected the drive, PhotoRec will prompt you to choose the specific partition to scan. You can choose either a specific partition or scan the entire disk, depending on where the data loss occurred.
- Select “Other” when prompted for the file system type.

- Choose a directory to save the recovered files. It’s important to save them to a different drive or directory to avoid overwriting any additional lost data. After specifying the directory, press “C” to start the scan, and PhotoRec will search for file signatures.
- As the scan progresses, PhotoRec will recover files. They will appear in folders named recup_dir.1, recup_dir.2, and so on inside your chosen destination. Files are recovered based on their type but without their original names or directory structures.

How to Recover Data from APFS Snapshots Using Time Machine
APFS volumes support snapshots (read-only points in time that record the exact state of your data). macOS automatically integrates these snapshots into Time Machine, allowing you to recover deleted or modified files even if you don’t have access to your main backup drive.
When your Time Machine backup disk is disconnected, macOS creates local snapshots directly on your APFS system volume. These snapshots are generated approximately once per hour and stored for up to 24 hours (as long as sufficient free space is available). This system ensures that even without an external backup, you can still restore recently deleted or changed files.
Here’s how to recover data from APFS snapshots using Time Machine:
- Click the Time Machine icon in the menu bar and choose Browse Time Machine Backups.

- When your main backup disk isn’t connected, Time Machine automatically switches to local snapshots. Use the timeline on the right edge of the screen to move backward in time. Each marker represents an hourly snapshot stored on your internal APFS drive.
- Browse through your folders as they appeared in the past. Once you locate the file or folder you want to recover, select it and click Restore. Time Machine will copy the item back to its original location.
How to Repair APFS Volume on Mac
Disk Utility can help fix APFS volumes that fail to mount or behave inconsistently, such as when files refuse to open, apps crash when accessing the drive, or macOS reports read/write errors. However, it’s important that Disk Utility can only repair logical issues within the file system, not severe structural corruption or physical disk damage. If the APFS container or partition map is badly damaged, Disk Utility won’t be able to help you.
Here’s how to repair an APFS volume on Mac:
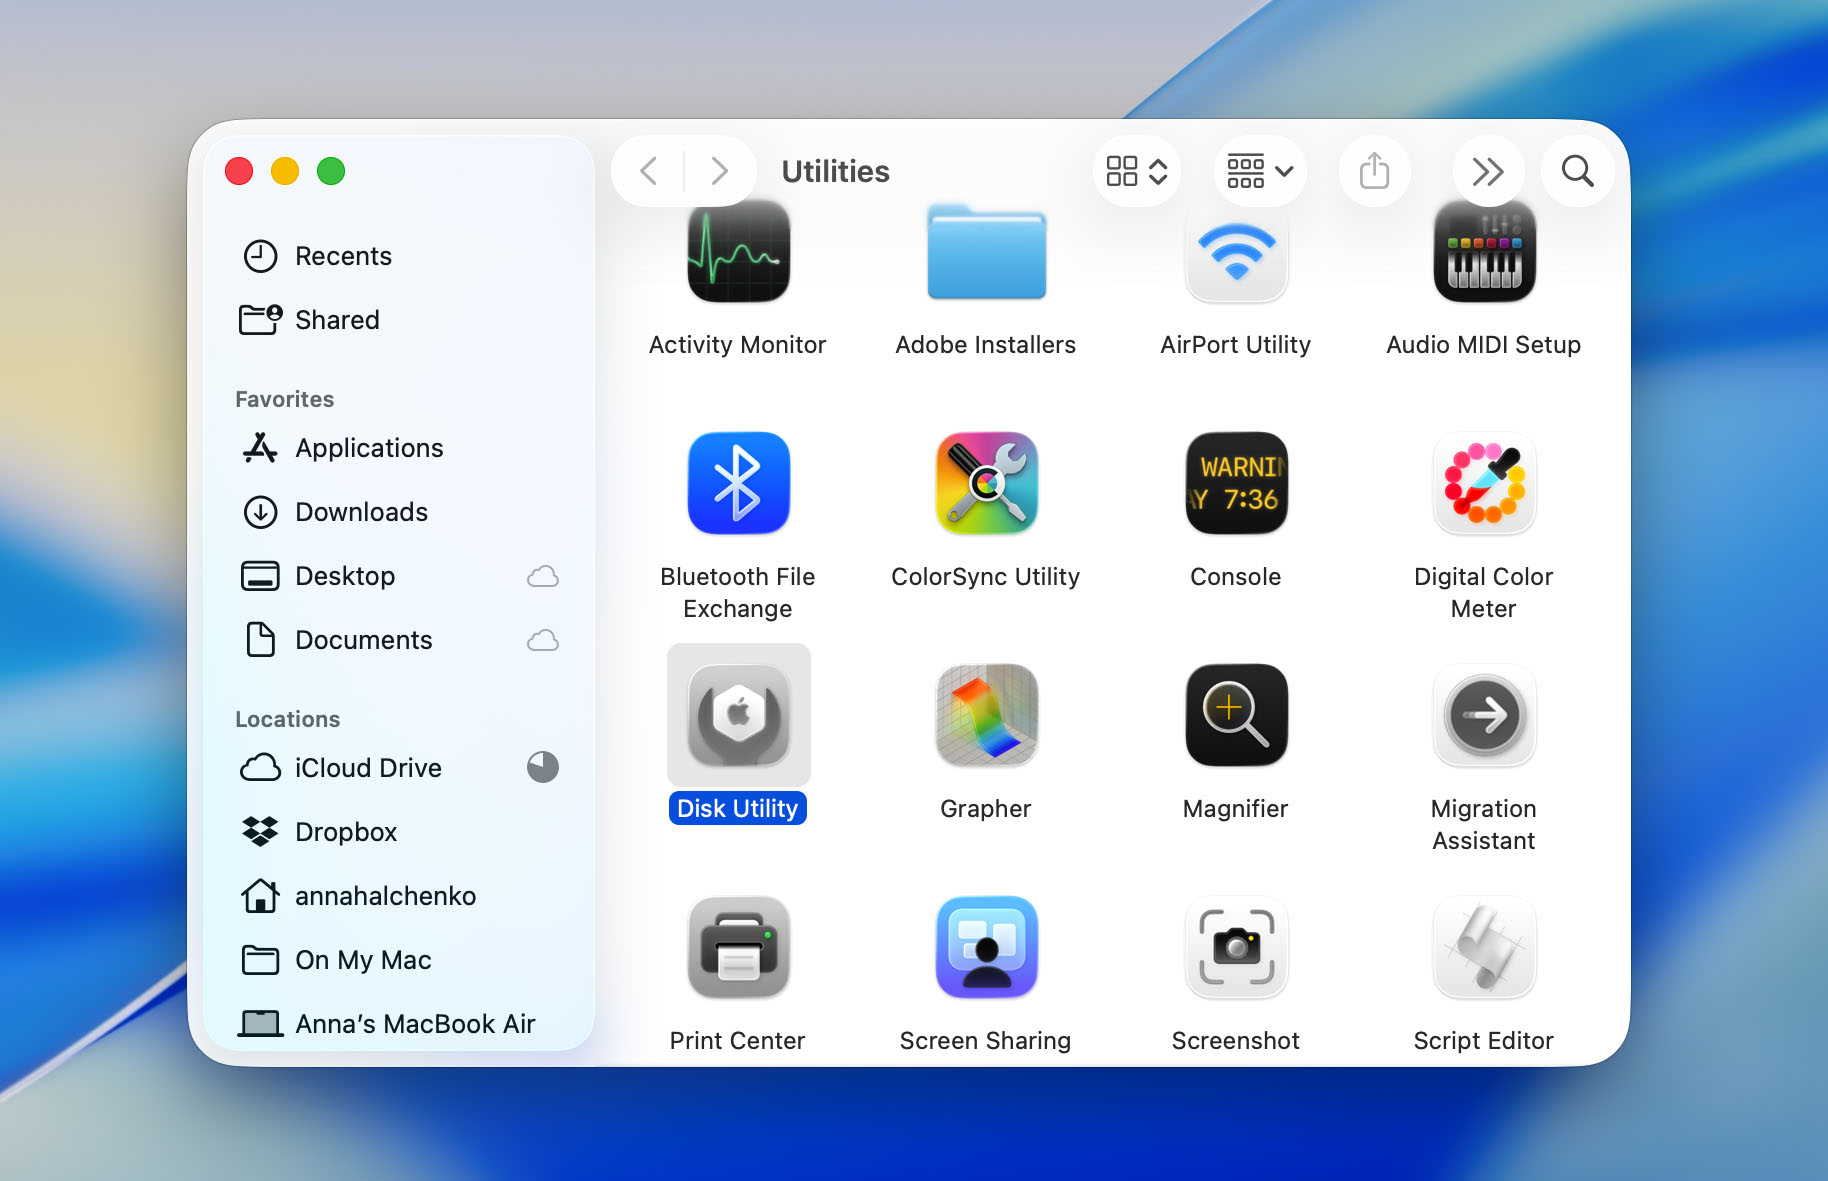
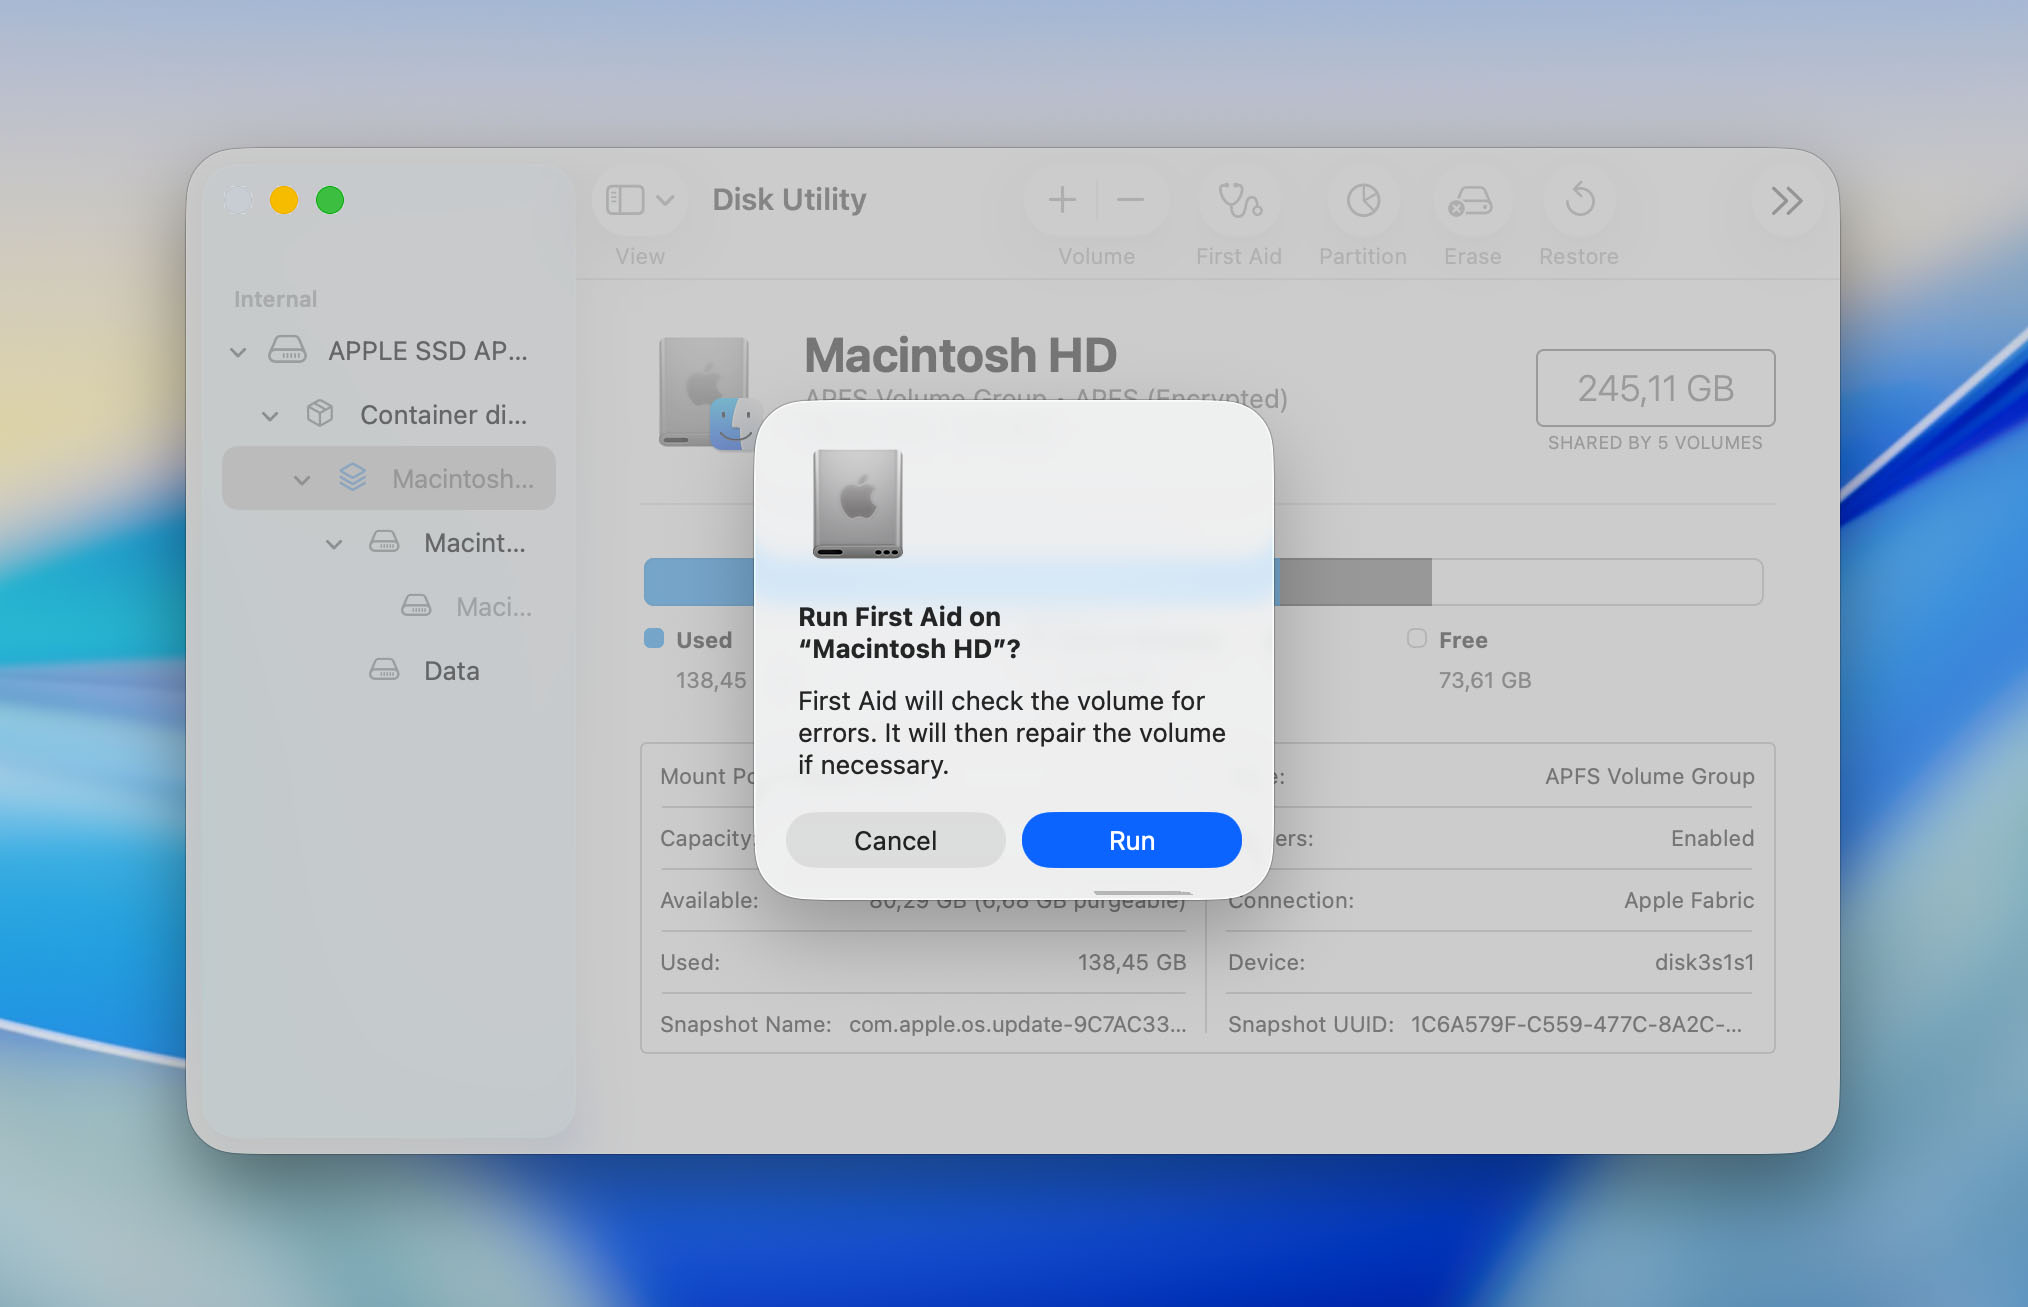
- Open Disk Utility.
- In the sidebar, locate the APFS volume you need to repair.
- After selecting the volume, click the “First Aid” button at the top of the Disk Utility window. First Aid checks the drive for errors and attempts to repair any problems with the file system.

- Confirm your choice and wait for the process to finish.
- Once First Aid completes, Disk Utility will display the results of the repair attempt. If the tool successfully repairs the drive, you should regain access to the volume and its data. If errors remain, Disk Utility will inform you, and additional recovery measures may be necessary.
If macOS prompts you to restart after the repair process, follow the prompt to complete the repairs.
How to Restore Data from an APFS Drive on Windows
If you plug an APFS-formatted drive into a Windows PC, you’ll quickly notice that nothing happens — the system simply doesn’t recognize it. Windows can’t read or mount APFS volumes out of the box, and that’s what makes data recovery a bit tricky. To even see the files, you need software that knows how to interpret Apple’s file system. So if your issue is simply accessing data on an APFS volume from Windows, you should look for software like Paragon Software’s APFS for Windows or similar alternatives.

That said, if you want to try another software, PhotoRec is still a solid choice and completely free. It works in a different way — by scanning for known file signatures rather than depending on the file system. This means it will find photos, videos, and documents even on a drive that Windows can’t read, but it won’t be able to restore the original structure. You’ll get a pile of recovered files with generic names, which can take a while to sort through. In the case of PhotoRec, as we discussed earlier, this tool works on that principle by design, regardless of the file system; in practice, any Windows data recovery software that doesn’t natively support APFS will treat such a disk as if it has no file system and will likewise try to recover data based on its file-signature database.
How to Get Data Off an APFS Drive in a Dead MacBook
When a MacBook suddenly dies, it can feel like all your work and files vanished with it. In reality, the data is still sitting there on the drive — the problem is simply getting to it. What you can do next depends a lot on the type of MacBook you have and how the storage is built in.
If your model uses a removable internal drive, you’re in luck. You can take it out and try recovering the files yourself. There are plenty of short YouTube videos (for example, like this for MacBook Pro) showing exactly how to do this for each MacBook generation. With a proper toolkit and a bit of care, it’s not too difficult. After removing the drive, connect it to another computer using an adapter — any Mac or even a Windows PC will do. Once it’s connected, scan it with recovery software like Disk Drill or PhotoRec, just as described earlier in this article. This simple approach works surprisingly well and can often bring your files back without professional repair costs.
The story is completely different if you own a newer MacBook. Modern models have their SSD chips soldered directly onto the motherboard, which means there’s no way to remove the drive without advanced tools and skills. Trying to do it yourself can make things worse and may destroy the only copy of your data. In this case, it’s better to hand the job over to professionals. Look for a service center with a solid reputation — for instance, CleverFiles Data Recovery Center, which specializes in Mac storage and APFS recovery. You can ship your MacBook to them, and their engineers will attempt to extract the data safely and return it to you on a new working drive if the recovery succeeds.

Conclusion
That wraps up our guide to APFS data recovery. It may sound like a difficult process, and we won’t deny that. Apple’s strong encryption, together with the TRIM command on modern Macs, makes recovering data from APFS drives much harder than from USB flash drives or external HDDs. Still, recovery is not impossible.
The key steps are simple:
- Stop using the affected drive immediately. Every new write operation reduces your chances of recovery.
- Act fast before TRIM runs. Once TRIM clears the deleted blocks, no software can bring the data back.
- Choose the right recovery tool. If you need to recover files from the system drive, pick software that actually supports it, like Disk Drill, instead of tools that only claim to.
- Have a plan. When you lose data, panic is your worst enemy. Think ahead and know what steps you’ll take if recovery becomes necessary.
- If your MacBook won’t power on, check what type of storage it has. Removable drives can often be taken out and scanned on another computer, but if the SSD is soldered to the board, don’t try to fix it yourself – let a professional recovery center handle it.
- Need to recover data from an APFS drive on a Windows PC? Use software that understands APFS, such as Disk Drill 6. It can read file system metadata and rebuild folders the right way, something most signature-only tools can’t do.
And of course, prevention is still the best protection. Time Machine remains one of the most reliable backup tools available on macOS. Easy to set up, fully automatic, and capable of saving you from complete data loss. Investing in an external drive for backups costs far less than losing your files.
So, set up Time Machine, keep this guide handy, and you’ll be ready for anything. Good luck, and may your data stay safe.