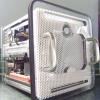
MiniHack Posted April 13, 2013 Share Posted April 13, 2013 Converting G5 fans for original look and native PC control NOTE - some pictures missing due to Imageshack - all missing images are in attached folder now!!!A lot of people have tried using the original G5 fans by re-wiring the connector. Many have tried varying the voltages to the fans in different ways to try and make them quieter. And a few have tried to make special control circuitry to replicate the way a G5 would control the fans.Each of these approaches has met with issues and, mostly, people (myself included) decide that it is more sensible in the end just to sacrifice the original look and buy new fans.However, as I have quite a few original fans around I thought why not experiment and see if I can succeed in taking apart the original fans and looking at how they might run if I put in a new motor board (stator) from a modern PC fan.My logic was that if there really is something unique about the way the G5 controls the original fans, then the stator must be the thing with different control circuitry. So how will the G5 fans run if I switch the G5 stator circuit board for a PC stator board?The experiment started with some cheap (£3 or so) but quiet Zalman 92mm fans.I got 4 of these from Quiet PC. 36dBA is not silent (2,800 rpm at 12v) but the reduced voltage settings of 20dBA @1500rpm was a reasonable starting point.These fans were chosen for a couple of reasons:No point in trying a Noctua expensive fan when much of the technology is in the fan blade shape and the frame or in special bearings that would not be used in the G5 fans;With a cheap fan I can afford to wreck one or two figuring out how to take them apart (yes I did wreck some);Maybe the parts will not be interchangeable/compatible with the Mac fan rotors etc. so a big investment not a great idea.Taking apart the G5 fansI made mistakes here on my first time around, so you don’t have to!Here is how to take the exhaust fans apart with minimal risk.1.Remove grill and clip off the wiring.Using a flat blade remove the grey sticker from the back. Be careful and it can be re-used.Here is a close look. You can see the rotor spindle, that is held on by a little white plastic circular clip and underneath that is a bearing.Hold the fan rotor still with one hand from underneath and with the other hand use a sharp knife to prise the white circular clip off the end of the rotor shaft.5. Shown below - clip removed. Don’t worry if it looks a little damaged. They are surprisingly hard to destroy and, if you do manage to break it, you get a second chance later to keep the Zalman one undamaged.The rotors now just can fall off. Basically all fans have a the same inner rotor construction, it is a circular permanent magnet. They rotate when current is passed in the coils of the stator. Notice the springs on the rotor shaft. Don’t lose them.Be VERY careful here. The stator removal is where everything can go wrong. It doesn’t matter if you damage the circuit board, but the frame and the plastic shaft on which the stator board sits is vital to keep intact. The best way I found to remove the stator board is to support the fragile frame of the fan centre with one hand and using the other poke a small screw driver in each of the holes one after the other in turn and pushing gently.When the stator board starts to move you can use you fingers from the other side to pull it off the plastic shaft.You now have this. The stators removed from the frame and you can see the top bearing in the shafts (don’t worry if they fall out - just place them back in they are a loose fit) and there are also separate bearings underneath.Taking apart the Zalmans9. Remove the sticker and then carefully pull the wiring from the retaining clips in the frame.10. Remove the rubber cap (keep it you can re-use it) and in the same way as with the G5 fans prise off the little circular white plastic clip.11. Rotor now comes off and can be thrown away. Notice though the bearing here is a solid brass sleeve. Your next job is to remove it without damaging the stator board.12. Find something blunt and larger than the brass sleeve bearing (like a cross head screwdriver) and with the fan on a flat surface push the bearing down hard.13. The idea is to push the sleeve out through the bottom of the fan frame as shown.14. When the bearing has slipped through you can pull it out from underneath.15. With the bearing removed the fan bottom looks like this. VERY gently insert a screw driver in as shown between board and frame and wiggle gently to loosen the board from the plastic shaft of the frame.16. Alternate step 15 with gently working the board loose from the front as shown. Do NOT try to pull the top coil part of the stator as you can easily break it....just be patient until the board starts to move up the shaft.17. Once the board is freely moving off the shaft you can pull it clear and then pull the wiring from the frame.18. Here is a comparison between the Zalman board (left) and the much more complicated G5 original board (right).Putting the parts together19. For the rear G5 fans the wiring has to fit through a small hole in the fan frames so make a note of where wires fit in the fan connector and using your blade depress the little “tongue” holding each of the wires in the connector and then pull the wires out.20. Now feed the wires through the frame one by one as shown:21. Place the stator on the plastic shaft and wiggle down. They should be a snug fit. If there is any slack or movement you could always apply a blob of glue to the board to fix it in place around the plastic shaft.22. You can now re-attach the fan connectors.23. Nearly done:24. Before re-assembling completely take time to clean the grill and the rotors.25. I used a wet wipe cloth.26. Fit the rotors back in place and then re-fit the white plastic clips. The original ones or the Zalman ones will fit. You can use your multitool to push it back onto the rotor shaft.27. I re-used the rubber bungs and then put back the grey stickers.28. Route the wiring neatly. Then put back the clean grills. Job done!See and hear the results:http://youtu.be/61nXo7H0ZJs fans.zip 8 Link to comment Share on other sites More sharing options...
Mr.D. Posted April 14, 2013 Share Posted April 14, 2013 is the fan on channel 4 an original G5 w/o the swap? My curiosity would be a comparison between an original G5 vs your modified G5 fan with regard to RPM and Noise, each at the same voltage. This is an awesome tutorial... unless you have an issues, I'm bumping it to the top for the week long comment period before moving it to the [How-To]s. And on a personal note - Kudos on your Multi-tool choice. Anybody who knows quality will choose a Gerber over a Leatherman any day. Link to comment Share on other sites More sharing options...
MiniHack Posted April 14, 2013 Author Share Posted April 14, 2013 Thanks for the positive comments. I've just done a back to back comparison of an unconverted CPU fan and a converted one comparing start up voltages, noise and rpm. http://youtu.be/wupO2pxnRTE To hot wire the original fan and work it on the fan controller it is necessary to have one terminal always at 12v (fed from a molex) and then to have a GND, power and feedback wire from the fan connected to the fan controller. You can then control the speed with the controller okay. My findings were that to the nearest volt the G5 fan unmodified will start up at 3v and is adjustable to 12, and at 12v it appears (if the rpm sensor is accurate?) to top out at about 4,000rpm. To compare noise, I found the same indicated rpm levels beween the fans and then subjectively listen to the noise. Personally it seemed to me that the converted and G5 fans gave roughly the same noise levels at equivalent rpm of 3,000 (which is probably to be expected) but that the quality of the noise seemed to be harsher on the unconverted fans. It may be that this harshness of noise comes from using voltage control instead of the original PWM control. The Zalmans converted fans sounded "smoother". Noise levels at 2000rpm indicated were noticeably lower on the Zalman converted fans than with the original fans. Possibly the method of control is the reason there?? Given that the pieces to convert are relatively cheap I am going to do these conversions on the spare fans that come my way. It is nice to have the original look and also good that the fans can be re-used and be nicely controlled by a PC board. By the way, I took the rear fans I had hooked up yesterday and wired them up now to be using a single sleeved fan connection. Result of that is in the attachment. 2 Link to comment Share on other sites More sharing options...
Baudouin Posted April 14, 2013 Share Posted April 14, 2013 Very interesting tutorial indeed. Specially for me who spend a lot of time by trying to convert the original G5 fan to Mobo connectors or Molex connectors @ 5V, which was the less loud . But you went further by swichting the stator to get even less noise. Congratz for that. I still have two Verax fan, famous at the G4 MDD (Mirrored Drive Doors) time for the youngest who haven't know the G4 range, this label made very very noiseless fans used by G4MDD modders. I will switch the stators by curiosity with the double G5 back fans. 1 Link to comment Share on other sites More sharing options...
MiniHack Posted April 14, 2013 Author Share Posted April 14, 2013 Very interesting tutorial indeed. Specially for me who spend a lot of time by trying to convert the original G5 fan to Mobo connectors or Molex connectors @ 5V, which was the less loud . But you went further by swichting the stator to get even less noise. Congratz for that. I still have two Verax fan, famous at the G4 MDD (Mirrored Drive Doors) time for the youngest who haven't know the G4 range, this label made very very noiseless fans used by G4MDD modders. I will switch the stators by curiosity with the double G5 back fans. Yes Baudouin, I followed your instructions with your original conversions and it helped me a lot - thank you. I only thought of trying this different method recently and to be honest I was surprised how easy Apple made it to take their fans apart completely. Once I could see the way to get them apart it seemed like an invitation to try this and see what happened. It did take quite a bit of trial and error [and a few broken fans] in working out the best way to get some of the PC hardware to come apart easily - I even spent an hour drilling out the sleeve bearing on one of the fans before realising that there was a much easier way to do it without getting brass dust all over the kitchen table.... I think the main benefit to changing out the stator is simply compatibility. In the end, the G5 fans are not quiet naturally, but once they fit the usual PC pattern you can then do what you would do with any fan to control it better. At 2,000 rpm though (at least to my ears!) the fans do seem acceptably quiet and they still seem to shift a lot of air. It's also nice for some people to have something that looks 100% original. 1 Link to comment Share on other sites More sharing options...
Baudouin Posted April 19, 2013 Share Posted April 19, 2013 Yes Baudouin, I followed your instructions with your original conversions and it helped me a lot - thank you. I am happy I could help you. It did take quite a bit of trial and error [and a few broken fans] in working out the best way to get some of the PC hardware to come apart easily - I even spent an hour drilling out the sleeve bearing on one of the fans before realising that there was a much easier way to do it without getting brass dust all over the kitchen table.... That brings me some memories ... I think the main benefit to changing out the stator is simply compatibility. It's also nice for some people to have something that looks 100% original. I am always trying to keep it original. Nice work. I only thought of trying this different method recently and to be honest I was surprised how easy Apple made it to take their fans apart completely. Bad news for the Verax fans; coze I cannot get the stator out without breaking the structure. Verax did not make easy to take the fans apart unlike Apple. 1 Link to comment Share on other sites More sharing options...
MiniHack Posted April 19, 2013 Author Share Posted April 19, 2013 Bad news for the Verax fans; coze I cannot get the stator out without breaking the structure. Verax did not make easy to take the fans apart unlike Apple. That is a shame. There is usually a way to get them apart without breaking them. Problem is that to find that way sometimes you have to break some more first.... There are though definitely some fans that it is impossible to take apart without destruction. Looking underneath the sticker is often the indicator on whether it is worth trying. Link to comment Share on other sites More sharing options...
Baudouin Posted April 19, 2013 Share Posted April 19, 2013 My problem is how to secure the stator with the Apple fan afterwards, because the is no white/black plastic clip, unless I try with the Apple one. I will give a try; I do not use the Verax fans anyway. I'll let you know. Link to comment Share on other sites More sharing options...
MiniHack Posted April 19, 2013 Author Share Posted April 19, 2013 My problem is how to secure the stator with the Apple fan afterwards, because the is no white/black plastic clip, unless I try with the Apple one. I will give a try; I do not use the Verax fans anyway. I'll let you know. On some fans they fix the stator with glue..... Got any pictures? Link to comment Share on other sites More sharing options...
Baudouin Posted April 20, 2013 Share Posted April 20, 2013 Sorry for the bad quality, still have to repair my iPhone screen. Here you are : Maybe you can guess the four metal points which represent the way the central metal piece is seal onto the structure. If I push onto the metla pin the fan doesn't come out and there is nothing in between. I am wondering if there is no magnet underneath. I will definitely have to break it down. Link to comment Share on other sites More sharing options...
MiniHack Posted April 20, 2013 Author Share Posted April 20, 2013 So is the central point in those pic.s the end of the rotor shaft? If so, then there must surely be a washer, circlip or ring that will release it. If you can't find a release mechanism then maybe supporting the outer frame (front face down) and hitting the end of the rotor shaft hard - hammer - will release it! If you are otherwise happy to sacrifice the fan then I'd be tempted to try the destructive approach to get in there. After all, it is only the stator you need to keep unharmed... If that central area in the photo is not the rotor shaft end then I'd maybe think about dremeling the fan frame to get a closer sideways look at what is going on in there. Link to comment Share on other sites More sharing options...
Baudouin Posted April 21, 2013 Share Posted April 21, 2013 So is the central point in those pic.s the end of the rotor shaft? Yes, it is and I succeed to take the fan out without breaking the mechanism. Nevertheless, I had to break the plastic enclosure to free the PCB and the rotor. The four little metal points, showed in the first pix are indeed the way the mechanism is seal onto the structure. And the PCB is wedged between the wiring and the plastic frame .If so, then there must surely be a washer, circlip or ring that will release it. Nope, there is circle graved onto the rotor shaft, that's all. Strange, first time I see hat. I check on the second fan to be sure.Pix follow later. Link to comment Share on other sites More sharing options...
alecosti Posted May 9, 2013 Share Posted May 9, 2013 looks great! i'll give it a try 1 Link to comment Share on other sites More sharing options...
MiniHack Posted May 9, 2013 Author Share Posted May 9, 2013 looks great! i'll give it a try Let us know if it works out for you.... Link to comment Share on other sites More sharing options...
Baudouin Posted May 9, 2013 Share Posted May 9, 2013 Bad news for the Verax fans, the rotor shafts have not the same size, the one from apple is thicker. And if I brake the plastic enclosure to free the PCB and the wiring; I am wondering how I can secure the rotor fan afterwards. I need to borrow a very good camera to show the parts. Link to comment Share on other sites More sharing options...
MiniHack Posted May 9, 2013 Author Share Posted May 9, 2013 Bad news for the Verax fans, the rotor shafts have not the same size, the one from apple is thicker. And if I brake the plastic enclosure to free the PCB and the wiring; I am wondering how I can secure the rotor fan afterwards. I need to borrow a very good camera to show the parts. Sorry to hear that. Maybe I was lucky with the Zalmans...... Link to comment Share on other sites More sharing options...
ik_ben_Mark Posted January 2, 2017 Share Posted January 2, 2017 The photo's aren't working anymore. Can the TS fix them or does someone made a backup of them? I Would love to try this. Does it matters what size I use? 80mm, 120mm, etc. And does it matter if you use 2pin, 3pin or 4pin? Link to comment Share on other sites More sharing options...
MiniHack Posted January 2, 2017 Author Share Posted January 2, 2017 The photo's aren't working anymore. Can the TS fix them or does someone made a backup of them? I Would love to try this. Does it matters what size I use? 80mm, 120mm, etc. And does it matter if you use 2pin, 3pin or 4pin? Missing pictures now attached as a zip to the main post!!! Happy New Year! 1 Link to comment Share on other sites More sharing options...
ik_ben_Mark Posted January 2, 2017 Share Posted January 2, 2017 Missing pictures now attached as a zip to the main post!!! Happy New Year! Awesome! Thank you! Link to comment Share on other sites More sharing options...
claudiony Posted May 15, 2018 Share Posted May 15, 2018 Hey MiniHack! whats up! So, can you resend the pictores, because de link is off!!! i am needing a lot these pictures! thanks! Link to comment Share on other sites More sharing options...
RicardoF1RST Posted July 6, 2019 Share Posted July 6, 2019 Looks like the image zip attachment / link has disappeared, anyone have a link to the missing images per chance before I have a go blind? Thanks MiniHack for the inspiration and excellent write-up. Link to comment Share on other sites More sharing options...
institute Posted August 29, 2020 Share Posted August 29, 2020 (edited) It seems there was a PDF that the OP made at one point that still contains all pictures. I have attached it to this message, good luck! G5 Fan Conversion Tutorial.pdf Update per 2021: I have tried to follow the guide but I would not recommend this at all anymore. The fans discussed in the guide are not available anymore and essentially every mainstream fan has the backside glued so you cannot remove it. Furthermore, the few fans that do have a removable plug on the back (I guess mostly sleeve bearings which are rare on their own) will generally not have removable inner bearings, or aren't designed to separate from the plastic frame. This is coming somebody from somebody that spent $20 on purchasing fans that were likely candidates, but that all failed to be used. It is essentially impossible to find fans that can be disassembled sufficiently to use their innards. Sadly the closest thing we have nowadays to the G5 fans are grey-ish regular PC fans. Edited June 2, 2021 by institute Link to comment Share on other sites More sharing options...
Recommended Posts