How to Clean Junk Files on Mac: 10 Best Methods
Let’s face it, nobody likes a slow Macbook. Often, it’s because of all the junk files that pile up without you even noticing. From old caches to forgotten downloads, these leftovers can clog your system. The same applies to iMacs and Mac Minis. But here’s the good news: you can remove junk files from your Mac and get it running smoothly again. We will walk you through ten easy and quick ways to tidy up your Mac and make it feel brand new. Almost.
Prefer a quick demo first? Watch the short video below for a safe cleanup warm-up, then continue to what junk files are and how to clear them.
Introduction to Junk Files on Mac
When you use a Mac, it saves various types of files to help things run smoothly. Over time, these files can pile up and slow your Mac down. It’s a good idea to clean them out now and then. Let’s look at what these files are and why getting rid of them can help your Mac run better.

- System Cache Files (.cache, .tmp) are temporary files that your Mac creates to store frequently accessed data. Caches help applications and macOS load faster because they don’t need to retrieve data from scratch each time. Common cache file extensions include .cache, .tmp, and others specific to certain applications. A single application might generate hundreds of megabytes of cache data over a few months.
- App leftovers (.plist, .appdata). When you uninstall an application, it sometimes leaves behind residual files such as preference files (.plist) and support data (.appdata). These remnants remain small in size but can add up if multiple applications are involved. These leftover files typically do not harm your system but clutter your storage.
- Temporary files (.temp, .tmp). Temporary files facilitate smooth operations by providing necessary data during processes. They are designed to be deleted automatically once their purpose is served. But sometimes, temporary files are not removed as intended, which leads to accumulation that consumes disk space. For example, hundreds of temporary files can occupy several gigabytes over time.
- Logs (.log). Log files record detailed information about the activities and operations of applications and the system. These files are invaluable for troubleshooting and diagnosing issues. Logs are important for developers and support teams to identify and fix problems within applications and macOS. Despite their usefulness, log files grow large, and take up significant storage space without any benefits to the average user.
- Language files (.lproj). Language files enable users to interact with applications in their preferred language and many apps come with multiple language options, most of which you’ll never use. It’s like having instructions in 10 languages when you only need one.
- Duplicate files. Over time, you might accumulate multiple copies of the same files without realizing it. This can happen when you download the same attachment multiple times or copy files into different folders. Multiple copies of a file can serve as backups, but excessive duplicates waste storage space and make file management more cumbersome.
10 Best Ways to Remove Junk Files from Mac
As you can see, there are various types of files that can be classified as junk, and each category demands a specific approach for a thorough cleanup. Here are ten simple methods to help you tackle this process:
Method 1: Remove Cache System Junk on Mac
Think about cache files like shortcuts for your Mac to access and load data faster. However, over time they can clutter and slow down your system. Here’s how to clean them up:
- Go to the ‘Go’ Menu: Found at the top of your screen when Finder is open, this menu helps navigate different parts of your Mac.
- Hold Down ‘Option’ and Select ‘Library’: The Option key reveals hidden menu items, including the Library where cache files live.
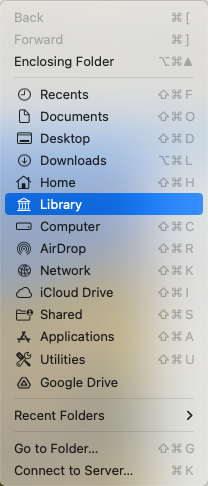
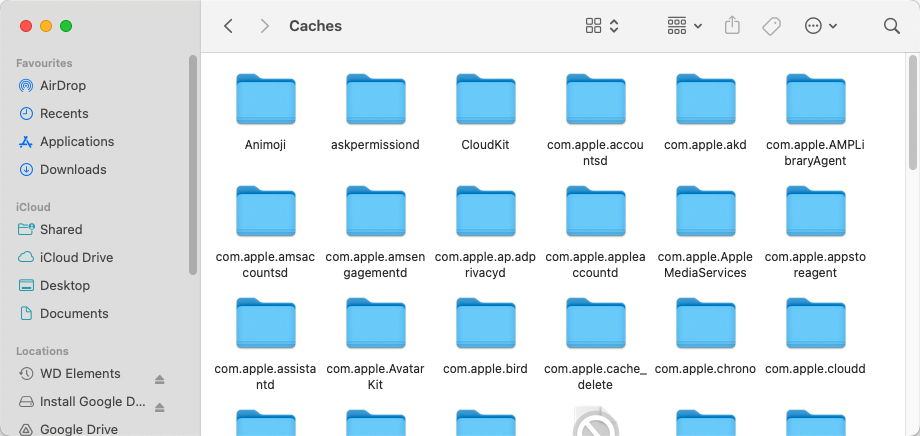
- Open the ‘Caches’ Folder: Here’s where your Mac stores all the cache files.
- Review and Delete: Take a careful look and delete the cache files you don’t need. Remember, when in doubt, it’s better to leave it than delete something crucial.
Method 2: Remove Unused Language Packs
Apps on your Mac and even macOS itself come with language packs for different users worldwide. Chances are, you’re using just one or two languages and can free up space by removing the rest.
- Find a Language Removal Tool: Apps like Monolingual can help you easily remove languages you don’t need.
- Download and Open the Tool: Follow the instructions on the tool’s website to download and open it.
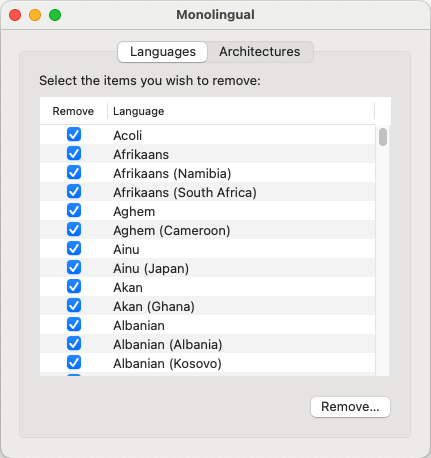
- Select Languages to Keep: Be sure to keep your primary language and any others you might need. The tool will list all the languages installed on your Mac.
- Start the Removal Process: With your selections made, initiate the cleanup. The tool will then remove the unchecked language packs from your apps.
Method 3: Delete Unnecessary Files on Mac from the Trash
Files aren’t completely removed from your Mac until you empty the Trash. It can be easy to forget, but regularly doing so can free up valuable space.
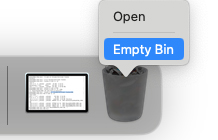
- Click on the Trash Icon: Find it in your Dock, usually at the bottom of your screen. It’s where your deleted files go.
- Review the Contents: Take a quick look to make sure you haven’t accidentally trashed anything important.
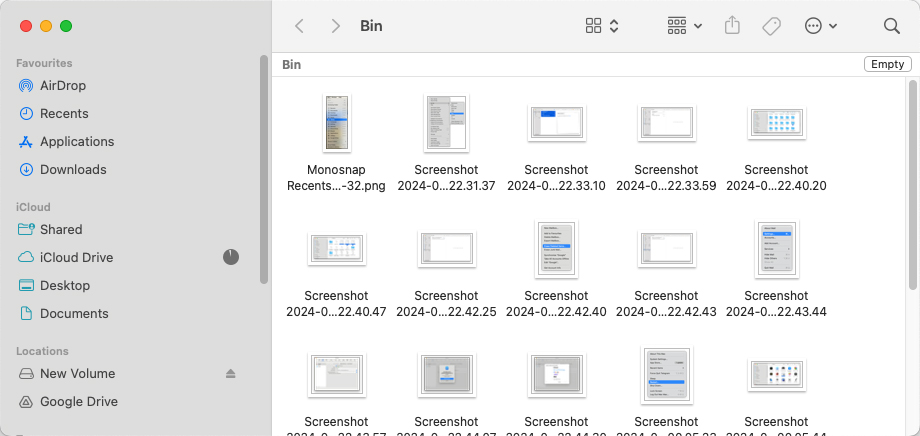
- Empty the Trash: Right-click or Ctrl-click on the Trash icon and select ‘Empty Trash.’ You can also open the Trash and click the ‘Empty’ button you’ll find in the top right corner of the window.
By default, macOS is configured to automatically empty the Trash after 30 days to maintain free storage space without any manual intervention. To verify this setting open Finder Settings, click on the ‘Advanced’ tab, and check the box next to the Remove items from the Trash after 30 days.

Method 4: Remove Unwanted Duplicate Files from Mac
Duplicate files are identical copies of files that exist in multiple locations on your Macbook. While duplicates can sometimes serve as backups, they often accumulate unintentionally through repeated file transfers. You could try to search for duplicate files manually in Finder (looking for files with identical names, file types, and sizes), but this can become tedious very quickly, especially with a larger volume of data. To make this task faster, and much easier, you can use third-party tools. We will use Disk Drill as an example.
- Download and Install Disk Drill: Download and install Disk Drill for Mac from the official website. Once installed, open the application to begin.
- Navigate to the Duplicate Finder Tool: In the left-hand menu, select ‘Find Duplicates’. This tool is designed to scan your system for duplicate files.

- Select Folders or Drives to Scan: Choose the folders/drives you want to scan, then click ‘Start Scan’.
- Review Duplicate Files: Review the duplicate files grouped by type, and use file previews to confirm which duplicates to delete.

- Select and Remove Duplicates: Check the boxes next to the files you want to remove. When ready, click ‘Remove Selected’ to delete them.
- Empty the Trash: Finally, navigate to the Trash folder and empty it to permanently remove the duplicate files.
Method 5: Clean the Downloads Folder
Another place you should check is the Downloads folder. Often, this folder holds large files you may have forgotten about, including installers and disk images for downloaded apps. These files can take up gigabytes of space, especially if you’ve downloaded multiple versions of software or updated apps without deleting the older installers.
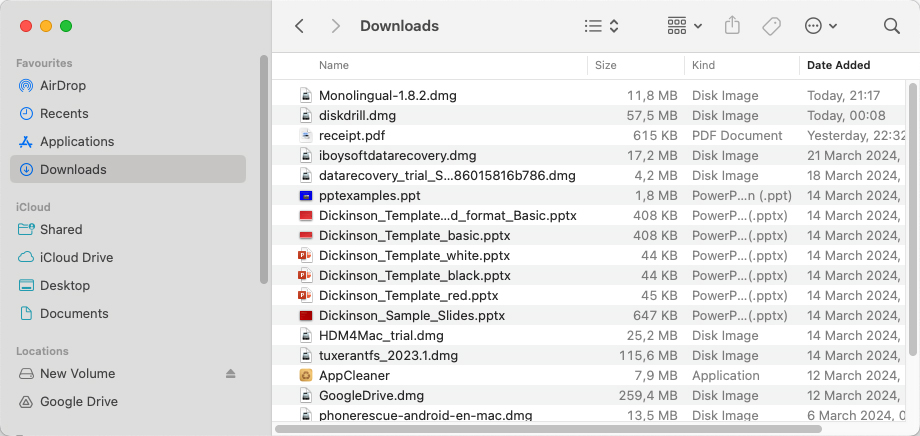
- Navigate to the Downloads Folder: You can find this in the sidebar of the Finder window, under ‘Favorites’.
- Sort and Review Files: Use the ‘List View’ and sort by ‘Date Added’ to see the most recent files at the top. Look through the files to determine what you still need.
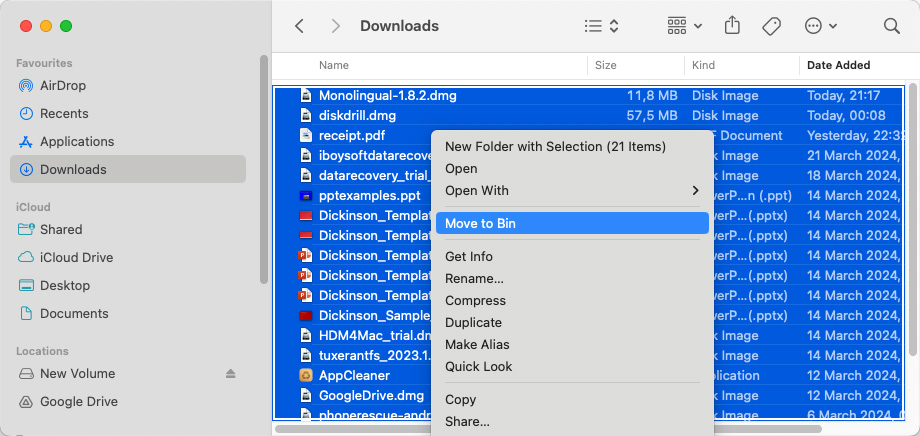
- Delete Unneeded Files: Select files you no longer need and right-click to choose ‘Move to Bin’ or simply press the ‘Delete’ key.
- Empty the Trash: Remember, files aren’t fully deleted until you empty the Trash.
When you clean out your Downloads folder, you not only free up space but also make it easier to find important files when you need them.
Method 6: Delete Log Files
After tackling the bulkier files in your Downloads folder, it’s also worth looking at log files. Log files record app activities and system events, which can be helpful for troubleshooting but may eventually take up unnecessary space. Here’s how to clean them:
- Access the ‘Go’ Menu: Found at the top of your screen when finder is open, this menu helps you navigate to different system locations.
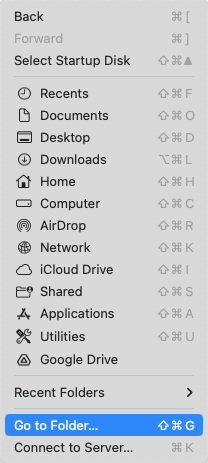
- Go to Folder: Choose ‘Go to Folder’ from the ‘Go’ menu and type in
~/Library/Logsto access user logs, or/var/logto view system logs.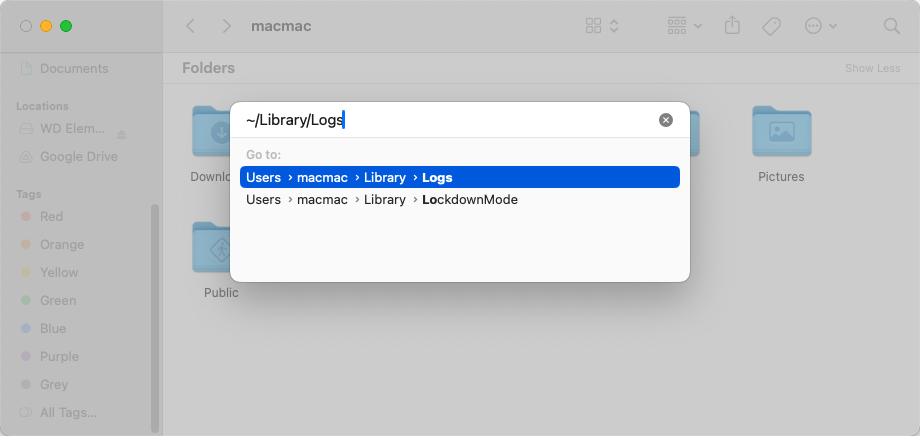
- Review Log Files: Take a moment to look through the log files. If you’re unsure about what a log file is for, it’s best to leave it alone or do a quick online search.
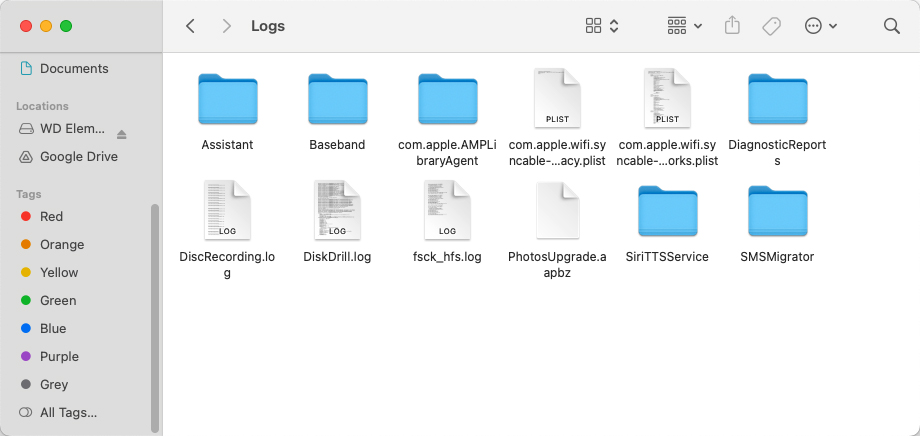
- Delete Unnecessary Logs: For logs you recognize and no longer need, move them to the Trash. Be cautious and ensure you’re not deleting anything vital to your system or applications.
- Empty the Trash: As with any file deletion on a Mac, the process isn’t complete until you empty the Trash.
Method 7: Deal with Unused Apps and Files
Apps and files you no longer use can take up a surprising amount of space. Here’s how to identify and remove them:
- Visit the Applications Folder: You’ll find this in the sidebar of Finder, where all your installed apps are listed.
- Sort Apps by Size: In the Finder window, choose ‘List View’ and click on the ‘Size’ column to sort your apps by size. This helps you identify the largest apps you might not need anymore.
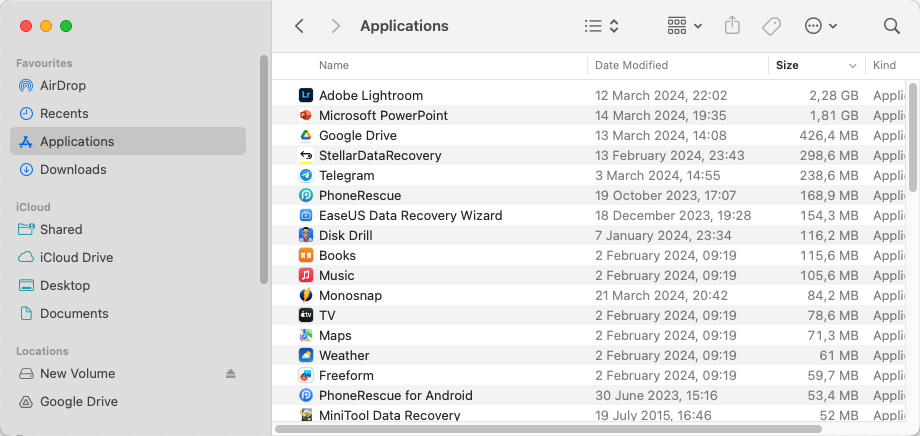
- Review and Decide: Look through the apps, especially the larger ones, and decide which ones you haven’t used in a long time.
- Drag to Trash: For apps you choose to remove, simply drag them from the Applications folder to the Trash. Or right click and select ‘Move to Bin.’ For a more thorough cleanup, consider looking for related files in the
~/Library/folder.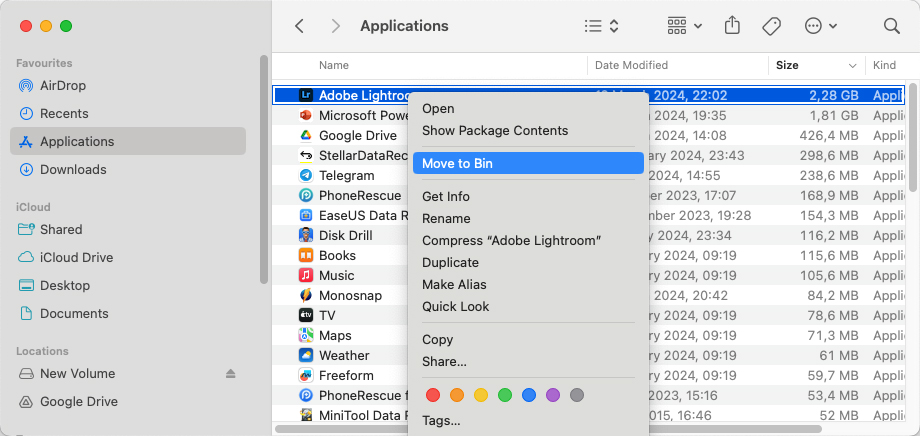
- Check for Associated Files: Some apps store files in other locations like
~/Library/Application Support/or~/Library/Preferences/. You might want to remove these as well but be careful not to delete files needed by other apps.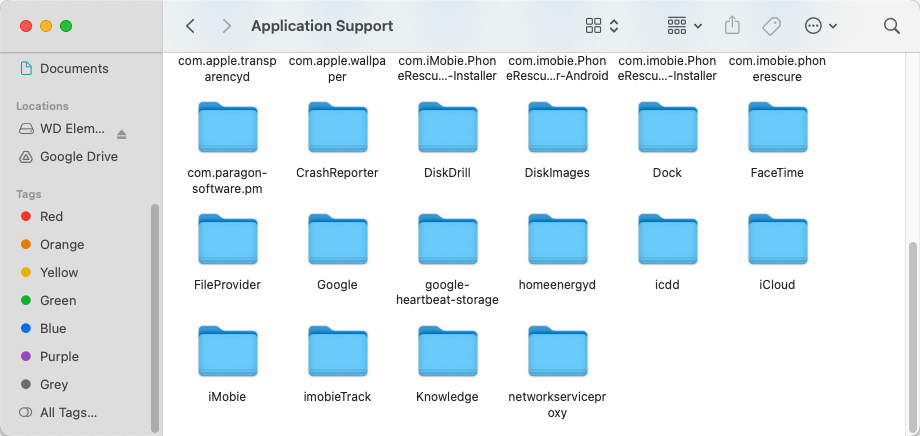
- Empty the Trash: Finalize the cleanup by emptying the Trash, making sure the unwanted apps and files are completely removed from your Mac.

- Open the Applications folder in Finder.
- Switch to List View by clicking the list icon at the top.
- Right-click the column headers and select Date Last Opened from the options.
- Click Date Last Opened to sort your apps by the last time they were used.
Method 8: Delete Large and Old Files
Over time, large and old files can accumulate on your Mac, taking up storage space. So don’t forget to delete them too:
- Use Finder’s Search: Open a new Finder window and use the search bar at the top right: start typing any symbol.
- Search by File Size: This will reveal the “+” button below the search bar. Choose File Size > is greater than > and enter file size you wish to search.
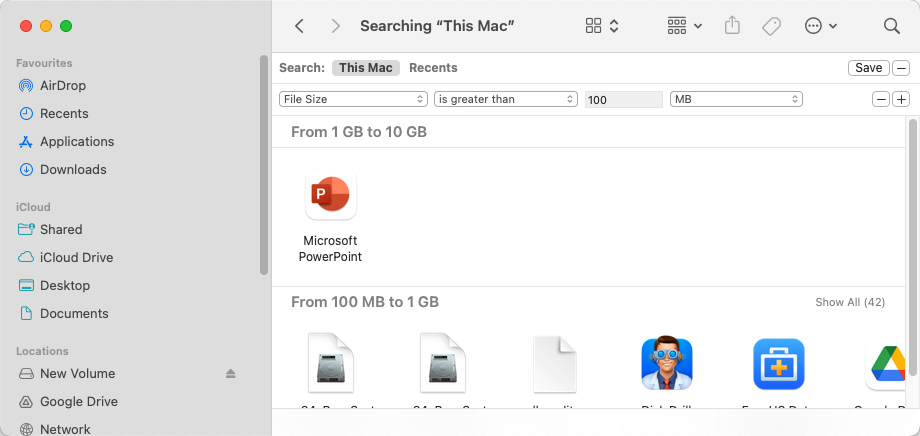
- Review Files: Go through the list and identify files that you no longer need. These could be old movies, large downloads, or outdated backups.
- Decide What to Do: For each file, decide whether to delete it, move it to an external drive, or archive it. Moving or archiving can be a good option for files you don’t often use but aren’t ready to delete.
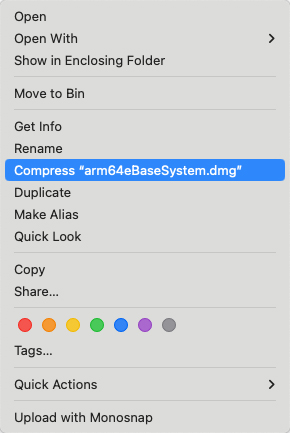
- Delete or Move: For files you choose to delete, move them to the Trash. For those you want to keep but store elsewhere, drag them to an external drive or upload them to cloud storage.
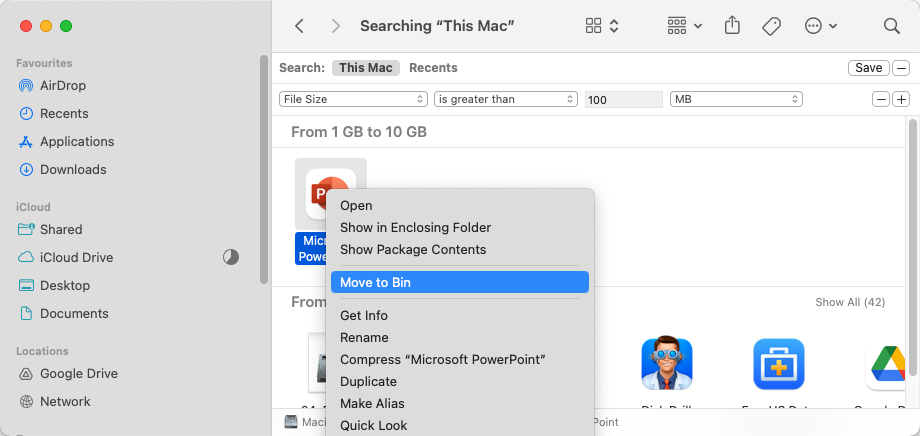
- Empty the Trash: Remember, files aren’t fully removed from your Mac until the Trash is emptied. Make sure to do this as the final step.
Method 9: Clear Browser Cache and Cookies
Your web browser stores cache files (images, videos, JavaScript files) and cookies to help websites load faster and remember your preferences. While these files improve browsing speed and convenience, they can also build up over time. Here’s how to clear cache and cookies in Safari:
- Open Safari: Launch Safari, then click on ’Safari’ in the menu bar at the top of your screen.
- Navigate to Privacy Settings: Select ‘Settings,’ and head to the ’Privacy’ tab to access your browser’s data management options.
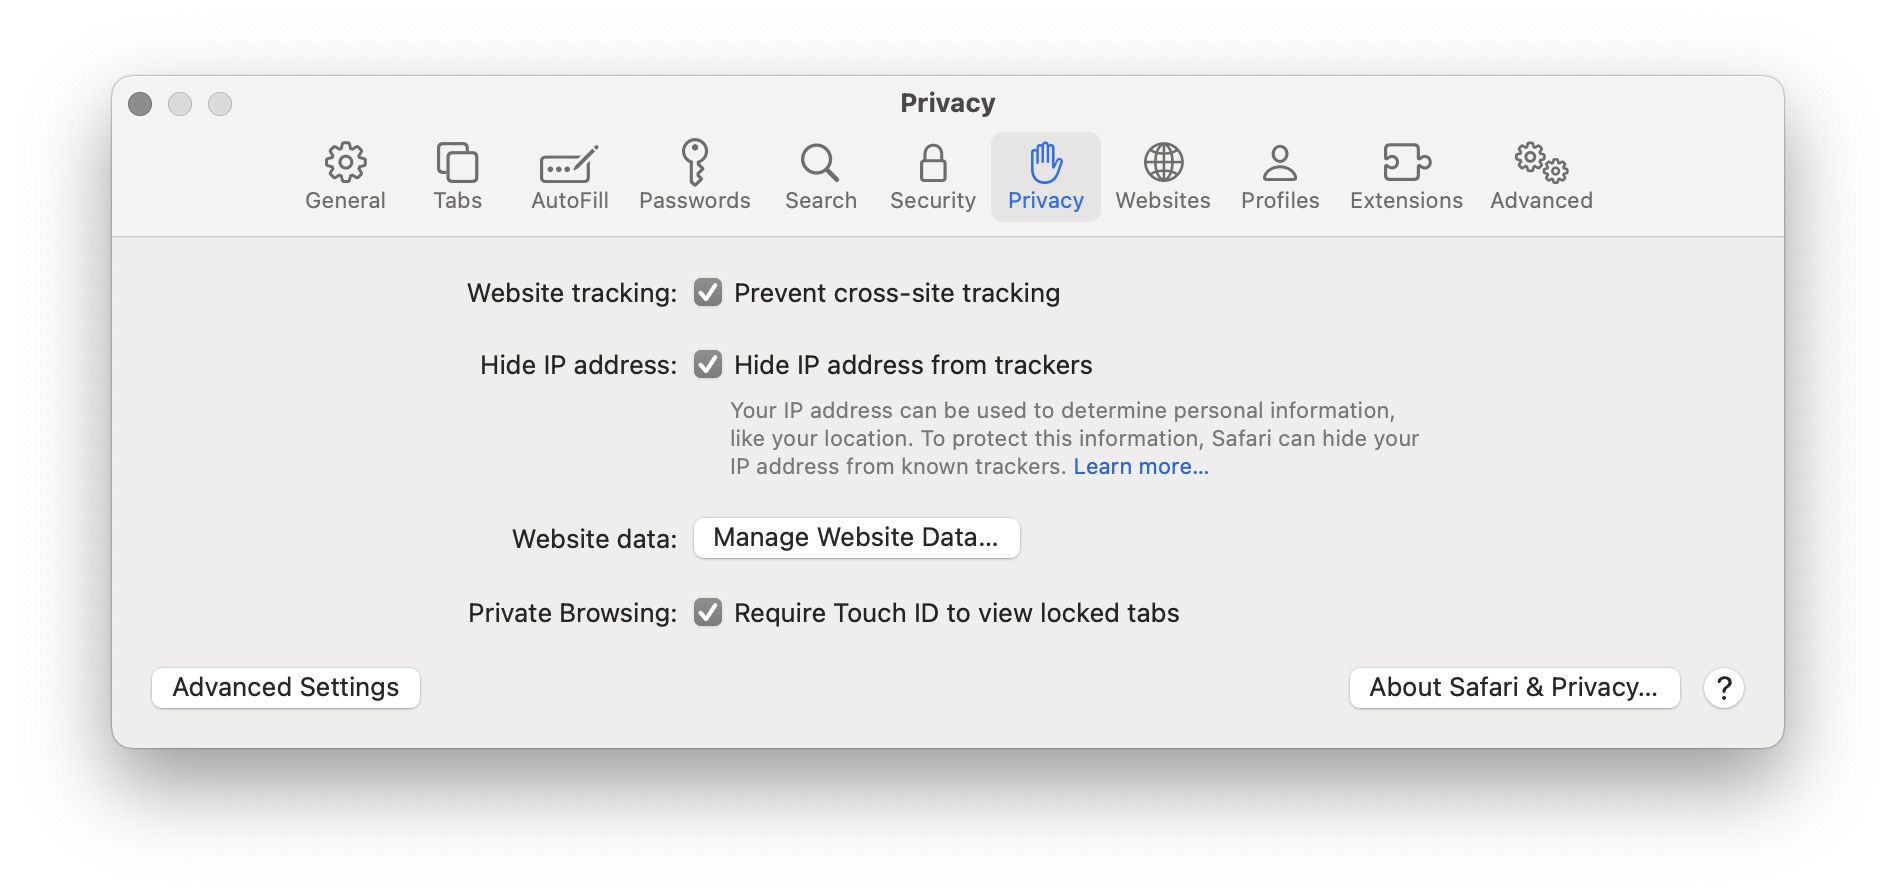
- Manage Website Data: Click ’Manage Website Data…’ to view all the stored cache files.
- Remove Cache and Cookies: To clear everything, choose ’Remove All’. Alternatively, select specific websites if you want to remove data from only those sites.

- Confirm Deletion: Click ’Remove Now’ to finalize the process.
Method 10: Clean Up Junk Files on Mac with Third-Party Tools
Why spend hours sorting through files when there are apps that can tidy up your Mac in no time? Check out these handy tools:
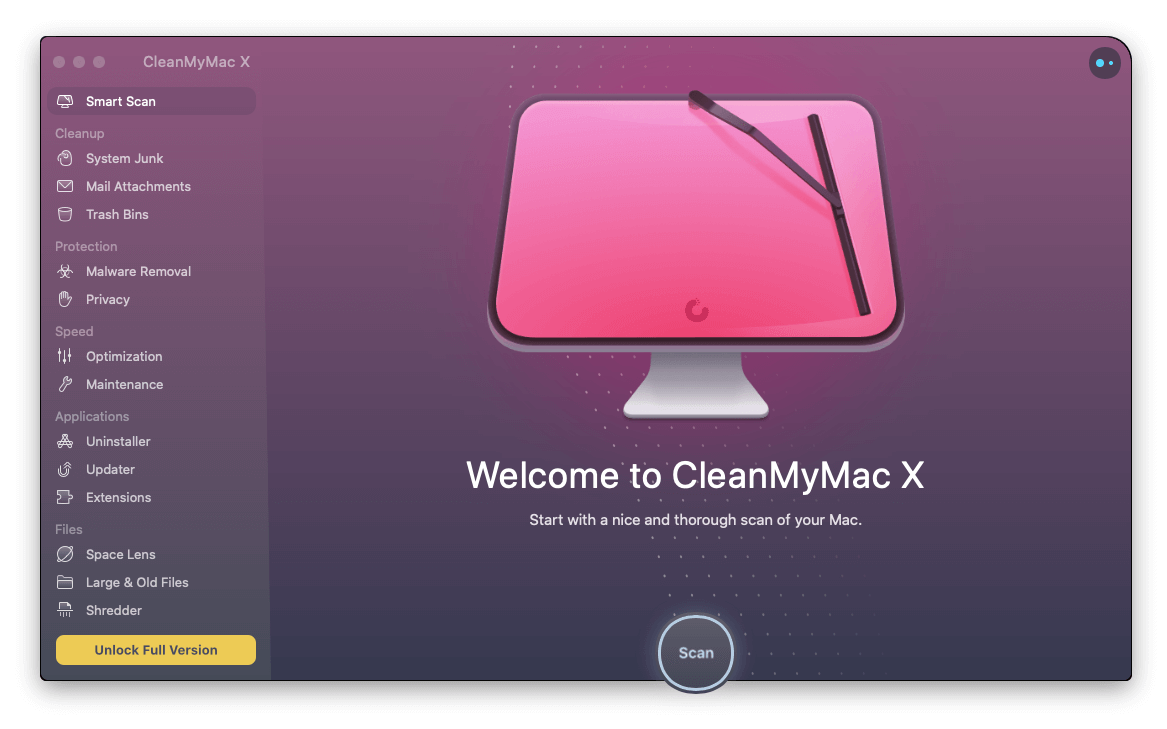
- CleanMyMac: A favorite among Mac users, CleanMyMac stands out for its thorough cleaning process and user-friendly interface. It digs deep into your system to remove junk files from your Mac, including system junk, photo caches, outdated mail attachments, and more. What sets it apart is its Safety Database, which protects important files and applications from accidental deletion during the cleanup.
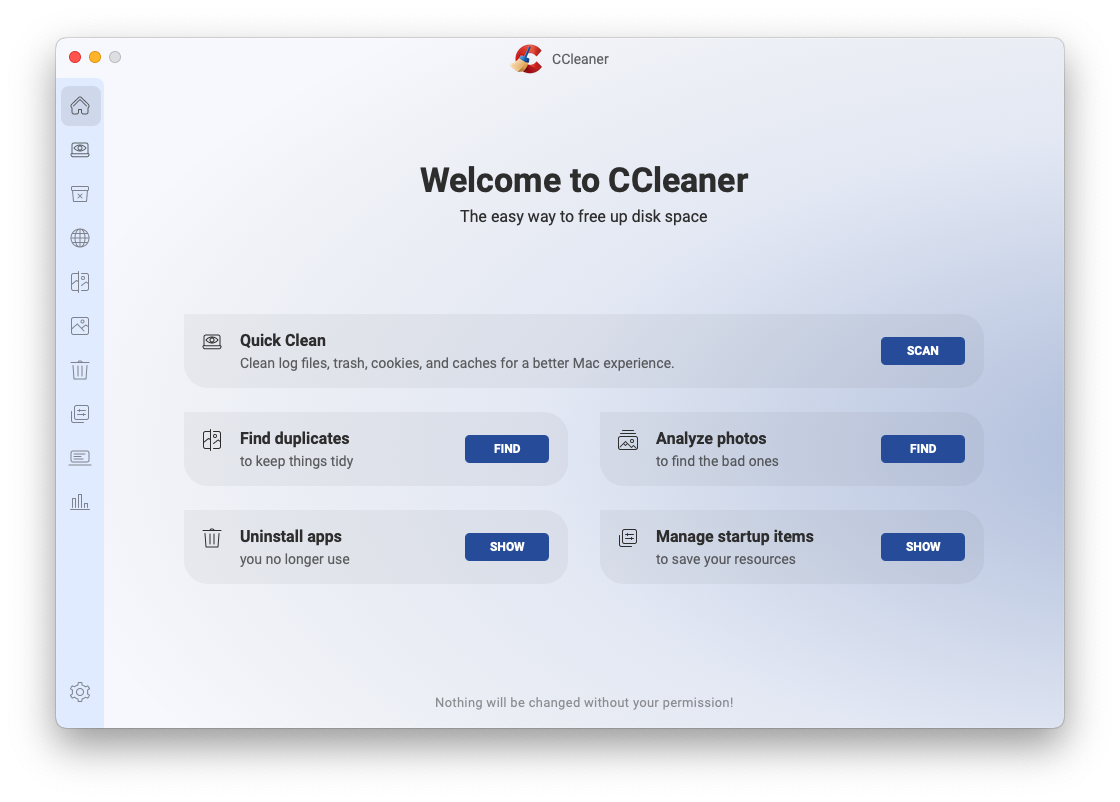
- CCleaner for Mac: CCleaner has long been trusted by PC users and brings its effective cleaning process to Mac users. It’s particularly good for those who want a quick, uncomplicated cleanup. With just a few clicks, CCleaner scans for and allows you to delete unnecessary files on Mac with minimal fuss.
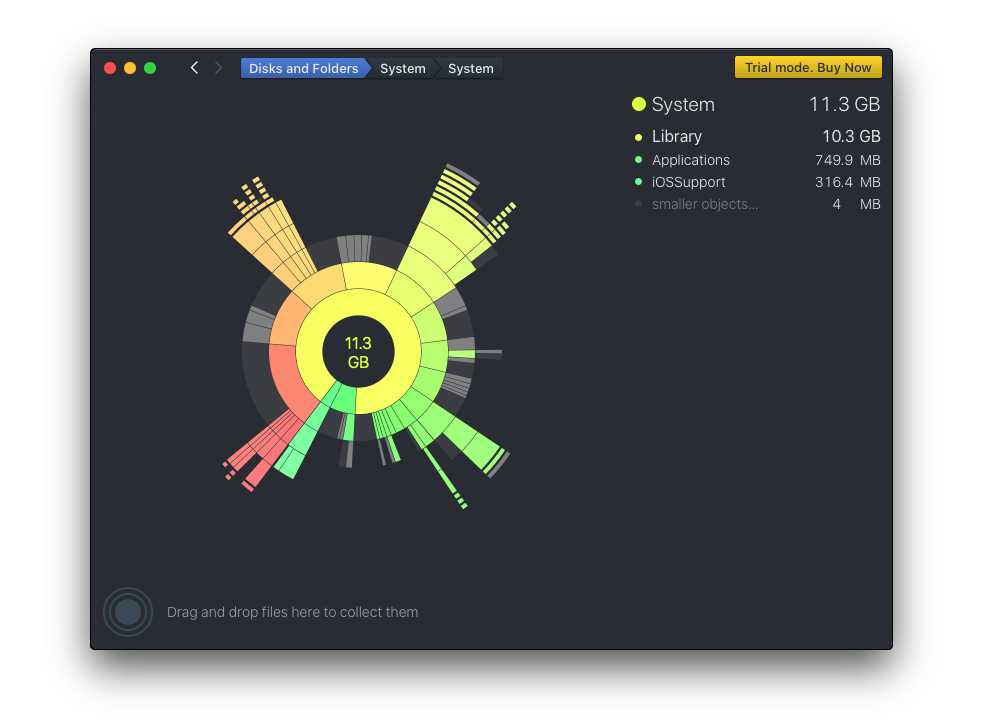
- DaisyDisk: For those who prefer a more visual approach to disk cleanup, DaisyDisk offers a beautifully designed interface that maps out your disk space usage in an interactive, color-coded graph. This makes it easy to spot which files or folders are using up the most space, allowing you to clean junk files on Mac in a more targeted manner. DaisyDisk combines utility with aesthetics, which makes disk cleanup a surprisingly pleasant experience.
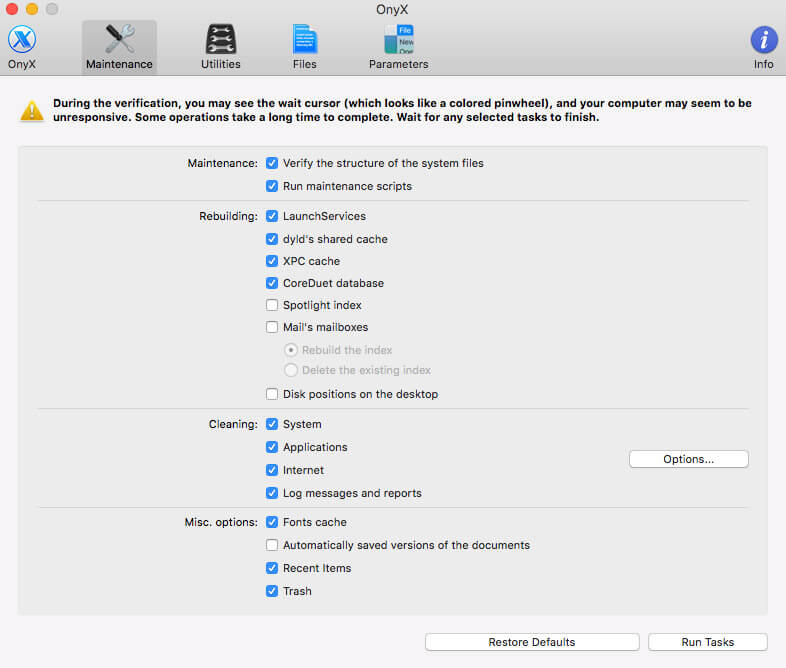
- OnyX: OnyX is a multi-tool for macOS with a wide array of maintenance tools and tweaks alongside its cleaning features. It’s perfect for power users who want to go beyond simple junk removal; it offers tools for in-depth system maintenance, application management, and settings customization.
Pick one that sounds like your cup of tea and give your Mac a good cleanup. It’ll thank you by running smoother.
Final Thoughts
You don’t need to view Mac cleanup as a chore. With the right tools and a bit of time, you can clear out those unwanted files and keep your system running like a well-oiled machine. But remember: a one-time cleanup is just a temporary fix. Set a monthly reminder to clean out junk files, and make it a habit to empty the Trash. Your Mac also has built-in tools—use ‘About This Mac > Storage’ to quickly view what’s taking up space. Here, you can review recommendations such as “Optimize Storage” or “Reduce Clutter” to easily identify and delete unnecessary applications and files.

Regularly check through your Downloads folder and Desktop, two common clutter hotspots, for a quick cleanup. It will help you keep that new-Mac feel with lots of storage and a clutter-free experience.