How to Remove Application Leftover Files on a Mac
Apps often leave behind ‘leftover files’ even after being uninstalled, hogging precious space and slowing things down. But fear not, there’s a way to deal with this clutter. With a mix of built-in tools and trusted third-party apps, you can sweep away these digital dust bunnies, freeing up space and sometimes even boosting your Mac’s performance.
Why Some Files Stick Around After You Uninstall Apps on Your Mac
Ever noticed that even after you delete an app from your Mac, it’s like it never fully goes away? That’s because many apps leave behind what we call ‘leftover files’. These aren’t the files you see on your desktop or in your usual folders. They’re more hidden away, but they can pile up and take up precious space on your Mac.
Here’s a quick look at what these leftover files usually are:
- Files the app was using temporarily while it was running
- Settings and preferences files, so if you ever reinstall the app, it remembers how you liked things
- Logs that keep a record of what the app did
- Cache files that help the app start up faster next time
These files stick around because when you delete an app, macOS doesn’t hunt down every single file associated with it. It gets rid of the main stuff, but these extra pieces stay behind in different places on your Mac.
If you don’t clean these up, they can:
- Take up space you could use for something else
- Make your Mac run a bit slower because it’s more cluttered
If you want to keep your Mac running smooth and have as much free space as possible, it’s a good idea to check for these leftover files now and then. You can do this with some tools built into your Mac, or you can get a bit of help from apps made just for this.
So, while those leftover files might not seem like a big deal, getting rid of them every so often can really help keep your Mac happy.
How to Get Rid of Leftover App Files on Your Mac
So as shown above jsut dragging an app to the trash bin is often not the end of the story. Here’s how you can clean up those leftovers and keep your Mac tidy.
Deal with Leftovers with Finder
Finder isn’t just for browsing; it’s also great for cleaning. Here’s a step-by-step on how to use Finder to find and remove those pesky leftover files:
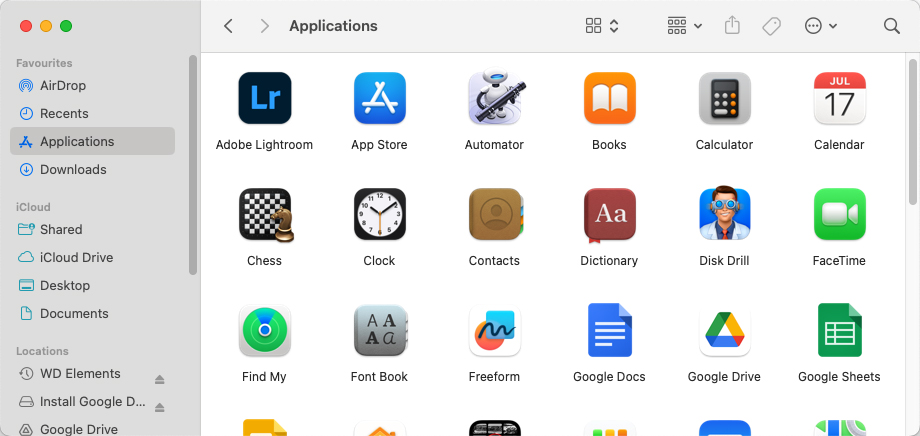
- Open Finder: It’s usually on your dock, or you can find it by clicking on the half-blue, half-light-blue smiley face.
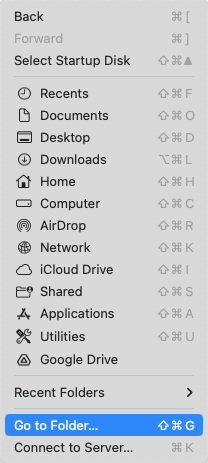
- Access ‘Go to Folder’: Click on ‘Go’ in the menu bar at the top of your screen, then select ‘Go to Folder…’ from the dropdown.
- Type in common leftover locations: Enter paths like
~/Library/Caches/,~/Library/Preferences/, or~/Library/Application Support/into the search box that pops up.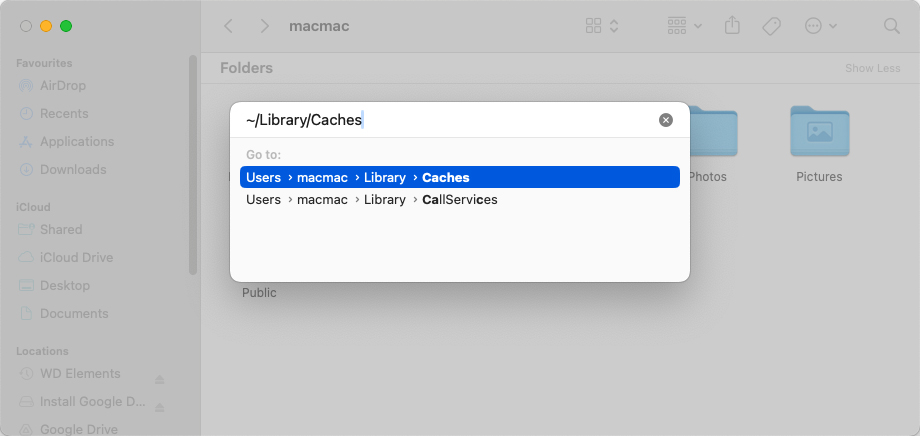
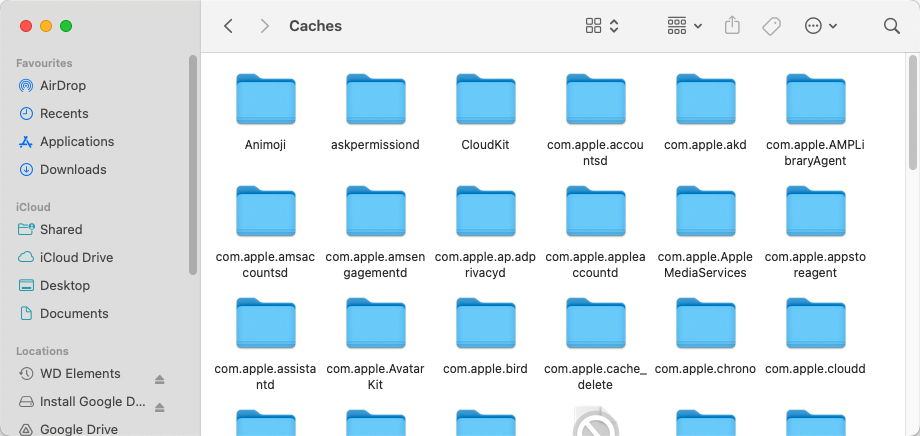
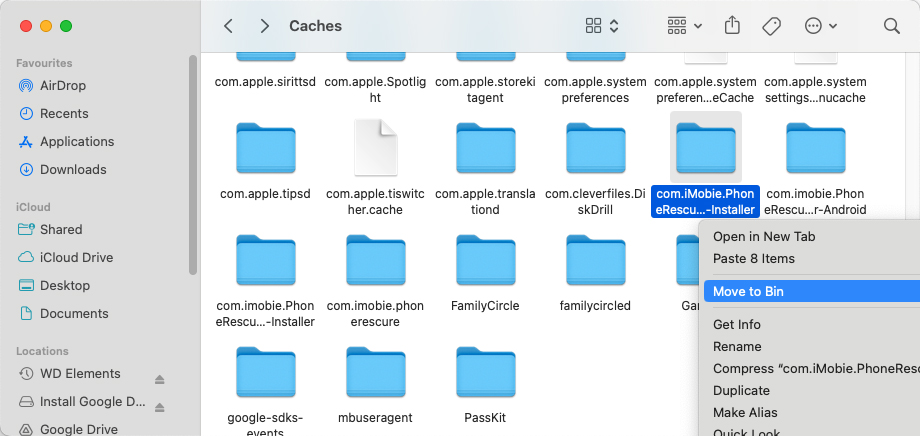
- Search for suspects: Look through these folders for any files or folders that seem related to apps you no longer use. They might still bear the name of the app or its developer.
- Move to Trash: Once you’ve found the leftovers, select them and either drag them to your Trash or right-click and choose ‘Move to Trash’.
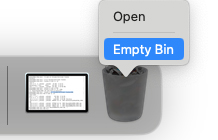
- Empty Trash: Right-click on your Trash can and select ‘Empty Bin’, or open the Trash and click the ‘Empty’ button.
And that’s it! You’ve just used Finder to do some spring cleaning on your Mac. Keep in mind that while it’s generally safe to remove cache and preference files, you should be careful with Application Support files. If you’re not sure what something is, it’s better to leave it alone or do a bit of research first.
Up next, we’ll talk about how to clean out those login items that might be slowing down your startup.
Tidying Up Login Items
Ever notice your Mac taking its sweet time to get going when you first turn it on? One reason might be the clutter of login items – apps and services set to launch automatically when you log in. Some of these could be leftovers from apps you’ve removed. Here’s how to give your startup process a good decluttering through System Preferences.
Follow these steps to check your Login Items and clear out any unwanted guests:
- Open System Settings: Click on the Apple menu at the top left of your screen and select ‘System Settings’.
- Head to Login Items: In the ‘General’ category find ‘Login Items.’
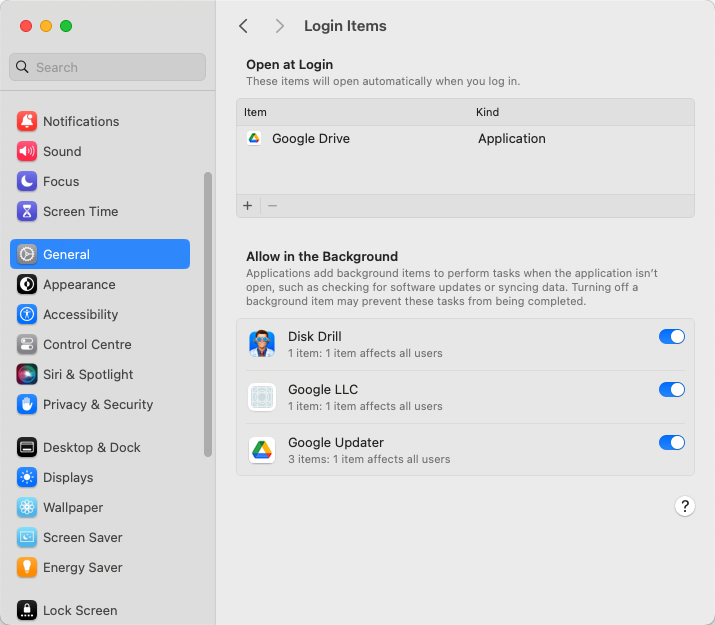
- Review and remove: Look through the list for any apps you don’t recognize or no longer use. Select them and click the ‘-‘ button below the list to remove them.
Voila! You’ve just streamlined your Mac’s startup sequence by removing unnecessary login items. It’s a simple step, but it can make a noticeable difference in how quickly and smoothly your Mac starts up.
Ready for more cleanup? In the next section, we’ll explore how third-party apps can help you hunt down and eliminate leftover files with even less effort.
When in Doubt, Use a Clean-Up App
Let’s be honest, even the most diligent of us can miss a few spots when tidying up our digital space. That’s where third-party cleanup apps come into play, offering a deep clean with minimal effort. Here are a few standout options that have earned their stripes in keeping Macs lean and mean.
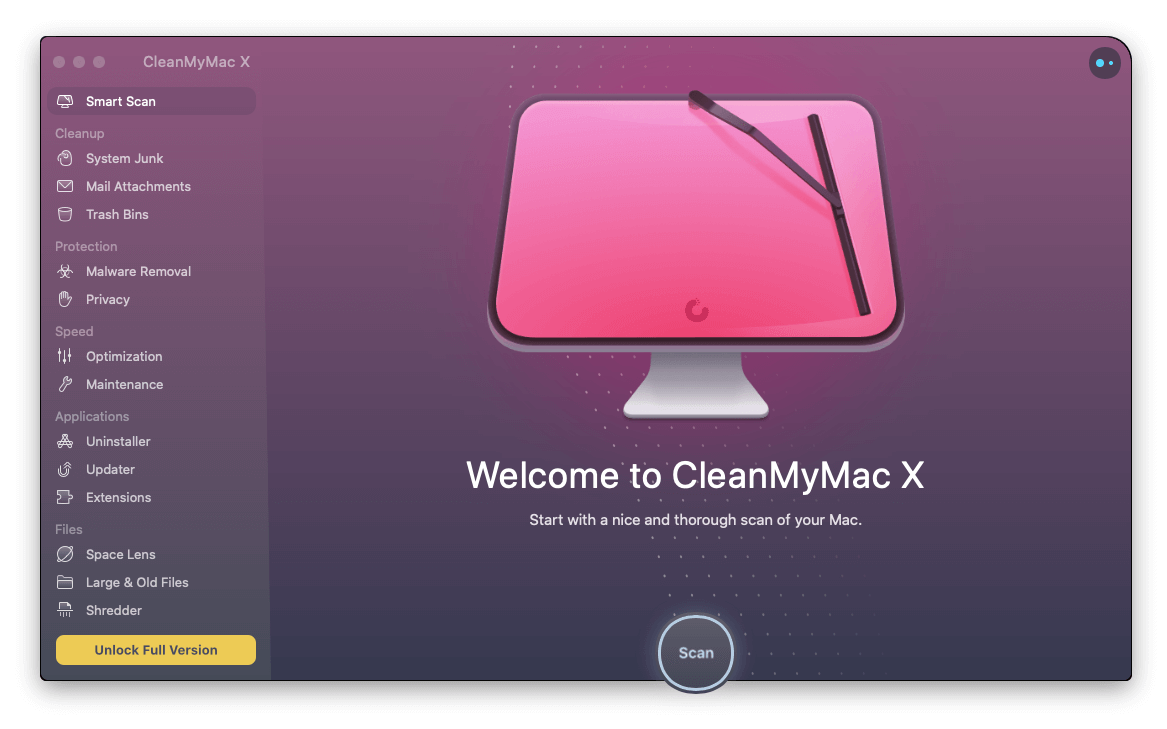
- CleanMyMac X: This is the Swiss Army knife of Mac cleanup tools offering a huge suite of cleaning features. From trimming down bulky files to malware protection, it’s got your back. Users love its intuitive interface and the sense of security it brings to regular maintenance chores.
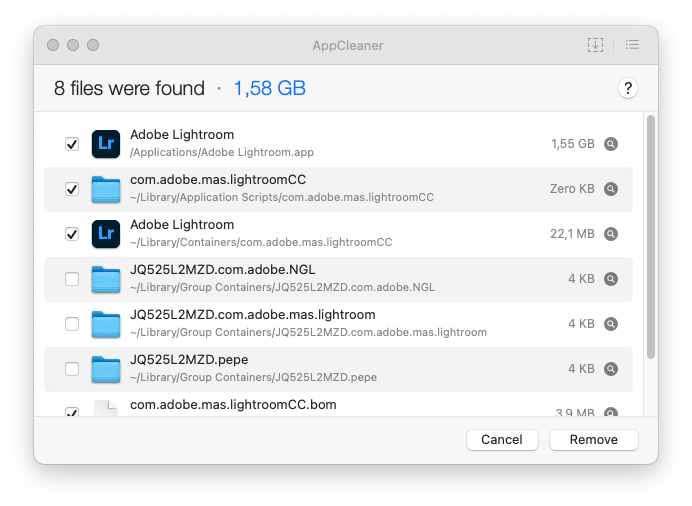
- AppCleaner: For those who appreciate a no-frills approach, AppCleaner steps up to the plate. Drag and drop an app into AppCleaner, and it’ll hunt down all associated files for you to review and delete. It’s particularly praised for its simplicity and effectiveness, making it a hit for users who want a straightforward cleanup without extra bells and whistles.
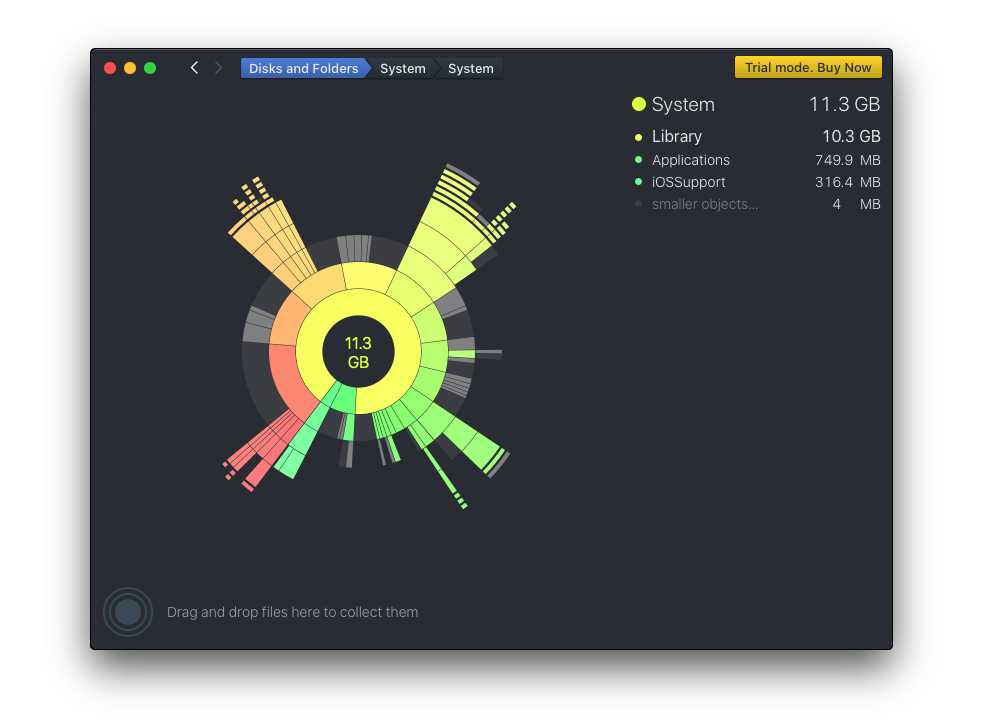
- DaisyDisk: DaisyDisk stands out with its unique, colorful wheel interface that shows you exactly what’s eating up your disk space. It turns the mundane task of file deletion into a visually engaging experience. Users often find themselves discovering space-hogging files they didn’t even know existed, making DaisyDisk not just a tool but a journey through the hidden recesses of their Mac’s storage.
While these tools are fantastic helpers, remember the golden rule of downloading third-party software: always from the official website or a trusted source like the App Store. And even though these apps are pretty reliable, a quick backup before a big clean never hurts, just to be safe.
With the right app, keeping your Mac tidy is easier than ever. Say goodbye to the digital clutter and hello to a smoother, faster computing experience.
Remember, a little cleanup now and then keeps your Mac happy and speedy. Getting rid of those old app leftovers is a great way to start.
Keep Your Mac Clean
Getting rid of apps you don’t need anymore is like tidying up your room – it feels great! But sometimes, apps can leave a bit of a mess behind. Here’s how to make sure you’re not just sweeping stuff under the bed when you uninstall an app.
- Check if the app has its own ‘goodbye’ button: Some apps are polite and will clean up after themselves if you use their built-in uninstaller.
- Watch out when putting in new apps: Keep your eyes peeled during installations for any extra stuff it wants to add. If you don’t need it, don’t let it in.
- Do a regular app check-up: Every so often, look through your apps and if there are some you haven’t clicked on in months, it might be time to say goodbye.
- Keep your Downloads folder tidy: This place can turn into a forgotten pile of old installers. Clean it out once you’re done setting up your apps.
- Don’t let cache files get too comfy: Cache files are temporary files that help apps run faster, but they can get out of control. Clearing them out once in a while helps keep things running smooth.
So, before you drag another app to the Trash, a quick cleanup can save you from dealing with a bigger mess later on.
Conclusion
From the hidden depths of Finder to the streamlined simplicity of third-party apps , you’ve got a whole arsenal at your disposal to deal with leftover files. And let’s not forget the power of preventive measures, keeping those digital cobwebs from forming in the first place. So, take a moment, follow these steps, and give your Mac the care it deserves. After all, a clean Mac is a happy Mac, and who doesn’t want a happy Mac?