
How to Get More Storage on iPad
Have you noticed your iPad’s storage feeling a little tight? Maybe you updated your iPad, downloaded a few too many apps, or went on a photo-snapping spree, and suddenly, things feel cramped. So, can you add memory to an iPad, or are you stuck with the capacity you bought? (Spoiler: You definitely can, but maybe not in the literal “add” or “expand” sense).
Below, we’ll cover clever tricks, built-in features, and handy tools that can extend your iPad storage in ways you might not have considered. We’ve personally tested every single one. These aren’t just theories – they actually work.
Can You Physically Add More Storage to an iPad?
One of the most common questions from iPad users is whether they can physically upgrade iPad storage capacity to accommodate more apps, documents, and media. Short answer? No. Long answer? Also no, but with some workarounds.
iPads, unlike many personal computers and some smartphones, do not offer the flexibility to increase storage through physical upgrades. This is due to their sealed unit design, where the internal components, including storage modules, are not accessible for modifications or enhancements after manufacturing.
When iPads are assembled, the storage chips are integrated directly into the device’s main circuit board. This integration improves the device’s durability and performance but at the cost of upgradability. This means that the storage capacity you choose at the time of purchase is what you are committed to for the lifespan of that device. As a result, users looking to expand iPad storage must look towards alternative storage solutions rather than physical hardware changes.
In light of these constraints, the next sections will describe various strategies that can help manage and maximize the available storage without the need for hardware modifications.
How to Get More iPad Storage
While we’ve already made it clear that you can’t expand your iPad’s built-in storage, we also promised that you can add storage to your iPad in some other way. That’s what this section is about. Below, we’ll look at options that can give you extra space for some types of data on your iPad.
1. Use Cloud Storage
One of the most effective ways to add storage to an iPad is to utilize Apple’s iCloud service. iCloud is seamlessly integrated into the iOS ecosystem, offering not just storage solutions but also reliable sync across all your Apple devices. This integration makes it an important extra storage tool for the iPad.
Here is how to use iCloud for iPad storage optimization:
- On your iPad, go to Settings > [your name] > iCloud. If you are not signed in, enter your Apple ID and password.
- Within the iCloud menu, you can select which types of data (such as Photos, Contacts, and Calendars) you wish to sync across your devices. Toggle each app to your preference.
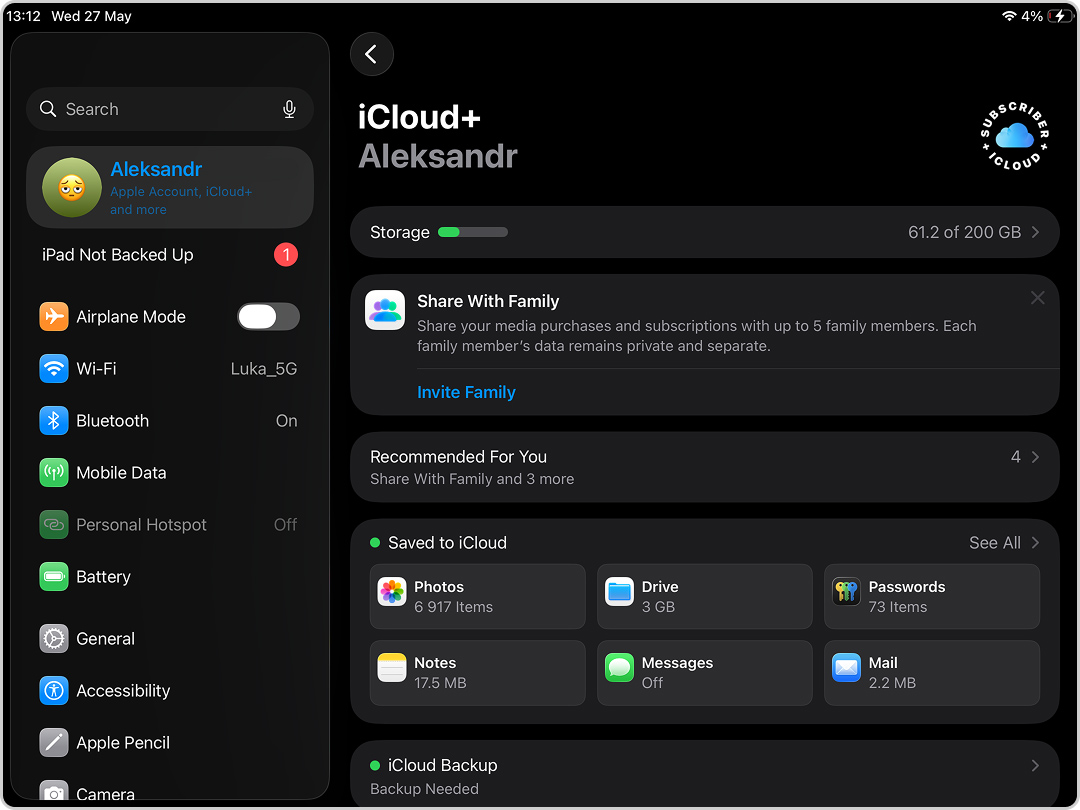
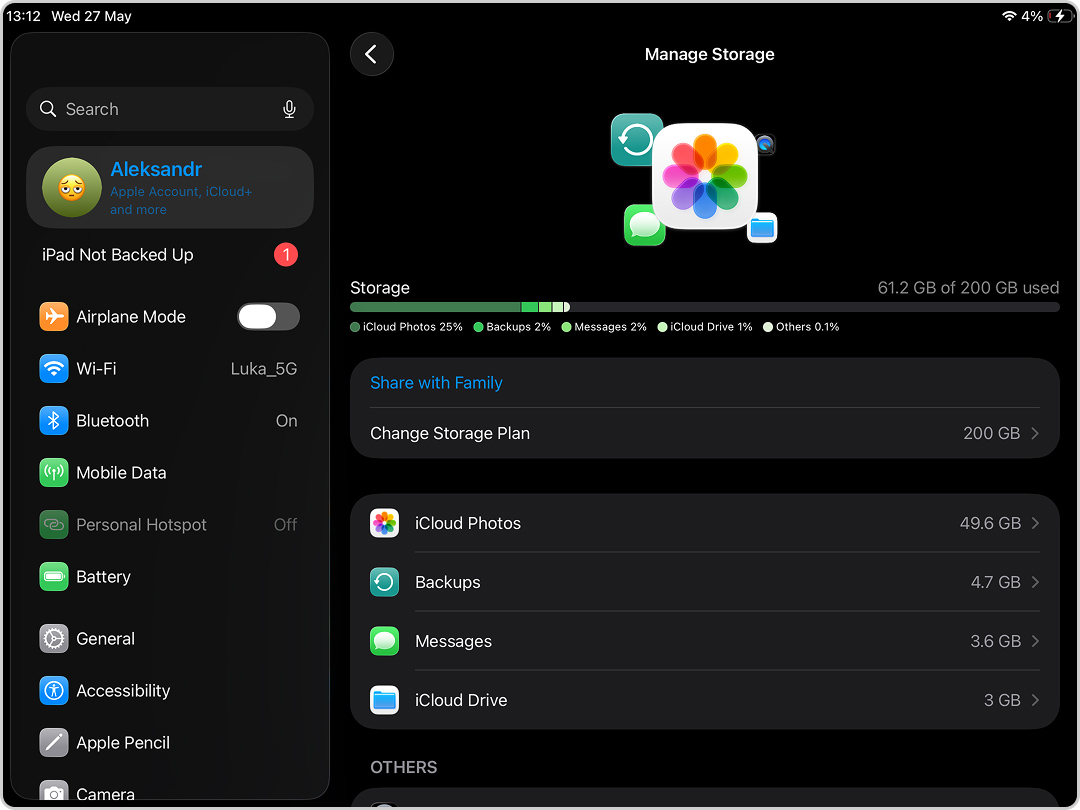
- Tap on Storage to view detailed information about what is taking up space. From here, you can see how much space each app uses and make informed decisions about what to keep on your iPad.
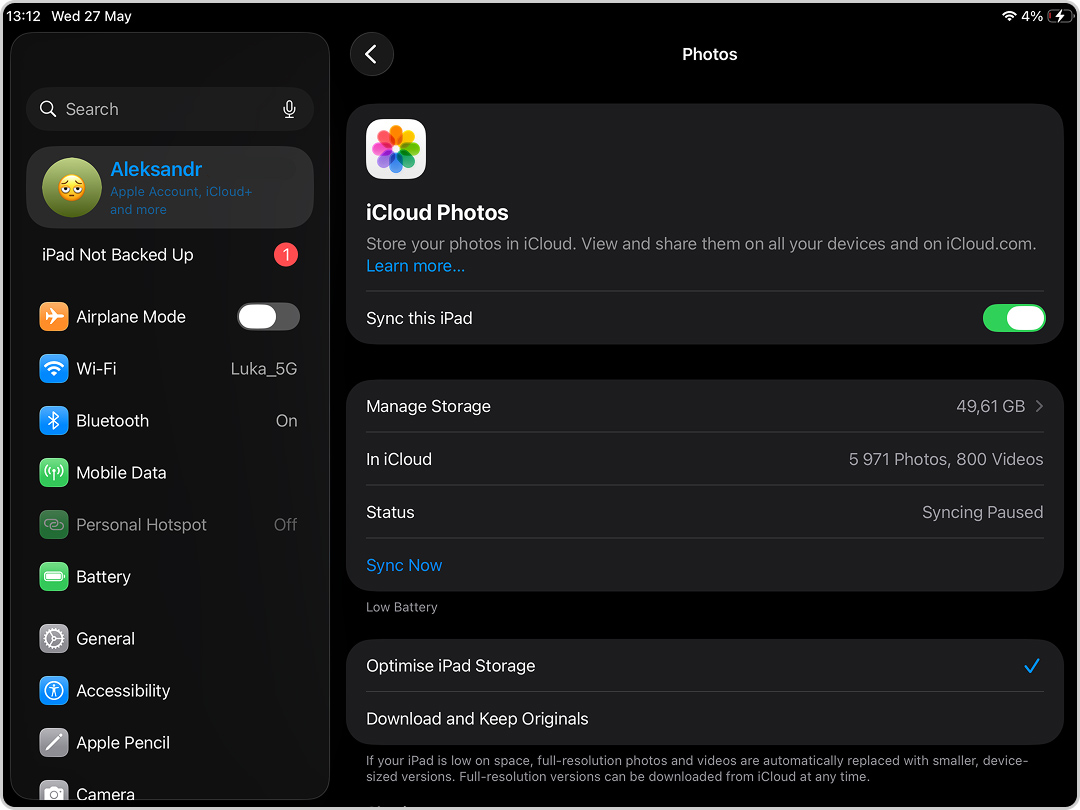
- Turn on Optimize iPad Storage in the Photos settings. This setting automatically keeps smaller, space-saving photos and videos on your iPad while full-resolution versions are stored in iCloud.
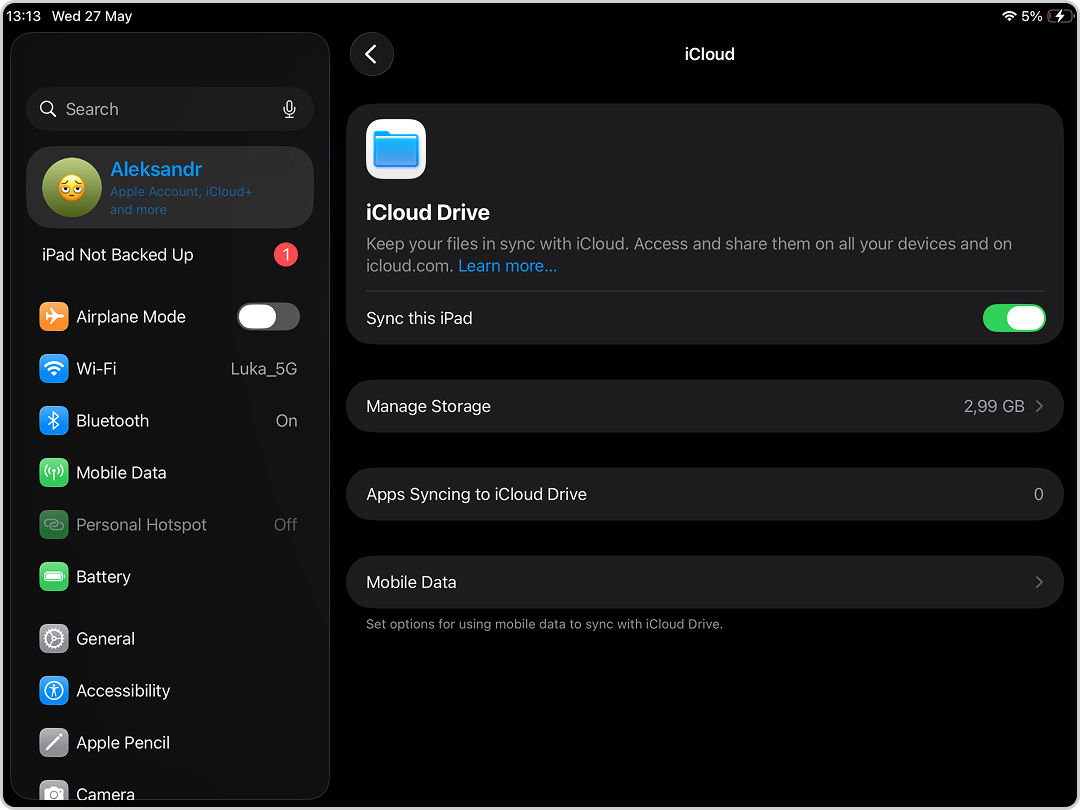
- Enable iCloud Drive to store documents and data from compatible apps directly in iCloud, freeing up space on your device.
With these steps, you can significantly expand your iPad’s available storage. iCloud stores your files and keeps your photos, notes, and other important data synced across all your Apple devices, guaranteeing you always have access to your latest files wherever you go. Just keep in mind that the free iCloud plan gives you only 5 GB, and that space is shared across all data categories and all Apple devices connected to your account. So if you want a noticeable storage boost, you’ll probably need to consider iCloud+ plans, such as 50 GB, 200 GB, or more.
2. Use Streaming Services
Another easy way to increase iPad storage without physical upgrades is to stop downloading media files and switch to streaming instead. If you frequently consume multimedia content on your iPad, streaming services offer an excellent alternative to downloading large files directly on the device. With streaming music, movies, TV shows, and more, you can significantly reduce the amount of storage used, thus freeing up space for other applications and data.
Benefits of Streaming Services:
- Streaming eliminates the need for large files to be saved on your device, preserving storage for other important applications and documents.
- Most services offer extensive libraries of content, meaning you have more entertainment options than what would fit on your device.
- These services sync across devices, so you can start watching a show on your iPad and finish it on another device without having to transfer files manually.
Popular Platforms:
- Apple Music, Spotify, and YouTube Music: For music lovers, these services offer millions of songs that can be streamed without downloading them to your iPad.
- Netflix, Hulu, Disney+, and Apple TV+: These video streaming services provide access to a wide range of movies and TV shows without the need to store them on your device.
- Apple Books and Podcasts: If you read or listen a lot, these apps can also help save space. You can stream or download only what you need now, then remove finished books, audiobooks, or podcast episodes later.
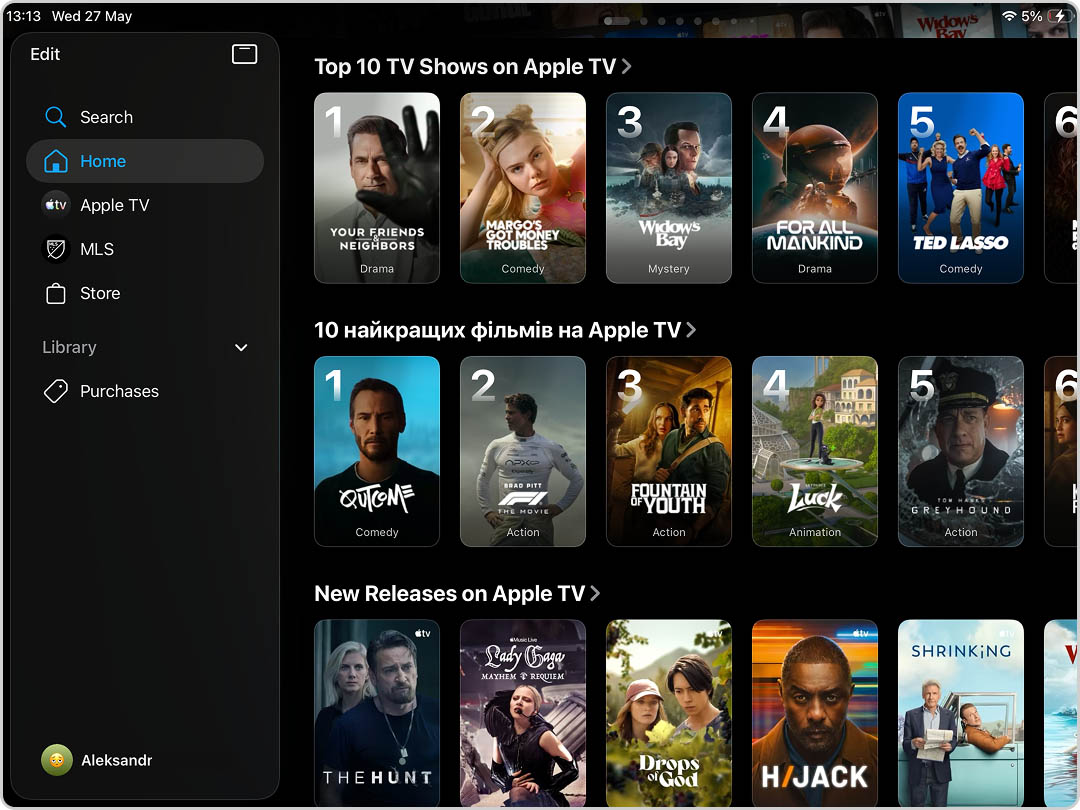
Integrate streaming services into your daily routine to increase your iPad’s storage capacity and improve your multimedia experience. If your iPad is always connected to Wi-Fi or cellular data, there’s really no reason to clog up your device with massive downloads. But full access to most of these services usually requires a paid subscription.
3. Attach External Drive to iPad
Another way to get more storage on your iPad is with an external drive. While you can’t upgrade the internal storage, you can connect a USB-C or Lightning-compatible external drive to store large files like videos, photos, and documents. This is perfect for anyone who works with media-heavy files (or simply wants extra iPad storage without deleting important data).
If you have a newer iPad with a USB-C port (like an iPad Pro or iPad Air), you can plug in an external SSD or flash drive directly. If your iPad still uses a Lightning connector, you’ll need an adapter, such as the Lightning to USB 3 Camera Adapter or Lightning to SD Card Reader.

- Your external storage must be formatted as APFS, APFS (Encrypted), macOS Extended (HFS+), exFAT (FAT64), FAT32, or FAT. If it’s not, you’ll need to format it using a Mac or PC first.
- Some external hard drives need extra power to work with iPads. If your iPad doesn’t supply enough power, you may need a powered USB hub or an externally powered drive.
- If your iPad supports Thunderbolt / USB 4, you can connect multiple USB drives in a chain for even more storage flexibility.
While external storage significantly boosts the flexibility and capacity of your iPad, keep in mind the limitations. The primary drawback is that the iPad can only interact with these external devices through the Files app. This means that while you can store any file type that the Files app supports, you cannot use external storage to directly extend the iPad’s internal storage for app installations or system expansions. Additionally, the performance of accessing files might be slower compared to using the iPad’s built-in storage, depending on the external drive’s speed and the connection interface.
This method provides a practical solution for those who frequently work with large files or require additional portable storage without permanently upgrading their iPad’s capacity.
How to Add Memory to an iPad Without Extra Costs
Okay, we’ve already talked about methods to expand your iPad’s storage through external devices and services, but those usually cost money and take time to set up. So now let’s move to what you can do right here, right now, for free. The easiest way to get more space? Declutter the storage you already have by deleting everything that’s no longer relevant. You’d be surprised how much junk is sitting on your iPad.
1. Manage Media Library
For most people, Photos app take up the most space. So if you’re looking to get more memory on your iPad, start there. This category includes all your photos, screenshots, and videos – and let’s be real, there’s probably a ton you don’t need. Duplicates and similar images? Tons. Random forgotten large media files from five years ago? Definitely.
You could go through the Photos app manually, deleting them one by one. But not all have time for a manual cleanup. Plus, the built-in Duplicates album only finds exact copies, so all those nearly identical shots won’t even get flagged. That’s where a third-party cleaning app makes way more sense.
We recently tested the best iPad cleaner apps available in the App Store and found several great options designed specifically for media cleanup. Some of them can be used for free, like Clever Cleaner, which we ranked at the top for three key reasons:
- It’s 100% free – no in-app purchases, no locked features (but paid features may appear in the future, but users who download the app while it’s still free should keep free access, so it’s worth installing it now and keeping it on your iPad).
- It has multiple cleaning tools focused on clearing media clutter.
- It works flawlessly on iPads – even though it runs in compatibility mode since it’s designed for iPhones – there’s no lag, no crashes, no interruptions, and no intrusive ads.
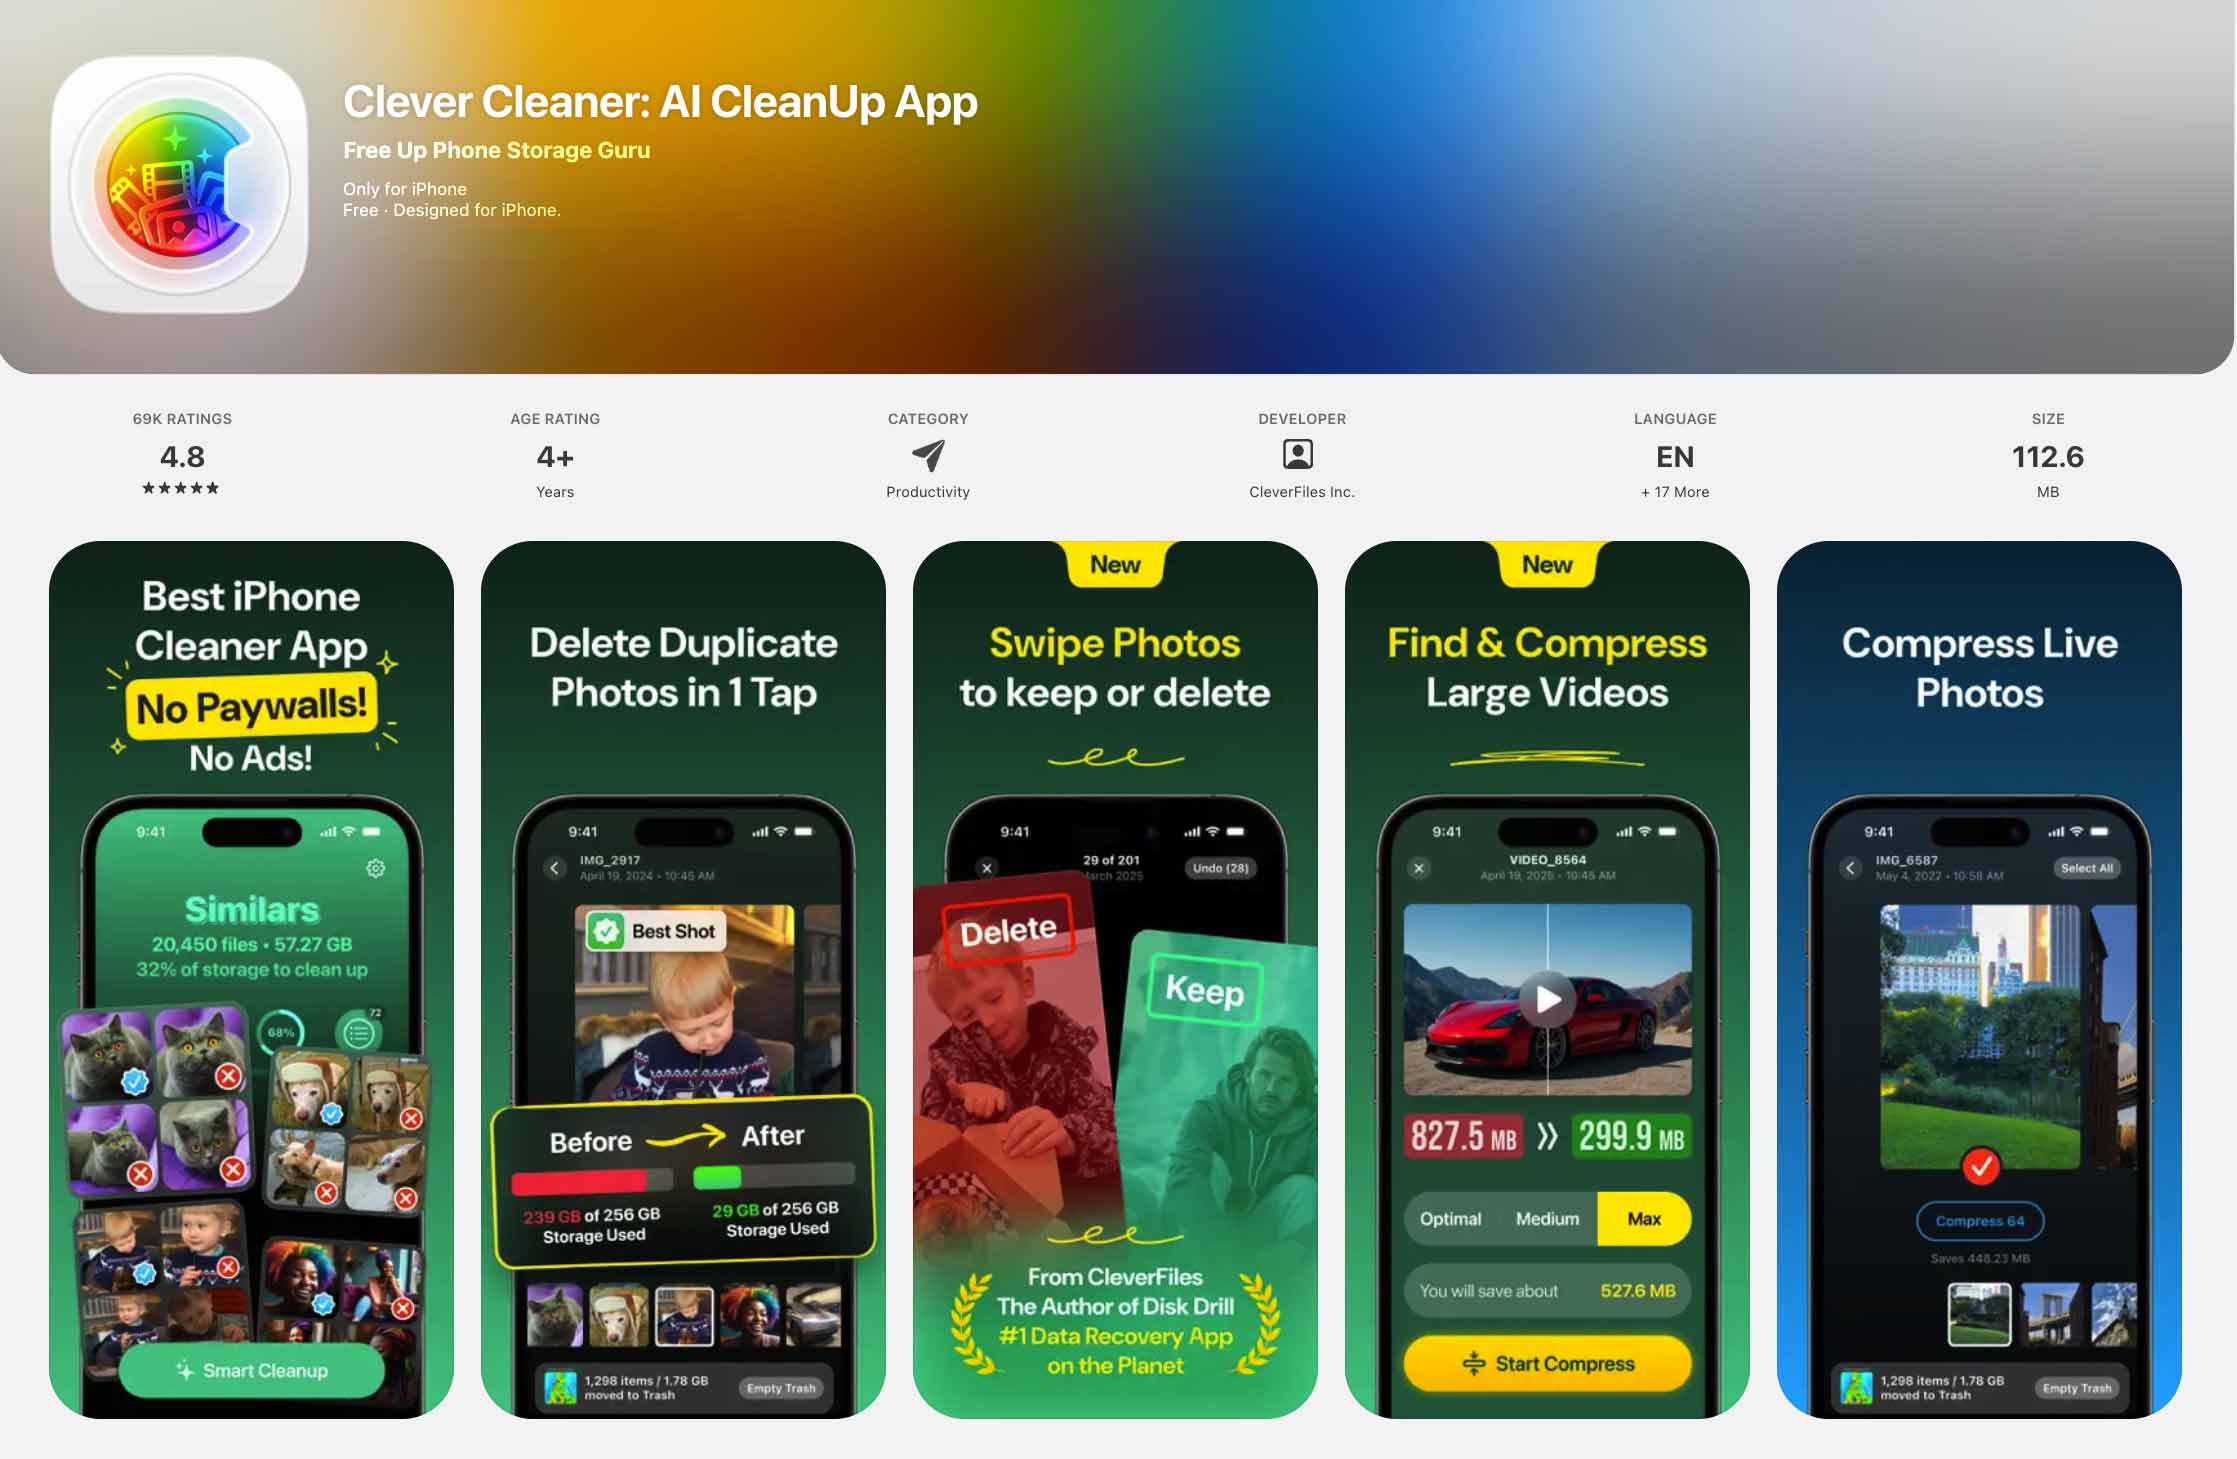
A dedicated app is the fastest, easiest way to tidy up your media library.
Here’s how you can quickly see which media files are taking up the most space on your iPad and remove them:
- Download Clever Cleaner from the App Store.
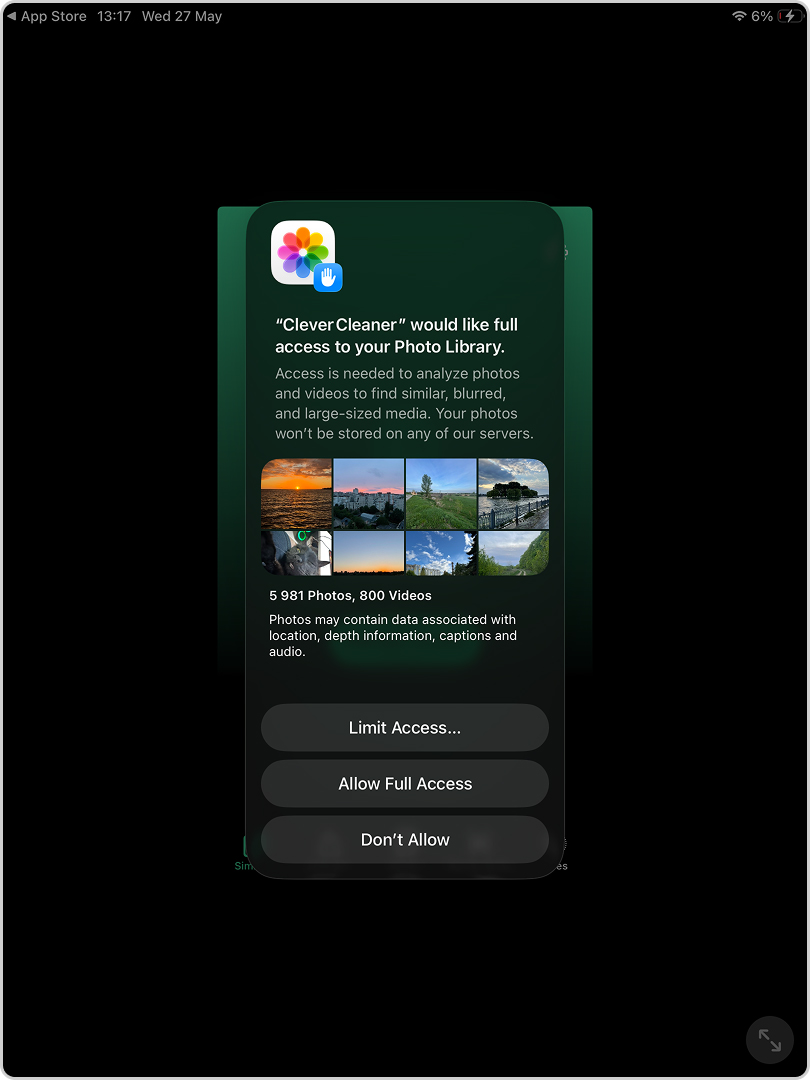
- Open the app and allow it to access your Photos library.
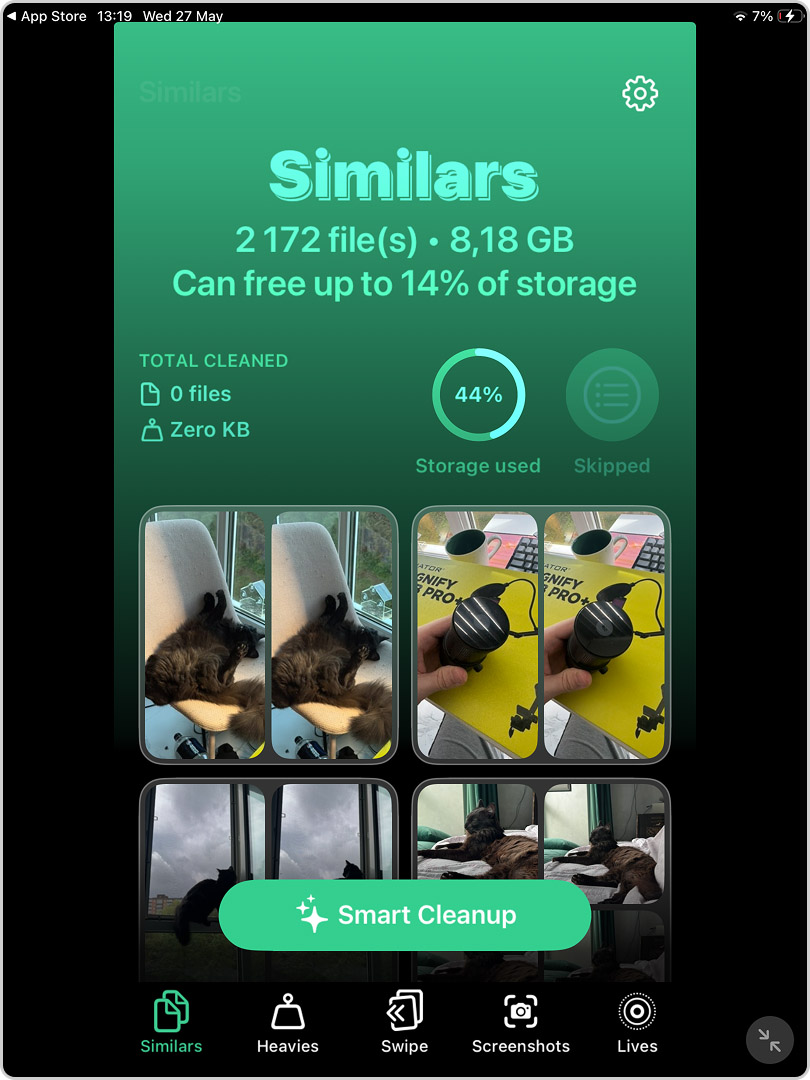
- At the bottom, you’ll see five categories: Similars, Heavies, Swipe, Screenshots, and Lives. Tap Similars – this section finds both exact duplicates and near-identical photos.
- Tap Smart Cleanup if you want the fastest option. The app will analyze your similar photos, mark lower-quality or repeated shots for deletion, and keep the best image in each group.
- Review the app’s suggestions before you delete anything. If you see a photo you want to keep, tap Restore to deselect it.
- If everything looks good, confirm the cleanup with Slide to Delete. The app will move the selected duplicates and similar photos to the trash.
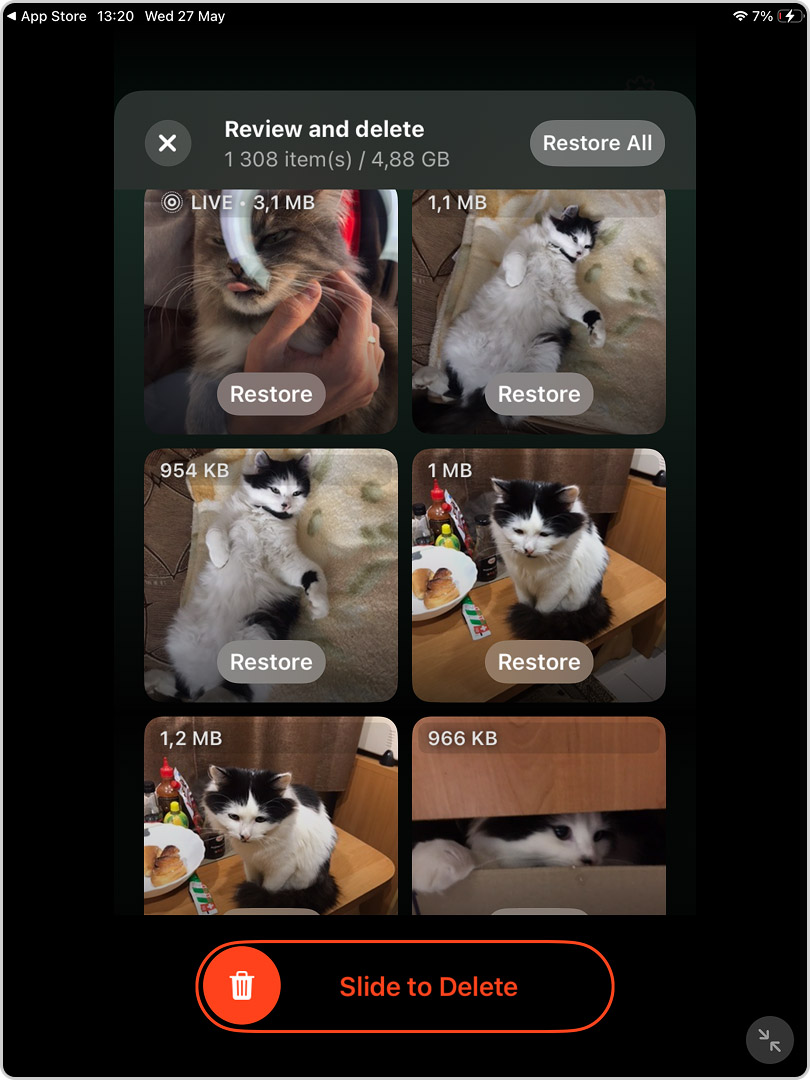
- If you prefer a more selective cleanup, open any group in the Similars tab and review the photos manually. You can accept the app’s selection, choose different photos to remove, or tap Skip All if you don’t want to delete anything from that group.
- Once you finish, tap Move to Trash , then Empty Trash to finalize the cleanup.
You can also use the other three features: Heavies, Swipe, Screenshots, and Lives. Combined, all these tools should free up a lot of storage on your iPad. Just don’t forget – after deleting all those photos/videos, you still need to clear out the Recently Deleted album in the Photos app. Every file you remove from your media library first goes there, and unless you manually empty it, they’ll sit there for 30 days.
- Heavies shows the largest videos first, with a separate option to compress large videos.
- Swipe lets you clean up photos manually by swiping through your library.
- Screenshots helps delete screenshots inside the app.
- Lives converts Live Photos into still images without the short video clip.
2. Delete or Offload Apps
After Photos, the next big category is Applications – especially if you use your iPad as a gaming console or for heavy-duty creative work. Games, editing apps, and anything with lots of media content can take up serious space.
iOS offers a useful feature that allows you to offload unused apps. This method is perfect for apps that aren’t needed every day but might be useful occasionally and allows you to maintain functionality without permanently occupying storage.
And what about deletion? Well, it’s pretty clear. Everything about that app will be gone from your iPad. One extra perk though – if you delete an app and reinstall it later, you’ll also clear out its cached data. That’s sometimes worth it, especially for apps that have built up a lot of data over time.
Here’s what you should do:
- Go to Settings on your iPad.
- Tap on General, and then select iPad Storage.
- Scroll through the list of apps and choose one that you don’t frequently use.
- Tap on the app, then select Offload the App to remove the app but keep its data. Alternatively, tap Delete App to remove the app and all its related data permanently.
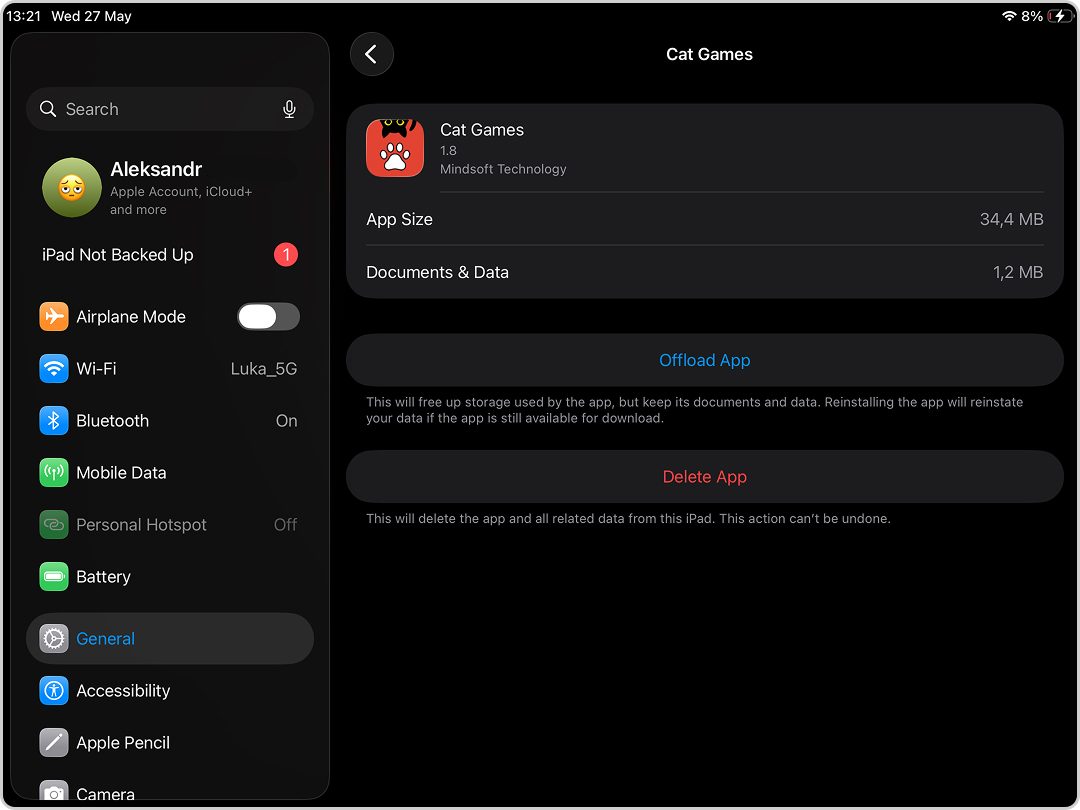
Offloading or deleting unused apps can free up storage and keep your iPad organized. This method quickly improves your device’s storage capacity.
3. Clean Up Downloads in the Files App
Another workaround method to increase storage on an iPad? Your Downloads folder in the Files app. If you’ve ever downloaded PDFs, Word documents, ZIP files, images, or videos from the web to your local storage, chances are they’re still sitting there, quietly taking up space. Unlike Safari’s cache, downloads don’t ever clear themselves – you have to delete them manually.
To check and clean it up:
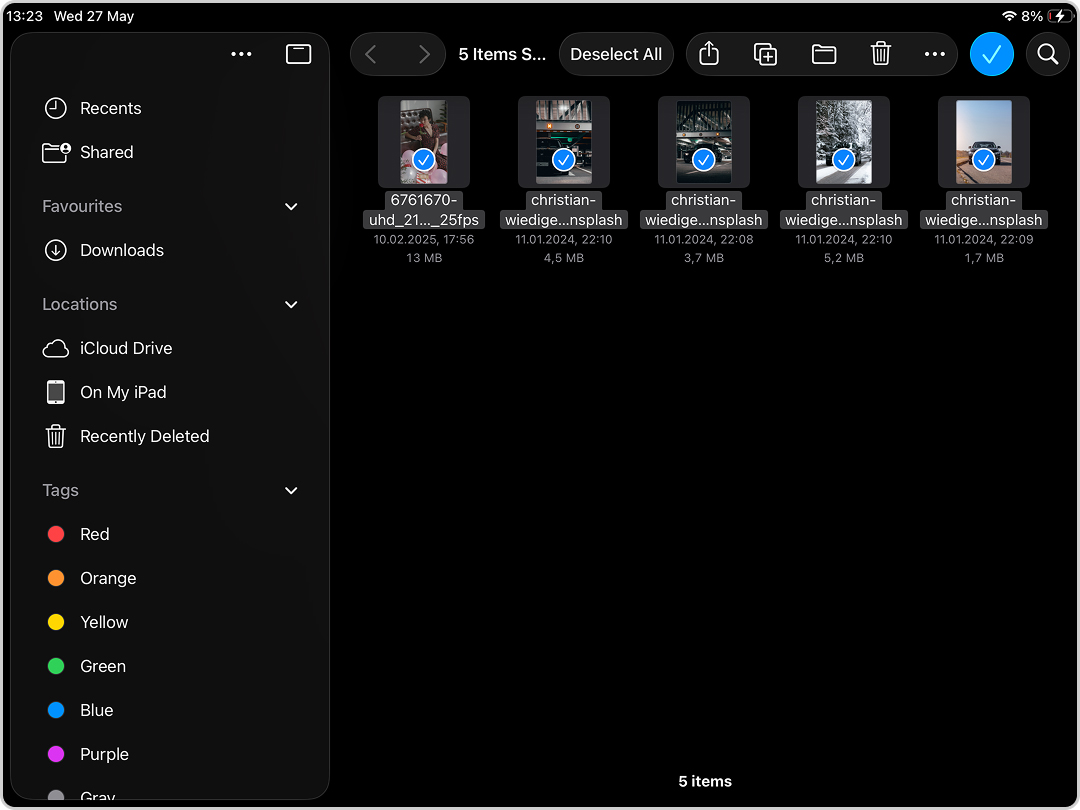
- Open the Files app and go to Browse > On My iPad > Downloads (or any other folder where you usually save files).
- Scroll through and look for large or unnecessary files – old documents, videos or anything you don’t need.
- Tap Select, choose what to delete, then tap the Trash icon.
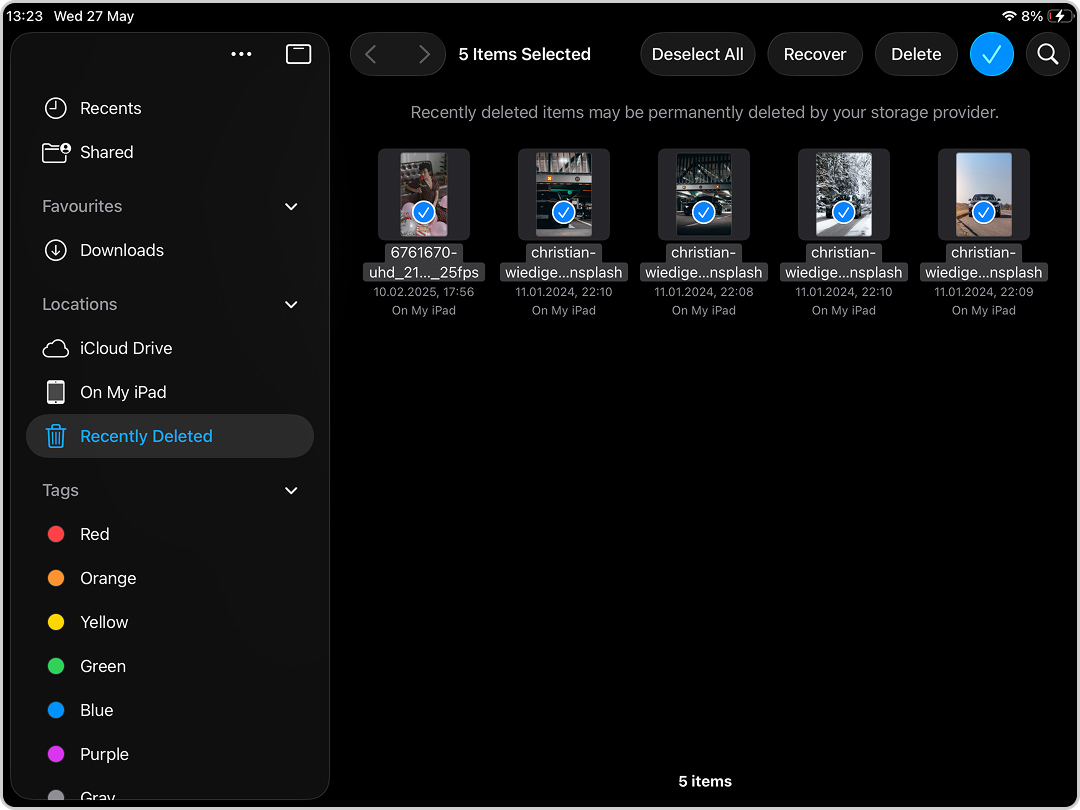
And don’t forget to empty the Recently Deleted folder in the Files app – it keeps trashed files for 30 days before actually removing them.
4. Clear Browser Cache
Another potential target as you look for ways to add memory to your iPad is your browser cache. You might be surprised to learn that if you browse the web heavily, your browser could be hoarding gigabytes(!) of cached data.
Safari and other browsers store website data, cookies, and cached images to make pages load faster when you revisit them. But over time, this cache can become massive – especially if you frequent media-heavy sites.
Here’s how to clear Safari’s cache:
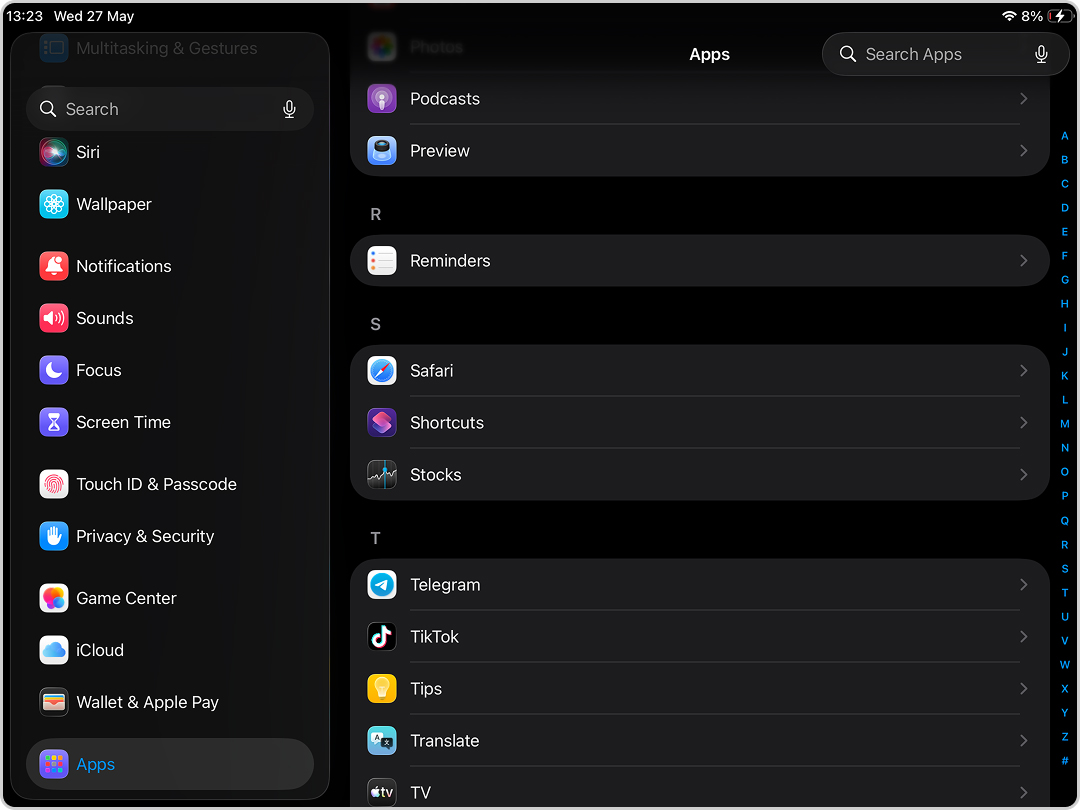
- Open Settings on your iPad and go to the Apps tab.
- Scroll down and tap on Safari.
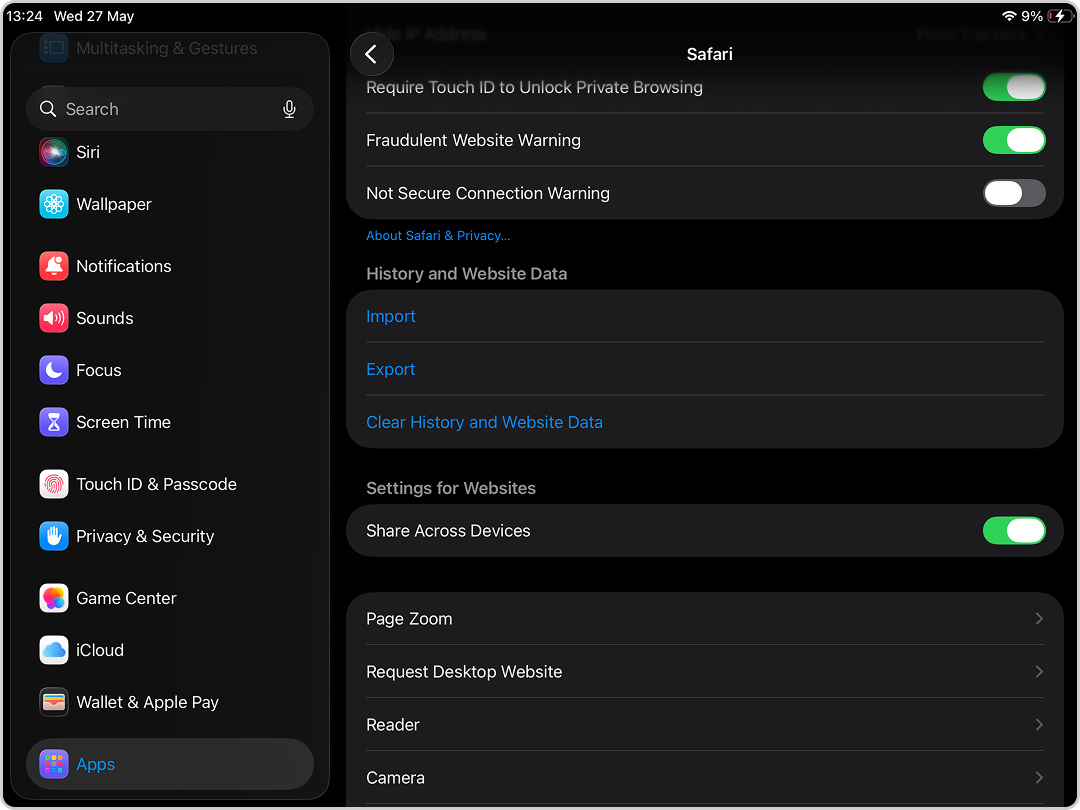
- Within the Safari settings, tap on Clear History and Website Data.
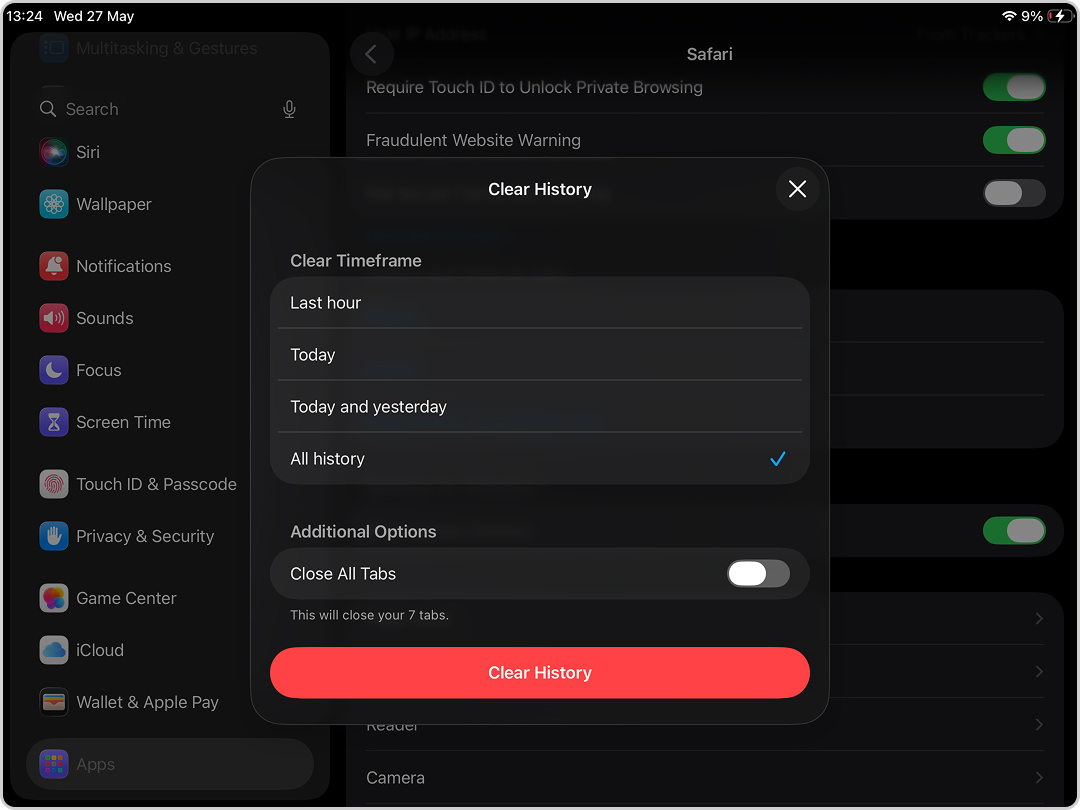
- Confirm your selection with the Clear History button in the confirmation dialog that appears.
For browsers like Chrome or Firefox, you’ll need to clear the cache within the app itself:
- Chrome: Open Chrome, tap the three-dot menu > Settings > Privacy and security > Delete Browsing Data, then select Cached Images and Files or other categories.
- Firefox: Open Firefox, tap the menu button > Settings > Data Management, then choose what to clear.
The Bottom Line
A physical iPad storage upgrade might not be possible, but that doesn’t mean you’re stuck. Between cloud storage, app offloading, streaming, external drives, and a good old-fashioned cleanup, you can add more free space on your iPad without much trouble. And the best part? Most of the methods we covered won’t cost you a thing.
We deliberately started with options you can try right now – no investment in time or money required. Simple tweaks, free tools, and features already available on your iPad are often all most people need.
Of course, if you find yourself constantly running out of space, upgrading to a newer iPad with more storage might be the best move. (Apple even has a trade-in program to make it easier.) But in our experience, people searching for ways to “increase memory on iPad” are specifically looking for solutions they can apply themselves. And now, you have plenty of them!
And hey, if you found this helpful, let us know! Or better yet, share this with a fellow iPad user. We’re all in this together.
FAQ
- Go to the ‘Files’ app, tap ‘Browse’, then go to ‘On My iPad’. From there, open a folder like ‘Downloads’ and use the three-dot menu to sort files by size. This only shows files stored locally, but it’s a great place to start.
- The Photos app doesn’t let you sort by file size, but some third-party apps like Clever Cleaner do. It helps you find and remove the biggest photos and videos first.
- Go to ‘Settings’ > ‘General’ > ‘iPad Storage’. This gives you a full breakdown of your storage by app. It also shows how much space each app is using, including documents, cached data, and other hidden stuff.
