How to Get More Storage on iPhone
Is your iPhone constantly running out of space? Whether you’re trying to download new apps, capture that perfect photo, or update iOS, insufficient storage quickly becomes a problem. In practice, you have two main ways to increase iPhone storage. The first is to free up as much physical space on the device as possible by cleaning and managing existing data. The second is to pay for iCloud storage. Since most users prefer not to spend extra money on cloud plans, this guide focuses on the first option – using free methods to reclaim storage and manage your iPhone.
Let’s start by looking at one of the most effective ways to get more storage on your iPhone without any cost: optimizing your photo storage.
Before You Start, Check Your iPhone Storage
The simplest way to get more storage on an iPhone is to remove unnecessary items, especially those that take up the most space. However, the largest storage consumers differ for every user (for some, it’s photos and videos, for others, it’s apps, messages, or downloaded media). That’s why the first step should always be checking your iPhone storage to see where the space actually goes.
This information is easy to access through your iPhone settings and helps you understand which category you should focus on first.
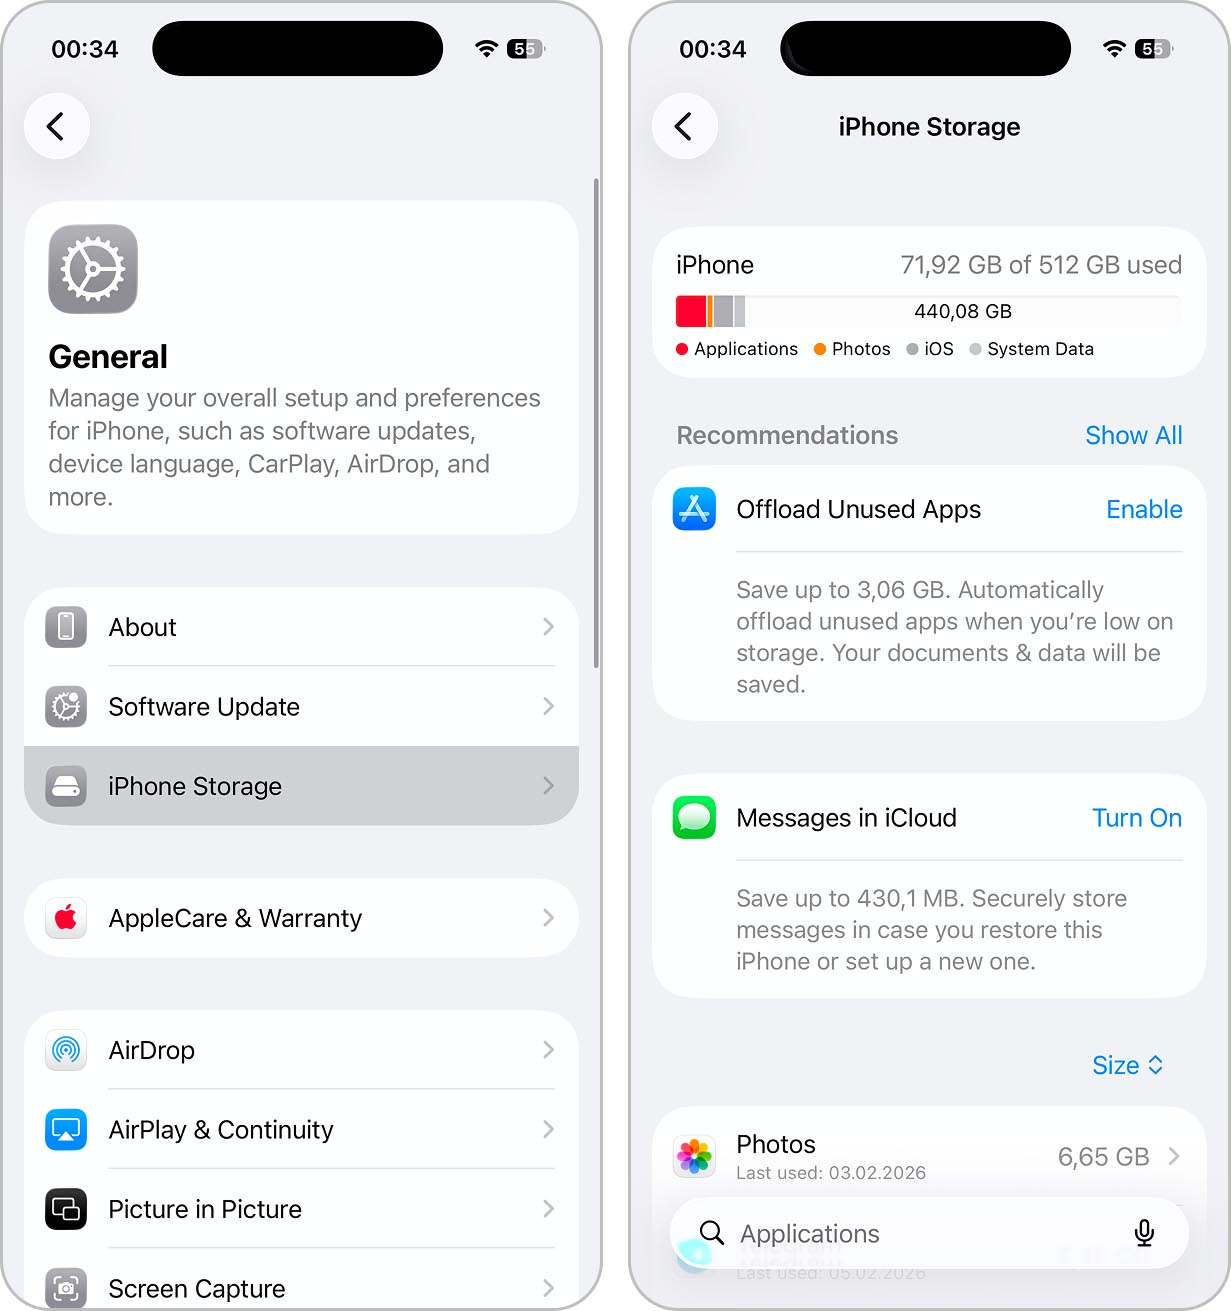
- Open the Settings app on your iPhone and tap General.
- Select iPhone Storage.
- Wait a few seconds while your iPhone analyzes storage usage.
- Look at the color-coded bar at the top of the screen. Each color represents a different category, and the largest segment shows what currently takes up most of your storage.
How to Get More Storage on iPhone
Have you found which data category takes up the largest portion of your iPhone’s storage? If yes, you can now start cleaning it up, and to make this easier, we prepared a set of tips for each major storage category – they help you complete the process faster without wasting time on actions that bring little result.
Review the list below and pick the options that match your situation, or follow the steps in order if you want to improve storage on your iPhone as much as possible.
1. Clean Up Photo Storage
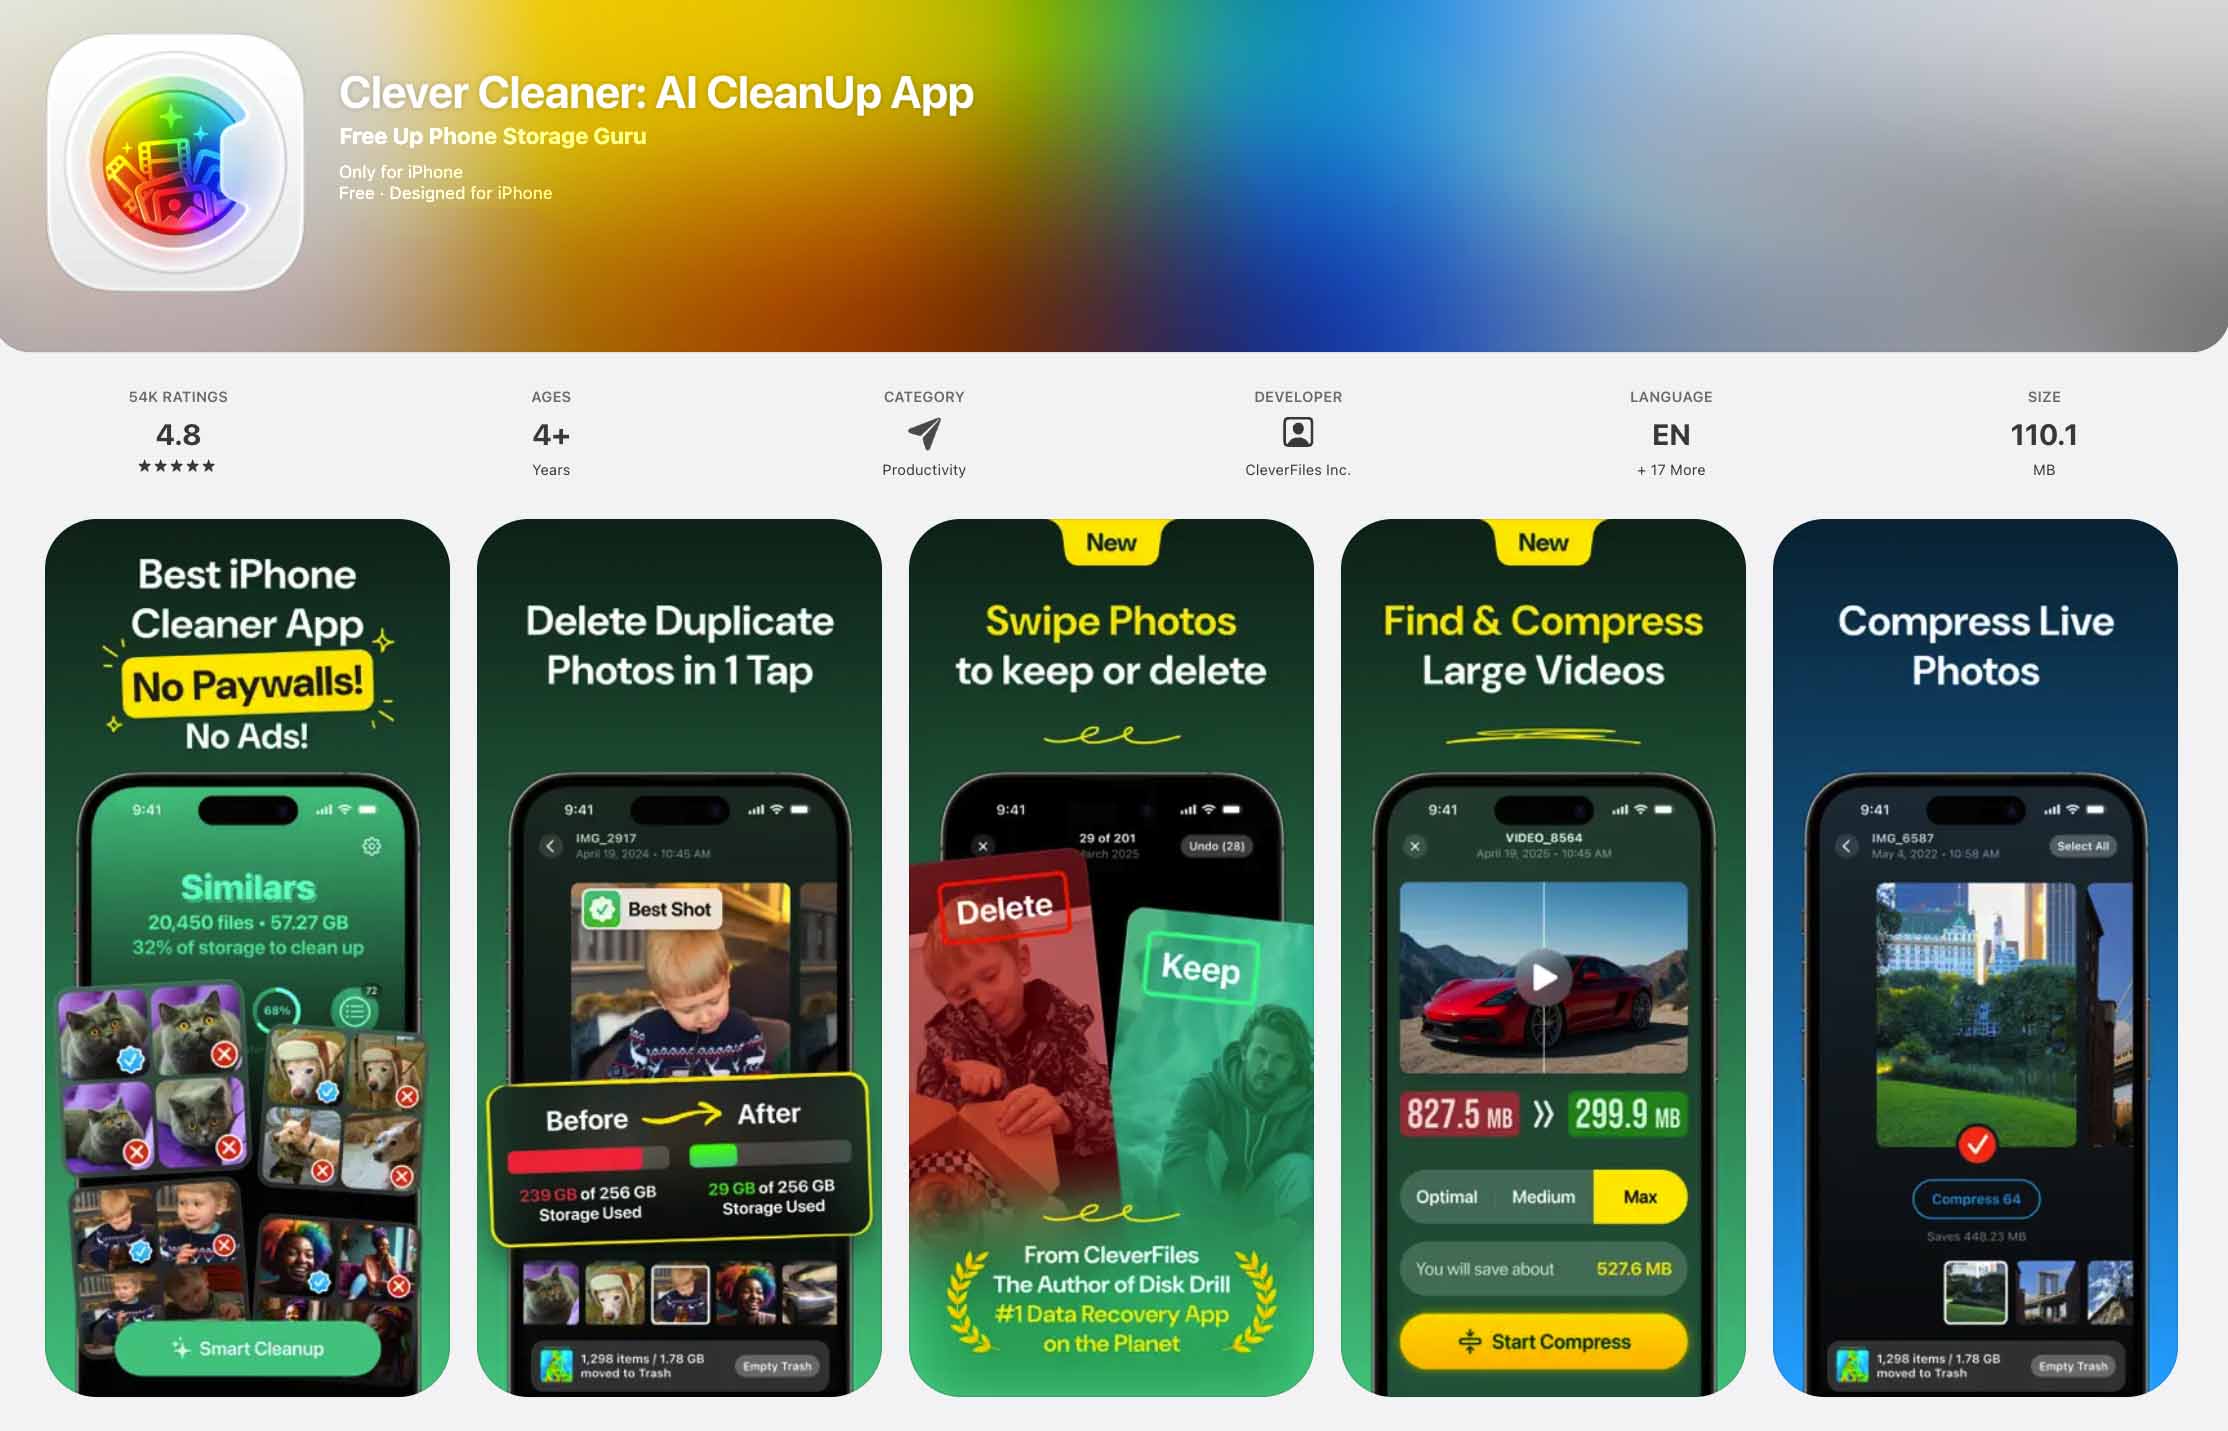
Photos and videos often take up the most space on an iPhone and while many of these files can be removed, the built-in Photos tools have limitations (for example, the Duplicates utility detects only exact copies, videos can’t be sorted by file size). You can handle all of this manually, but if you prefer faster, more structured solutions, apps like Clever Cleaner are alternatives.
Clever Cleaner is a completely free app without ads or paywalls. It helps clean up your photo and video library more efficiently than the standard Photos app. Below, we take a closer look at how to remove duplicates and similar photos, and we cover other useful features of the app right after that.
Clever Cleaner includes a Similars tool. It finds exact duplicates, just like the Photos app, but it also detects visually similar photos that the Photos app does not catch. The app groups these images together and uses AI-based analysis to select the best shot in each group. The remaining photos are marked for deletion (you can accept this selection or adjust it manually if you prefer more control.
To clean up duplicate photos from your iPhone using Clever Cleaner:
- Download Clever Cleaner from the App Store or open it via the QR code on the official website.
- Open the app and grant permission for full access to your photo library. The Similars section opens automatically.
- Tap Smart Cleanup to let the app remove exact duplicates and visually similar photos automatically or open any group to review it manually. The app marks one image as Best Shot, but you can change the selection if needed. Tap Move to Trash to delete the selected photos. The app then moves to the next group.
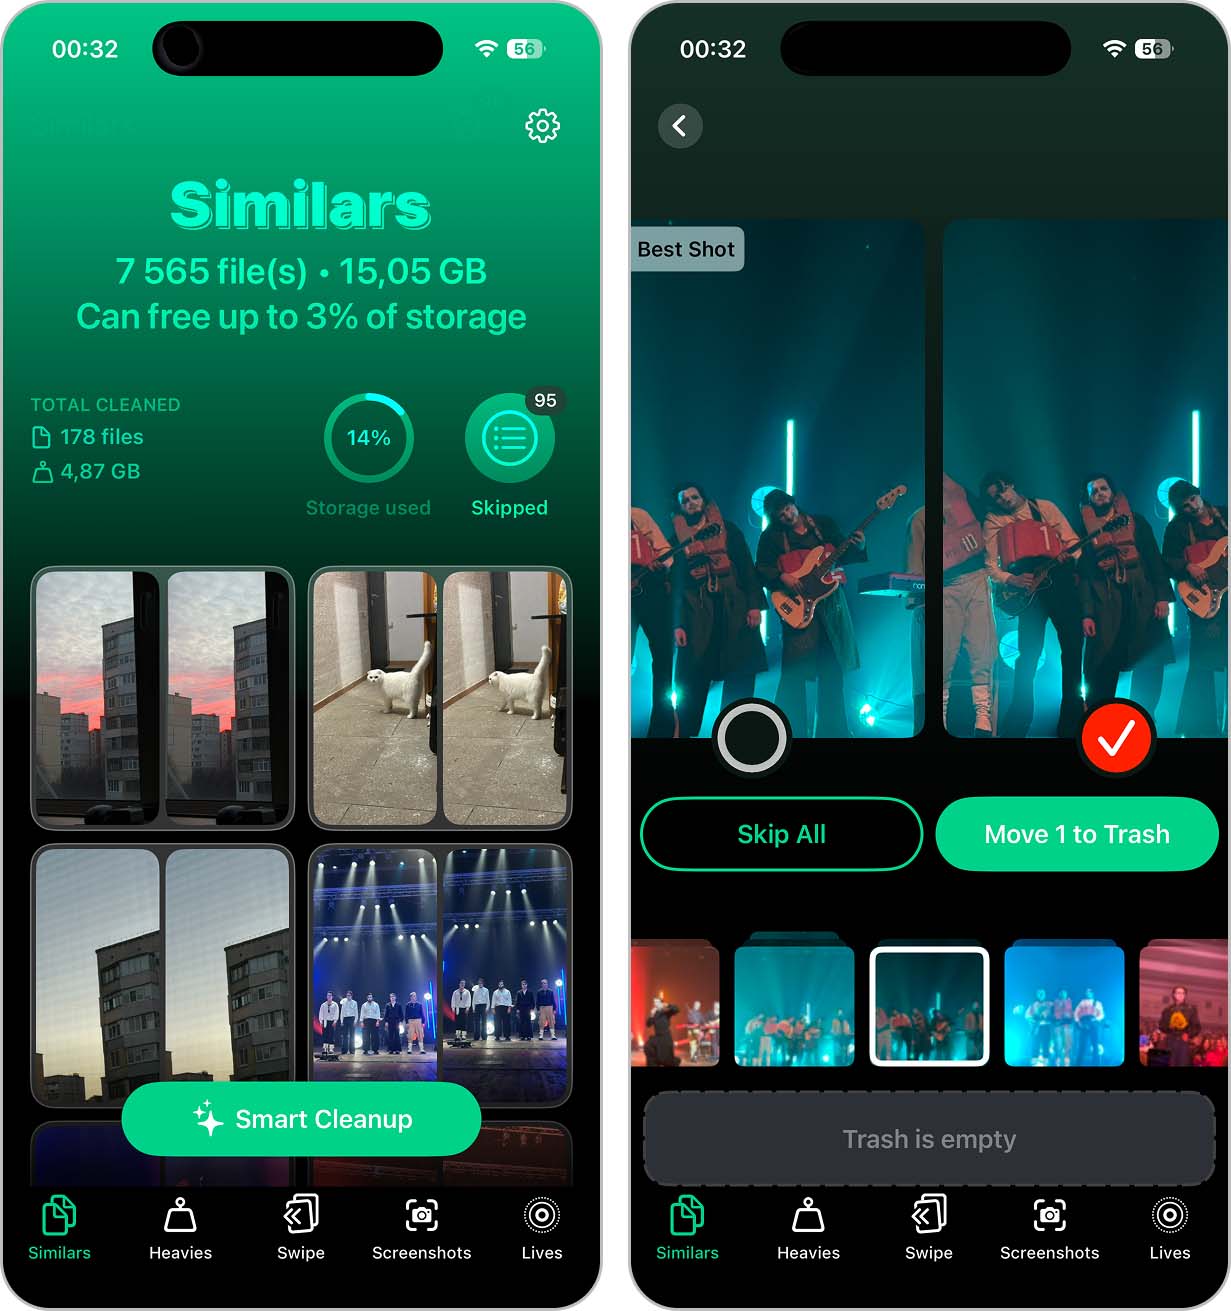
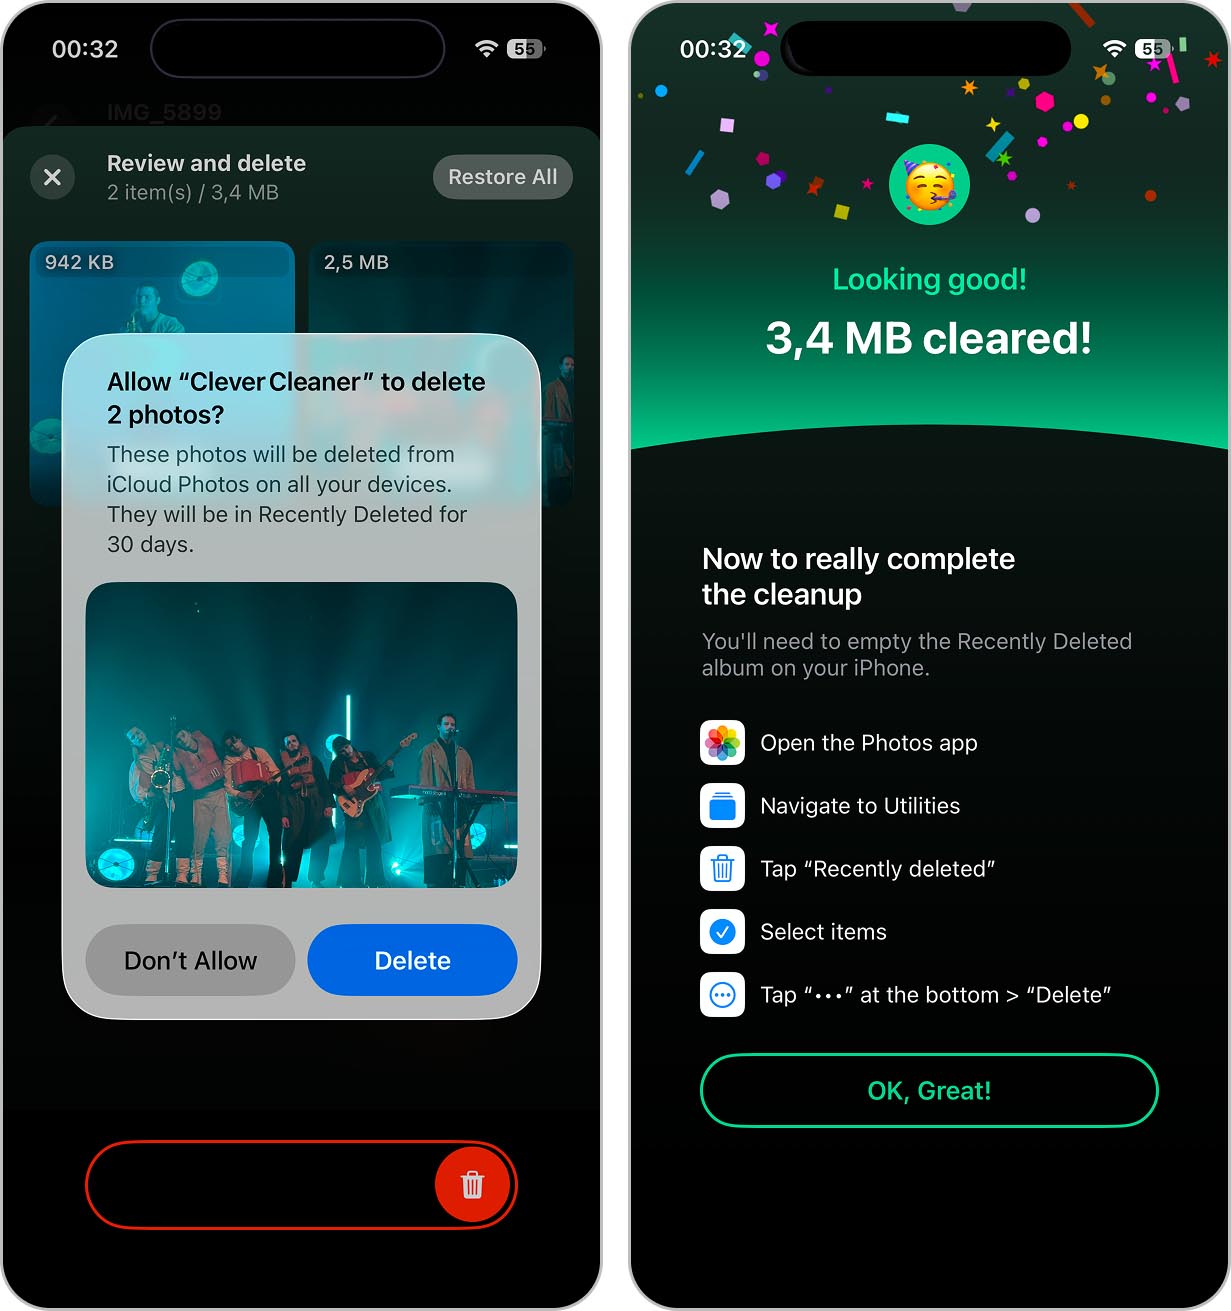
- When you finish reviewing groups, tap Empty Trash and use Slide to Delete to confirm removal.

- After that, iOS asks for confirmation to delete the selected items.
- Once confirmed, Clever Cleaner shows a reminder that all removed items remain in the Recently Deleted album.
Clever Cleaner also includes additional tools that help manage media storage:
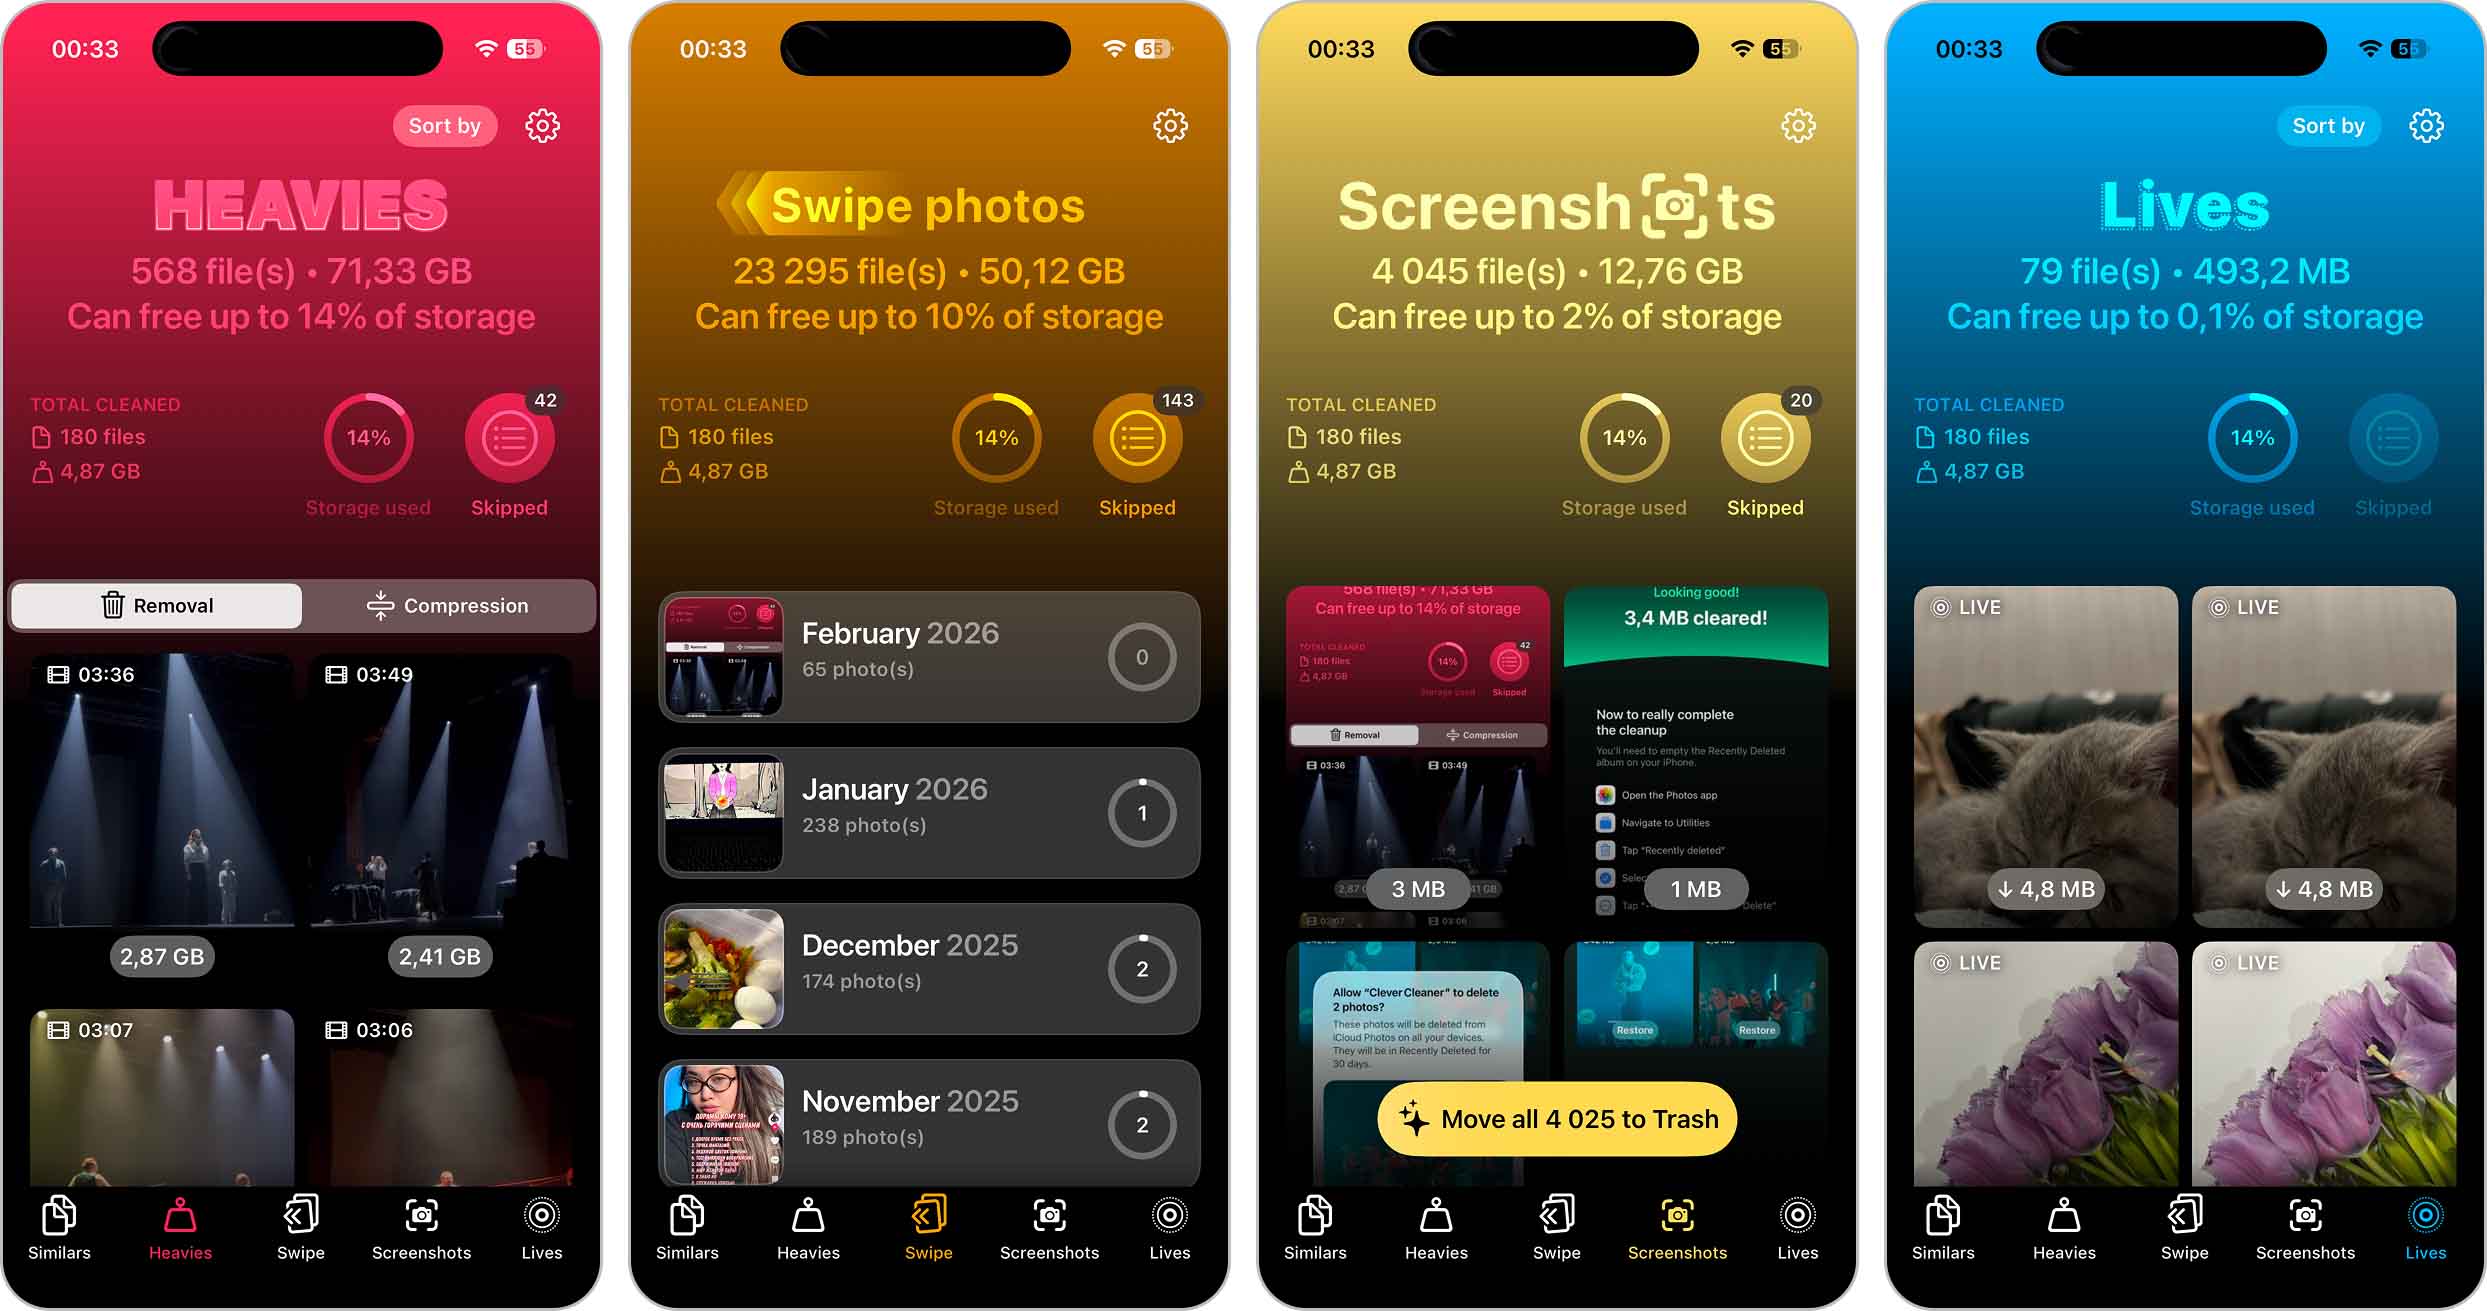
- Heavies feature finds the largest media files, mostly videos, and lets you review and delete them quickly.
- Compress Videos is a good option if you want to get more storage on your iPhone without deleting videos, as it reduces file size while keeping the content.
- Swipe Mode groups photos by month and lets you swipe left or right to keep or delete images. This method works well for gradual, everyday cleanup rather than instant storage cleaning.
- Also, the app can remove unnecessary screenshots and convert Live Photos into still images to save space.
With a single app, you can manage each media category inside the Photos app and improve storage on iPhone without relying only on built-in tools.
2. Manage Installed Applications
Applications can take up a surprising amount of your iPhone’s storage space. This happens because an app’s size includes not only the app itself downloaded from the App Store, but also App Data and Documents, which grow over time as you use the app. This data often includes cache, downloaded content, and other related files. If you have apps you no longer use, removing them is an easy way to get more iPhone storage for free.
While there are several ways to delete apps, the most convenient option is through iPhone settings, where you can clearly see how much space each app occupies.
Follow these steps to find and remove apps that take up the most space:
- Go to Settings > General > iPhone Storage.
- Review the list of installed apps and the amount of space each one uses.
- Tap on an app you don’t use often and tap Delete App and confirm the action to remove the app and all its related data.
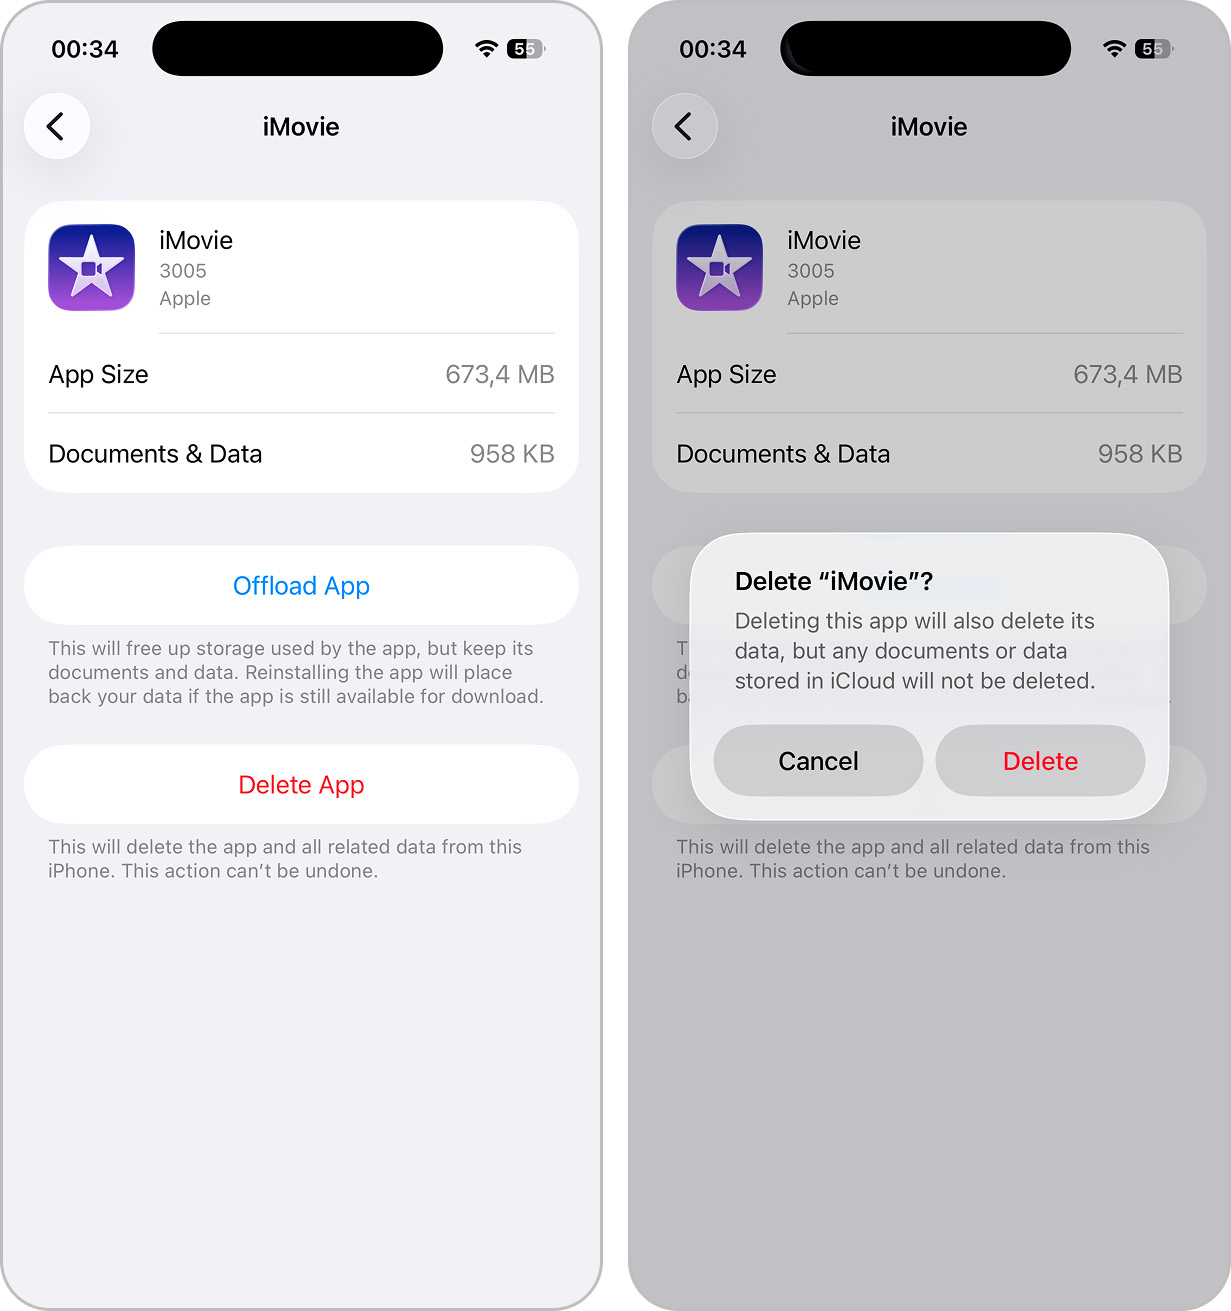
You may also notice the Offload App option. If you choose it, iOS removes the app itself and part of its cache, but keeps the app’s data on the device.
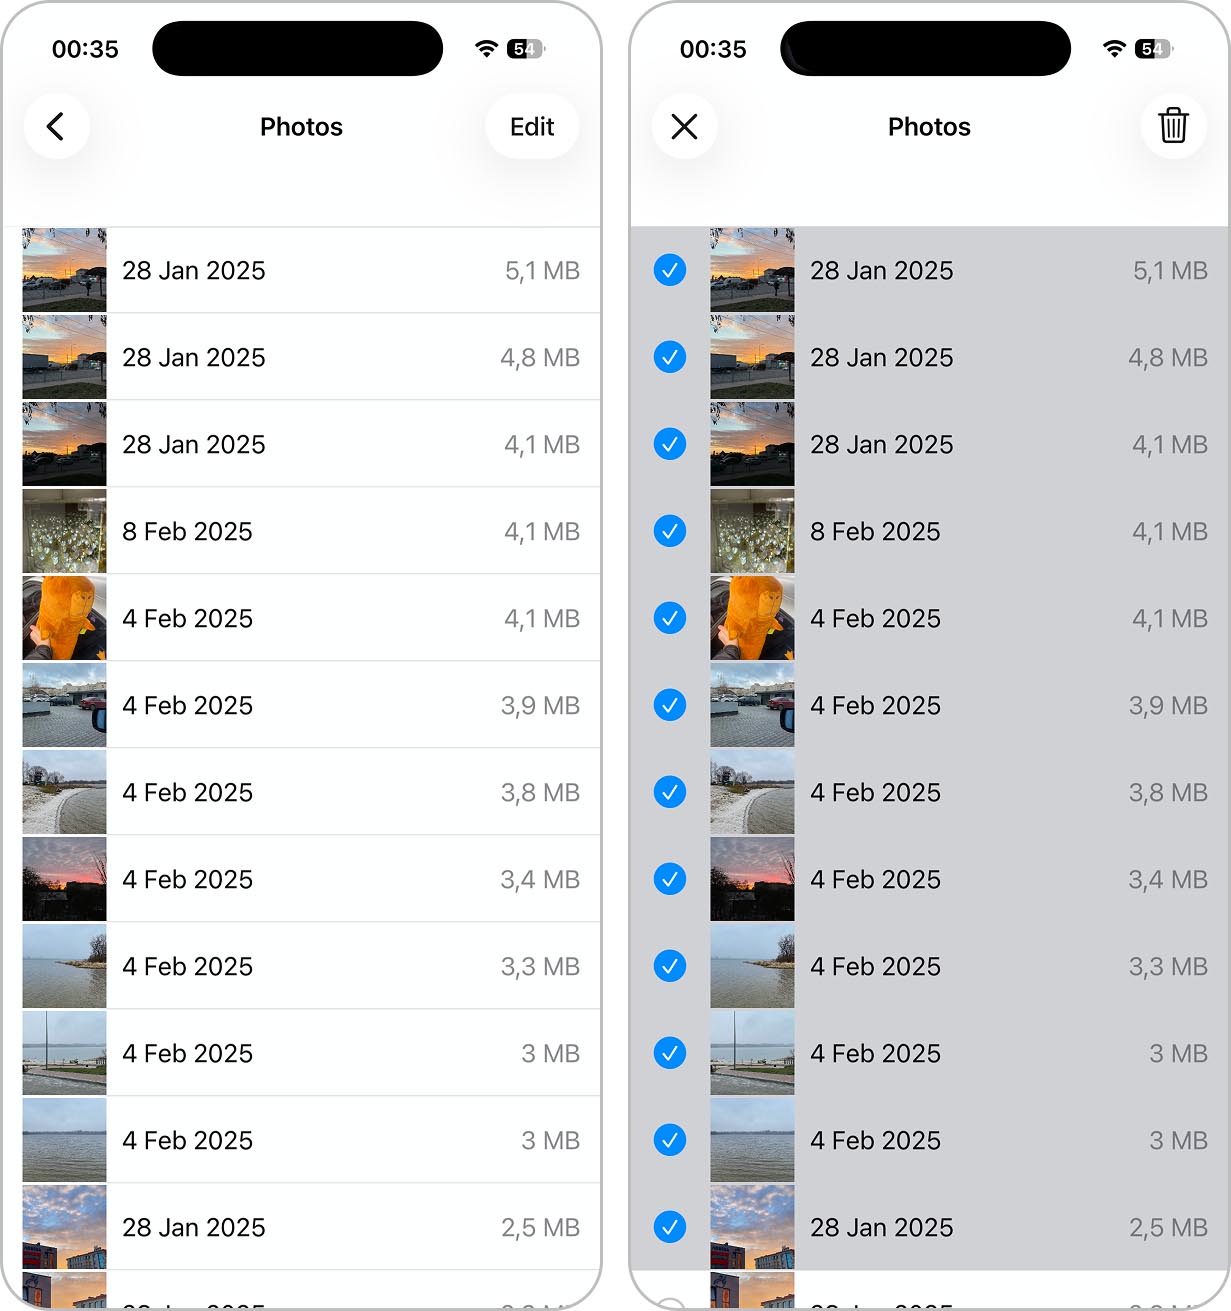
3. Clean Up Old Messages and Attachments
If you still actively use the native Messages app on your iPhone, you will likely see it listed in storage usage when you check iPhone Storage. If this category stays unchecked, it often contains message threads that are several years old. Messages also frequently include attachments, which take up much more space than plain text. If some of these conversations or files are no longer relevant (like from contacts you no longer communicate with), you can remove them and free up storage.
It’s best to start with attachments. While you can search for them manually inside each conversation, iOS provides a more convenient way to review and delete them in one place.
Here’s how to find and delete large attachments in Messages:
- Open the Settingsapp on your iPhone.
- Go to General > iPhone Storage.
- Scroll down and tap Messages.
- Look for Review Large Attachments and tap it to see a list of large files stored in Messages.
- If this option is not available, scroll to the Documents section. You will see categories such as Top Conversations, Photos, Videos, GIFs and Stickers. Open any category, or review them one by one.
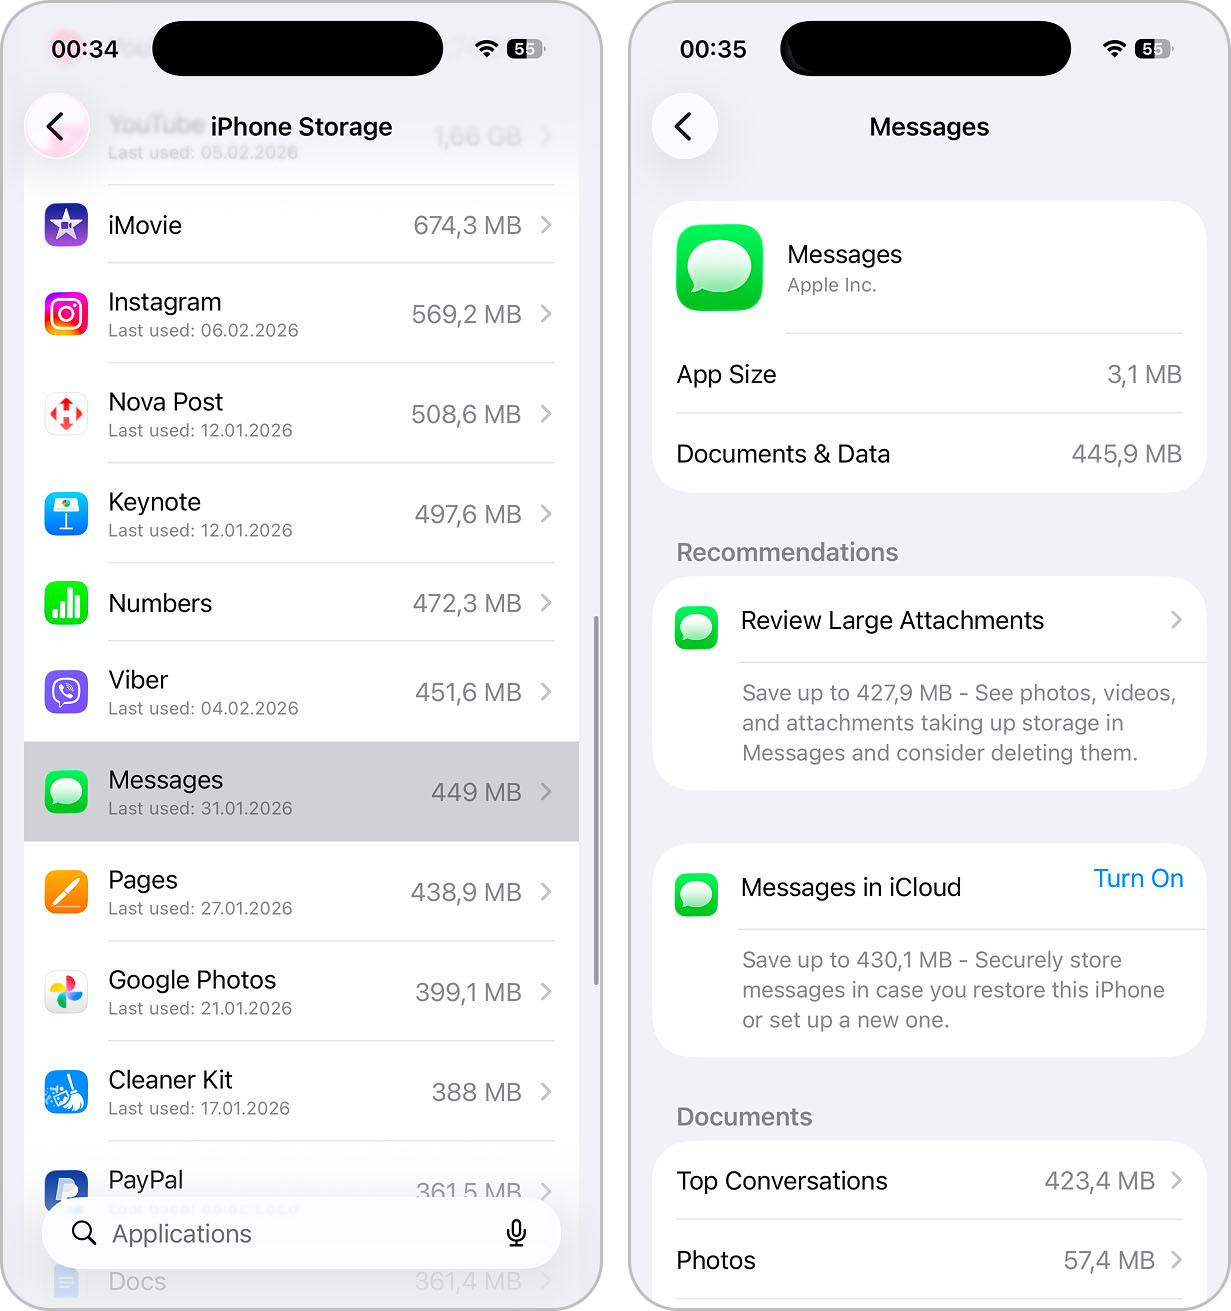
- Tap Edit in the top-right corner.
- Select the items you want to remove and tap the trash icon to delete them.
If you want to remove entire conversations, you need to do this directly in the Messages app.
- Close Settings and open the Messages app.
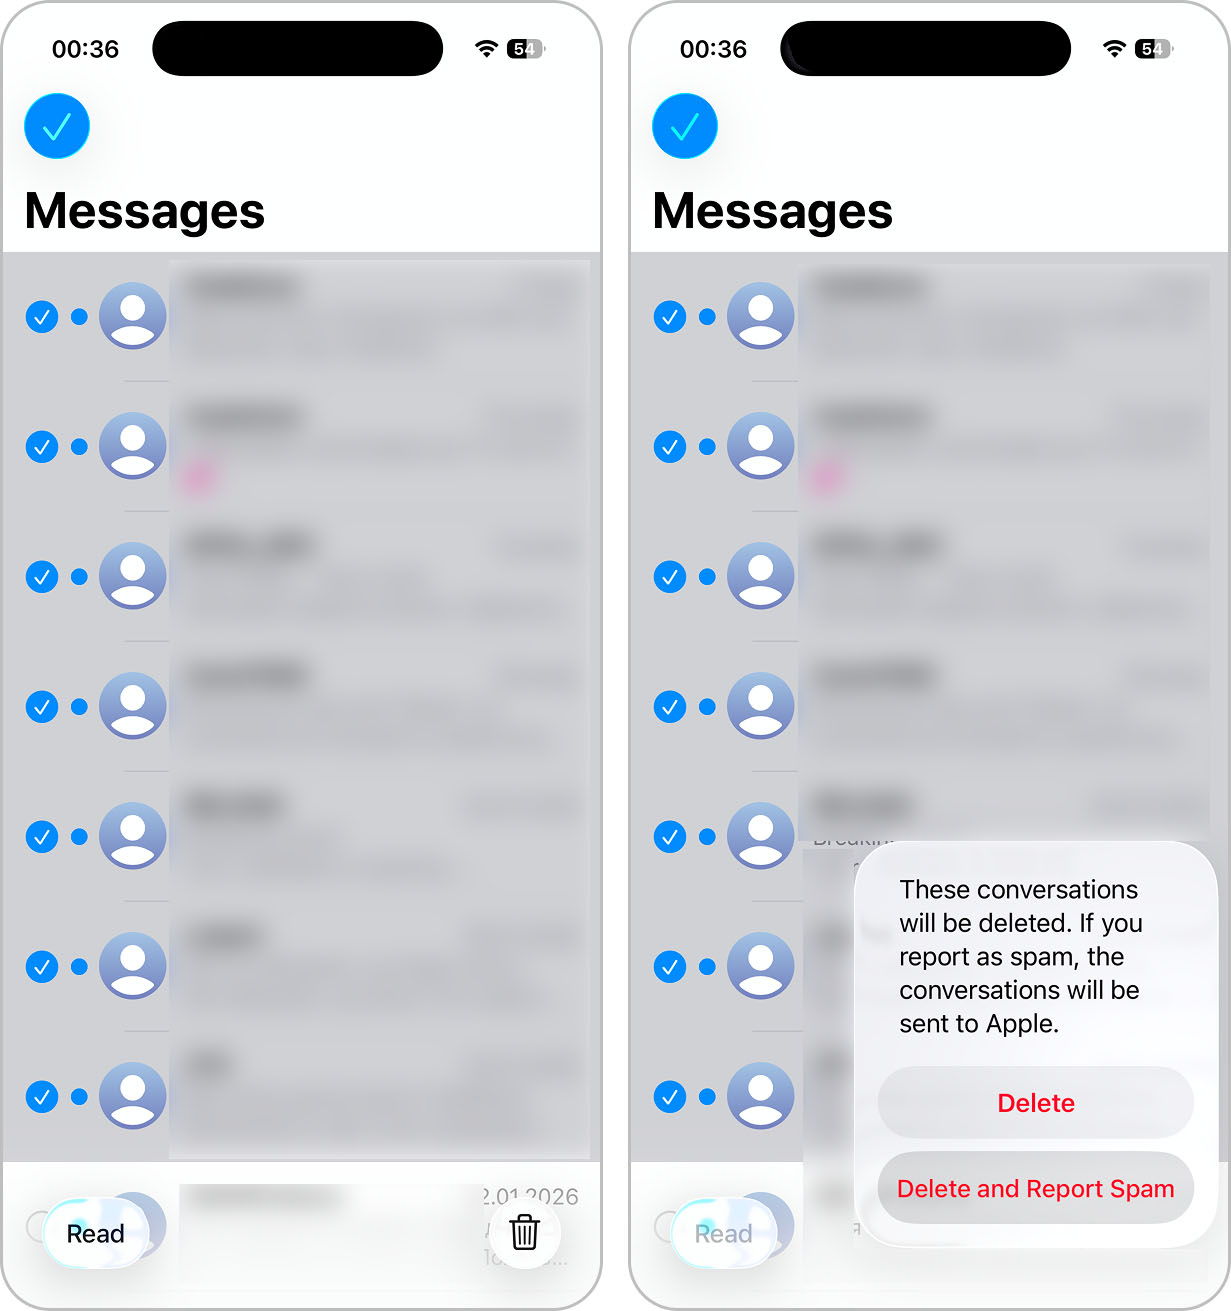
- Tap Edit in the top-left corner and pick Select Messages options from the dropdown menu.
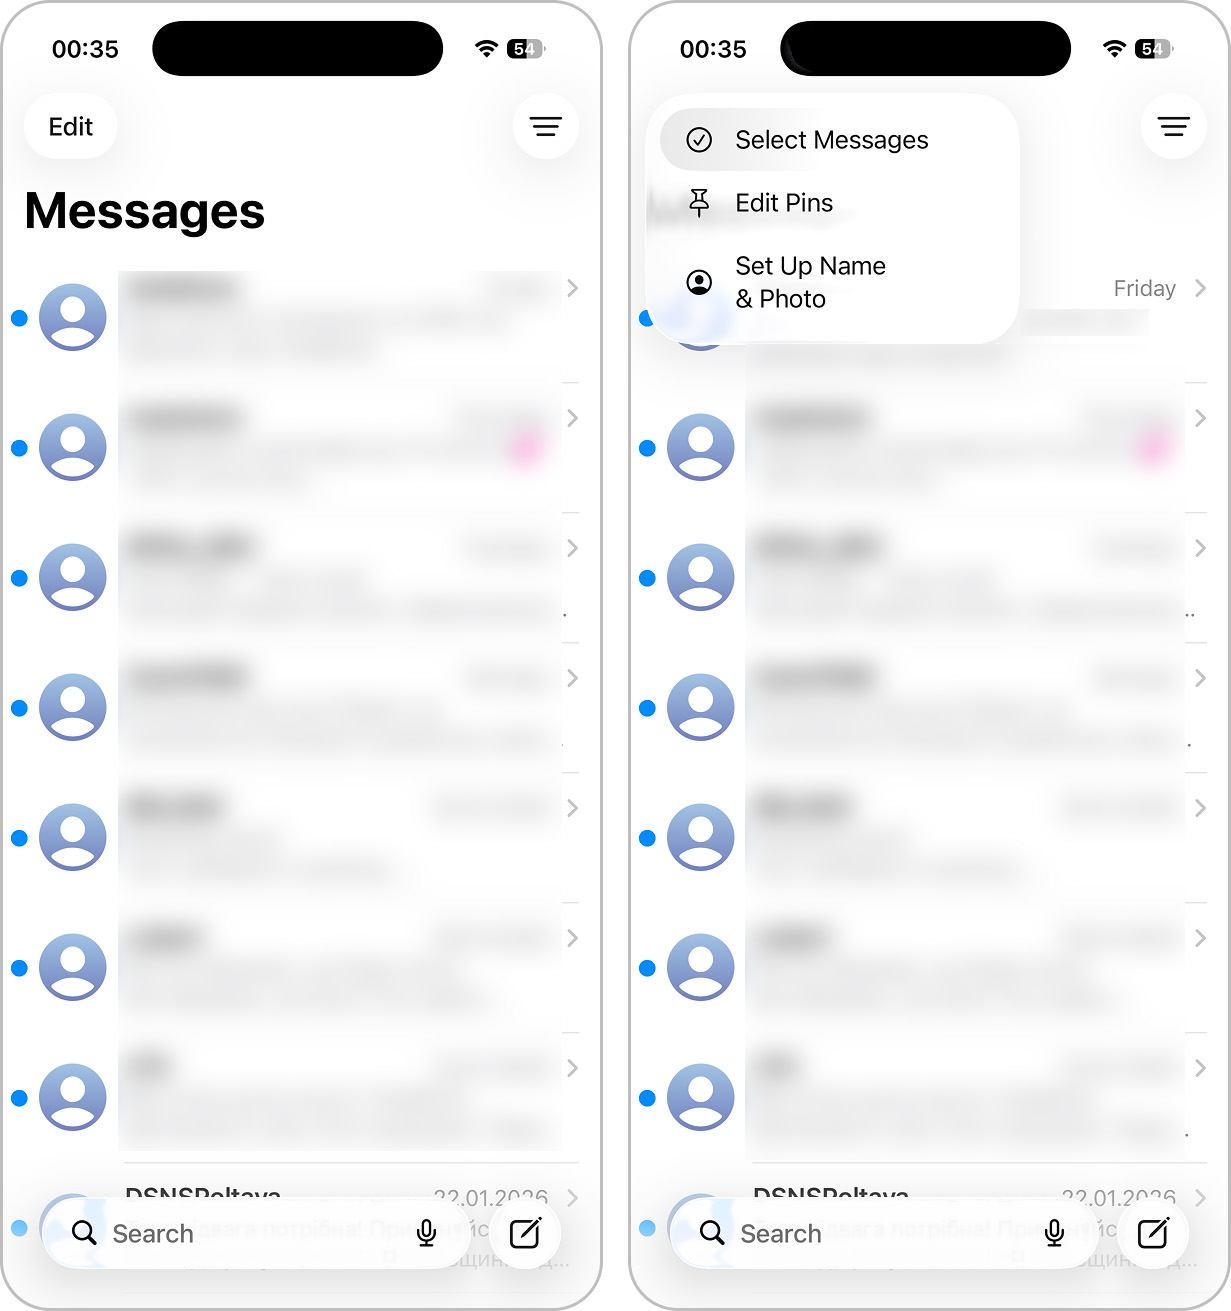
- Mark the conversations you want to delete and tap the trash icon in the bottom-right corner to remove them.
4. Clear Browser Cache and Cookies
Although browser data is technically part of app storage, it’s managed differently, which is why it makes sense to cover it in a separate section.
Any browser you use on your iPhone stores temporary data, such as cache and cookies. Over time, this data grows and can take up noticeable storage space. In practice, this means your iPhone may still keep data from websites you visited years ago, even if you no longer use them. Clearing this data from time to time helps free up space and keeps browser storage under control.
Below are the steps for clearing cache and website data in Safari, the default iPhone browser:
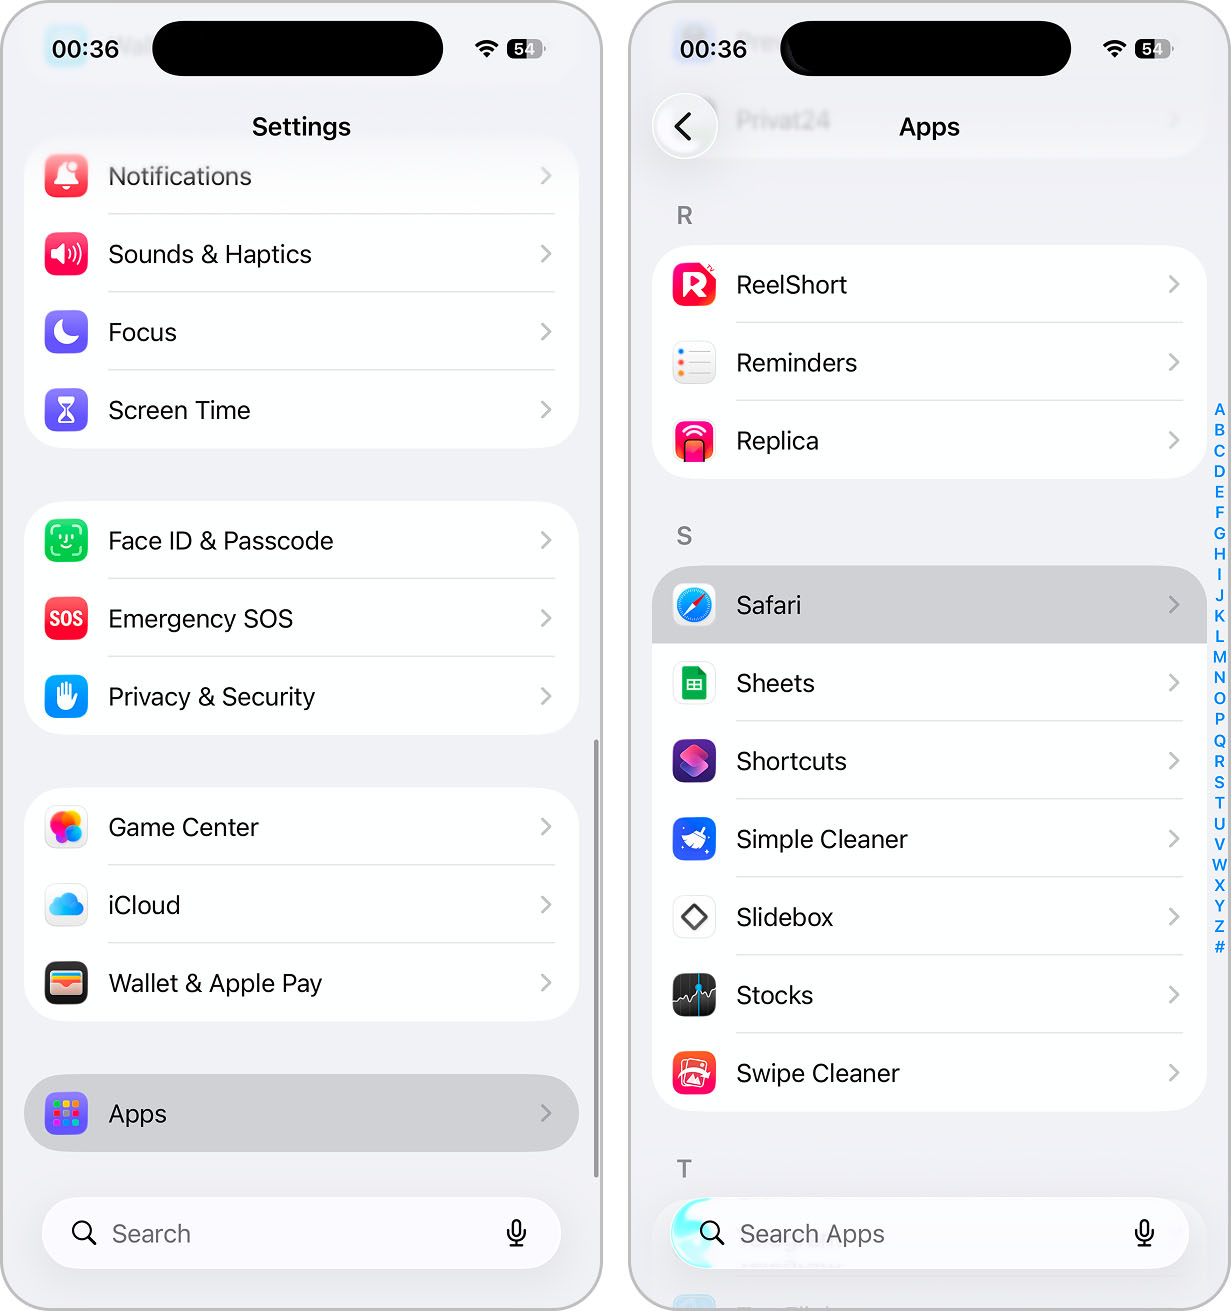
- Open the Settings app on your iPhone.
- Scroll down and tap Apps, then find Safari in the list.
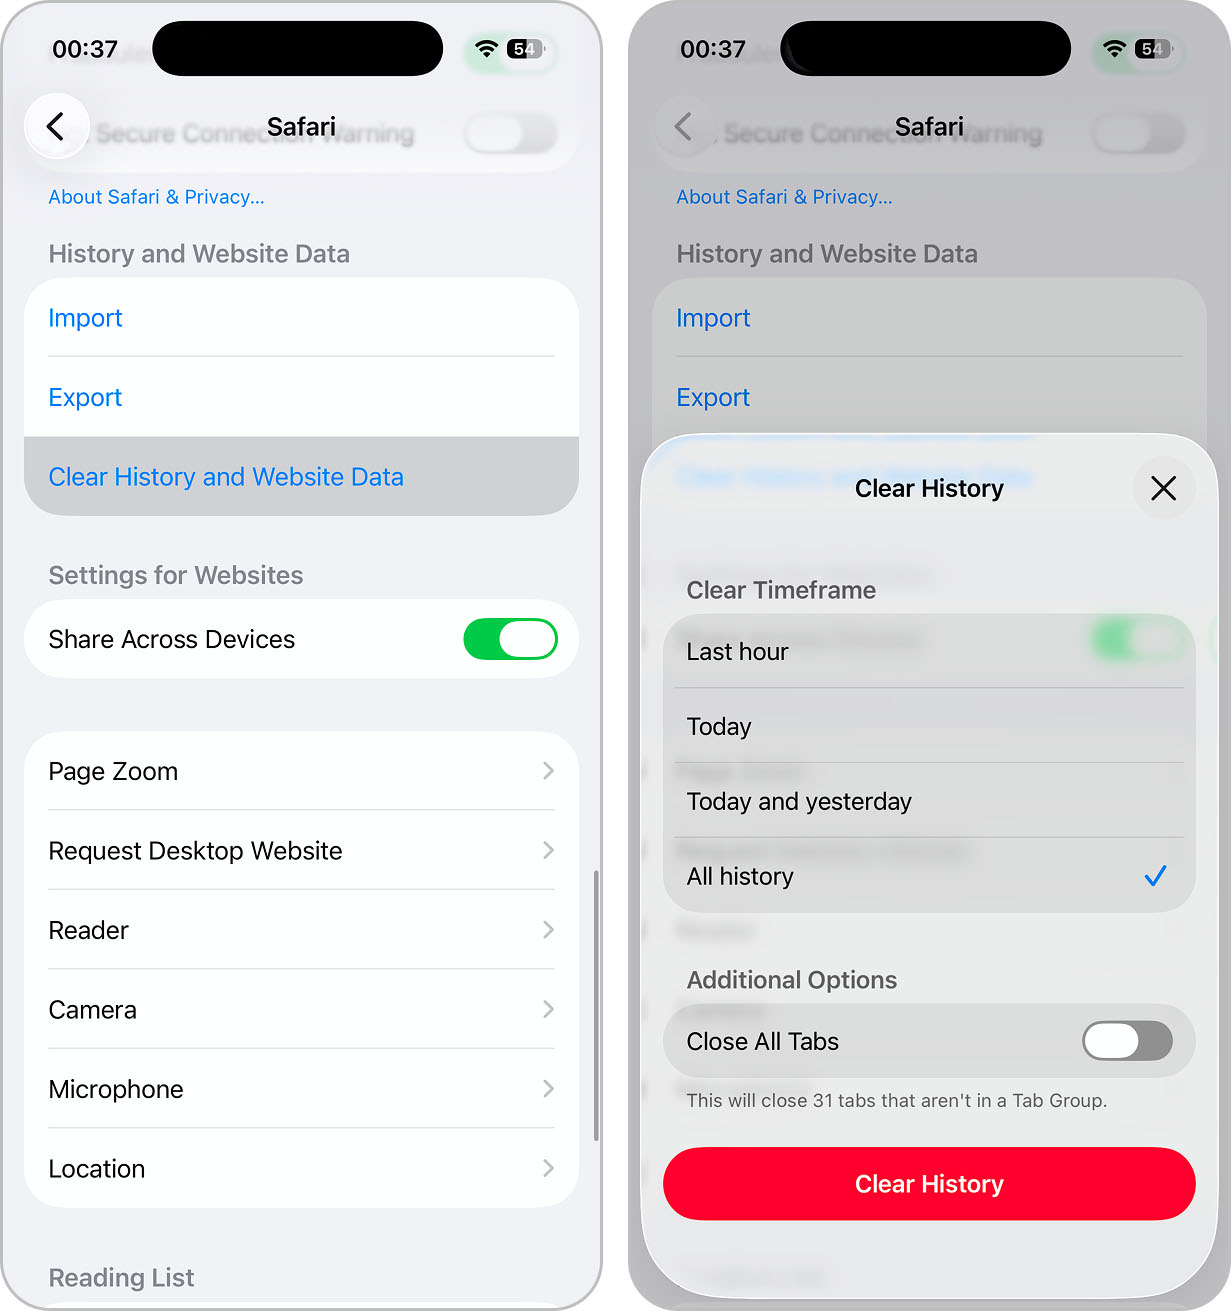
- Scroll to the History and Website Data section and tap Clear History and Website Data.
- When prompted, select All History as the time range and tap Clear History.
- Confirm the action to remove browsing history, cookies, and cached website data.
5. Delete and Manage Large Media Files
We already covered how to manage photos and videos stored in the Photos app. However, large files can also be stored in another location on your iPhone — the Files app. This area often contains items downloaded from a browser, files imported from other apps, or documents saved temporarily. As a result, it may include photos, videos, PDFs, documents, and other file types. Since the Files app is not something most users open daily, it’s easy to forget about this storage category, but it’s worth checking from time to time.
Follow these steps to review and remove files from the Files app:
- Open the Files app on your iPhone.
- Tap Browse at the bottom of the screen.
- Open On My iPhone to view files stored locally on your device.
- Review folders such as Downloads or app-specific directories.
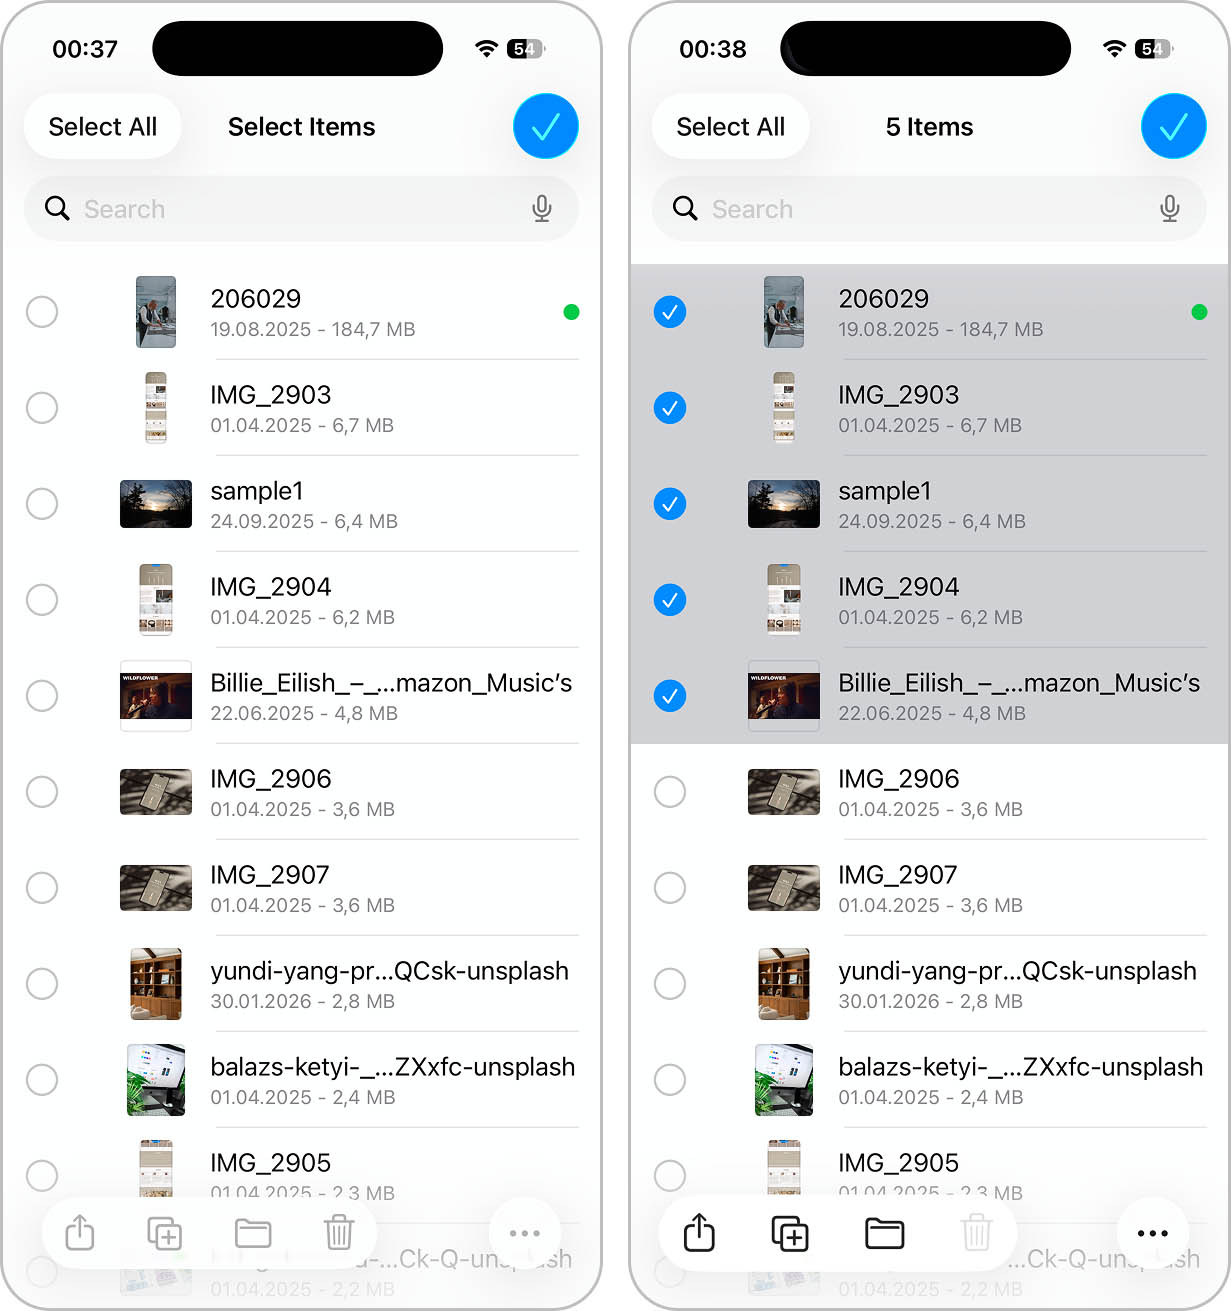
- Tap the three-dot menu in the top-right corner and select Select.
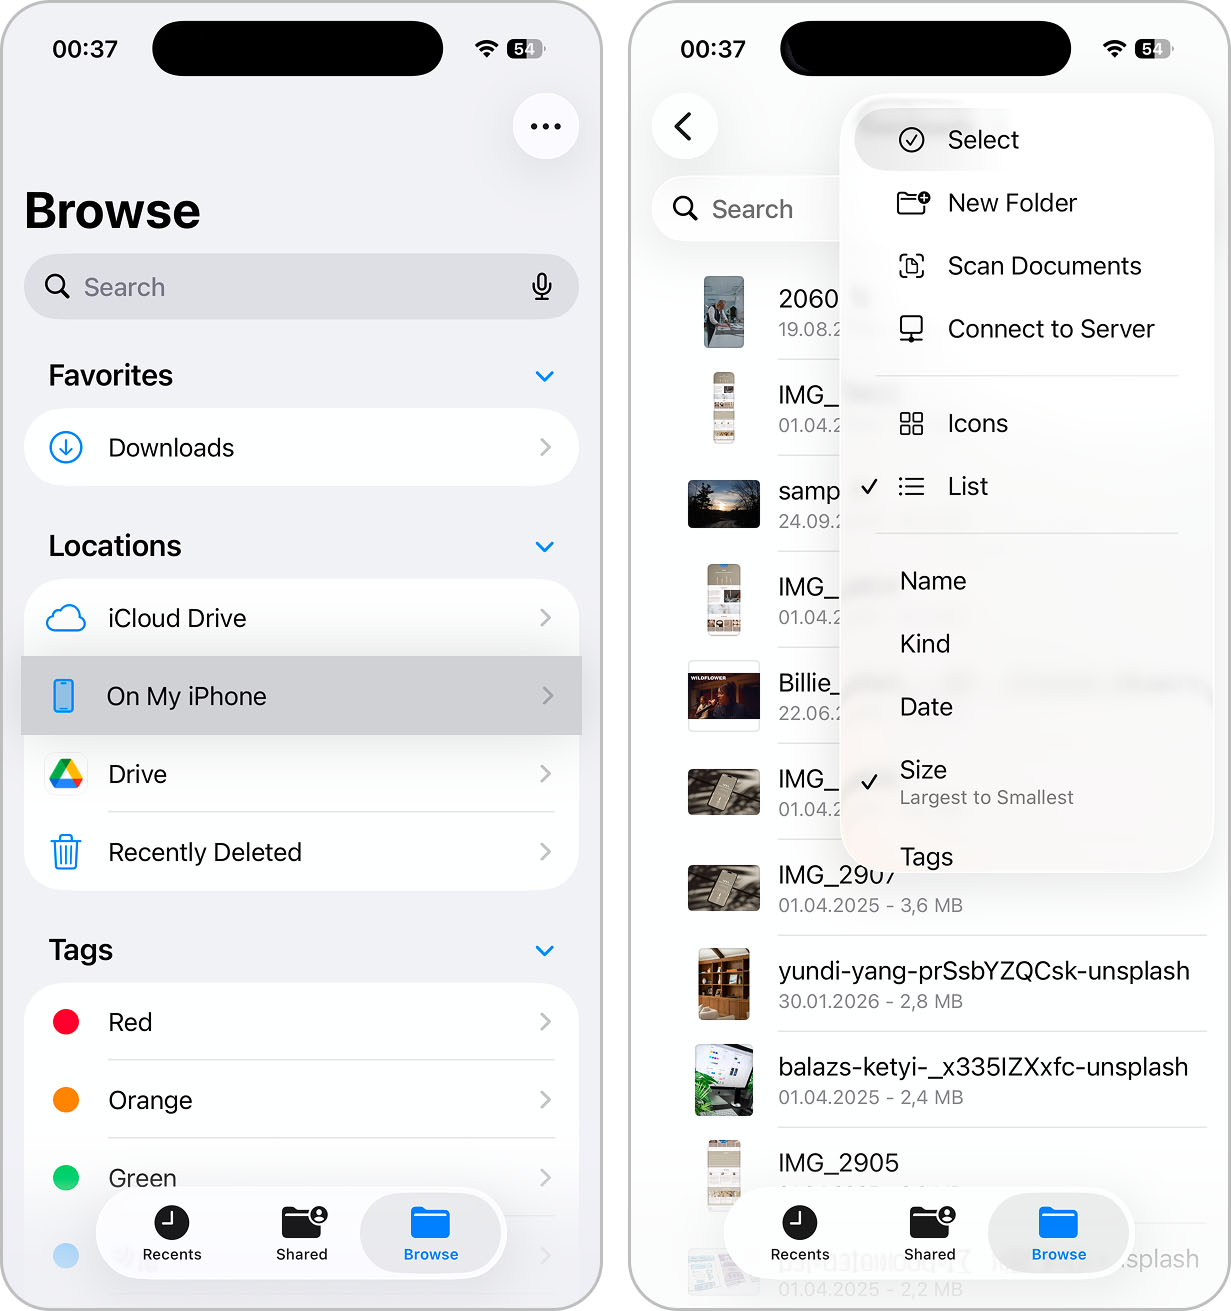
- Choose the files you want to remove and tap the trash icon to delete them.
6. Use Cloud Services for Backup and Storage
Cloud services offer a practical solution to expand your iPhone’s storage without the need for physical upgrades. By storing files remotely, you can free up significant space on your device while keeping your data accessible and secure. Here’s how to make the most of cloud services like iCloud to manage your iPhone storage:
Expand iCloud Usage Beyond Photos:
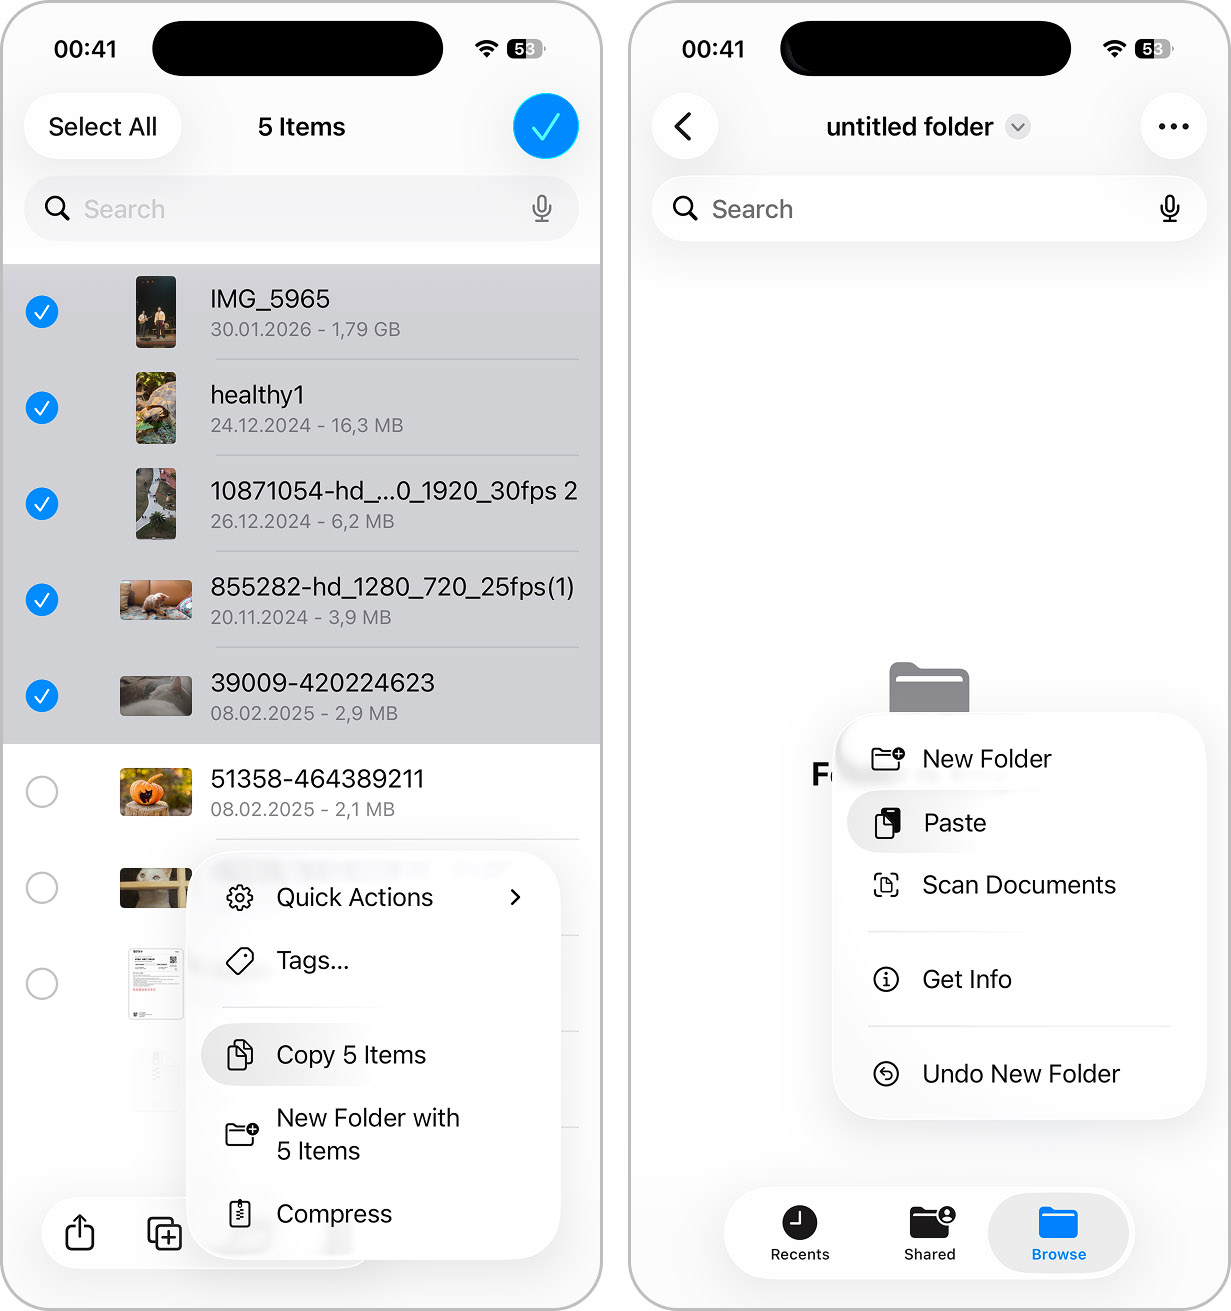
- You can use iCloud and other cloud services to reduce how much data is stored locally on your iPhone. This approach works best for files and documents that you don’t need offline all the time. To move documents and other files to iCloud Drive, open the Files app, go to On My iPhone, and locate the files you want to move. Tap Select, choose the items, then tap Copy and select iCloud Drive as the destination. Once the files are stored in iCloud, and you delete them from your iPhone, they no longer take up local storage unless you download them again.
- Some apps also support storing part of their data in iCloud. You can review this by opening Settings, tapping your Apple ID at the top, selecting iCloud, and checking which apps are allowed to use iCloud storage. This does not move all app data out of your iPhone, but it helps reduce local usage for apps that sync documents, messages, or other content through iCloud.
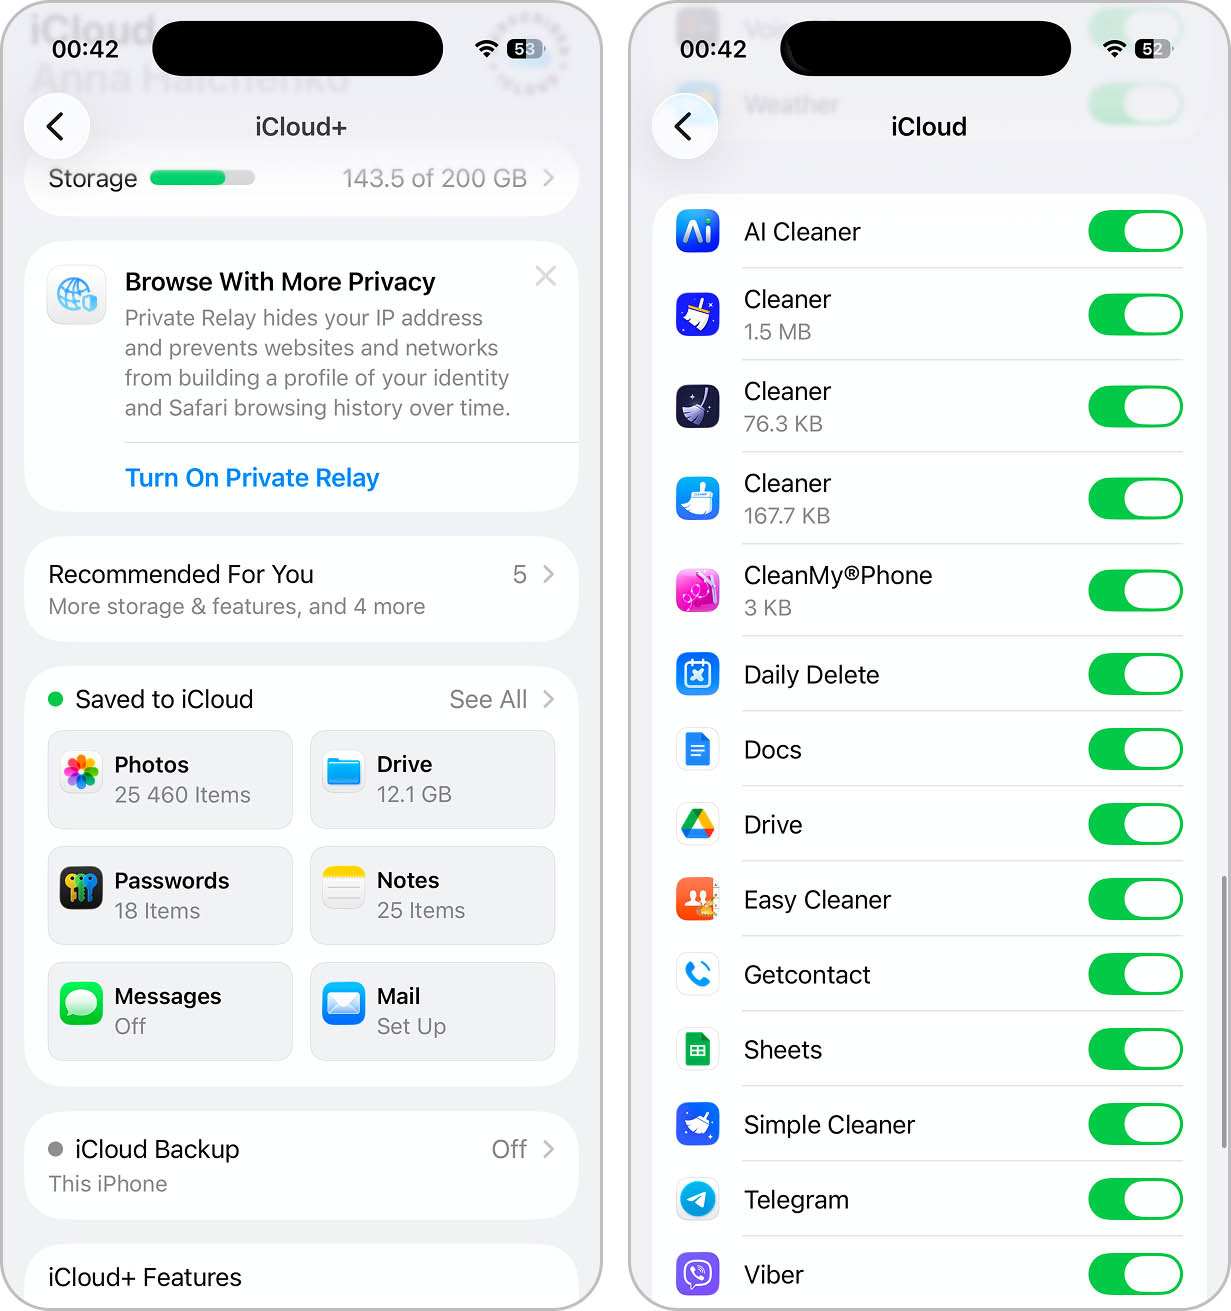
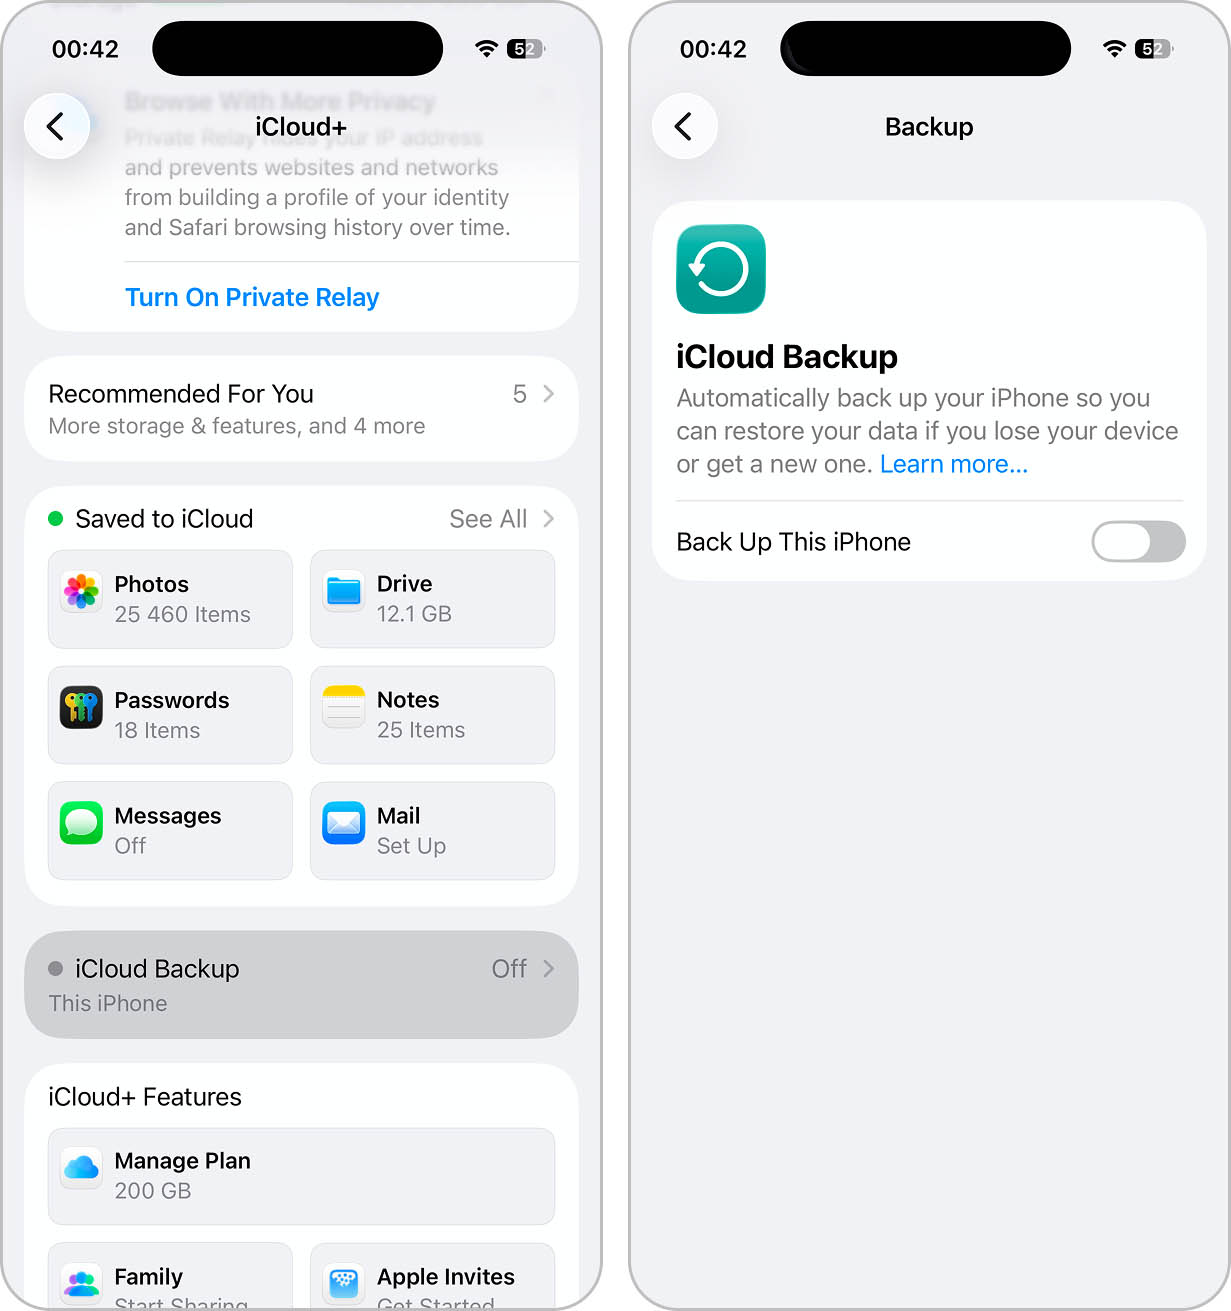
- Backing up your iPhone to iCloud does not free up storage on the device, but it remains important for data safety. To check backup settings, open Settings, tap your Apple ID, select iCloud, then iCloud Backup. A current backup ensures that your data can be restored if you switch devices or lose access to your iPhone.
- If you use Apple Mail, attachments can also contribute to storage usage. While emails themselves usually take up little space, downloaded attachments remain on the device. To reduce this, delete old emails with large attachments or avoid keeping them downloaded offline.
7. Utilize External Storage Solutions
For iPhone users who need to manage large files or want an alternative to cloud storage, external storage solutions provide a flexible option. These tools are ideal for offloading content from your iPhone, thus freeing up significant space without having to delete precious data. External storage for iPhone comes in a few common forms.
- One option is portable flash drives designed for iOS devices. These drives connect directly to your iPhone, most commonly via USB-C on newer models or Lightning port on older models, and allow you to transfer photos, videos, and documents to external storage using a companion app. This way works well if you want a simple, cable-based way to offload large media files.
- Another option is wireless external drives. These are standalone storage devices that create their own Wi-Fi network. After connecting your iPhone to the drive’s network and installing the manufacturer’s app, you can transfer files wirelessly. This type of storage is often used for large video projects, photo libraries, or backups when cables are not convenient. Wireless drives do not rely on a physical port and can be shared across multiple devices.
External storage does not expand the internal storage of your iPhone, but it helps reduce how much data stays on the device itself. This makes it useful for users who regularly work with media files or want additional backup options outside of cloud services.
FAQ
To check the remaining storage space on your iPhone, follow these steps:
- Open the Settings app.
- Tap General.
- Select iPhone Storage.
This section will display a bar graph showing how much storage you’ve used and what’s left. It also lists how much space each app and its data are taking up.
Upgrading to a new iPhone with more storage is advisable if:
- You frequently run out of space and have maximized all possible storage optimization strategies.
- You need to store large files locally due to your specific needs, such as professional photography or video editing.
- You prefer having easy access to all your apps and media without relying on cloud services or external storage.
When you upgrade to a new iPhone:
- You can restore your data from an iCloud backup or from a backup on your computer via iTunes or Finder. This process will transfer your apps, settings, photos, and other data to your new iPhone.
- If you use iCloud, your data like contacts, calendars, notes, and iCloud Photos remain in the cloud and sync automatically to your new device once you log in with your Apple ID.
iPhone Storage refers to the physical storage capacity of your device. It is used to store apps, photos, videos, messages, and other personal data directly on your iPhone.
iCloud Storage is cloud-based storage provided by Apple. It’s used to back up your device and store data such as your photos, videos, documents, and backups securely in the cloud. iCloud storage can be accessed from any device where you are logged in with your Apple ID, making it useful for data recovery and syncing across multiple devices.
Conclusion
If you’ve read this far, you’ve already done half the work to add more storage to your iPhone. The next step is to apply these tips in practice and see how several gigabytes of space are freed up in your storage.
At this point, a common question is what comes next? In reality, nothing new. The same process repeats. As mentioned earlier, even if you choose cloud storage or external devices, iPhone storage management does not disappear. It’s a task worth turning into a regular routine.
Choose a time interval that works for you (weekly, monthly, or once every few months) and follow these steps:
- ✅ Check iPhone Storage and identify which categories consume the most space.
- ✅ Periodically clean up photos and videos in the Photos app. For faster results, you can use tools like Clever Cleaner or similar apps. If you prefer full manual control, use swipe-based cleanup to decide which photos to remove.
- ✅ Review apps you no longer use and delete them. For daily-use apps, clear cache where possible or reinstall them to reset storage usage.
- ✅ Pay attention to smaller categories as well. Even if they take up less space individually, together they still affect overall storage.
By sticking to this routine, your iPhone storage stays under control, and storage issues won’t build up over time.