How to Delete Junk Mail on iPhone: Remove, Filter & Block
An inbox cluttered with junk mail is not only a nuisance but also a hindrance to your daily productivity. This article offers direct methods to effectively clear out junk mail on your iPhone. By applying these straightforward techniques, you can swiftly organize your email and enhance your communication tools.
We’ll start by examining manual deletion methods, empowering you to tackle junk mail directly and efficiently.
How to Delete Junk Mail on iPhone
Dealing with junk mail on your iPhone doesn’t require complex steps. With a few straightforward actions, you can clear your inbox of these unwanted interruptions. The methods we’ll discuss are designed to empower you to manually remove junk mail, whether you’re dealing with a single annoying email or a bulk of them cluttering your Junk folder. By taking control of what stays and what goes, you can maintain an organized and efficient inbox, setting a foundation for better email management.
In the following detailed guide, we will cover two main techniques: deleting individual or multiple junk emails at once, and emptying your entire junk mail folder efficiently.
Method 1: Permanently Delete One or Few Junk Mails
When just a few junk emails are disrupting your inbox, you can remove them individually or in small batches. This method is particularly useful for maintaining day-to-day control over your email influx. Here’s how to tidy up your mailbox by removing these emails one at a time or several at once:
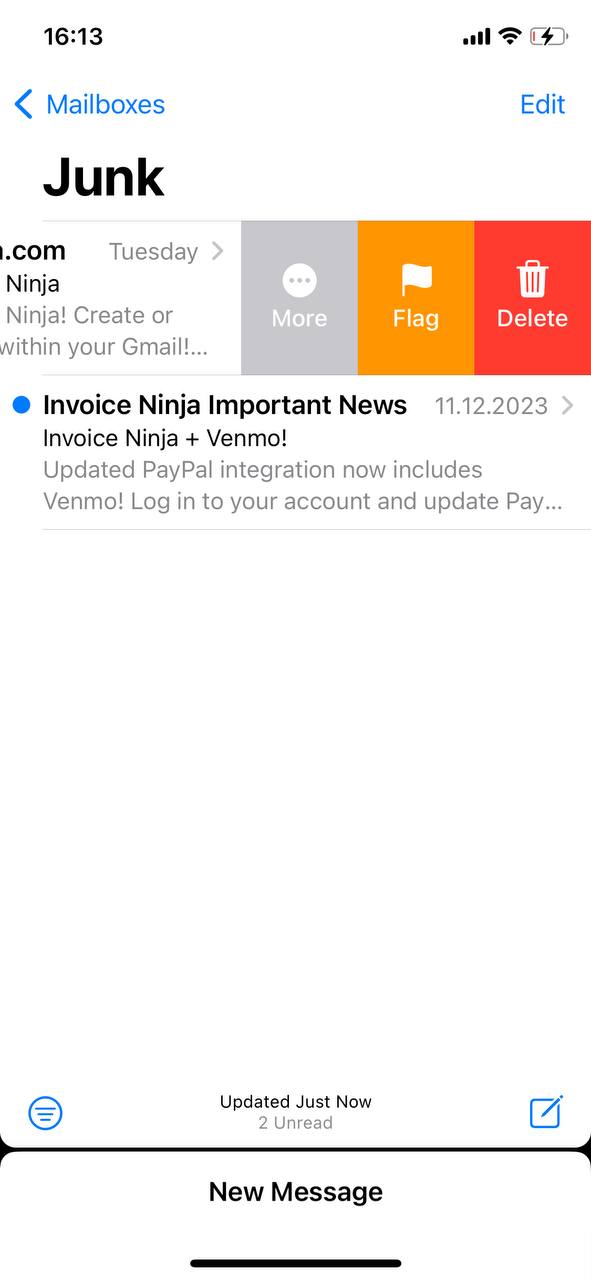
- Open the ‘Mail’ app and go to your Junk folder.
- To delete a single email, swipe left on the email and select ‘Delete’.
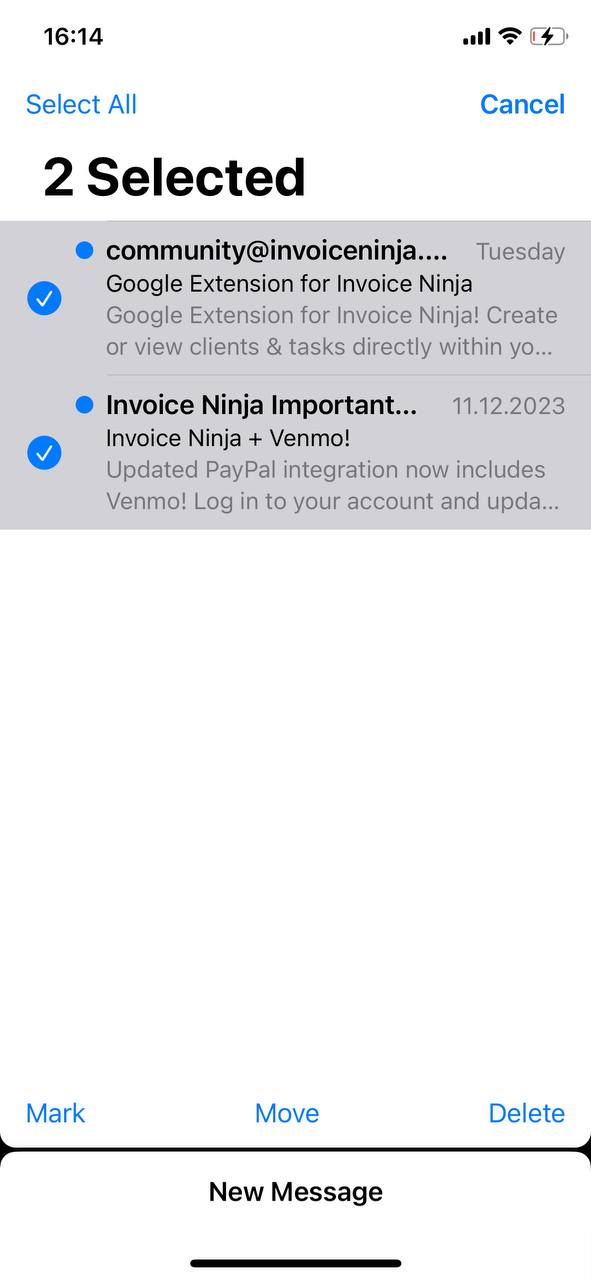
- For deleting multiple emails, tap ‘Edit’, select the emails, then tap ‘Delete’.
Next, we’ll explore how to efficiently clear your entire Junk folder, perfect for when you need a more comprehensive cleanup.
Method 2: Empty Entire Junk Mail Folder
For a more extensive cleanup, emptying your entire Junk folder is an effective approach. This method is ideal when your Junk folder becomes overwhelmed with unwanted emails and you prefer a quick resolution to reclaim your inbox space. Here’s how to clear all junk mail at once on your iPhone:
- Open the ‘Mail’ app and navigate to the Junk folder.
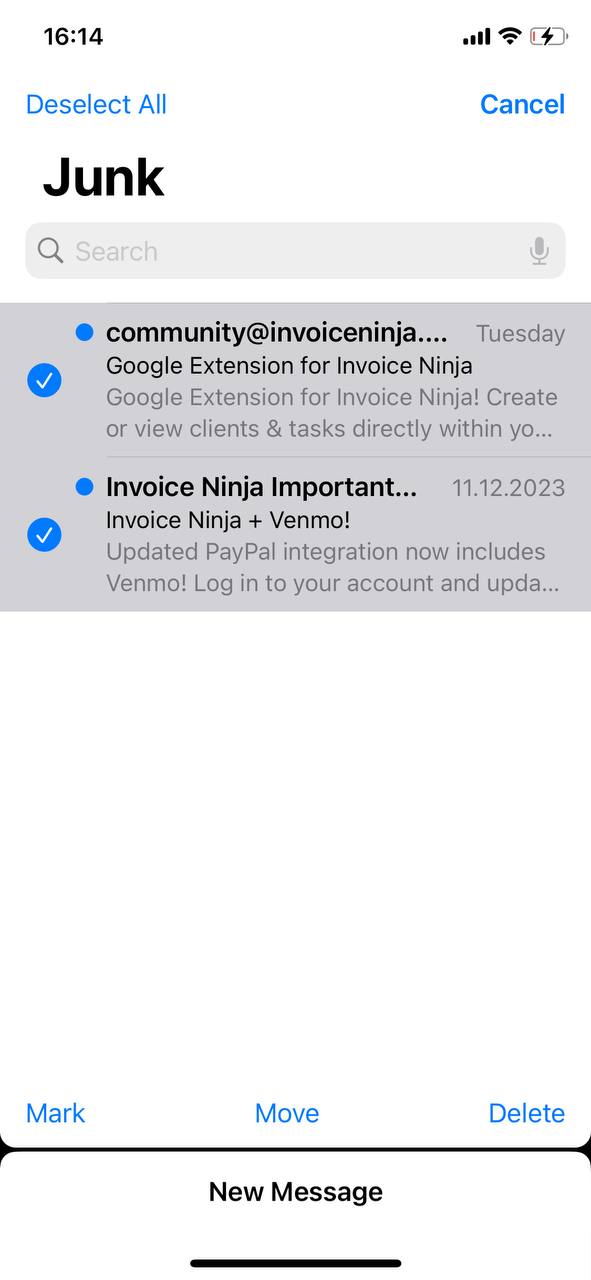
- Tap ‘Edit’, then select ‘Select All’ to remove all emails, then tap ‘Delete’.
This process quickly frees up your email storage, helping you keep an orderly and functional inbox.
Method 3: Manually Locate and Delete Junk Mail that Bypassed Filters
When junk emails bypass your filters and accumulate in your main inbox, using advanced filtering techniques can simplify bulk deletion. This method is efficient for managing large volumes of unwanted emails effectively. Here’s a step-by-step guide to perform bulk deletion of junk mail on your iPhone, using smart filtering to streamline the process:
- Open the ‘Mail’ app – Start by accessing your primary email management application.
- Navigate to your Inbox or a specific mail folder – Identify where the junk mail has primarily collected.
- Utilize the Search Function – Tap on the search bar at the top of the app. Enter keywords commonly found in junk mail, such as “unsubscribe,” “promo,” or specific sender names that frequently appear in spam.
- Filter Results – The search will display all emails containing these keywords. This filtering makes it easier to identify bulk junk mail.
- Switch to Edit Mode – Tap the ‘Edit’ button in the upper right corner of the screen to begin selecting emails.
- Select Multiple Emails – Use the results from your filtered search to quickly select multiple emails. You can tap each email individually or look for an option to select all filtered results, if available.
- Delete the Selected Emails – Once selected, tap the ‘Trash’ or ‘Delete’ button to permanently remove these emails from your inbox.
By incorporating keyword searches and targeted filtering, this method significantly reduces the time and effort needed to clean up your inbox, allowing for quick and effective management of junk mail.
Next, we’ll look at methods to prevent incoming junk mail, focusing on foresighted strategies and useful third-party tools to keep your inbox clean long-term.
How to Prevent Junk Mail on iPhone
Reducing and managing junk mail effectively is crucial for maintaining an organized and functional inbox on your iPhone. Here are practical tools and steps, including some innovative methods, to help minimize the influx of unwanted emails:
- Unsubscribe from newsletters – Junk mail often includes newsletters and promotional emails. Use the unsubscribe option typically found at the bottom of the emails to stop receiving these messages.
- Adjust spam/junk filters – Enhance your iPhone’s mail filtering settings by navigating to the ‘Settings’ app, choosing ‘Mail’, and modifying the filters under the ‘Junk Mail’ section to be more stringent.
- Utilize email management apps – Consider using apps like Clean Email or Unroll.Me, which help organize your inbox by automatically sorting and deleting junk mail.
- Update your filters regularly – Maintain effectiveness against new types of junk mail by regularly updating your email filters.
- Temporary email addresses – Use services that provide temporary or disposable email addresses for one-time sign-ups, preventing your main inbox from accumulating junk.
- Custom rules and automation – Implement custom rules in your email settings or use iOS Shortcuts to automate actions like redirecting specific emails to the Junk folder based on keywords or sender addresses.
- Behavioral filters – Leverage filters that adjust based on your interaction history with senders, which can help in automatically sorting new emails more effectively.
- Reporting spam – Consistently report spam emails. This not only cleans your inbox but also aids your email provider in enhancing spam detection technologies.
Below we will cover some particular steps in details.
Option 1: Basic Filter Options in iOS Mail App
Use these steps to sort emails in the iOS Mail app:
- Launch the Mail app on your iPhone.
- In your inbox, tap the filter icon (three lines in a circle) at the bottom-left corner.
- Select ‘Filtered by’ and choose criteria like Unread or Flagged.
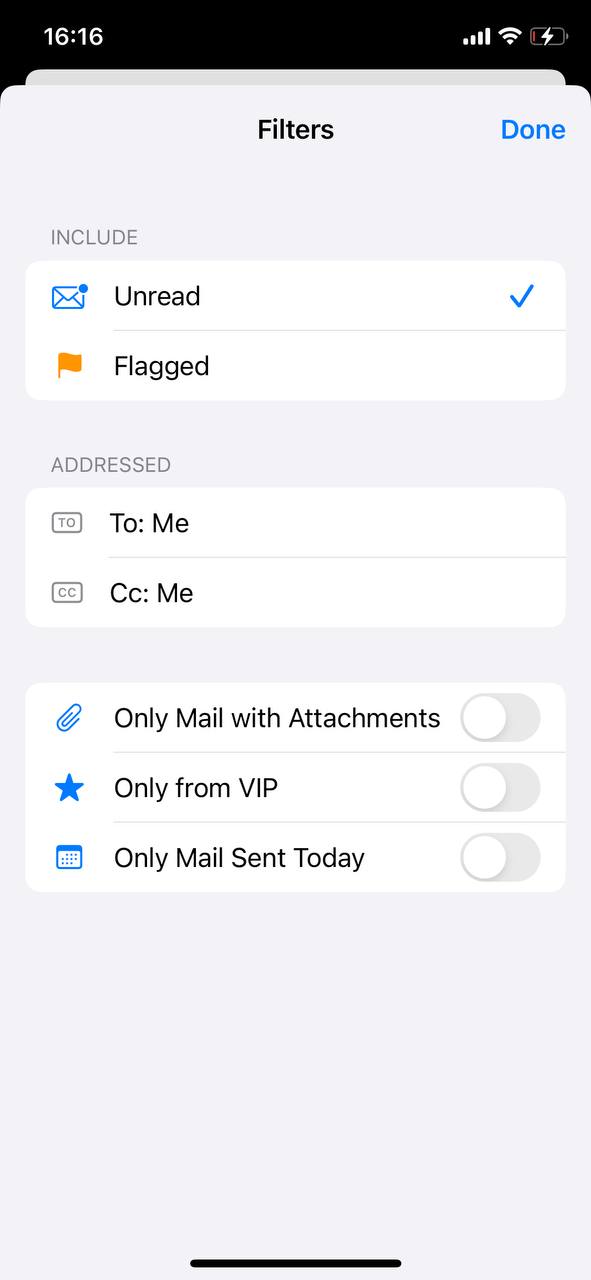
- Tap ‘Done’ to activate these filters.
Option 2: Email Filters via Provider’s Website
Set up advanced filters through your email provider’s website. This approach offers a wider range of options to tailor your email sorting and blocking preferences:
- Gmail: Log in to Gmail on a web browser, go to ‘Settings’, and then ‘Filters and Blocked Addresses’ to create new filters for organizing emails.
- Outlook: On the Outlook website, access ‘Settings’, choose ‘View all Outlook settings’, then ‘Mail’, and ‘Rules’ to set up custom email rules.
- Yahoo: Visit Yahoo Mail on a browser, click ‘Settings’, and then ‘More Settings’. Go to ‘Filters’ to add new email sorting rules.
These filters, once set, will apply to your email account across all your devices, including your iPhone.
Option 3: Third-Party Email Filtering Services
Consider these services for more filtering options:
- Clean Email — Inbox Cleaner: Clean Email is an app dedicated to simplifying email management. It allows users to efficiently organize, delete, or archive large groups of emails. The app’s features include smart filters for categorizing emails, quick unsubscribing from unwanted subscriptions, and automated rules to keep the inbox organized. It’s compatible with various email services, providing a user-friendly interface for handling bulk emails and reducing inbox clutter.
- Cleanfox – Mail & Spam Cleaner: Cleanfox offers a convenient way to clean your inbox and manage subscriptions. It identifies and categorizes newsletters and spam, providing users with options to quickly unsubscribe and delete old emails. This app is particularly useful for those looking to minimize digital waste, as it helps in efficiently reducing the number of unnecessary emails and maintaining a cleaner inbox.
- Triage 2: Triage 2 is an innovative app designed for quick email sorting. It presents your emails as a stack of cards, allowing users to easily swipe to archive or keep messages. This method is ideal for busy individuals who need to quickly sort through a large volume of emails, offering a time-efficient solution to manage your inbox without the need to delve into each individual email.
Organizing your inbox helps in finding important emails swiftly and maintains a manageable email environment. These tools, whether basic filtering in the Mail app, advanced settings via email providers, or third-party services, offer valuable assistance in achieving an orderly inbox.
Conclusion
By following this guide, you now have the means to handle junk and spam emails on your iPhone more effectively. Adopting these methods will make your inbox easier to navigate and reduce the time spent dealing with irrelevant emails. This change in your email routine can make a noticeable difference, allowing you more time for other activities. Put these steps into practice and see how they simplify your email experience.