Leaderboard


Popular Content
Showing content with the highest reputation on 09/15/2020 in all areas
-
I've tried something different and added a new icon pack to the repo. BOCIP_4_Grey Preview (Grey) | Download Full range of icons that are currently available oh.. And @billgates I also added an Android icon to the other sets.5 points
-
Works for me using v3.0.3 of unlocker by BDisp.
 2 points
 -
I think I understood why I don't have it : I usually change the GPT type of my EFI partition to Basic Mircrosoft Data, so the partition mount at startup. Although I should try fstab instead of changing type because with no EFI type partition, Apple tools to install, partition, resize usually silently fail...2 points
-
Just because Acidanthera doesn't support AMD CPUs, doesn't mean that it will not work with OpenCore. Its working perfectly fine with AMD FX, Ryzen Gen1 and Gen2, Threadripper Gen1, Gen2 and Gen3 right now.2 points
-
I think at this point no one should be relying on @AudioGod to provide EFI's for our systems. He provided us with an excellent base with basic correct configurations, kexts, SSDTs, and mobo settings, and I for one will always be grateful for that. If you are hackintoshing, you should have some basic level of experience with editing config lists and adding kexts, etc. Every system will be different and you will have to tweak these for your system anyway. For instance, I have a PCI card with my WiFi that has to have specific kexts and configs that are not in AudioGod's EFI. I also always keep my kexts up to date with Hackintool. I consider this to be an indispensable app. It can do and show you so much. Not sure about Clover at this point, but with OpenCore (OC), you just need to see what additions or changes have happened since the last version and match that to what you have currently. OC always provides a "Differences.pdf" document and a sample config.plist. OC isn’t changing that dramatically between revisions at this point. They are just making tweaks and fixes for new OSes. For example. In the update from 060 to 061, I compared my current config.plist with the sample provided with the release to see what changed. You can go line by line with text editor or plist editor like ProperTree, or PListEdit Pro; or with an app like Kaleidoscope or DeltaWalker. There is also an ocvalidate tool that comes with OC. I like to use the Sanity Checker at opencore.slowgeek.com. It quickly shows me what is missing or incorrect. Be aware though! Not everything it says is wrong or incorrect. For instance, it will say: EnableWriteUnprotector = Yes but should normally be No But that is not true for our specific board. Be smart about your choices and always have a back-up. But it is excellent at telling you what is missing. Using Sanity Checker I could see the following were missing from my 060 config: Security ApECID = 0 DmgLoading = Signed EnablePassword = No ProtocolOverrides AppleImg4Verification = No AppleSecureBoot = No So I used PListEdit Pro to add those to my config. Now in my case once, once made these changes I couldn’t boot and got an error. I asked about that specific error on the OpenCore forum and almost immediately got a response that said I needed to change one setting that was already in my config which I reference in a few posts above that was: Misc/Security/SecureBootModel to "Disabled" not "Default. Again, that was based on my specific situation. So a generic EFI wouldn't have helped me. Hopefully this will help my fellow AORUS PRO/PRO WiFi users in the future.2 points
-
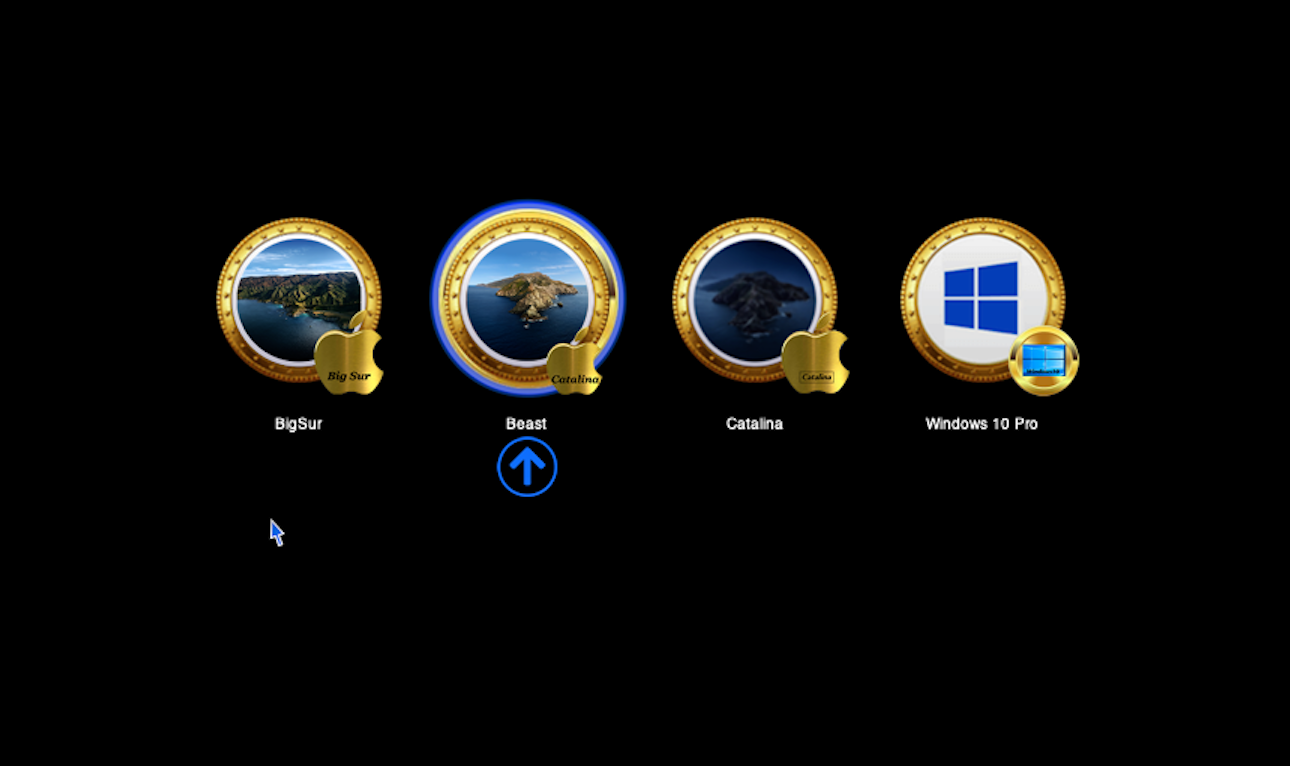
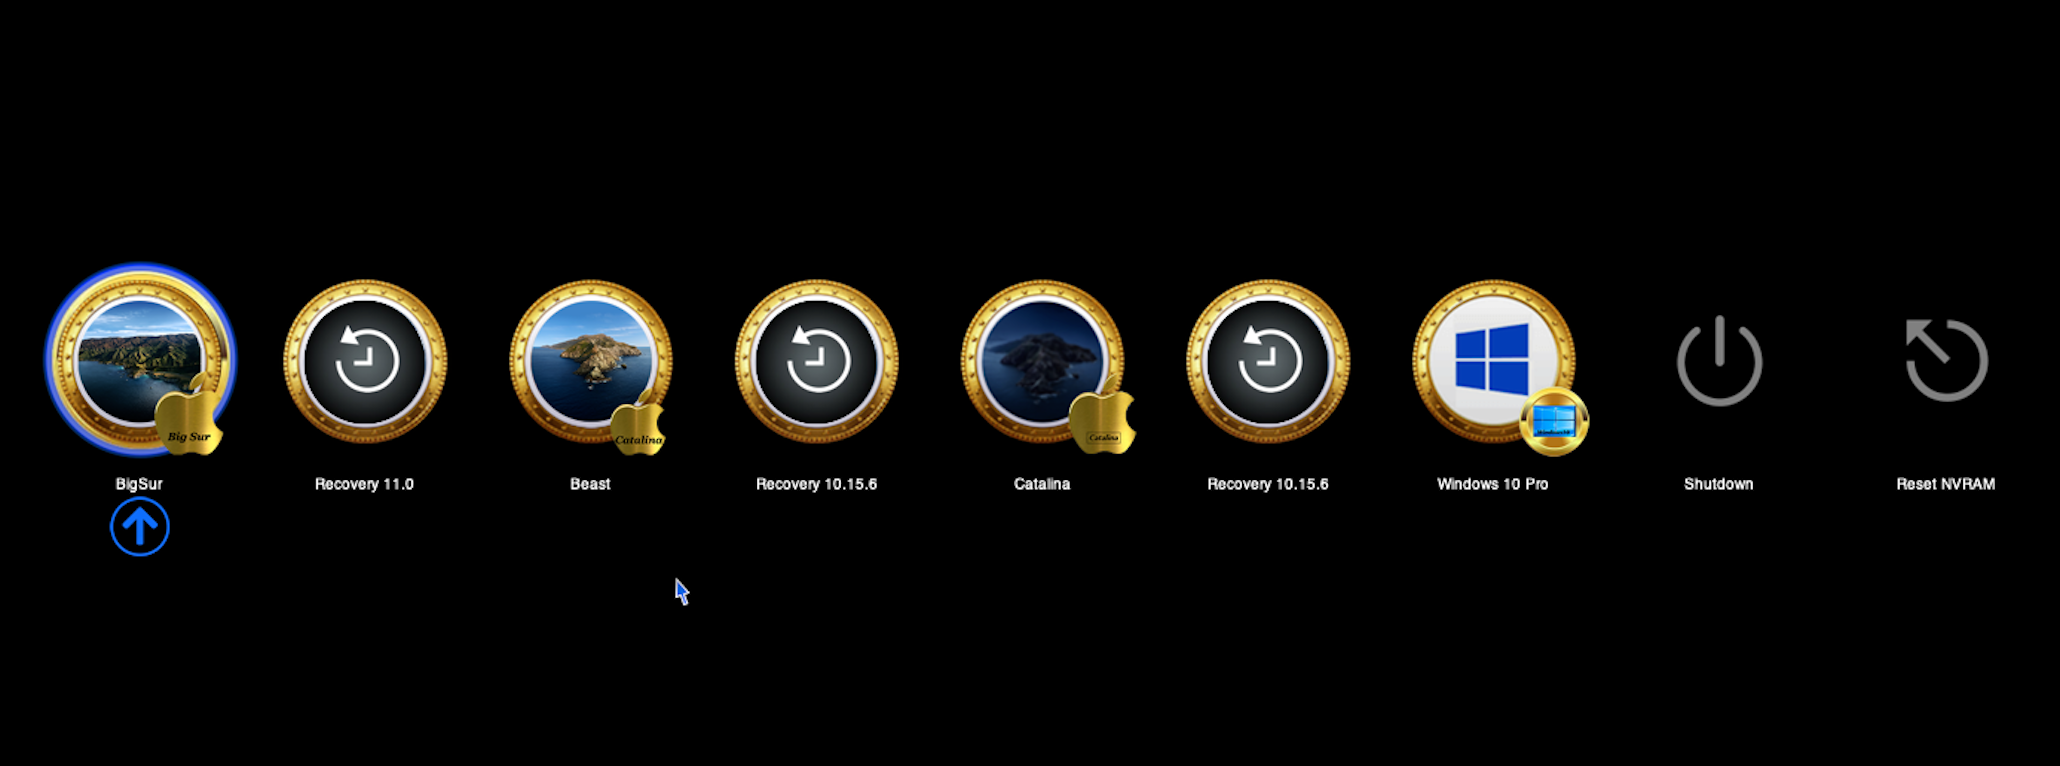
OpenCanopy is a graphical user interface for OpenCore which is currently under development. To setup OpenCanopy 1 - See OpenCore documentation 2 - See Dortania GUI setup You should setup OpenCanopy using the source files from OCBinaryData to check all is working. These files will provide you a UI as close as possible to a real Mac by using Apple's own icons. Users wishing to deviate from Apple's boot icons for a more custom look, they're left with having to find their own icons from various places which can sometimes result in a not so consistent theme feel. To help, I am aiming to create families of 'similar' icons, amongst others, which may eventually lead to a more harmonious look when mixing/customising icons. The idea is that eventually there will be a large 'pick and mix' range of icons where the user can choose which ever ones they like whilst knowing they will all look like they're meant to be together. Of course, I could never come up with every permutation that someone could imagine so there will always be icons missing from the range, but over time I hope to grow the collection(s). For an overview of available media sets from different contributors, check the OpenCanopy-Gallery at dortania. OpenCanopyIcons GitHub Repository All icons are being hosted at https://github.com/blackosx/OpenCanopyIcons The front page of that repository contains links to previews of all the icon sets. Current number of icons in the repo: [Set1: 24] [Set2: 296] [Set3: 3,527] [Set4: 333] [Set5: 10,684] = 14,864 OpenCanopyIconsSet3Builder The beginnings of a tool to generate custom icon sets from the repo (Details) Current version: 0.2.0 (Updated for OpenCore 0.7.0) OpenCanopyIconsSet3Builder_v0.2.0.command.zip OpenCanopyIconsSet5Downloader The simple bash script to download individual icon sets from Set5 of the repo Current version: 0.1 (Updated for OpenCore 0.7.0) OpenCanopyIconsSet5Downloader_v0.1.command.zip Fonts OcFontFileGenerator (Mar 01 2021 - Bash script with dpfb and FTNTools to create font images) Aug 14 2020 - Initial look at OpenCanopy's support for AngelCode BMF Feb 28 2021 - Revised font files with fixed kerning pairs) QEMU Disk Image QemuDiskImage (Mar 6th 2021 - Virtual setup for testing icons in OpenCanopy. Now Updated to v0.6.7) Other noticeable posts in this thread IconsBuilder bash script (Sep 11 2020 - Bash script suggestion for Chris1111's Icnspack-Builder) OpenCanopyIconPacks LE Glow Sets (Feb 03 2021 - Preview and download links) Themes (Compatible with OpenCore v0.7.0) BsxDark1 BsxDarkFenceBlue1 And further alternative coloured themes based on the above BsxDarkFenceDarkGray1 | BsxDarkFenceGreen1 | BsxDarkFenceLight1 | BsxDarkFenceLightGrey1 | BsxDarkFenceOrangeRed1 | BsxDarkFencePinkPurple1 | BsxDarkFenceYellowGold1 | BsxDarkFenceYellowOrange1 BsxDarkSpace1 BsxImacBlue_ And further alternative coloured themes based on the above BsxImacGreen | BsxImacOrange | BsxImacPink | BsxImacPurple | BsxImacSilver | BsxImacYellow BsxM1 BsxOc1 BsxRedOldApple_ BsxDebossBluePlain BsxOsIcons3D BsxSet4Revisited BsxDarkRed BsxDarkUpLight BsxTexturedSquare Pre-made icon packs (No longer supported) I did start to collect individual icons in to packs and host them at OpenCanopyIconsPack GitHub repository. See this post from Aug 16 2020 with links to initial pre-made packs with previews. However, due to OpenCanopy still being experimental and subject to changing requirements and mandatory icons I feel this process can quickly lead to out of date icon packs which need time to rebuild. I will therefore no longer support these icon packs, instead will work on a programmed method to download icons from the main OpenCanopyIcons GitHub repository as a 'set' ready to use in OpenCanopy. The beginnings of this is the OpenCanopyIconsSetBuilder script above. For reference, the existing BOCIP_3 icon packs have been updated to include Left and Right icons for OpenCore 0.6.6, but all others are older and NOT up to date for recent versions of OpenCanopy.1 point
-
https://www.bloomberg.com/news/articles/2018-04-02/apple-plans-to-move-from-intel-to-own-mac-chips-from-20201 point
-
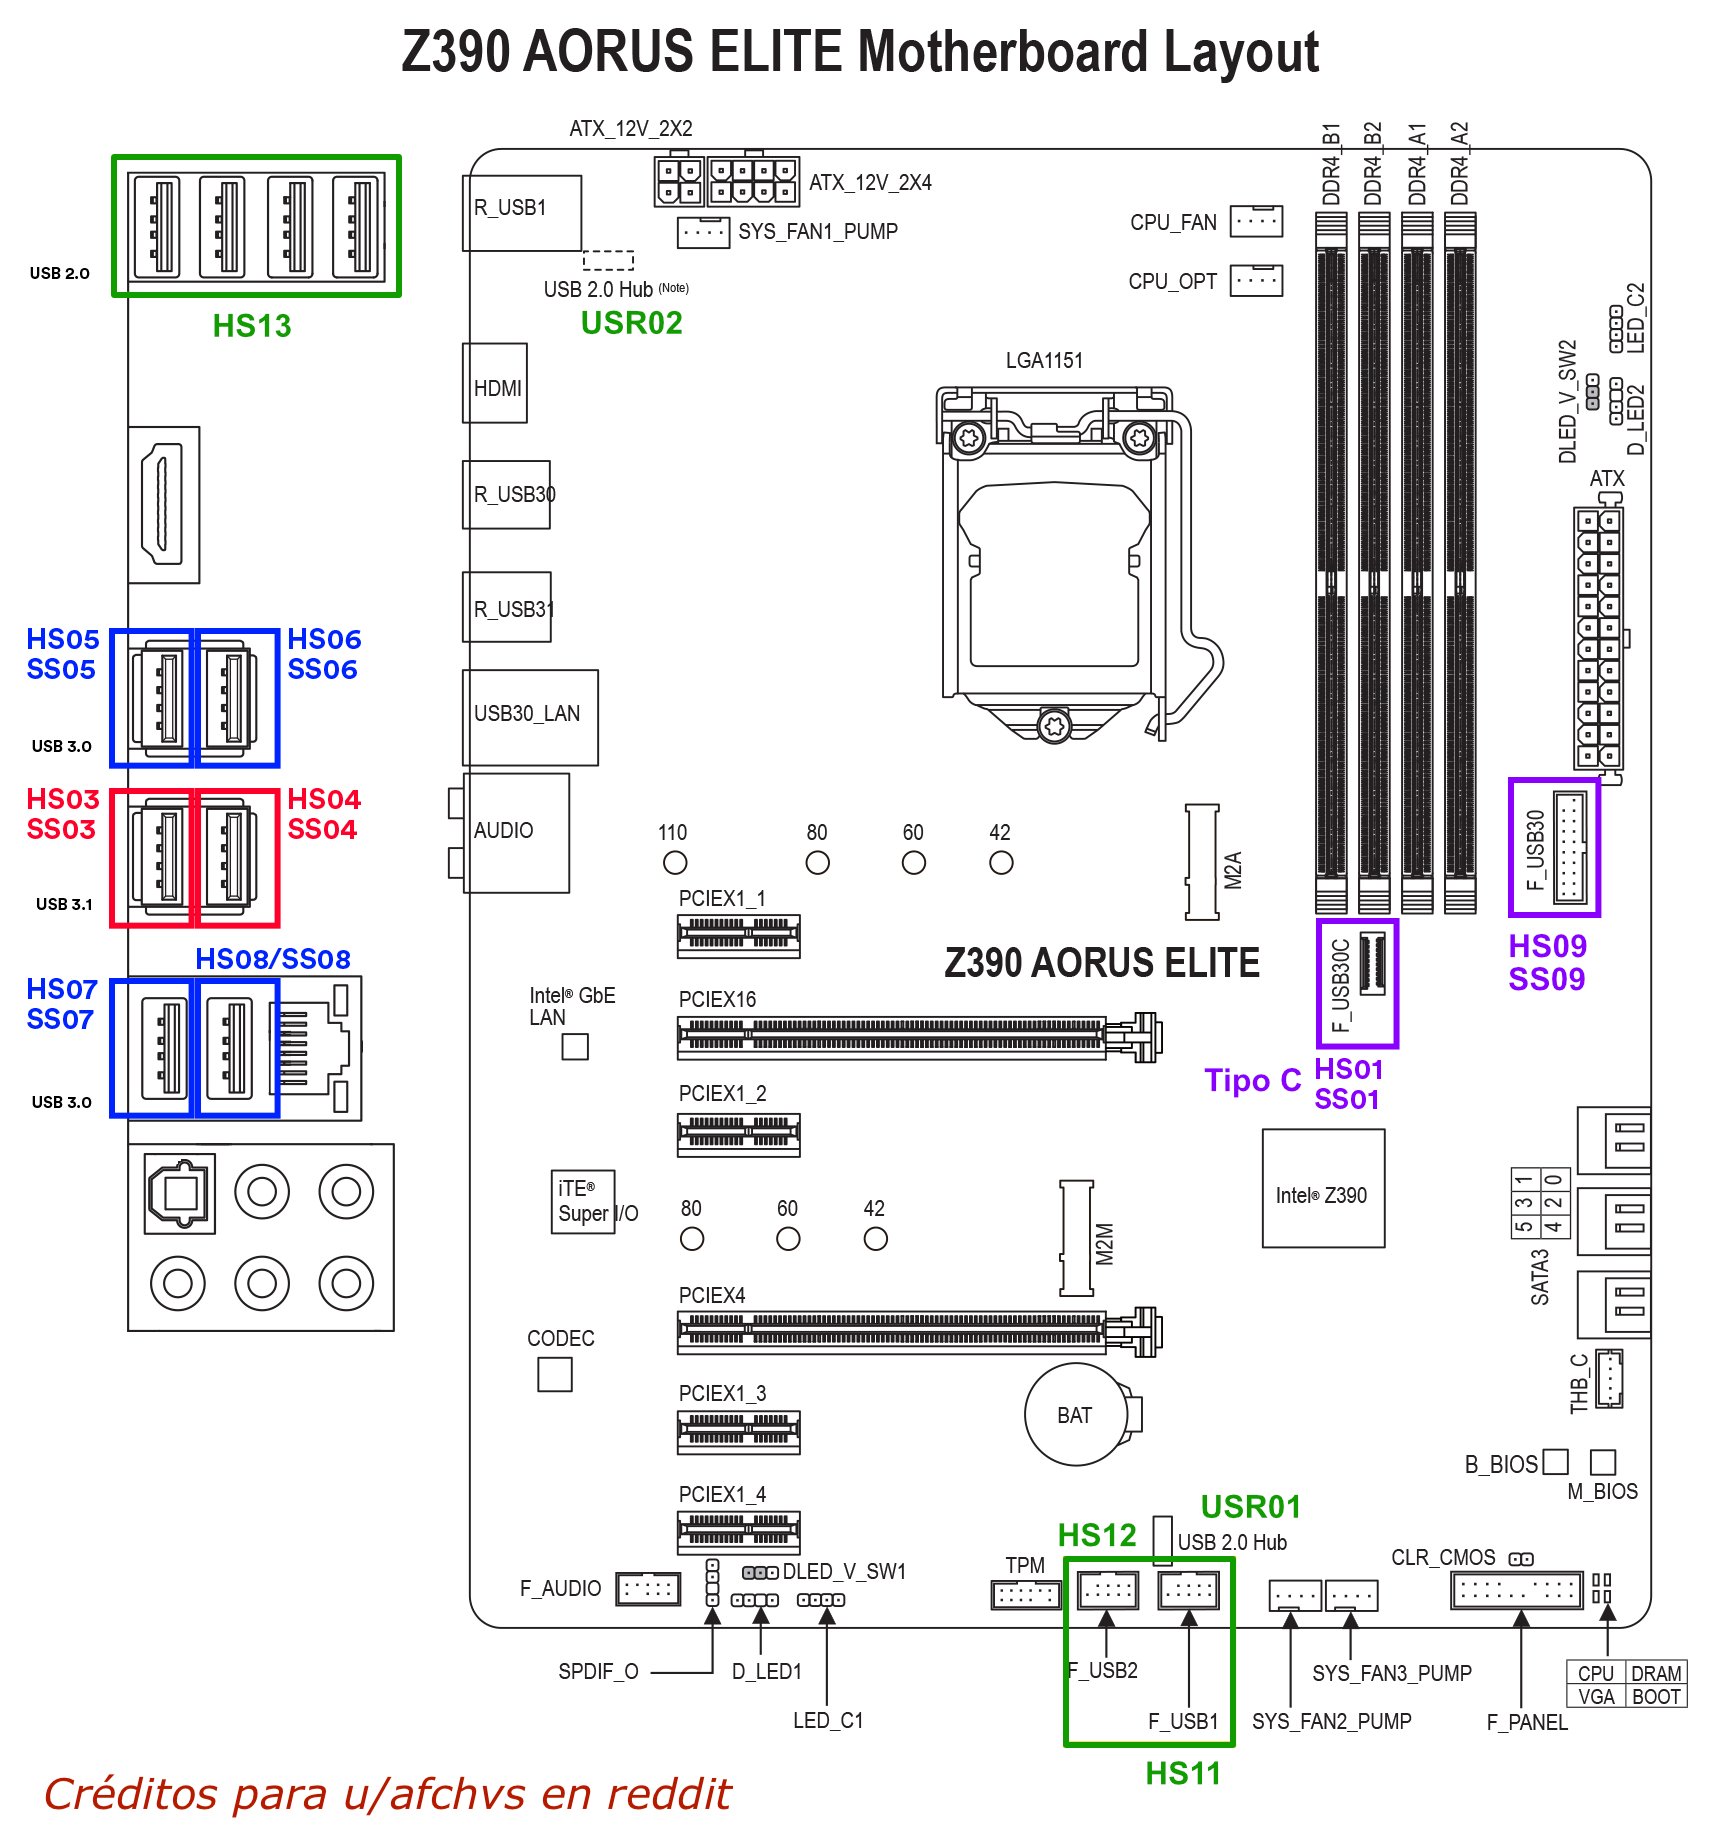
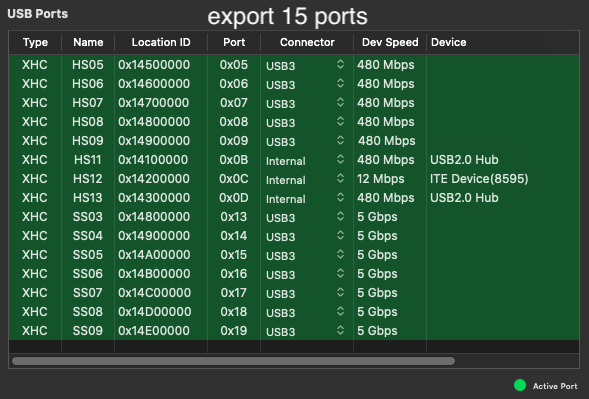
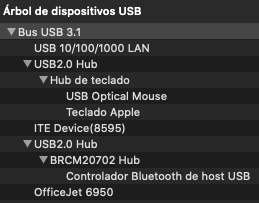
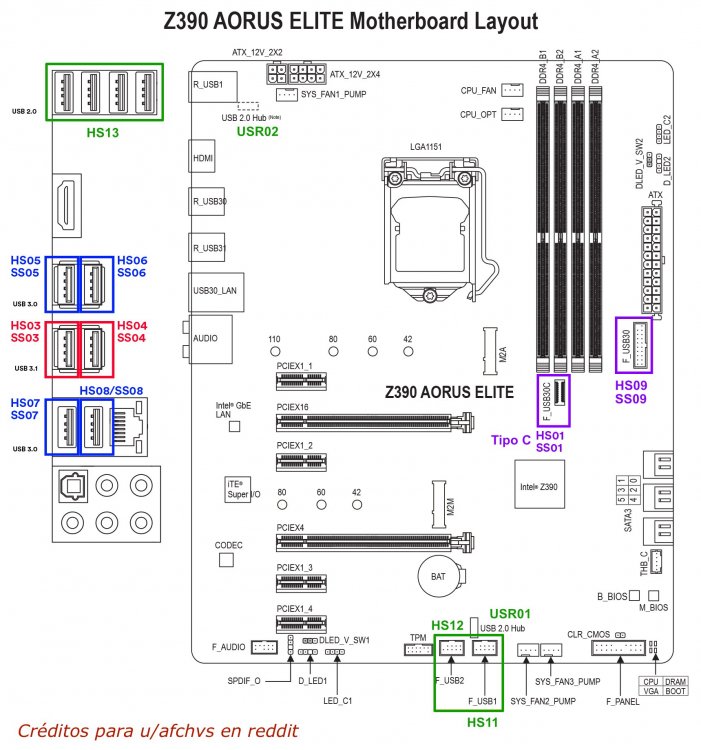
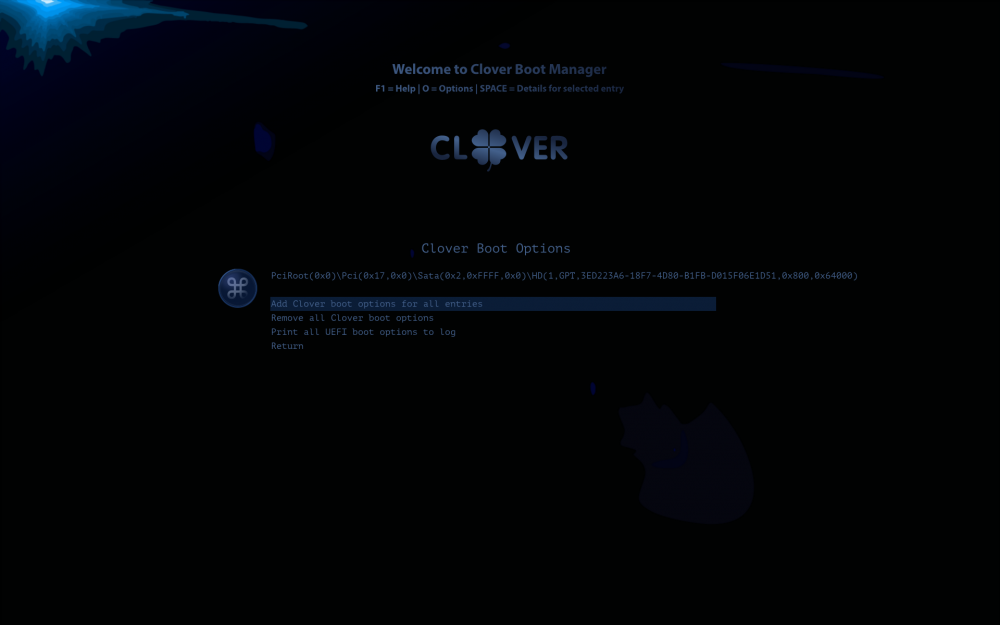
Ajustar los puertos USB de la placa base Z390 Aorus Elite para que no superen el límite impuesto por macOS Catalina (15 puertos) y asignar correctamente el tipo de cada puerto para que funcione a la velocidad correcta. Siguiendo el método propuesto en la ayuda integrada en la herramienta Hackintool de headkaze. macOS Catalina tiene por diseño un límite de 15 puertos USB que puede manejar. Ningún Mac supera o se acerca siquiera a ese número pero cualquier placa base de las que utilizamos para construir un Hackintosh supera ese número, bastantes de ellas ampliamente. Por ejemplo, mi placa Z390 Aorus Elite viene con 4 puertos USB2 + 1 puerto USB3 tipo C + 7 puertos USB3 + 2 hubs USB2 en la placa. Para contar los puertos con vistas al límite hay que tener en cuenta que cada puerto USB2 cuenta como 1 pero cada puerto USB3 (clásico o tipo C) cuenta como 2, la parte USB2 y la parte USB3. Así que mi placa en realidad viene con 14 puertos USB3 (7 USB3 + 7 USB2) + 3 puertos USB2 + 2 puertos en el tipo C (1 USB3 + 1 USB2) + 2 hubs USB2, total 21 puertos. Se puede dejar que el sistema trabaje así pero lo más probable es que algunos puertos no funcionen bien o no lo hagan a la velocidad adecuada e incluso que esto repercuta en otras funciones como el encendido o el reposo. Nota: Los puertos USB2 se muestran como HSxx (HighSpeed) y los USB3 como SS (SuperSpeed). Los hubs USB2 integrados en la placa se muestran como PRxx. RehabMan tiene una extensión, USBInjectAll.kext, que utilizada junto con el parche, escrito por pmheart y otros, que elimina el límite de 15 puertos (Port-Limit Removal Patch, PLRP en adelante), permite cargar todos los puertos de la placa base por elevado que sea su número. Algunos usuarios utilizan su sistema con esta configuración por la comodidad de disponer de todos los puertos de la placa pero es una configuración inestable pensada únicamente para trabajar durante la asignación de puertos pero no de forma permanente. USBInjectAll junto al PLRP son la opción más ampliamente utilizada para configurar y asignar los puertos dejando el número en 15 y con sus velocidades correctas. Para seguir este método hay una guía excelente de UtterDisbelief titulada «The New Beginner’s Guide to USB Port Configuration». En este artículo voy a comentar otro método, el que se propone en las instrucciones de la ayuda de Hackintool que, si bien recurre a USBInjectAll, en cambio no utiliza PLRP sino comandos incluidos en USBInjectAll para excluir grupos de puertos al arrancar de manera que podemos arrancar solamente con los USB2 o con los USB3 activos y realizar la asignación de puertos sobre cada uno de los 2 grupos por separado. Agradecimientos a headkaze, Rehabman, pmheart, UtterDisbelief y otros que hacen posible estas modificaciones. Requisito previo: esta placa lleva el controlador «Canon Lake PCH USB 3.1 xHCI» con identificador de dispositivo A36D (8086:A36D) por lo que requiere tener instalada la extensión XHCI-unsupported.kext para que el controlador sea bien reconocido. USBInjectAll Hay que copiar la extensión USBInjectAll a la carpeta EFI/CLOVER/kexts/Other. USBInjectAll requiere que tengamos en Clover> DSDT parches para cambiar de nombre XHCI a XHC – XHC1 a XHC – EHC1 a EH01 – EHC2 a EH02. Desde Skylake en adelante no existen controladores EHCI por lo que en mi sistema (Coffee Lake) este cambio no es necesario. Tampoco se requiere renombrar XHC1 a XHC. El único cambio que puede ser útil es el de XHCI a XHC aunque yo he probado con y sin él y no he observado diferencias. Para renombrar XHCI a XHC hay que añadir estas líneas en la sección DSDT> Patches: <key>DSDT</key> <dict> <key>Patches</key> <array> <dict> <key>Find</key> <data>WEhDSQ==</data> <key>Replace</key> <data>WEhDXw==</data> <key>Disabled</key> <false/> <key>Comment</key> <string>change XHCI to XHC</string> </dict> </array> Después hay que reiniciar. Hackintool En la pestaña USB has de anotar los puertos en los que tienes conectados de forma permanente el ratón y el teclado y tal vez el bluetooth (por ejemplo HS11, HS12 y HS13 en mi caso). Has de seleccionar todos los puertos, pulsar el botón Delete y después el botón Refresh que rellenará la lista de puertos con todos los que detecta la herramienta, sin límite. En Clover Configurator> Boot> Boot Arguments añade este comando para que al arrancar se descarten los puertos USB3 y se incluyan los que hemos anotado para teclado, ratón, etc.: -uia_exclude_ss uia_include=HS11,HS12,HS13 Después hay que reiniciar. Volvemos a Hackintool> pestaña USB. Hay que conectar y desconectar un dispositivo USB2 en cada uno de los puertos de la placa. Al terminar, los puertos activos están resaltados en verde. Selecciona los que NO están resaltados en verde y pulsa el botón Delete. En Clover Configurator> Boot> Boot Arguments borra el comando añadido en el paso anterior y añade este comando para que al arrancar se descarten los puertos USB2 y se incluyan los que hemos anotado para teclado, ratón, etc.: -uia_exclude_hs uia_include=HS11,HS12,HS13 Después hay que reiniciar. Volvemos a Hackintool > pestaña USB. Hay que conectar y desconectar un dispositivo USB3 en cada uno de los puertos de la placa. Si utilizas el conector Type C también has de conectar un dispositivo Type C en ese puerto, recuerda conectarlo en ambos sentidos. Al terminar, los puertos activos están resaltados en verde. Selecciona los que NO están resaltados en verde y pulsa el botón Delete. En la lista que hemos completado ahora es el turno de asignar a cada puerto el tipo de conector adecuado: - los puertos que tienen un dispositivo conectado permanentemente (ej: bluetooth) se ponen como Internal - los puertos HS conectados a puertos USB3 se ponen como USB3 - los puertos SS se ponen como USB3 - el puerto Type C puede utilizar idénticos HSxx/SSxx en ambos sentidos en cuyo caso se pone como TypeC+Sw pero si utiliza diferentes HSxx/SSxx en cada orientación se pone como TypeC. Si el número de elementos de la lista es mayor de 15 has de elegir puertos para descartar. Para mantenerme en el número 15 yo he borrado los puertos HS03 y HS04 (USB2) de los conectores rojos traseros que con este cambio solamente reconocerán dispositivos USB3. Pulsa en el botón Export para generar en el Escritorio unos archivos de los que vamos a coger 3: SSDT-EC-USBX.aml, SSDT-UIAC.aml y USBPorts.kext. Los archivos .aml han de copiarse a la carpeta EFI/CLOVER/ACPI/patched y la extensión a la carpeta EFI/CLOVER/kexts/Other. En teoría la extensión USBPorts.kext y el archivo SSDT-UIAC.aml son redundantes y ambos realizan la misma modificación desde lugares diferentes pero en la práctica a mí me ha dado mejor resultado emplear ambos. En Clover Configurator> Boot> Boot Arguments borra el comando añadido para excluir puertos y también borra la extensión USBInjectAll.kext. Después hay que reiniciar. Volvemos a Hackintool > pestaña USB. Selecciona todos los elementos que aparecen en la lista de puertos, pulsa el botón Delete y después el botón Refresh para cargar la configuración actual. Aquí puedes comprobar que todo funcione correctamente. Si necesitas realizar alguna corrección hay que exportar los archivos de nuevo y reemplazar los existentes. En la imagen están numerados los puertos de mi placa Z390 Aorus Elite. Imagen modificada de un original de u/afchvs en el sitio Reddit.

 1 point
 -
Thanks bro works perfectly by your method..1 point
-
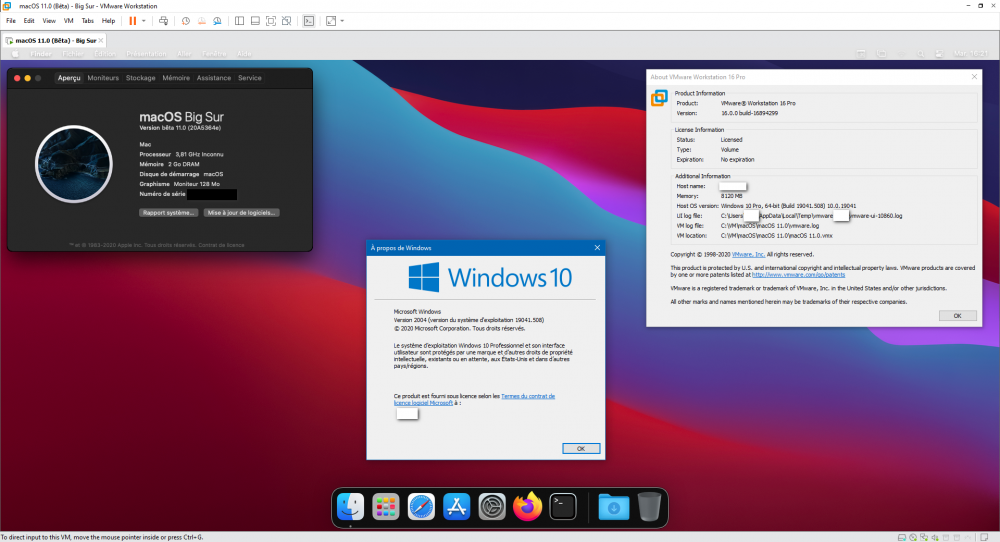
Thanks for testing. I upgraded to 16, and then used the same unlocker as you from BDisp and my macOS 10.15 VM boots up just fine. I also upgraded tools using the ISO file from VMware Fusion 12 and nothing bad seems to have happened. I haven't upgraded to Big Sur yet but I imagine that I am ready to go when the time comes.
1 point
-
Wow @blackosx! LOVE these!1 point
-
the question is, why do you commit to hardware from 10 years ago and beyond to be able to start old versions of macOS, where it would be enough to chameleon-enoch-clover, and not instead recent AMD hardware? I understand that apple has never used amd, but it has never even used certain intel hardware with which so many assemble hacks.1 point
-
Yup. I think I'll go with this: https://github.com/Hackintoshlifeit/GA-Z490M-Gaming-X1 point
-
Of course it does, you can see that I said Ryzen Gen 2 in my statement.1 point
-
Just because of what I read out there and a bit of my experience (I made the change to Asus Pime H410) I would recommend 1st Gigabyte, 2nd Asus, currently I have Catalina 10.15.6 working perfectly and testing BS Beta 6 although with many problems, but it works thanks to a configuration copied from a Z490 Asus user, with Gigabite it is easier1 point
-
Ok, VMware Workstation 16 is out... Who wants to try it first? :-P (Fusion 12 also released with Big Sur support.)1 point
-
USB port mapping on the Z390 Aorus Elite motherboard so that they do not exceed the limit imposed by macOS Catalina (15 ports). Setting the type of each port so that it works at the correct speed. Following the method proposed in the help integrated in headkaze Hackintool app.Note: USB2 ports are referred as HSxx (HighSpeed) and USB3 as SS (SuperSpeed). Onboard USB2 hubs are shown as PRxx or USRxx.macOS Catalina by design only can handle 15 USB ports maximum. No Mac exceeds or even comes close to that number but any motherboard we use to build a Hackintosh exceeds that number. For example, my Z390 Aorus Elite board comes with 4 USB2 ports + 1 USB3 Type-C port + 7 USB3 ports + 2 USB2 hubs. To count the ports, you have to know that that each USB2 port counts as 1 but each USB3 port (classic or type C) counts as 2, the USB2 part and the USB3 part. So my board comes with 14 USB3 ports (7 USB3 + 7 USB2) + 3 USB2 ports + 2 Type-C ports (1 USB3 + 1 USB2) + 2 USB2 hubs, total 21 ports. You can let the system work like this, but it is most likely that some ports do not work well or do not work at the appropriate speed and even that this affects other functions such as boot or sleep.RehabMan has an extension, USBInjectAll.kext, which used in conjunction with the patch, written by pmheart and others, which removes the 15-port limit (Port-Limit Removal Patch, PLRP onwards), allows loading all ports on the motherboard however high their number is. Some users use their system with this configuration for the convenience of having all the ports on the board active but it is an unstable configuration intended only to work during port mapping but not permanently. USBInjectAll together with PLRP are the most widely used option to configure and mapping ports up to the number at 15 with their right speeds. To follow this method there is an excellent guide from UtterDisbelief titled "The New Beginner's Guide to USB Port Configuration".In this article I am going to comment on another method, the one proposed in the Hackintool help instructions that, although it uses USBInjectAll, instead it does not use PLRP but commands included in USBInjectAll to exclude groups of ports at startup so that we can boot only with USB2 or USB3 active and assign ports to each of the 2 groups separately. Thanks to headkaze, Rehabman, pmheart, UtterDisbelief and others who make these modifications possible.Prerequisite: this board has the "Canon Lake PCH USB 3.1 xHCI" controller with device identifier A36D (8086: A36D) so it requires XHCI-unsupported.kext installed for the driver to be well recognized.1. USBInjectAllCopy the USBInjectAll extension to the EFI / CLOVER / kexts / Other folder. USBInjectAll requires that we have in Clover> DSDT some patches to rename XHCI to XHC / XHC1 to XHC / EHC1 to EH01 / EHC2 to EH02. From Skylake onwards there are no EHCI controllers so in my system (Coffee Lake) this change is not necessary. It is also not required to rename XHC1 to XHC. The only change that can be useful is the one from XHCI to XHC although I have tried with and without it and have observed no differences. To rename XHCI to XHC, add these lines in the DSDT> Patches section: <key>DSDT</key> <dict> <key>Patches</key> <array> <dict> <key>Find</key> <data>WEhDSQ==</data> <key>Replace</key> <data>WEhDXw==</data> <key>Disabled</key> <false/> <key>Comment</key> <string>change XHCI to XHC</string> </dict> </array> Then you have to restart.2. HackintoolIn the USB tab, you have to write down the ports in which you have the mouse and keyboard permanently connected and perhaps the bluetooth (for example HS11, HS12 and HS13 in my case). Select all the ports, press the Delete button and then the Refresh button that will fill the list of ports with all those detected by the tool, without limit.In Clover Configurator> Boot> Boot Arguments add this command so that, when booting, the USB3 ports are discarded but the ones we have noted for keyboard, mouse, etc are included: -uia_exclude_ss uia_include=HS11,HS12,HS13 Then you have to restart.Go back to Hackintool> USB tab. A USB2 device must be plugged and unplugged on each of the ports on the board. When finished, active ports are highlighted in green. Select the ones that are NOT highlighted in green and press the Delete button.In Clover Configurator> Boot> Boot Arguments delete the command added in the previous step and add this command so that when booting the USB2 ports are discarded but the ones we have noted for keyboard, mouse, etc. are included: -uia_exclude_hs uia_include=HS11,HS12,HS13 Then you have to restart.Go back to Hackintool> USB tab. A USB3 device must be plugged and unplugged on each of the ports on the board. If you use the Type C connector you also have to connect a Type C device in that port, remember to connect it both ways. When finished, active ports are highlighted in green. Select the ones that are NOT highlighted in green and press the Delete button.In the list that we have now completed, it is the turn to assign the appropriate connector type to each port: ports that have a permanently connected device (ex: bluetooth) are set to "Internal" HS ports connected to USB3 ports are set as "USB3" SS ports are set as "USB3" the Type C port can use identical HSxx / SSxx in both directions, in which case it is set as "TypeC + Sw" but if it uses different HSxx / SSxx in each orientation, it is set as "TypeC ". If the number of elements in the list is greater than 15, you have to choose ports to discard. To stay at number 15, I have deleted the HS03 and HS04 (USB2) ports from the red rear connectors so they will only recognize USB3 devices. Click on the Export button to generate on the Desktop some files from which we are going to take 3: SSDT-EC-USBX.aml, SSDT-UIAC.aml and USBPorts.kext. The .aml files must be copied to the EFI / CLOVER / ACPI / patched folder and the extension to the EFI / CLOVER / kexts / Other folder. In theory the USBPorts.kext extension and the SSDT-UIAC.aml file are redundant and both perform the same modification from different places, but in practice it has been better for me to use both.In Clover Configurator> Boot> Boot Arguments delete the added command to exclude ports and also delete the USBInjectAll.kext extension.Then you have to restart.Go back to Hackintool> USB tab. Select all the items that appear in the list of ports, press the Delete button and then the Refresh button to load the current configuration. Here you can check that everything works correctly. If you need to make corrections, you have to export the files again and replace the existing ones. Last picture shows the ports on my Z390 Aorus Elite board. Modified from an original of u/afchvs en Reddit.

 1 point
 -
Did you add the voodooSMBus + voodooRMI for multitouch?1 point
-
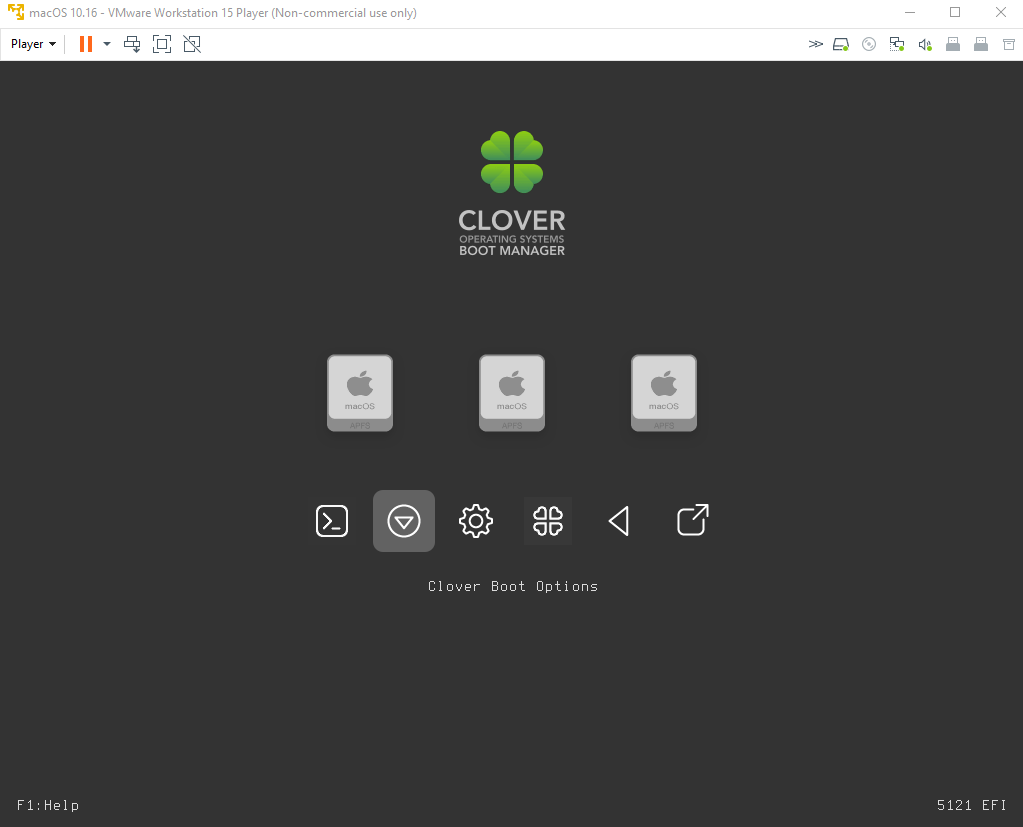
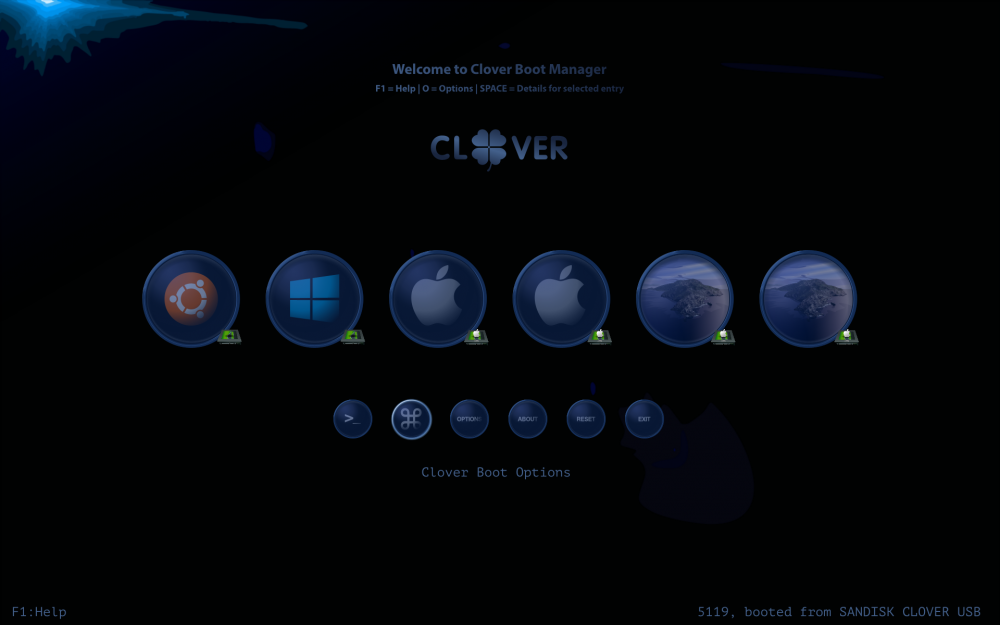
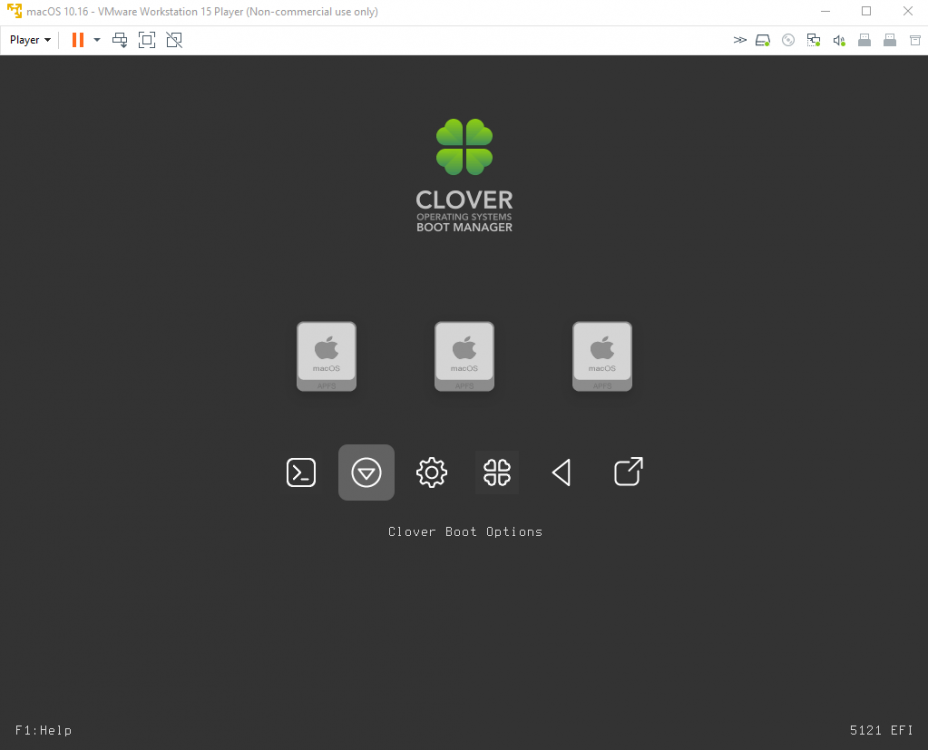
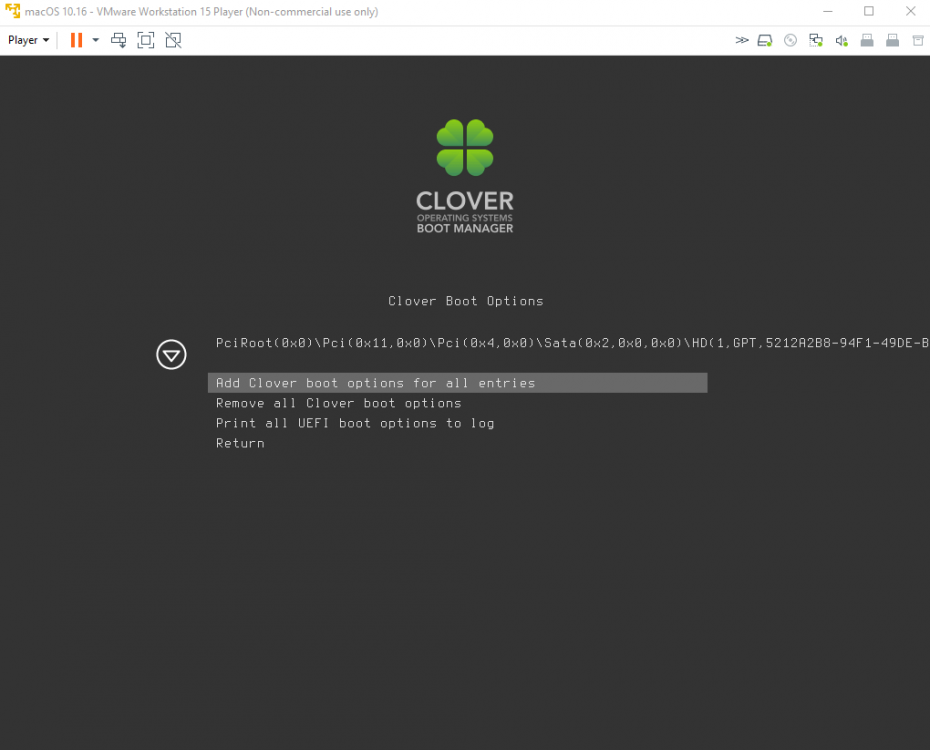
For me, "Clover Boot Options" menu appears in real hardware and VMware but icon varies depending on the theme eg BGM_SVG theme on real hardware (system1 NUC6i5SYH in signature) has 4 leaf Clover icon... eg embedded theme on VMware has triangle icon for "Clover Boot Options", 4 leaf Clover icon for "About" menu...
 1 point
 -
Works great with my Hack & Wacom Tablet.1 point
-
if (FileExists(Volume->RootDir, CLOVER_MEDIA_FILE_NAME)) { DBG(" Found Clover\n"); // Volume->BootType = BOOTING_BY_EFI; AddCloverEntry(CLOVER_MEDIA_FILE_NAME, L"Clover Boot Options", Volume); break; }1 point
-
1 point
-
On the boot picker press space and the option will show up.1 point
-
@Naki thanks for your comment and interest. My motherboard is a H97 socket with an unlocked (lol...) Haswell CPU. Back in the day I had actually bought the MSI Z97i AC which would've allowed me to overclock the G3258 very impressively. The CPU was a steal back then for the performance it could provide overclocked. Sadly the board arrived malfunctioning and the reseller couldn't stock me another Z97 replacement. I got pretty upset and had to bite the apple ending up with the locked H97 version... The CPU doesn't support VT-d so no reason to go into the BIOS to deactivate it. VT-x is and has been always enabled. I occasionally run tons of different OSes in VMware. From Windows, to almost every Linux distro, to several BSDs...never had an issue. I did have Disable Execute Bit enabled though, which I think to remember causing me issues back when I still built hackintoshes. Disabling it didn't make a difference in this situation though. I also changed C-State from Auto to enabled and disabled HEIST. No change in VMware. I'm kinda disappointed by now. It seems nobody can help me here 'cause nobody's facing a similar issue.1 point
-
Hey guys and gals, Just found this article about how the Linux team discovered a vulnerability in almost all Intel CPUs. Both Windows and Linux are rolling out an update that will decrease all Intel CPUs performance by at least 17% if not up to 25%. Unsure what the macOS timeline is. It has to do with being able to inject code from mundane places by exploiting the speculative instruction feature that attempts to guess what instructions will be coming next in the pipeline to gain access to the kernel memory. There is no security check when this happens apparently and seems like a pretty big deal as the problem appears not to be able to be fixed in hardware at all as Intel says the issue cannot be fixed with a microcode update. https://www.theregister.co.uk/2018/01/02/intel_cpu_design_flaw/ EDIT: This is one of my favorite lines: EDIT2: The scale of this is immense, looks like half the worlds computers might have this vulnerability. They literally have to update the entire Azure, AWS, and GCE clouds because of this. EDIT3: This can be used to cause a virtual machine to bypass the hypervisor mode of the CPU and gain access to the kernel mode of the host machine!!! OMG this is a very very bad vulnerability. EDIT4: I also see reports that some older Intel CPUs may take a performance hit of 30% or more. EDIT5: The performance hit depends on the IPC of the CPU, the presence of CPID feature, and the amount of instructions supported by the CPU since the more instructions, the more the speculative instruction feature includes exceptions/undocumented instructions that can be exploited. EDIT6: For reference, IPC for specific CPUs models.1 point
-

Version 1.00
1,525 downloads
Hi people, Installer to activate the sound card REALTEK ALC282-v2 (10ec:0282) with LayoutID 1 or 3 in MacOS. This installer does not contain AppleHDA patched Kext. To work properly, it must be installed over vanilla AppleHDA.kext. I want to thank the whole community for their efforts and content provided, because without these it would not be possible to create this installer. I would appreciate comments and suggestions!! Status: Speakers : OK Headphones : OK HDMI Audio : OK (Intel HD4K Tested) LineIn : N/A (Model Without LineIn) MicInt : OK MicIntNoiseReduction : OK MicExt : N/A (Model Without MicExt) AutoDetectLineIn : N/A (Model Without LineIn) Sleep : OK WakeUp : OK AutoSleep : OK Hibernate : OK Siri : OK Tested Laptops: - HP Pavillion 15-D002SS Coming Soon: - Unified installer for the different supported operating systems. - Support model with LineIn jack. Modified Verbs: 01271C20 01271D00 01271EA0 01271F90 01471C10 01471D00 01471E17 01471F90 01871CF0 01871D00 01871E00 01871F40 01E71CF0 01E71D00 01E71E00 01E71F40 02171C30 02171D10 02171E21 02171F00 01470C02 DSDT: Patch to apply with MaciASL in your DSDT ######################################### HDEF v1.00######################################## into method label _DSM parent_label HDEF remove_entry;into device label HDEF insertbeginMethod (_DSM, 4, NotSerialized)\n{\n If (LEqual (Arg2, Zero)) { Return (Buffer() { 0x03 } ) }\n Return (Package()\n {\n "layout-id", Buffer() { 0x01, 0x00, 0x00, 0x00 },\n //"layout-id", Buffer() { 0x03, 0x00, 0x00, 0x00 },\n "hda-gfx", Buffer() { "onboard-1" },\n "PinConfigurations", Buffer() { },\n })\n}\nend;1 point -
Not necessarily?! What will happen to all the Macs with the Intel CPU? Is Apple going to drop the support for all those Macs as well? Although Apple has done this before when they switched to Intel from their PPC architecture but who knows? I guess if that's going to happen we all have to stick to macOS Very High Sierra (10.14 ) and macOS Ultimately Sierra (10.15 :D) or macOS Last Sierra1 point
-
I hope it doesn't kill our AMD kernel programs if they make it completely invisible. I wonder if they haven't known about this for awhile with the new immutable kernel in High Sierra prelinkedkernel folder?1 point
-
Hi, as my Z97-D3h died, I'm in a hurry to build replacement hack. It should be very simple as I don't have any macs laying around to build/configure stick with OC efi, and my efi on SDD will not work with new build I presume. That means I need prebuilt DSDT (if needed for setup), config.plist and the rest of the EFI folder. I hope it's possible to nake bootable USB with windows. Will do research. I will reuse my RX570, intel 2TB SSD, PSU, case... Reading on Anti-Hackintosh buyers guide I was thinking on following: some Z490 mobo and i5-10500 or i5-10600 CPU. Maybe Asus Prime Z490-P, Gigabyte Z490 Gaming X or ASROCK Z490M PRO4? Memory 16GB G.Skill Ripjaws V DDR4-3600 or Corsair Vengeance LPX CMK16GX4M2D3600C18? I ruled out AMD for simplicity and compatibility reasons. Please share Your opinions and advises. I'm looking for specific mobo model and maybe some other options in that price range. Best regards, Goran0 points
-
Idem here with Z390 Aorus Master when try to boot USB Big Sur installer.0 points
-
Just finished trying out every Unlocker version listed - 3.0.2, 3.0.3 and MK-unlocker - none of these work on Workstation 15.5.6.16341506. The same error is generated in the install script every time: GOS Patching: C:\Program Files (x86)\VMware\VMware Workstation\vmwarebase.dll Traceback (most recent call last): File "unlocker.py", line 401, in <module> main() File "unlocker.py", line 397, in main patchbase(vmwarebase) File "unlocker.py", line 306, in patchbase f = open(name, 'r+b') PermissionError: [Errno 13] Permission denied: 'C:\\Program Files (x86)\\VMware\\VMware Workstation\\vmwarebase.dll' [20096] Failed to execute script unlocker Where or when will a current/usable version be available?0 points
-
end of hackintoshes0 points