Leaderboard


Popular Content
Showing content with the highest reputation on 07/02/2020 in all areas
-
Anyone wanting to boot an existing Big Sur install with Clover can do it now. Necessary files have been published and it got a little easier: https://www.hackintosh-forum.de/forum/thread/49311-macos-11-bigsur-dev-beta-clover-patch/?postID=619527#post619527 Make sure you have Big Sur already installed on your drive (Installer not working yet!) Use the Clover build attached to the post linked above Paste the kernel patches inside your config.plist Use latest OcQuirks, otherwise it won't boot If you don't know how to use that stuff, it isn't for you.12 points
-
Hello everyone I see with pleasure that you are all making a lot of effort and progress to have Big Sur on the PC .., also because we are talking about the first beta that soon we will see new updates of the same. The virtual machine solution is the installation with a real Mac is an alternative procedure with the sure conviction that the clover developers will release a definitive bootloader for direct installation, as is the case with previous maOS es. (mojave, Catalina). You just have to wait patiently for this new clover bootloader is to trust those who work there. I will wait like so many for this exit.6 points
-
been studying the new APFS sealing process upon installation on a real Mac, and there is big challenges ahead to implement disabling SIP3, and the introduction of ramrod like iOS, I wonder if we may have to go back to the old days of updating the OS via Delta/Combo patched updates. Interesting times ahead for Hackintosh.4 points
-
when it works, you will know. it will be front page everywhere and all that people are talking about3 points
-
Managed to install after quite a bit of faffing about. Couldn't do it without the invaluable help and guidance of Señor MaLd0n. Restored the dmg to a ssd drive and slight tweak to my config.plist to enable booting from the drive.
 3 points
 -
Works! I started big su-ppositor with Clover PS: my hack Z3702 points
-
I’m not sure but this what I do in BigSur Hackie to activated atheros40 csr-active-config : 77080000 1. run script (thanks to jackluke) BigSur prelinkedkernel fix2.command --> reboot 2. run kext-droplet (thanks to chris1111) drag n drop IO80211Family.kext —> reboot 3. open terminal sudo kextunload /System/Library/Extensions/IO80211Family.kext sudo kextload /Library/Extensions/IO80211Family.kext sudo kextload /Library/Extensions/IO80211Family.kext/Contents/PlugIns/AirPortAtheros40.kext and bump .. wifi ON
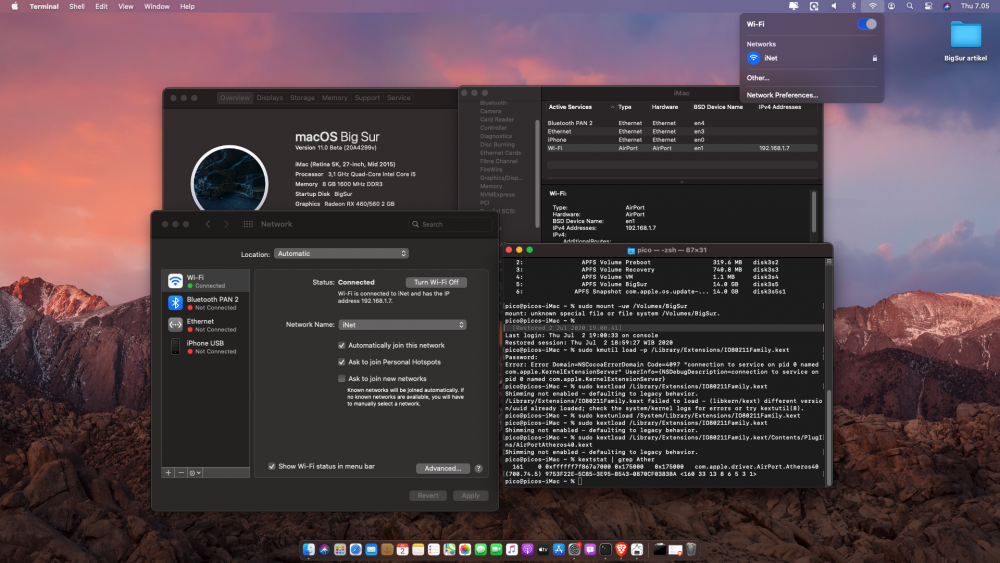 2 points
 -
It doesn't need to. The user can take any .icns file, rename it to .VolumeIcons.icns and place at the root of the volume, then set PickerAttributes in config.plist to a value that reads them. * Check OpenCore documentation for correct details.2 points
-
Use this guide. Multiple users reported success ( Including Z490 ).2 points
-
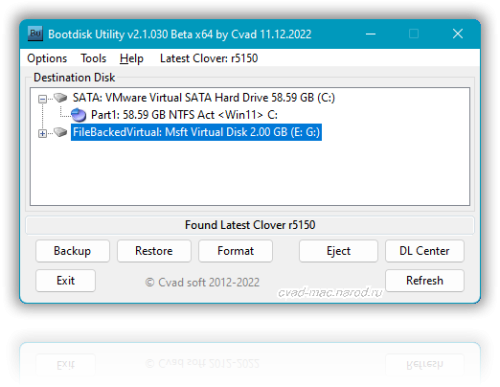
Version v2.1.2022.030b.X64
42,518 downloads
Make bootable USB Flash Disk for MAC OS X with Latest Clover bootloader revision fast and easy by one click! under OS Windows. Special utility from cvad & russian MAC community for new hackintosh users. Enjoy... For more information and complete instructions please see this topic. Anyone who likes the program, please support its Community Score. Feel free to "Rate File"1 point -
Some boards do not have a visible option for CFG Lock. For those cases the Bootloaders offer options to not write to the MSR. An other way is to disable CFG Lock in the BIOS despite the fact that there is no option available in the user interface. One way to do so is to use UEFITool, ifrextract and a patched Grub. Which is not only cumbersome, also it will work only, if the storage used for CFG Lock is in a certain varstore. Generally speaking CFGLock.efi does what those tools do, but the only user interaction needed is to confirm that you want to toggle the CFG Lock value (on to off/off to on) and it works regardless where the CFG Lock option resides, as long as the BIOS has a CFG Lock option - hidden or not - in their HiiDatabase. It is an EFI Application. Install it in the Tools folder of your OpenCore EFI and enter it under Misc->Tools in the config.plist. The EFI must not be able to boot MacOS, it must just be able to show the picker. It should also run as an application from the UEFI shell, but I haven't tested this. CFGLock.efi.zip1 point
-
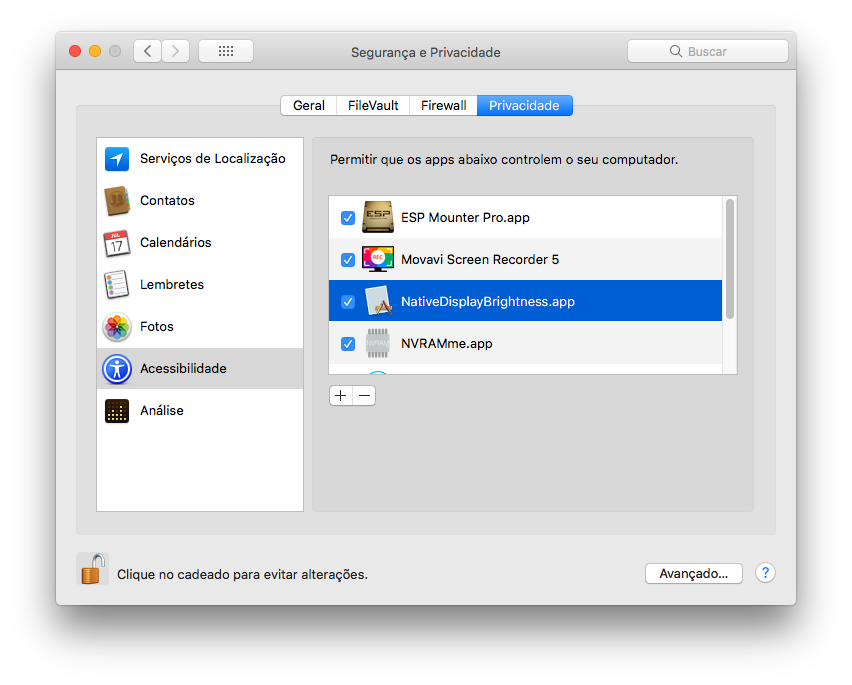
First... If you need DSDT edits... -Extract tables with F4 key in Clover boot screen! -Run it and send me files! RunMe.app Installation --Create a bootable copy of El Capitan / Sierra / High Sierra / Mojave https://github.com/chris1111/Create-Install-Media/releases --Install Clover in USB stick https://github.com/CloverHackyColor/CloverBootloader/releases --Replace with my Clover folder https://www.olarila.com/topic/5676-clover-folder-for-all-chipsets/ --Install EL Capitan / Sierra / High Sierra and boot into system! Post Installation --Install Clover and replace with my folder https://www.olarila.com/topic/5676-clover-folder-for-all-chipsets/ --Reboot and activate video! Bingo! Now you need a fine tune! DSDT Time! My DSDT GA P35-DS3 DSDT.MaLd0n.zip Patches -FIX ERRORS AND WARNINGS -HPET -SATA -SLPB -DARWIN -LPC -HDEF -RTC -EHCI -UHCI -IRQs -SBUS -BUS1 -MCHC -ALS0 -SHUTDOWN -LAN -EC -PNLF --Native Power Management Use Clover, check Generate P and C States --Brightness Install .app, select the required permission and reboot. Work in F1 / F2 keys! NativeDisplayBrightness.app.zip https://github.com/Bensge/NativeDisplayBrightness/releases *in some cases .app don't work, check patches in config.plist inside Clover folder Post Install --AUDIO Device HDEF + AppleAlc + Lilu --install Lan driver by Mieze -Atheros http://www.insanelymac.com/forum/files/file/313-atherose2200ethernet/ -Intel http://www.insanelymac.com/forum/files/file/396-intelmausiethernet/ -Realtek http://www.insanelymac.com/forum/files/file/88-realtekrtl8111-binary/ --Links -FakeSMC https://bitbucket.org/RehabMan/os-x-fakesmc-kozlek -Audio https://github.com/vit9696/AppleALC http://www.insanelymac.com/forum/topic/293863-applehda-patch-requests/ -Credits and thanks to the old and new people in the community who developed patches, kexts and bootloaders! Slice, Kabyl, usr-sse2, jadran, Blackosx, dmazar, STLVNUB, pcj, apianti, JrCs, pene, FrodoKenny, skoczy, ycr.ru, Oscar09, xsmile, SoThOr, RehabMan, Download-Fritz, Zenit432, cecekpawon, Intel, Apple, Oracle, Chameleon Team, crazybirdy, Mieze, Mirone, Oldnapalm, netkas, Elconiglio, artut-pt, ErmaC, Pavo, Toleda, Master Chief and family, bcc9, The King, PMheart, Sherlocks, Micky1979, vit9696, vandroiy2013, Voodoo Team, Pike R. Alpha, lvs1974, Austere.J, CVad and many, many, many others! We're all here to have fun and learn from each other! ENJOY!


 1 point
 -
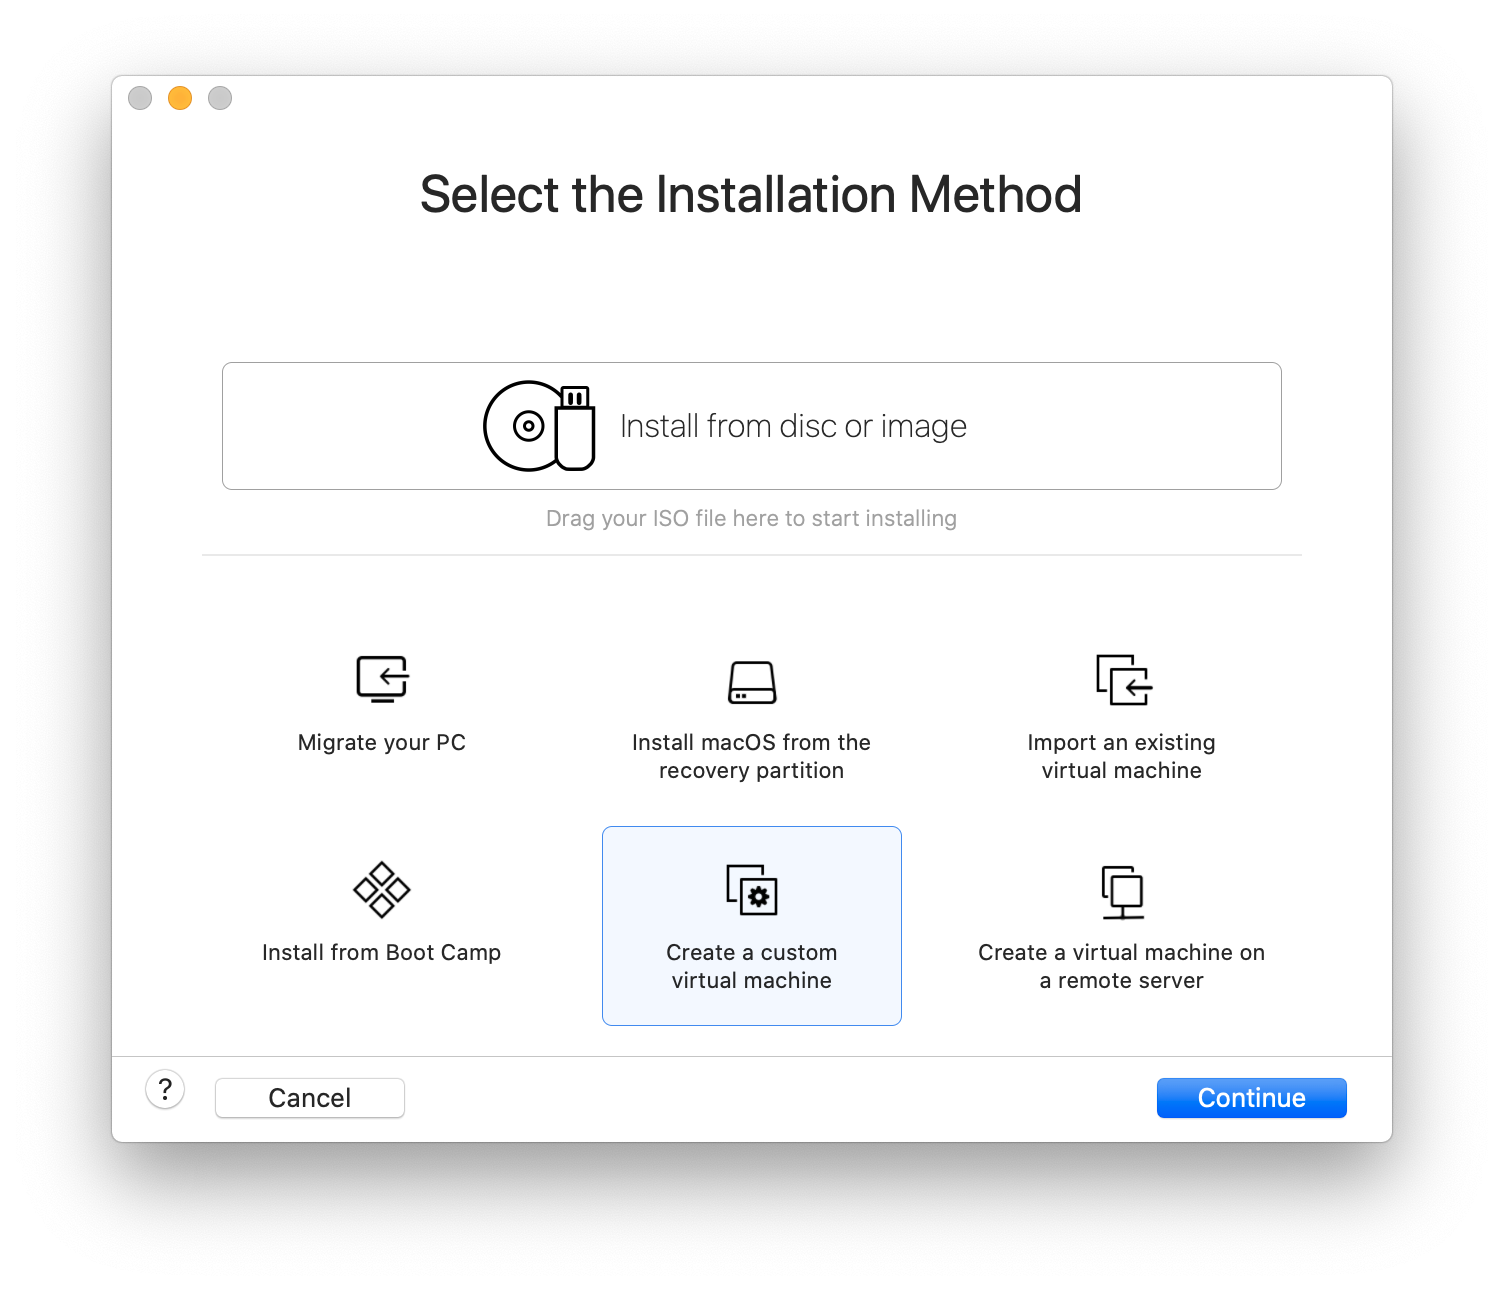
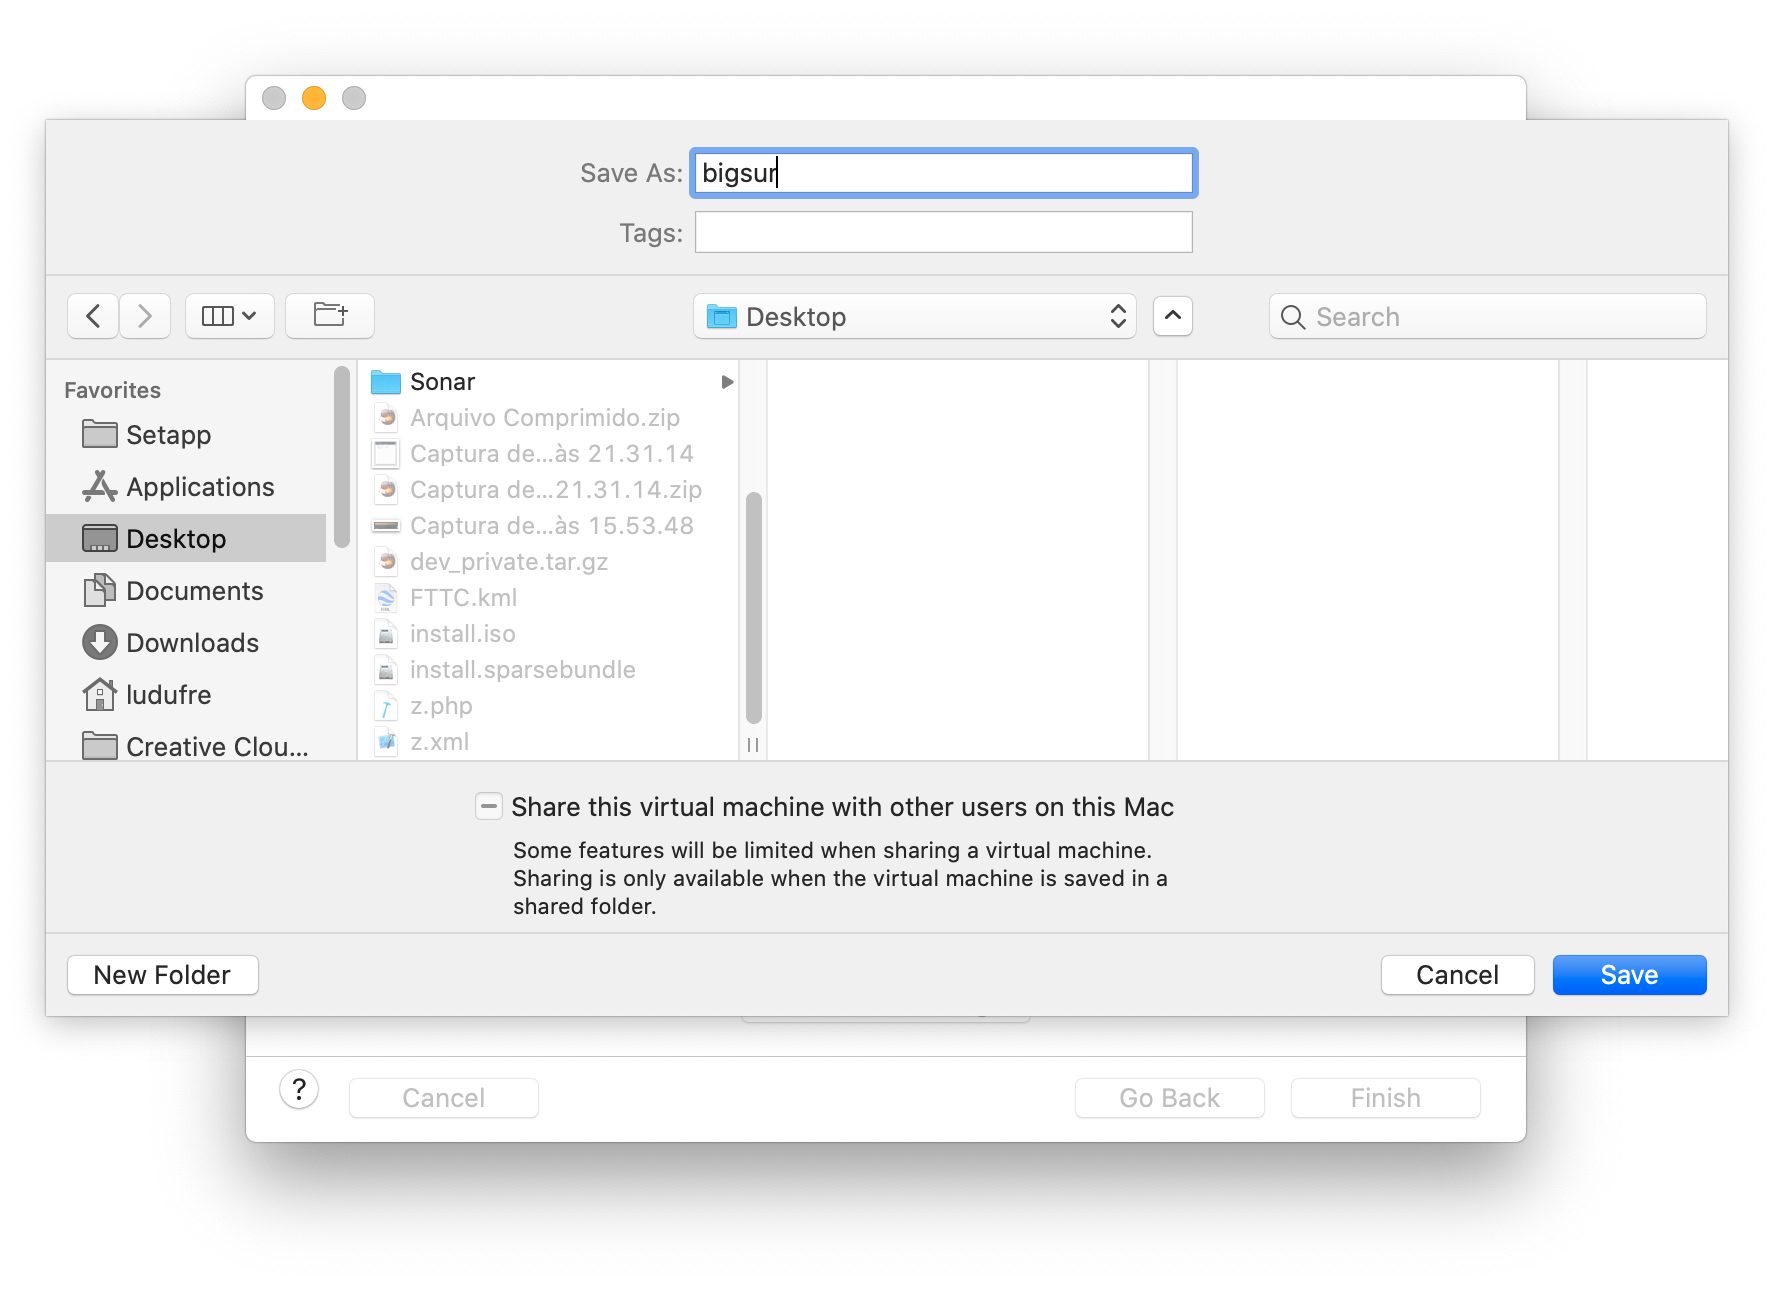
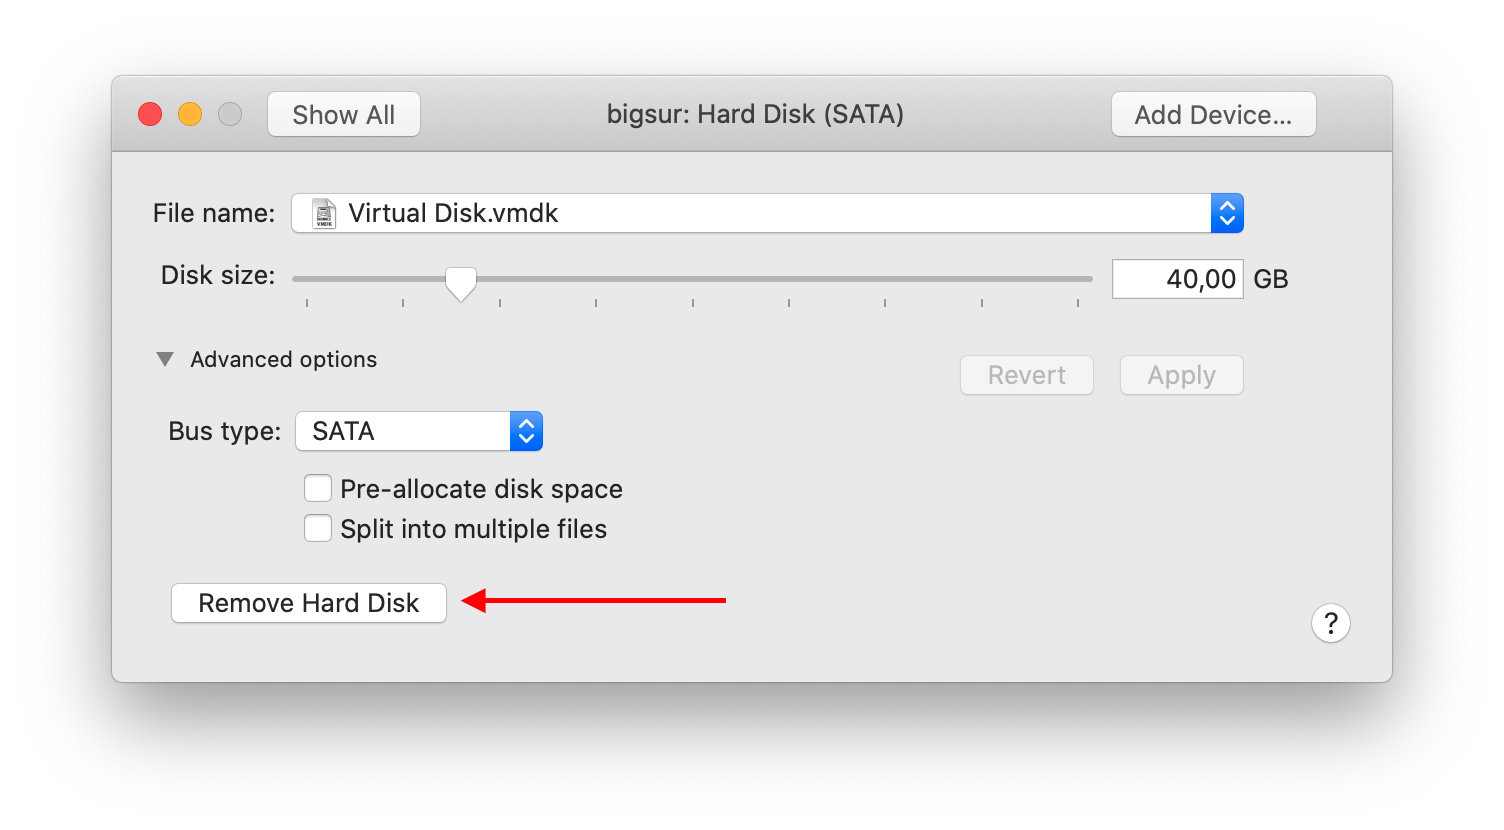
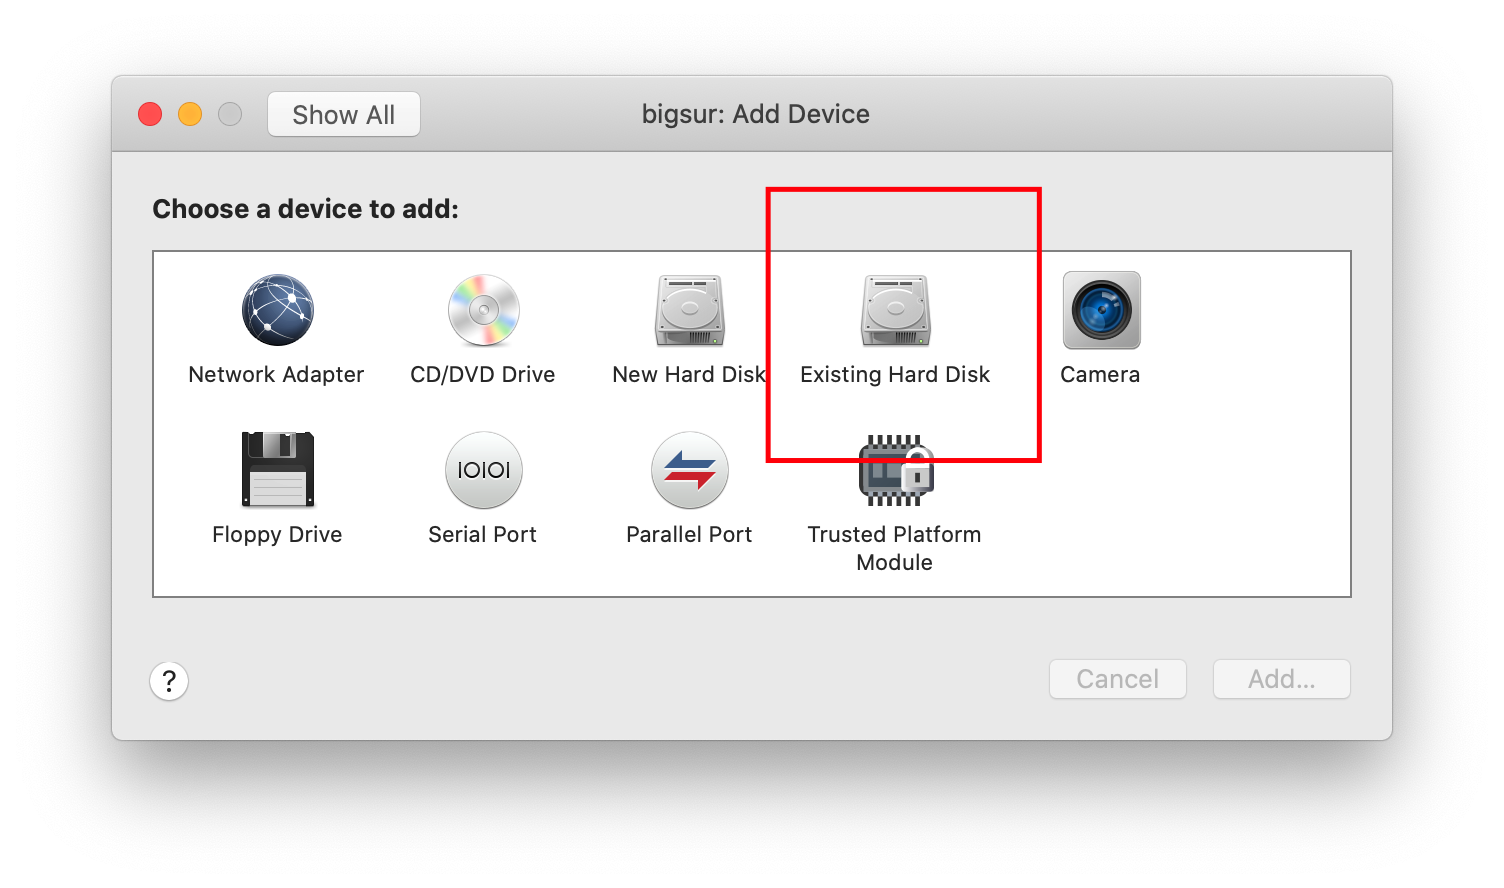
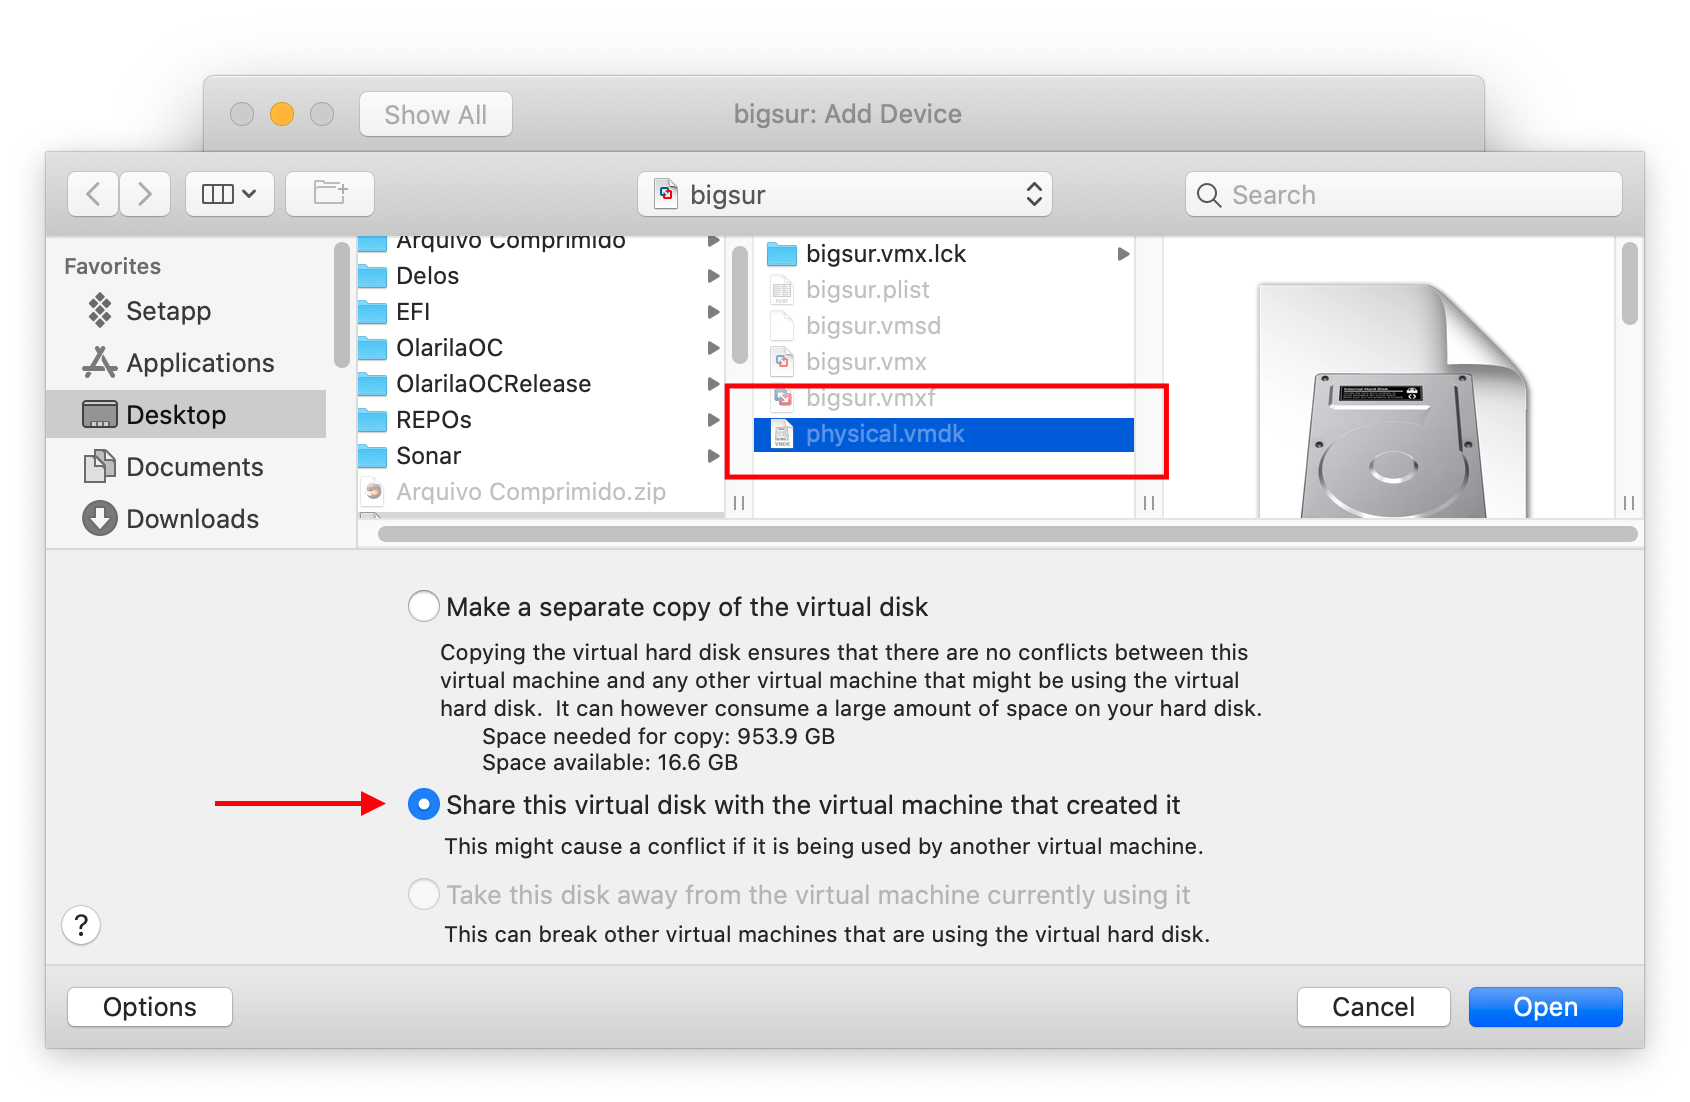
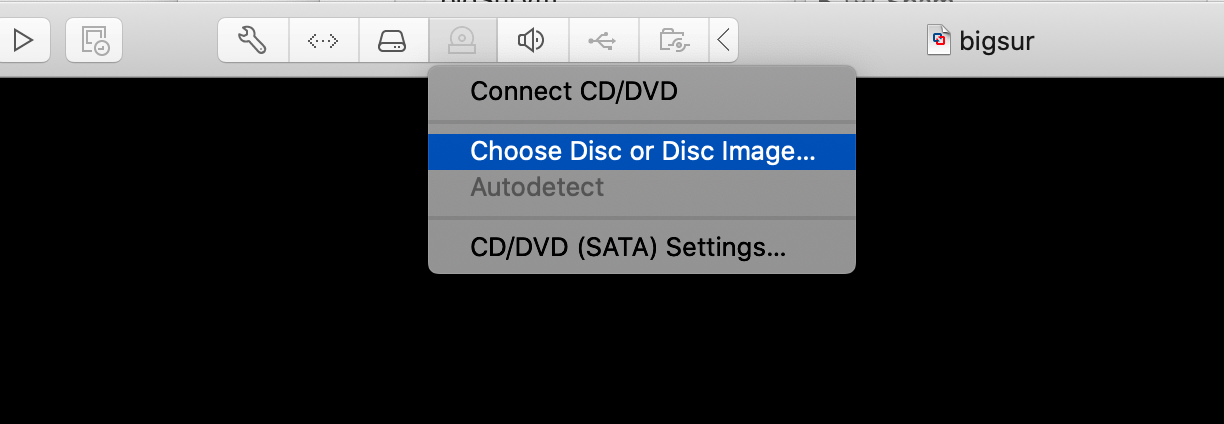
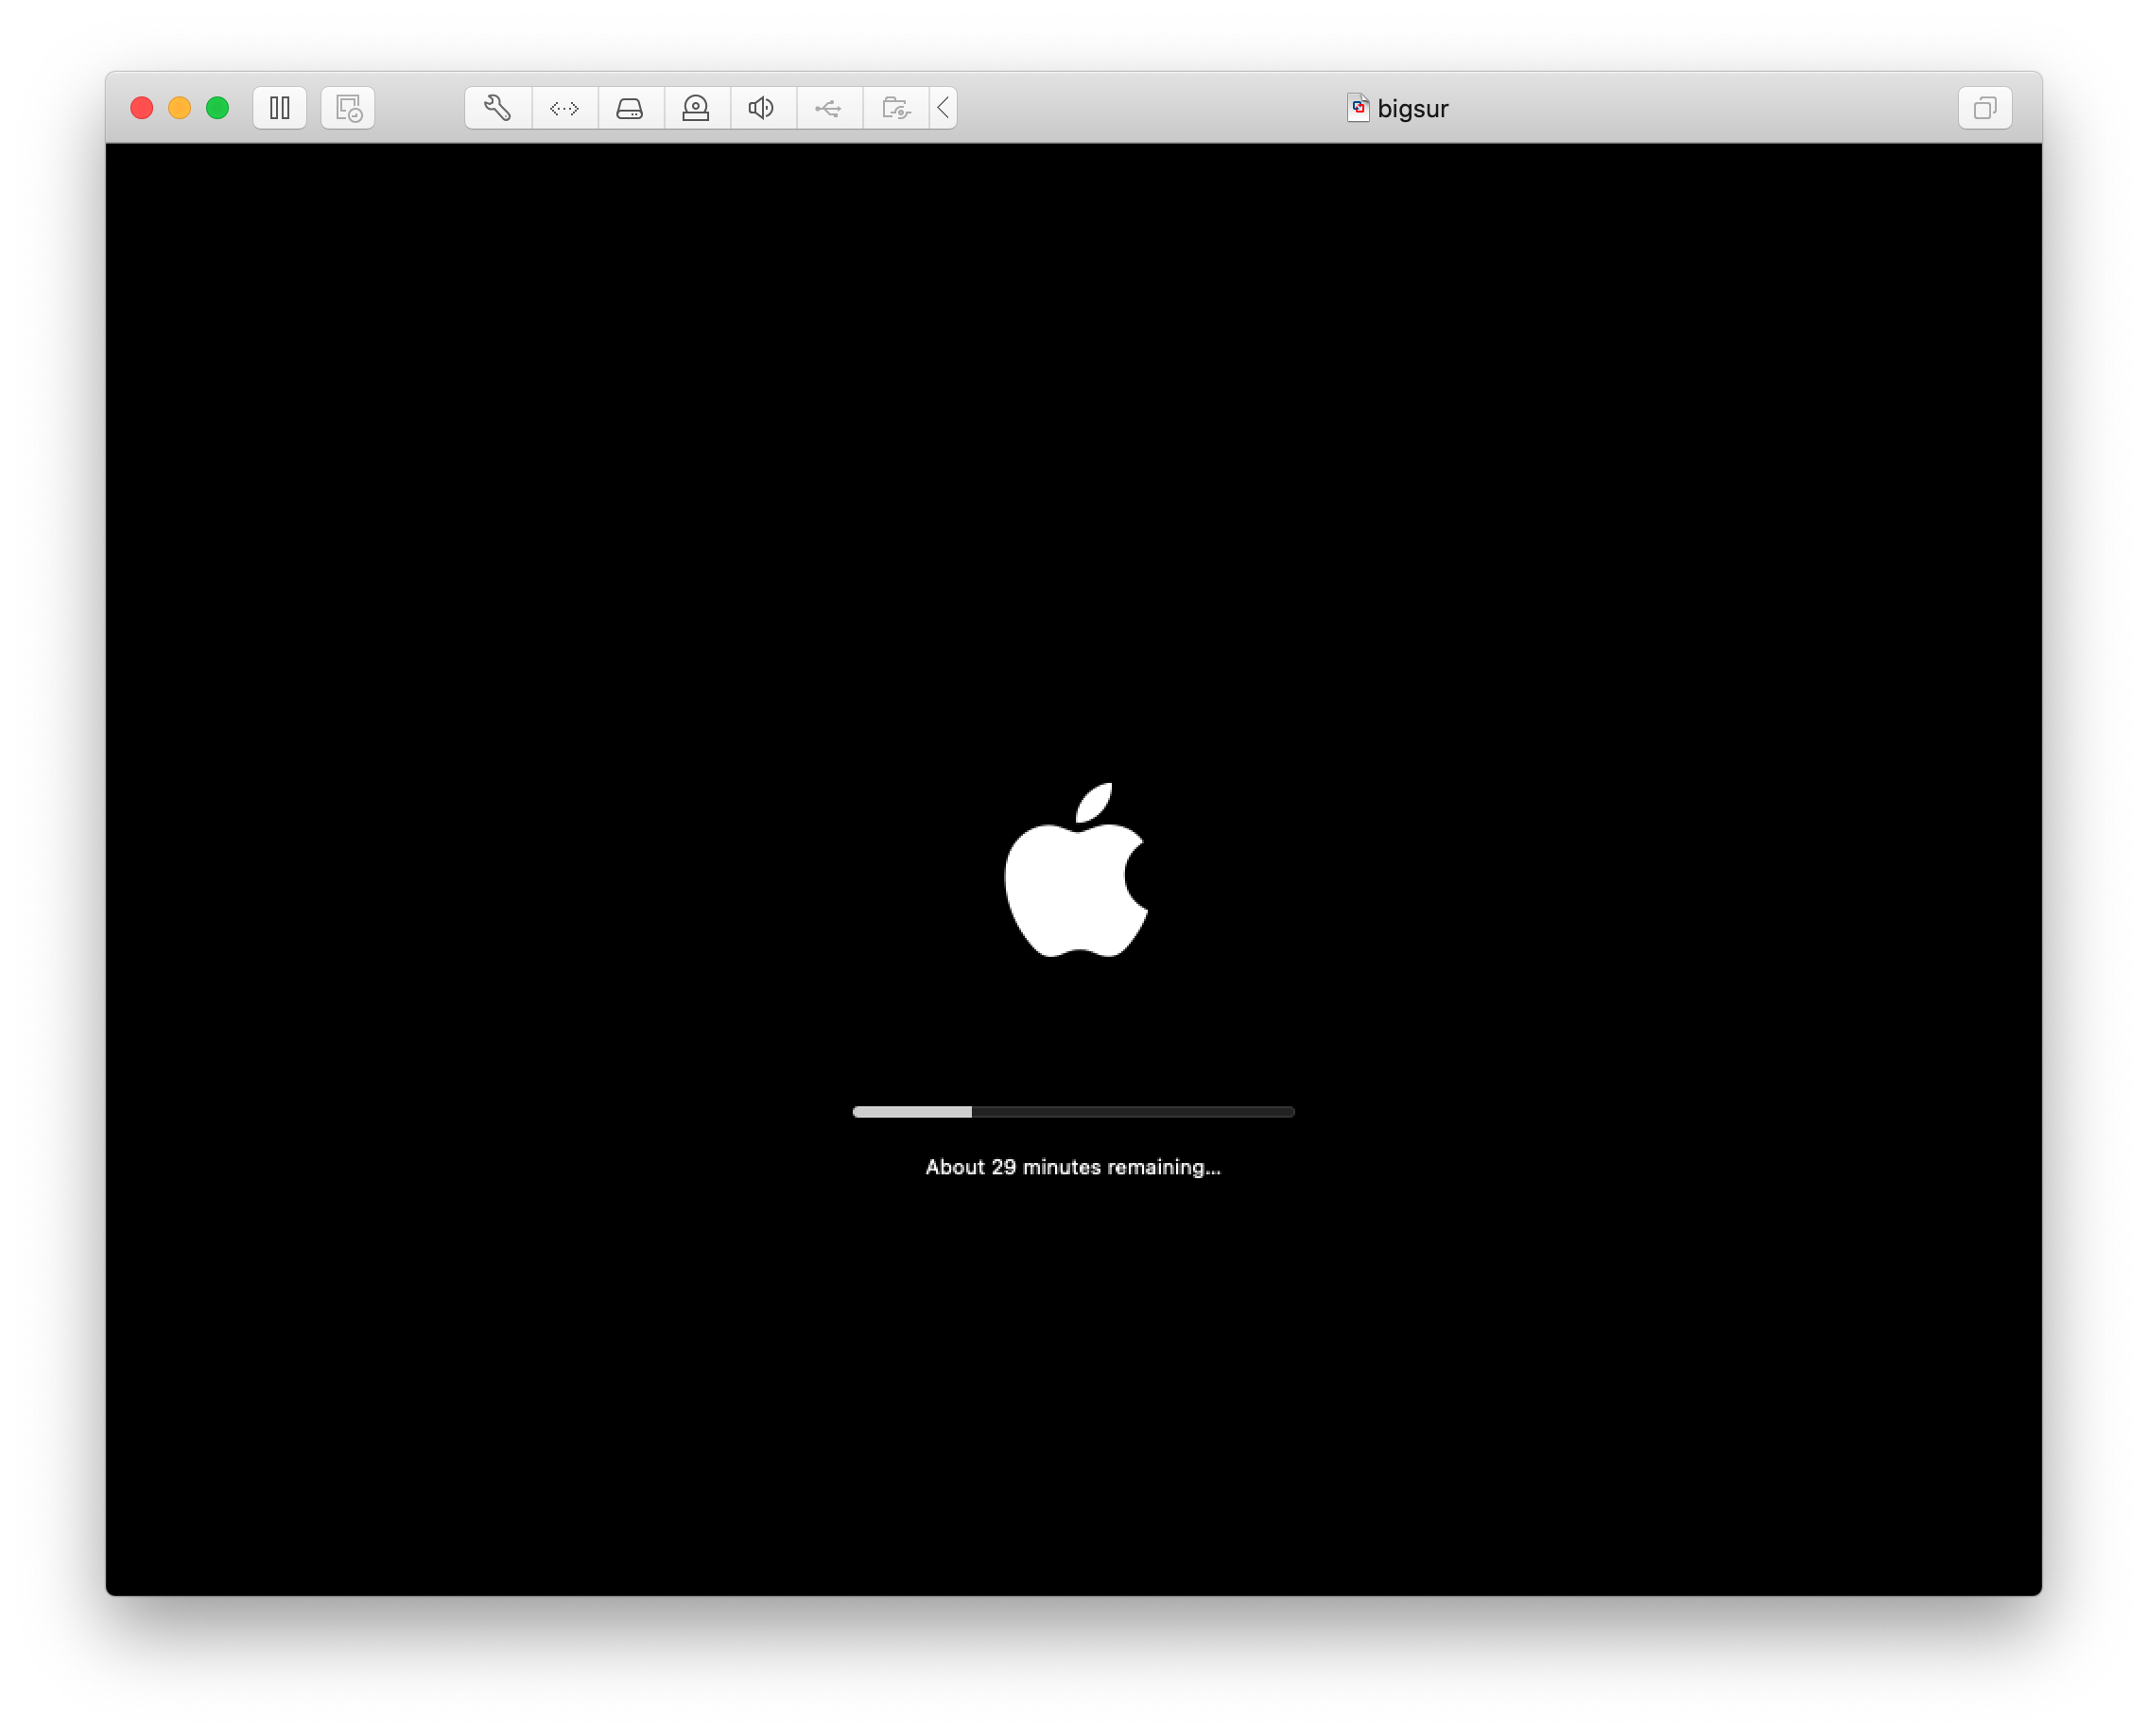
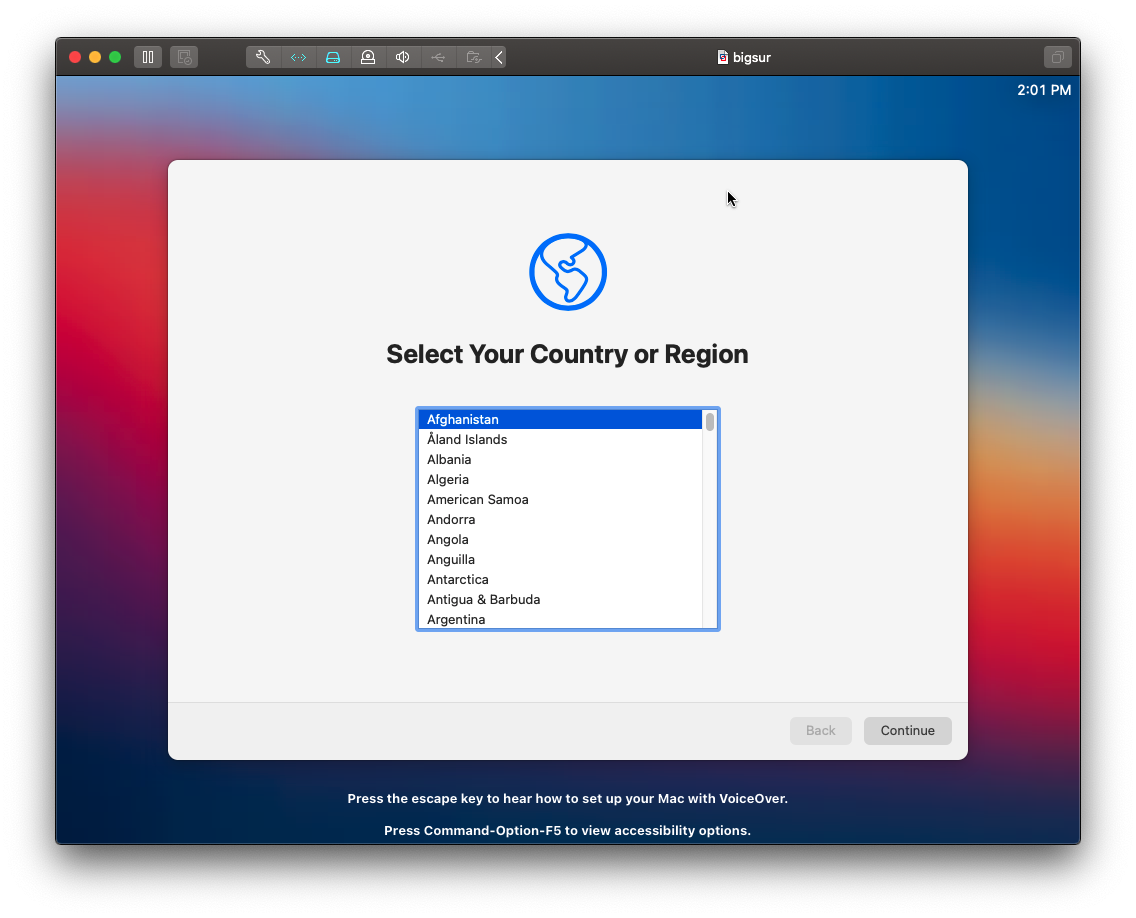
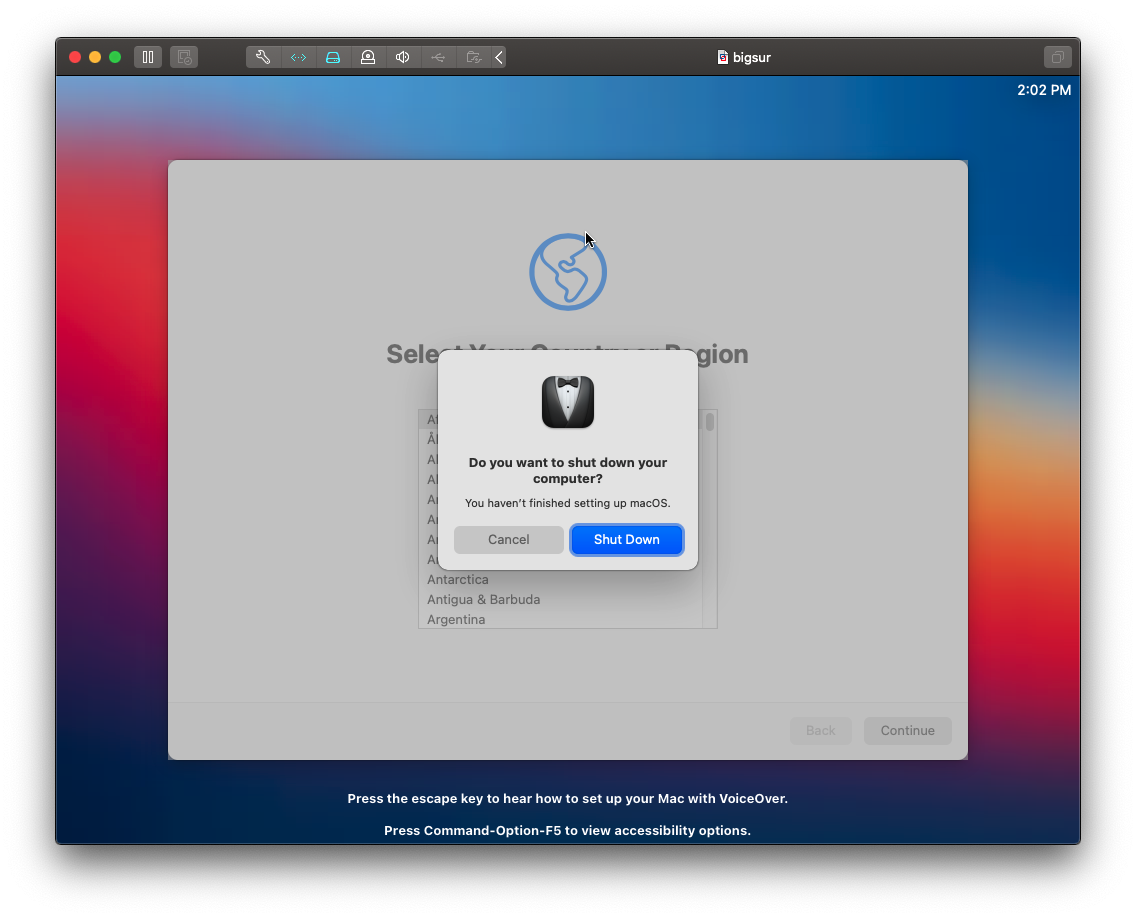
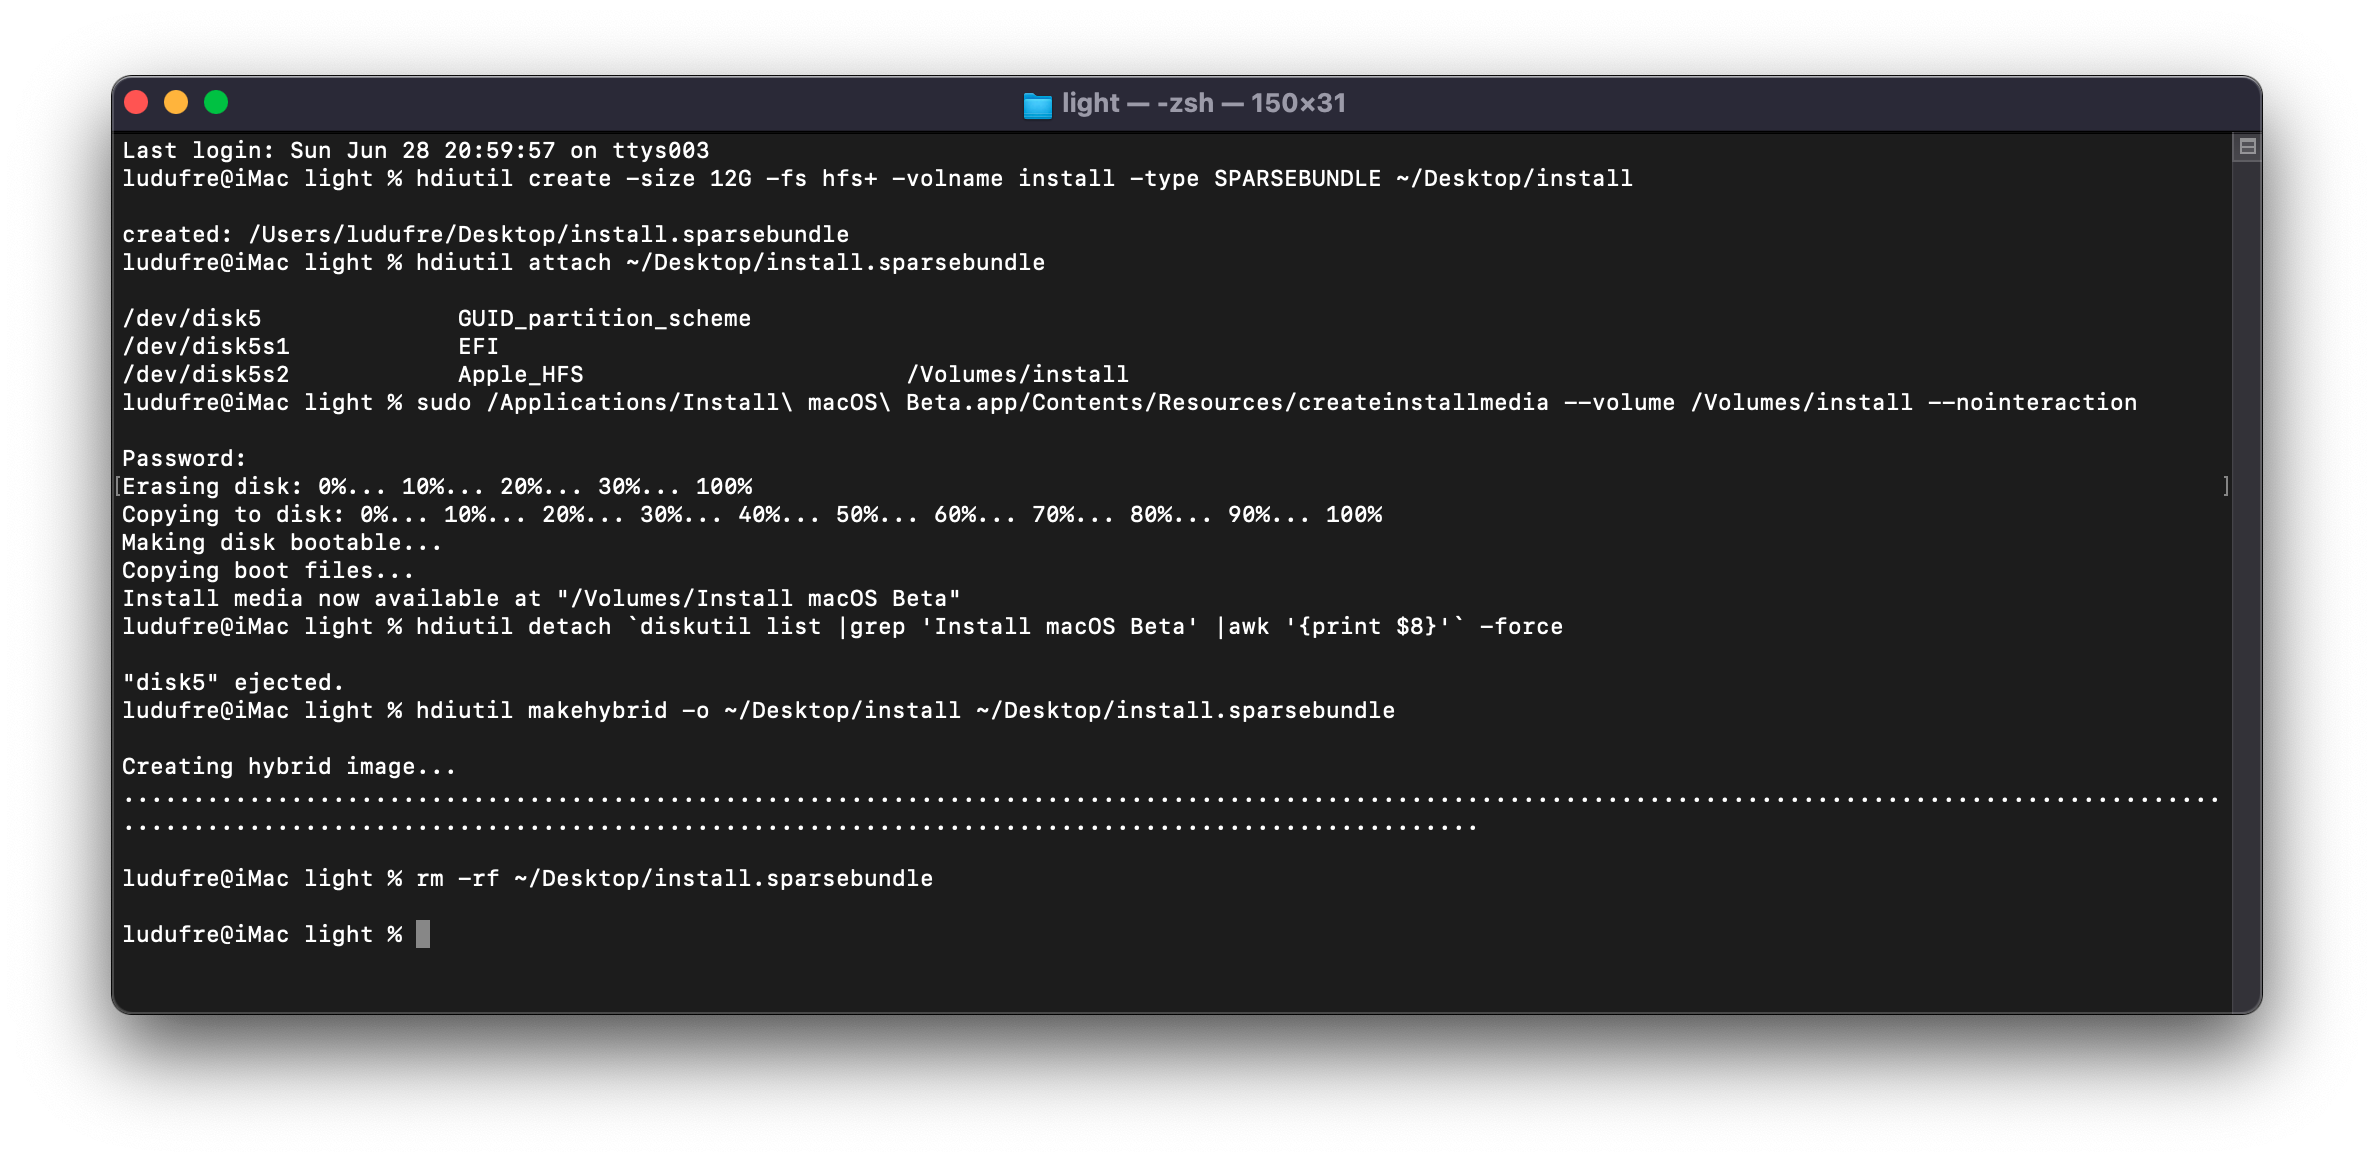
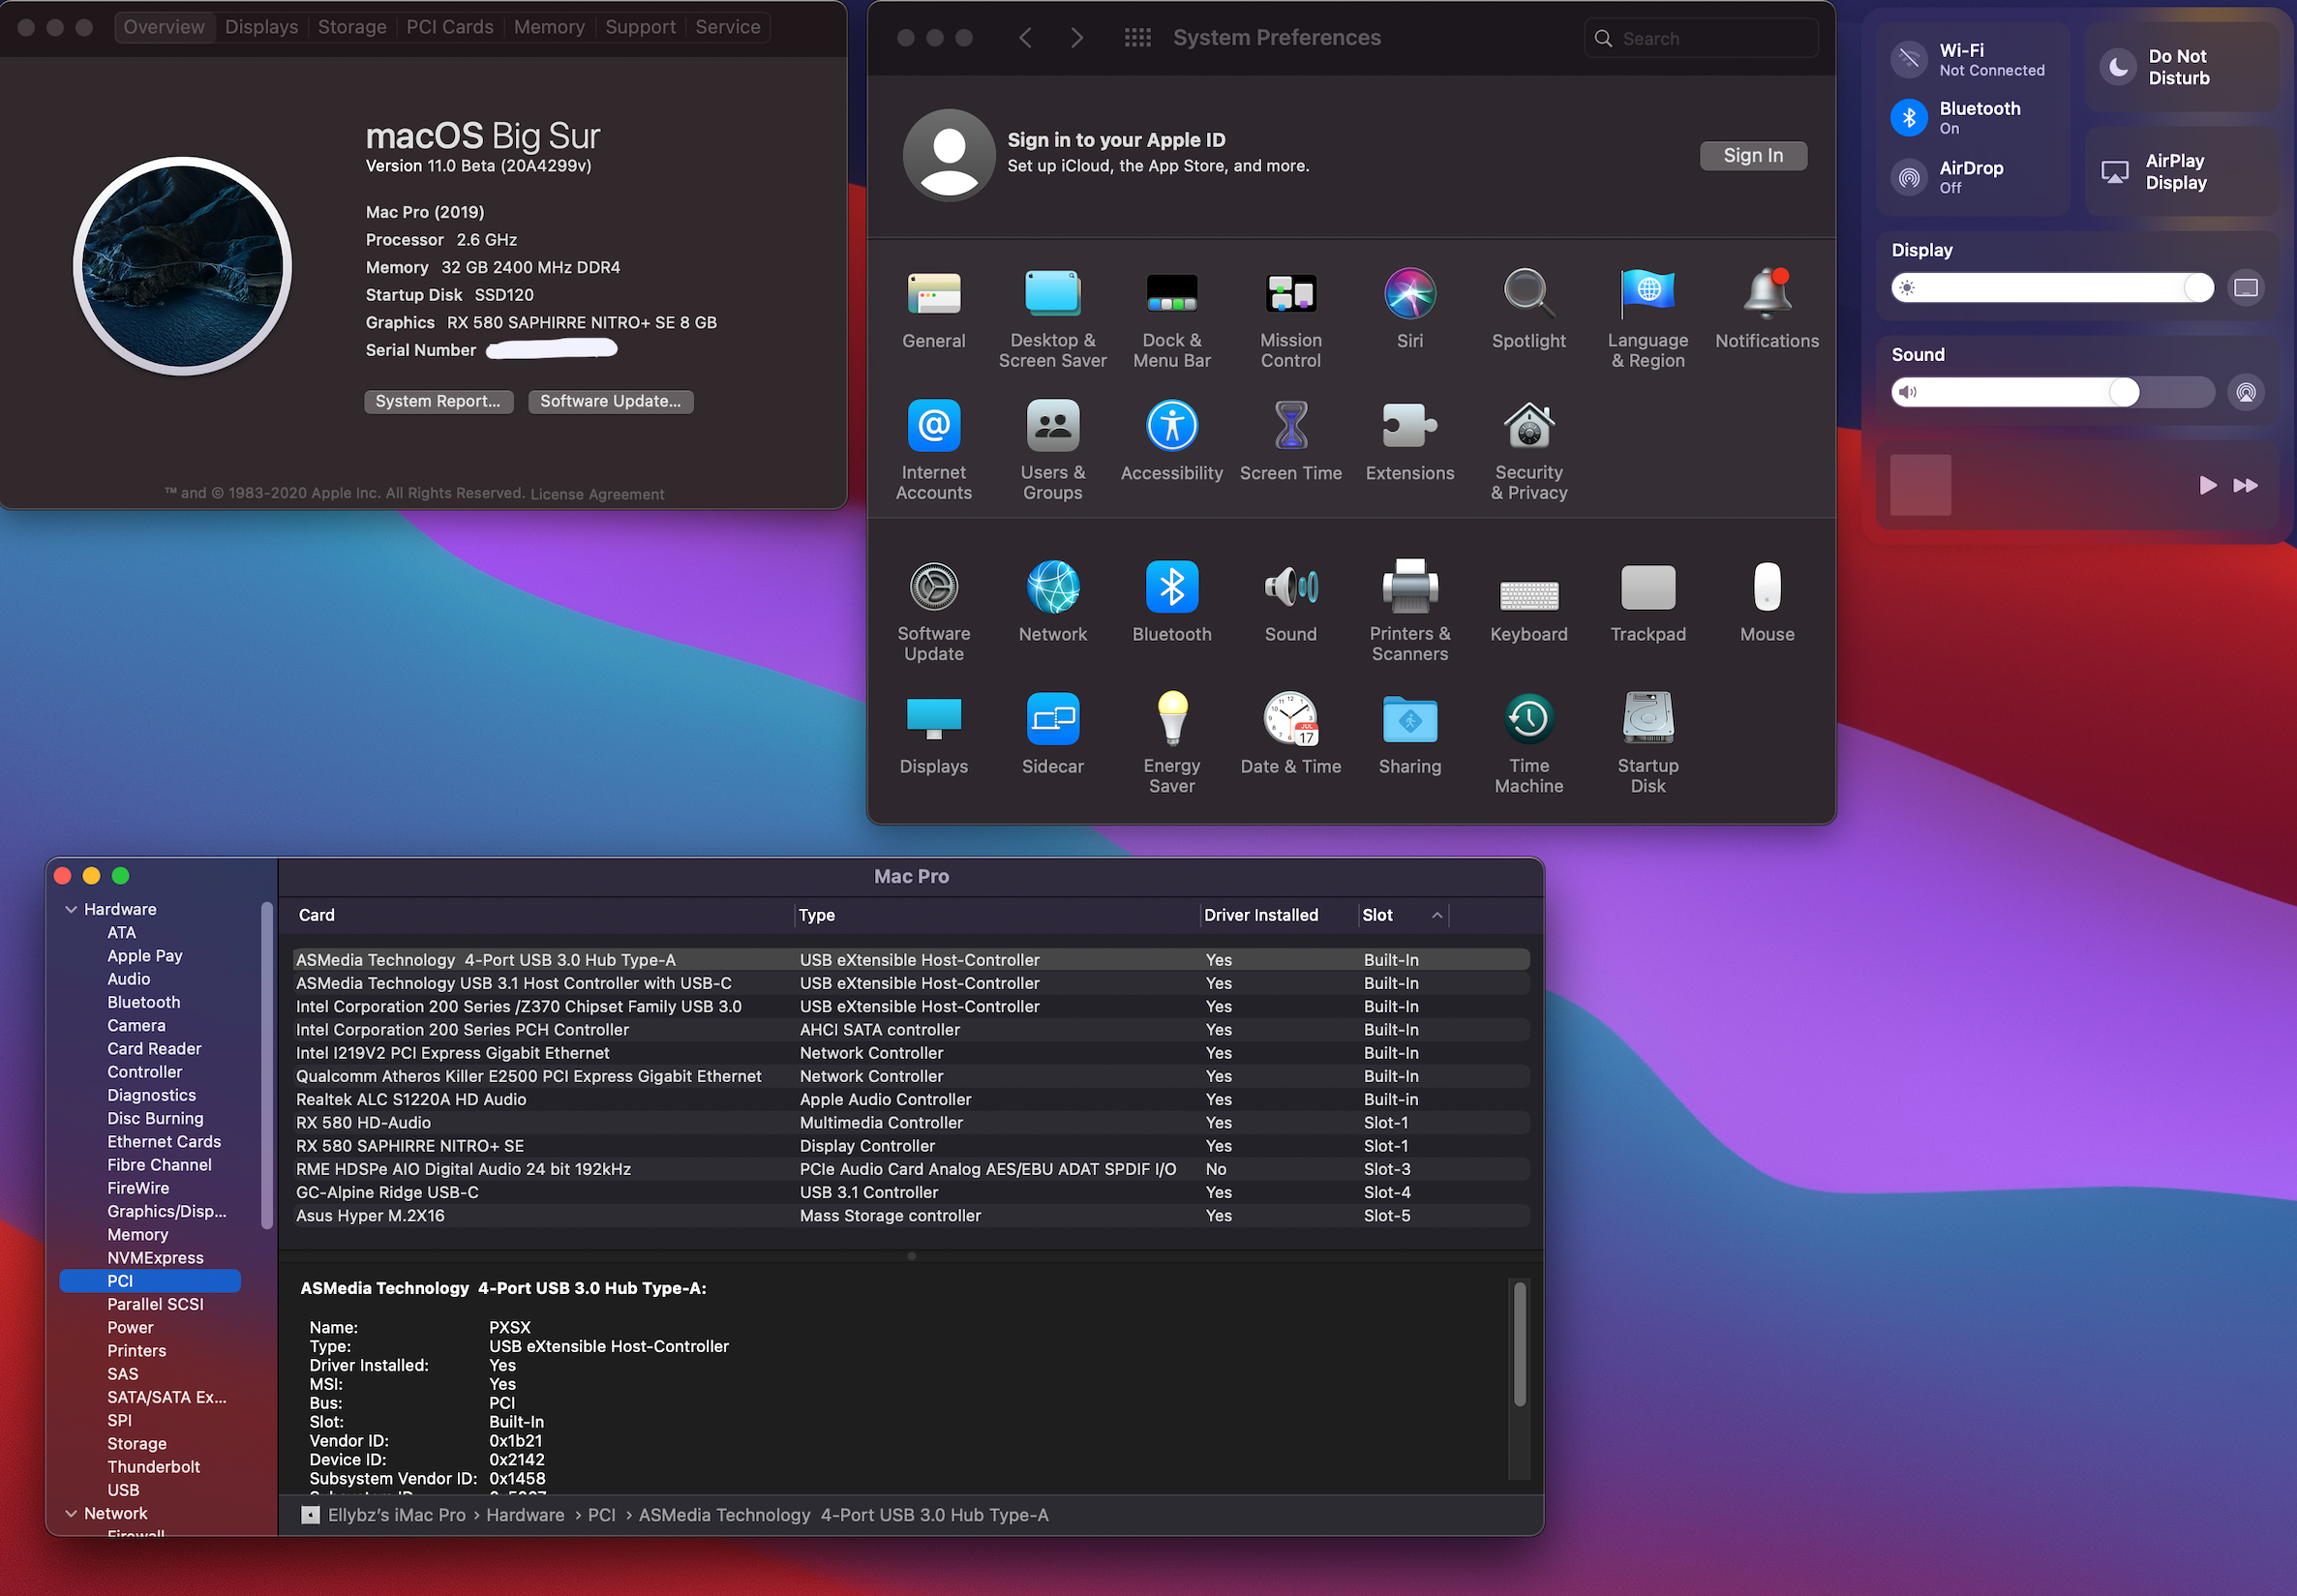
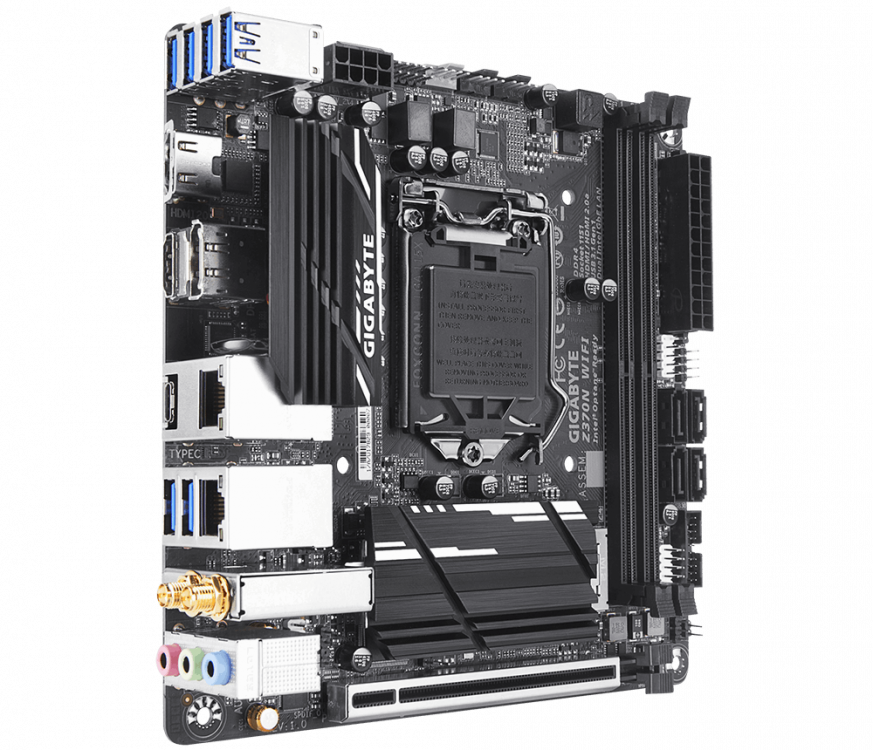
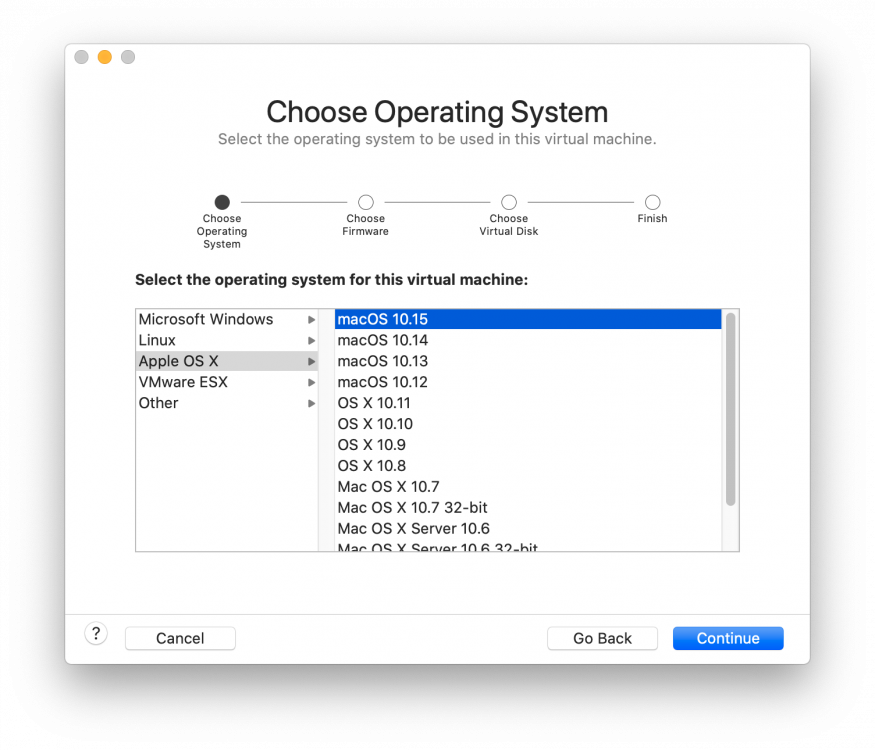
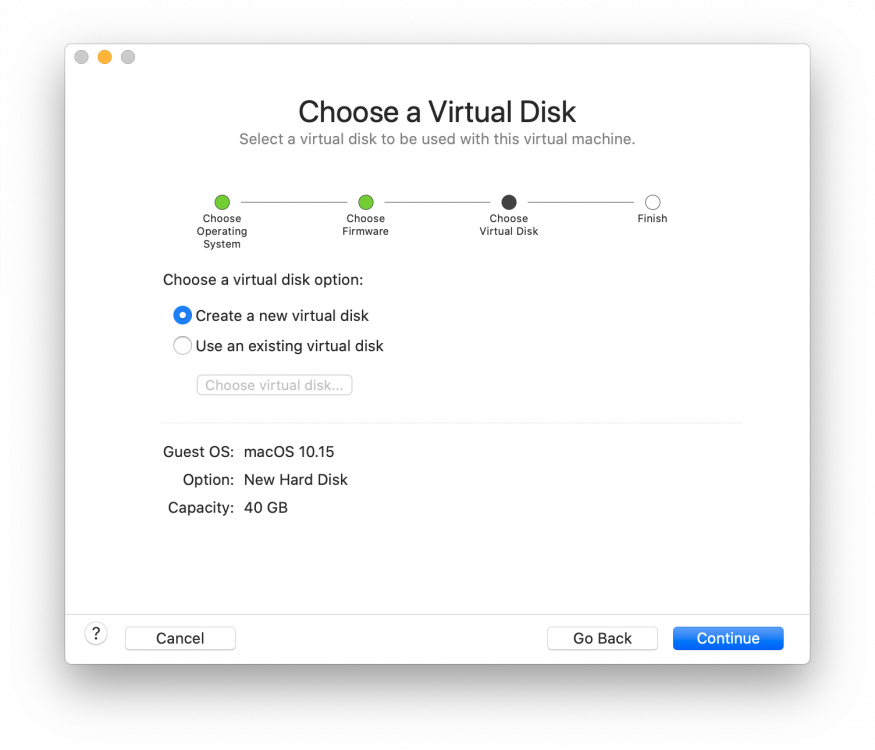
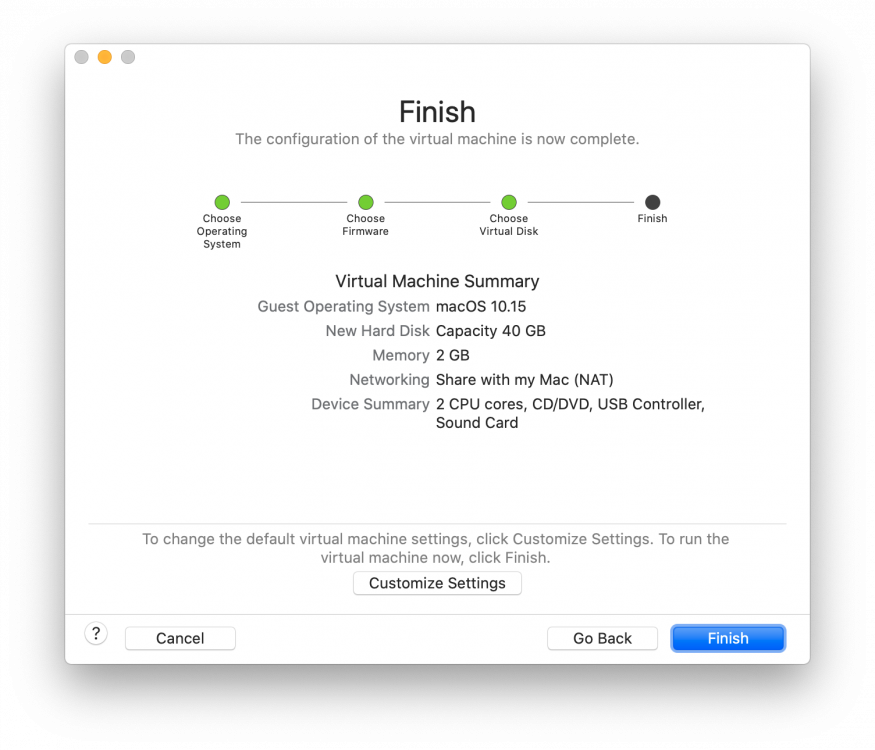
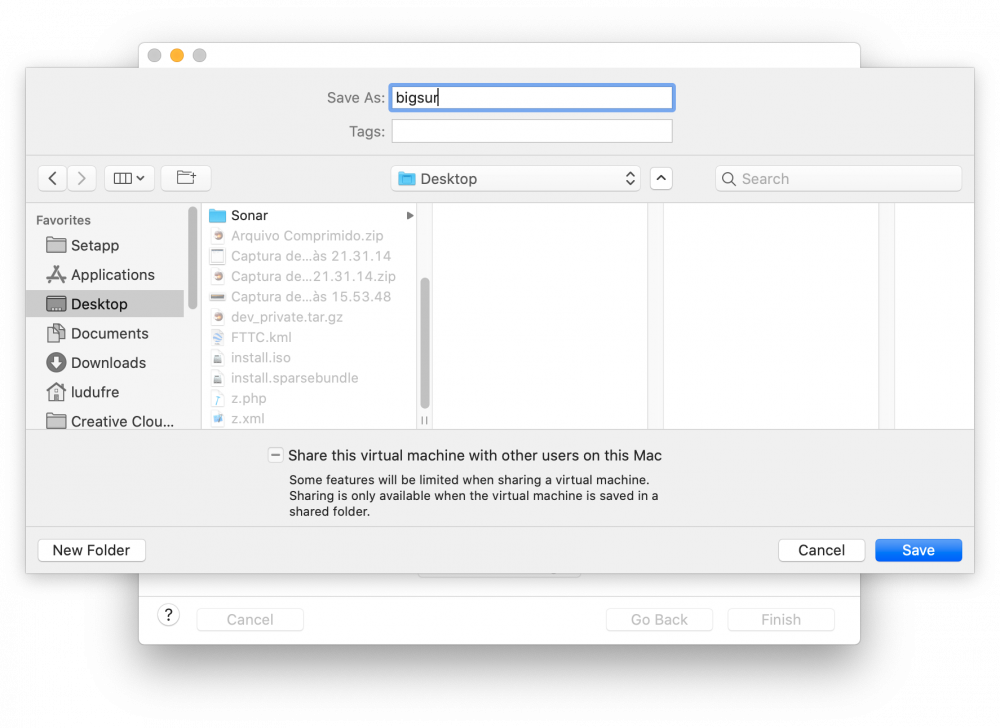
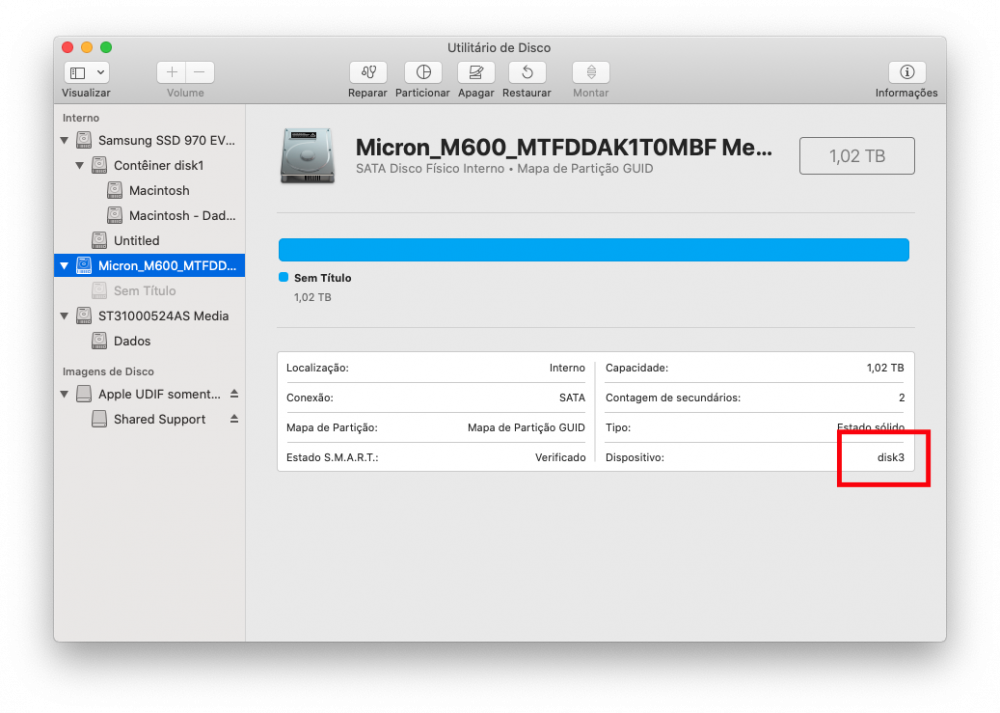
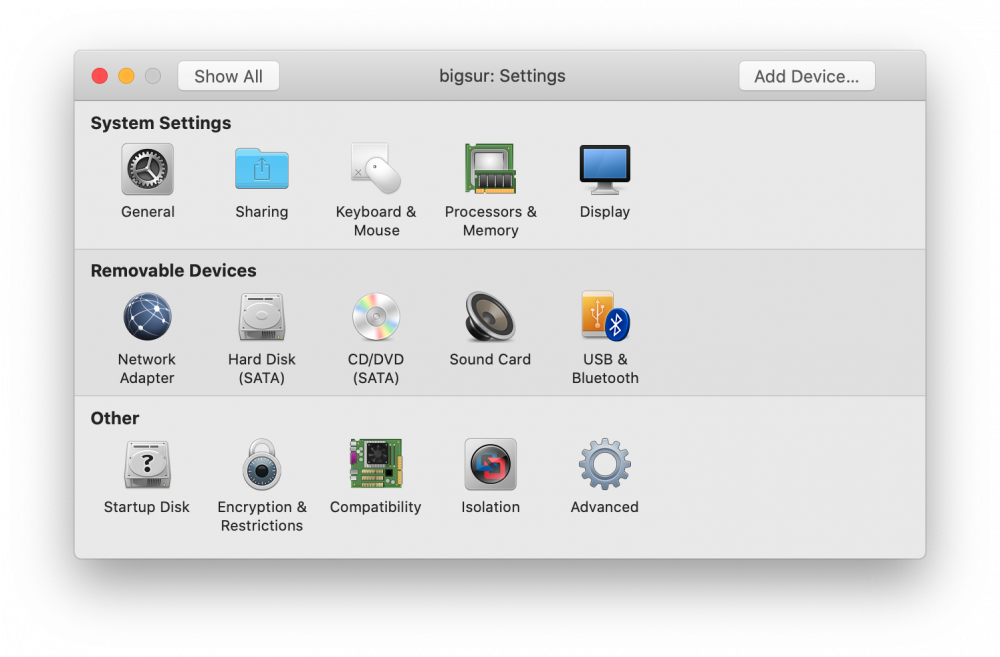
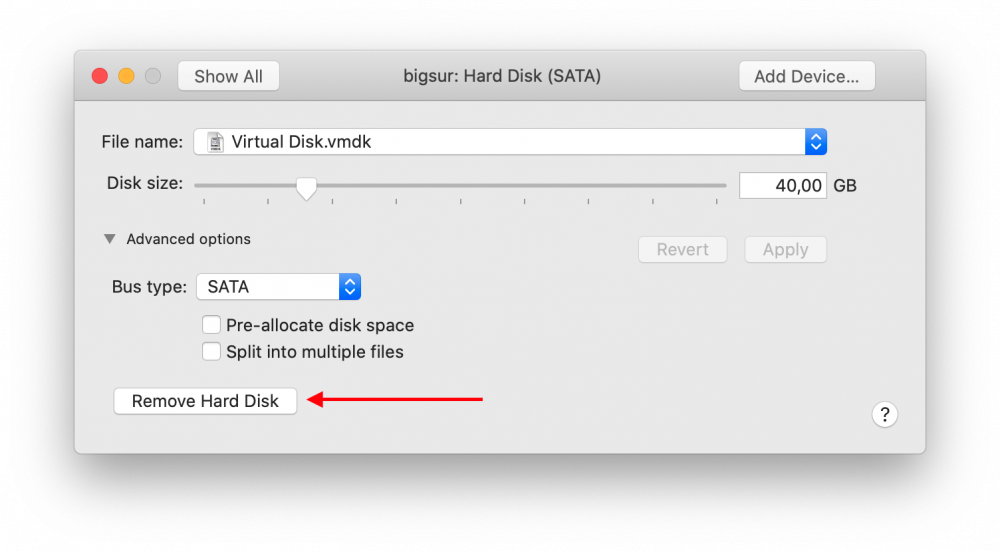
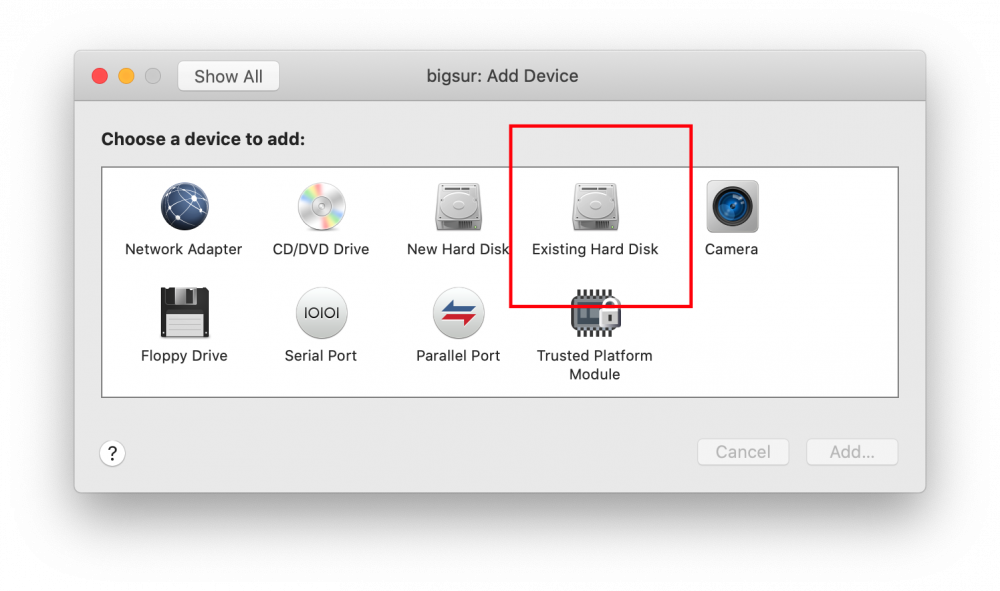
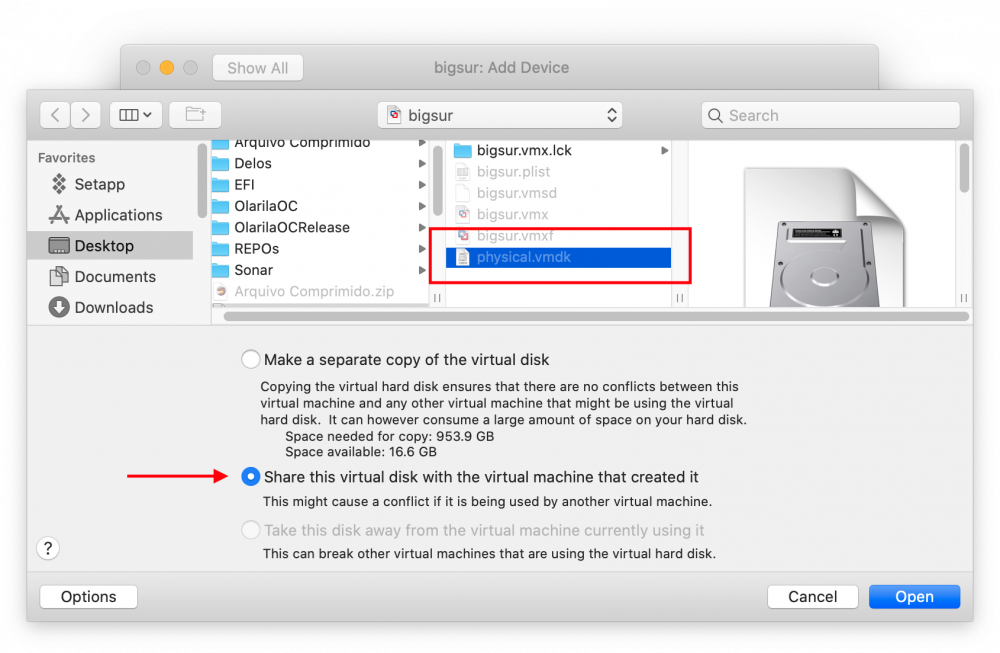
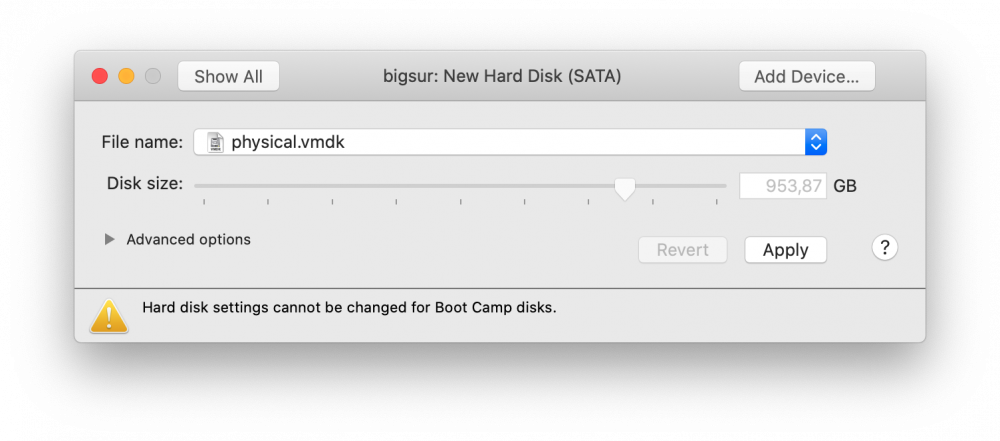
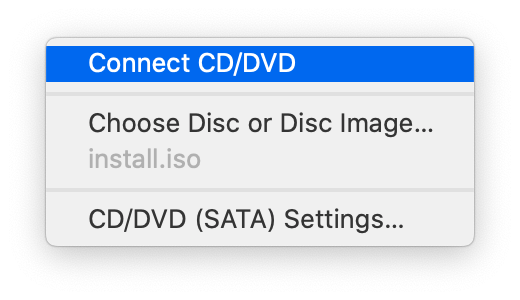
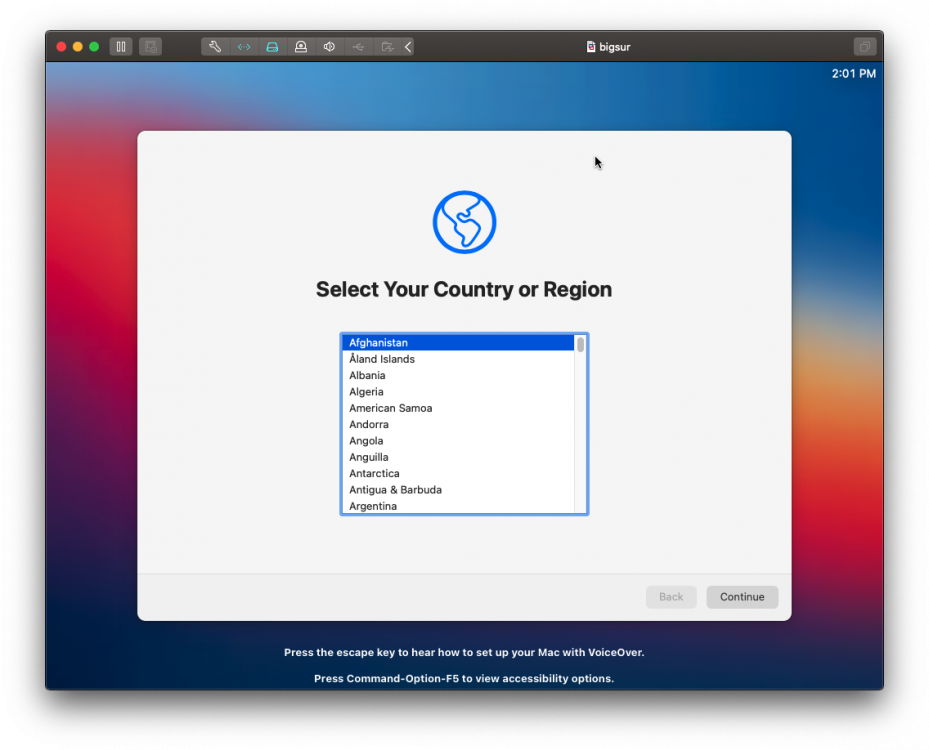
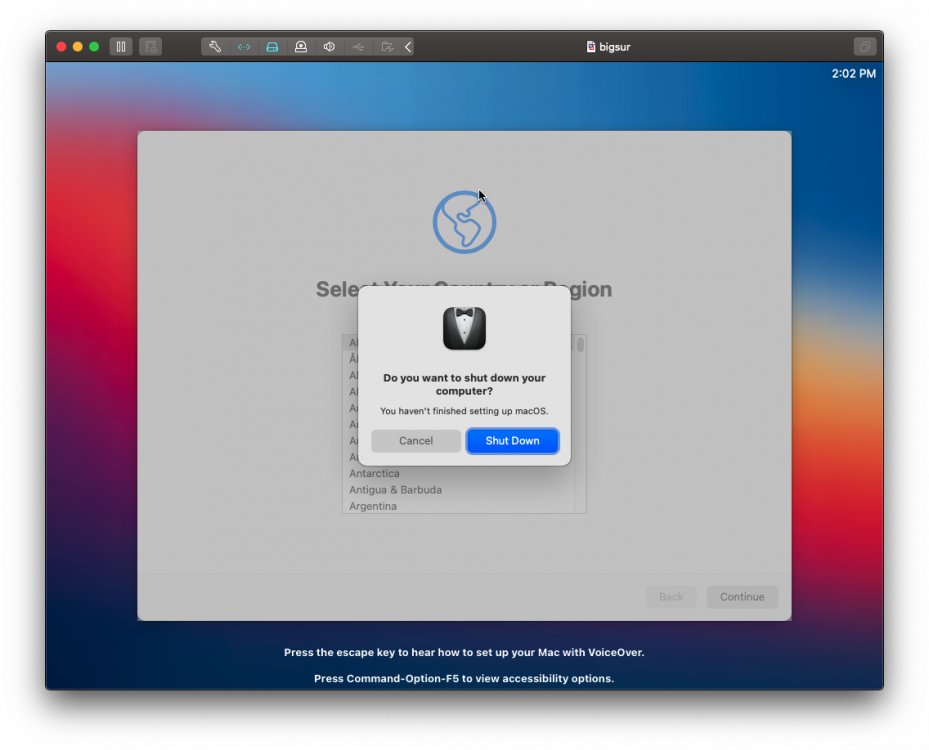
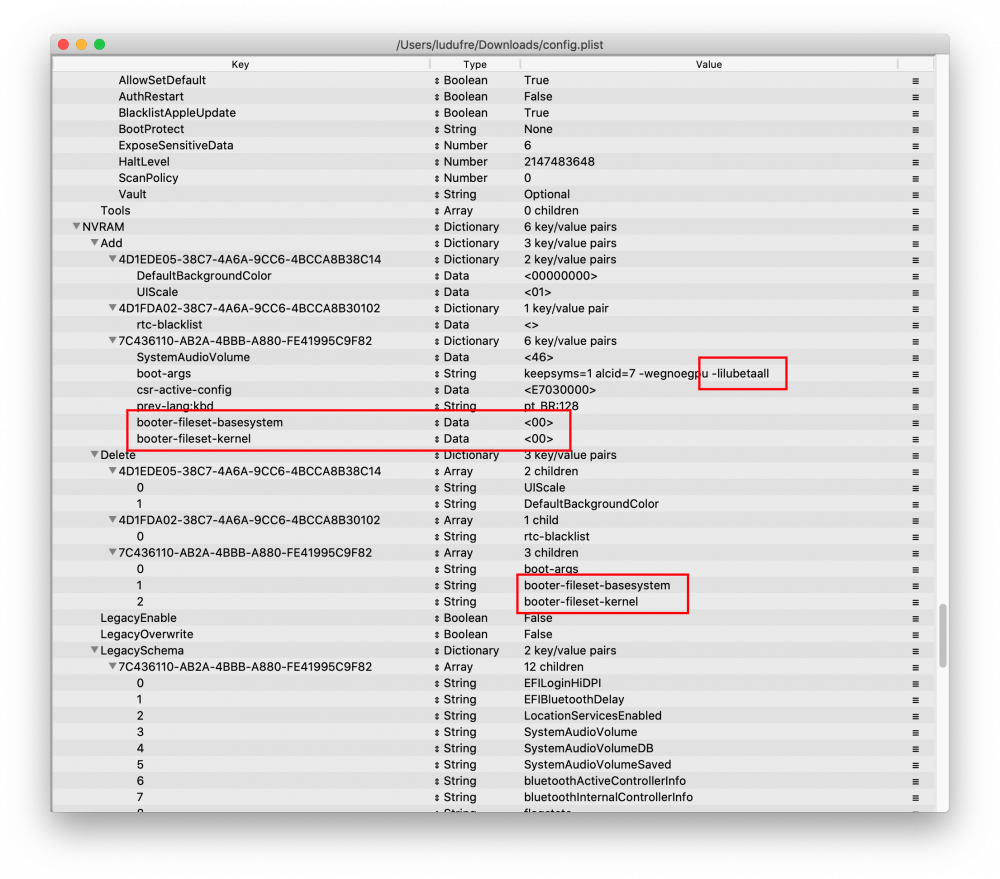
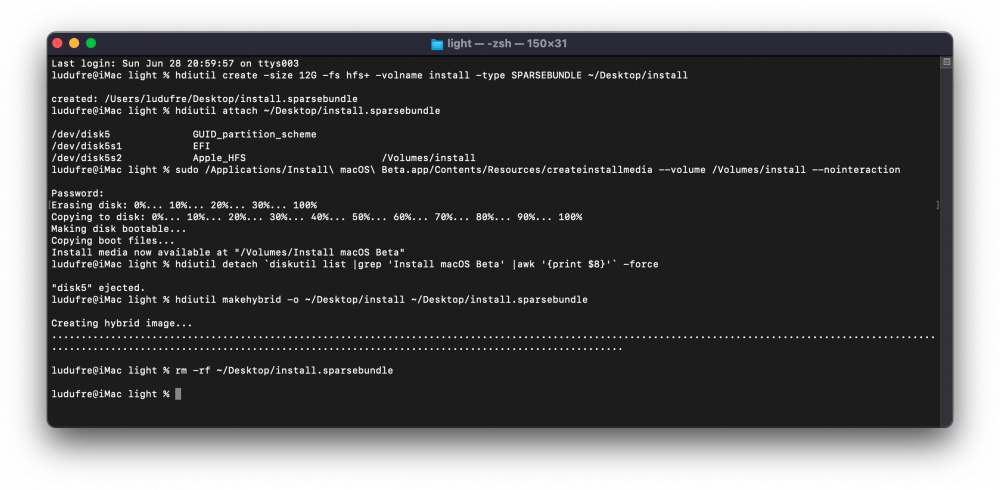
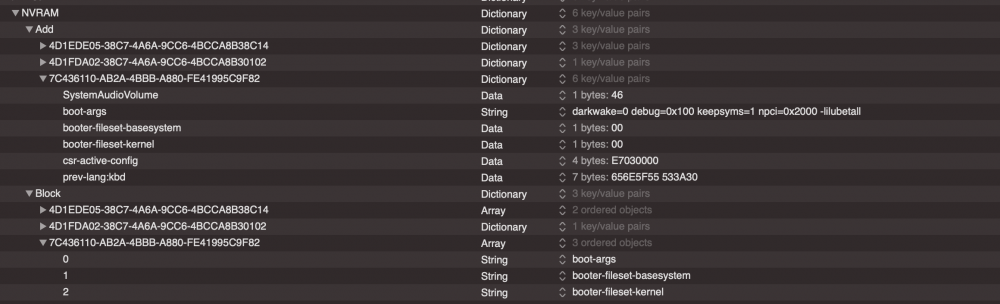
Installing macOS Big Sur 11.0 DP1 on Gigabyte Z370N WIFI + i7 8700K + UHD 630 Changelog: 06/28/2020 22:05h GMT-0 - Replaced detach command when creating ISO. - Thanks @ham4ever - Added instruction to run one line at time. 06/27/2020 02:37h GMT-0 - iMessage works too. Just not at first boot. 06/26/2020 18:54h GMT-0 - First version. What works and what does not - Processor: Intel Core i7-8700K -> Work. All SpeedStep stages.- Video Card: Intel UHD 630 -> Work. QE/CI and Metal.- Chipset: Intel Z370 -> Work.- HDMI 2.0 (1st) -> Work. - HDMI (2nd) -> Work. - DP -> Work. - Audio: ALC1220 -> Work. - HDMI Audio -> Work.- WiFi/Bluetooth -> Not work. Replaced with BCM94360CS2. - Ethernet (1st) -> Work.- Ethernet (2nd) -> Work.- USB3.0 -> Work.- Sleep -> Work. - Airdrop, Handoff, Instant Hotspot and Continuity -> Work after replaced wireless. Todo - Fix iMessage (other iServices works perfectly) - Nothing Disclaimer! Bootloaders are currently unable to start the installation. The solution is to use a virtual machine and use a physical disk (additional, USB or SATA, NVME) as a target in the installation. Change the OpenCore compiled from the source code, and add some entries in NVRAM through config.plist. This is not the best solution. But it is the only way at the moment. There are some ready-made images available out there, but I prefer not to use them and create a clean installation. What you need to install - Running install of macOS - Already working OpenCore with this setup - Create bootable ISO file - Spare Disk/SSD- macOS Big Sur DP1 install app- Latest OpenCore + Kexts compiled from sources - Some KEXTs and SSDT patches UEFI configuration My BIOS is F10 (I use an 8th generation processor, so I don't need to upgrade) You can configure manually or load my BIOS profile. Manually: - Shutdown and insert the flash.- Power on with DEL pressed to enter BIOS setup.- Change value: BIOS - CSM Support to Disabled- Change value: BIOS - Secure Boot to Disabled- Change value: Peripherals - Initial Display to IGP- Change value: Chipset - VT-d to DISABLE- Change value: Chipset - Internal Graphics to ENABLE- Save & Exit Setup or, BIOS profile You can use one of my BIOS profiles attached bellow. It's two versions. One stock and another with overclock [5.0 GHz] - Put the profile in the root of the flash drive at EFI partition. - Restart with DEL pressed to enter BIOS setup. - Go to Save & Exit. - Select Load Profiles. - Select last option and then the flasdrive in the list. - And finally choose MACOS_STOCK or MACOS_5GHZ. - Save & Exit Setup How create bootable ISO file Download Big Sur DP1 Run this command on Temrinal: sudo /System/Library/PrivateFrameworks/Seeding.framework/Resources/seedutil enroll DeveloperSeed Go to System Updater and download the Install macOS Beta app. Create ISO Then run on Terminal (One line at a time): hdiutil create -size 12G -fs hfs+ -volname install -type SPARSEBUNDLE ~/Desktop/install hdiutil attach ~/Desktop/install.sparsebundle sudo /Applications/Install\ macOS\ Beta.app/Contents/Resources/createinstallmedia --volume /Volumes/install --nointeraction hdiutil detach `diskutil list |grep 'Install macOS Beta' |awk '{print $8}'` -force hdiutil makehybrid -o ~/Desktop/install ~/Desktop/install.sparsebundle rm -rf ~/Desktop/install.sparsebundle Now you have install.iso on desktop. How create create the virtual machine and install to disk/SSD Download and install the trial version of the VMware Fusion from their site. I'm used the version 11.5.5. - Create a custom virtual machine - Operating System: Apple OS X - macOS 10.15 - Create a new virtual disk (The size doesn't matter, We'll delete later) - Click in "Customize Settings" - Save the VM on desktop with name: bigsur - Insert the spare disk/SSD on PC (reboot if necessary) and identify what /dev/diskX is. You can look on Disk Utility.app: - Create VMDK that point to it: sudo diskutil unmountDisk diskX /Applications/VMware\ Fusion.app/Contents/Library/vmware-rawdiskCreator create /dev/diskX fullDevice ~/Desktop/bigsur.vmwarevm/physical sata - Edit the virtual machine settings created previously - Click in Hard Disk (SATA) and delete it (Remove Hard Disk) - Then add the physical disk - There's a bug in Fusion. To select the physical.vmdk, right click then "Quick Look", then "Share virtual disk with the virtual machine that created it" - Click Apply. - Now mount de install.iso - Start the VM and install as usual until: Disk Utility, format GUID with APFS (VMware Virtual SATA Hard Drive Media), Install macOS, wait few reboots and stop at first boot wizard. This can take up to 45 minutes. It may seem like it is stopped, but it is not. - Press Command + Q and shutdown (usually WIN + Q) - Close VMware Fusion. Copy OpenCore to EFI - Mount the EFI with: sudo diskutil mount diskXs1 - Copy your current working OpenCore EFI to that mounted EFI. - Download mine attached or Update your OpenCore, Kexts and driver UEFI. - You can use the @MaLd0n script attached to compile all (OlarilaOC.command.zip) - If using mine add your MLB, ROM, SystemUUID and SystemSerialNumber. (see how to) - Add following items do config.plist: NVRAM -> Add -> 7C436110-AB2A-4BBB-A880-FE41995C9F82 -> boot-args -> -lilubetaall (append) NVRAM -> Add -> 7C436110-AB2A-4BBB-A880-FE41995C9F82 -> booter-fileset-basesystem + Data + <00> NVRAM -> Add -> 7C436110-AB2A-4BBB-A880-FE41995C9F82 -> booter-fileset-kernel + Data + <00> NVRAM -> Delete -> 7C436110-AB2A-4BBB-A880-FE41995C9F82 -> booter-fileset-basesystem NVRAM -> Delete -> 7C436110-AB2A-4BBB-A880-FE41995C9F82 -> booter-fileset-kernel Done! Boot from the new disk/SSD and finish de first boot wizard. And last but not least I would like to thank the following community members, by making these dream possible:@crushers, @snatch, @apianti, @blackosx, @blusseau, @dmazar, @slice2009, @autumnrain, @phpdev32, @EMlyDinEsH, @RehabMan, @Scellow, @mitch_de, @Shailua, @Andy Vandijck, @maxfierke, @ArturXXX, @LexHimself, @brumas, @khamsakamal48, @MaLd0n, @joedm and @vit9696 and all others members involved directly or indirectly. Attachments MACOS_5GHZ MACOS_STOCK OlarilaOC.command.zip EFI.zip


 1 point
 -
more files to test boot-6d717c89b2bf90fc5378b652548d5e3c153396dc.zip boot-0ae551a8fea77d1d6a38351a8e1816c76df78845.zip boot-e693de246f1a6adafc3ac7c5120a49b71c0d7857.zip1 point
-
Thank you @iCanaro1 point
-
Coming soon for those who own an HP ProDesk 600 g1 easy program for Big Sur and Catalina with OpenCore ☞ See Picture1 point
-
At least you won't lose an argument1 point
-
@ludox - To be honest I think we're all caught up in the Big Sur rush, panic, fever, what ever you want to call it, my self included. I can't remember the last time an Apple OS X System caused so much whoohaaa (or is that old man time catching up with me). I spent the time it was released trying like crazy to install it the 'Create Install Media' conventional way and gave up with the thought that my sanity was worth more than that, but reading the many posts of success and failures, I felt I was being left behind and gave it a final push. I had partial success with VMWare but my screen was reduced to letter box size with laggy performance, with a bit more net trawling I found MaLd0n's method - restoring the dmg image to an internal/external disk and saved my sanity. So what I am saying, don't be too harsh admonishing the posters even though the Threads are being kind of cluttered with the same woes and cries because in a few years down the line, Apple will have us ripping the boards and components out of the cases and using the said cases to display potted plants.1 point
-
OK so I'm back to the iMac19,1 setup and it's OK-ish again. UI animations and screen saver password prompt are still laggy / choppy / slow (added for SEO) and nowhere near as smooth as on Mojave with the exact same hardware setup. At this point I'm starting to suspect that something's wrong with the USB or Bluetooth setup of either OpenCore or Catalina. Perhaps @AudioGod has some more ideas what could be causing these issues. Now, before you all go and say I'm crazy and your setup is perfect... My friend has almost the exact same setup as mine (5700 XT instead of an RX 580) and he has the exact same issues. He just didn't notice them and he never had Mojave on this machine. So perhaps I'm just super anal about having perfect animations at 60 fps without frame drops. Anyway, I'll try to boot from a clone of my Mojave installation to show you the difference on video. If anyone has any good ideas, please do chime in. This is driving me nuts! Edit: 2nd kernel panic today... panic(cpu 0 caller 0xffffff801d14153a): "thread_invoke: preemption_level 1, possible cause: blocking while holding a spinlock, or within interrupt context"@/AppleInternal/BuildRoot/Library/Caches/com.apple.xbs/Sources/xnu/xnu-6153.121.2/osfmk/kern/sched_prim.c:2205 Backtrace (CPU 0), Frame : Return Address 0xffffff875c8bb640 : 0xffffff801d11f5cd 0xffffff875c8bb690 : 0xffffff801d258b05 0xffffff875c8bb6d0 : 0xffffff801d24a68e 0xffffff875c8bb720 : 0xffffff801d0c5a40 0xffffff875c8bb740 : 0xffffff801d11ec97 0xffffff875c8bb840 : 0xffffff801d11f087 0xffffff875c8bb890 : 0xffffff801d8c27cc 0xffffff875c8bb900 : 0xffffff801d14153a 0xffffff875c8bb970 : 0xffffff801d13fc2f 0xffffff875c8bb9c0 : 0xffffff801d2407c0 0xffffff875c8bba20 : 0xffffff801d1b26fd 0xffffff875c8bbaf0 : 0xffffff801d176e01 0xffffff875c8bbc20 : 0xffffff801d239aef 0xffffff875c8bbc70 : 0xffffff801d0c5a40 0xffffff875c8bbc90 : 0xffffff7fa269ed01 0xffffff875c8bbd80 : 0xffffff7fa269d78e 0xffffff875c8bbda0 : 0xffffff7fa269b4be 0xffffff875c8bbdf0 : 0xffffff7fa269ab7f 0xffffff875c8bbe20 : 0xffffff801d8333e9 0xffffff875c8bbe90 : 0xffffff801d833309 0xffffff875c8bbec0 : 0xffffff801d161565 0xffffff875c8bbf40 : 0xffffff801d161091 0xffffff875c8bbfa0 : 0xffffff801d0c513e Kernel Extensions in backtrace: ru.joedm.SMCSuperIO(1.1.4)[3EBEC0A6-5D45-3034-A52E-8B63A6FABDA1]@0xffffff7fa2699000->0xffffff7fa26a8fff dependency: as.vit9696.Lilu(1.4.5)[E42CE60E-EC0B-33AE-A513-5383B81BF165]@0xffffff7fa24d6000 dependency: as.vit9696.VirtualSMC(1.1.4)[9DD28544-2B81-33EB-B3F1-488D0FBB0947]@0xffffff7fa24ff000 dependency: com.apple.iokit.IOACPIFamily(1.4)[0A7D7382-66FE-391B-9F93-97A996256C25]@0xffffff7f9e245000 BSD process name corresponding to current thread: kernel_task Boot args: -v shikigva=80 darkwake=0 alcid=16 igfxmetal=1 Mac OS version: 19F101 Kernel version: Darwin Kernel Version 19.5.0: Tue May 26 20:41:44 PDT 2020; root:xnu-6153.121.2~2/RELEASE_X86_64 Kernel UUID: 54F1A78D-6F41-32BD-BFED-4381F9F6E2EF Kernel slide: 0x000000001ce00000 Kernel text base: 0xffffff801d000000 __HIB text base: 0xffffff801cf00000 System model name: iMac19,1 (Mac-AA95B1DDAB278B95) System shutdown begun: NO Panic diags file available: YES (0x0) System uptime in nanoseconds: 309372283041 point
-
and the solution was ???1 point
-
OpenCanopy_Pick_and_Mix_Icons_5 HardDrives with overly large OS icons (possibly too big, but trying to give the user choices). Also, OS icons on their own without the drive image.1 point
-
My last attempt made my Catalina install disappear so I think I’ll just wait for a clean install method. Appreciate the help. Sent from my iPhone using Tapatalk My last attempt made my Catalina install disappear so I think I’ll just wait for a clean install method. Appreciate the help. Sent from my iPhone using Tapatalk1 point
-
Hi, im believe that you will get 90% chance to not have a problem in install from your new installation (external usb), but im think is not necessary restoring. Just use a simple adapter to make your ssd that you will install on Hack, and make boot from then. Use same driver that you use on install from Macintosh. But restoring Hack its very probably that you will have issues. First, try use Opencore in your hack build with Catalina, for exemple, and its huge probably that you will have success.1 point
-
@SavageAUS It works really well, my card is an Intel-9462NGW, I think I can't put links but I'll leave you a file with the kext I use, first you open the kext with the option show package content, you modify the file info.plist and in the image section you modify the ssid and your internet password, you save it and put the kext in the opencore kexts folder and modify your config.plist to add it. Reboot your computer, open the Heliport app to see the status and connect to another network. Credits to the creators of the itlwm kext and the Heliport app. itlwm.kext.zip
8_11_33.png.6eac6610368ed8fd2694f4bc63a81878.png) 1 point
1 point -
@PC IT Google MaLd0n, he has everything you'll need for a successful install including a working EFI Folder, a 'How To' guide from start to finish.1 point
-
I am having some issues and maybe, just maybe, someone has a good suggestion for me. 1. While it took a long time, I now have a working EFI for OpenCore for both Catalina and Big Sur. However, for whatever reason, my webcam does not work (but other internal USB devices seem to be ok) and my CPU temp sensors are not picked up by iStat Menus but do seem to be displayed correctly in HWMonitorSMC (I am using the plugins for VirtualSMC.) 2. I used the image of Big Sur that was first posted in Applelife.ru, and while it works, and while I was able to resize the APFS container to fit on my laptop's SSD, I cannot restore the live installation created from the image on my laptop's SSD. It gets UUID errors that prevent me from restoring it. If I create my own installation on a real Mac to my external USB drive, will I also have problems restoring that installation to my laptop's SSD? 3. The BRCMPatchRam3 kext seems to work in Big Sur but it also appears to be spamming my log file and possibly using a ton of resources for no good reason. When I just use the BT injector, the BT device appears but does not work properly. The PatchRam kext appears to be necessary from proper BT function. Any input would be appreciated.1 point
-
ok!This is my EFI! OC0.6-EFI.zip1 point
-
Try if USB 2.0 works. With some people don't work with external, only internal.1 point
-
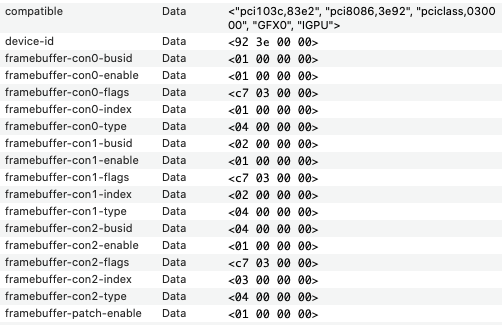
When not specified, device-id defaults to the macOS-detected device-id (which for my I7-8700T / UHD 630 is 0x3e92) - read here. 0x3e92 is the best device-id for me based on my testing, so no reason to "spoof" a different value. I could also have defined device-id = 0x3e92 (Reverse Byte Order 0x923e0000), which still leaves the device-id unchanged from its default. Read this post and this post for further explanation. See attached IORegistry dump and note the value of device-id (without me having to specify a value).
 1 point
 -
Depends on if you want to use the entire drive or just a single partition. You choose that, but the process is the same for either or.1 point
-
Beautiful. Does OpenCanopy even discern between other OSs?1 point
-
OpenCanopy_Pick_and_Mix_Icons_4 I have generated dark and light Microsoft Windows 10 and Apple HardDrive icons with stronger desktop images to give the user choice over the more subtler ones posted previously. There are now some internal and external generic Linux icons and also light and dark HardDrive icons for 15 Linux distro's.1 point
-
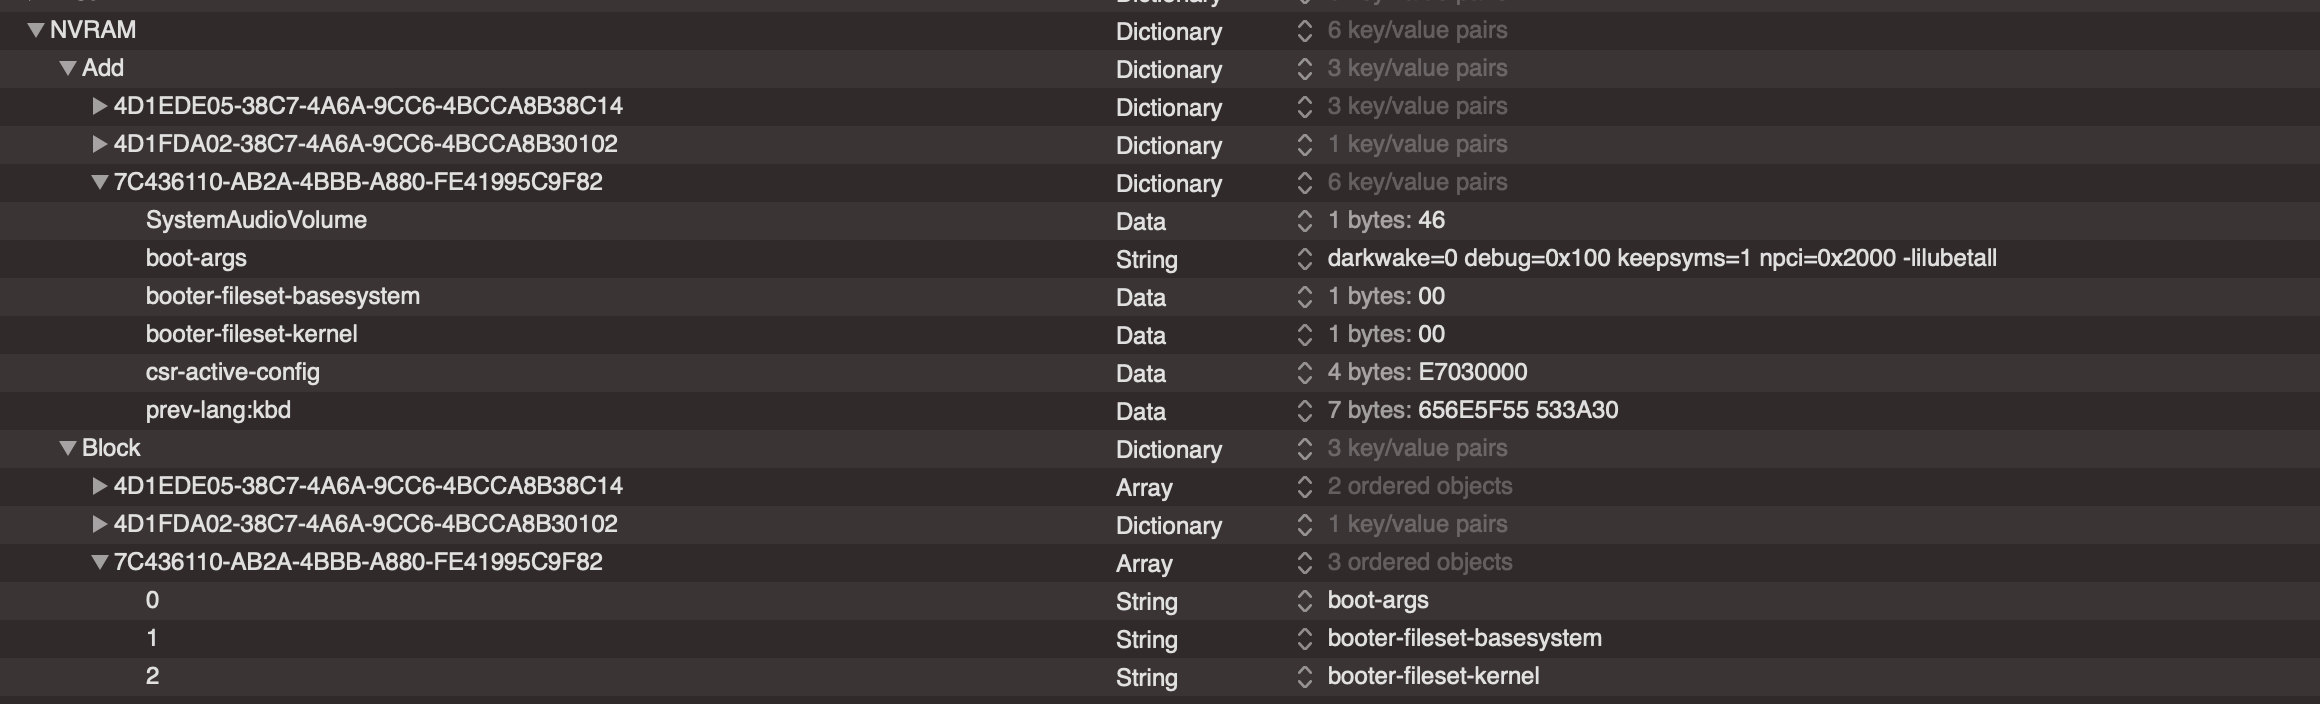
In case anyone was wondering... It is still possible to boot Big Sur with OpenCore NDK-059 As long as you update the kexts, drivers, etc, and the elements below, you're good to go. In your config.plist: 1-Disable AvoidRuntimeDefrag 2-NVRAM/Add : 7C436110-AB2A-4BBB-A880-FE41995C9F82 : booter-fileset-basesystem / Data=0 7C436110-AB2A-4BBB-A880-FE41995C9F82 : booter-fileset-kernel / Data=0 3 -NVRAM/Block ( String ) 7C436110-AB2A-4BBB-A880-FE41995C9F82 : booter-fileset-basesystem 7C436110-AB2A-4BBB-A880-FE41995C9F82-: booter-fileset-kernel 4- boot args: Lilubetaall (Not needed with RX580 ) First part of installation was done via VMware Fusion / OSX Mojave ( Installer dowloaded thru Catalina Software update ) Not working (Yet ) : Airplay & Sleep functions BT, Audio ( except RME PCIe) , DP, TB3 are working. I don't use Wifi. Enjoy!


 1 point
 -
In terms of A to Z, this is the OpenCore bible: https://dortania.github.io/OpenCore-Desktop-Guide/1 point
-
A clean installation is always the best choice. I cannot say about migrating to OC because i havent tried it yet, but what i can say is that i have the same installation since Yosemite and even kept it when moving to this motherboard from the X58 platform in High Sierra so i never lost my audio presets and settings and reinstall all this stuff again. Just keep a Clone as backup and a working Clover boot stick handy and try it. Audiogod's and the rest of the team's magic made this possible and saved at least a week of reinstalling from the beginning.1 point
-
Not being funny but Get yourself a USB keyboard mate. It’s 20201 point
-
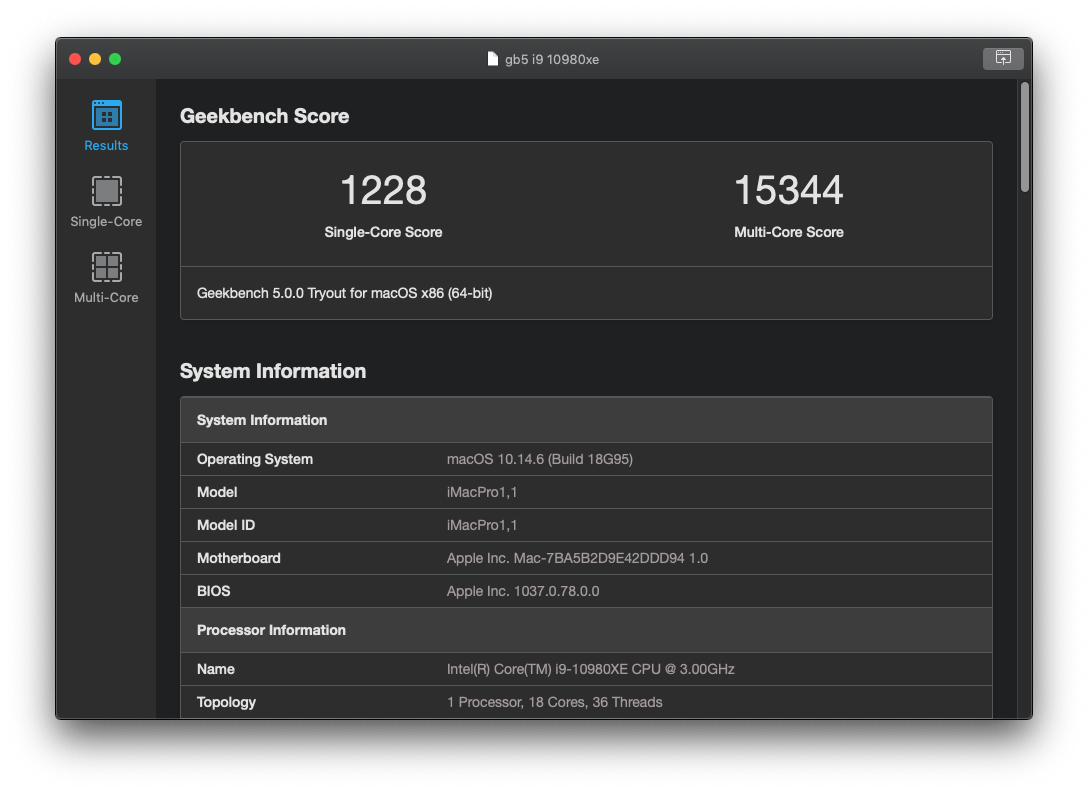
Comparison reveals that the PC's AWAC and the iMac Pro's ARTC are the same device but the iMac Pro loads AppleSMCRTC. I'm sorry my English isn't very good. I hope that didn't affect your understanding.1 point
-
It doesn't matter as long as Apple made the effort for this CPU/GPU comination (i3-8100) to operate correctly in their driver. Its device id is 0x3e918086 which is explicitly listed in the Info.plist for both CFLGraphicsFramebuffer and KBLGraphics. It has some associated ig-platform-ids. AFAIK this device id is only used in the desktop i3 CPUs. So what's your theory for their making the effort? Just to reemphasize - my i3-8100 GPU works flawlessly with H310 chipset if I set Model ID to iMac19,2. I don't have Lilu/WhateverGreen installed, and the only related kext patch is to enable HDMI audio on port 6. This patch is optional in the sense that graphics would still work without it - but HDMI audio would be muted. The framebuffer settings in the firmware I believe are set to "auto" - at least I don't remember tweaking them from the default. I also use -disablegfxfirmware boot arg. Last time I tried w/o it there was deadlock during boot, but that was many versions of macos ago. PS after further review, I found I also have DSDT patches to rename GFX0 to IGPU, HECI to IMEI <dict> <key>Comment</key> <string>Rename GFX0 to IGPU</string> <key>Find</key> <data>R0ZYMA==</data> <key>Replace</key> <data>SUdQVQ==</data> </dict> <dict> <key>Comment</key> <string>Rename HECI to IMEI</string> <key>Find</key> <data>SEVDSQ==</data> <key>Replace</key> <data>SU1FSQ==</data> </dict> I believe this is important, because the graphics kexts look for for the associated ACPI devices by explicit name occasionially. I don't manually specify an ig-platform-id. The one implicitly injected by Clover for device 0x3E918086 is 0x0x3E92000. The kext patch I mentioned to change DP connector to HDMI on port 6 for this configuration is <dict> <key>Comment</key> <string>10.14.4-CFL-3E920000-Port_0x6-DP2HDMI</string> <key>Find</key> <data>AgQKAAAEAACHAQAA</data> <key>Name</key> <string>com.apple.driver.AppleIntelCFLGraphicsFramebuffer</string> <key>Replace</key> <data>AgQKAAAIAACHAQAA</data> </dict> Additionally, I have AddPNLF set to false in DSDT fixes because the native DSDT has an object named PNLF for another purpose than the one Apple uses. Also, I double-checked in the bios setup, and the graphics memory aperture is indeed set to AUTO. The primary graphics adapter is listed as PCIE, but I don't have a PCIE graphics card, so it falls back to IGPU. I hope this helps people having problems getting graphics to work on 0x3E918086.1 point
-
1 point