Leaderboard


Popular Content
Showing content with the highest reputation on 06/29/2020 in Posts
-
Guys: Would you please stop quoting each other with the pictures attached? Please remove the pictures when you wanna quote someone. you can also mention the person you are quoting by using @ and the member's name and then they will be notified that someone is talking to them. Thanks.5 points
-
Anyone who want to install big surr on FX / Ryzen can use this patches in beta branch for opencore. https://github.com/naveenkrdy/binPatchAMD/tree/beta/opencore And to fix adobe products on AMD CPU use this method here: https://gist.github.com/naveenkrdy/26760ac5135deed6d0bb8902f6ceb6bd4 points
-
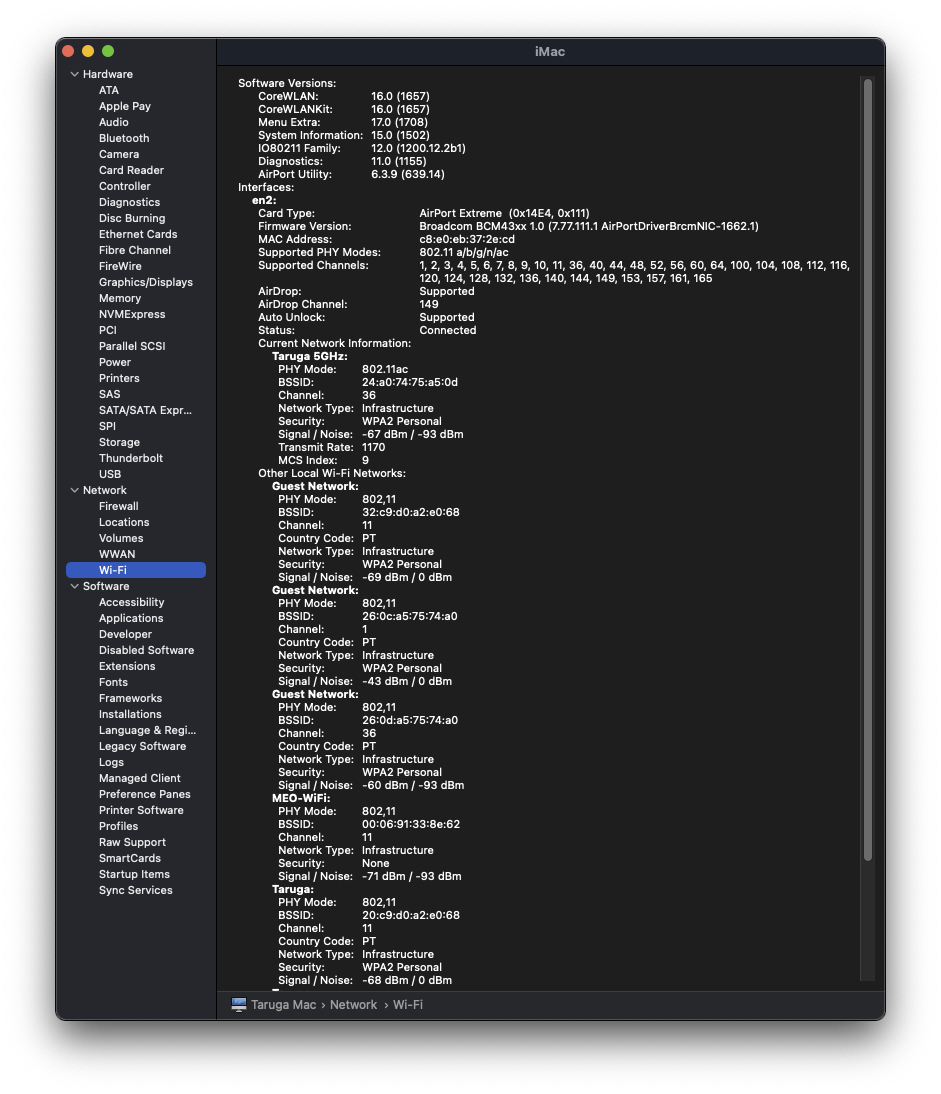
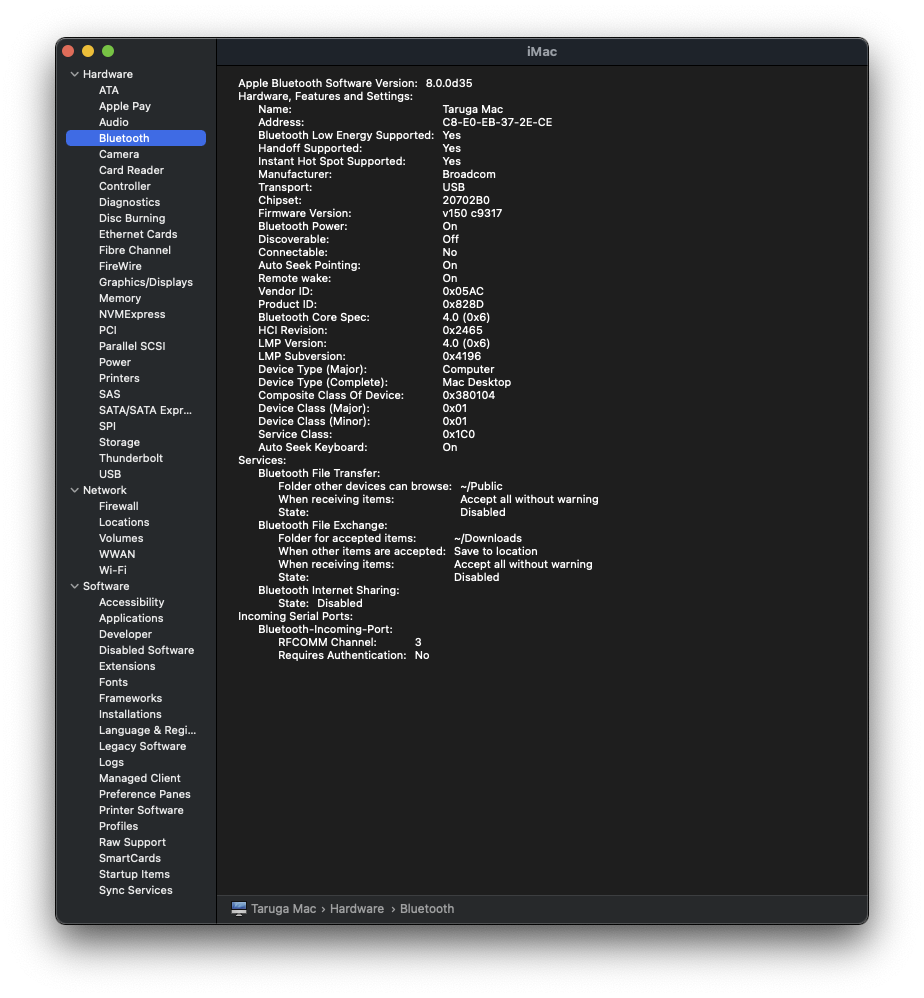
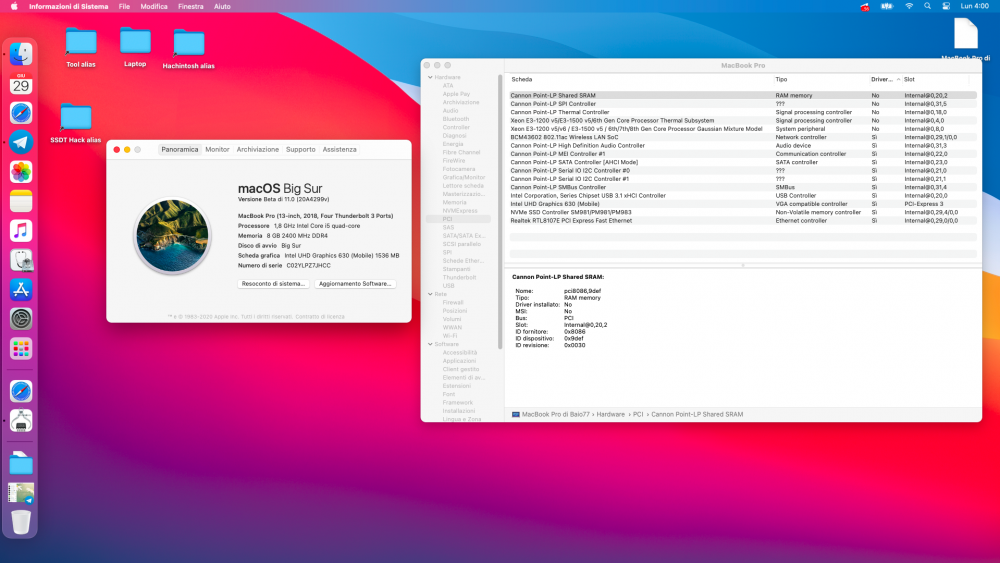
I'm using an BCM4360, Vendor 0x14E4 Device: 0x43A0. Bluetooth and wifi working now as an iMac13,2. I had to disable USBInjectAll.kext which I did not had enabled when I tested as an MacPro6,1. Stupid mistake.
 4 points
 -
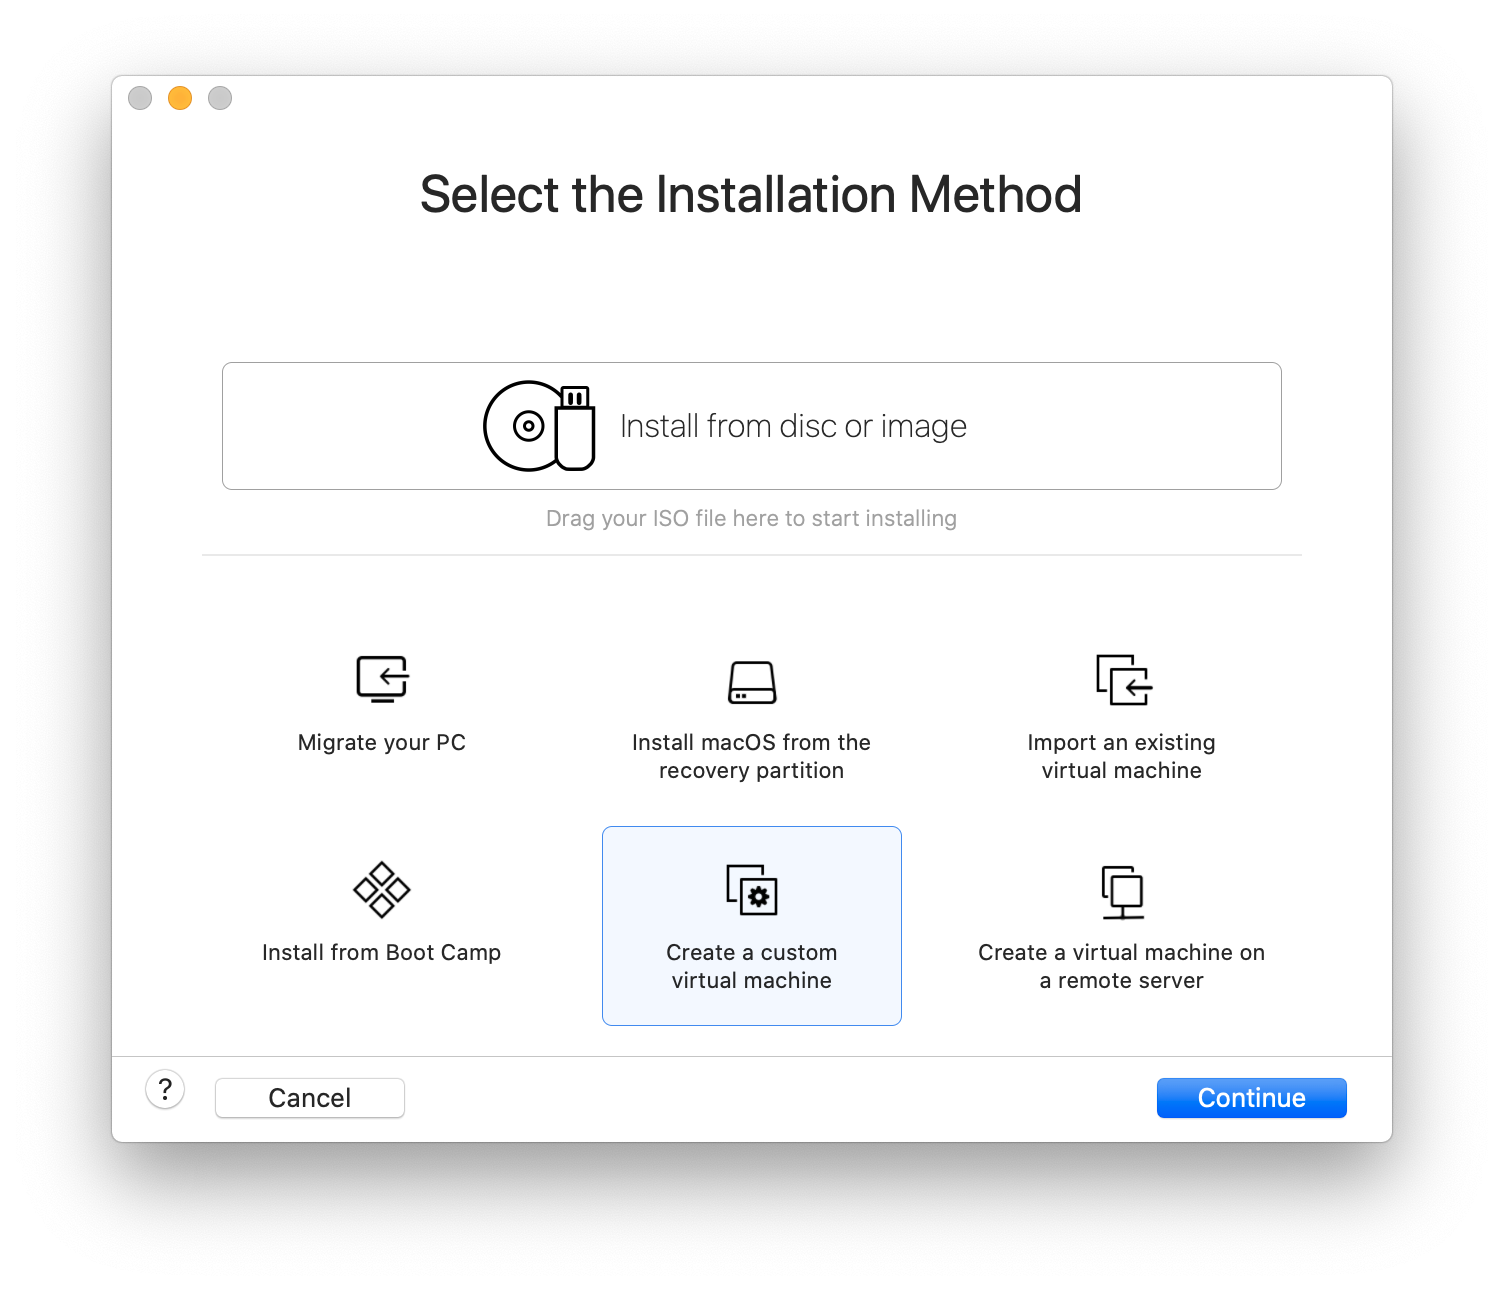
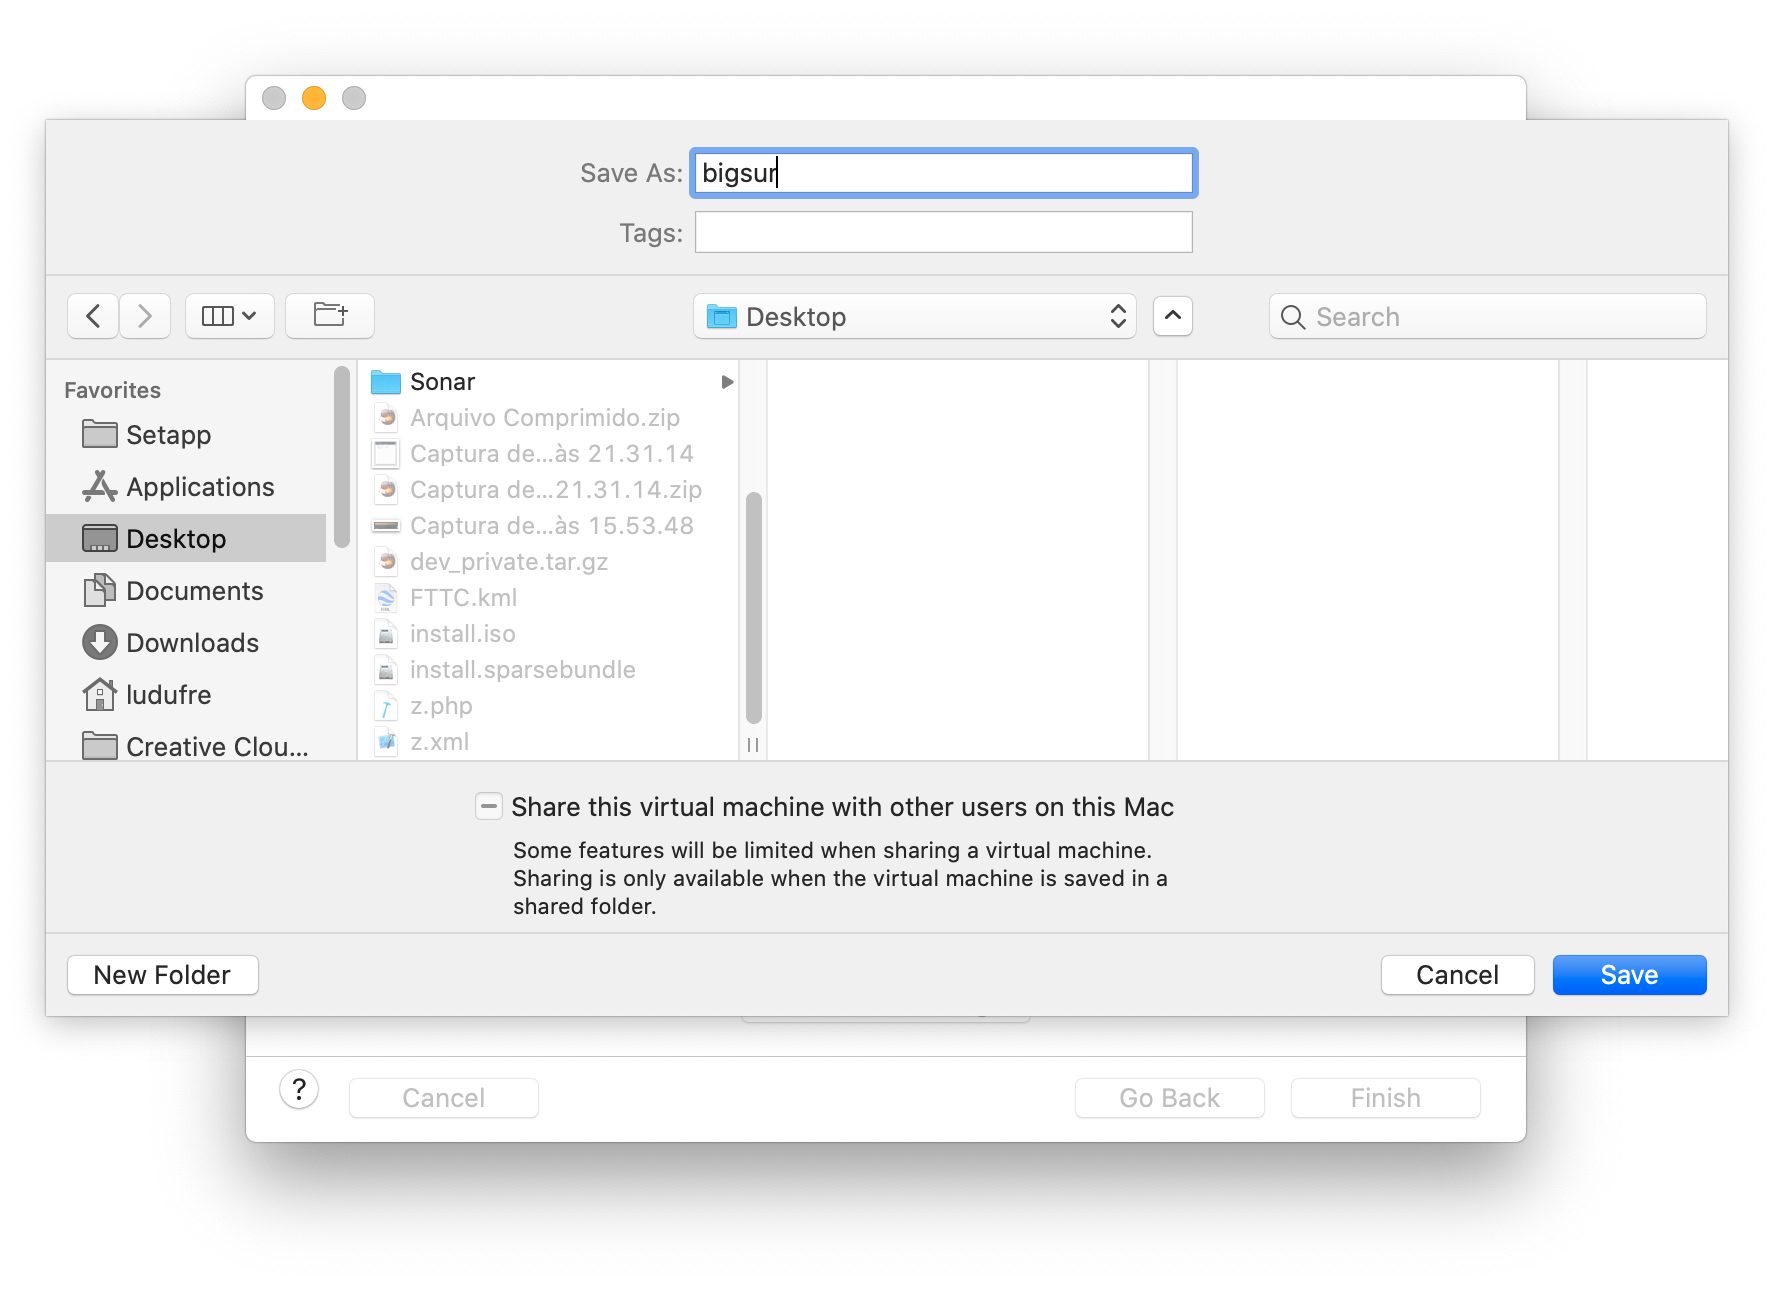
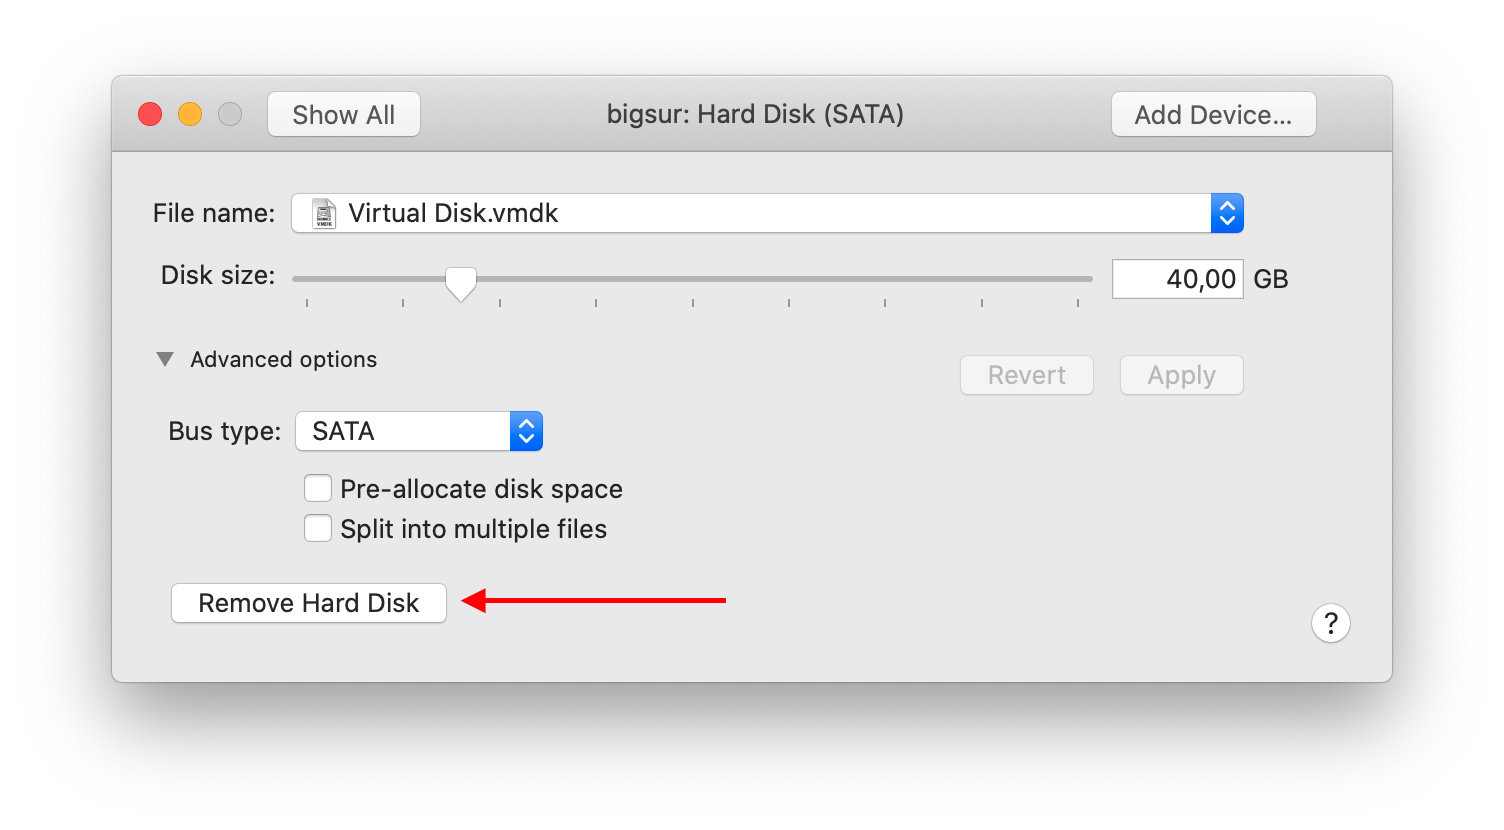
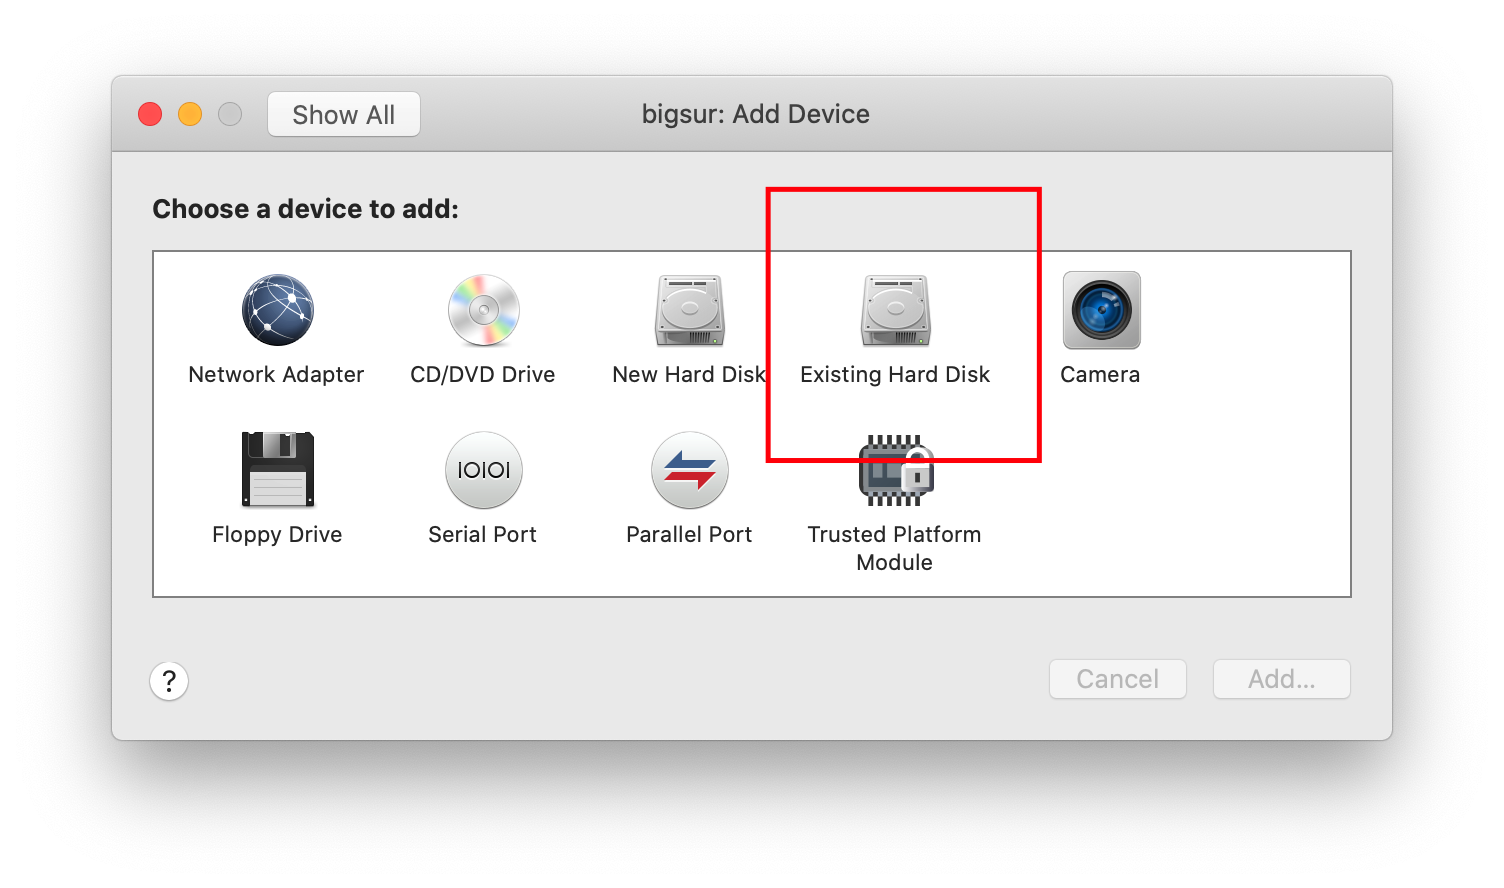
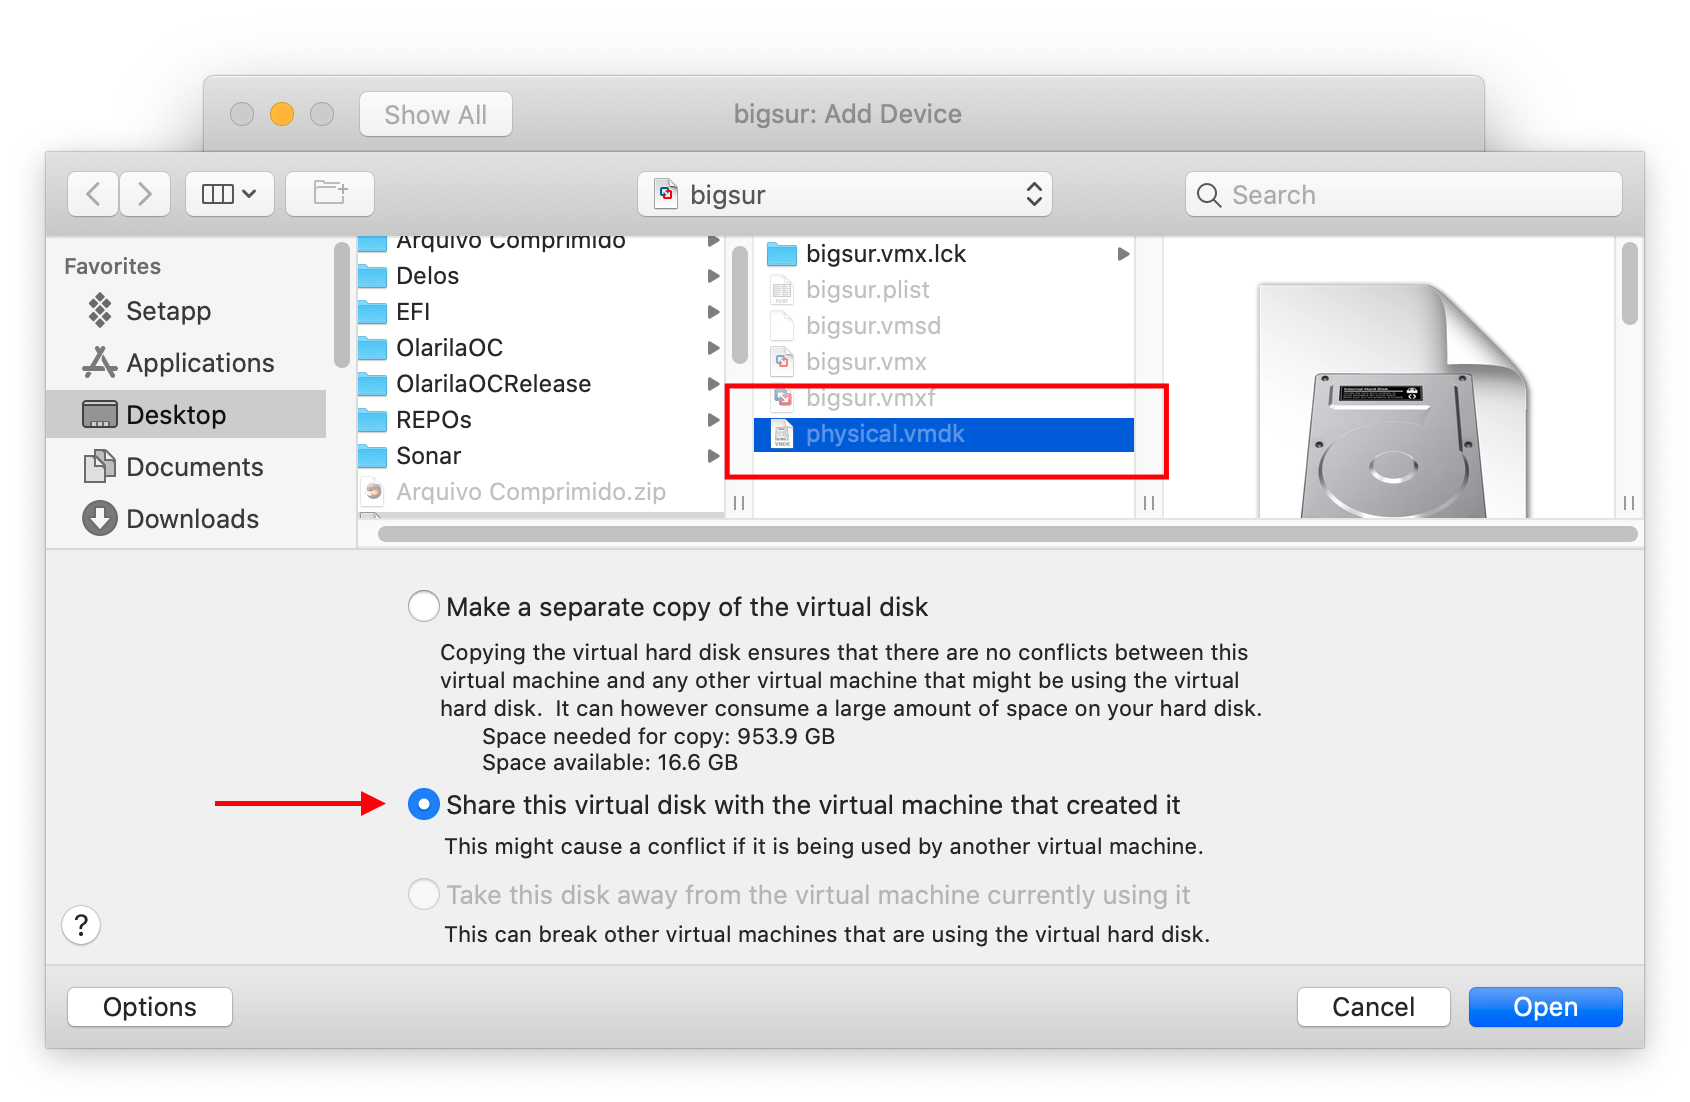
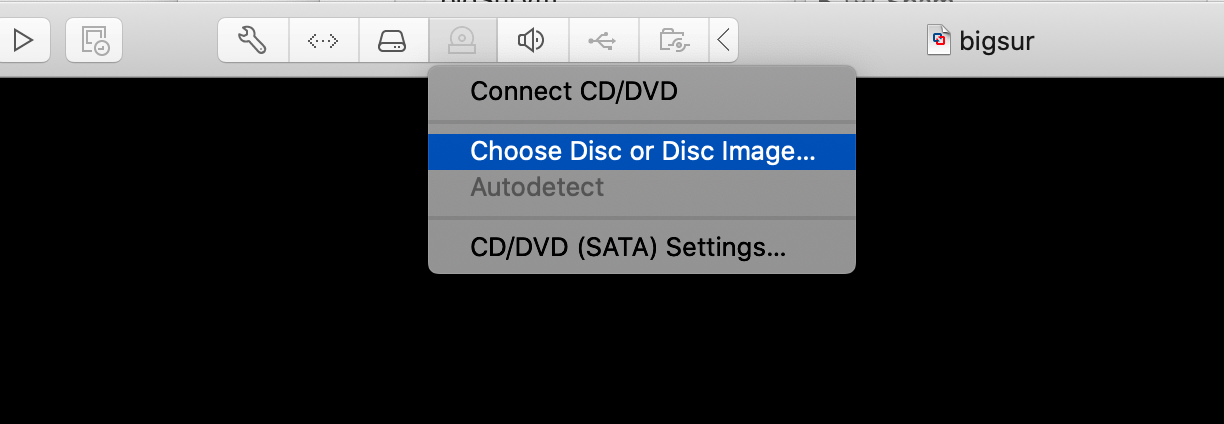
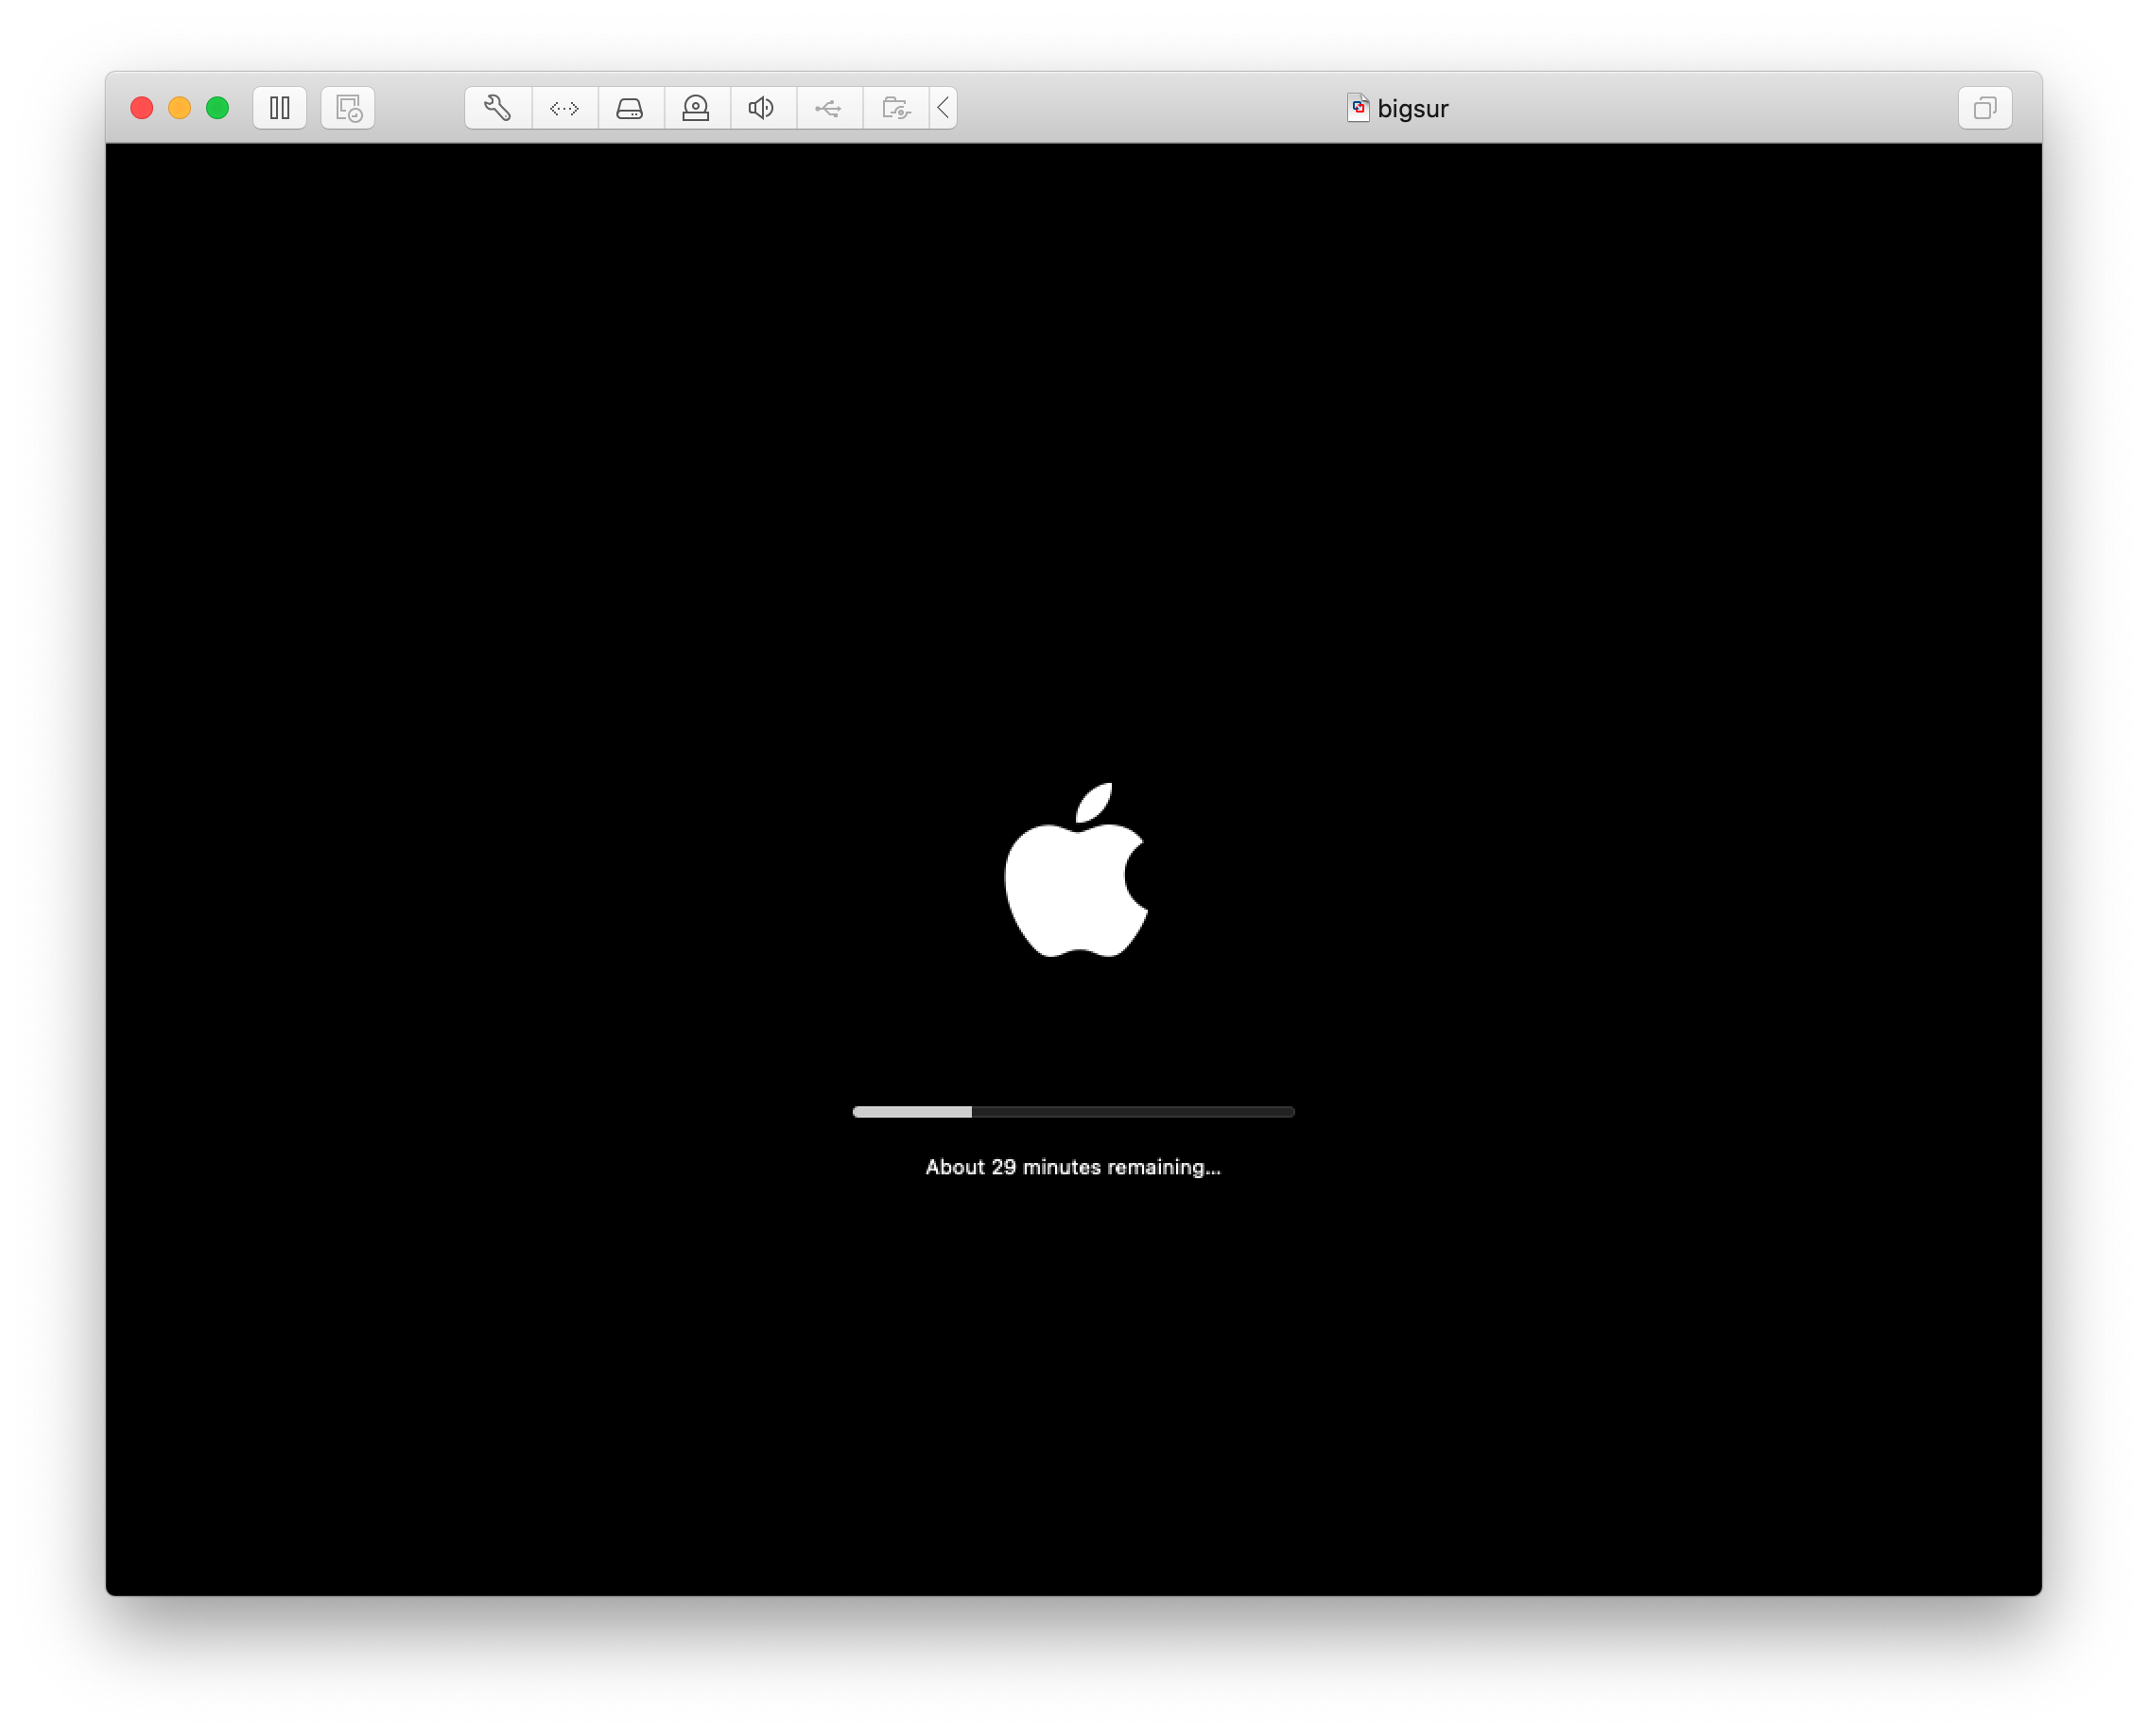
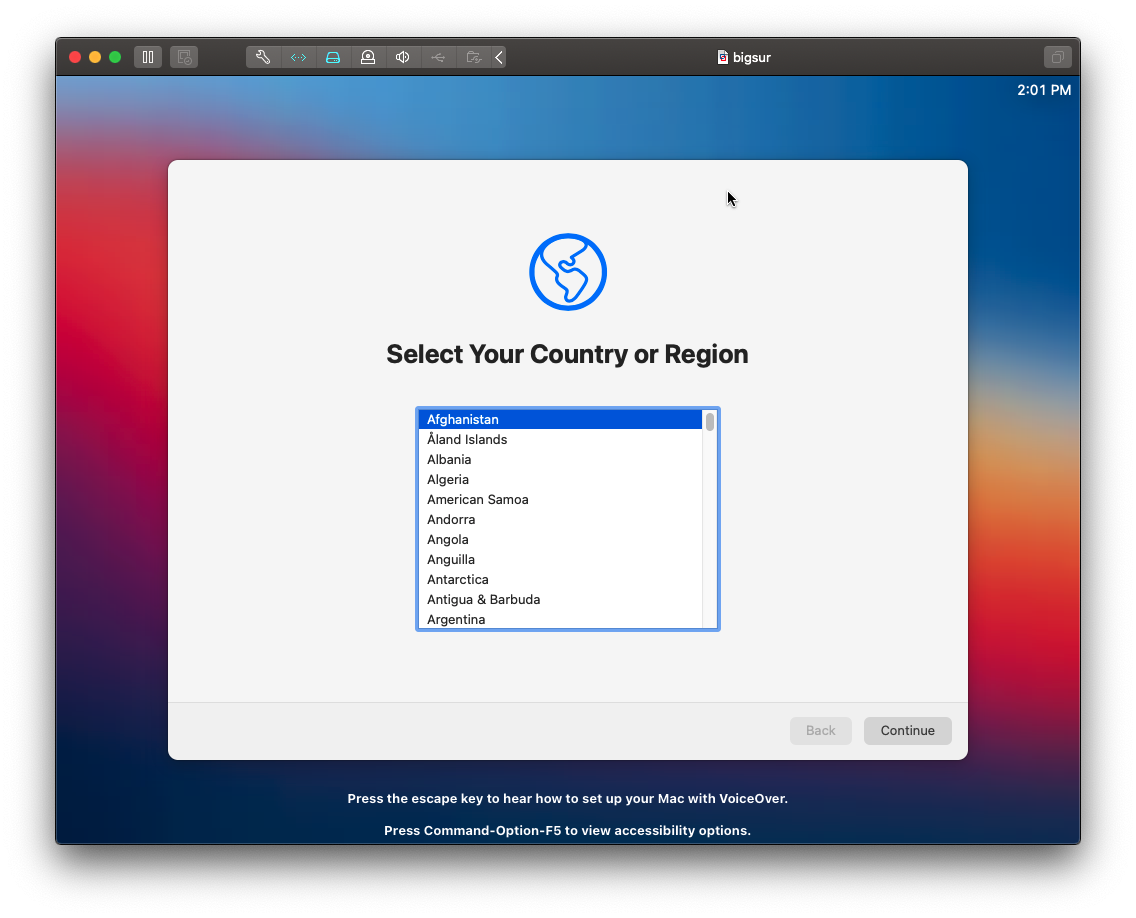
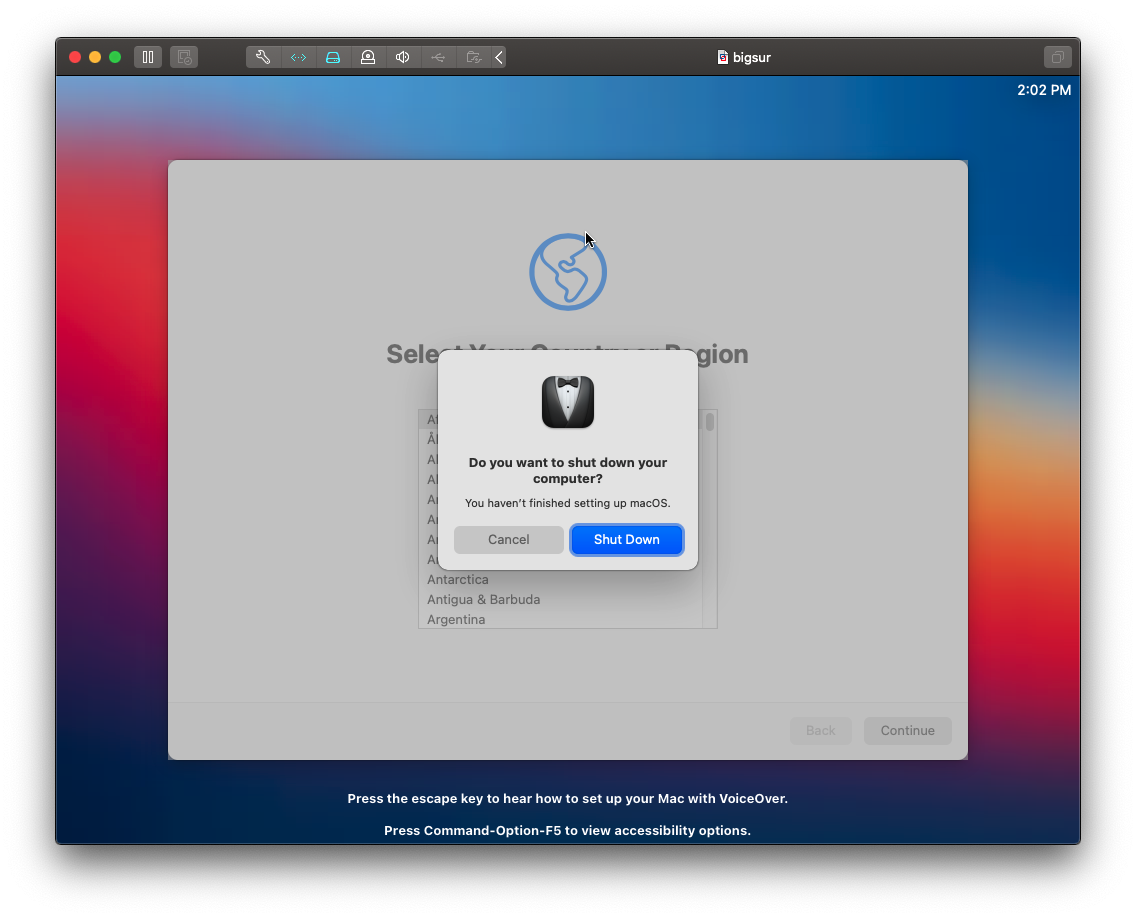
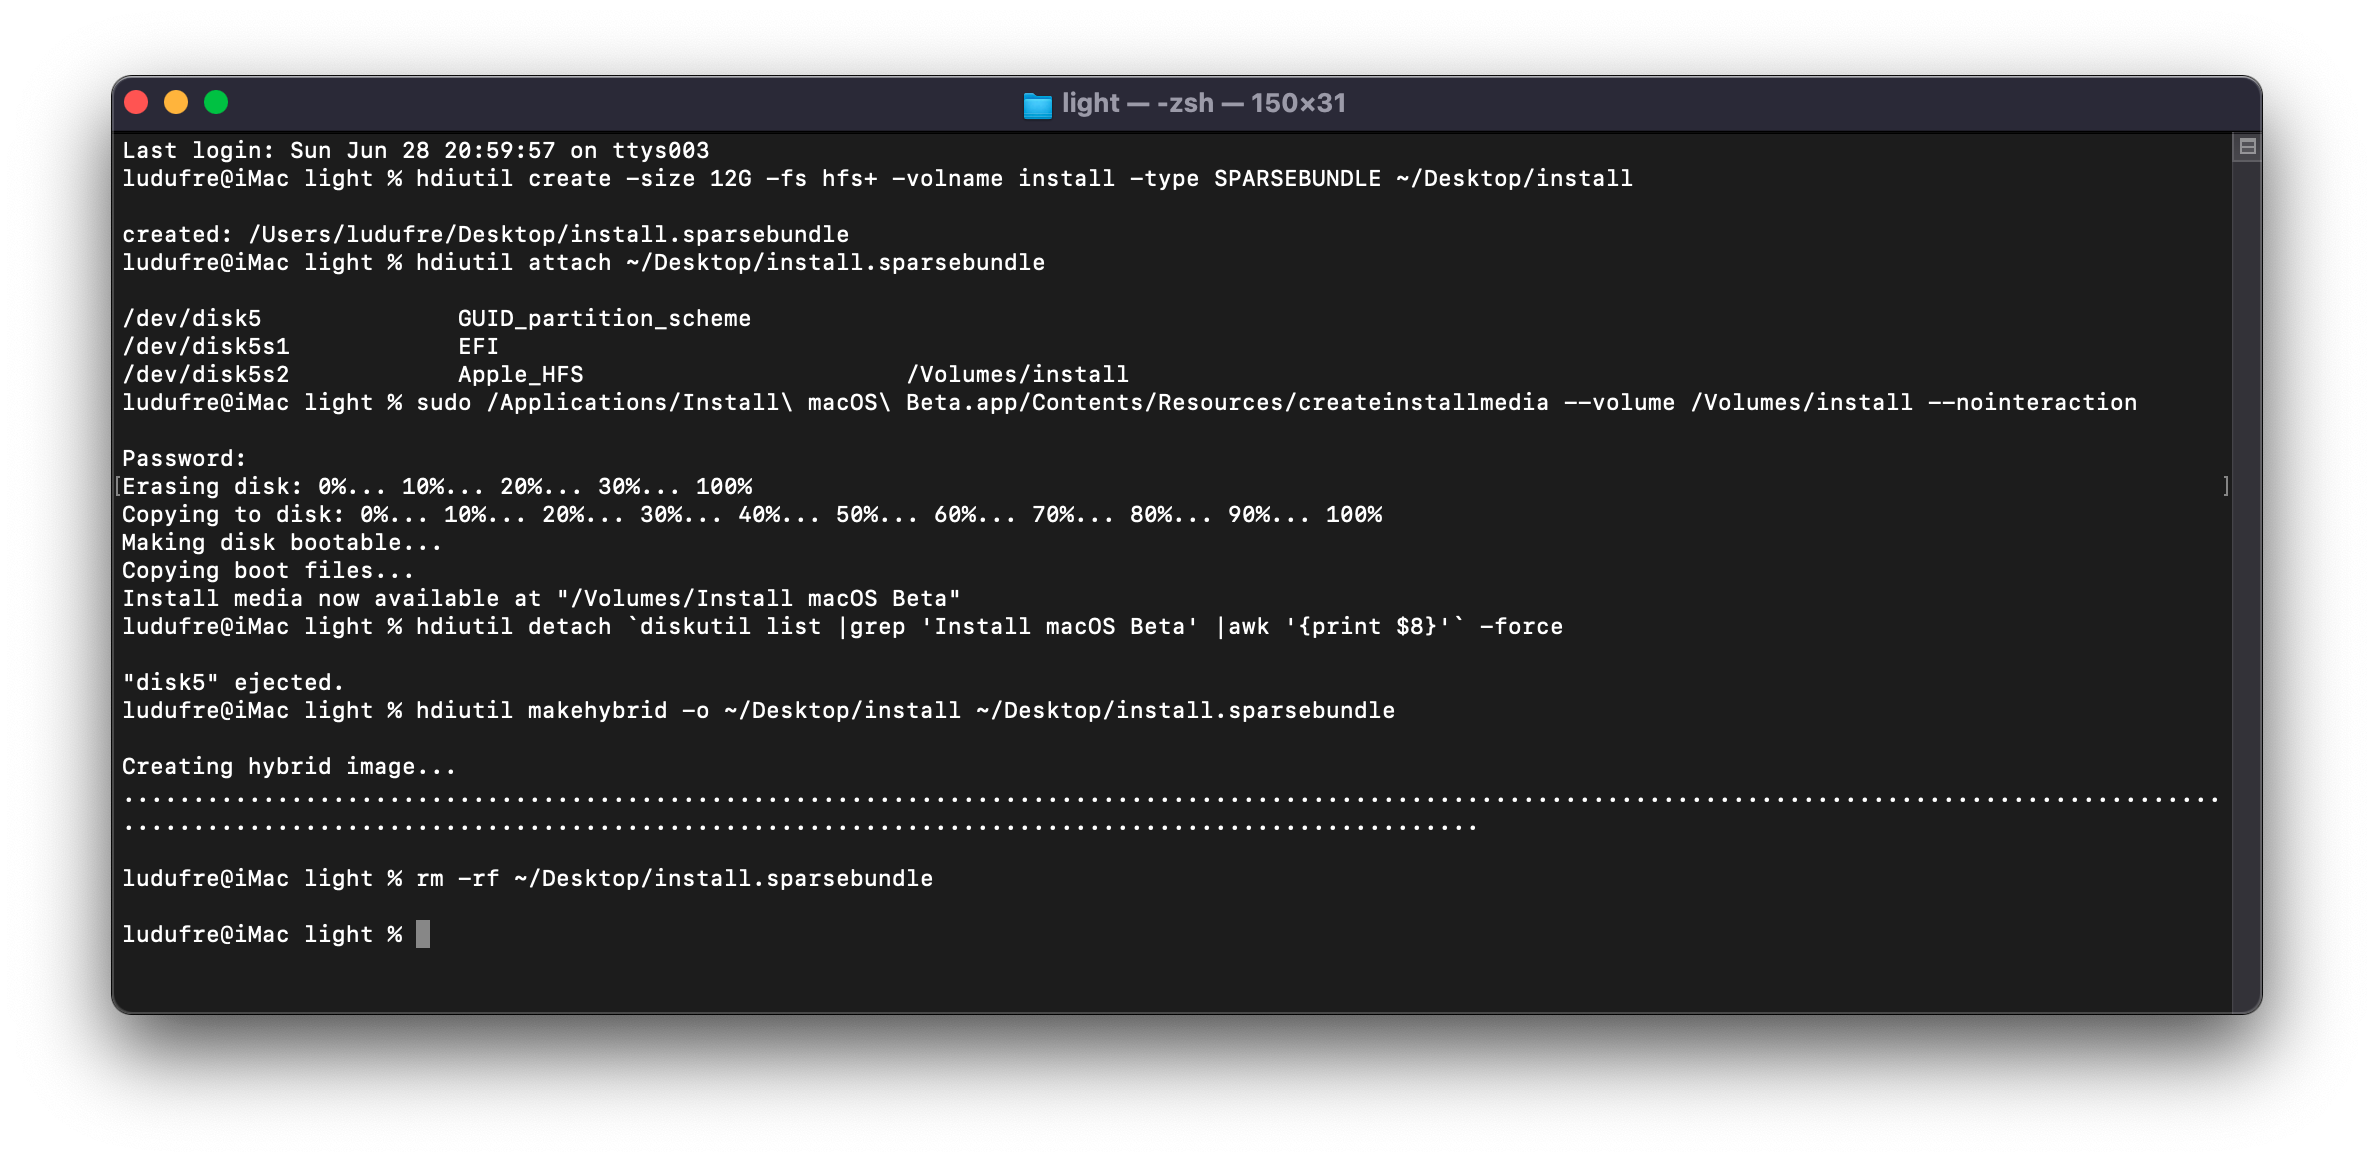
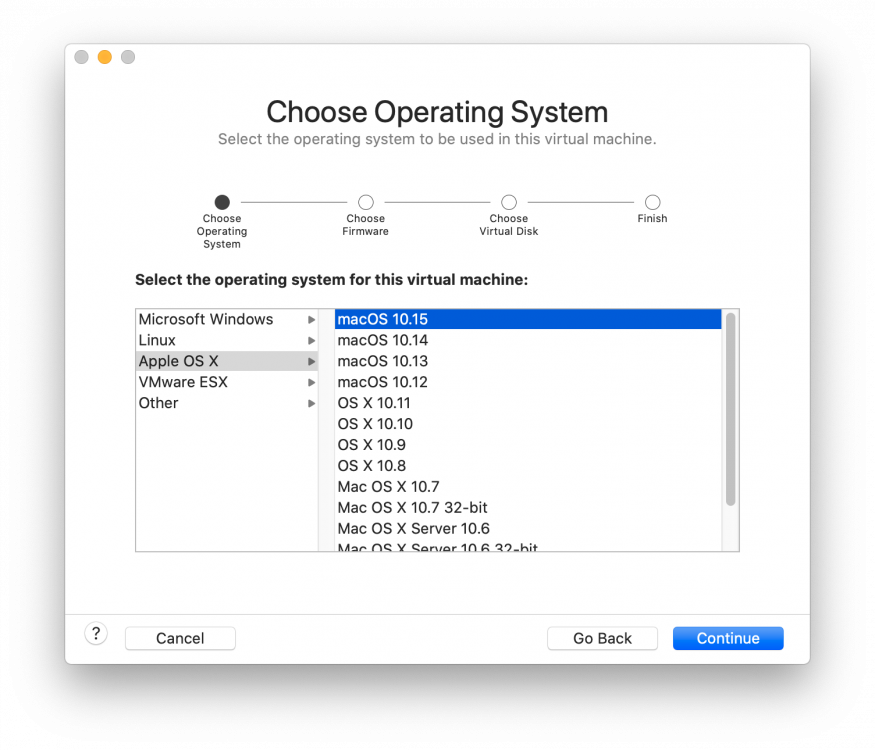
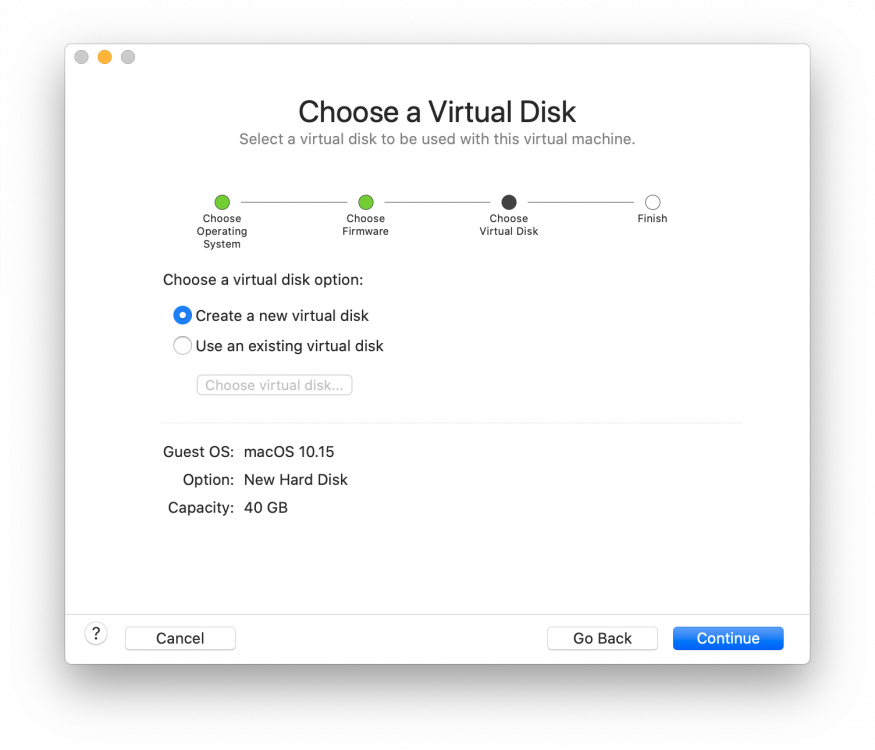
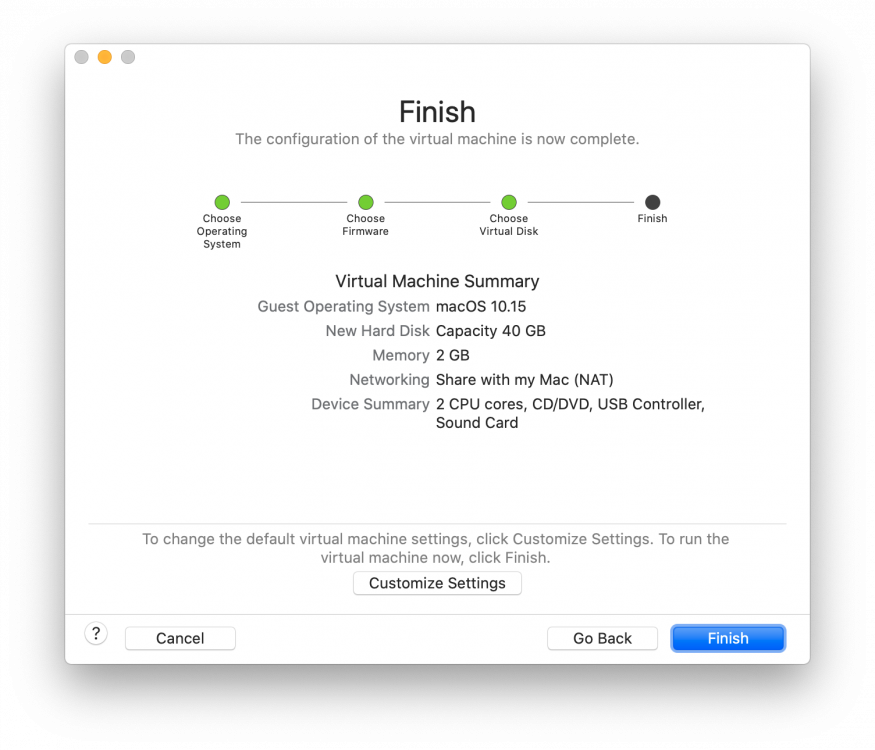
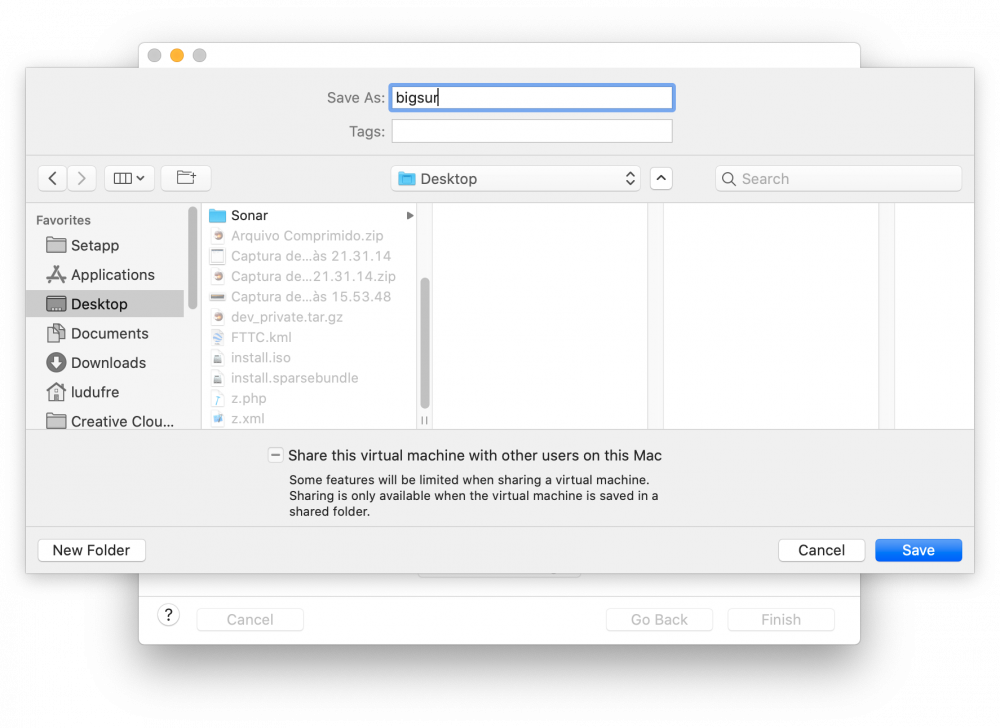
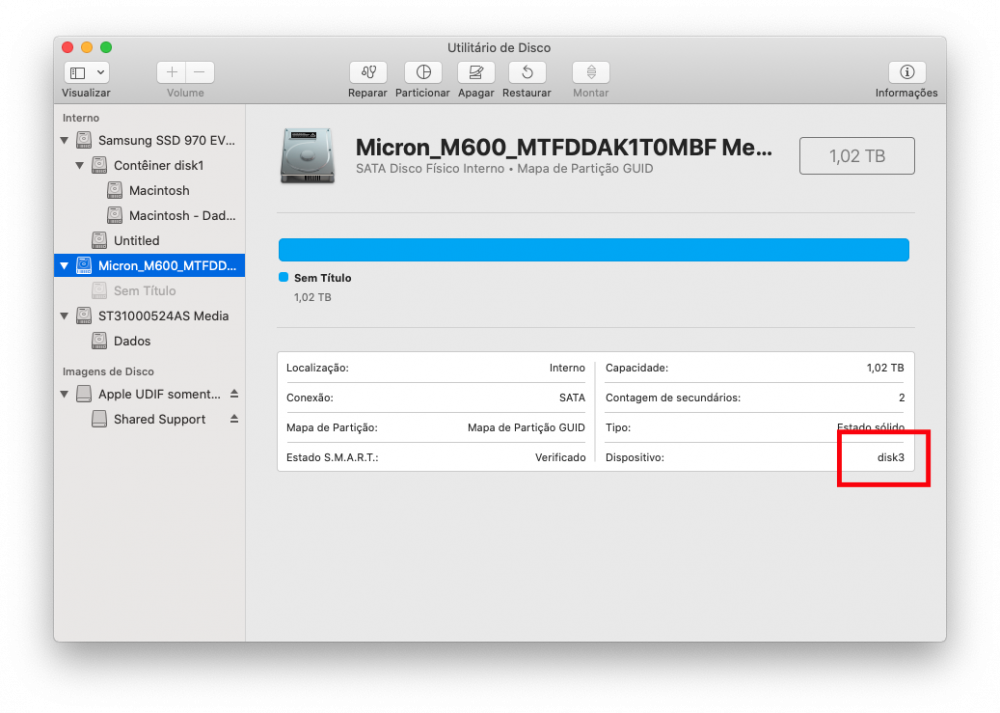
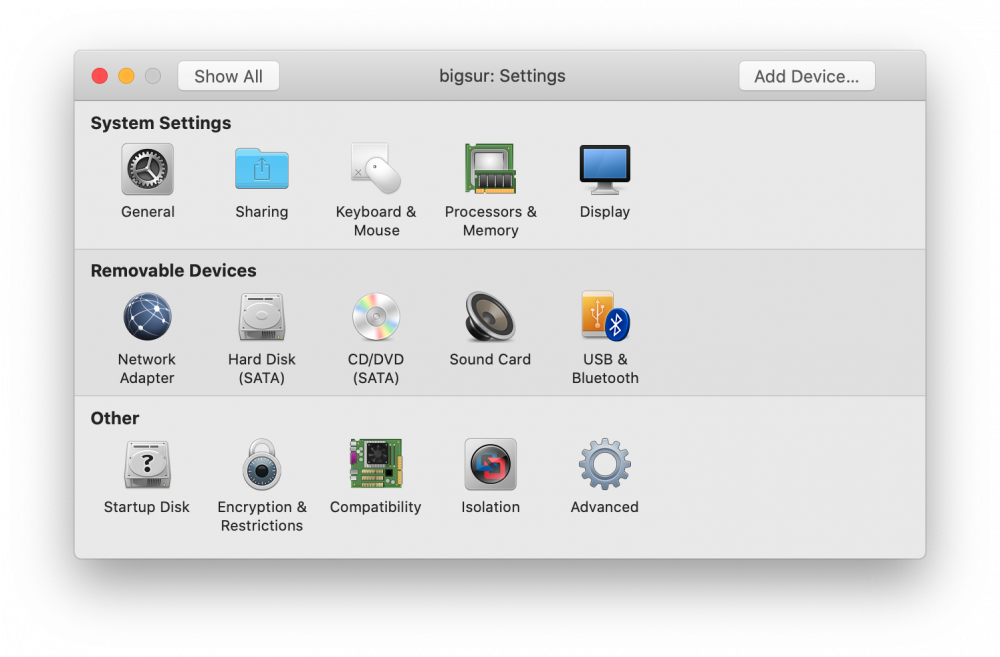
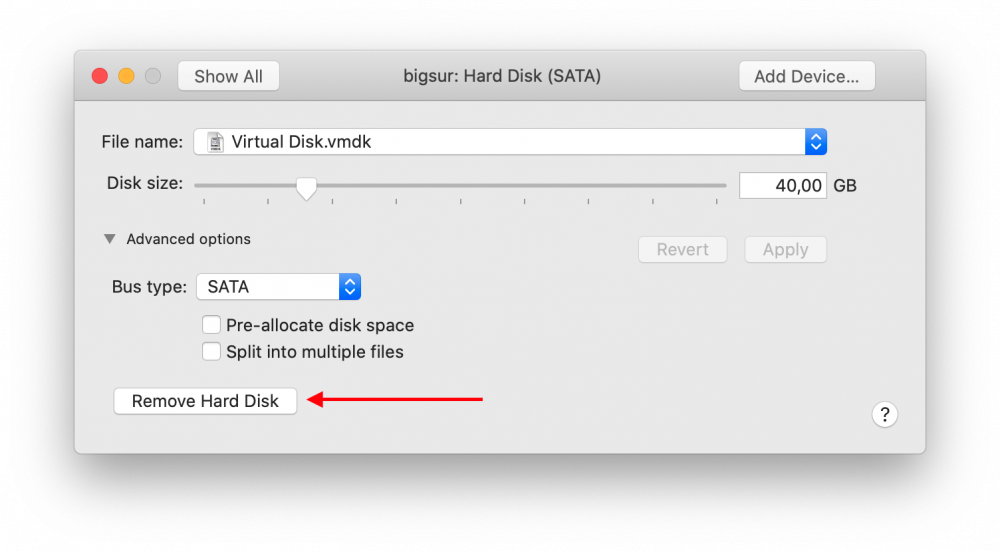
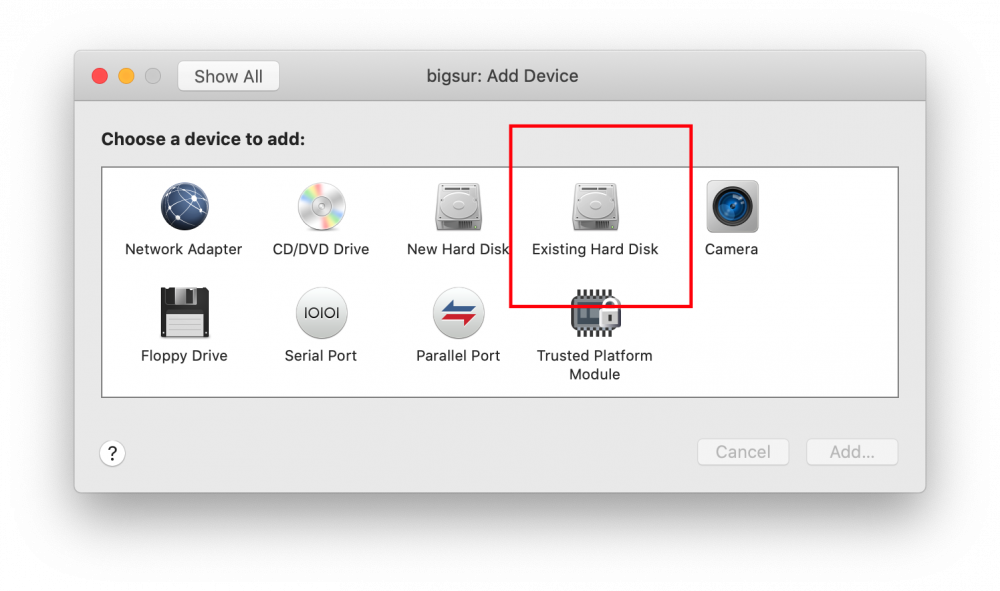
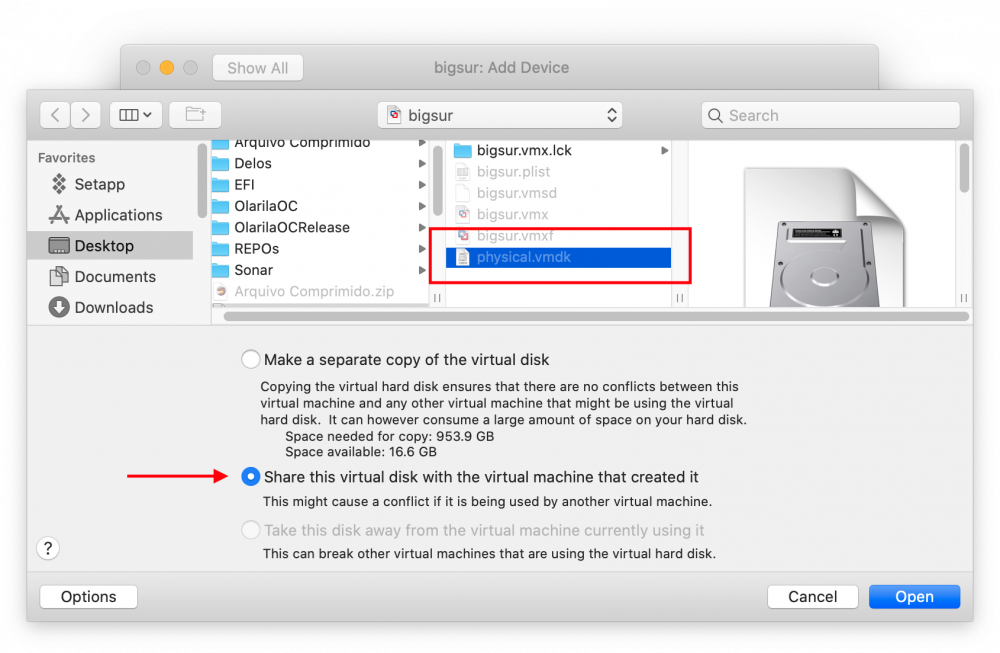
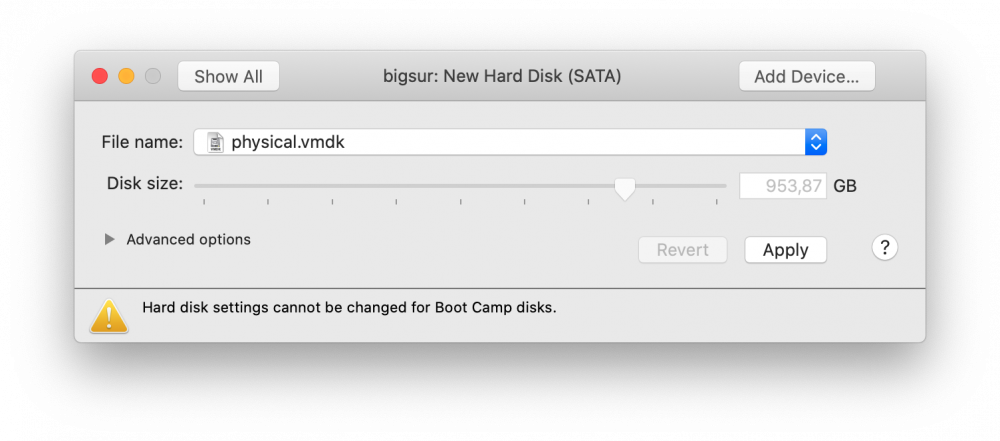
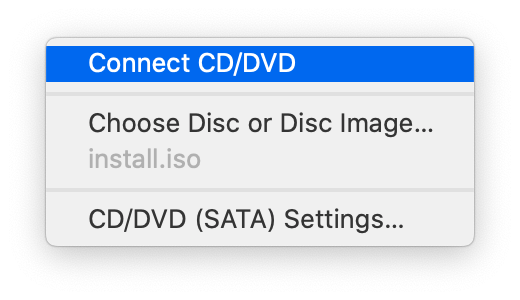
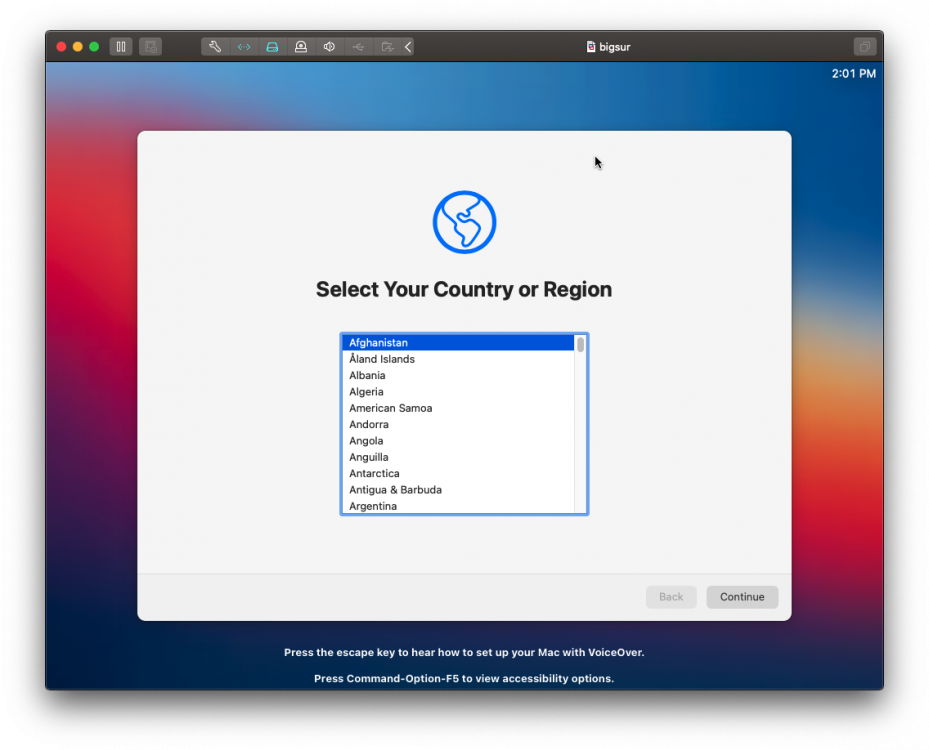
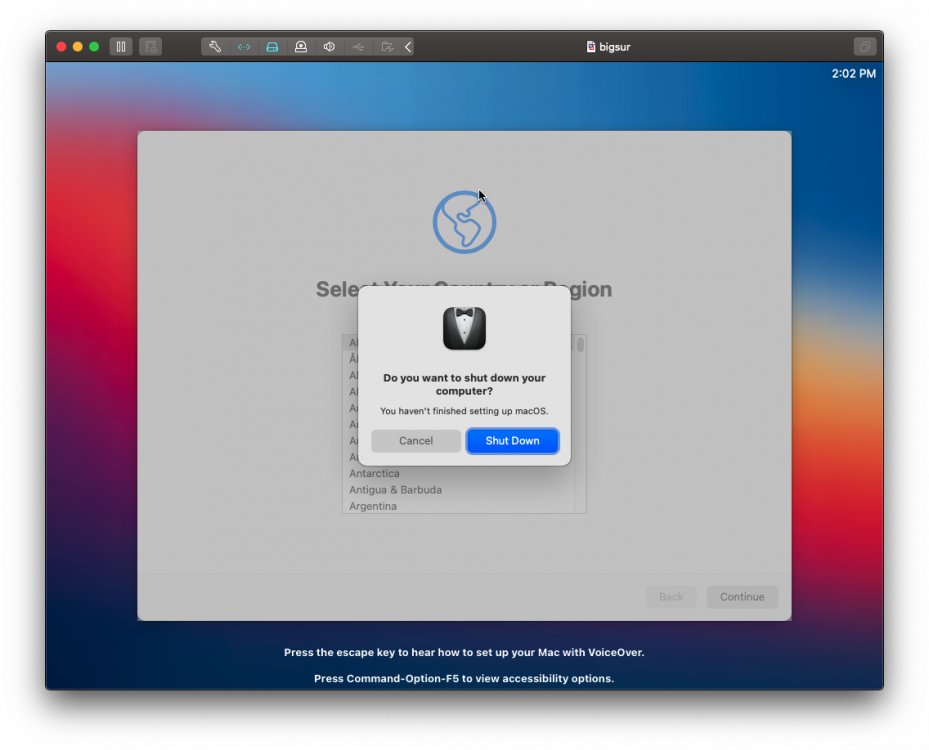
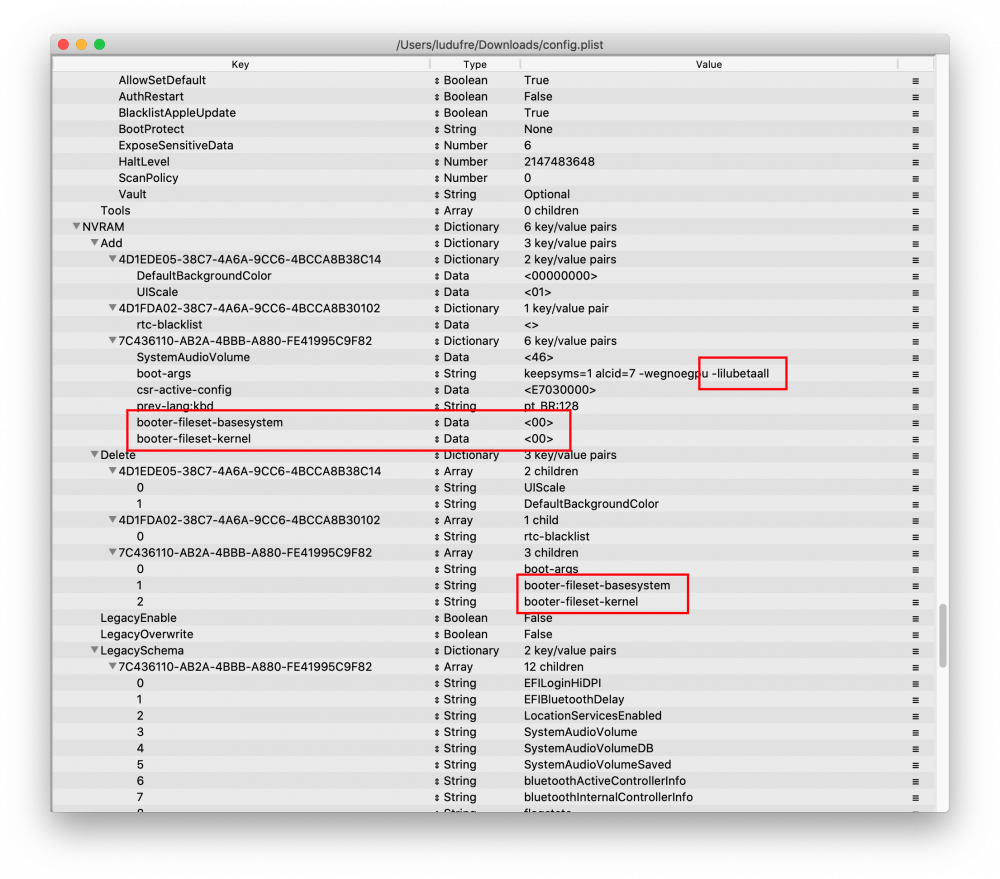
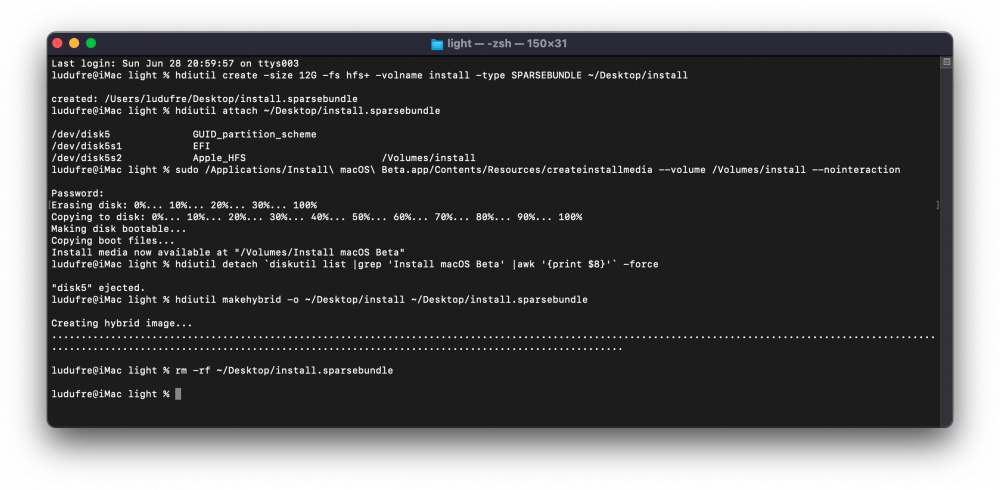
Installing macOS Big Sur 11.0 DP1 on Gigabyte Z370N WIFI + i7 8700K + UHD 630 Changelog: 06/28/2020 22:05h GMT-0 - Replaced detach command when creating ISO. - Thanks @ham4ever - Added instruction to run one line at time. 06/27/2020 02:37h GMT-0 - iMessage works too. Just not at first boot. 06/26/2020 18:54h GMT-0 - First version. What works and what does not - Processor: Intel Core i7-8700K -> Work. All SpeedStep stages.- Video Card: Intel UHD 630 -> Work. QE/CI and Metal.- Chipset: Intel Z370 -> Work.- HDMI 2.0 (1st) -> Work. - HDMI (2nd) -> Work. - DP -> Work. - Audio: ALC1220 -> Work. - HDMI Audio -> Work.- WiFi/Bluetooth -> Not work. Replaced with BCM94360CS2. - Ethernet (1st) -> Work.- Ethernet (2nd) -> Work.- USB3.0 -> Work.- Sleep -> Work. - Airdrop, Handoff, Instant Hotspot and Continuity -> Work after replaced wireless. Todo - Fix iMessage (other iServices works perfectly) - Nothing Disclaimer! Bootloaders are currently unable to start the installation. The solution is to use a virtual machine and use a physical disk (additional, USB or SATA, NVME) as a target in the installation. Change the OpenCore compiled from the source code, and add some entries in NVRAM through config.plist. This is not the best solution. But it is the only way at the moment. There are some ready-made images available out there, but I prefer not to use them and create a clean installation. What you need to install - Running install of macOS - Already working OpenCore with this setup - Create bootable ISO file - Spare Disk/SSD- macOS Big Sur DP1 install app- Latest OpenCore + Kexts compiled from sources - Some KEXTs and SSDT patches UEFI configuration My BIOS is F10 (I use an 8th generation processor, so I don't need to upgrade) You can configure manually or load my BIOS profile. Manually: - Shutdown and insert the flash.- Power on with DEL pressed to enter BIOS setup.- Change value: BIOS - CSM Support to Disabled- Change value: BIOS - Secure Boot to Disabled- Change value: Peripherals - Initial Display to IGP- Change value: Chipset - VT-d to DISABLE- Change value: Chipset - Internal Graphics to ENABLE- Save & Exit Setup or, BIOS profile You can use one of my BIOS profiles attached bellow. It's two versions. One stock and another with overclock [5.0 GHz] - Put the profile in the root of the flash drive at EFI partition. - Restart with DEL pressed to enter BIOS setup. - Go to Save & Exit. - Select Load Profiles. - Select last option and then the flasdrive in the list. - And finally choose MACOS_STOCK or MACOS_5GHZ. - Save & Exit Setup How create bootable ISO file Download Big Sur DP1 Run this command on Temrinal: sudo /System/Library/PrivateFrameworks/Seeding.framework/Resources/seedutil enroll DeveloperSeed Go to System Updater and download the Install macOS Beta app. Create ISO Then run on Terminal (One line at a time): hdiutil create -size 12G -fs hfs+ -volname install -type SPARSEBUNDLE ~/Desktop/install hdiutil attach ~/Desktop/install.sparsebundle sudo /Applications/Install\ macOS\ Beta.app/Contents/Resources/createinstallmedia --volume /Volumes/install --nointeraction hdiutil detach `diskutil list |grep 'Install macOS Beta' |awk '{print $8}'` -force hdiutil makehybrid -o ~/Desktop/install ~/Desktop/install.sparsebundle rm -rf ~/Desktop/install.sparsebundle Now you have install.iso on desktop. How create create the virtual machine and install to disk/SSD Download and install the trial version of the VMware Fusion from their site. I'm used the version 11.5.5. - Create a custom virtual machine - Operating System: Apple OS X - macOS 10.15 - Create a new virtual disk (The size doesn't matter, We'll delete later) - Click in "Customize Settings" - Save the VM on desktop with name: bigsur - Insert the spare disk/SSD on PC (reboot if necessary) and identify what /dev/diskX is. You can look on Disk Utility.app: - Create VMDK that point to it: sudo diskutil unmountDisk diskX /Applications/VMware\ Fusion.app/Contents/Library/vmware-rawdiskCreator create /dev/diskX fullDevice ~/Desktop/bigsur.vmwarevm/physical sata - Edit the virtual machine settings created previously - Click in Hard Disk (SATA) and delete it (Remove Hard Disk) - Then add the physical disk - There's a bug in Fusion. To select the physical.vmdk, right click then "Quick Look", then "Share virtual disk with the virtual machine that created it" - Click Apply. - Now mount de install.iso - Start the VM and install as usual until: Disk Utility, format GUID with APFS (VMware Virtual SATA Hard Drive Media), Install macOS, wait few reboots and stop at first boot wizard. This can take up to 45 minutes. It may seem like it is stopped, but it is not. - Press Command + Q and shutdown (usually WIN + Q) - Close VMware Fusion. Copy OpenCore to EFI - Mount the EFI with: sudo diskutil mount diskXs1 - Copy your current working OpenCore EFI to that mounted EFI. - Download mine attached or Update your OpenCore, Kexts and driver UEFI. - You can use the @MaLd0n script attached to compile all (OlarilaOC.command.zip) - If using mine add your MLB, ROM, SystemUUID and SystemSerialNumber. (see how to) - Add following items do config.plist: NVRAM -> Add -> 7C436110-AB2A-4BBB-A880-FE41995C9F82 -> boot-args -> -lilubetaall (append) NVRAM -> Add -> 7C436110-AB2A-4BBB-A880-FE41995C9F82 -> booter-fileset-basesystem + Data + <00> NVRAM -> Add -> 7C436110-AB2A-4BBB-A880-FE41995C9F82 -> booter-fileset-kernel + Data + <00> NVRAM -> Delete -> 7C436110-AB2A-4BBB-A880-FE41995C9F82 -> booter-fileset-basesystem NVRAM -> Delete -> 7C436110-AB2A-4BBB-A880-FE41995C9F82 -> booter-fileset-kernel Done! Boot from the new disk/SSD and finish de first boot wizard. And last but not least I would like to thank the following community members, by making these dream possible:@crushers, @snatch, @apianti, @blackosx, @blusseau, @dmazar, @slice2009, @autumnrain, @phpdev32, @EMlyDinEsH, @RehabMan, @Scellow, @mitch_de, @Shailua, @Andy Vandijck, @maxfierke, @ArturXXX, @LexHimself, @brumas, @khamsakamal48, @MaLd0n, @joedm and @vit9696 and all others members involved directly or indirectly. Attachments MACOS_5GHZ MACOS_STOCK OlarilaOC.command.zip EFI.zip


 3 points
 -
@Pavo @REKTIMU2 Nobody knows what precisely breaks installer. Kexts do not inject, yes, but we do not know whether they need to for all systens. First stage installer does not need DSMOS, that's confirmed.3 points
-
Dang I want those two monitors! Yes, I resolved by moving the Fenvi on the most bottom PCI Slot -> PCIEX4 (1 x PCI Express x16 slot, running at x4)3 points
-
Big Sur on HP 800 G1 mini Installed Big Sur from a real Mac (Mac mini) using a USB SSD, mounted the EFI partition and copied my EFI folder. (after many hours of trial and error), install the SSD into my HP 800 G1 mini and the system boots into the desktop, finished user settings. Sleep is working but fans seem to be running fast. all in all seems to be good. I using VooDooHDA for sound. Thanks to all with the great posts that helped figure out, this is not ready for prime time but its cool to play with...
 3 points
 -
For all testing purposes I suggest using a USB drive with a EFI on it. Test every OS with that EFI to see if it boots, if all goes well then you can move it to a single internal drive. You only need 1 EFI to boot all OSes on the system. Not a EFI for every OS.2 points
-
Finally, MacOS Big Sur on Dell XPS 9350 OC 0.6.0 Thanks @MaLd0n for tutorial on olarila.com and pre compiled main kexts (lilu, WEG, applealc, virtualsmc)
 2 points
 -
Thanks! I'm going to try that now and see how it goes :) I'll let you know!2 points
-
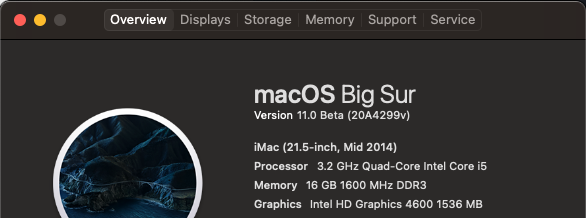
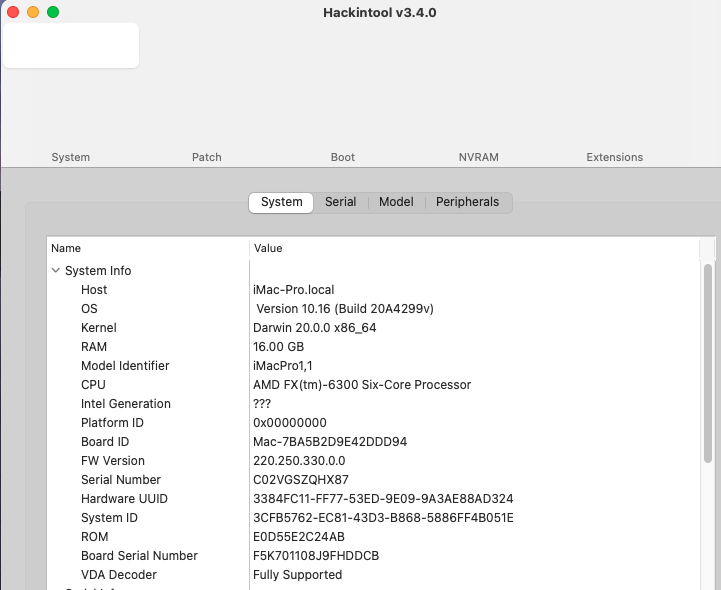
Good news: OpenCore 0.6.0 with new AMD vanilla patches can boot Big Sur in my FX-6300 hackintosh now ! [Edit] Major bugs: 1. Screen background still shows Catalina instead of Big Sur. 2. Loss of audio output in Firefox, and poor video playl in Safari & Google Chrome. 3. In Ryzen 1700X hackintosh normal audio and video play in Safari & Google Chrome, but still loss of audio output in Firefox. 4. Previous fix of CMOS reset in Catalina was broken in Big Sur again. Always got CMOS reset during reboot after wake-up from sleep. 15h_16h-jslai-OC.plist FX-6300-Big-Sur.txt
 2 points
 -
1 is WriteFlash enabled? 2 does nvram 8BE4DF61-93CA-11D2-AA0D-00E098032B8C:Boot0080 show different values when switching from Startup Disk? 3 attach more logs please 4 run logouthook manually, does it create nvram.plist with correct values?2 points
-
All of us hope the same hehe2 points
-
true looks amazing2 points
-
2 points
-
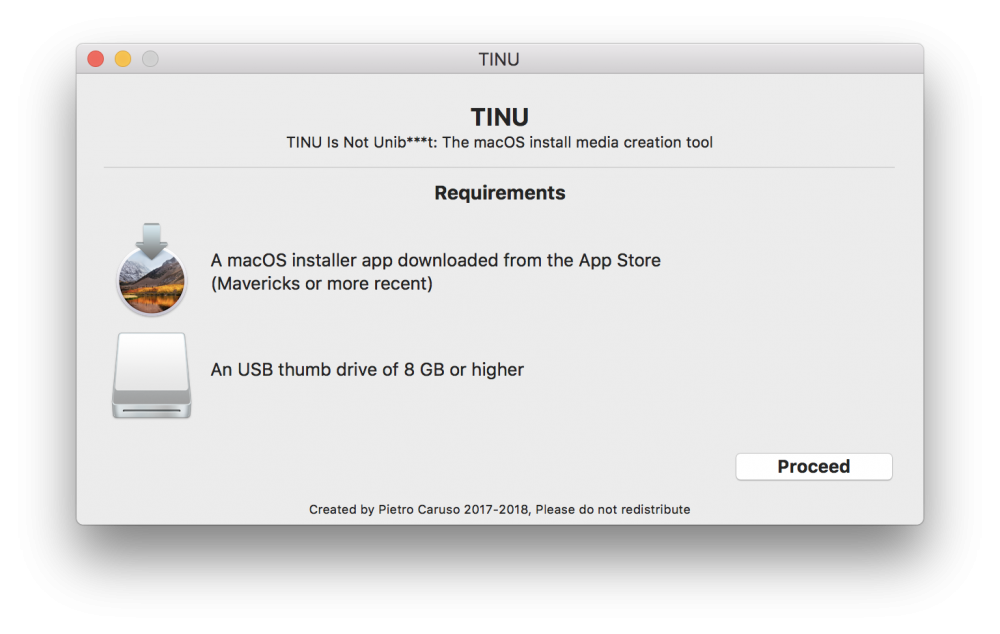
Questo è il thread in italiano dedicato alla mia app TINU, l'app open source che ho creato per creare chiavetta di installazione di mac utilizzando il metodo "createinstallmedia". Il nome è l'acronimo di TINU Is Not U (Per le regole del forum devo censurare, ma la U si riferisce ad un programma che piu o meno svolge lo stesso scopo che per buoni motivi è bandita su questo sito, il punto del metterlo nel nome sta nel sottolineare che la mia app è totalmente diversa) L'app è pensata per essere molto semplice ed immediata da usare (con un interfaccia grafica progettata con criteri e metodi usati in ambito professionale per lo sviluppo di applicazioni utente) e per essere molto solida e stabile che funziona sempre al primo colpo (a differenza di altri tool che conosciamo ...) A livello funzionale quest'app non è altro che un interfaccia grafica per il metodo da terminale "createinstallmedia" che viene sfrutatto dalla stessa per creare la chiavetta, quindi le chiavette create con TINU sono chiavette al 100% vanilla come se le aveste create dal terminale, l' applicazione, rispatto al metodo da terminale, aggiunge però funzioni utili come il controllo ed il riconoscimento di errori nel processo, la formattazione automatica della chiavetta USB che si sceglie di usare in formato Mac OS Extended (journaled) (detto anche HFS+) con mapatura di partizione GUID, ed anche altre opzioni personalizzabili o disattivabili come l'applicare un icona alla chiavetta di instalalzione. Tra gli altri vantaggi troviamo il fatto che permette di creare chiavette utilizzando qualunque applicazione di mac che contiene l'eseguibile "createinstallmedia" inclusi installer delle beta ed installer appena rilasciati, e non richiede di fare cose particolari prima come formattare la chiavetta e cambiare lingua al sistema e puo utilizzare applicazioni di mac che si trovano in varie directory nel sistema e non solo quelle che stanno nella cartella delle applicazioni ed hanno un nome specifico (nota che l'applicazione di installazione di mac deve essere quella interacche pesa diversi gb e non quella da pochi mb che l'app store puo scaricare alcune volte e che non contiene tutto quello che serve per permettere a createinstallmedia di funzionare) Tra l;e altre cose quest'app è l'unica app di questo genere sviluppata e che continua ad essere sviluppata in Italia ed è anche l'unica completamente open source. Trovate qui alcuni link utili: - Scarica l'app: https://github.com/ITzTravelInTime/TINU/releases - Codice sorgente dell'app: https://github.com/ITzTravelInTime/TINU - FAQs (Domande fatte di frequente, in inglese): https://github.com/ITzTravelInTime/TINU/wiki/FAQs - Thread in inglese su tinu (English thread about TINU): http://www.insanelymac.com/forum/topic/326959-tinu-the-macos-install-media-creation-tool-mac-app/ Qui invece ci sono un paio di guide (Anche se l'app è molto facile da usare): - Piccola guida su come usare TINU per un hackintosh: https://www.youtube.com/watch?v=Ug1yBZybpD4 - Piccola guida su come usare TINU per creare cheiavette per Mac "originali": https://www.youtube.com/watch?v=fZOZOUt2ErM Pianifico molte altre nuove funzioni per future versioni dell'app (vedi il thread in inglese per saperne di più) Il supporto a clover in TINU è pianificato per una versione futura, anche se dei protipi a livvello codice per renderlo possibile, sono gia stati sperimentati con successo. Spero che anche voi del forum italiano aprezzerete questa app come gli utenti del forum inglese, per idee e suggerimenti, siete liberi di esprimervi :-)
 1 point
 -
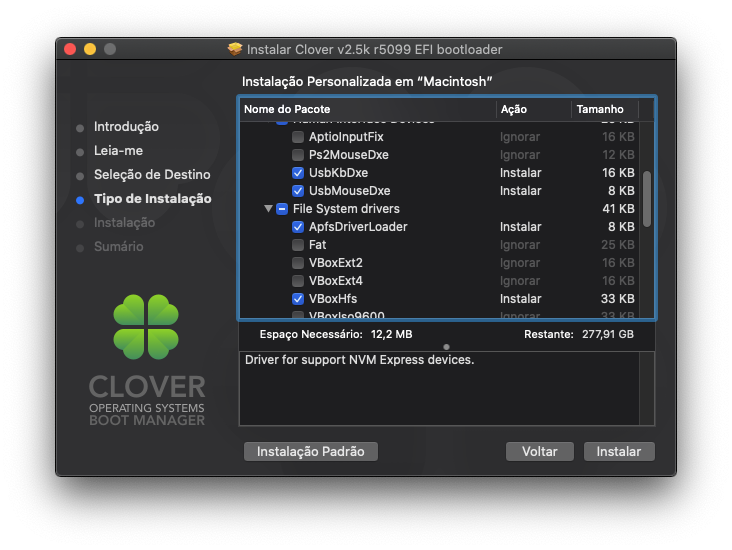
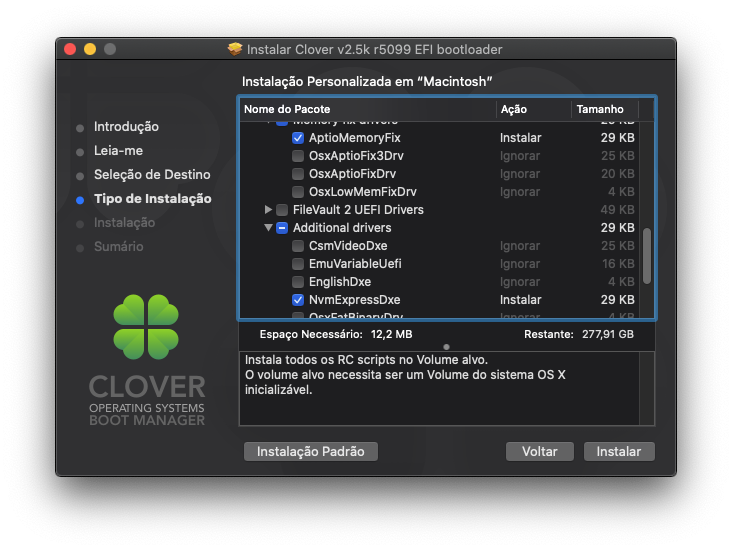
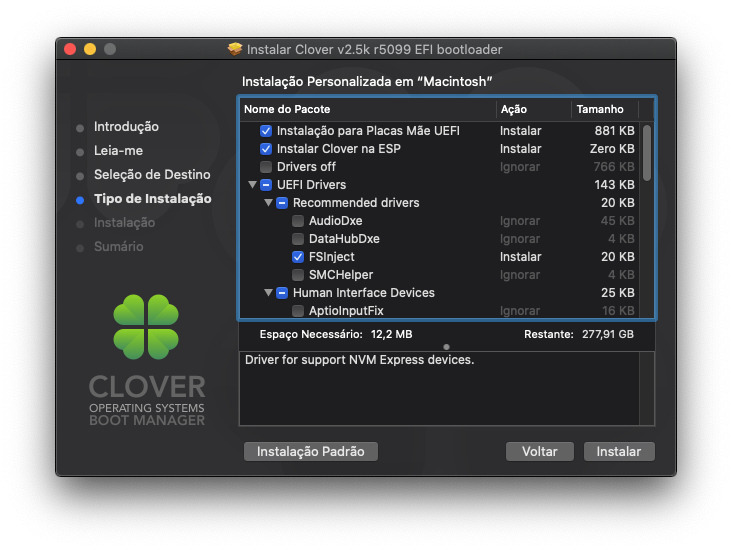
Installing macOS Catalina 10.15.5 on Gigabyte Z370N WIFI + i7 8700K + UHD 630 Changelog: 06/10/2020 14:51h GMT-0 - Fixed dual screen issue in 10.15.5. Thanks @khamsakamal48 05/27/2020 20:02h GMT-0 - Update instructions 10.15.5. 03/24/2020 20:23h GMT-0 - Update instructions 10.15.4. 01/30/2020 23:54h GMT-0 - Update instructions 10.15.3. 12/11/2019 03:58h GMT-0 - Update instructions 10.15.2. - Updated EFI folder attached. 11/30/2019 18:03h GMT-0 - Changed Device -> Graphics platform to fix dual HDMI monitor. - Updated EFI folder and config.plist 11/29/2019 21:28h GMT-0 - Added full EFI folder as requested. 11/27/2019 02:33h GMT-0 - Added BIOS profiles for ease. 11/25/2019 22:45h GMT-0 - Fixed wrong ethernet link (IntelMausi.kext). - Thanks to @MiMoHo 11/24/2019 04:56h GMT-0 - First version. What works and what does not - Processor: Intel Core i7-8700K -> Work. All SpeedStep stages.- Video Card: Intel UHD 630 -> Work. QE/CI and Metal.- Chipset: Intel Z370 -> Work.- HDMI 2.0 (1st) -> Work. - HDMI (2nd) -> Work. - DP -> Work. - Audio: ALC1220 -> Work. - HDMI Audio -> Work.- WiFi/Bluetooth -> Not work. Replaced with BCM94360CS2. - Ethernet (1st) -> Work.- Ethernet (2nd) -> Work.- USB3.0 -> Work.- Sleep -> Work. - Airdrop, Handoff, Instant Hotspot and Continuity -> Work after replaced wireless. Todo - Empty What you need to install - Running install of macOS- One USB flash drive of 8GB or bigger- macOS Catalina install app- Clover EFI - Clover Configurator - Some KEXTs and SSDT patchesHow create create the install flash drive Prepare install flash drive Format the flash drive with GUID partition mapping and name it "Install".- Open Disk Utility.- Click in View, then "Show All Devices".- Select the destination flash drive, then Erase.- Name: Install, Format: Mac OS Extended (Journaled) and Scheme: GUID Partition Map Create install flash driveOpen terminal and run this command: sudo /Applications/Install\ macOS\ Catalina.app/Contents/Resources/createinstallmedia --volume /Volumes/Install --nointeraction This will take about 30 minutes. Install bootloader Download the CloverEFI from official repository (used 5099) and install only with these options on "Install macOS Catalina": - Install for UEFI booting only- Install Clover in the ESP- UEFI Drivers - Recommended Drivers - FSInject (I still don't know if it's really necessary) - UEFI Drivers - File System drivers - ApfsDriverLoader (Support to APFS partitions) - UEFI Drivers - File System drivers - VBoxHfs (Support HFS/HFS+ partitions) - UEFI Drivers - Memory fix drivers - AptioMemoryFix (Fix the memory management of de UEFI/BIOS) - UEFI Drivers - Additional drivers - NvmExpressDxe (If you are going to use NVMe) FileVault 2 If you plan to use FileVault 2, you need to download additional drivers, since what comes with Clover is not up to date and use VirtualSMC instead of FakeSMC. Follow instructions bellow: From current Clover installation, check these options to USB keyboard/mouse work on password screen: - UEFI Drivers - Human Interface Devices - UsbKbDxe - UEFI Drivers - Human Interface Devices - UsbMouseDxe After Clover install will be created a partition named EFI and mounted in Desktop. Usually the path is /Volumes/EFI/. Download the versions 2.1.0 and 2.0.9 of AppleSupportPkg from: https://github.com/acidanthera/AppleSupportPkg/releases We need the last version of AppleGenericInput.efi that is inside 2.1.0 and last version of AppleUiSupport.efi that is inside 2.0.9. OR download attached bellow. Put in /Volumes/EFI/EFI/CLOVER/drivers/UEFI/ That's it! FileVault 2 will work without problems. Make things works After Clover install will be created a partition named EFI and mounted in Desktop. Usually the path is /Volumes/EFI/. - Replace the /Volumes/EFI/EFI/CLOVER/config.plist with mine attached below according to your processor version. - Put all SSDT-*.aml attached below in /Volumes/EFI/EFI/CLOVER/ACPI/patched/ Generate your Serial, MLB and SmUUID - Open the replaced config.plist with Clover Configurator (used 5.8.0.0) - Go to SMBIOS, click few times in "Generate New" in Serial Number and SmUUID. Copy the Clover Configurator to flash drive because you will need later. Download those Kexts and put in /Volumes/EFI/EFI/CLOVER/kexts/Other/ - Download the VirtualSMC.kext, SMCProcessor.kext, SMCSuperIO.kext and UEFI driver (put VirutalSmc.efi inside /Volumes/EFI/EFI/drivers/UEFI/). I used the version 1.0.9. - Download the Lilu.kext from here. I used the version 1.3.9. - Download the WhateverGreen.kext from here. I used the version 1.3.4. - Download the AppleALC.kext from here. I used the version 1.4.3. - Download the USBInjectAll.kext from here. I used the version 2018-1108. - Download the IntelMausi.kext from here. I used the version 1.0.2. - Download the SmallTree-Intel-211-AT-PCIe-GBE.kext attached bellow to enable second ethernet. Important! If you are coming from my previous Mojave guide, please note that I am using some kexts from other repositories / authors. Wifi and Bluetooth (BCM94360CS) Works out of box (plug 'n' play). Now you can start the installation without problem (I guess). How install UEFI Setup Configuration and InstallationUEFI configuration My BIOS is F10 (I use an 8th generation processor, so I don't need to upgrade) You can configure manually or load my BIOS profile. Manually: - Shutdown and insert the flash.- Power on with DEL pressed to enter BIOS setup.- Change value: BIOS - CSM Support to Disabled- Change value: BIOS - Secure Boot to Disabled- Change value: Peripherals - Initial Display to IGP- Change value: Chipset - VT-d to DISABLE- Change value: Chipset - Internal Graphics to ENABLE- Save & Exit Setup or, BIOS profile You can use one of my BIOS profiles attached bellow. It's two versions. One stock (Geekbench 4: 5840/27384) and another with overclock [5.0 GHz] (Geekbench 4: 6360/30348) - Put the profile in the root of the flash drive at EFI partition. - Restart with DEL pressed to enter BIOS setup. - Go to Save & Exit. - Select Load Profiles. - Select last option and then the flasdrive in the list. - And finally choose MACOS_STOCK or MACOS_5GHZ. - Save & Exit Setup Then: - Now, hold the F12 - In the list, select your flash drive. - Choose the flash drive (white icon). The installer will start. Format destination diskFormat the disk with GUID partition mapping and name it "Macintosh".- Select Disk Utility in the list, then press Continue.- Click in View, then "Show All Devices".- Select the destination Disk, then Erase.- Name: HD, Format: APFS and Scheme: GUID Partition MapClose Disk Utility.Select "Install macOS", then Continue.Follow instructions in screen.After installAfter first part install the system will reboot. Maybe you have to press ESC again and select the flash drive. Choose the internal disk (gray hdd icon) if not already selected. The second part of the installation will begin. This will take 16 minutes. Post installation Bootloader When the second part of install finish, the system will reboot again.After performing the user initial setup and go to the desktop, you need to make the system disk bootable.Open the Clover Configurator from flash drive that you copied before.Mount and open the flash drive EFI partition. (Inside Clover Configurator, Mount EFI -> Select flash drive in Efi Partitions list -> Mount Partition -> Open Partition) Copy the EFI folder to desktop. Go back to Clover Configurator, unmount the EFI partition of the flash drive and mount and open the EFI partition of internal disk. Move the EFI folder from Desktop to EFI partition of the internal disk. Eject the flash drive. Move all Kexts from EFI partition of internal disk to /Library/Extensions and make kext cache, with those commands in Terminal: sudo mv -R /Volumes/EFI/EFI/CLOVER/kexts/10.15/* /Library/Extensions/ sudo chmod -R 755 /Library/Extensions sudo chown -R root:wheel /Library/Extensions sudo kextcache -i / Restart the system. Last thing Run this command in Terminal to disable hibernation (doesn't work in macOS): sudo pmset -a hibernatemode 0 It's done! System Updates 10.15.2 Before install, update the following kexts: - Lilu.kext. I used version 1.4.0. - WhateverGreen.kext. I used version 1.3.5. - AppleALC.kext. I used version 1.4.4. (all download links above) Download the latest CLOVERX64.efi.zip build. I used version 5100. Mount EFI partition and unzip to: - /Volumes/EFI/EFI/CLOVER/CLOVERX64.efi - /Volumes/EFI/EFI/BOOT/BOOTX64.efi (rename the copy of CLOVERX64.efi to BOOTX64.efi Install update. Will reboot at least four time. 10.15.3 Updated with success without changing anything. 10.15.4 Before install, update the following kexts: - Lilu.kext. I used version 1.4.2. - WhateverGreen.kext. I used version 1.3.7. - AppleALC.kext. I used version 1.4.7. - VirtualSMC.kext. I used version 1.3.7. (all download links above) Download the latest CLOVER installer. I used version 5107. - Install respecting the configuration mentioned above in "Install bootloader" section. Install update. Will reboot at least four time. 10.15.5 - Same as usual, update all Kexts and Clover. - Install Update, reboot. If you like me, I had a problem with two monitors. I needed to roll back two Kexts of video from 10.15.4: FixGraphics10.15.5.zip After replace, fix permissions and cache. Change AAPL,ig-platform-id to 00009B3E to fix it. And last but not least I would like to thank the following community members, by making these dream possible:@crushers, @snatch, @apianti, @blackosx, @blusseau, @dmazar, @slice2009, @autumnrain, @phpdev32, @EMlyDinEsH, @RehabMan, @Scellow, @mitch_de, @Shailua, @Andy Vandijck, @maxfierke, @ArturXXX, @LexHimself, @brumas, @khamsakamal48 and all others members involved directly or indirectly. Attachments config.plist v2.zip EFI v4.zip Filevault 2 additional drivers.zip SmallTree-Intel-211-AT-PCIe-GBE.kext.zip SSDTs.zip MACOS_5GHZ MACOS_STOCK
 1 point
 -
ola... esta uma cofusao... um alvoroço... danado sobre... e estao reeditando roseta..para poder rodar app em ARM.. "quando vc tem um monte de solucoes para uma coisa eh porque vc nao sabe o q eh...senao so teria um remedio..." conversa de medico... c.frio papo de medico1 point
-
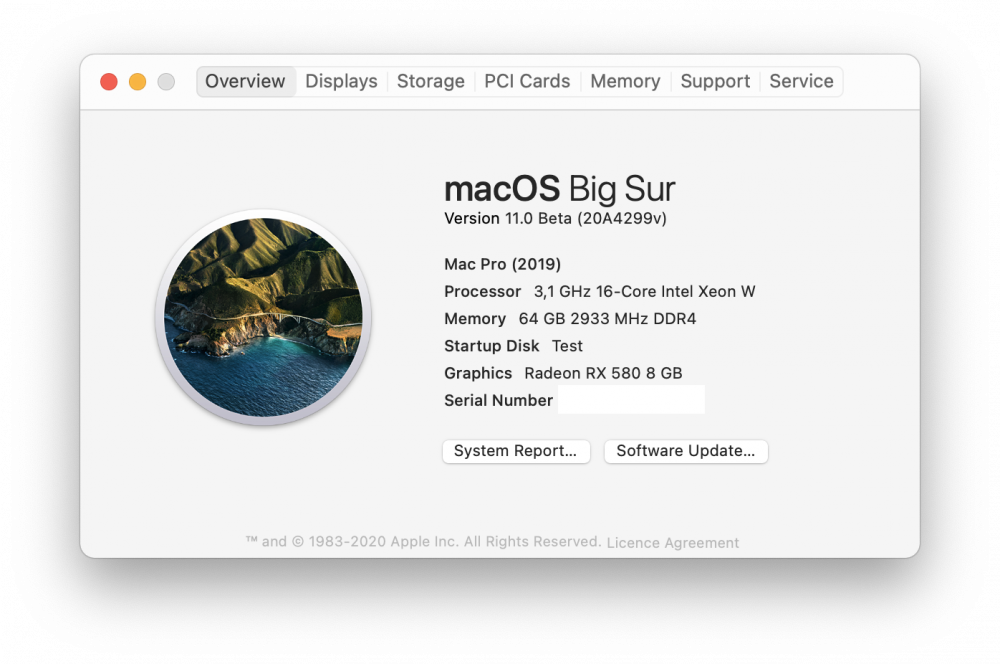
So far everything is working Great CPU: intel i7 9700k RAM: Corsair Vengeance RGB PRO 16 GB (4 x 8 GB) Motherboard: Gigabyte Z390 AORUS ULTRA Ethernet: Intel 1219V7 PCI Express Gigabyte Ethernet Graphics Card: Radeon RX 5700 XT 8 GB WIFI/BT Card: Fenvi FV-HB1200 SMBIOS: iMacPro1,1 point
-
You are literally using the existing apfs firmlink in filesystem from Catalina. However that's not possible on a clear installation to a blank partition/volume. And I also suppose that you can't open Safari by just clicking the icon since that's not migrated automatically. If you run diskutil apfs list, there's also no "sealed: yes" for system volume, which should exist with VM/real Mac installation. Meanwhile, don't over exaggerate and a lot of people have already succedded in this kind of "update" way, which may break in further updates. The real native solution hasn't arrived yet.1 point
-
if you did a full disk wipe and installed and the logs had no evidence of VM and no gaps in timestamps, I'd concede it's possible and magical.1 point
-
Yes, that's correct. Endless loop. Any idea what's the error about?1 point
-
Can we see your install log too to see obvious use of virtualization passthrough?1 point
-
"content-hint" = EFI; "dev-entry" = "/dev/disk28s1"; 2020-06-27 19:08:26-03 Julios-iMac Installer[6276]: Oracle VM VirtualBox 6.1.10 Installation Log 2020-06-27 19:08:26-03 Julios-iMac Installer[6276]: Opened from: /Volumes/VirtualBox/VirtualBox.pkg 2020-06-27 19:08:27-03 Julios-iMac Installer[6276]: Product archive /Volumes/VirtualBox/VirtualBox.pkg trustLevel=350 I'll just leave this here.1 point
-
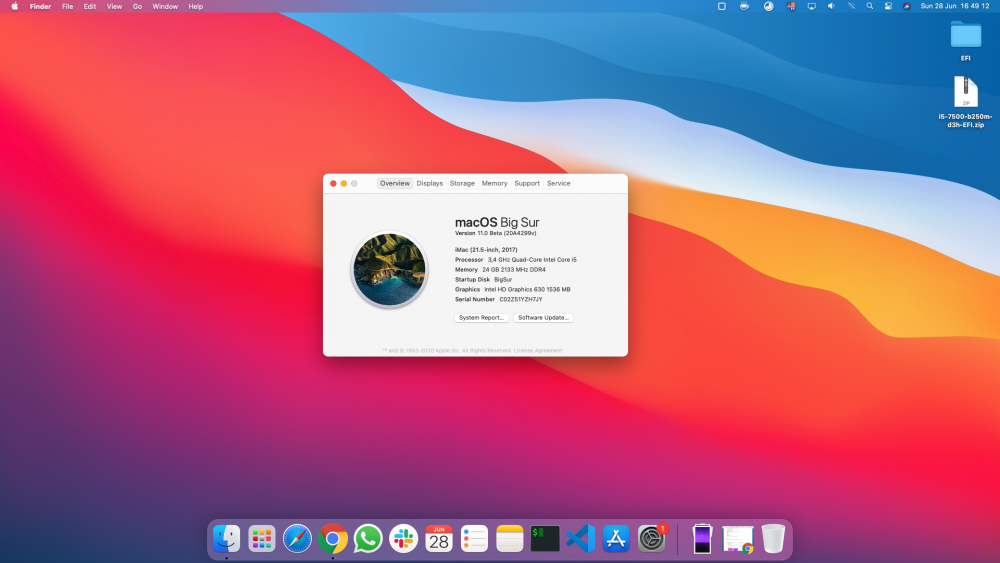
There you go. It dates back to 23 Jun which is when I install the Catalina. The timeline is pretty much as follows: 23 Jun - Install Catalina; 24,25,26 - Random stuff, was using the system to do some work, sometime in between I dowloaded BigSur; 27 Jun about 5pm Started to work on getting BigSur; Specs: i5 7500 Gigabyte B250M-D3H 24GB RAM Nvidia GTX 1060 (which doesn't work obviously) What else do you need? I don't see how other specs would play a role but if you need anything else just let me know. Enjoy install.log1 point
-
As I've said in my post. I've managed it. However, graphics was buggy (pink screen) and also I installed on top of a Catalina. One thing that I believe is the reason why I've got it is that WhateverGreen was not Patching anything but my device/vendorID/framebuffer is supported and that I've a SMBios properly set but without WhateverGreen patching connectors (DP -> HDMI) it would mess with the display output that's why I needed to change sources on my monitor (I believe it has the same effect if you unplug/plug) so eventually I've got into the installer screen. Also, I did the prelinked kernel method, I believe that this maybe the reason why OC and Lilu could not Inject or Patch anything. I maybe try to do it again if I've got time, and try my best to document everything. For the newcomers I do not advise to try as I did it was really painful, you're better of doing the VM/Real Mac methods.1 point
-
You're missing quite a bit of stuff. Does C422 not need TSCAdjustReset.kext? Your sig says you're using clover so is this your first time using OpenCore? I built this EFI for X299 so it might be compatible. EFI.zip1 point
-
Just want to thank AudioGod and everyone else that's helped with the latest OpenCore EFI. I made the switch from Clover a couple of weeks ago and it was easy peasy. Running on OpenCore is super stable, clean and feels 100% like a real mac. Wow.1 point
-
"Vanilla" install is most likely installing using a real Mac to external disk method. OpenCore devs have already confirmed that it can not boot the installer yet.1 point
-
If this is using the installer, the installer doesn't work. You have to use the image restore method or install from a real Mac to external drive method.1 point
-
@Common_Sense sigh, that is a log from a RELEASE build, please read the docs...1 point
-
This is the issue I'm having.
 1 point
 -
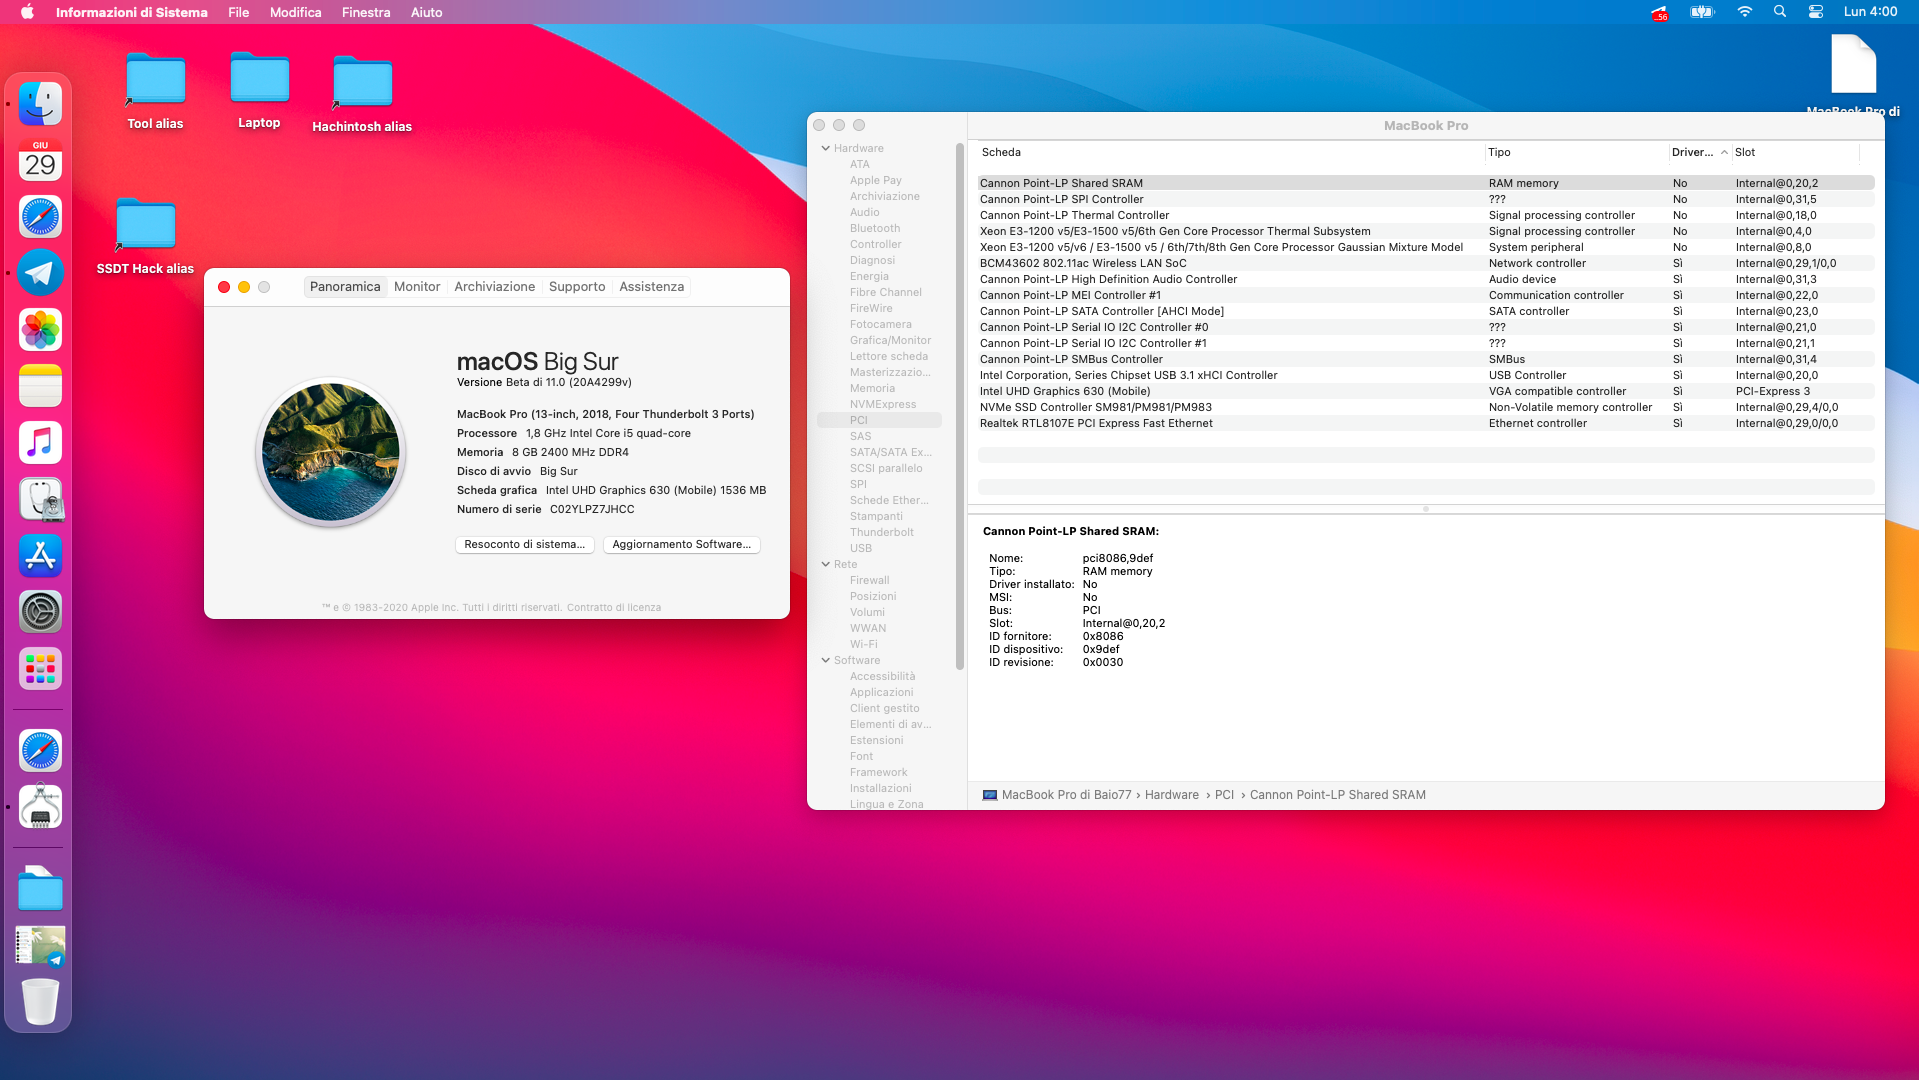
Dell 5584 I5 5265U Only UHD620 everything working MacBook Pro di Baio77.zip
 1 point
 -
Hey @ludufre thanks for your help. I combined my Catalina info with your kext and updated smbios and oc 6 and I am in Big Sur right now. Only issue so far is audio.1 point
-
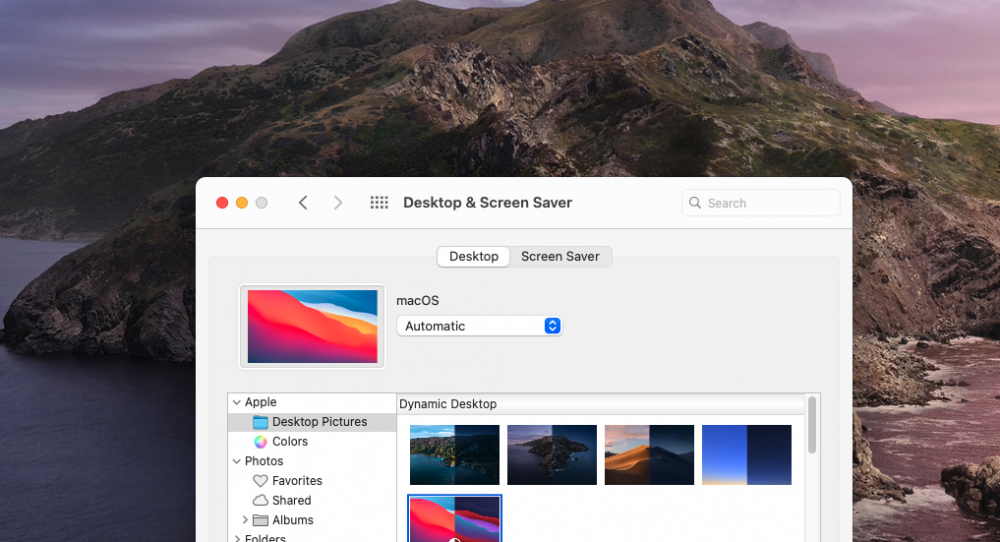
If you upgraded from Catalina to Big Sur, this is a known issue by Apple: Desktop Picture Known Issues If the desktop picture was never changed from the default macOS Catalina 10.15 image, it will persist after updating to macOS Big Sur 11 beta, even though the new default desktop picture is displayed in Desktop and Screen Saver preferences. (64390185)1 point
-
Yeah I think that’s your best way forward tbh, Heres an easy test that you could do just to write off any Bluetooth issues, if you have a wired keyboard and mouse just hook them in and see if it’s still choppy via that. I think @WizeMan had a similar issue with his wireless keyboard and mouse and he resolved it by moving he’s combo card to a different pcie slot (Pcie Lane conflicts). Now I’ve tagged him on this post he will see it and chime in on he’s issue and fix when he sees this. BTW, Nice setup brother, I especially like your Dual Monitors. That’s awesome stuff....1 point
-
@fastfwd Sorry. I didn't saw before. I fixed a lot of errors in your config.plist. The SMBIOS previously in your config maybe wrong. I think Kaby Lake processor need to be iMac18,1 with iGPU and iMac18,3 with dGPU. Try this and tell me: config.plist1 point
-
Hi everyone,I have run into a frustrating problem here.My hardware:MSI x399 Meg Creation2990WX64GB ram @2933MhzRadeon 7Sata: Samsung 130GB SSDM.2: Samsung 970 Pro 1TB(latest firmware)Using OpenCore 0.5.6(NVMeFix NVMeDxe installed)I have successful installed OSX catalina onto my 130GB. It works flawlessly.and then I figure I should do it on my M.2 drive. It installs flawlessly, at the last stage of installation, it naturally restart and thats it.I can not boot into this newly installed OS on the M.2 drive. it keeps throwing: "error loading kernel cache 0x1"I have tried deleting the prelinkedkernel from recovery partition. Tried rebuilding cache(I have not installed any kext into L/E).All this time, I can use the same boot USB to boot into catalina on my sata 130Gb SSD working just fine. attached is my EFI folder. I have tried all the suggested SMBios iMacPro1,1 MacPro6,1 MacPro7,1 is this ruled out that samsung 970Pro doesnt work? Please help. EFI.zip1 point
-
Do you currently need SSDT-AWAC to boot? It looks like you're on a patched BIOS but not sure the version numbers on C422. If you do need SSDT-AWAC, you can just use the find-replace patch. Or, disable SSDT-AWAC and use the SSDT-RTC0-Range.aml (Remove the RTC scope). Scope (RTC) { Method (_STA, 0, NotSerialized) // _STA: Status { If (_OSI ("Darwin")) { Return (Zero) } Else { Return (0x0F) } } } You don't need the find-replace patch with this.1 point
-
For sure! I’ll send it tomorrow night, I’m not home currently.1 point
-
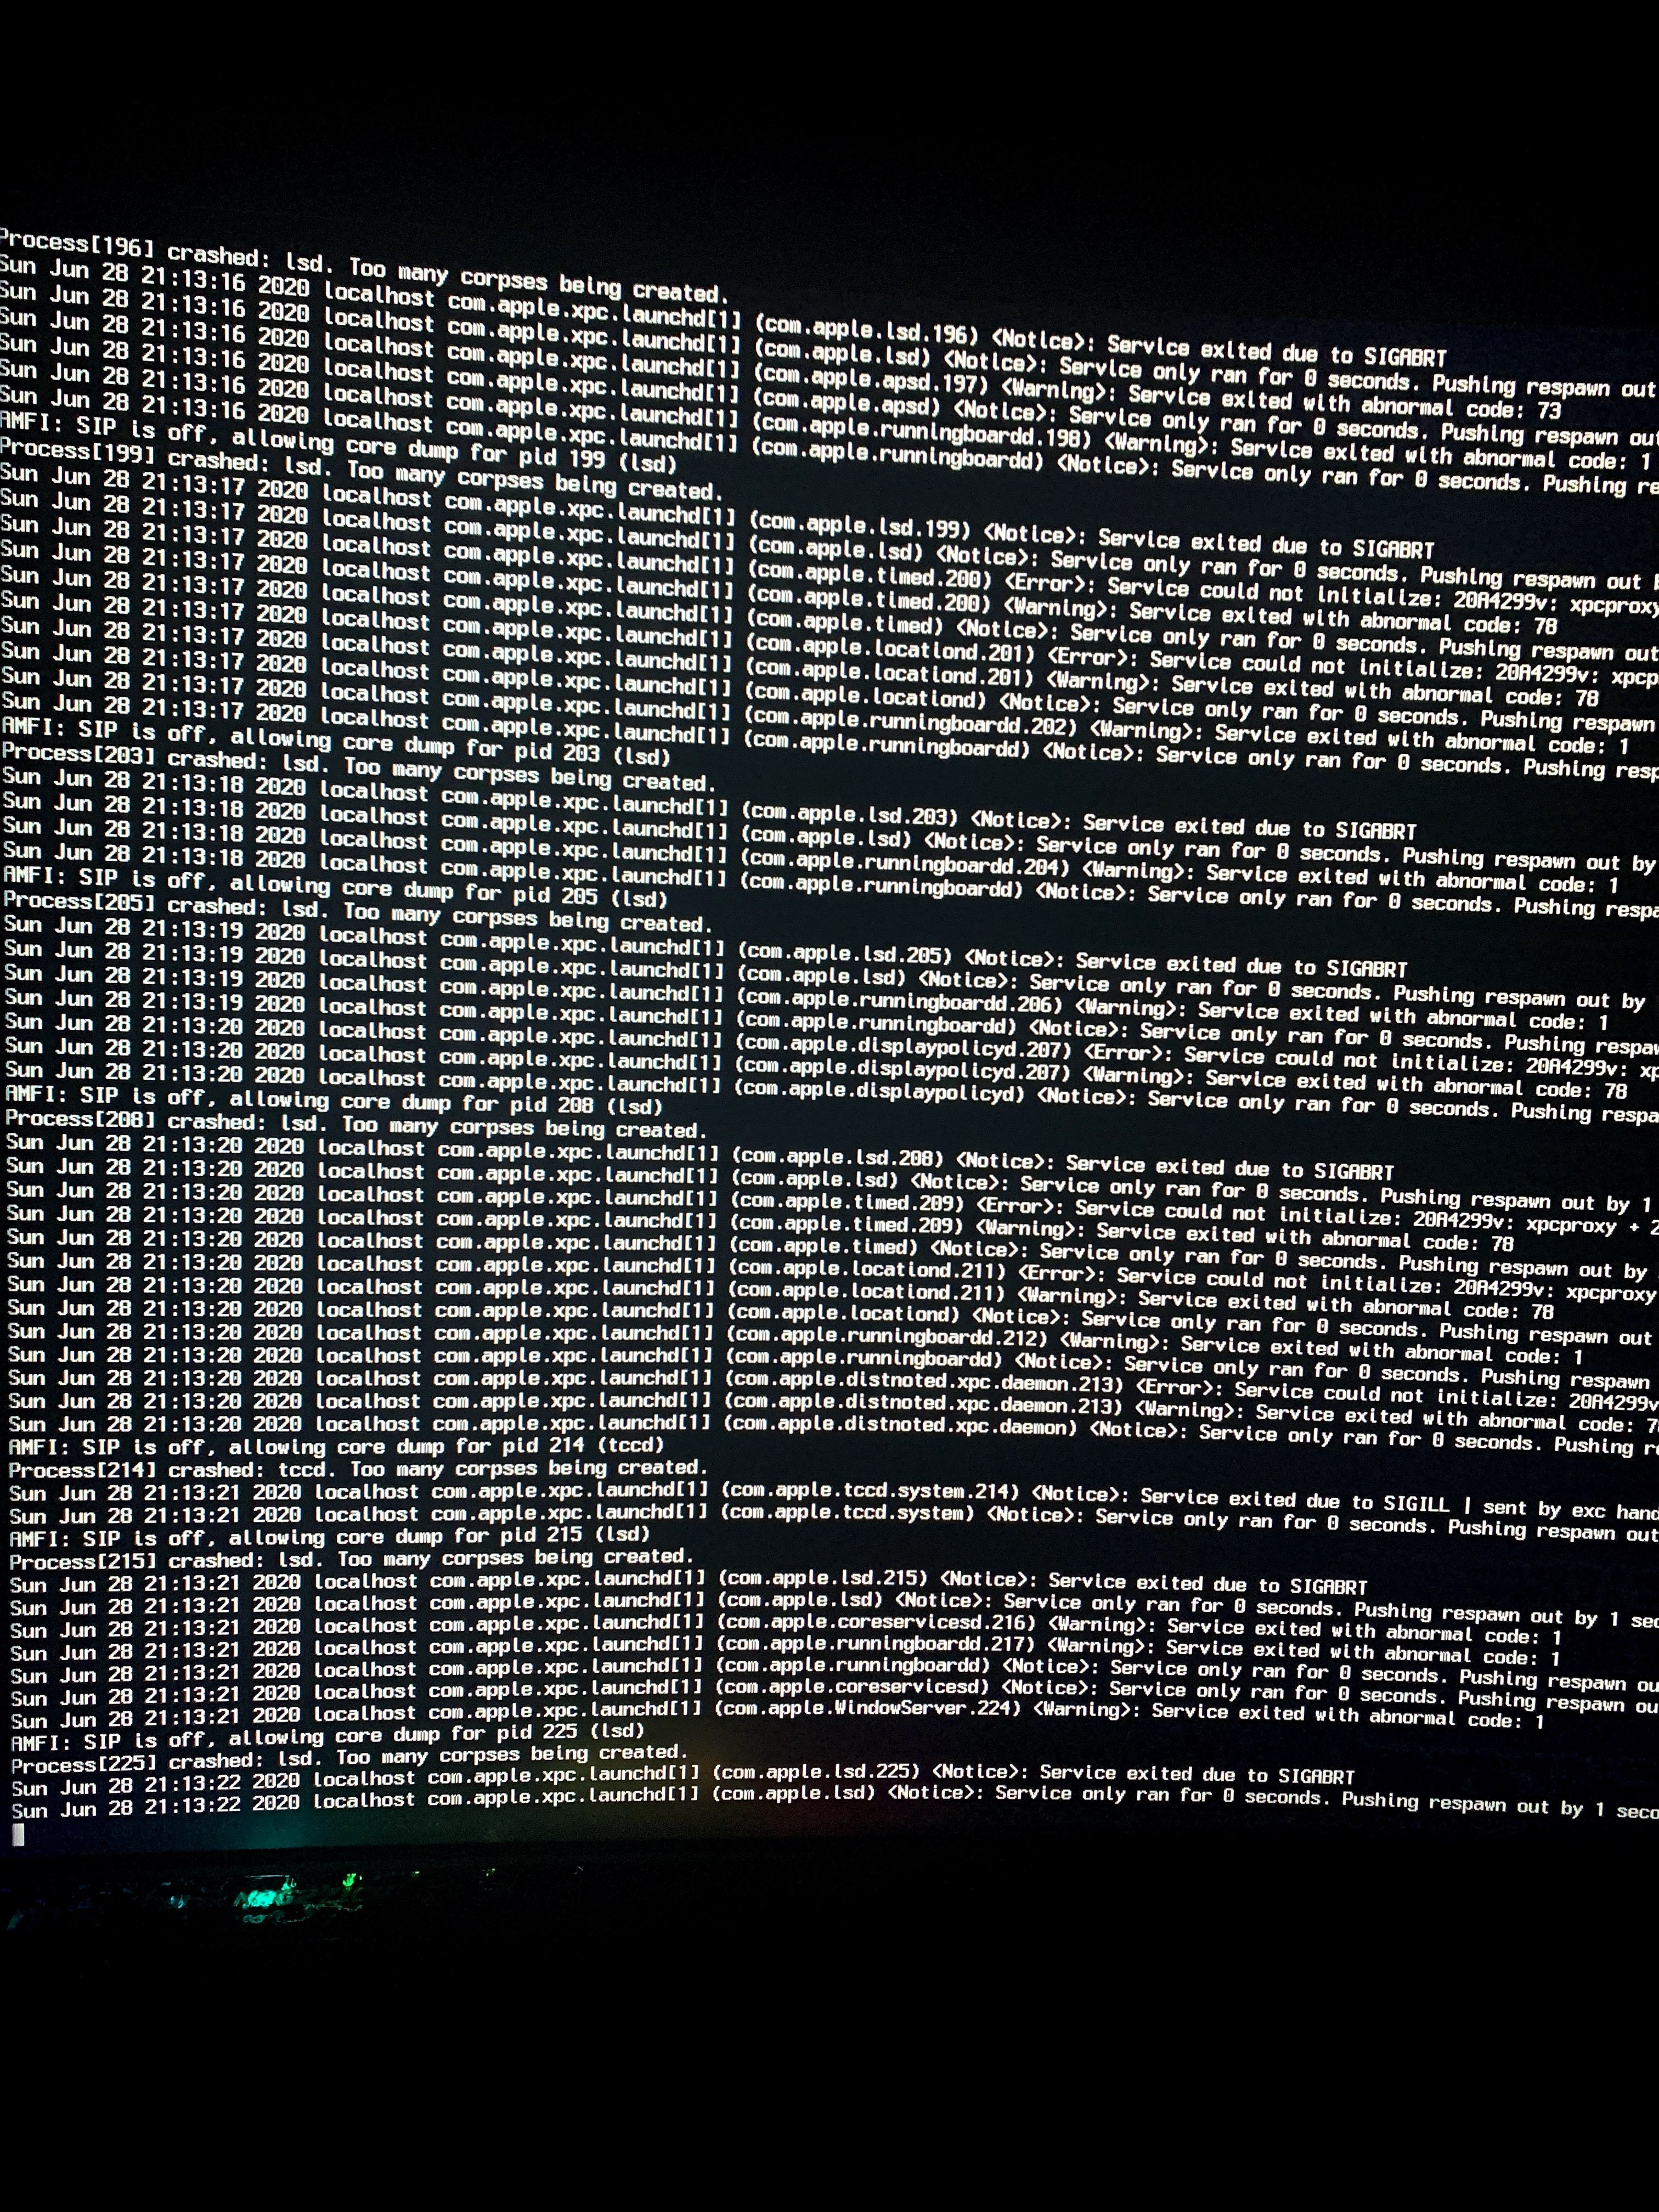
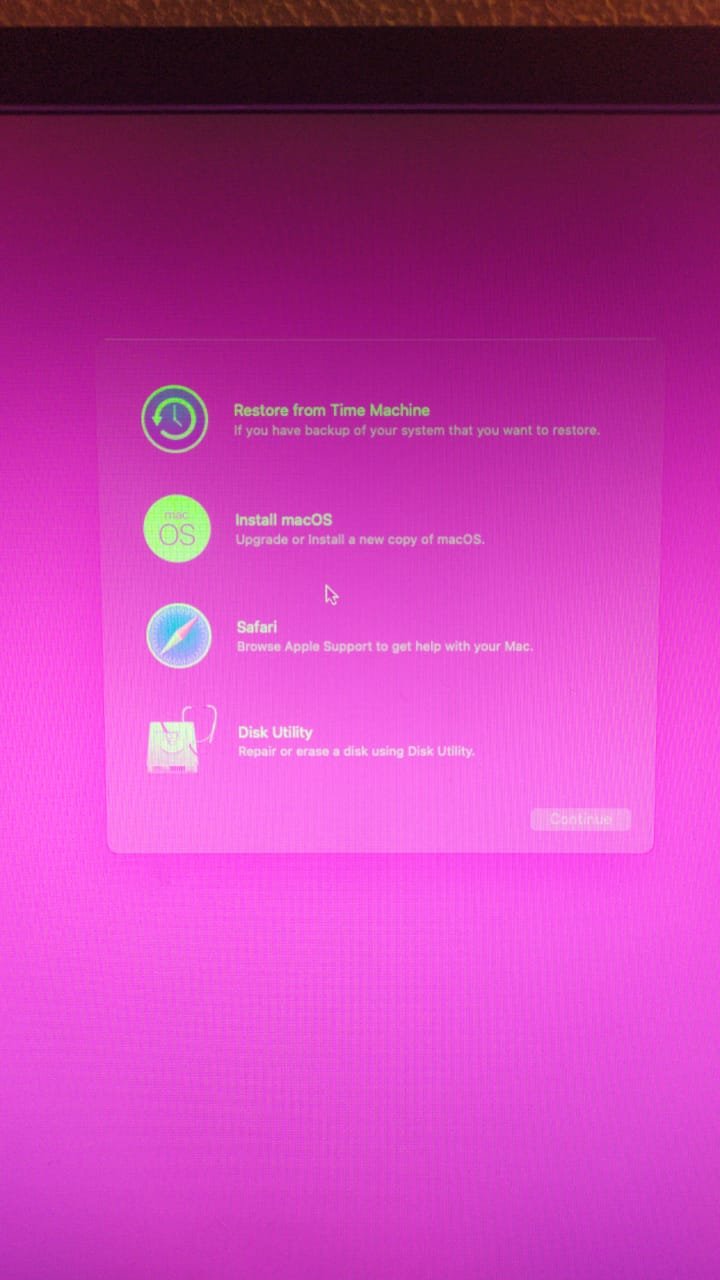
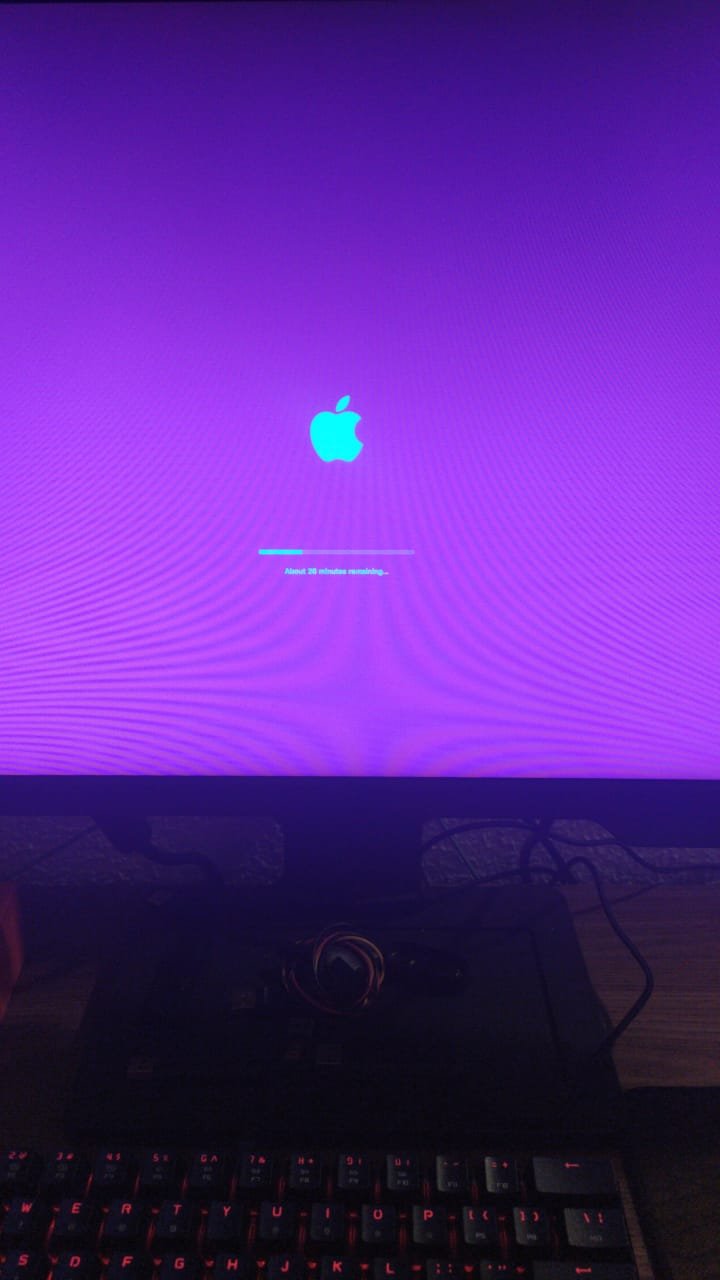
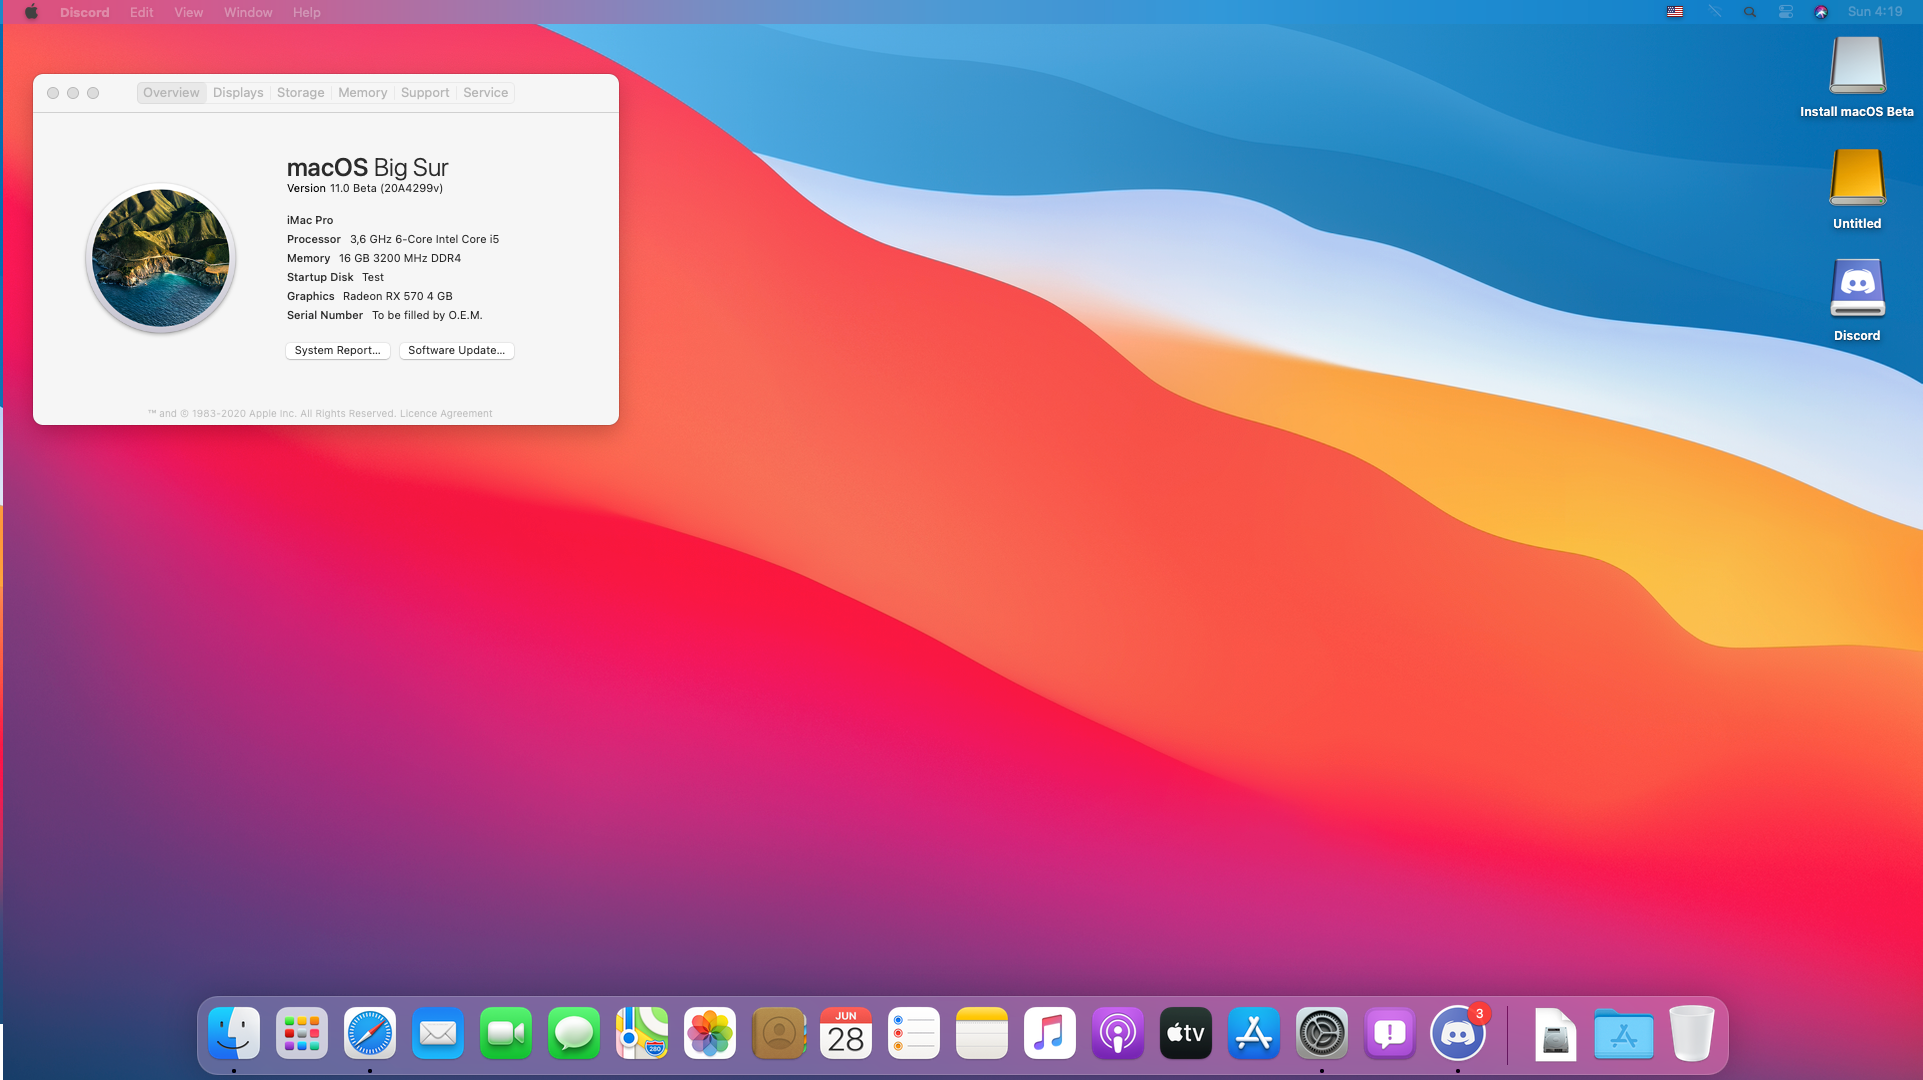
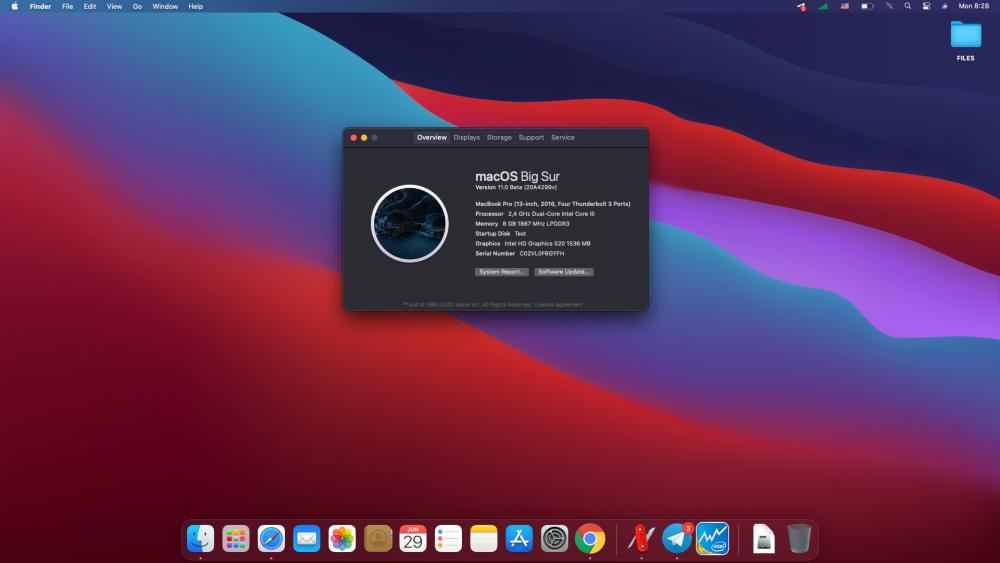
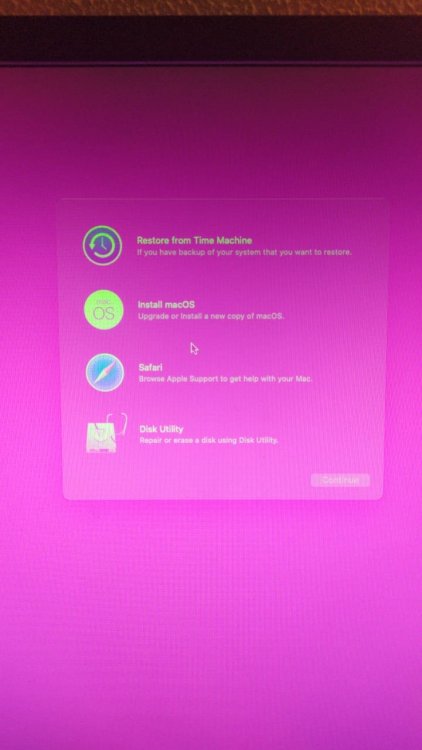
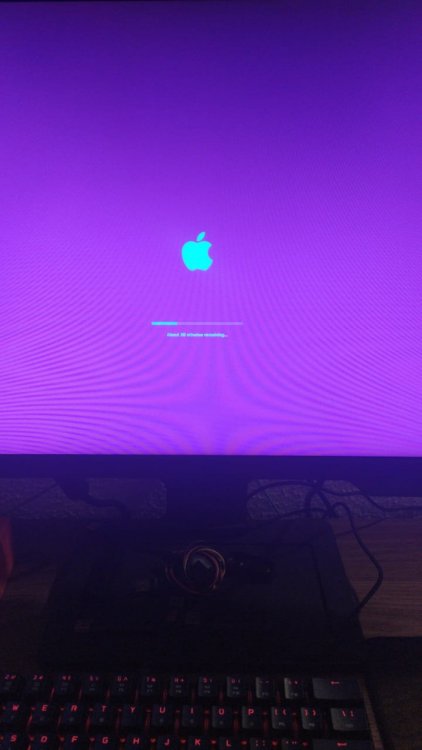
Hi everyone, Finally got a "vanilla" macOS Big Sur running here, no VM, no real Mac install, no pre-build image. I'll try my best to describe the processes: Build: i5 7500 Gigabyte B250M-D3H Prep: I was running the latest Catalina version. Enrolled to beta channel. Downloaded the 10.16 update. First time it got corrupted and the download finished 80% of the way. Downloaded it again. I tried the createinstallmedia method on a 8GB thumb drive but it would not finish due to the size of the installation being ~10GB. So I created a 16GB partition on a spare SSD that I have with High Sierra and ran the createinstallmedia on it. I was a long time Clover user, so I had to port my setup to OpenCore. I thoroughly followed the dortania OpenCore Desktop guide https://dortania.github.io/OpenCore-Desktop-Guide/ for my CPU family I didn't use anything from my previous Clover setup except for the SMBIOS information which I ended up generating a new one in later attemps. This is my current EFI: i5-7500-b250m-d3h-EFI.zip Installation: I tried the Install macOS Beta first, it would always give me a black screen but I could see it was doing something either by hearing fan noise or the LED indicator, eventually I would reboot whenever it stop doing whatever it was doing just to find out I didn't Install anything, then I moved on to the install media method. The install media would lead to a black screen but I found out that if I change sources on my monitor back and forth it would display something eventually in some stages in others it would be just black but I went on whenever I saw activity hoping it was doing something, and it was. I booted into High Sierra dozen of times between stages until I saw it was not going any further and most of the time it would lead to a pink screen with the Apple logo and a stationary progress bar. So I did the prelinked kernel on Preboot volume method which you guys (can't remember who, thank you anyway) brought to us from MacRumors on another post and I was pretty sure this was the last attempt. Tried to boot again. Nothing. Then I came to the forum and downloaded the EFI posted by @Bios-PC here. (much thanks) I copied most of the quirks and kexts but kept the specifics of my system. And...... It booted! The screen would go black and I had to use the switch sources method but eventually it went ahead and finished installing the system. I hope you guys find this post useful. I'm sorry for not being able to pinpoint exactly what was needed to make it work, hopefully the OpenCore\Clover devs can workaround this soon. Some photos from installation:
 1 point
 -
Hi and welcome to InsanelyMac. IMHO I choose to wait, who knows if we'll be surprised by a new iMac Pro, and Apple confirms that will continue to support "olds" Intel machines for a long time, maybe you'll have a cheaper option.1 point
-
Ryzen 3600 MSI tomahawk B450 RX 570
 1 point
 -
Finally updated to 10.15.5 last night, and it went fine. I made sure to update to latest Clover (now r5119) and any kexts first. Apple combined the supplemental update into the point release, so it's just one step now for a full update if you are coming from 10.15.4 or lower. A good number of our kexts have been updated since @golimpio posted his EFI folder. I don't know if any of them are important updates for us, but here is a list of the ones that have new versions: AppleALC.kext Lilu.kext VoodooI2C.kext VoodooI2CHID.kext VoodooPS2Controller.kext WhateverGreen.kext As well as the SMC package (VirtualSMC.kext and associated SMC kexts)1 point
-
No, for Catalina. Bir Sur or is 10.16 or 11.01 point
-
Got ASUS X299 up and running. Huge thanks to @dracoflar for Asus RTX fix. https://github.com/khronokernel/OpenCore-Asus-X299
 1 point
 -
@fantomas, let me be crystal clear about it. AppleLife is not an unknown blog but one of the locations Acidanthera team and related people are located. It is a local Russian community, so if anything, the userbase is not intersecting in the first place. Yet, even if it was not, when team members post links to authorised instructions (e.g. my posts), you can treat it similar to github.com/acidanthera. If understanding all that you believe that links to developer resources are improper on insanelymac, we may have to cease all kind of interaction with insanelymac community.1 point
-
this was on a site : the main difference is that "Big Sur" BaseSystem.dmg now is an APFS Installer volume (no more an HFS macOS Extended)another major change is that now prelinkedkernel is totally different, these are the paths for kext and kernel cache:/System/Library/KernelCollections/BootKernelExtensions.kc.development /System/Library/KernelCollections/BootKernelExtensions.kc1 point
-
Big Sur is a well known place in California. https://en.wikipedia.org/wiki/Big_Sur1 point
-
Thank you so much, but page shows 404.My computer is 6800k and asus x99 a ii.It work in clover but opencore never.You are the first one to show me hope.1 point
.thumb.png.ed053ff355622e3431cbbabcd0392d6d.png)