Leaderboard


Popular Content
Showing content with the highest reputation on 02/17/2020 in all areas
-
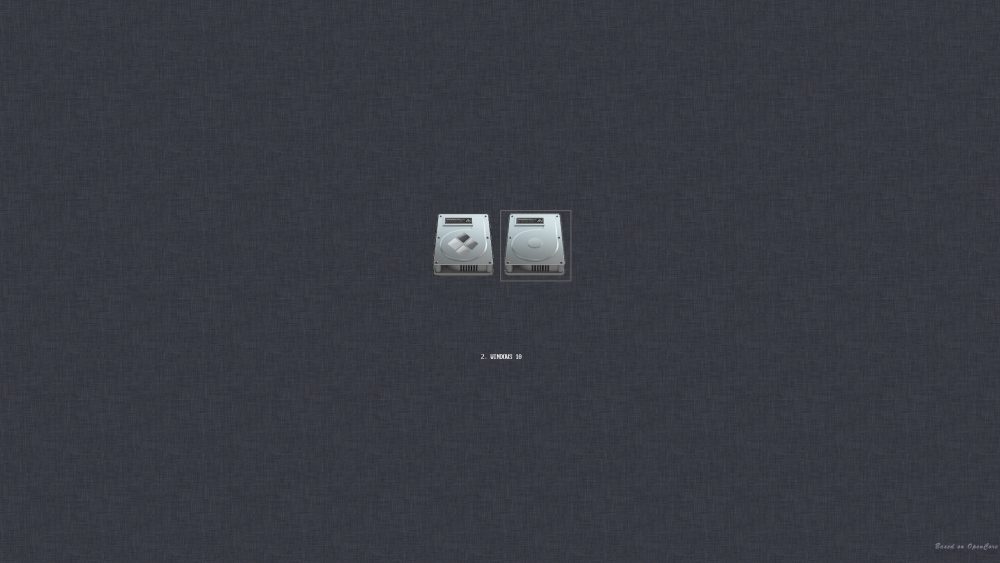
I am releasing the external GUI boot picker for the standard OC https://github.com/n-d-k/NdkBootPicker, Binary release are available as well, auto built by Travis ci server.9 points
-
I am releasing the external GUI boot picker for the standard OC https://github.com/n-d-k/NdkBootPicker, Binary release are available as well, auto built by Travis ci server. it won't work with this fork, so don't even try.4 points
-
@n.d.k Use a custom png picture as the background of the icon to select the movement, the effect is better!
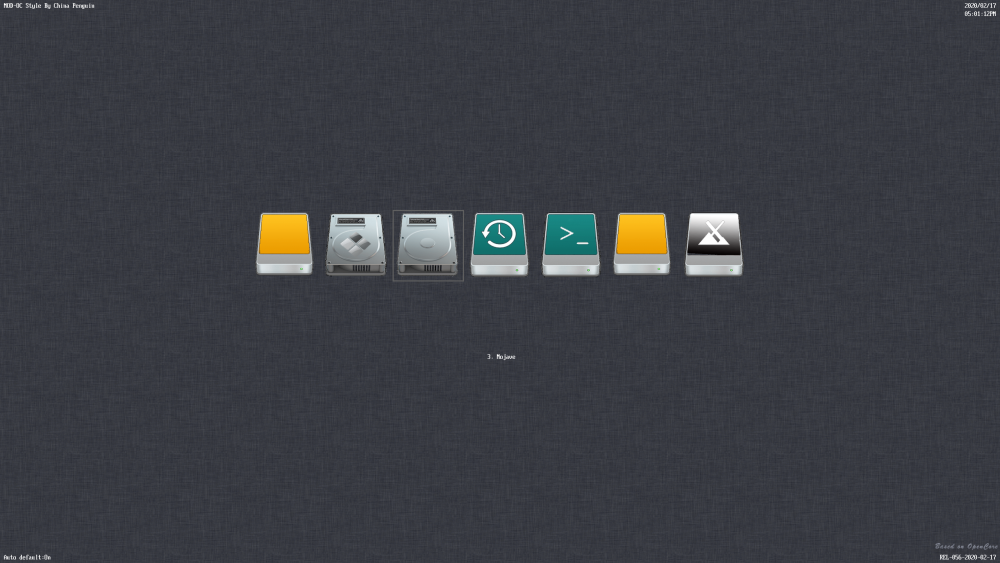 3 points
 -
Simple steps to create macOS Installer for Vmware on Linux or Windows This guide describes how you can create a Vmware image (vmdk) for installing macOS in Vmware. Most tutorials about this topic require an ISO installer file that was typically created in macOS or you have to download some preinstalled image file from unknown source. None of them are ideal. But if you follow the steps below, you will not need to access macOS and will use official and trusted sources. First of all download gibMacOS from here and set up https://github.com/corpnewt/gibMacOS Run the script to download the full macOS installer: on Linux: gibMacOS.command on Windows: gibMacOS.bat Install qemu-img converter on Linux (Debian or Ubuntu): install qemu-tools package on Windows use this installer: https://qemu.weilnetz.de/w64/ when you run the installer, it is enough to select the "tools" and "dll library". Convert the downloaded BaseSystem.dmg to Vmware image run the following commmand in that directory where BaseSystem.dmg was downloaded (somewhere here: gibMacOS-master/macOS Downloads/publicrelease/061-44387 - 10.15.3 macOS Catalina) on Linux: qemu-img convert -O vmdk -o compat6 BaseSystem.dmg recovery.vmdk on Windows: c:\"Program Files"\qemu\qemu-img convert -O vmdk -o compat6 BaseSystem.dmg recovery.vmdk Use the previously created image to install macOS in Vmware I assume you have a patched and working Vmware already. If not, find another guide but in nutshell: - confirm the VT-x is supported on your Intel machine (if you are on AMD you may not able to virtualize macOS or you need to do more work) - install VMware Workstation or VMware Workstation Player (free for non-commercial use) - use an unlocker to patch the Vmware to support macOS guest currently this works well: https://github.com/BDisp/unlocker/ So when you are here you have a patched Vmware and a Vmware image (recovery.vmdk). Run Vmware and create a new virtual machine by choosing macOS guest. But add another hard disk as well with selecting to use an existing virtual disk. Browse the recovery.vmdk. You will get a warning about the image is not in the latest format but choose to keep the existing format. After you installed the macOS, install the vmware tools as well. Tested on Windows 10 with macOS Catalina 10.15.3 in Vmware 15.5 Player Comments are welcome.2 points
-
Great But I prefer your fork.2 points
-
--xcode8 is fixed. Looks like it does the exact same compilation as --xcode5, except for 2 flags : -mno-red-zone and -mno-implicit-float is added when using --xcode8 Compilation with --gcc53 works too.2 points
-
What I'd actually love to see are these 2 things: 1- Verbose boot option: Selecting the entry on the picker and hitting "V" or a function key to load that entry with verbose. (Instead of the enter key) That PollAppleHotKeys is still a hit or miss 2- Dual boot Configuration option. If You only have 1 startup Disk and your config.plist gets corrupted, you can fall back on a backpconfig.plist or by starting it pressing a function key ( F2 ?) before the Picker shows. Not sure if these are unrealistic or difficult to achieve. What do you think?2 points
-
Good news for AMD users2 points
-
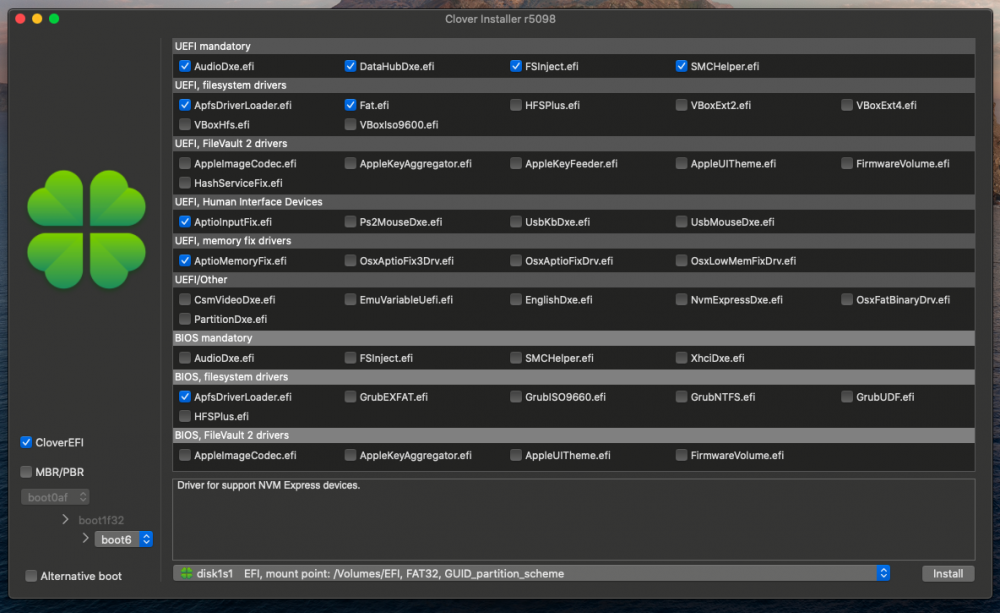
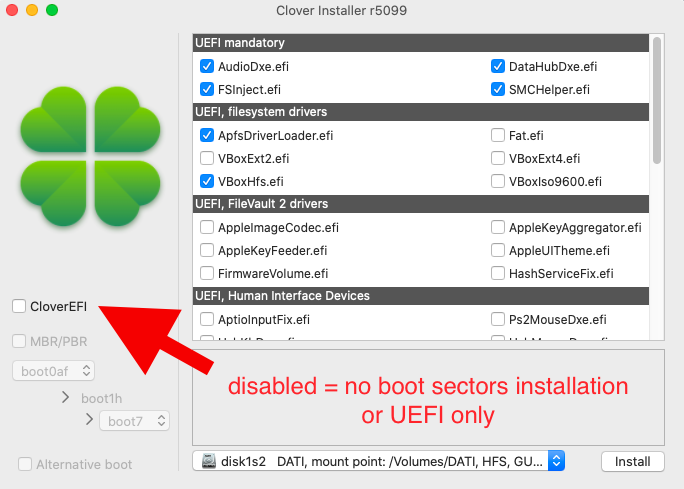
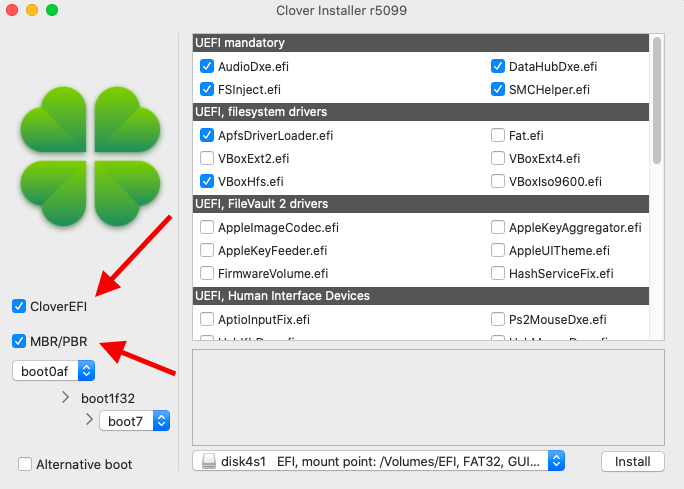
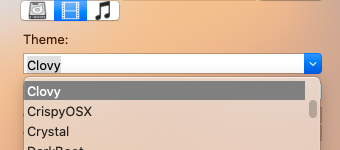
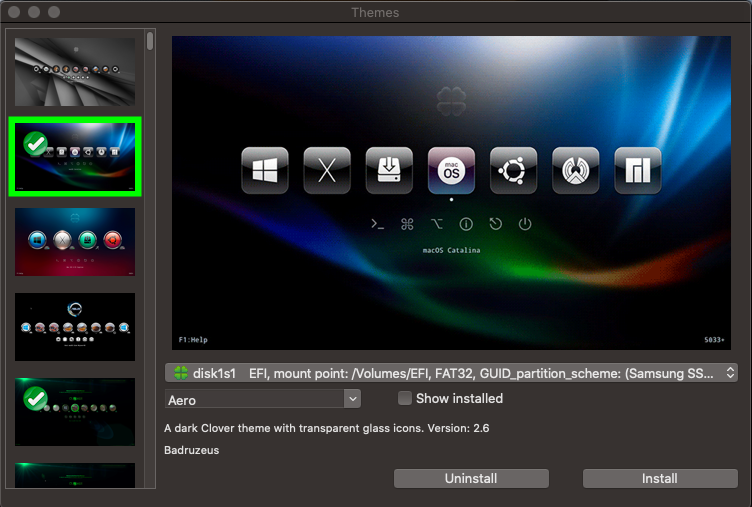
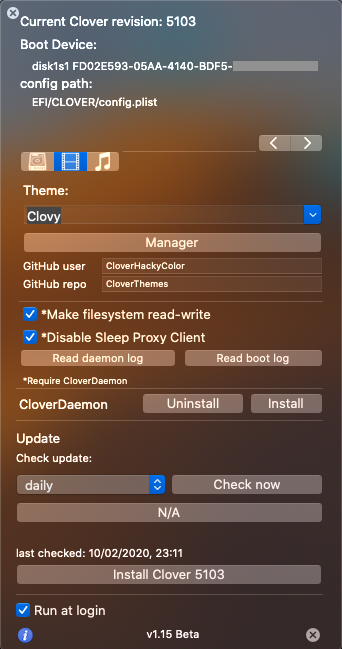
Hi, I've created a new GUI agent application to assist Clover bootloader. Its name is "Clover.app". Made to run in 10.9 and newer. What it does (or should do)? Give prominent info about the current revision in use, the Boot Device (disk where Clover is) and the the config.plist used. Install Clover in UEFI and legacy mode with a new way to store preferences and with out a pain searching for the correct ESP. Prevent target like Catalina-Dati from another OS (and ruin it) or read-only volumes, as this is not allowed. Provide essential NVRAM management for most used things such Theme and sound used. Ability to search any (correctly formatted) ESP in the system and mount/open them. As well the ability to umount. Auto mount for the chosen ESP. Get rid of RC Scripts... Yes, no more, just a new daemon (CloverDaemonNew) written in Swift and controllable by the NVRAM. Dump the nvram in the ESP, boot device takes precedence, otherwise the first available Internal) EFI System Partition. Root partition as last resource. Easily read the boot log (and the daemon log.. w/o mess the System log). Checking for updates whithout installing preferences panes here and there: just one app. Themes Manager embedded which doesn't require git to be installed. About installing drivers Unlike the package you have more control about what you are installing: Selected drivers are just the mirror of what is it really present in your EFI/CLOVER/drivers folders, and in fact, checkboxes get activated only if the driver is really present. Unknown drivers, i.e. ones not included in the current installer, are listed as well. Of course the app will not be able to update drivers that doesn't own. Be aware that deselecting a driver means (unlike the pkg) to delete the driver! A back up is always made to ~/Desktop/CloverBackUp/ .. so you can handle the back up immediately by your self. Warning: old drivers64 and drivers64UEFI directories aren't taken into account, only new ones (drivers/UEFI and drivers/BIOS). For some time the package was updated to migrate old directory structure to a new one with also the renaming of drivers with the old -64 suffix (as Clover is 64-bit only for some time.. so no need to specify again and again). Clover bootloader Updates Updates are online, but will show up only if the online version is greater then installed one. Based on the update intervall you set in the GUI, otherwise monthly as default. Clover.app Updates When a new release will be published it will appear a window that will inform you about it. Based on the update intervall you set in the GUI, monthly as default otherwise. Testing Clover.app is in a Beta stage, and is going to be promoted as "stable". Update: installation of legacy Clover looks really good. (thanks to @Rodion2010 for testing the installation) Update: since v1.11 is now compatible with 10.9 Mavericks and newer. Tested in 10.9, 10.10, 10.11, 10.12, 10.14 and 10.15. As soon someone will test successfuly it in 10.13 the Beta stage will ends. But why waiting for a test in 10.13.. there are problems otherwise? No, no problems. The code is written in swift 5 (whith stable ABI) and I did not expect something different for the code I wrote, but the difference can reside in the Cocoa.framework shipped with the OS: starting in 10.10 Apple introduced some new stuff for the interfaces like dark mode, Visual effect views (with vibrancy appearance) and problems can reside because many Apple-bugs where introduced and only fixed later. For this some graphical issues can show up (like a dark background with a dark text where you are able to see nothing). In the mentioned OSes all is fine (or at least perfectable), so just High Sierra is missing .... FAQs How to find the correct partition to update/install Clover? When you select a disk, the one with the Clover image... is the partition where Clover started. Easy no? Why you can't see other disks under "Mount (ESP)"? Because there, the app show only ESPs (EFI System Partition) and if a disk did not show up here... it's because the partition you are looking for is not an EFI System Partition. Why you can't see all the partition you have in the Installer? Because to install Clover it's required a filesystem to be FAT16, FAT32, EXFAT or HFS. Other ones are simply not taken into account. Example: if your ESP is formmated with FAT16 filesystem, BIOS options will not get activate because Clover doesn't have boot secotors for the ol fat filesystem! Warning, FAT16 can be good for UEFI loading, but for example my firmware simply ignore it. FAT32 is higly recommended for ESP, you're warned. What Make filesystem read-write" does? It is irreversible? This function add an nvram key that the daemon can read when the system starts so that can made the filesystem writable, if isn't, by invoking "mount -uw /". As you know starting from 10.15 the root filesystem is read-only and this functionality can help if you want to write to the System partition, like the case if you want to disable the Bonjour Sleep proxy Client, or to dump the nvram in / using EmuVariableUefi.efi, or using kexts like HibernationFixUp. It is a permanent change? No, mount -u means update an already mounted file system, so disabling the functionality the filesystem will stay as per default. The change is applied at next start up. What does "Disable Sleep Proxy Client? If your computer wake itself from sleep each n hours it's probably due to the Bonjour service called "Sleep Proxy Client". If you don't want this to happen you may want to disable it. In 10.15+ this functionality require the filesystem to be writable to add a special argument to the mDNSResponder launch daemon. By disabling the checkbox the service get re-enabled as per default, but then will require a read-write filesystem, at least for the next reboot. Note: if the filesystem is not writable the daemon will try to make it read-write to do the modification even if "Make filesystem read-write" is turned off. CloverDaemonNew is a complete replacement for the RC Scripts? Yes. It does every things done by rc scripts but without installing additional scripts into the System directories. Warning: the CloverDaemonNew is not compatible with old rc scripts and for this reason, since v1.07, Clover.app remove them. For the same reason the package remove CloverDaemonNew if you install back the rc scripts (since commit d447228 of november 29 2019). Big thanks to @Sherlocks for helping me to make it work. Themes Since v1.15 Clover.app has a Theme Manager. Unlike CloverThemeManager.app git is not mandatory, and in fact it doesn't use it. The requirement it is a Github repository instead. The main repo for Clover.app is https://github.com/CloverHackyColor/CloverThemes but the app allow you to chose a fork by specifying the GitHub user name and the GitHub repository name: A requirement for users repository is that your will contains themes in the root of it, and not in a sub directory. After themes are indexed (if you ever run the Theme Manager) a list of all themes is listed below: (You can type anything you want, and auto completion is available) ..so you can switch the theme to use by set its name in NVRAM. This way Clover override what is set in the config.plist. Sound Since v1.13 (with Clover r5102+) Clover.app is able to handle the volume level and the device for the the start up sound: No sound? Ensure the volume is audible (100%) and the device it is really connected to speakers. Of course your theme must contains the sound file. How to install Clover in UEFI only? Simply by not selecting "CloverEFI" (which means legacy Clover) and without play with MBR/PBR (Master Boot Record/Partition Boot Record). "CloverEFI" it's replaced by "BIOS". How can you install Clover in legacy mode? Simply by selecting "CloverEFI" (which means legacy Clover). MBR/PBR (Master Boot Record/Partition Boot Record) must be enabled the first time to make your disk bootable, and when this happened once there is no need to install boot sectors again. "CloverEFI" it's replaced by "BIOS". "Alternative boot" means that the installer will installs more then one boot loader you can chose by pressing the relative number (boot3, boot5, boot6, boot7, boot9) while booting. To do that the installer use a special boot 1 sector that wait 2 seconds to wait you for a key to be pressed. kernel panic installing bootsectors to a hfs partition (Clover legacy) During my tests with Clover.app I run in to a kernel panic installing boot sectors in a hfs formatted pen drive (and I realize some users had already run into this problem with the pkg) . After studying the problem, the conclusion is that the hfs driver panics when the journaling is enabled, so Clover.app take the step to disable the journal just before the installation. Of course the app re enable it as soon sectors are installed. Will the package installer no longer be supported? No. The package is still supported, also because Clover.app doesn't support old OSes like 10.8, 10.7 etc. and older. However the pkg has reached some limits by installing on Catalina. Can the Clover updater coexist? Yes, but why? With the package you have to install Clover to update them (in all partitions you have) to get access to it. With Clover.app you need only one app for all, ok, unless you have really old OSes. The Clover preferences panel? The idea is that you have every things you need by make Clover.app run at login. In how many languages it is translated? Actually in English (me) Italian (me) Russian (Slice) Portoguese (artur_pt) Korean (Sherlocks) German (Mork vom Ork) Simplified Chinese (Steve Zheng) Indonesian (Badruzeus) Serbian (crusher) French (Ellybz) But it can be translated in any language supported by macOS, so just start translating the en.strings and post the file here. Or make a pull request at github. Is it open source? Of course yes! Changes committed at github. How to compile? Xcode 11+ and swift 5+ both required. buildme do it for you. Last Release here


 1 point
 -
macOS kext_rtsx Hi, making a new thread. This driver is for Realtek SDHC card readers on a pci/pcie bus, most commonly found in laptops. I would like to get testers. The driver is not yet finalized, but I'm making the tread now anyway since there was interest. expect this post to change in the future. [read below for current status] -- sinetek things to fix eventually - get more pci id's in plist - async task in its own thread instead of blocking the os - prealloc DMA buffer? - cards with sector_size != 512, haven't been tested at all. - clean up src. git push. - power management? what happens when you sleep the machine? - the eject button in finder is broken, do not use for now. - spams the syslog with debug messages. release config? - basic namespace pollution a bit out of hand Update 1: Power management support on the way: see post #43. Latest version from Cholonam1 point
-
That worked for me. Thanks. Love the new theme manager!1 point
-
I've never had problem with Xcode. having said that I've always used PlistEdit Pro. cheap, small & lite and very easy to use. never failed me.1 point
-
I've committed the final step to switch to C++ compiler. I've tested gcc53, xcode5 and xcode8 compilation. Tomorrow, I'll remove the debug code displayed when you launch.1 point
-
@AudioGod's current Clover EFI is rock solid for Z390 Pro with latest BIOS F12D. Anything lower is unstable. My testing methodology: disconnect all other HDD (reseting 200 times will likely to affect it), cold reboot 100 times and 50 additional times with rebooting into windows and come back to Mac OS. I noticed with your OpenCore, BIOS boot device order is sometimes changed without me touching it...1 point
-
When it comes to extracting the original ACPI table, you have to start the shell environment, isn't it tedious to run ACPIDUMP, and there can be unexpected problems, isn't it convenient to integrate in a shortcut key, not everyone who uses OC is a technologist! For the average user, how convenient to get their own boot device path information?1 point
-
efi-boot-device-data is not used by literally anything but Clover, it's a communication variable for the Apple NVRAM stack. The default boot option is saved to Boot0080, which already is logged by OC (as well as Boot0081, Boot0082 and BootOrder) The point is there already are tools to accomplish this: https://acpica.org/downloads/uefi-support There is no point for this to be in OC itself1 point
-
some corsair cooler cause problem in sleep, is a usb cable connected, try set this usb port to internal(0xff/255)1 point
-
NDK does a great job, but if we didn't have the "others" from original OC thread, we wouldn't have OpenCore at all.1 point
-
Hi All users I've a little issue: OCS: failed to parse key field of type 0 Somebody knows how to solve it. Please.1 point
-
Great work working very good as expected thanks1 point
-
I've to add ndkBootPicker.efi to Drivers section in config.plist to work + PickerMode=External, Icons folder in EFI/OC of course. is It normal? Works fine1 point
-
Very good, try it now!1 point
-
1. As you can see from the below code snippet ApfsDriverLoader is not being built with DEBUG options. You can look at the code yourself at https://github.com/Pavo-IM/ocbuilder/blob/master/OCBuilder/release.command applesupportclone unset WORKSPACE unset PACKAGES_PATH cd "${BUILD_DIR}/AppleSupportPkg" mkdir Binaries >/dev/null || exit 1 cd Binaries >/dev/null || exit 1 ln -s ../UDK/Build/AppleSupportPkg/RELEASE_XCODE5/X64 RELEASE >/dev/null || exit 1 cd .. >/dev/null || exit 1 applesupportudkclone cd UDK applesupportpkgclone ln -s .. AppleSupportPkg >/dev/null || exit 1 make -C BaseTools >/dev/null || exit 1 sleep 1 unset WORKSPACE unset EDK_TOOLS_PATH export NASM_PREFIX=/usr/local/bin/ source edksetup.sh --reconfig >/dev/null || exit 1 sleep 1 echo "Compiling the latest commited Release version of AppleSupportPkg..." build -a X64 -b RELEASE -t XCODE5 -p AppleSupportPkg/AppleSupportPkg.dsc >/dev/null || exit 1 2. All OCBuilder does is clone the repo of the kexts and builds the master branch of that repo. So if there is a kext issue its an issue that the owner of the repo needs to fix, not OCBuilder. buildrelease() { xcodebuild -configuration Release >/dev/null || exit 1 } echo "Cloning IntelMausiEthernet repo..." git clone https://github.com/Mieze/IntelMausiEthernet.git >/dev/null || exit 1 cd "${BUILD_DIR}/IntelMausiEthernet" echo "Compiling the latest commited Release version of IntelMausiEthernet..." buildrelease echo "IntelMausiEthernet Release Completed..."1 point
-
So: Fenvi T-919 card on PCIEX4 port MSR Unlocked I need to give this some time in order to get legit results. But I've been playing Music on my Sony bluetooth headphones and while previously (even with MSR Locked) I could sense some audio glitches here and there, now I cannot hear any audible glitch. I will give back legit results later today or tomorrow. Until then let's hope this is the end of the MYSTERIOUS_MSR_BT_JUNK issue1 point
-
Oh snap I am using PCIEX1_3 as stated on @glasgood's guide I'll swap the card on PCIEX4 port and report back. I 'll even try MSR unlocking it again. Maybe this time is my lucky time1 point
-
I confirm the fan locations and their their names as shown in the pictures of the Z77X-UP TH motherboard. I went through each fan connecter one by one connecting a fan to make sure there was a speed reading on each connector. Then attached 4 fans + the one on the CPU cooler: Also attached is the config file in from the App. Z77X-UP5 TH-CF.plist.zip
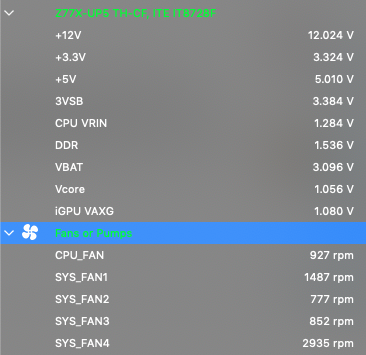
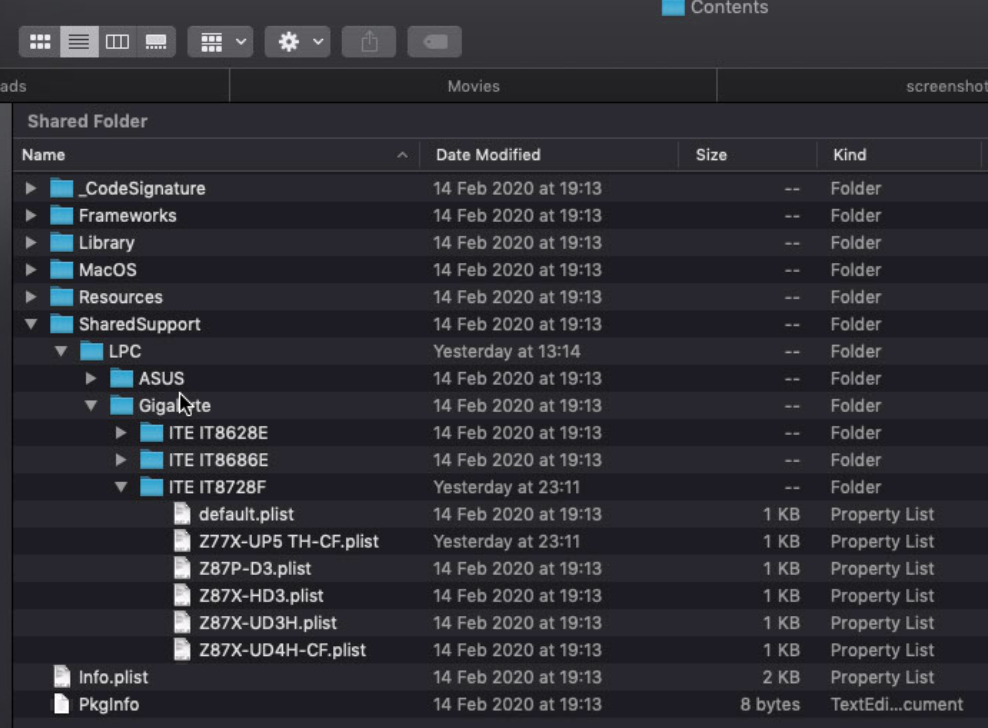 1 point
 -
Yes, some lines are commented. Different tests I made while I was exploring the C++ globals initialisation. All that will go away soon. This is what you comment out. construct_globals_objects(); // do this after SelfLoadedImage is initialized DBG("g_str = %s\n", g_str.data()); DBG("g_str2 = %s\n", g_str2.data()); extern XStringW global_str1; DBG("global_str1 = %s\n", global_str1.data()); extern XStringW global_str2; DBG("global_str2 = %s\n", global_str2.data()); { // XStringW str(L"local str value"); // DBG("str = %s\n", str.data()); // str.StrCat(L" appended text"); // DBG("str = %s, len=%d\n", str.data(), str.length()); // // XStringW str2(str); // DBG("str2 = %s\n", str2.data()); // str2.StrnCpy(str.data(), 2); // DBG("str2 = %s\n", str2.data()); // str2.StrnCat(L"2ndtext", 2); // DBG("str2 = %s\n", str2.data()); // str2.Insert(1, str); // DBG("str2 = %s\n", str2.data()); // str2 += L"3rdtext"; // DBG("str2 = %s\n", str2.data()); // // XStringW* str3 = new XStringW(); // *str3 = L"str3data"; // DBG("str3 = %s\n", str3->data()); // delete str3; } // destruct_globals_objects(NULL); // That should be done just before quitting clover module. Now, it's just for test. DBG("press"); PauseForKey(L"press");1 point
-
It's sure is ! :-) If it's working for you, comment line from main.cpp from 2125 to 2158, and change #define DEBUG_MAIN 2 to #define DEBUG_MAIN 1 line 52. I'd like to have at least 4/5 users that successfully compile this new version, checking the C++ globals works and I'll remove it. Thanks for the test.1 point
-
I have to admit that I have a TOOLCHAIN var exported before calling ebuild, because I like all tools to stay inside the folder. It doesn't need to be in 2 places. If you remove all your mtoc, the next time you call ebuild it should be compiled and put in your TOOLCHAIN dir, which is the best place, I think.1 point
-
Fix committed. Just forgot to rename in ebuild.sh.1 point
-
That is not normal that mtoc.New_jief is not built if mtoc.NEW exists. I'll check. I build with ./ebuild.sh --xcode5 --buildtarget=DEBUG --define=DEBUG_ON_SERIAL_PORT -fr -n $njobs $@1 point
-
Ok, thanks. I've pretty much got a perfect hack now, thank you, appreciate it. Next thing to tackle is fan control. But that can wait haha1 point
-
I had a crack at Opencore on the Z400. It's a nice toolchain and will be handy for future hackintosh platforms, but I haven't got to the graphic installer yet. I did get a login screen for the existing Mojave install, but frozen. One problem is that OC support starts at Ivy Bridge. My impression is there's a fair chance it can be cajoled into working with Westmere though. Back to Clover for the moment.1 point
-
Changing to the bottom x4 slot fixed my WiFI. Still no sidecar but I don't think thats related to my BT card.
 1 point
 -
xattr -rc path/Clover.app may help it removes "quarantine" attribute from apps by unknown developer1 point
-
I'm suggesting that every one hold on few hours. I proposed to finish to switch to C++, do the automatic conf regeneration in the next few hours. I will have to do few commits, and they may not compile straight away. I'll post when it's back on track. Is ok for every one ?1 point
-
Rev 5104 Clover switched to C++ programming language. Thanks to Jief_Machak. C++ proposition Programming tips will follow.1 point
-
It requires changes to compilation scripts. I just never change it. But yes it will be good for beginners.1 point
-
I think we should commit deletion of the content of conf folder and also erase the content of Conf folder at each compilation. The re-generation is so quick, we can afford to do it each time.1 point
-
I think I found what may be the problem, not sure yet though. The BIOSes that present problems all have their _DSM methods accepting 3 Arguments. This is a violation of the ACPI 6.2 spec, maybe they added it in the 6.3 one, I am not sure. _DSM should always accept 4 arguments. I can see why it happened. Many of the _DSM methods simply called PCID, which also accepted those same 4 arguments, but only used the first 3. In more recent BIOS versions, PCID was shortened to use just the 3 arguments it needed, and at some point, for some reason, all the _DSM methods were shortened to 3 arguments as well. For example, in v1202 of your BIOS, the DSDT tables have a 4 argument _DSM. In the most recent one, it has been shortened to 3. Maybe it is nothing, but it IS a violation of the ACPI spec and macOS typically does not handle those well. A relatively simple patch could fix it though, if that is even the problem.1 point
-
Yes, this is another useful feature, in the GUI menu can be free to choose a different config file for debugging the system is very helpful, this is clover existing features, hope ndk can join the fork OC1 point
-
I see ndk fork, аsk in ndk topic.
 1 point
 -
Hi @n.d.k I've already the same issue to compile local repo up to date Despite of: git pull ./ndk-macbuild.tool The files in X64 folder are keeping the previous compile date. So I'm not sure if is the right version How to do! Fork of Clover's BadruZeus's Clover Theme with my two new icons (func reset nvram and tool shell), Aorus logo on background !
 1 point
 -
thank you very mach i found another bios that was for t420s v1.41. I flash that and work ok and have max resolution in clover. But that had some error and problem this is very good works fine . thanks1 point
-
good question, on my Z390 Master I don’t need it no. i put it in there on the Z390 pro more to be on the safe side but by all means try removing it and if it works and can pass X amount or restarts on a cycle then it’s good to go. X=Whatever you think is enough restarts or cold boots to satisfy yourself really. for me X=50 but for system stress professional @larabee It’s more like 100.1 point
-
My previous post describes what I need.1 point
-
Can you provide an IORegistry dump (using IORegistryExplorer) with that SSD plugged? Partitions from that disk don't have to be mounted.1 point
-
It seems like Apple finally decided to solve the DRM bug in Safari and radeon RX5XX ! I can now play Netflix videos with safari without the system freezing!!! Good update! Cheers!!!1 point
-
I received my RTL8125 add-in card before Christmas but as I have to take several exams in university in February and March, I'm busy studying at the moment so that there is no time left for hacking but I will start working on a driver in March, when the exam period is over. Keep your fingers crossed for me! Mieze1 point
-
Let's cross reference the facts and settings and find out why we have the lags with the nVidia web drivers and why some other people don't have the lags. I have an EVGA 1070 SuperClocked GPU which is working pretty well under macOS Sierra and up to macOS 10.13.2 the last macOS update and the nVidia web driver didn't go so well. So far I tried all the following options but nothing seems to work: 1. Used only clover's on the fly patch for the board-id to avoid the black screen issue 2. Used Lilu and nVidiaGraphicsFixUp 3. Used only AGDPFix without any other patches or kexts 4. Activated the iGPU 5. used ACPI patches to change the PEG0 to GFX0 6. Used iMacPro SMBIOS without any patches or kext Nothing seems to work so far except for the patched version of the 104 or 106 web driver which has the lags but it's way better than the last drivers. To all people with no lags: Please share your EFI folders if you can. (Please remove the serial number, MLB, UUID and all the private stuff from your config.plist and also remove "themes" and "Apple" Folder before posting it) and please share your hardware specs with the firmware version (BIOS/UEFI version) Thank you all You can test the following sites to see wether you have the lags or not: http://madebyevan.com/webgl-water/ (thanks to @maerten) or http://www.bongiovi..../webgl/blossom/ (thanks to @TheBloke)1 point


.thumb.png.a43579d9e280a5c4c80807bf93412ae7.png)