Leaderboard


Popular Content
Showing content with the highest reputation on 07/10/2018 in all areas
-
macOS High Sierra 10.13.6 (17G65) - Available5 points
-
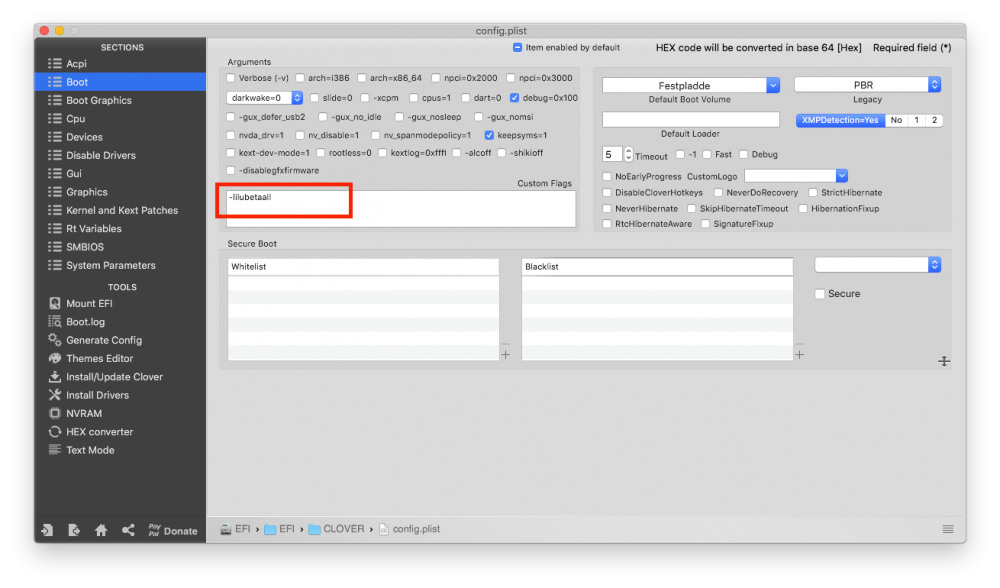
same patch from betas com.apple.driver.usb.AppleUSBXHCI 837D880F 0F83A704 0000 837D880F 90909090 9090 USB 10.13.6 by PMHeart 10.13.64 points
-
My fault guys. This release is the a final version, not the Beta. Post here now: macOS High Sierra 10.13.6 (17G65) - Final Version Thank you and sorry Note: If a new beta version came out, I'll unlock this topic again ok?3 points
-
Another way to download full app, works fine for 10.13.6, 10.14.x. Mojave MBR HFS Firmware Check Patch/Q6-DownloadFullApp/installScript_1014fullapp
 2 points
 -
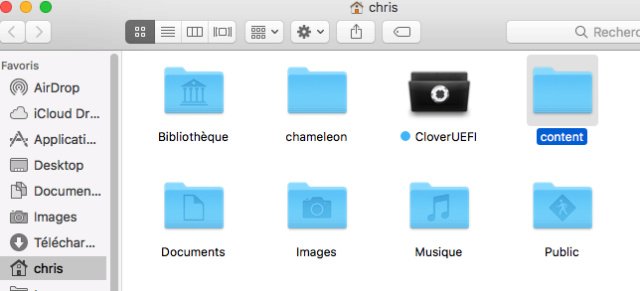
use Greg Neagle script installinstallmacos.py for Download latest High Sierra After Downloads completed remove content foder no longer need
 2 points
 -
OR Terminal: sudo trimforce enable To disable: sudo trimforce disable2 points
-
I have already the proof in my PM that Ozmosis are working on the 300 series, i do not want to update the 100 Series guide as it will be a rain of posts and i don't have much time for it right now. It works on some GIGABYTE boards, ASUS and especially on most of the ASRock boards2 points
-
Apple posted the final release - there's no more 10.13.6 beta seeds. You can keep this topic locked.2 points
-
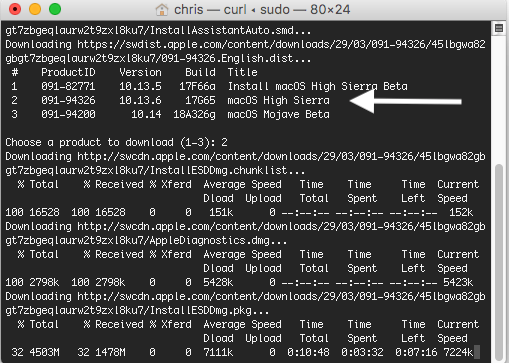
There you GO! 1. Download 6 packages below InstallAssistantAuto.pkg AppleDiagnostics.chunklist AppleDiagnostics.dmg BaseSystem.chunklist BaseSystem.dmg InstallESDDmg.pkg 2. Place downloaded packages on a folder. On my case are on "~/Desltop/HS” 3. Open "InstallAssistantAuto.pkg" using Pacifist.app then extract "Install macOS High Sierra.app" 4. Do the same as point "3", but now with "InstallESDDmg.pkg" 5. Right click "Install macOS High Sierra.app" within Finder, choose Show Package Contents 6. Go to Contents - SharedSupport. Place 5 packages on this folder: AppleDiagnostics.chunklist AppleDiagnostics.dmg BaseSystem.chunklist BaseSystem.dmg InstallESD.dmg (InstallInfo.plist is already here, so you have 6 files) 7. DONE PS i read somewhere in here someone mentioned regarding this method, it is safe to rename pkg's to dmg directly... PLEASE do NOT!!! always use pacifist or similar to extract contents.2 points
-
Hello @all Offline links available!2 points
-
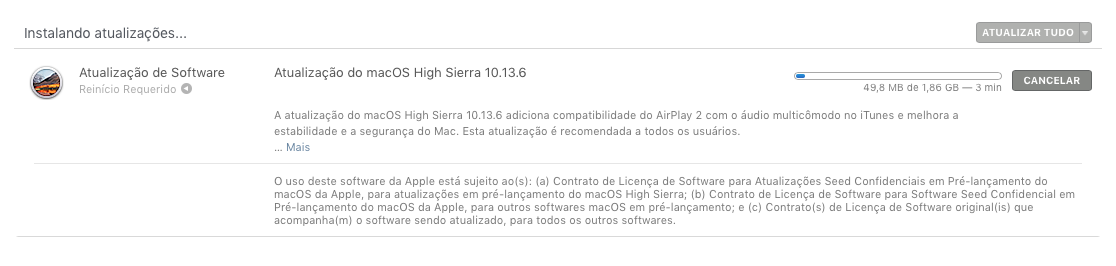
Final version of macOS High Sierra is available! The list is: The macOS High Sierra 10.13.6 Update adds AirPlay 2 multiroom audio support for iTunes and improves the stability and security of your Mac. This update is recommended for all users. AirPlay 2 for iTunes: Control your home audio system and AirPlay 2-enabled speakers throughout your house. Play music at the same time on multiple AirPlay 2-enabled speakers in your house, all in sync. Other improvements and fixes: Fixes an issue that may prevent Photos from recognizing AVCHD media from some cameras. Fixes an issue that may prevent Mail users from moving a message from Gmail to another account. Offline links: macOS High Sierra 10.13.6 Combo Update macOS High Sierra 10.13.6 Update View full article1 point
-
So I have now become semi-retired and have more time to go back to looking at the unlocker code. My plans are to start a 3.0 version which includes: Specifically for Workstation 14 and Fusion 10 ESXi support 6.0-6.7 if possible Remove the non-Server check for versions 10.5 (Leopard) & 10.6 (Snow Leopard) Tools download needs to get 2 ISOs depending on the version of macOS running in the guest A simple way to bootstrap a new macOS High Sierra VM directly from Apple software download repos AMD for recent CPUs using CPUID masking techniques (will need volunteers with Ryzen systems) Now this is not going to happen overnight as I am enjoying some freedom after 30+ years in the software industry and I have other projects both IT and non-IT related that will also take my attention. Do you, the great InsanelyMac community, have any suggestions that I can look into for the future?1 point
-
Check your config.plist in "System Parameters"... "Inject Kexts" should be "Yes" not "Detect".1 point
-
@chris1111, crazybirdy Thank you!1 point
-
hi... update OK from 10.13.4 to 10.13.6 on a msi z170 pcmate.. i5, g210..on a external usb HDD using chris1111 4422 clover.... c.frio1 point
-
I've successfully installed Mojave beta3 on my ssd samsung 850 pro with hfs partition table GPT Guid, thank's crazybirdy for your Mojave MBR HFS Firmware Check Patch 10.14.db3 work flawlessly, I would know if trim must be activated. Cheers
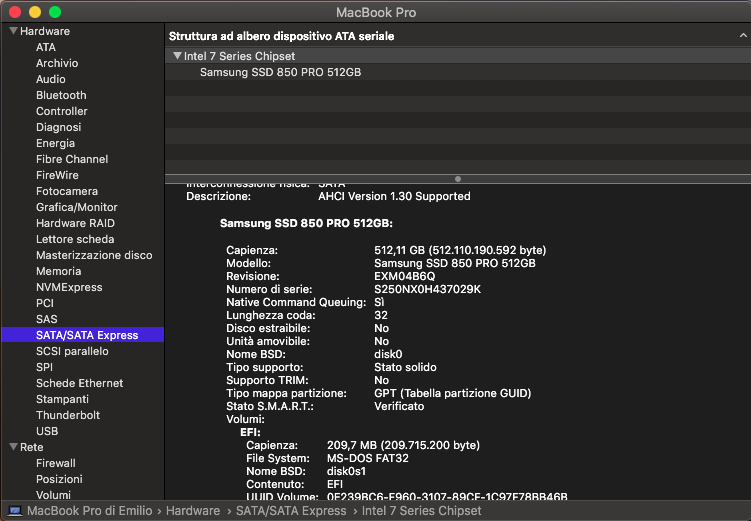
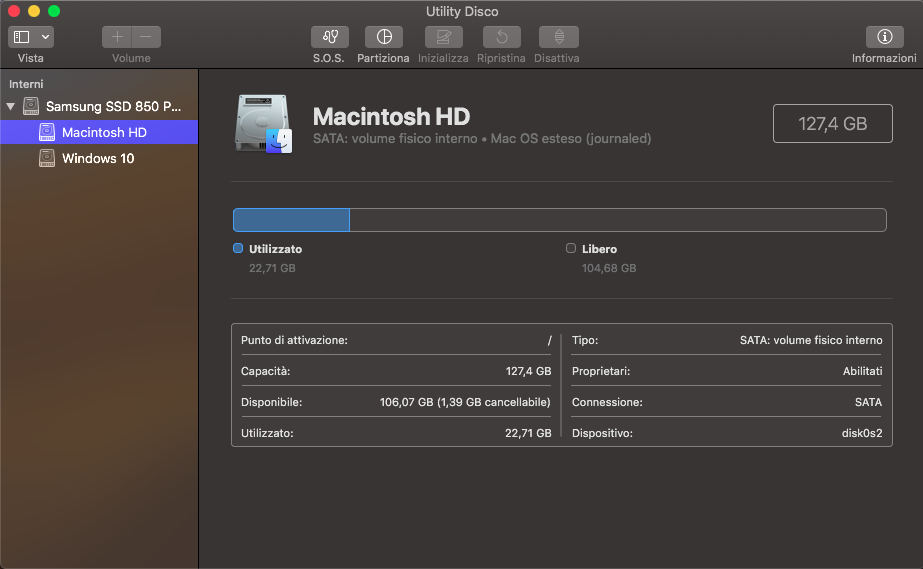 1 point
 -
You just have to wait. It will come1 point
-
Eventually got GT-9600M working at Mojave beta3 in real Mac Book Pro 5,2 Need rollback related Graphics & IOUSB kexts from 10.13.6 The same also working in Asus P5Q PRO (CPU: E8400, GPU: Nvidia GT-730) hackintosh too !

 1 point
 -
 @CrazyBirdy I upload Enoch here1 point
 -
Please script download complete HS 10.13.6 Release. Thank you!1 point
-
just updated. everything works fine. MD5 (macOSUpdCombo10.13.6.dmg) = db39f157143961afb81e8848748d5848 SHA256 (macOSUpdCombo10.13.6.dmg) = 8b919e9b1a1f962557cbf6342bb48ed5642f9624fc285ac128aa3abd200760971 point
-
Update posted for 17G65, 10.13.6; WebDriver-387.10.10.10.40.105.pkg1 point
-
Try this: [Guide] Sierra / High Sierra / Mojave on Intel 5, 6, 7, 8, 9 and x99 Chipset Series / Nehalem, SandyBridge, IvyBridge, Haswell, Broadwell1 point
-
Yes i know, but best thing is to try bios versions one by one and see, we all know that the latest versions is the one that have to be, but sometimes it’s not the case, some problems appear or disappear from bios version to another! You’ll experiment that by yourself. This also is to try, yes do it to have mind free. Sent from my iPhone using Tapatalk1 point
-
I never said i can’t help you! Yes, because you’re last post confirmed that it worked, except for that driver, and after that i suggested that you download hfsplus from clover configurator drivers menu, and you said that you don’t have the latest build. Each set in your config have a sense, uncheck things doesn’t mean that your config is good and checking too much things doesn’t mean by the same way it’s good each hack will have some of same sets but not all completely. I let you check the things that need to be for a proper boot process, and let you uncheck things that doesn’t make sense for your hack like: uncheck xmp because of laptop memory, RTC because i already patched it in DSDT, AppleIntelCPUPM because we added CpuSsdt with new way plugin-type in the case of your hardware, xosi because i added Darwin in \_OSI for OS check by@RehabMan in the DSDT. You just have to know why to do, not complicated, these problems you had and have with your hack will help you to know more, like every one here! May i ask you what you did before shutting down your laptop, this will help us to go directly to the problem Sent from my iPhone using Tapatalk1 point
-
All good here, update made and all works including sound... without update of kexts...
 1 point
 -
Or like this in config.plist directly <string>USB 10.13.6+ by PMHeart</string> <key>Disabled</key> <false/> <key>Find</key> <data> g32IDw+DpwQAAA== </data> <key>MatchOS</key> <string>10.13.x</string> <key>Name</key> <string>com.apple.driver.usb.AppleUSBXHCI</string> <key>Replace</key> <data> g32ID5CQkJCQkA== </data> Btw all good here1 point
-
It's working! Thank you!!!!1 point
-
Topic moved. This section are only for real Apple machines. Thanks1 point
-
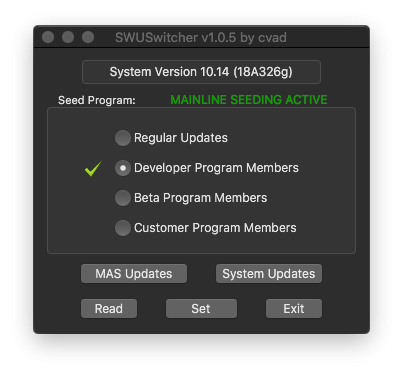
I don't get it. I have build 18A326g Public Beta installed, but Software Updates shows a badge that there updates available, yet when I scan for updates it shows that the system is up to date. The badge doesn't go away though. Nevermind. Fixed it. Downloading PB21 point
-
I have started some stability testing with ESXi 6.7 to find the best way to run the patch files. I will release a simple test script that builds a new vmtar ramdisk and need volunteers to test it on 6.5 and 6.7. Note this is not the patcher and no files will be patched so it won't run macOS. This is a test of technology to ensure ESXi runs smoothly and also vCenter does not have problems connecting to the host.1 point
-
Can you run chcp from the command line and tell me the value please? I think it is an issue with Python and code page 65001. You could try running chcp 850 and then running the unlocker.1 point
-
Good news. I can boot only installer, but can't boot to installed system with Enoch 2908. found UserEventPlugins is credit to ASentientBot at post#1683 found com.apple.telemetry.plugin is credit to jackluke at post#1761 found patch code of com.apple.telemetry.plugin is credit to Pavo at post here. LGA775 Core2 Duo E7400 CPU with only SSE4.1, without SSE4.2, alive with Mojave now. my config.plist.zip Replace only one file from 10.13.6. telemetry-plugin-10136.zip /System/Library/UserEventPlugins/com.apple.telemetry.plugin or patch the 10.14.db3 com.apple.telemetry.plugin, use Q4-mojave2core/mojave2core to auto-patch with Terminal after update new version. com.apple.telemetry.plugin-patched-1014db3.zip And nVidia GPU card use NVDANV50HalTesla.kext, works here.1 point
-
Maybe someone could check what difference there is between these both files and see if we can use Clover's patch on the fly?1 point
-
I FOUND SAME LINK On a Macbook7,1 aka Core 2 duo with penryn architecture Nvidia 320M MCP89 Controller, I suppose this will work on any Penryn c2d Mac too.There is no need to add and replace all the UserEventPlugins folder instead follow these steps:- leave the Mojave's S/L/UserEventPlugins untouched;- replace from a High Sierra's S/L/UserEventPlugins just this plugin: com.apple.telemetry.plugin Only replacing this plugin you will get no Kernel Panic on C2D. found com.apple.telemetry.plugin is credit to jackluke at post#17611 point
-
dont need ssdt CLOVER.zip if u need exclude ports, check Unused Ports, excluded with flag uia_exclude=HS01;HS02;HS05;HS06;HS07;HS13;HS14;SS03;SS04;SS05;SS06;SS09;SS10;USR1;USR2 if u need change 2, 3 or 255, just edit usbinjectall send me new dump after reboot RunMe.app send me one new dump RunMe.app1 point
-
 v1.0.3 macOS 10.8-10.14 ready1 point
 -
My RX 460 works in Mojave, it is probably some other issue.1 point
-
The easiest way by far is to install it as usual then CCC it to an HFS formatted drive.1 point
-
AppleLoadImage added into repo by savvas to get work with native / Apple ApfsJumpStart. Form sources comment: ApfsJumpStart looking for AppleLoadImage to load apfs.efi ApfsJumpStart --> AppleLoadImage --> apfs.efi So ideally, AppleLoadImage need to be loaded first before ApfsJumpStart. * It doesnt work with my pc. Attached compiled binary for anyone to test https://1drv.ms/u/s!AjxLshYT0HDug2LrpkE7XWBJ20XB1 point
-
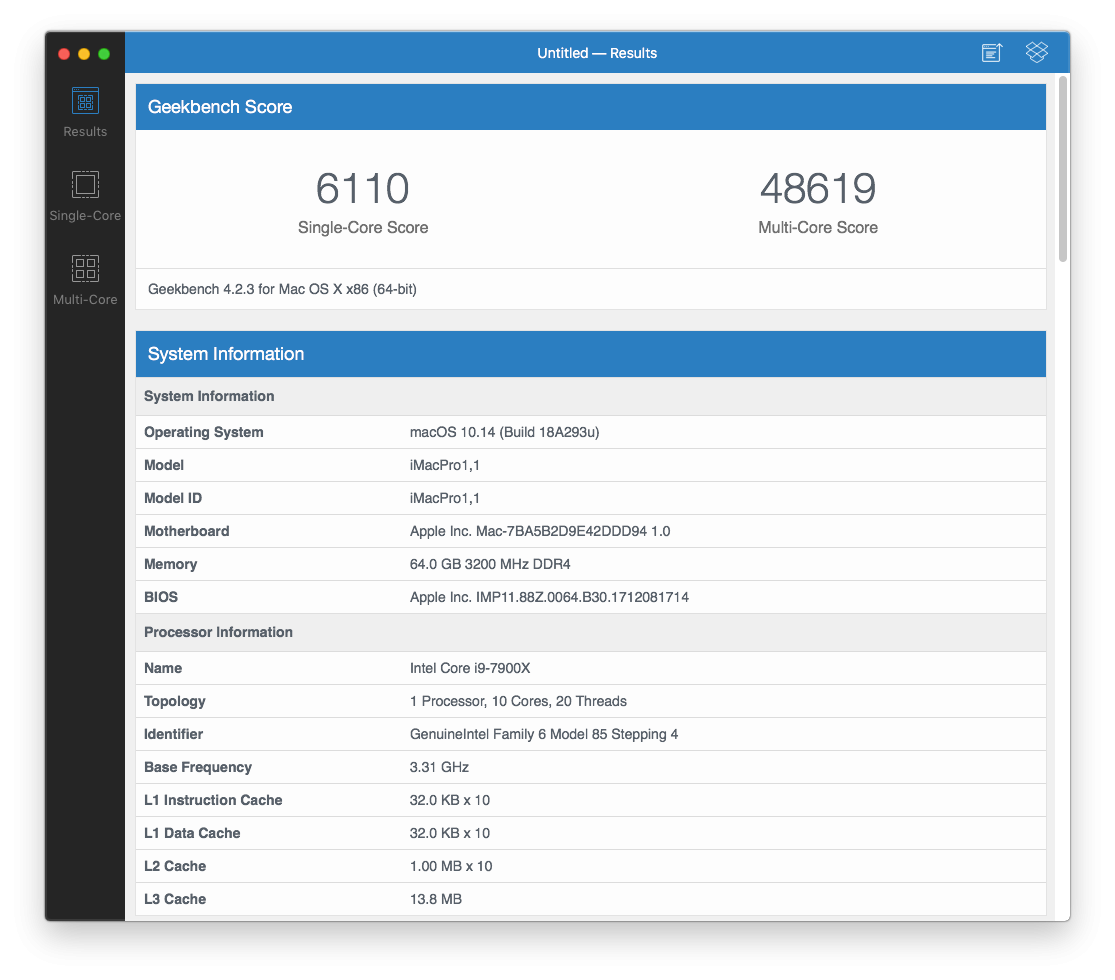
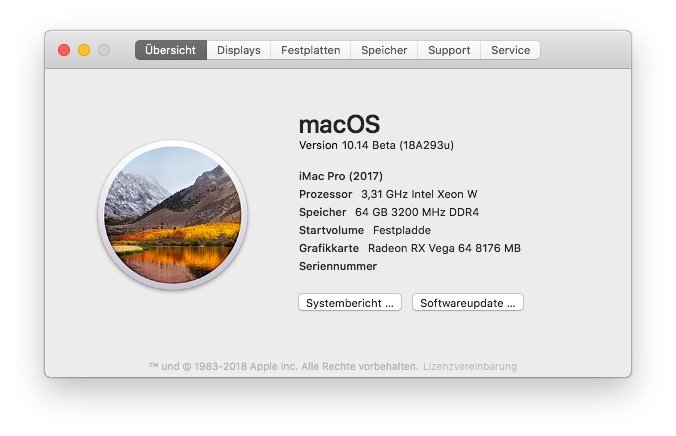
Установил 10.14 с Ozmosis bootlog.txt.zip
 1 point
 -
sorry thought I had it included in the thread. will upload it later if you still need it.1 point
-
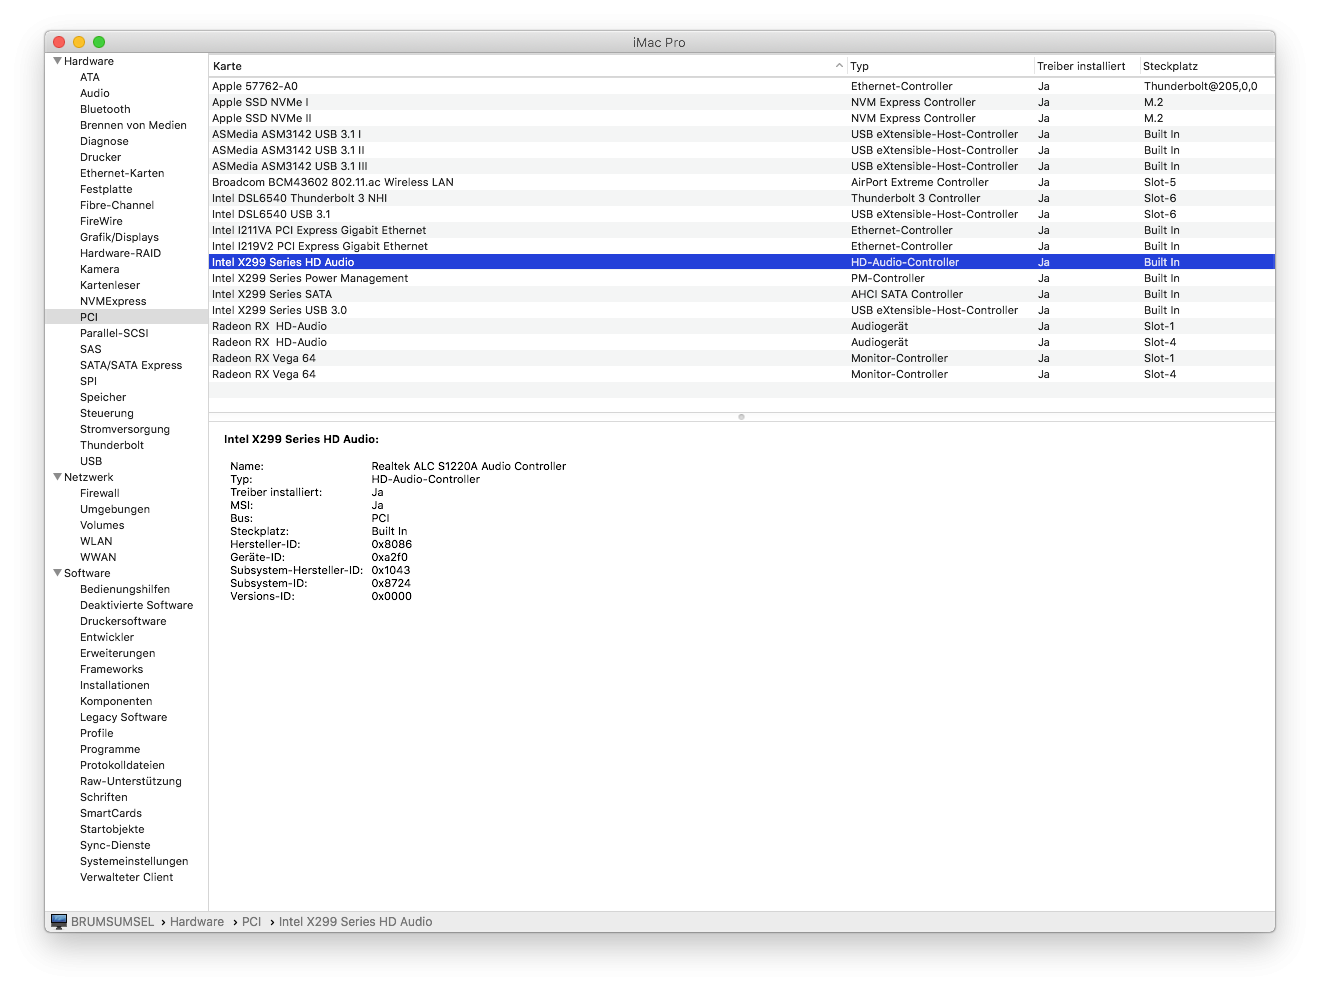
No, the FakeSMC is on ROM but doesn't get loaded during install process, also showing AppleACPICPU and other things problem, but just wait and reach the install screen. SMBios should be updated using Ozmosis Configurator as well, it's simple, don't need any kind of hassle, just try but be patient and do not reboot the machine even if showing errors, because after installing it will not show them, and all the things will be injected as well. Be sure to have working APFS otherwise you'll not be able to see the drive, i'm having this problem now.1 point
-
System runs perfectly, only the USB 15-port patch is missing ...


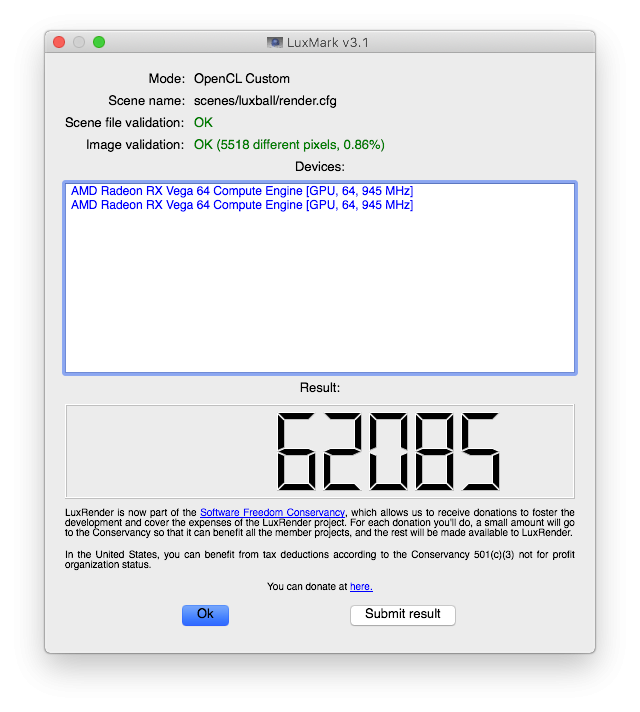 1 point
 -
Download first MMTool linked by xpamamadeus, use it to decompress and compress CORE_DXE Download UEFITool 0.21.5.app to insert Ozmosis files, and don't forget to insert Ozmosis Hight Sierra compatible few posts a go Download OzmosisConfigurator to make your own OzmosisDefaults Download AcpiPatcher and KernextPatcher from cecekpawon GitHub repos, insert them in the ROM, but you have to modify them with your preferences Download FakeSMC and stuffs from RehabMan, remove clover Dict from the info.plist, and change the keys to latest Mac model SMC you'll play with on your hake, convert them to ffs using again, cecekpawon YodKext2Ffs.sh from he's repos, insert them to ROM Flash your mobo, and cross your fingers until macOS Login Screen DON'T CHANGE THE BIOS FILE NAME AFTER MODIFICATIONS, IT'S USEFUL TO UPDATE OROM'S AND CPU MICROCODES USING UBU BIOS UPDATER1 point
-
This is a mini-guide to get Thunderbolt hotswap working. My SSDT is for an ASRock TB3 (JHL6540) card in my X299 motherboard, but I know this also works with the Gigabyte X99 Designare's built-in TB3 port. If you need a more basic overview of SSDTs then I suggest Shiloh's SSDT GPU Injection thread at the place that shall not be named. Based on the TheRacerMaster's work, and remote.syst3m's idea to change the value of "PCIHotplugCapable", I have TB3 hotswap working. Thunderbolt does not show as loaded in System Profiler, and this is undoubtedly a bit of a hack, but it seems to work and it is quite easy to implement. TheRacer Master's github work seems to be based on importing MacBookPro14,1 ACPI information. You can find some raw Darwin Dumps here from him that contain DSDTs, SSDTs, and IOreg. Below is the seemingly relevant bit, pulled from TheRacerMaster's github, with only the "PCIHotplugCapable" value changed to enabled and a few values modified to fit my computer. Device (DSB0) { Name (_ADR, Zero) // _ADR: Address Method (_DSM, 4, NotSerialized) // _DSM: Device-Specific Method { If (LNot (Arg2)) { Return (Buffer (One) { 0x03 }) } Return (Package (0x02) { "PCIHotplugCapable", One }) } I implemented this as an SSDT, but perhaps one could simply inject the single property via Clover arbitrary, or just the DSB0 device with that one property. 1. What you need: IOregistryExplorer (or IOJones) MaciASL (use Rehabman's patchmatic) Thunderbolt working (just without hotswap) 2. Identify the TB device address 2.1 Open IOreg and find your thunderbolt device(s) by typing in "thunderbolt" in the search bar. 2.2. Take note of the address (PCI0.RP05 for me). 2.3. Now clear the thunderbolt search and switch to IOACPIPlane view on the top right of IOreg. Find that same address. You should see a few other entires under it, and make note of whatever does not begin with H (for X99), and any values for X299. In this case, mine are PXSX and SLT5. We are going to prevent these from loading by setting their STA value to Zero so that our devices load instead. 3. Modify stock SSDT 3.1 Download the attached base SSDT and replace any instances of PCI0.RP05 with your actual address. If you have multiple thunderbolt controllers then copy and modify accordingly. 3.2. Replace PXSX and SLT5 with your value(s) from IOACPIPlane view. You might only have one value, in which case you can delete the extra line from the stock SSDT. That should be it! Reboot and open IOreg again. Look to see if you now have PCIHotplugCapable set to "True" on the right-hand side. If so, then it should be working. 4. BIOS Settings 4.1. If you have an ASUS X299 board then you should enabled ASPM and GPIO ForcePwr in addition to the normal BIOS settings (Legacy Security, Cache Line-in 128, any slot selection). If you don't do this then you will not see a USB 3.1 bus for the TB3 card unless you keep a USB 3.1 device plugged in to the TB3 port on startup. 5. Inject USB ports (not required for hotswap but clears up errors in boot log) I also hardcoded the two USB 3.1 ports on my card to clear up some complaints during verbose startup. This was pulled from one of PikerAlpha's blog posts. I don't think it matters which device you inject this into (DSB2,3,4), but I chose DSB2 based upon the address on my particular card (0x0002000) locatable in IOreg. If I had had 0x0003000 then I would have done DSB3, etc. 5.1. If you already have an XHC2 device, then name it XHC3, 4, or whatever is appropriate. If you only have one TB3 port, then you only need HS01 and SSP1. Device (DSB2) { Name (_ADR, 0x00020000) // _ADR: Address Device (XHC2) { Name (_ADR, Zero) // _ADR: Address Device (RHUB) { Name (_ADR, Zero) // _ADR: Address Device (SSP1) { Name (_ADR, One) // _ADR: Address Name (_UPC, Package (0x04) // _UPC: USB Port Capabilities { 0xFF, 0x09, Zero, Zero }) Name (_PLD, Package (0x01) // _PLD: Physical Location of Device { Buffer (0x10) { /* 0000 */ 0x81, 0x00, 0x00, 0x00, 0x00, 0x00, 0x00, 0x00, /* 0008 */ 0x31, 0x1C, 0x00, 0x00, 0x00, 0x00, 0x00, 0x00 } }) Method (_DSM, 4, NotSerialized) // _DSM: Device-Specific Method { If (LEqual (Arg2, Zero)) { Return (Buffer (One) { 0x03 }) } Return (Package (0x02) { "UsbCPortNumber", One }) } } Device (SSP2) { Name (_ADR, 0x02) // _ADR: Address Name (_UPC, Package (0x04) // _UPC: USB Port Capabilities { 0xFF, 0x09, Zero, Zero }) Name (_PLD, Package (0x01) // _PLD: Physical Location of Device { Buffer (0x10) { /* 0000 */ 0x81, 0x00, 0x00, 0x00, 0x00, 0x00, 0x00, 0x00, /* 0008 */ 0x31, 0x1C, 0x00, 0x00, 0x00, 0x00, 0x00, 0x00 } }) Method (_DSM, 4, NotSerialized) // _DSM: Device-Specific Method { If (LEqual (Arg2, Zero)) { Return (Buffer (One) { 0x03 }) } Return (Package (0x02) { "UsbCPortNumber", 0x02 }) } } Device (HS01) { Name (_ADR, 0x03) // _ADR: Address Name (_UPC, Package (0x04) // _UPC: USB Port Capabilities { 0xFF, 0x09, Zero, Zero }) Name (_PLD, Package (0x01) // _PLD: Physical Location of Device { Buffer (0x10) { /* 0000 */ 0x81, 0x00, 0x00, 0x00, 0x00, 0x00, 0x00, 0x00, /* 0008 */ 0x31, 0x1C, 0x00, 0x00, 0x00, 0x00, 0x00, 0x00 } }) } Device (HS02) { Name (_ADR, 0x04) // _ADR: Address Name (_UPC, Package (0x04) // _UPC: USB Port Capabilities { 0xFF, 0x09, Zero, Zero }) Name (_PLD, Package (0x01) // _PLD: Physical Location of Device { Buffer (0x10) { /* 0000 */ 0x81, 0x00, 0x00, 0x00, 0x00, 0x00, 0x00, 0x00, /* 0008 */ 0x31, 0x1C, 0x00, 0x00, 0x00, 0x00, 0x00, 0x00 } }) } } } } SSDT-TB3.aml.zip1 point
-
Here are the v21. It's a patched version so please don't use it with KextsToPatch because it might not work... For AR9485 & AR9565, Tx Rate is still limited to 11Mbps maximum... Patched kexts: (10.13.x only) AR946X.10.13.v21.zip (AR9462 & AR9463) AR9485.10.13.v21.zip AR9565.10.13.v21.zip Patched kexts: (10.12.x only) AR946X.10.12.v21.zip (AR9462 & AR9463) AR9485.10.12.v21.zip AR9565.10.12.v21.zip Patched kexts: (10.11.x only) AR946X.10.11.v21.zip (AR9462 & AR9463) AR9485.10.11.v21.zip AR9565.10.11.v21.zip Patched kexts: (10.10.x only) AR946X.10.10.v21.zip (AR9462 & AR9463) AR9485.10.10.v21.zip AR9565.10.10.v21.zip Patched kexts: (10.9.x only) AR946X.10.9.v21.zip (AR9462 & AR9463) AR9485.10.9.v21.zip AR9565.10.9.v21.zip ATH9KFixup: (source code only) ATH9KFixup-1.1.0.zip (Added High Sierra compatibility)1 point
-
Topic pinned!1 point
-
@InfintyGhost, Yes, with slight modification in "Making the Installer" step 4: For Windows 7, you need to extract bootmgfw.efi from "install.wim" eg using 7-Zip, open the iso and navigate to \sources\install.wim\1\Windows\Boot\EFI\bootmgfw.efi and copy to efi\microsoft\boot on the USB. For Windows 8 and 10, copy the bootx64.efi found in the \efi\boot folder to \efi\microsoft\boot and rename it bootmgfw.efi.1 point


.thumb.jpeg.7082d67b3394c9399e80144027a7b397.jpeg)